
- Automatic bed leveling
- Flexible PC-coated print bed
- Reliable full-metal extruder
- Almost completely pre-assembled
- Acceptable sound levels
- Single Z-axis configuration
- No direct extruder
- Safety features need improvement
- No filament runout sensor
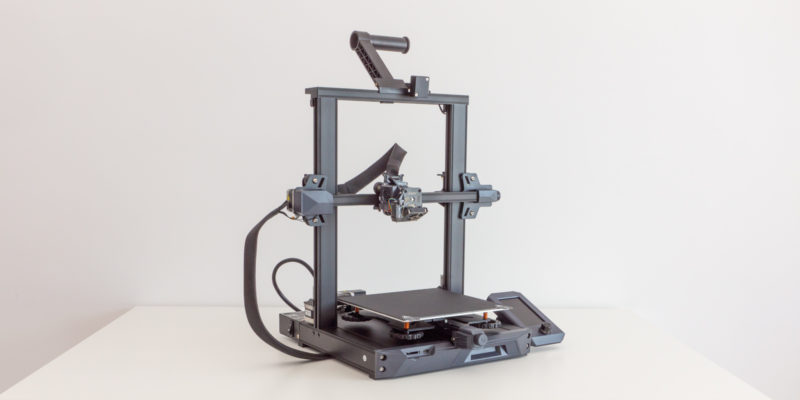
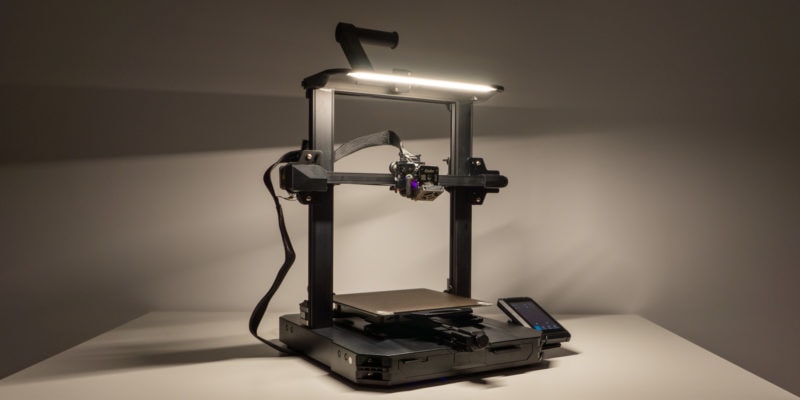
With its Ender 3 series 3D printers, Creality established itself as a 3D printer manufacturer for end users with an excellent price-performance ratio.
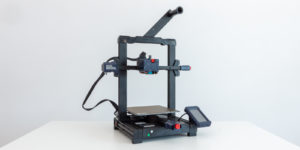
Technology has advanced in the last couple of years, and to make sure that the Ender 3 line stays ahead of the curve, the company has released the Creality Ender 3 V2 Neo.
It’s an improved and upgraded version of the Ender 3 V2, and it offers several new features specifically focused on improving user experience and print quality.
In this Ender 3 V2 Neo review, we’ll see what the machine offers and what sets it apart from its predecessor and other 3D printers in the same price range.
Creality Ender 3 V2 Neo Specifications
| Ender-3 V2 Neo Specs | |
|---|---|
| Price | Creality | Amazon | Creality3DOfficial | AliExpress |
| Build volume | 220x220x250 mm |
| Layer height | 0.1-0.4 mm |
| Nozzle diameter | 0.4 mm |
| Precision | ±0.1 mm |
| Filament | PLA, PETG, ABS |
| Supported file format | STL, OBJ, AMF |
| Supported slicers | Creality Slicer, Creality Print, Cura, Repetier-Host, Simplify3D |
| Max. nozzle temperature | 250°C |
| Max. bed temperature | 100°C |
| Typical printing speed | 50 mm/s |
| Max. printing speed | 120 mm/s |
| Power loss recovery | Yes |
| Auto leveling | Yes |
| Languages | 中文, English |
| Rated power | 350W |
| Input voltage | 100-120V~, 200-240V~, 50/60Hz |
Ender 3 V2 Neo Box Contents
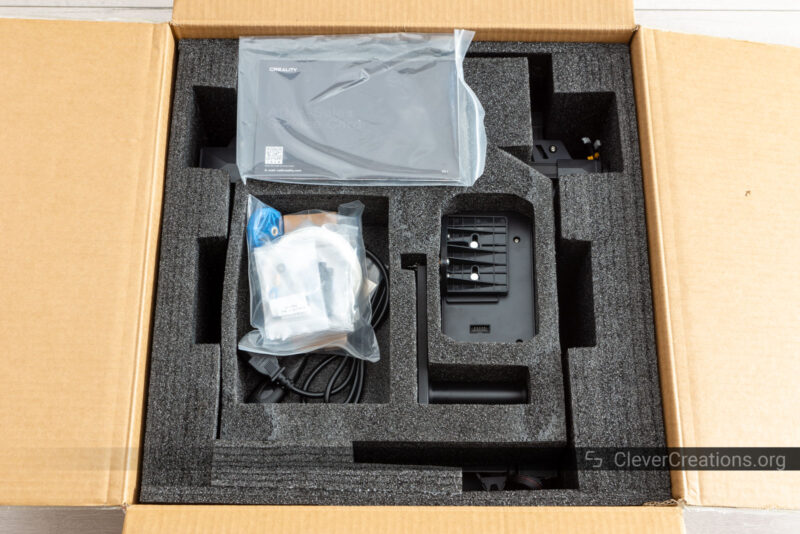
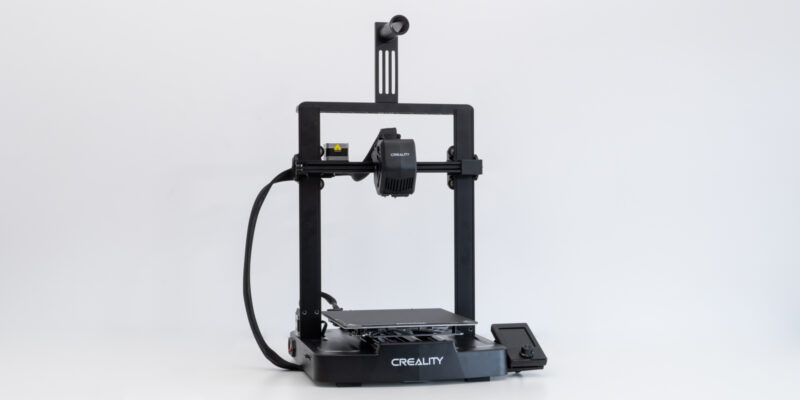
Unboxing the Creality Ender 3 V2 Neo is straightforward. It comes in a relatively small foam-padded box with all the necessary components and accessories to get started.
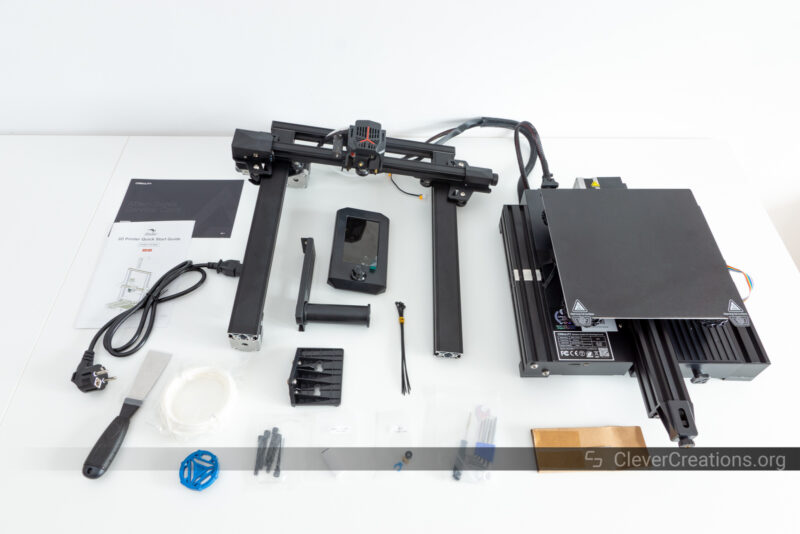
In the box, you’ll find the following:
- Ender 3 V2 Neo base
- Ender 3 V2 Neo XZ gantry
- Spool holder
- LCD screen
- Extruder rotary knob
- Bolts for assembly
- Various tools for assembly
- A range of 3D printer tools (spatula, wire snippers, nozzle cleaning tool)
- Tie wraps
- TF card and card reader
- Spare components (nozzle, wire clip, Bowden quick-release claw)
- Power cable
- Small roll of white PLA
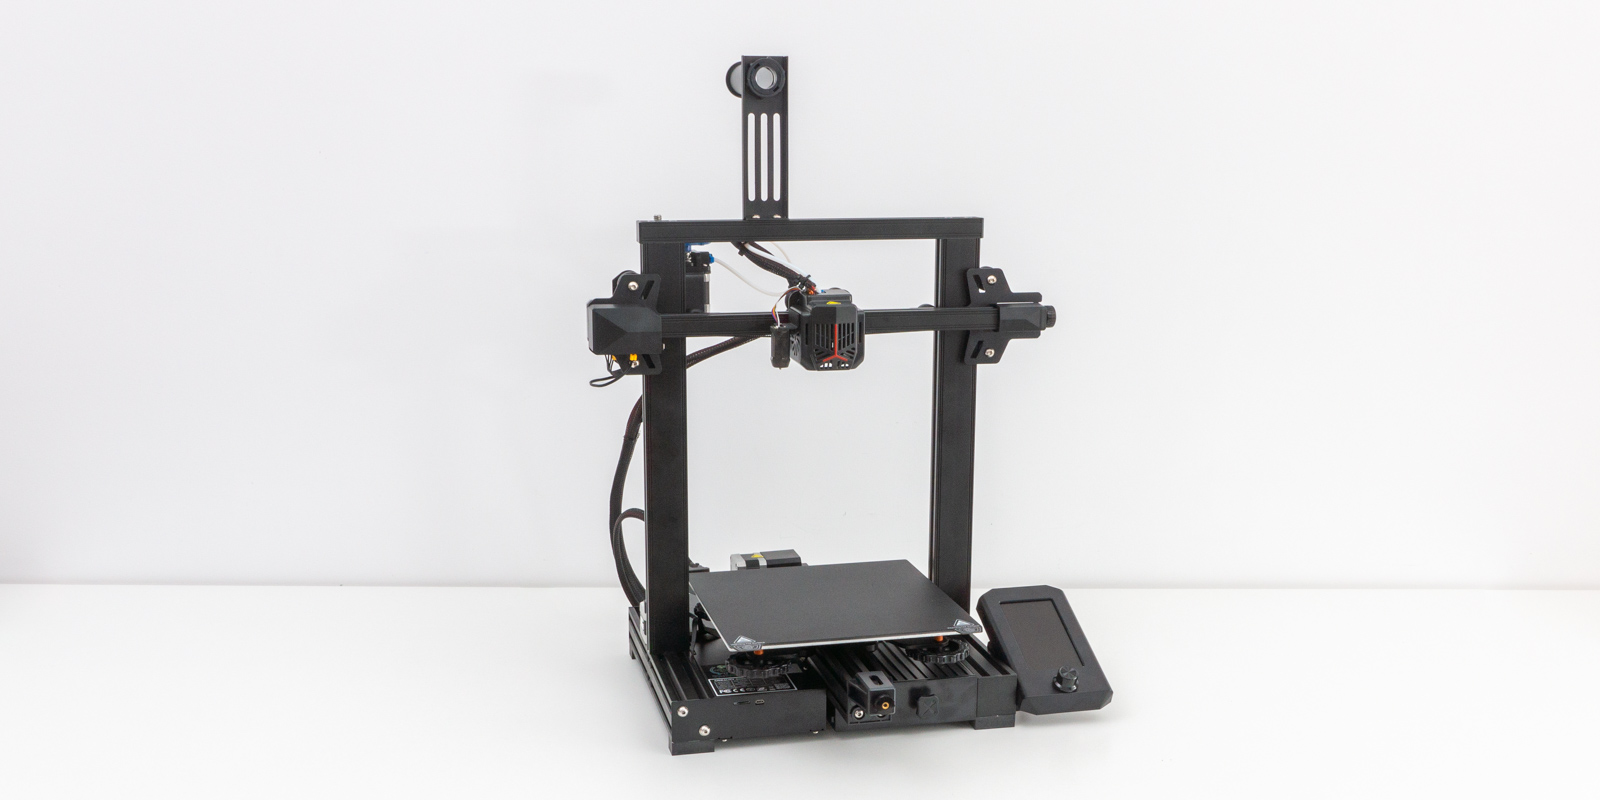
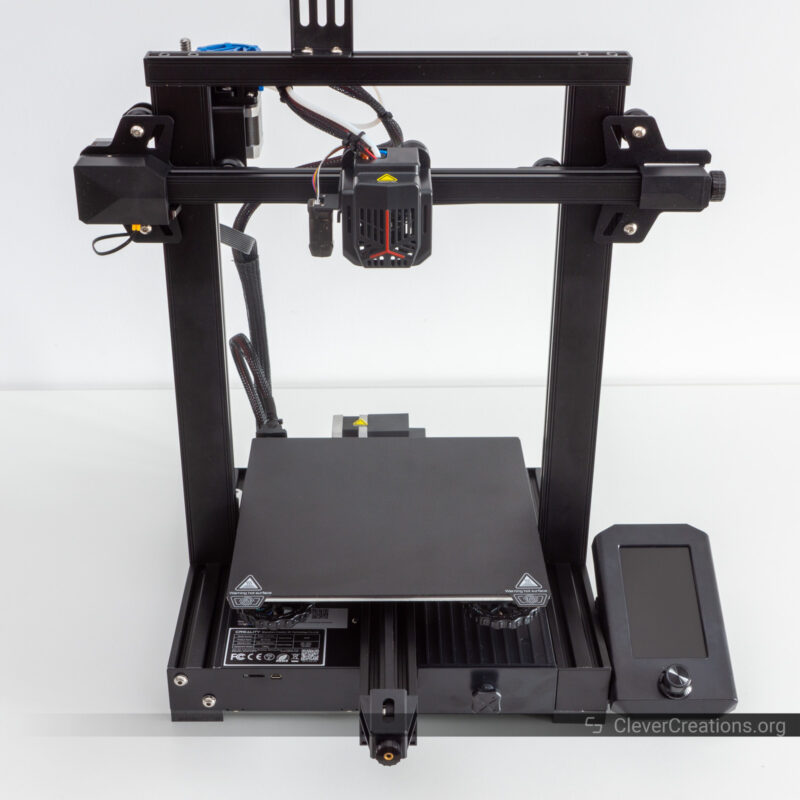
A noticeable difference from the original Ender 3 is that the 3D printer comes almost fully pre-assembled. Not only does this save you considerable time, but it also removes the complexity of putting the printer together.
It’s nice to see this because the Ender 3 V2 Neo is a machine targeted at new 3D printer users. Not having to worry about incorrectly assembling the printer means you can spend more time learning how to use it and getting great print results.
Getting Started
You’ll still need to complete a couple of steps before you can start 3D printing. The process takes about 10 minutes and is well documented in the quick start guide. We’ll still give you some additional pointers here.
- Attaching the gantry to the base can take more force than you expect. On the Ender 3 V2 Neo that Creality provided, it was clear that the machined threads are of poorer quality than on their other, higher-end machines, like their Ender 3 S1 series.
- There are no pre-drilled holes for the LCD screen mount. Because of this, you have some freedom on where to install the screen. We recommend moving it as far forward as possible, as this makes it easier to reach the control knob and read information from the screen.
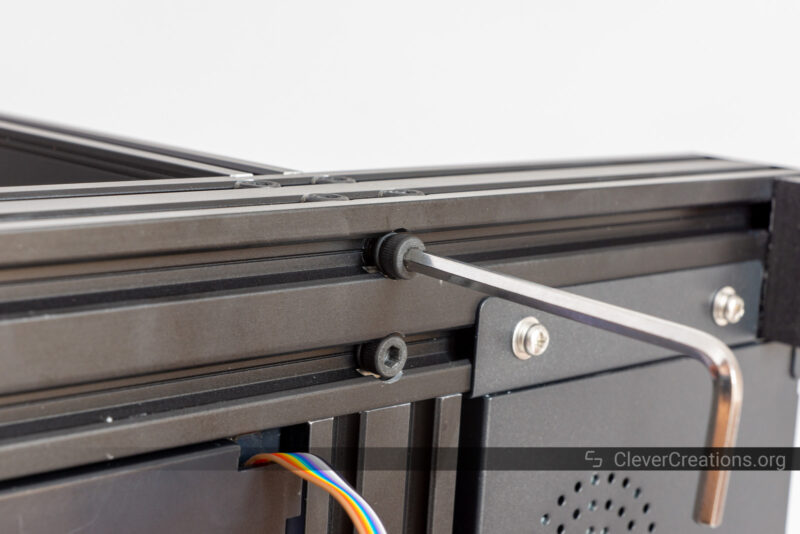
- Lastly, make sure to tighten the X- and Y- axis timing belts and adjust the eccentric nuts on all axes. It ensures that all moving components make proper contact and only go where they are supposed to.
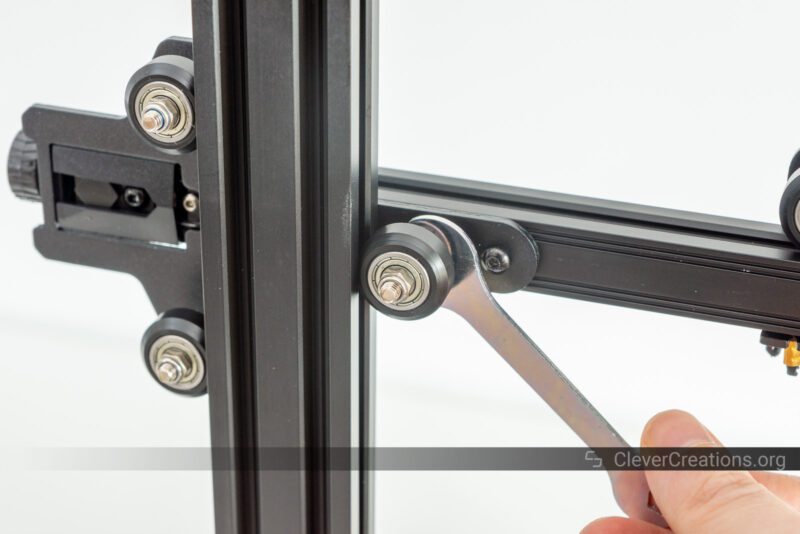
Creality rarely mentions these adjustment steps in their documentation, but they are essential for good results. It’s a bit frustrating for us knowing that there are people that end up with a sub-par 3D printing experience because they are not informed of this. So we point this out whenever we can.
Creality Ender 3 V2 Neo Features
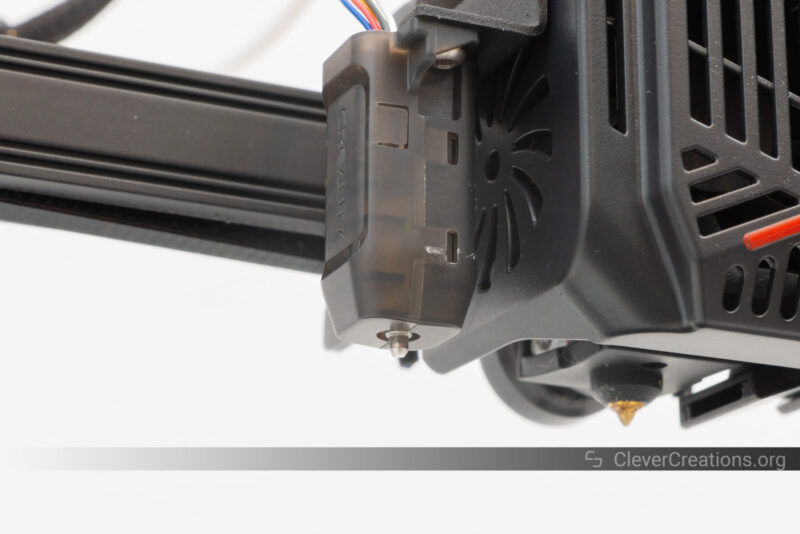
Full-Metal Bowden Extruder
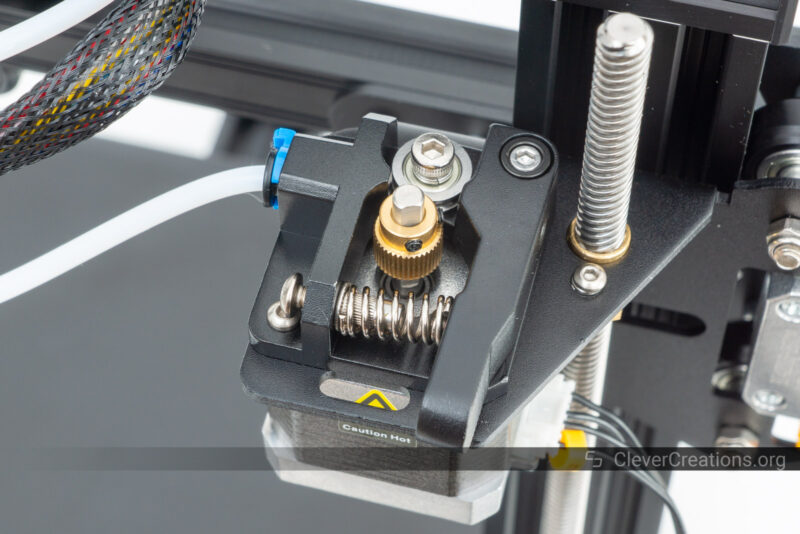
Whereas the original Ender 3 and Ender 3 V2 came with a Bowden extruder with plastic parts, the new Creality Ender 3 V2 Neo has an all-metal extruder. Since upgrading to a full metal extruder was one of the most popular Ender 3 v2 upgrades, this is a welcome improvement.
The full metal construction gives better print results as well as improved reliability. Since this is a Bowden extruder with its cold end mounted on the 3D printer frame, you won’t see increased ringing or other print artifacts due to the heavier weight of the metal components.
In our testing, the full-metal Bowden extruder performed as expected. It’s reliable up to its recommended 60 mm/s print speeds. At higher speeds, there are some print quality issues with stringing and under-extrusion.
These issues at higher print speeds are to be expected with a Bowden extruder, though. You can remedy this by upgrading to a direct extruder later on. The Micro-Swiss direct drive extruder is the go-to direct extruder upgrade for the Ender 3 line-up.
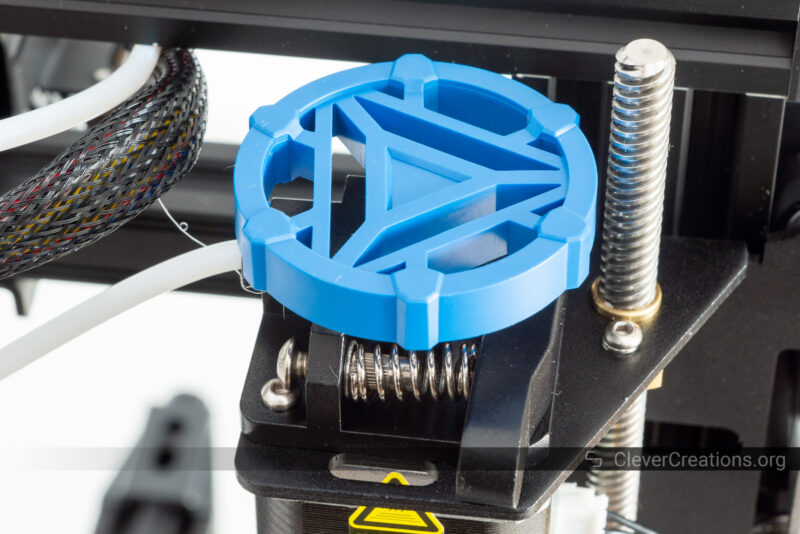
Included with the Bowden extruder of the Ender V2 Neo is an extruder knob that helps with feeding filament into the drive system. Even though these are easy to print yourself, it’s nice to see one included by default. It doesn’t have a set screw, so it simply rests on the motor shaft and can be taken off whenever you want.
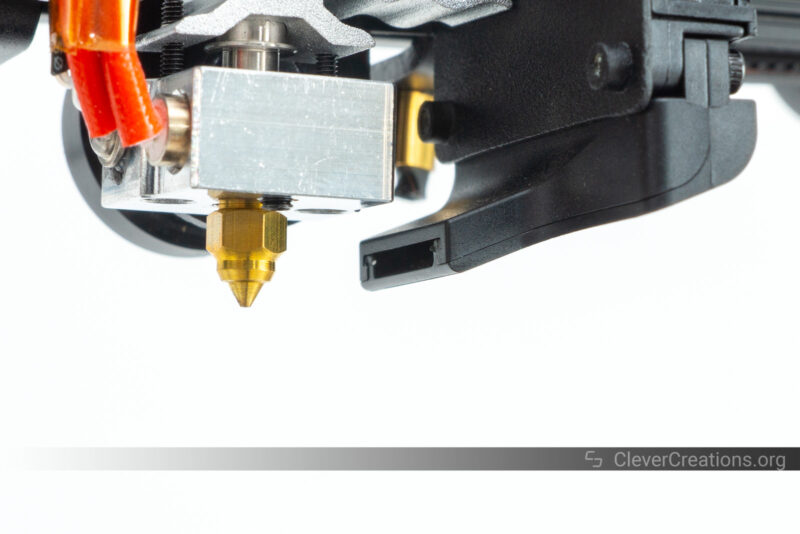
PTFE-lined Hot End

Just like you won’t see a direct extruder on the Creality Ender 3 V2 Neo, there is no all-metal hot end either. Instead, the machine has a PTFE-lined hot end that is limited to a nozzle temperature of around 250 °C.
This is more than enough if your focus lies on 3D printing with basic PLA and PETG filaments, but if you want to experiment with other materials, like ABS or Nylon, you will need to upgrade to an all-metal hot end at some point.
Print Cooling
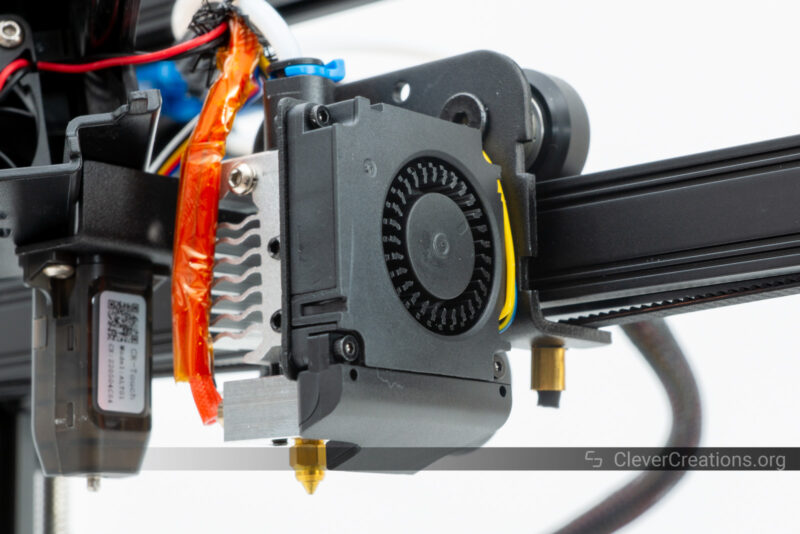
For cooling filament right after it comes out of the nozzle, the Creality Ender 3 V2 Neo uses a small 40x40x10 mm blower fan with a small one-sided shroud. It’s better than nothing, but it’s not going to give you the best results.
The Ender 3 V2 Neo print cooling is good enough if you don’t push the machine too hard. With conservative print settings, like standard print speeds and a generous minimum layer time, the results are good enough. The specific filament and 3D model you are printing are important too.
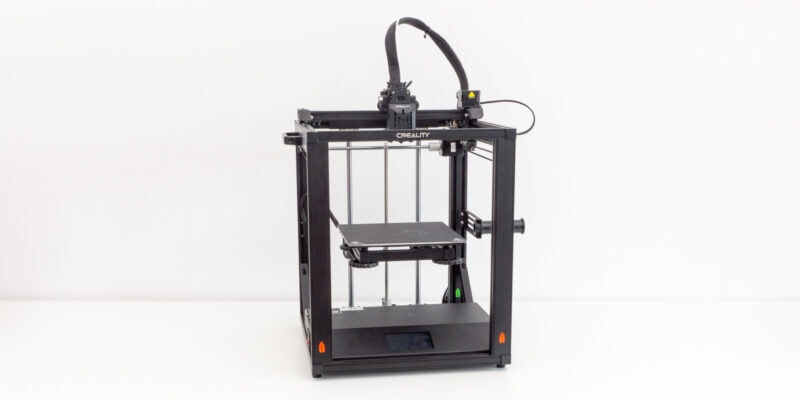
Again, this is a component you could choose to upgrade at some point. A more powerful 50x50x15 mm blower fan with a dual-sided fan shroud, like we saw on the Ender 5 S1, does wonders for overhangs and bridging.
PC-Coated Print Bed Surface
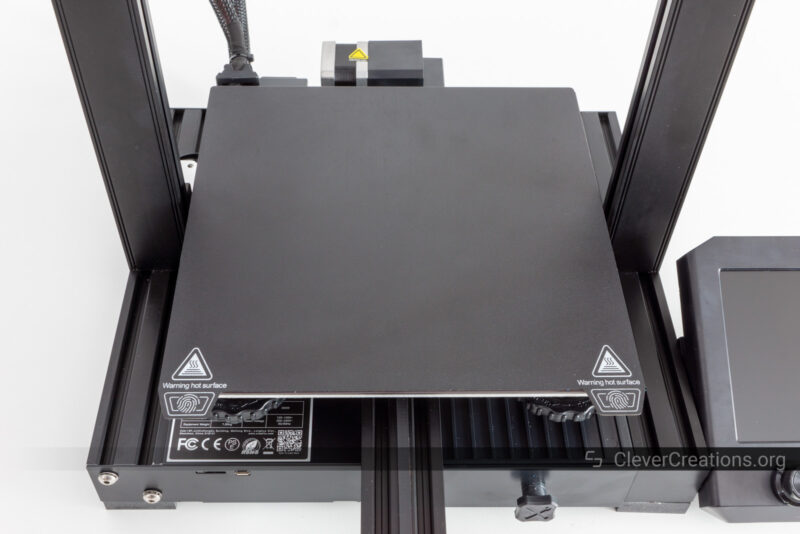
Another notable improvement of the Creality Ender 3 v2 Neo over the Ender 3 V2 lies in the print bed surface. Where the previous model used a Carborundum glass print bed, the V2 Neo uses a PC-coated flexible steel plate.
While a glass print bed has its advantages, like being flat and providing a smooth surface for the first layer, it also has shortcomings.
For example, it is prone to breaking when handled incorrectly, and it doesn’t provide great adhesion without Magigoo, glue sticks, or some other form of print bed adhesive.
The PC-coated print bed surface works a lot better in that regard. It provides good adhesion out of the box and you can quickly remove your models by bending the plate after the 3D printer is finished cooling down.
It also works with a wide variety of materials, even though TPU and other flexible filaments are best avoided with PC- and PEI-coated print beds. Not that you would want to use these with the Ender 3 V2 Neo’s Bowden extruder anyway—a direct extruder is a better choice for printing with flexible filaments.
Temperature Uniformity
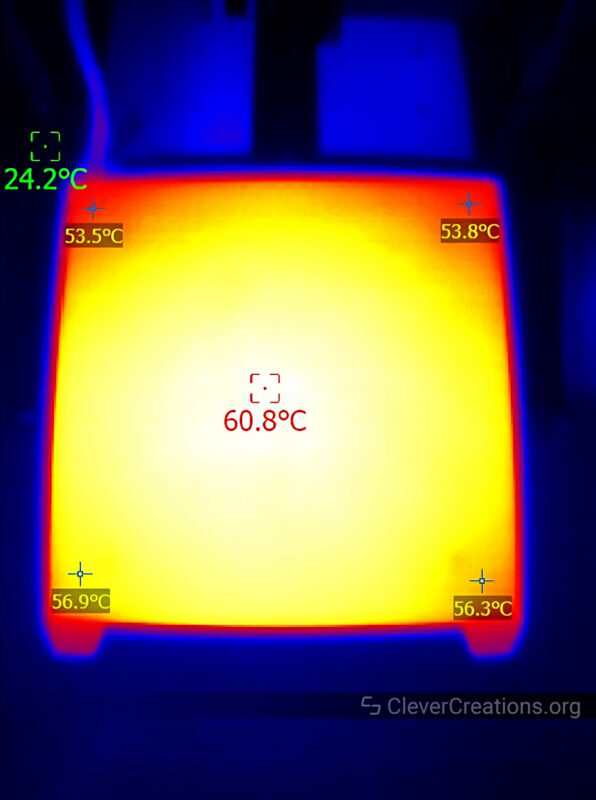
The Ender 3 V2 Neo print bed has decent temperature uniformity. The corners have a temperature difference from the setpoint, but it’s within reasonable limits. Especially considering the low price point of the 3D printer.
You’ll want to avoid placing large prints near the top of the print bed (when viewed from above) to avoid warping. Aside from that, the print surface is good enough for all basic 3D printing needs.
CR Touch Auto Leveling
Just like we have seen on all of Creality’s recent releases, the Ender 3 V2 Neo comes with a CR Touch bed leveling probe. While this probe doesn’t level the bed, as the name suggests, it does help adjust for irregularities in the print bed.
The CR Touch does this by measuring the print bed height at various points. With that information, the printer can then automatically compensate for the slight variations in print bed height, which results in better first layer adhesion and a reduction of print failures.
This is one of the key upgrades over the Ender 3 and Ender 3 V2 Neo that makes the machine more reliable and easier to use.
Compared to manually leveling the print bed, which can be a challenge for beginner users, automatic bed leveling is a godsend. Our recommendation is always to choose a 3D printer with an ABL sensor (CR Touch, BLTouch, conductive, it doesn’t matter), as it just makes the whole 3D printing experience that much more straightforward and enjoyable.
Other Features
You’ll also find that the Ender 3 V2 Neo has a power failure detection that allows it to resume printing where it left off. It doesn’t fit in the list of essential features of a 3D printer of this size, but it is nice to have.
Usually, we see this used in combination with a filament sensor that pauses the print when the filament runs out. The V2 Neo doesn’t have a filament sensor, but you can always add one as an aftermarket upgrade.
Build Quality & Construction
Build Volume
With its 220x220x250 mm build volume, the Creality Ender 3 V2 Neo is as average in this area as it gets.
This print area is more than sufficient for beginner users, and unless you have special requirements, like 3D printing helmets, it should last you for quite some time before upgrading to a larger machine.
Just like there is some confusion about the Ender 3 bed size, the same will probably happen for the Ender 3 V2 Neo. This is because the physical dimensions of the print bed are 235×235 mm, but the usable area is only 220×220 mm.
This limitation can be bypassed through a firmware modification, even though this probably isn’t worth it for most users. If you are looking for a large 3D printer that can handle bigger prints, there are plenty of other options to choose from.
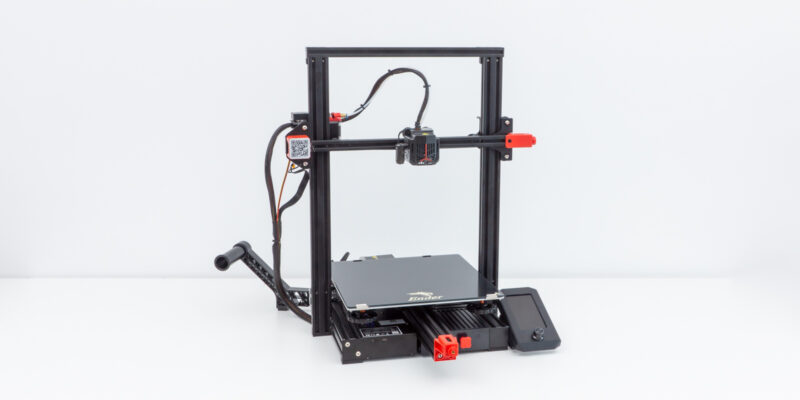
One of the best options in that regard is probably the Sovol SV01. It does not have the same quality-of-life features as the Creality Ender 3 V2 Neo, but it does have one of the largest print volumes of all 3D printers under $300.
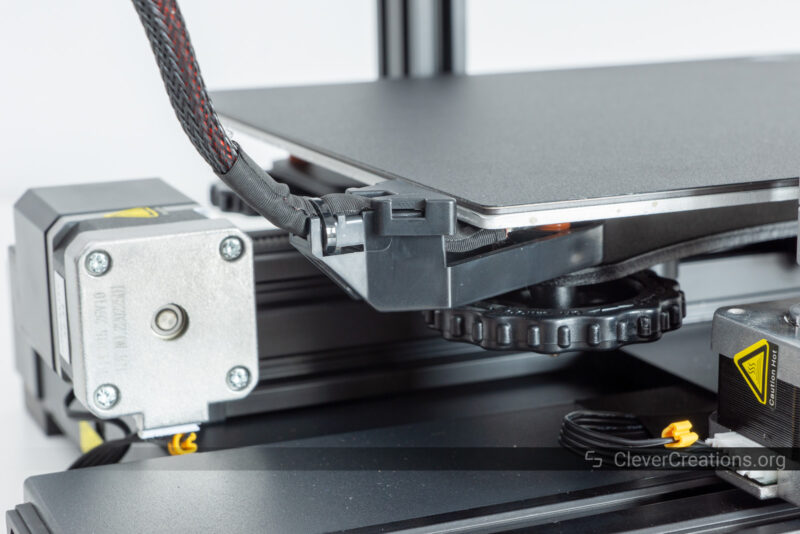
Single Z-axis
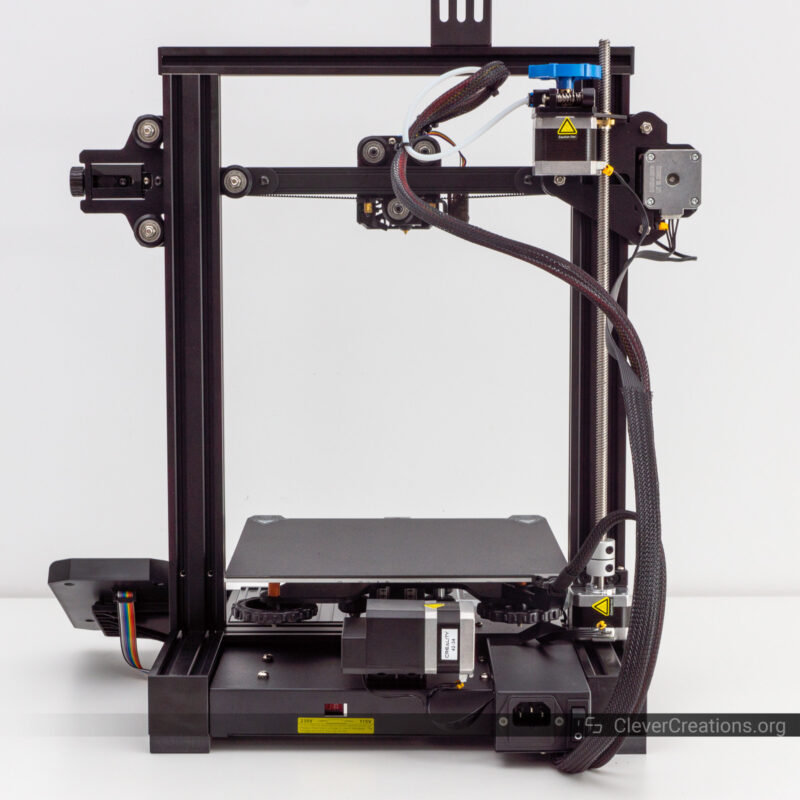
A notable limitation of the Creality Ender 3 V2 Neo is its single Z-axis configuration. It uses a single stepper motor and single lead screw to drive the Z-axis, which can lead to issues with Z banding and the X-axis sagging.
It’s a limitation that is carried over from the Ender 3 and Ender 3 V2. Because the V2 Neo comes with an automatic bed leveling sensor, however, it is not as big of an issue as it was on those machines.
Of course, the single Z-axis stability is still not as good as with a dual Z-axis 3D printer, but with the ABL sensor of the V2 Neo, the overall experience will be more acceptable for many users.
Just like with the other shortcomings of this machine, you can choose to upgrade the Z-axis to a dual configuration if you find that the current setup is not meeting your needs.
Electronics
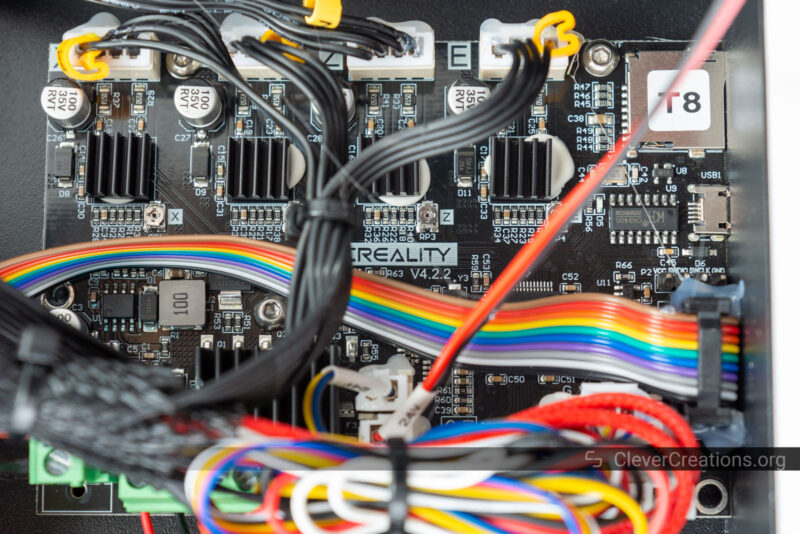
As a 3D printer controller, the Ender 3 V2 Neo uses Creality’s V4.2.2 motherboard. It’s an STM32F103-based board with TMC2208 stepper drivers.
Compared to the original 8-bit board of the Ender 3, the 32-bit STM32F103 is a huge step up. Its increased performance in combination with the TMC2208 stepper drivers provides a more silent and precise 3D printing experience.
While you could improve the printing quality and precision further by switching to Klipper firmware, for example through the Sonic Pad, the stock performance of the Creality Ender 3 V2 Neo controller and firmware are already pretty good up to its recommended printing speed.
Wiring & Safety
Unfortunately, in terms of safety, the Creality Ender 3 V2 Neo does not score well. While we understand that a 3D printer at this price point needs to cut some corners to stay affordable, cutting safety features is not something that we can condone.
The biggest safety concern with the Ender 3 V2 Neo is that it does not have a dedicated grounding wire connected to its frame. This means that there is a higher potential for electrical shocks when something goes wrong.
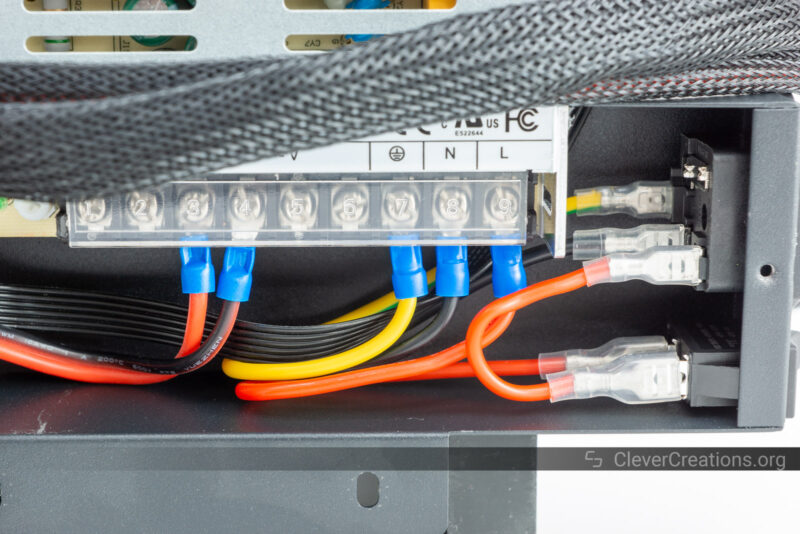
While the power supply is still somewhat grounded to the frame through its mounting screws, it’s still good practice to have a dedicated grounding wire. We know Creality is aware of this, as they do add this feature to their more expensive machines.
Another safety concern is that the high-current wires are not crimped with wire ferrules. Instead, their exposed ends are tinned with solder. This is undesired because it increases the chance of electrical fires over time.
Again, this is something that Creality goes back and forth on. Some of their machines do have these wires crimped, whereas others don’t. There seems to be a correlation with the machine cost, so on budget 3D printers like the Ender 3 V2 Neo, it is not a surprise to see this issue pop up again.
If this is a concern for you, you can always use a basic crimping kit to address the issue.
There are things that Creality did well from a safety aspect too. For example, the Ender 3 V2 Neo print bed comes with strain relief. It’s a fairly standard feature nowadays, but you still don’t want to see it omitted.
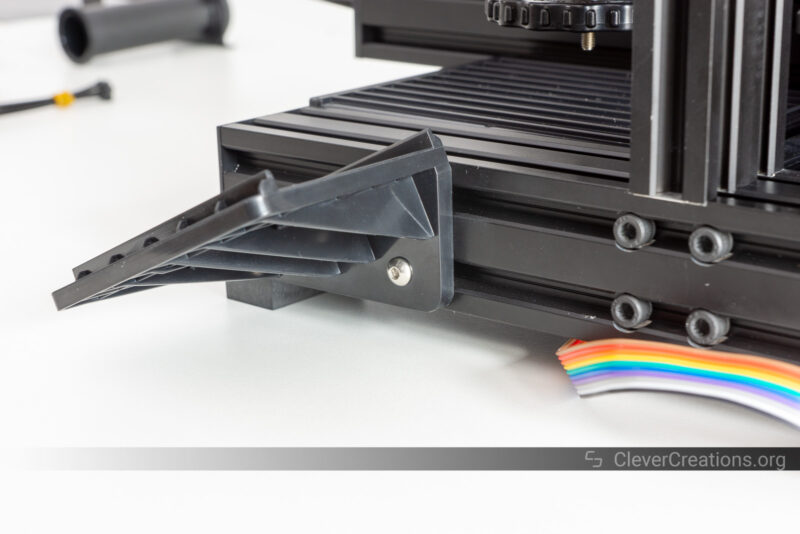
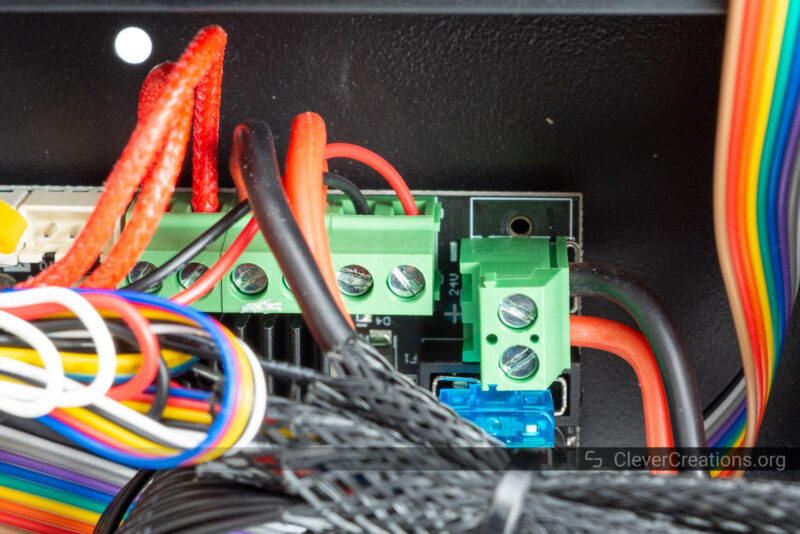
In its entirety, the Creality Ender 3 V2 Neo has very little cable management. From the top of the 3D printer, it looks a bit like the Kraken is escaping from its cage.
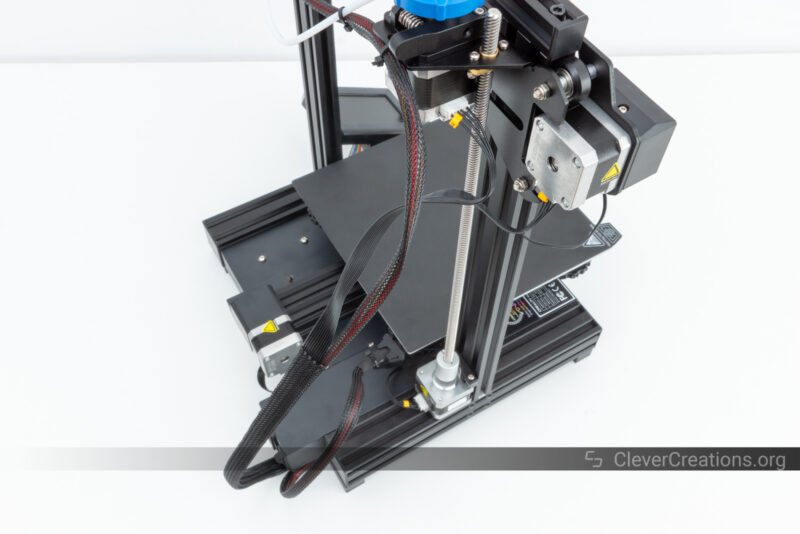
There are no impractical consequences of this and we can’t fault Creality for not including more cable management as it would have driven up the price.
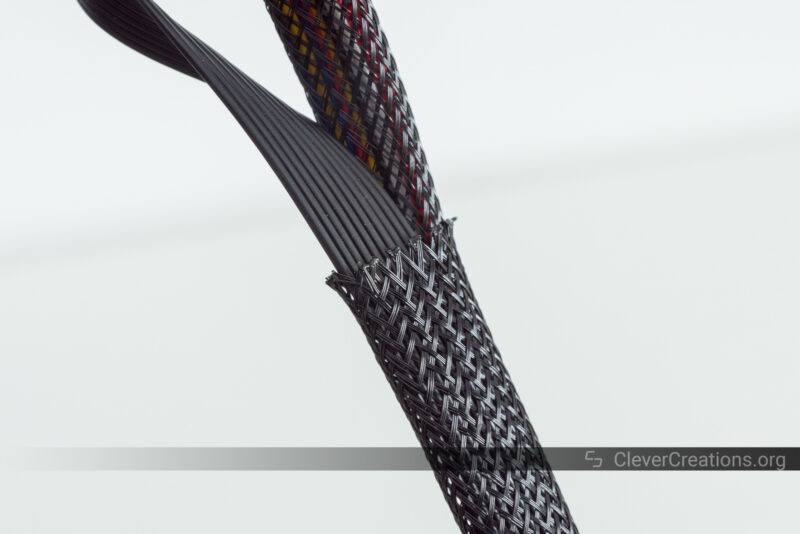
If you plan on buying this 3D printer, you might want to add a cable tie or heat shrink tubing around the sleeving of the main wire bundle. It will likely start unraveling over time without some form of protection.
Ease of use
LCD Screen
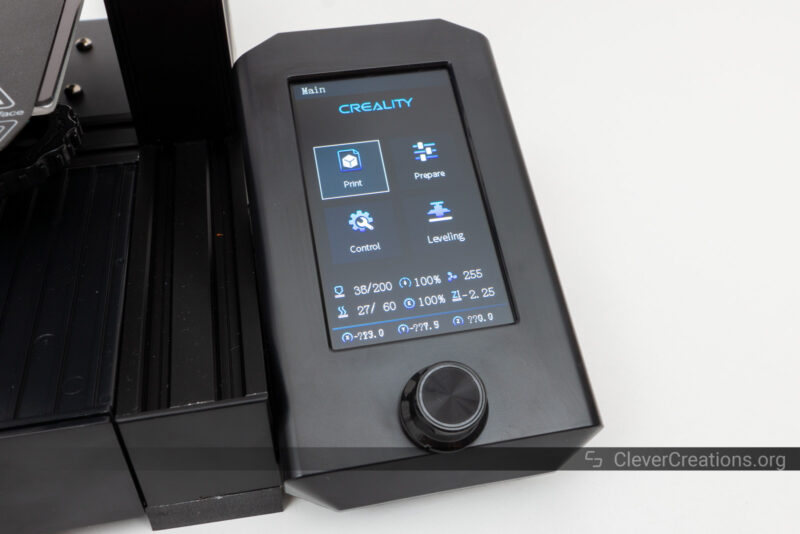
You’ll find that the Creality Ender 3 V2 Neo comes with a 4.3″ LCD screen with a rotary/push knob. It’s common for cheaper 3D printers to not have a touch screen, and the V2 Neo is no exception.
Some might see the lack of a touch screen as a shortcoming, but we don’t particularly mind the knob interface. Once you are used to it, it is faster to use than a touchscreen interface.
Not holding your hand above what you are trying to see helps a lot with selecting, adjusting, and confirming settings.

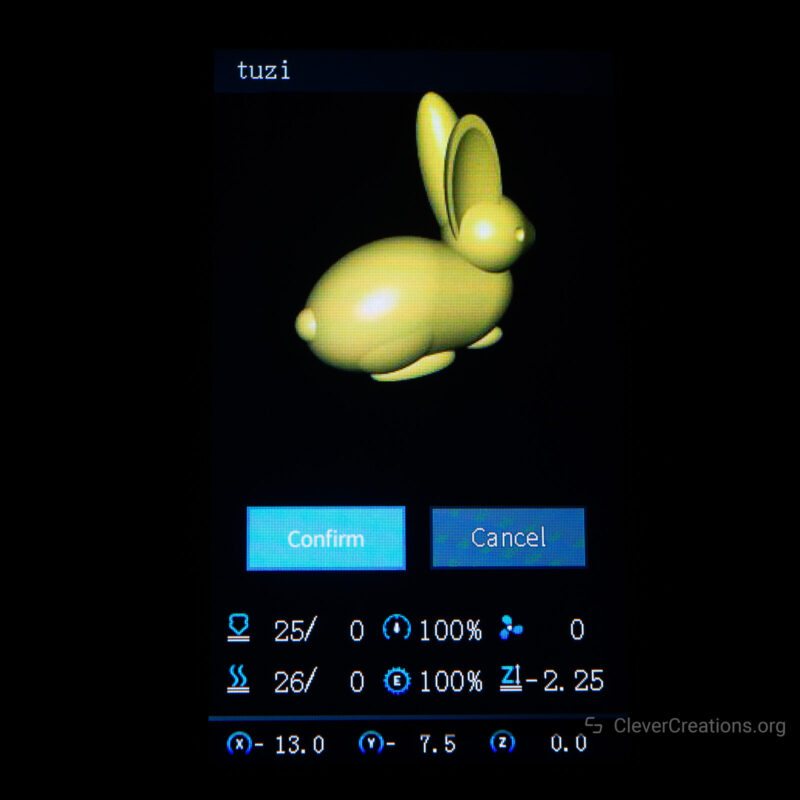
New UI
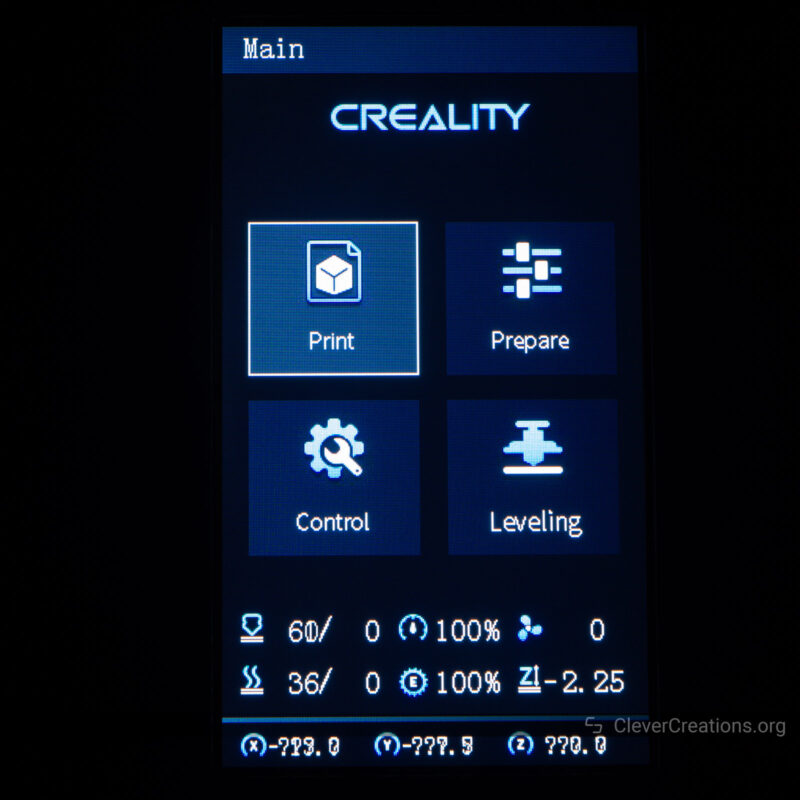
The Ender 3 V2 Neo also boasts an updated user interface. It’s possible that Creality chose to update this after seeing the popularity of aftermarket firmware/UI solutions like JyersUI.
The new UI does have a couple of new features, such as a model preview function and support for auto-leveling. Compared to JyersUI, it still falls a bit short.
Considering that the Ender 3 V2 Neo uses Creality’s v.4.2.2 controller, you might be able to upgrade to Jyers firmware anyway. The only concern we see is that Jyers’ firmware is configured for a BLTouch probe, whereas the V2 Neo uses a CRTouch.
If these are compatible, then you can do the upgrade to JyersUI. It offers a bit more functionality and customization options than the stock firmware, like the support for filament change.
If you are a beginner and none of that is of interest to you, the default UI will work just fine. Making this firmware change won’t improve print quality in any way.
Repairability & Maintenance
The Creality Ender 3 V2 Neo is a bit of a mixed bag when it comes to repairability and maintenance.
On the one hand, the full-metal Bowden extruder is fairly easy to troubleshoot. You don’t need to disassemble the entire print head, which can be an issue when working with direct drive extruders.
On the other hand, the electronics area is very difficult to access. It’s a puzzle of removing bolts from different orientations of the machine just to get to the inside.
The internal wiring is also crammed into the electronics area, which can make diagnosing issues and replacing parts more difficult. And while you won’t need to do that often, it’s still a budget 3D printer we are talking about. Things can go awry and require attention once in a while.
It’s not ideal, but it’s something you’ll often have to live with if you end up buying a cheap 3D printer like the Ender 3 V2 Neo.
Ender 3 V2 Neo Print Quality
More important is the print quality of the Creality Ender 3 V2 Neo. As you can see below, it’s pretty good for a cheap 3D printer. With the Bowden extruder and small print cooling duct/fan, there are some obvious limitations, but the V2 Neo can still produce some nice prints.
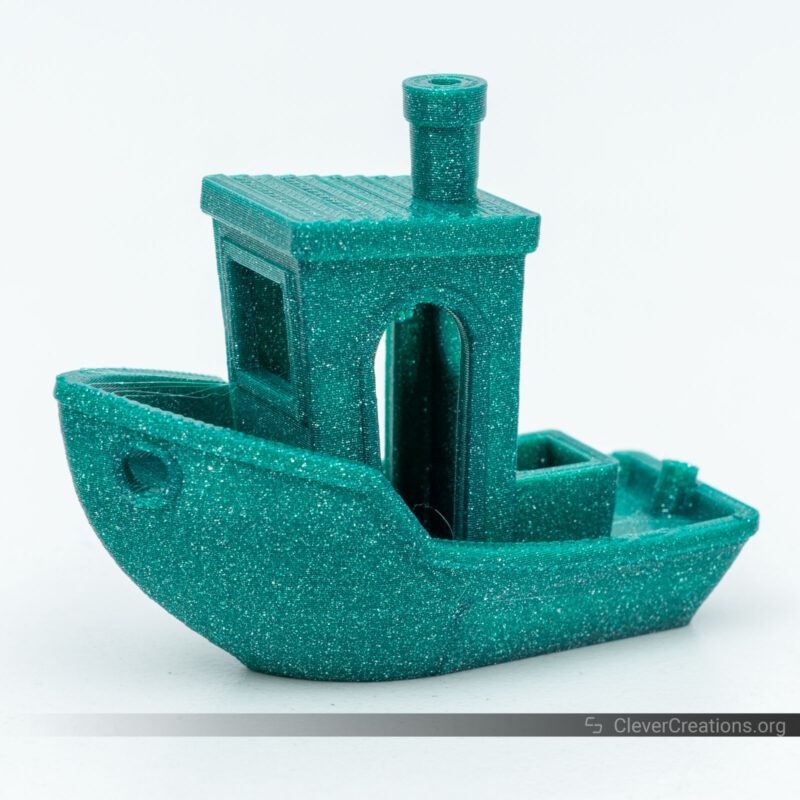
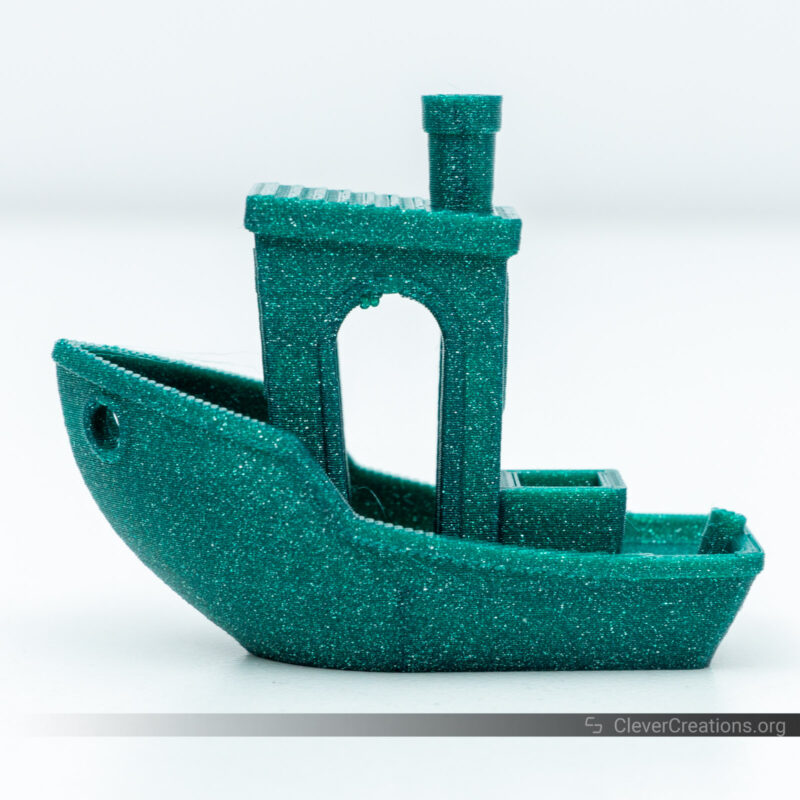
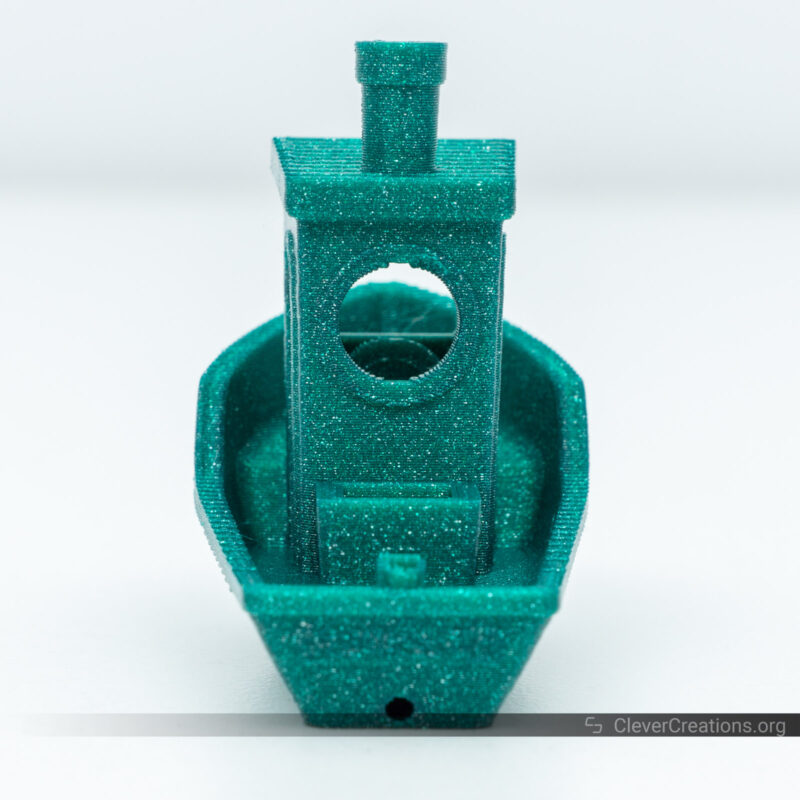
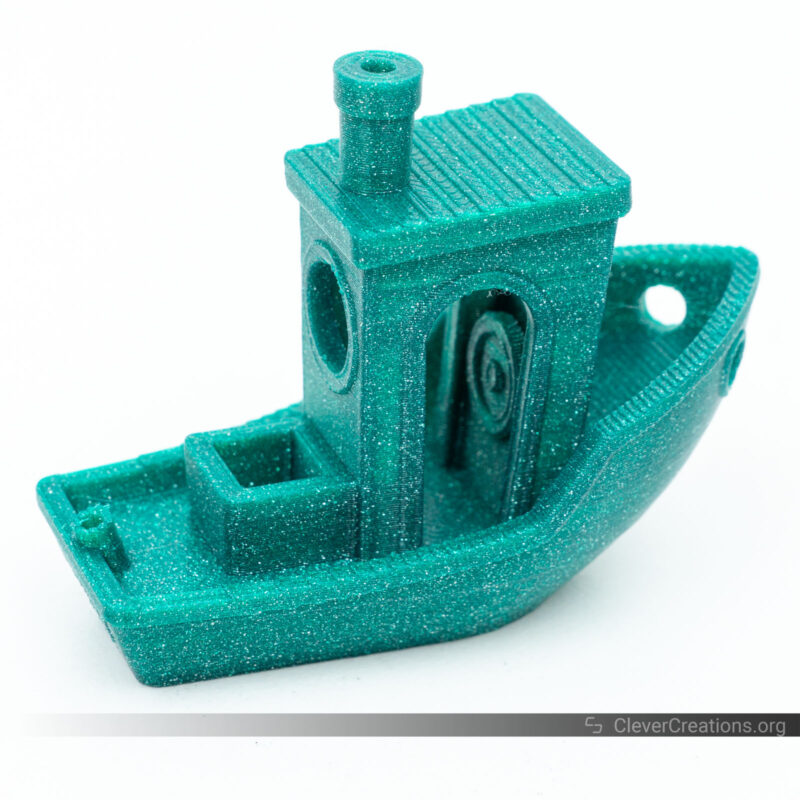
3DBenchy
There’s nothing like a Benchy to quickly check the print quality of a 3D printer. The Creality Ender 3 V2 Neo did a decent job on this one. There are no visible blobs, layer shifting, ringing, or Z banding that indicate issues.
The only notable problem is some drooping at the top of the deckhouse entrance and window. It’s fairly minor and likely caused by the print cooling limitations. 3D printing slower would help, as would decreasing the nozzle temperature.
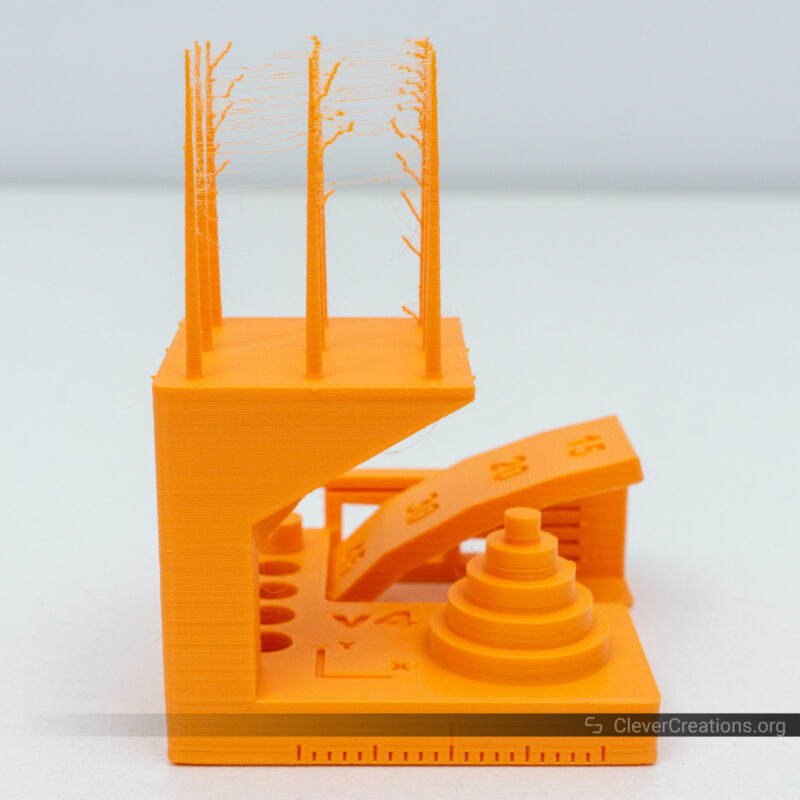
Autodesk x Kickstarter FDM 3D Printer Assessment
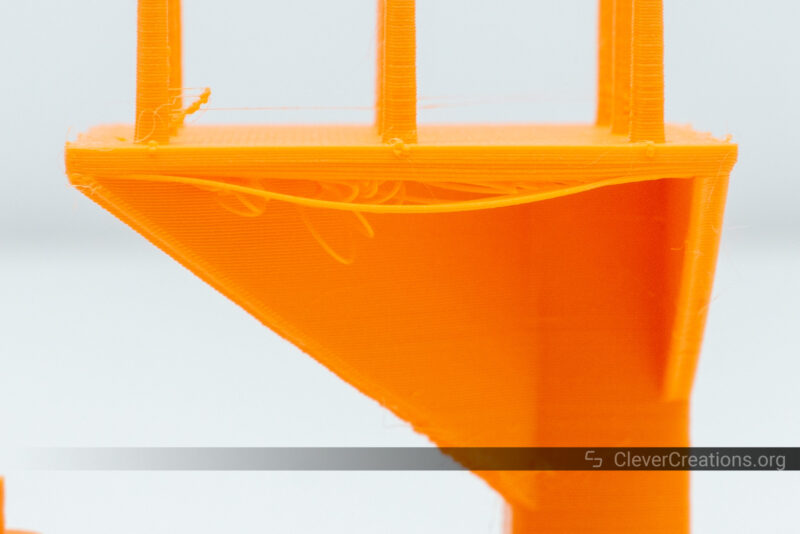
This print has a couple of obvious flaws, but it is not as bad as it initially looks. While the bridging is of poor quality due to the limited print cooling, the steep overhangs came out alright.
The pillars themselves at the top printed well too, even though the stringing is quite bad. The stringing was caused by a combination of aging filament and not dialing in retraction with a retraction tower beforehand.
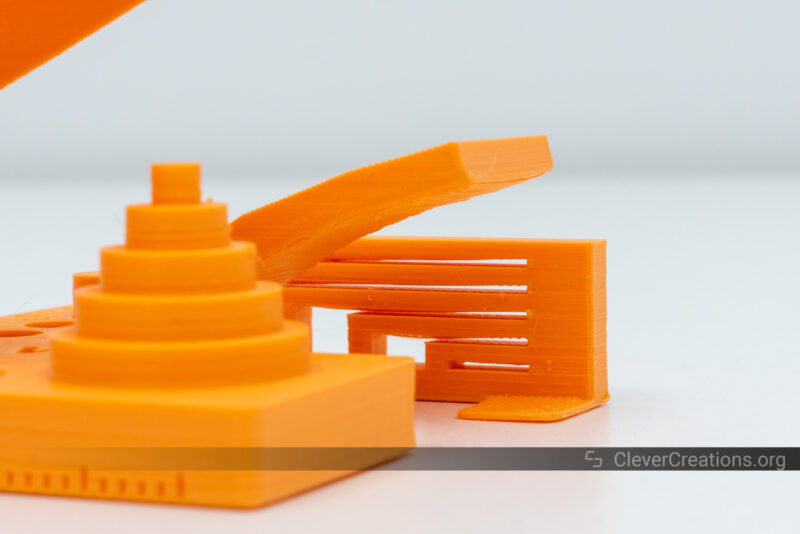
As far as ringing and dimensional accuracy, the Creality Ender 3 V2 Neo did alright. One of the cylinders of the negative feature resolution test did not come out by itself, but it was close enough that we could pry it out without damaging the print.
Most of the issues can be addressed with 3D printer upgrades and further dialing in print settings, but it is a good opportunity to point out that out-of-the-box performance can be limited with machines at this price point.

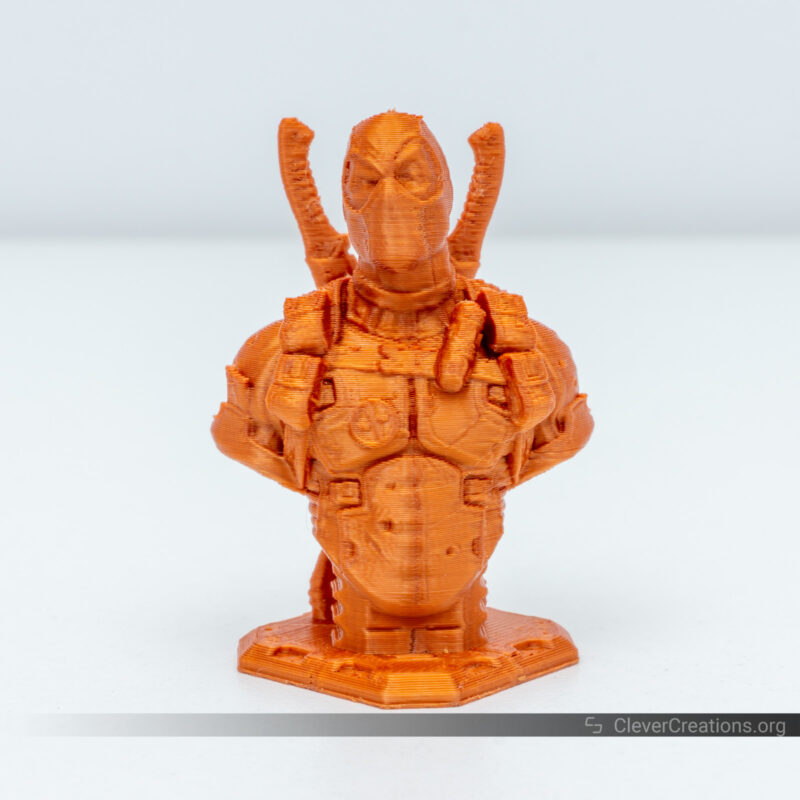
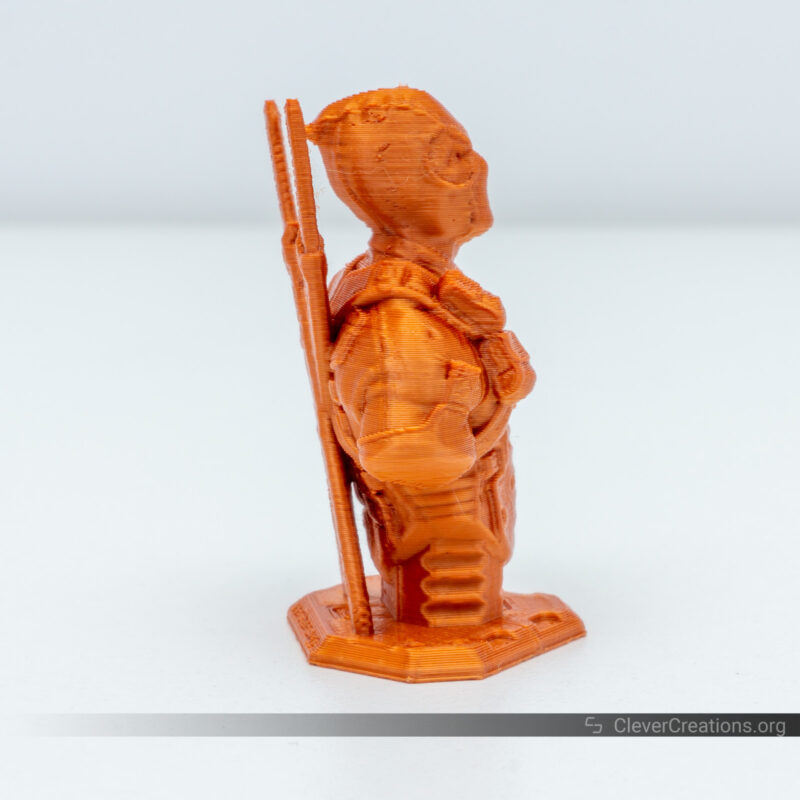
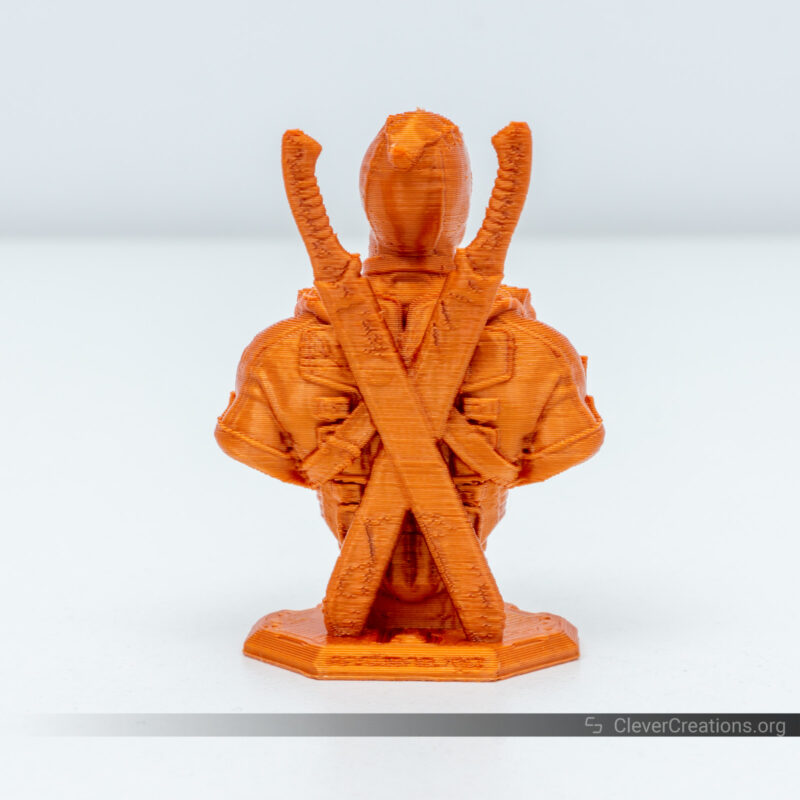
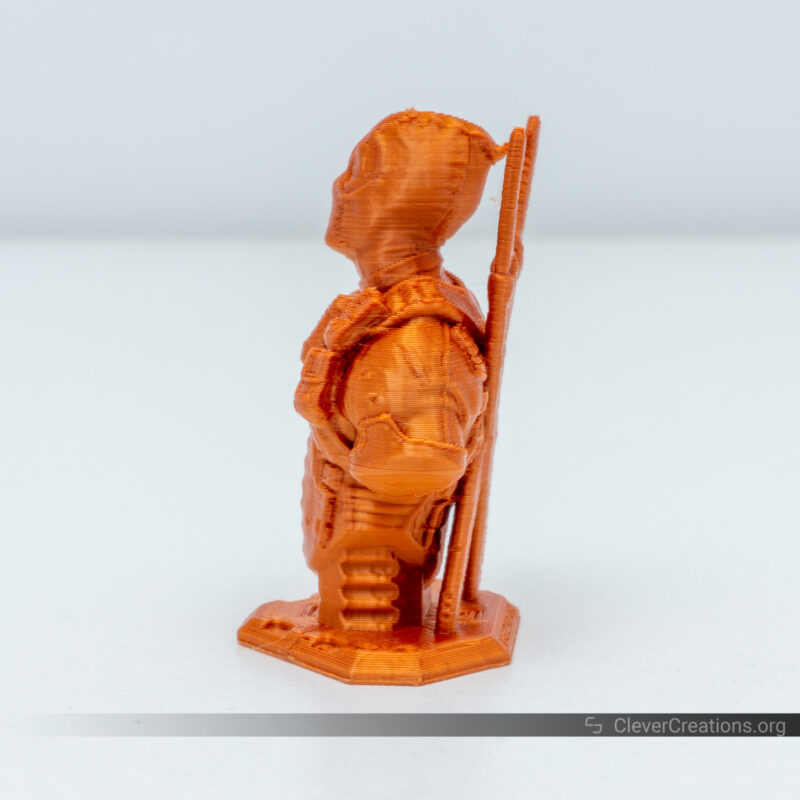
Deadpool Bust
We decided to print this Deadpool bust scaled down (45 mm / ~2″ height) with thin layers to see how well the Creality Ender 3 V2 Neo would do. As you can see, it did an excellent job.
Most of the detail came through without any issues. There is still some slight stringing here and there, but that’s easily fixable with a quick pass of a butane torch.
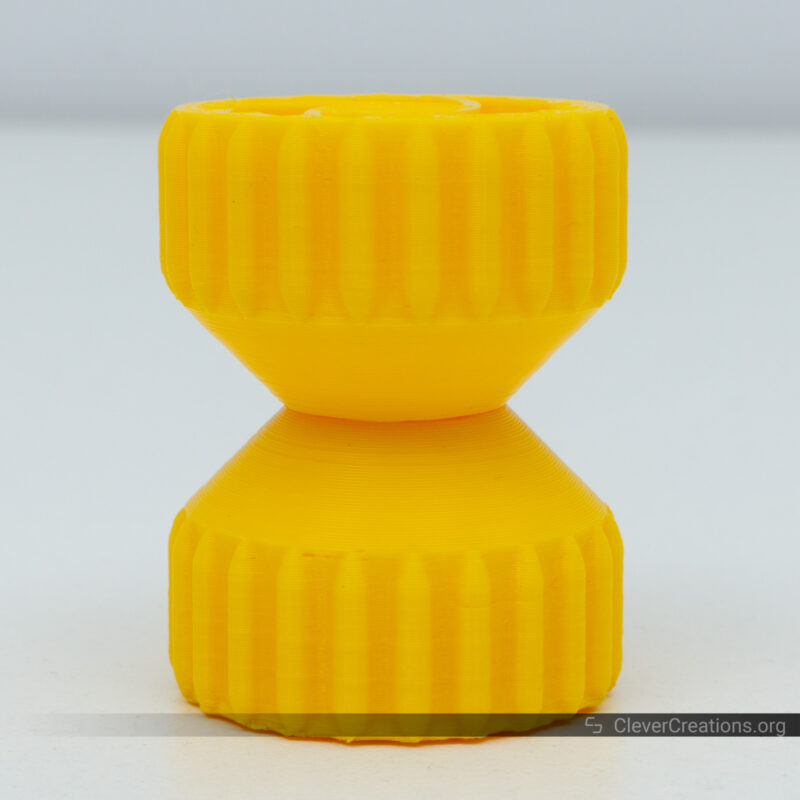
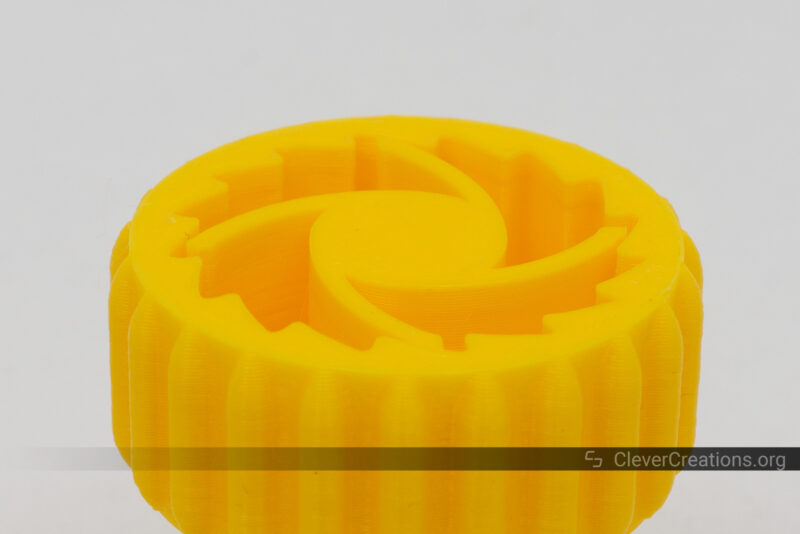
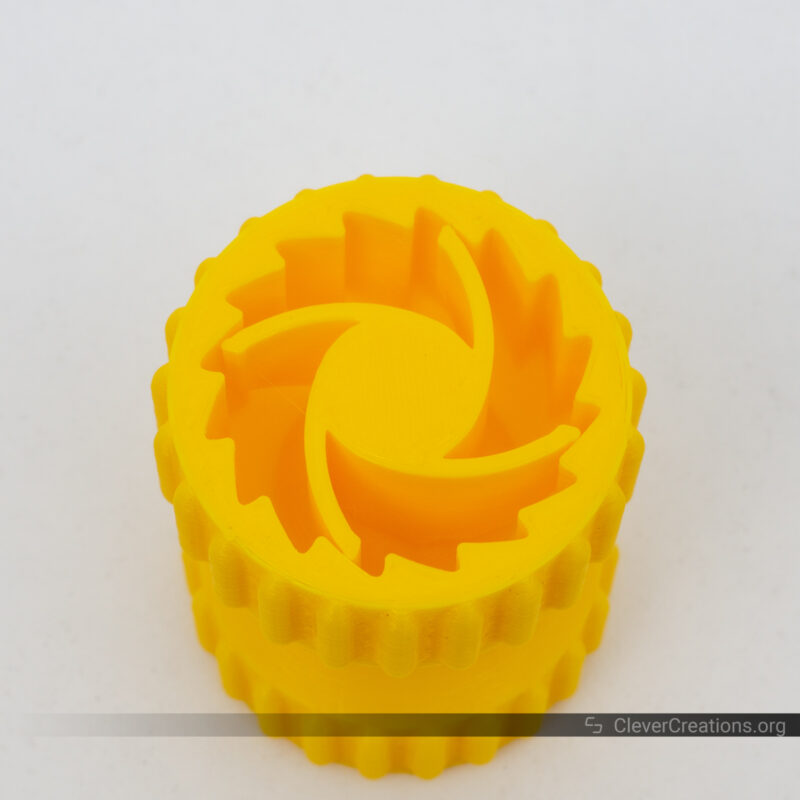
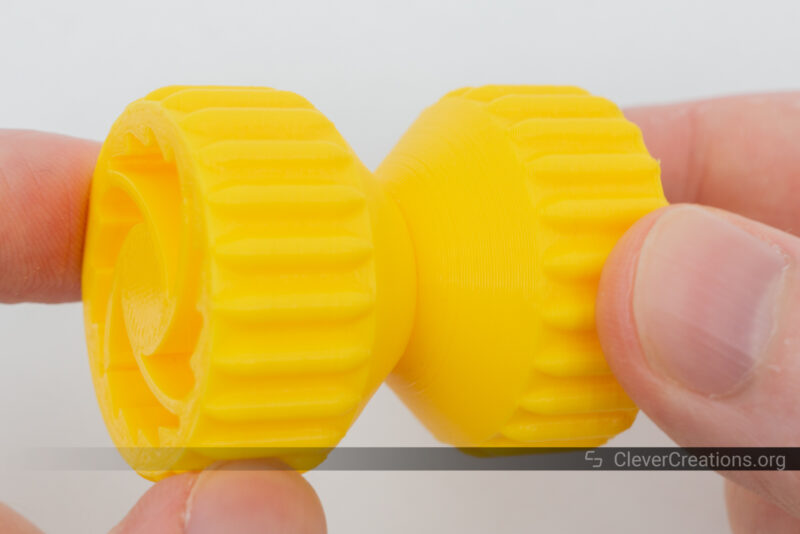
Ratchet Fidget
No issues with this ratchet fidget toy either. The dimensional accuracy is good, the overhangs are printed well, and there is no sign of any ringing or PETG stringing.
Alternatives to the Creality Ender 3 V2 Neo
Ender 3 V2 Neo vs Ender 3 V2 vs Ender 3
We don’t see many reasons to go for the Ender 3 V2 over the new Ender 3 V2 Neo. While the V2 Neo costs about $50 more, you are getting an updated print surface, a full-metal extruder, and an automatic bed leveling probe.
These are the things that many users upgrade as soon as possible. Saving yourself the time, hassle, and expense of sourcing and installing the upgrades is worth the extra cost in our opinion.
The original Ender 3 might still be a good option if you are on a very tight budget. At $189, it falls into the 3D printers under $200 category. From that perspective, it offers good value.
The Ender 3 doesn’t come with nearly as many features as the V2 or V2 Neo and will require some upgrades if you want to get it to the same level. But if you are okay with that and don’t mind getting your hands dirty, the Ender 3 can be a valid option.
Anycubic Kobra
The Anycubic Kobra is one of our favorite budget 3D printers at the moment. With a PEI-coated print surface, touch screen, and direct extruder, it offers a lot of extras for around the same price as the Creality Ender 3 V2 Neo.
As for the main downsides, the Kobra does have an overall lesser quality feel than the V2 Neo due to its more plasticky construction. It is noisier during operation as well.
The rest is all pretty much the same. Both have an identical build volume, auto leveling, single Z-axis configuration, and are equally easy to assemble.
Sovol SV06
The SV06 is one of Sovol’s recent releases that impressed us with its bang for the buck. It’s essentially a Prusa i3 clone, but without the demanding price tag.
Compared to the Creality Ender 3 V2 Neo, it has a couple of advantages. The planetary-geared metal extruder, PEI-coated print surface, and high-temperature all-metal hot end are the most notable.
The plastic construction of the SV06 leaves something to be desired. We also encountered several build quality issues in our testing. Brushing those aside, it is a capable 3D printer for the price.
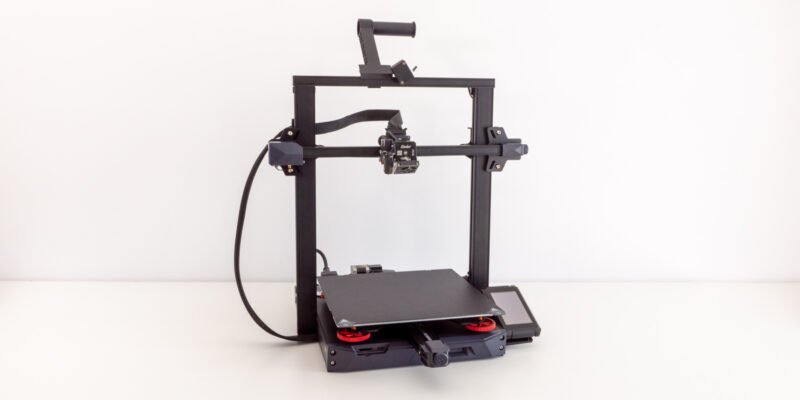
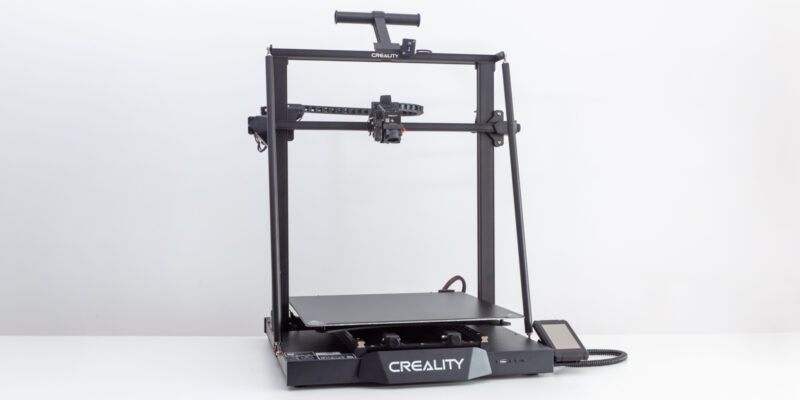
Ender 3 Max Neo
The Ender 3 Max Neo is the refresh of Ender 3 Max and can be considered the Ender 3 V2 Neo’s bigger brother. It comes with many of the same features, but also fills the gaps that the V2 Neo leaves open.
The most notable differences are a larger print volume (300x300x320 mm), a filament runout sensor, a glass print bed, and a dual Z-axis configuration. These make the Ender 3 Max Neo a better option if you are looking for a 3D printer that can handle bigger prints.
If that is not what you are looking for, you are probably better off with the Ender 3 V2 Neo. It costs $70 less and takes up considerably less desk space.
Conclusion
The Ender 3 V2 Neo is a welcome refresh of the popular Ender 3 V2. With a few key upgrades, it addresses the most common issues that users had with the original.
Its CR Touch probe is a game-changer, making the bed leveling process much easier and quicker. The new all-metal extruder is a nice addition too, as it provides better reliability and a greater extrusion force. The PC-coated print bed further improves the 3D printer’s user-friendliness.
That’s not to say this 3D printer is perfect. It copies some limitations from its predecessors, like the single Z-axis configuration, a Bowden extruder, and a lack of filament sensor. The wiring could benefit from some safety improvements as well.
Overall, the Ender 3 V2 Neo is a good budget 3D printer. Its current $299 price feels a bit on the steep side, however, and it would be an easier recommendation if the machine would go for about $25 to $50 less.
That said, as long as you don’t push the Creality Ender 3 V2 Neo too hard with high print speeds or exotic materials, it will serve you well. It’s a good 3D printer for beginners and hobbyists, and we are happy to see it added to the Ender 3 line-up.