- Good print quality
- Linear rails on Y-axis
- Automatic Z-offset
- Automatic bed leveling
- Direct drive extruder
- Amazing value
- Small screen
- Weak print cooling
- Slow heating
- Plastic construction
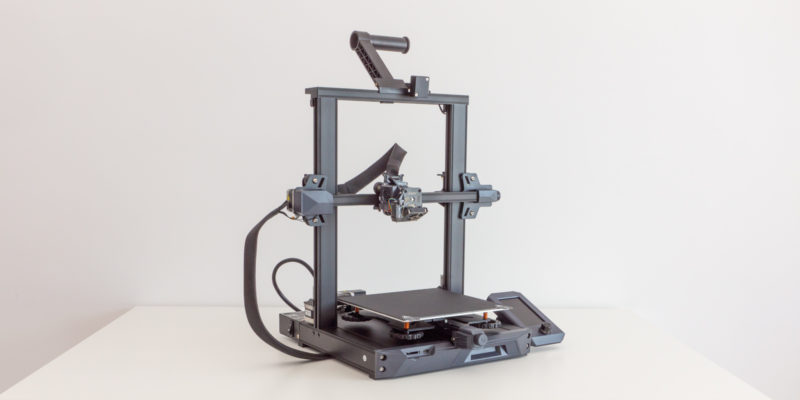
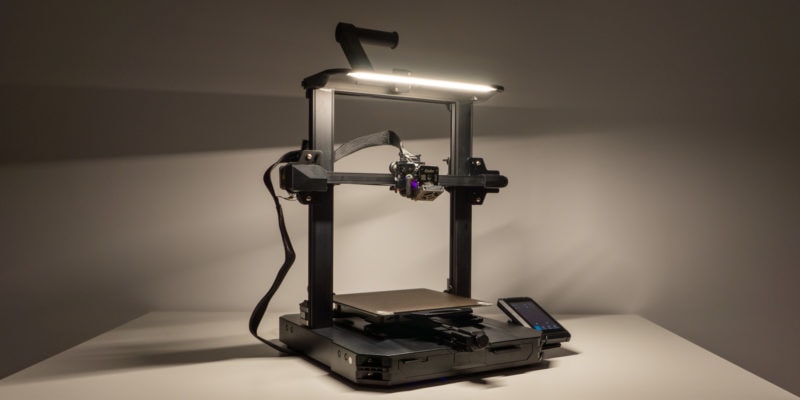
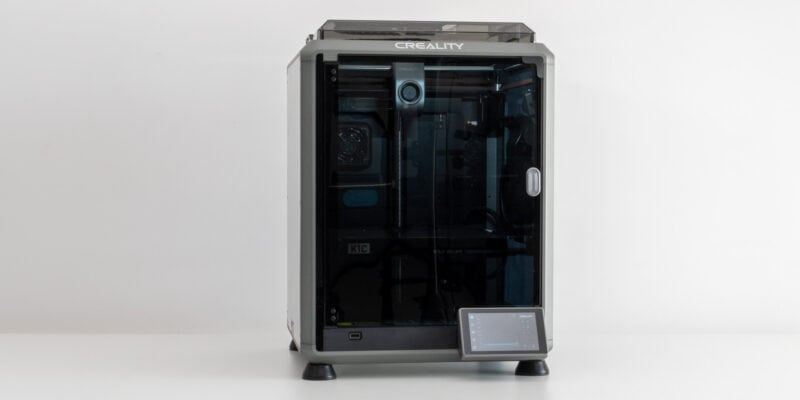
With the new Ender-3 V3 SE, Creality continues its affordable line of Ender-3 3D printers. While some of Creality’s recent releases have had a mixed reception, the Ender-3 line has traditionally been one of the company’s biggest strengths. In fact, one could argue that these 3D printers are what made the company into the behemoth it is today.
Today, we’ll take a look at the V3 SE to see if it matches up to those expectations. On paper, it has a bunch of cool features that we haven’t encountered before in a 3D printer under $200. But is it all what it seems to be, or has Creality bitten off more than they can chew?
Let’s dive into the Creality Ender-3 V3 SE review and find out!
Creality Ender-3 V3 SE Specifications
| Ender-3 V3 SE Specs | |
|---|---|
| Print Area | 220x220x250 mm |
| Leveling Method | Auto-leveling with CR-Touch |
| Nozzle Diameter | 0.4 mm (standard) |
| Layer Thickness | 0.1-0.35 mm |
| Precision | ±0.1 mm |
| Typical Printing Speed | 180 mm/s |
| Max. Printing Speed | 250 mm/s |
| Acceleration | 2500 mm/s² |
| Max. Nozzle Temperature | 260 °C |
| Max. Hotbed Temperature | 100 °C |
| Filaments | PLA, TPU(95A), PETG |
| Rated Power | 350 Watts |
| Input Voltage | 100-120V~, 200-240V~, 50/60Hz |
| Power Loss Recovery | Yes |
| Printing Method | Storage card printing |
| Language | 中文, English, Español, Deutsche, Français, Pусский, Português, Italiano, Türk, 日本語 |
| Operating Systems | Windows, MAC, Linux |
Unboxing
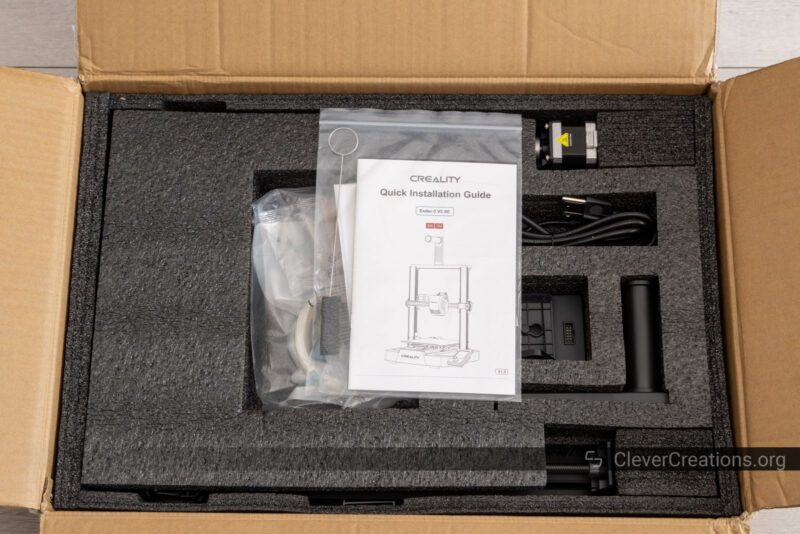
The first thing we noticed when handling the Creality Ender-3 V3 SE is its small box. Even though the 3D printer has roughly the same dimensions as its predecessors, the packaging has gotten smaller. It’s a welcome improvement that helps reduce the environmental impact of shipping the machine from China to wherever you live.
As for the components and accessories you find in the box, it’s all fairly standard. At least when you compare it to similar 3D printers and its predecessor, the Ender-3 V2 Neo.
Compared to the first-generation Ender 3D printers, you’ll find that the V3 SE is mostly preassembled. No longer do you get a pile of components that you have to assemble before use.
In total, you get the following:
- Ender-3 V3 SE base
- Gantry frame
- Display screen
- Spool holder
- Screws for assembly
- Basic toolkit
- Power cable
- 20 meters of filament (not a lot)
- Spare nozzle and nozzle cleaner
- Documentation
- SD card + reader
It’s enough to get started 3D printing with the Creality Ender-3 V3 SE right away, but you’ll want to get some extra filament as well. There is no USB-C cable included with the machine either, which is a requirement if you want to connect it to your computer.

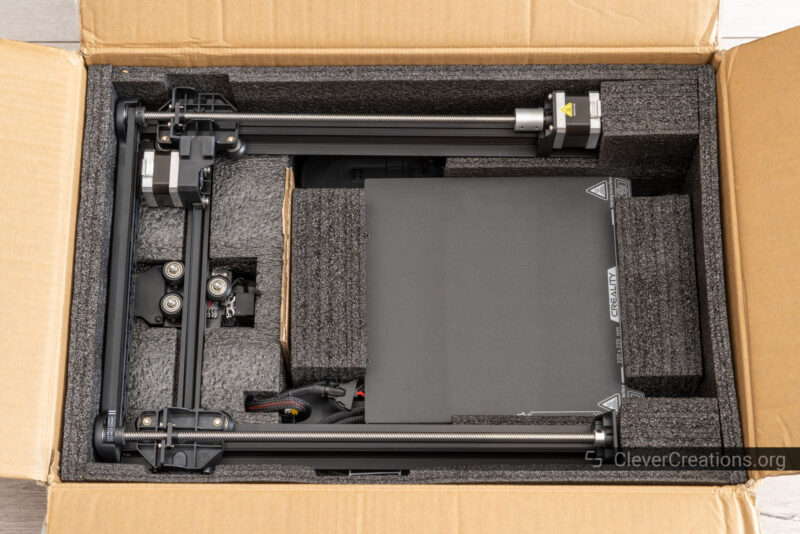
Getting Started

Just like the packaging of the Ender-3 series gets smaller and smaller, the assembly has gotten simpler as well. For example, when putting together the Creality Ender-3 V3 SE, you don’t even need to attach the print head anymore. It’s already attached straight out of the box.
Another interesting change is the base has fitted slots for the vertical Z-axis gantry. It makes the mounting process of the gantry much easier, because it isn’t able to move around in the process.

One issue we encountered during assembly—likely a consequence of shipping—is that the print bed was loose. It was an easy fix, we just had to tighten the four mounting screws under the print surface with a Phillips-head screwdriver.

Make sure to check this on your Ender-3 V3 SE. A loose print bed negatively affects your 3D print quality.
Other than that, our assembly of the 3D printer was very smooth. There was surprisingly little wiring to take care of, and the manual has improved on Creality’s previous documentation standards as well.
Because of the linear rods on the Y-axis, there’s also no need to adjust V-wheels under the print bed. We’ve seen this being a pain point for beginners and it’s one of the reasons that we’re happy with this change. We’ll cover it in more detail further down in this Creality Ender-3 V3 SE review.
Creality Ender-3 V3 SE Features
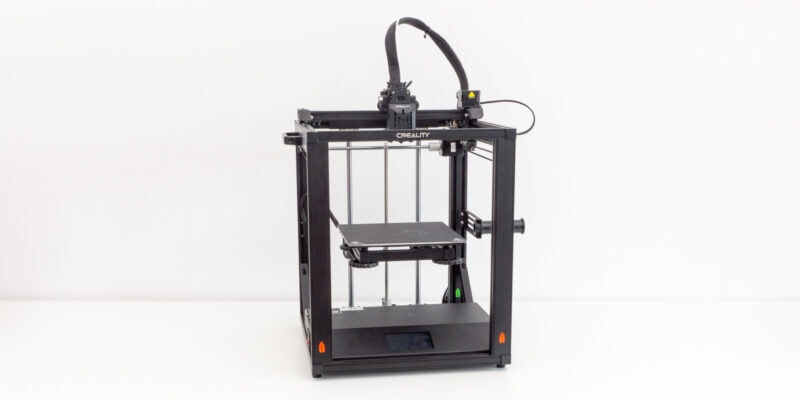
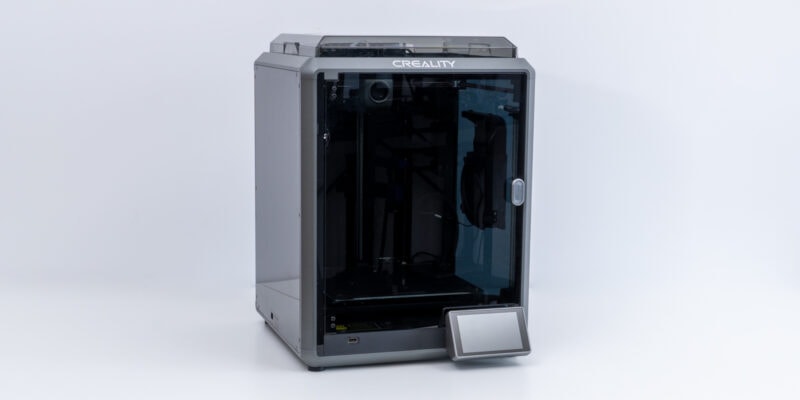
Because the Ender-3 V3 SE is a basic 3D printer for beginners, it’s important to temper the expectations a bit in terms of features. For example, you won’t encounter any advanced features or high print speeds. For that, you’re better off looking at the (more expensive) Creality K1 series instead.
But as you’ll see, the features that the V3 SE has work very well, and the machine delivers on its promises. Let’s take a closer look!
Sprite Direct Extruder

Just like most—if not all—recent Ender 3D printers, the V3 SE comes with Creality’s Sprite extruder. It doesn’t do extreme print speeds, but it is reliable and compatible with a wide range of filaments. For a budget machine like this, that’s perfect.
Because it’s a direct extruder instead of a Bowden, you won’t have to spend a lot of time dealing with stringing and related print quality issues. Especially for beginners, this is ideal. It’s also a big improvement over the Ender-3 V2 3D printers, which still used a Bowden extruder.
Reliable Hot End

The hot end of the Creality Ender-3 V3 SE follows a similar approach. It’s basic, durable, but at the same time doesn’t offer much special. Again, we think that is perfectly okay at this price point.
The hot end is capable of reaching nozzle temperatures of up to 260°C. It’s enough for filament materials like PLA, PETG, and TPU, but higher temperature filaments will be out of reach.
Given the construction of the Ender-3 V3 SE, that makes sense. Besides the lack of a high-temperature all-metal hot end, the 3D printer doesn’t have any other provisions for printing with materials like ABS or Nylon either. For example, it doesn’t have a heated build chamber or an enclosure.
There’s no reason why you can’t upgrade the machine with these later if you so desire. Creality’s Ender line has been one of the best in terms of 3D printer upgrades. Mostly because of their popularity and high sales numbers, but also because they are easy to modify.
Getting back to the hot end, it performed reliably in our testing and extruded filament smoothly throughout the process. Basically the same as every other time we’ve encountered it in our 3D printing tests.
Print Cooling

For print cooling, the Ender-3 V3 SE uses a single 40x40x10 mm radial fan. It’s the standard for 3D printers under $300 and as minimal as it gets. It’s one of the first things to consider upgrading if you are looking to improve print quality at higher print speeds.
At normal speeds, however, we’ve found the small fan to be sufficient. As you can see in the 3D print tests further down the page, even steeper overhangs come out fairly well at standard printing speeds.
The V3 SE that Creality sent us uses a 3D printed shroud, but we expect the retail version to use an injection-molded version. As long as the design is identical, this doesn’t impact performance. The fan itself is what matters way more. If you’re going for an upgrade at some point, a larger blower fan is the way to go.
Automated Nozzle Offset

Something we’re really excited about in the Creality Ender-3 V3 SE 3D printer is its ability to automatically set the nozzle offset. The nozzle offset, or Z-offset, is a parameter that sets the difference between the nozzle and the print surface. If you want to get your first layer to be smooth and to adhere well, it’s important to get it right.
The way the Ender-3 V3 SE automates this is by the use of a sensitive strain gauge under the print bed. It lets the 3D printer know when the nozzle comes into contact with the surface, setting the Z-offset to 0 at that height.
For those just starting out in the world of 3D printing, this automatic process is extremely helpful. The manual process can be tricky for beginners, and even for more experienced users it can feel like a chore.

In practice, the process takes minimal time and worked without a hitch during the testing of this Ender-3 V3 SE review. Every first layer came out flawlessly and there was no need for manual intervention.
This system is similar to what we encountered in the Creality K1, but we’re happy to also see it included in the Ender-3 series. It’s just such a time-saver for any type of user.
In contrast, the K1 has all four corners of the print bed hard-mounted on strain gauges. The V3 SE, on the other hand, only has a single strain gauge on one of the corners.
The main practical difference is that the K1 can use the four strain gauges for automatic bed leveling purposes as well, whereas the Ender-3 V3 SE still needs a separate bed leveling probe for that.
Automatic Bed Leveling

By looking at the automatic bed leveling probe of the Ender-3 V3 SE, we’re back to covering features that have proven themselves time and time again. Creality’s own CR-Touch is the only ABL probe that the company uses, and for good reasons.
The probe is accurate, reliable, and compared to the BLTouch, comes with less risk of damaging the tip. It’s a useful feature that you shouldn’t go without.
The CR-Touch probe helps the 3D printer create a virtual mesh of the bed that it uses to compensate for inaccuracies in the flatness of the build surface. As a result, you end up with an even, well-adhering layer of filament at the start of your 3D prints.

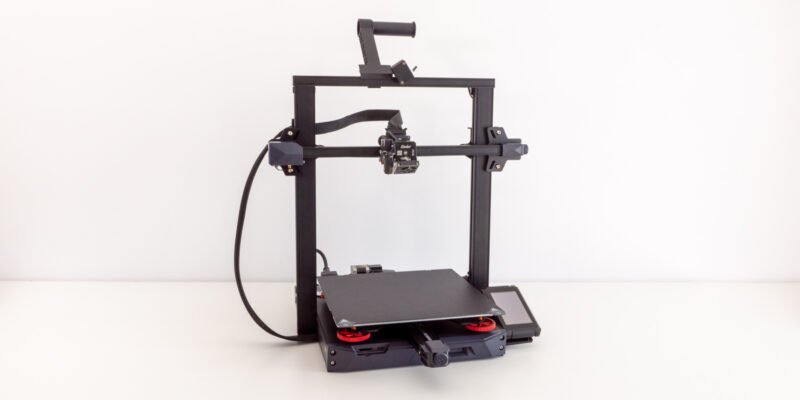
Sticky Print Bed

The Creality Ender-3 V3 SE continues the trend of a 220×220 mm print bed. It’s enough to fit most popular 3D printing projects and designs. For larger things, you can always split the 3D model before resorting to a large-scale 3D printer.
For the print surface, the V3 SE uses a one-sided PC-coated stainless steel sheet. We found it to be surprisingly sticky (in a good way) compared to previous versions of Creality’s PC-coated surfaces. We believe the company is actively working on improving these coatings for better adherence to filament.
In our testing, we found the surface to stick well to the filaments we tested with—PLA and PETG. The combination of the print surface with the ABL probe and automatic Z offset makes for a dream combination. Don’t expect the bed to work well with strongly warping materials like ABS unless you use a 3D printer enclosure.
You can expect the print bed to take about 2:25 minutes to heat up to 60°C and 7:25 minutes to get from room temperature to 100°C. It’s relatively slow for a print bed this small.
We haven’t tested the durability of the print surface, but just like with every 3D printer, you can expect it to wear out at some point. They are not expensive to replace, however, when the time comes.

Thermal Performance

The print bed of the Ender-3 V3 SE has a great temperature distribution. No matter the temperature at the center, the temperature at the corners isn’t far off. This came as a bit of a surprise to us given that the print bed does not have any insulation at its corners.

Regardless, you can expect to encounter little to no warping from temperature differences in the print surface. Not bad for such a cheap 3D printer!

Other Features
Other than the features listed above, the Creality Ender-3 V3 SE 3D printer does not come with any extras. For example, there’s no filament sensor, tool drawer, print head lighting, etc.
It’s not something we have a problem with, as all those things are relatively easy to find upgrades or improvements for later on if necessary.
At $200, we’d rather have a solid 3D printer that covers the basics well, than a machine that tries to do too much. And covering the basics is exactly what Creality has done here.
Build Quality and Construction
The 3D printers in Creality’s Ender-3 line are constructed fairly similarly. The V3 SE introduces some changes, however. Some of these focus on improving print quality, whereas others aim to keep costs down. Let’s go over the most notable ones.
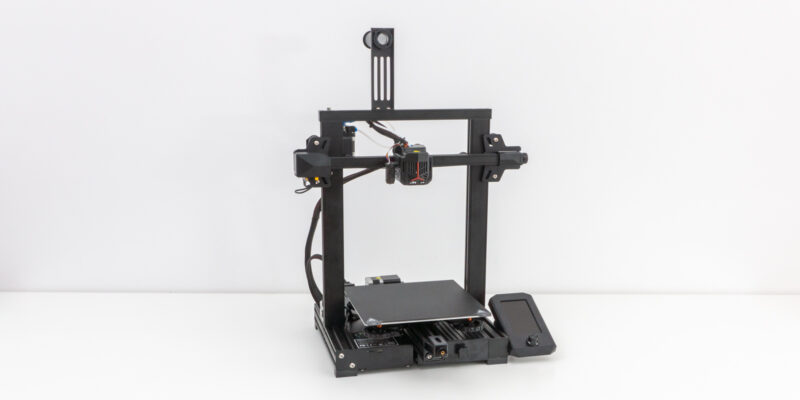
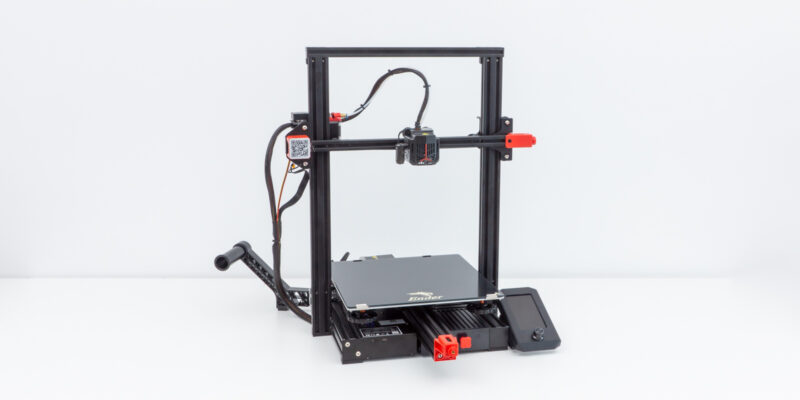
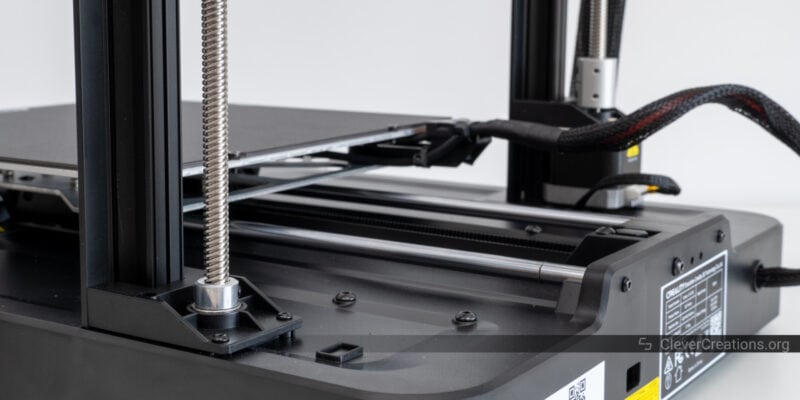
Y-Axis Linear Rods

A new feature on the Ender-3 V3 SE is its Y-axis linear rods. Common on many other 3D printers, we haven’t seen them on past Ender-3 machines like the V2 Neo and Max Neo. These used V-wheels instead.
The downside of V-wheels is that they wear and loosen over time. To prevent play in the axis, you’ll have to periodically adjust them—and eventually replace them altogether.
On the Ender-3 V3 SE, the linear rods and bearings provide a much more stable platform for the print bed. Not only does they give more accurate 3D prints, but there’s also less 3D printer maintenance for you to take care of.
We think it’s a great upgrade over the previous 3D printers in the Ender-3 series and we hope to see it in all future releases as well.
The only drawback we noticed is that compared to V-wheels, the linear bearings make more noise when they travel over the rods. It’s not loud or bothersome by any means, however.

Dual Z-axis

Also new is the stock dual lead screw, or ‘dual Z-axis’ in the Ender-3 V3 SE. Whereas previous 3D printers in the Ender-3 series used a single lead screw arrangement, the V3 SE has two lead screws for more stability.
This means you don’t have to deal with a sagging X-axis on one side, and its related print quality issues. Adding a second stepper motor and lead screw was a popular Ender 3 V2 upgrade, but having this feature straight out of the box means you save time and money.
The two lead screws on the Ender-3 V3 SE are driven by a single stepper motor and kept in sync with a timing belt. We found it to work just as well as a dual-stepper setup, but this approach has the benefit of a lower cost.

Component Quality

Something that we believe is a step back in the Creality Ender-3 V3 SE is its construction. The base of the 3D printer is completely made of plastic and there are various other important components that aren’t metal either.
While this saves cost, it also doesn’t give the same rigidity as a steel or aluminum does. So in terms of print speeds, accelerations, and accuracy, this has a negative effect.
On a budget 3D printer like the Ender-3 V3 SE, we don’t consider the plastic-heavy construction to be a big deal. In fact, if the cost savings of the cheaper base allow for features like automatic bed leveling, strain sensor, and dual Z-axis, it’s a great trade-off.

Print Area

With a 220x220x250 mm build volume, the Ender-3 V3 SE is as average as it gets for a 3D printer under $200. It’s not small, nor is it large. You’ll have enough space for all your basic 3D printing needs.
Electronics
It probably won’t come as a surprise by now, but the electronics of the Creality Ender-3 V3 SE 3D printer are par for the course as well. Nothing special, but enough for a 3D printer of this caliber.
As the main processor, the Ender-3 V3 SE uses an ARM GD32F303. As such, you’ll be able to use it with Klipper firmware, for example with the Sonic Pad or a Raspberry Pi.

In terms of safety, we have found the V3 SE to score well. Its high-current connectors are all crimped, and there’s adequate grounding for all the vital components.
For its power supply, the 3D printer uses a Creality-branded 350W 24W PSU. It’s good enough for what it needs to do and we aren’t aware of any known quality issues with it, unlike with some generic Chinese PSU brands.

As for the cable management, the 3D printer doesn’t have much going on that requires extensive management. The few wire bundles that it has are neatly managed with clips and strain relief. There’s no risk of any wires snagging on moving components, so it’s all good.

Ease of Use
With the addition of the aforementioned automatic Z offset capability and ABL probe, the Ender-3 V3 SE is a very easy to use 3D printer. There are a couple of other factors that contribute to this as well.
Repairability / Upgradeability

If you ever need to have access to the electronics of the Ender-3 V3 SE 3D printer, whether it is to repair or upgrade something, you won’t have to make much effort. After unscrewing the bolts of the plate on the underside of the machine, the electronics are neatly laid out for you.
Working on the extruder or hot end is a bit more challenging, as the Sprite direct extruder isn’t the easiest to disassemble. Especially when compared to the Bowden setups of the previous generation Ender-3 3D printers.
That said, the extruder is reliable enough that you won’t have to do that much in the first place.
Connectivity

You can only connect to the Creality Ender-3 V3 SE over USB. The 3D printer does not have Bluetooth, Wi-Fi or other wireless connectivity. This is fairly standard for a machine in this price class. If you need more, you can always use the Wi-Fi box or the aforementioned Sonic Pad to connect to control it remotely.
On the plus side, the V3 SE features a USB-C port and a full-size SD card slot. We like the USB-C port because it lets you insert the USB cable in any orientation, and the full-size SD card is much easier to handle than a fiddly micro-SD card.
There was no USB-C cable included with our Ender-3 V3 SE, so we recommend having one at hand.
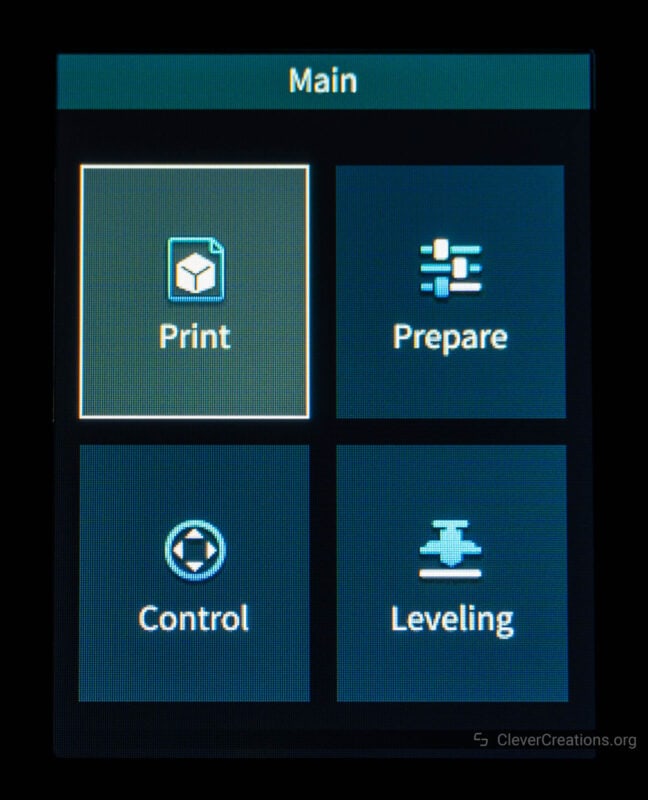
LCD Screen Interface with Knob

The LCD screen of the Ender-3 V3 SE is something that could be better in theory, but that is probably not realistic to improve at a sub-$200 price. At a bit over 3″, it’s rather small and does not have a capacitive touch overlay. The only way you can interact with it is through its rotary knob.
Even though the rotary knob works well, it takes a bit more time to use and get used to than a touch screen. It’s not a deal-breaker, however.

Creality Ender-3 V3 SE Print Quality Tests
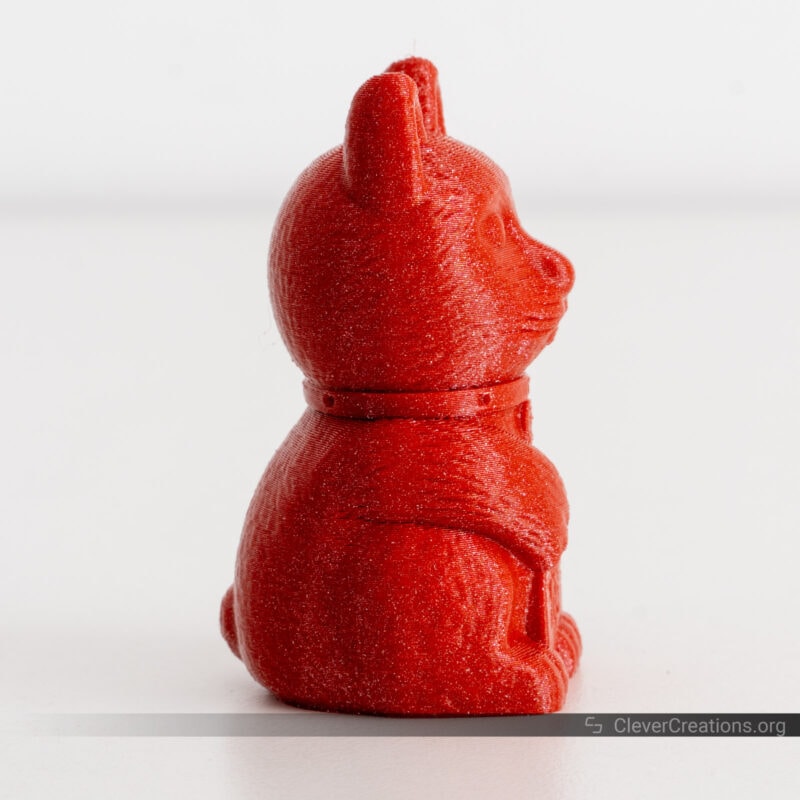
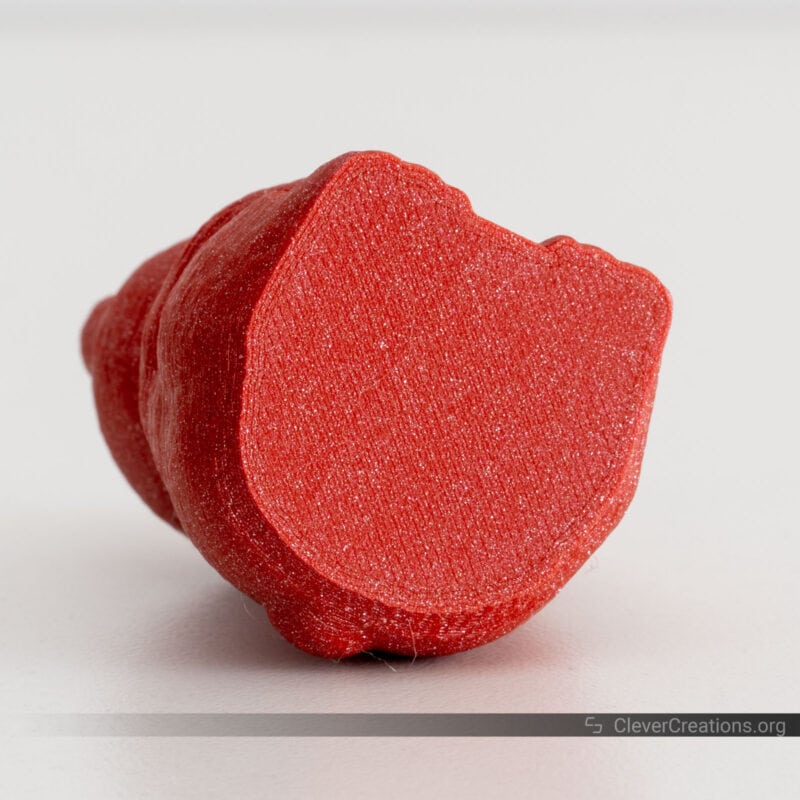
Included Cat Model
Printing one of the G-Code files from the included SD card gave us this model of a cat. It came out well, even though there are a lot of grooves present on the surface. It isn’t smooth at all. Upon closer inspection, this was the fur texture of the model instead of ringing artifacts or extrusion problems.


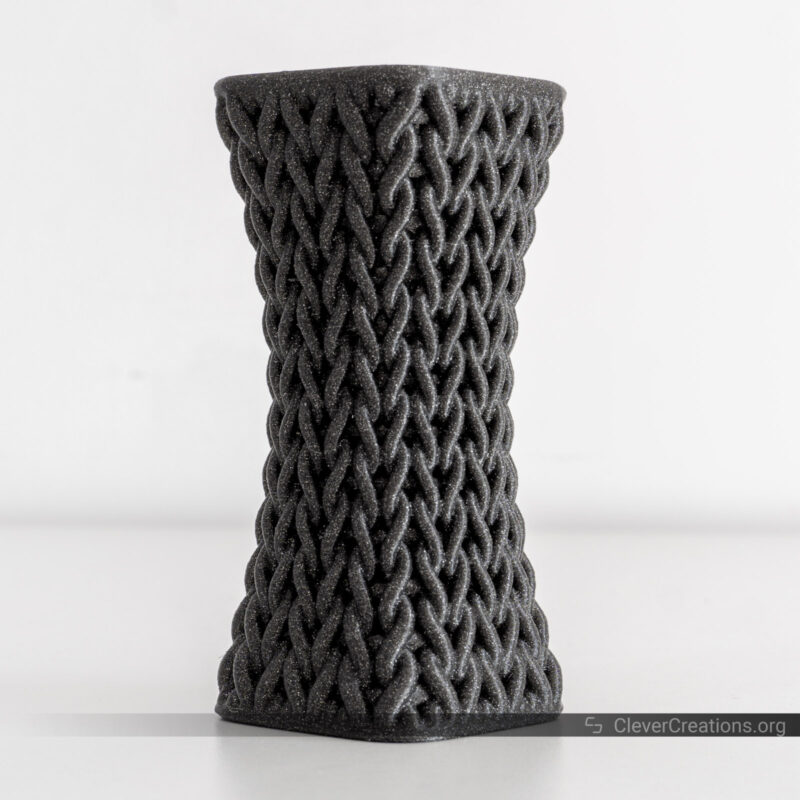
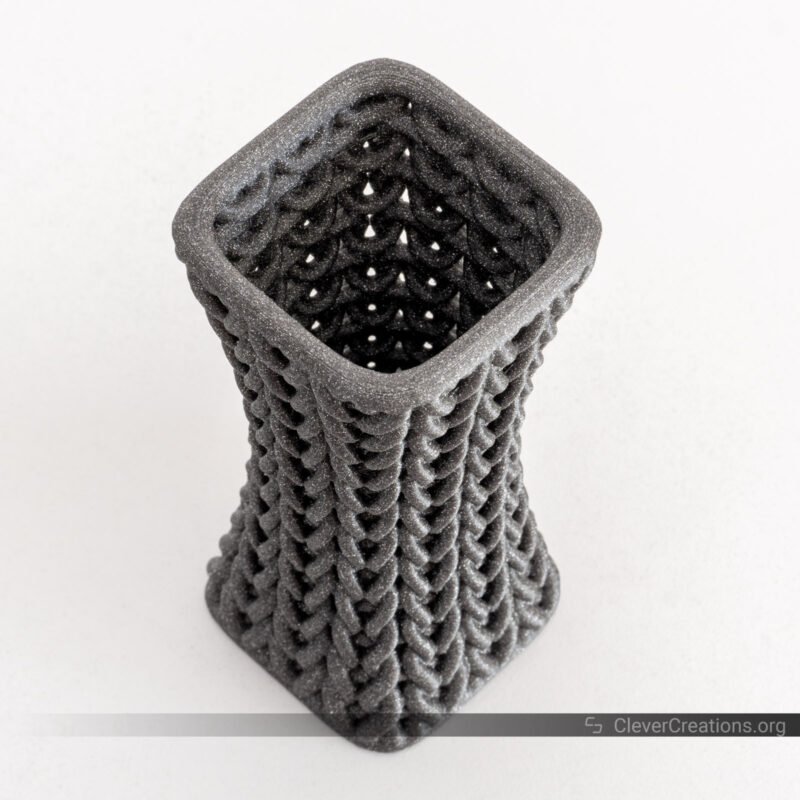
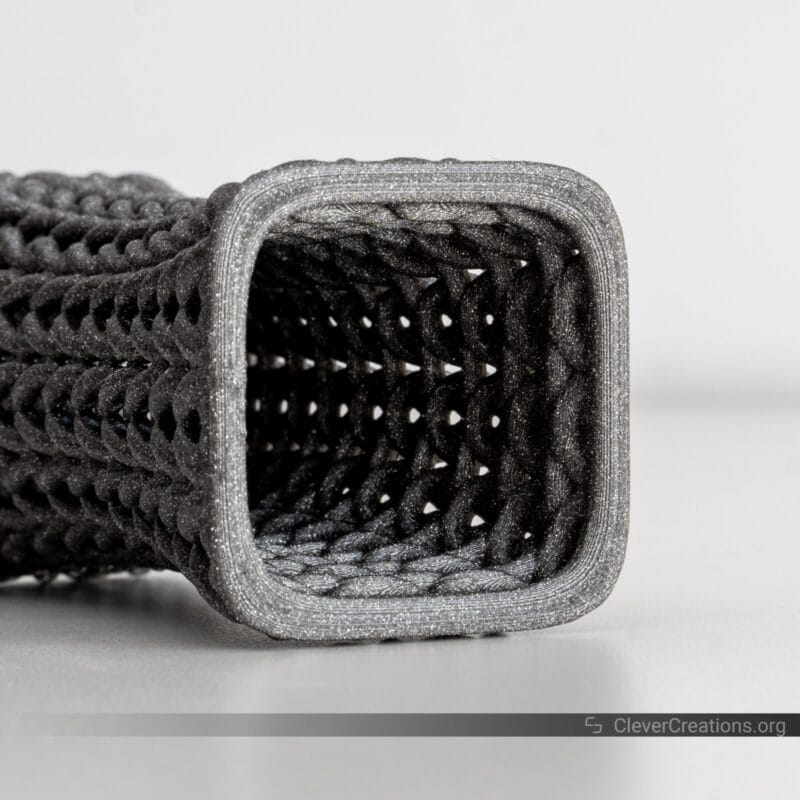
Square Knitted Vase
Moving on to more intensive testing, we wanted to see how the Creality Ender-3 V3 SE dealt with 3D models which required frequent retractions. This knotted vase is a good test for that.
The resulting 3D print came out very clean, without stringing, gaps or a noticeable Z-seam. We used the default retraction for the Sprite extruder with PLA (1 mm), which worked great.

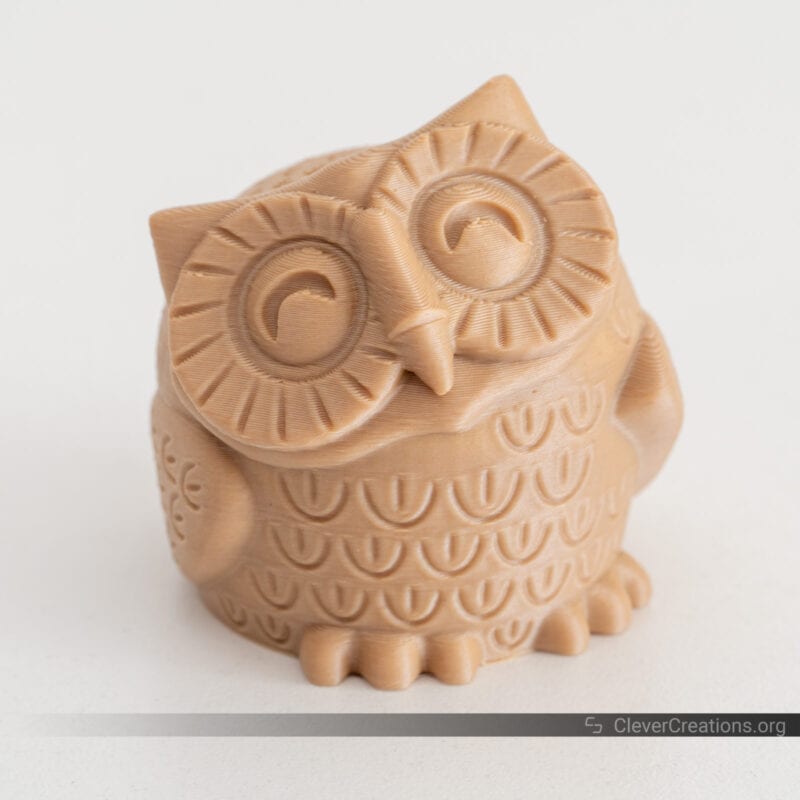
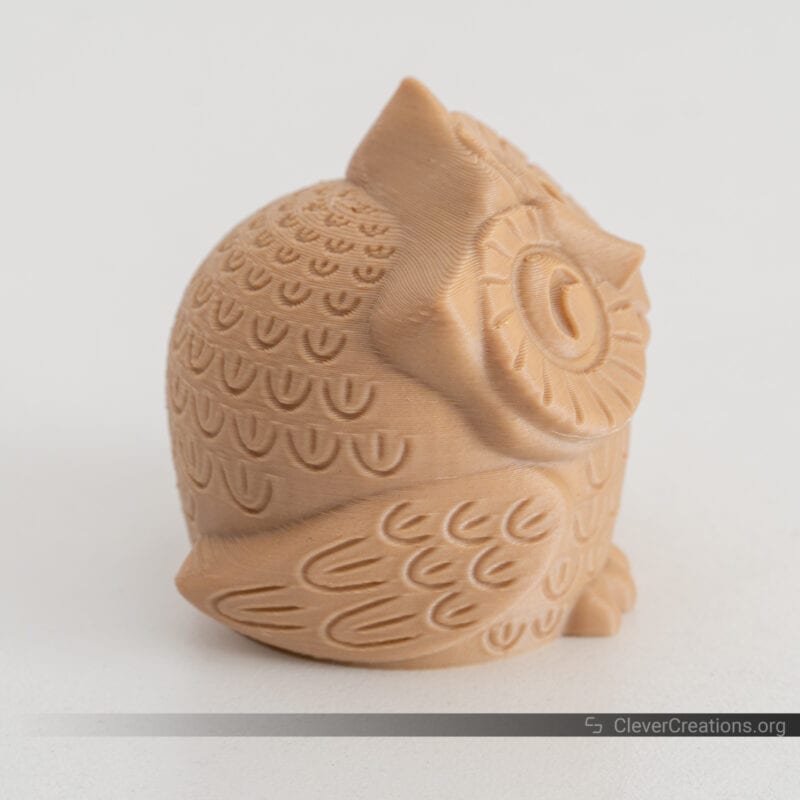
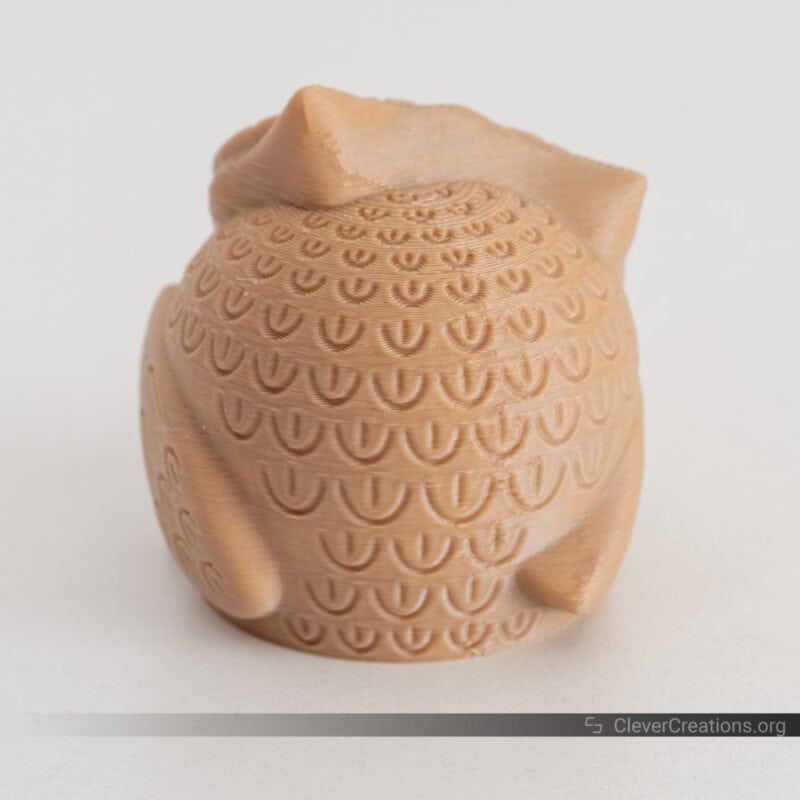
Smiling Owl
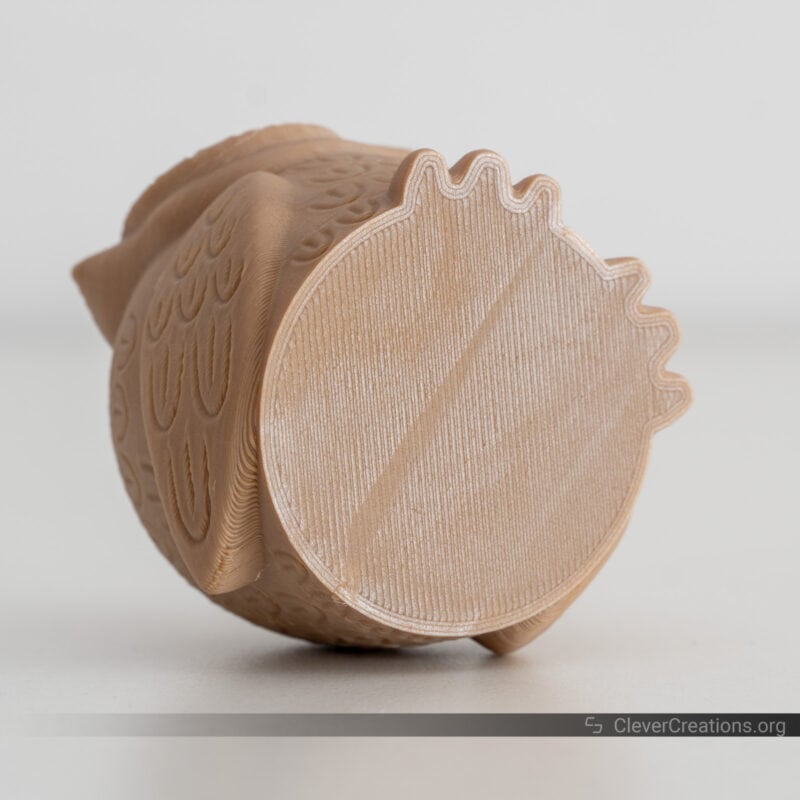
We’re also happy with how this 3D printed owl came out of the Ender-3 V3 SE, even though some of the feathery texture doesn’t have a great finish. We think this is because we printed fast with wood filament through the stock 0.4 mm nozzle. It’s usually a good idea to swap to a 0.6 mm nozzle or larger when 3D printing with wood filament.
The underside of the 3D print also has a white finish. We’ve seen this before with this specific filament and PC-coated print beds. It’s not entirely clear to us why this happens, but it’s not a big deal, if any.
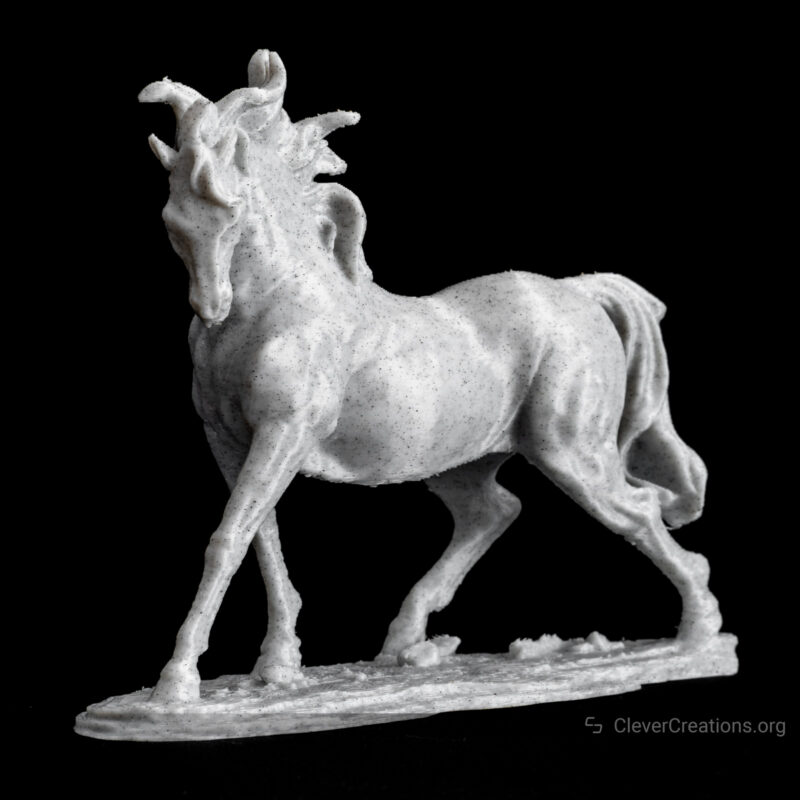
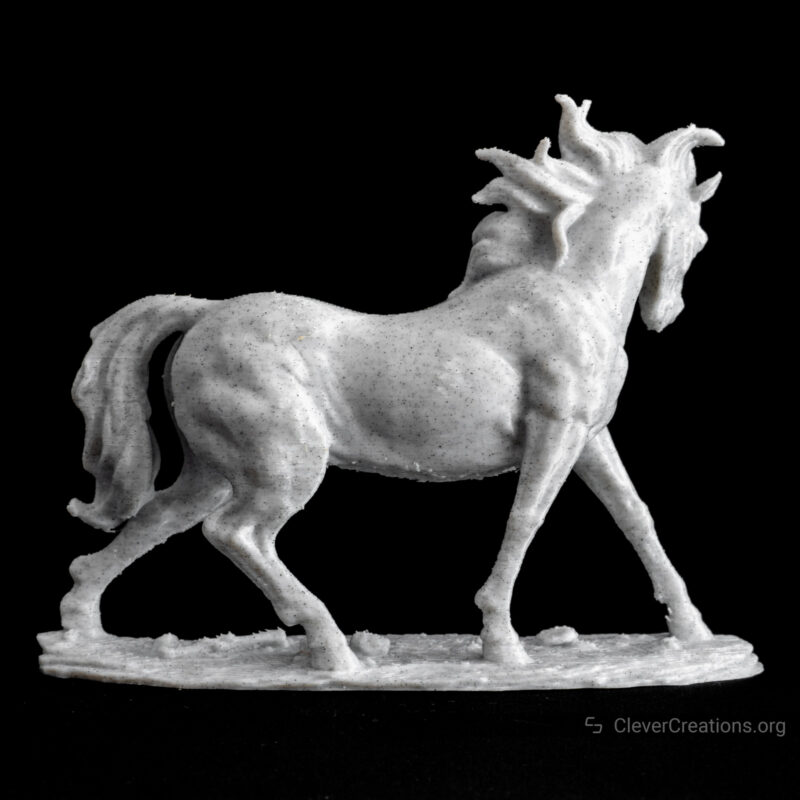
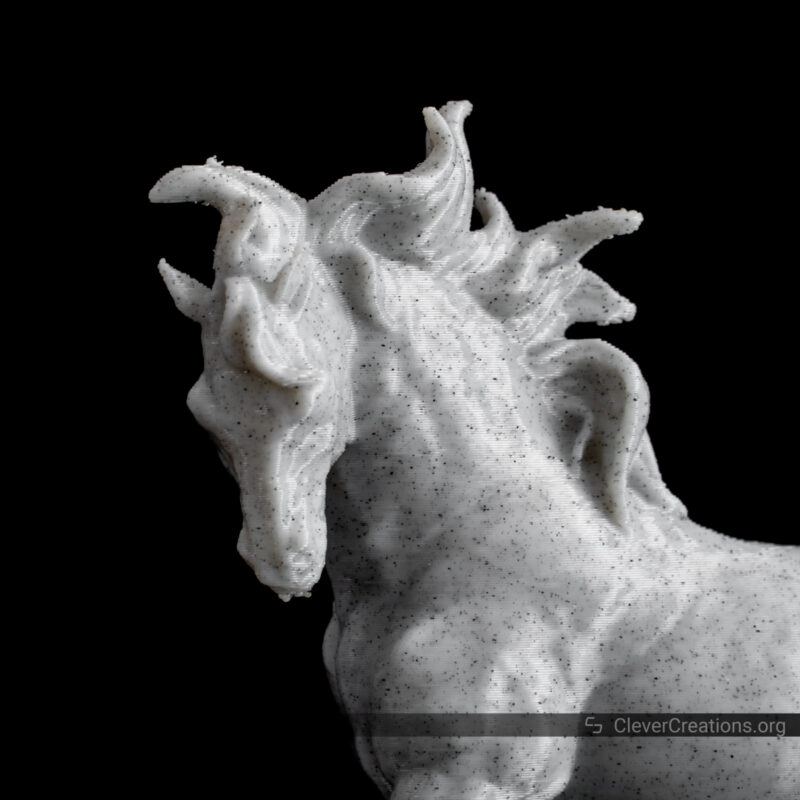
Marble Horse
One of the other 3D prints we made is this a horse statue. Needless to say, we 3D printed it with support material (tree supports to be more specific). They were easy to remove, and the result is nothing but amazing for a 3D printer that costs less than $200.
There was no need for trial and error, either. The Ender-3 V3 SE was able to do this with pretty much a default Cura profile on the first try.

Conclusion: Is the Creality Ender-3 V3 SE Worth Getting?
We can confidently say that the Creality Ender-3 V3 SE 3D printer is a solid machine for anyone who wants to start out with 3D printing. Even those looking for an affordable second or third 3D printer can’t go wrong with it.
We found that the automatic bed leveling probe and strain sensor of the V3 SE take away a lot of the hassle that is—or previously was—associated with 3D printing. No longer do you have to spend time manually leveling the bed or dialing in the Z-offset when on a budget.
The linear rods on the Y-axis and the dual lead screws are solid improvements as well. They have a significant effect on print quality and take away the itch to upgrade the 3D printer shortly after you start using it. This was a different store with the previous Ender-3 V2 series.
At $199, the machine provides incredible value as well. We previously expected this set of features to fall in the $250-300 range, so to see them at less than $200 is nothing but impressive.
Despite that, the Ender-3 V3 SE does not make many compromises to get to that price point. Its small non-touch screen, plastic base, and relatively slow heating aren’t that big of a deal. As long as the 3D printer is easy to use (which it is) and outputs quality 3D prints (which it does), its drawbacks are easy to tolerate.
In short, if you are in the market for a 3D printer for a couple hundred dollars, the Creality Ender-3 V3 SE is the one to go for right now. At the moment, there’s no other machine that offers this print quality and ease of use at such a low cost.