Splitting a 3D model for printing is something that solves many problems. You can print big parts with a smaller 3D printer, your parts won’t experience as much warping, and the parts are easier to handle during cleaning and post-processing.
Of course, you’ll need to glue the 3D printed parts together after printing, but splitting a 3D model is still a great solution for those who don’t have access to a large 3D printer.
It’s not always easy to split a 3D model, so we’ll explain the basics in this article. From the software to use to cutting angles and other technicalities, we’ll give you everything you need to split large STL files.
Let’s split this problem up piece by piece!
Why Split a 3D Printing Model?
There are two main reasons to split a 3D model before 3D printing. Let’s go over them quickly.
Large Models, Small 3D Printer
It’s not practical for everyone to have a large 3D printer that can print entire helmets in a single piece. In such cases, splitting a model into various small pieces is the way to go. Even with a modest 3D printer under $300, you can still print large objects.
Furthermore, life-sized 3D models or complex assemblies will always be bigger than consumer-level 3D printers. Splitting these 3D models lets you bypass this limitation.
For example, in 2019, a father-son duo 3D printed a Lamborghini Aventador on a $1000 3D printer right in their garage. Similarly, there are plenty of 3D-printed cosplay costumes composed of several large parts that make up the entire suit.
So, a large model size stands out as the primary reason to split models. The second reason has less to do with the size and more with the complexity of the 3D model.
Support-Free 3D Printing
Some 3D models are complex with lots of intricate details. Typically, these prints feature steep and large overhangs, requiring loads of support material if you were to print them in a single piece.
The extra support material also increases print time, material wastage, and post-processing efforts. And if it’s an aesthetic model, there’s a chance for support structures to ruin your model’s surface quality.
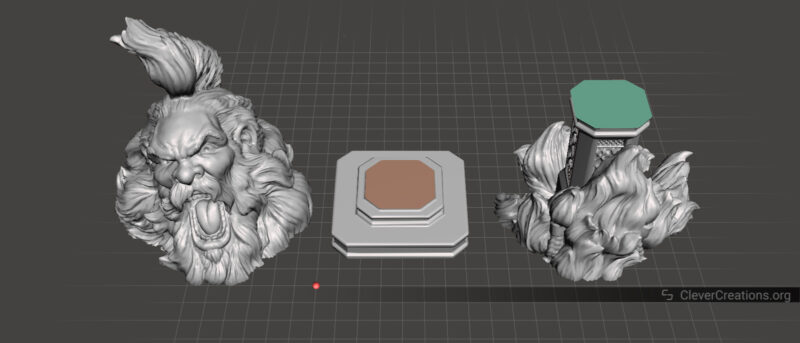
One such example is the Bearded Yell model on Thingiverse. If you were to print this model on your FDM 3D printer, the top hair and beard portions would need considerable support, increasing your printing time.
Even though there are more advanced support structures, like tree support and organic support, available in 3D slicers nowadays, it’s always good to avoid support where possible.
By splitting the model into two halves, you can separate the top and bottom and orient the piece in such a way that eliminates the need for (most) support material.
Software for Splitting 3D Models
Meshmixer
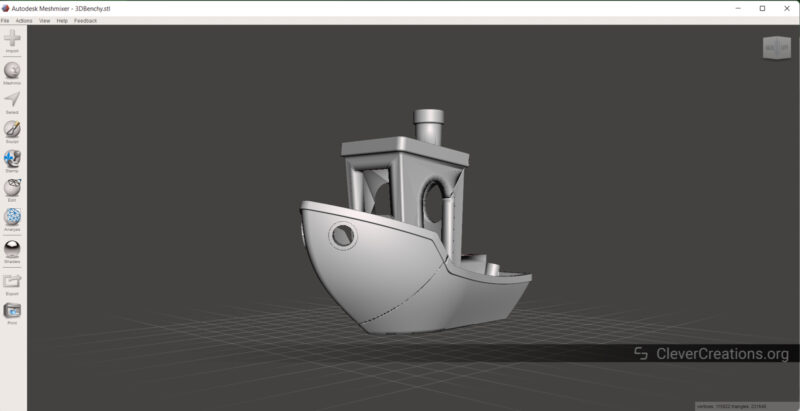
Meshmixer is one of the best 3D printing software for fixing your STL files, splitting them, and polishing them up for 3D printing. It has a suite of advanced features that let you split your 3D models to your liking. And the best thing about Meshmixer is that it’s completely free to use.
It has a slight learning curve, and navigating the UI can confuse new users. But there are plenty of helpful tutorials and guides available online that you can use to understand its various features.
As of September 2021, Autodesk has officially halted the development of its Meshmixer tool. Nonetheless, it remains one of the top software for splitting 3D models and editing them and most of the features are still useful today.
We’ll show you the steps to split STL files in each of these software solutions further down this article.
Blender
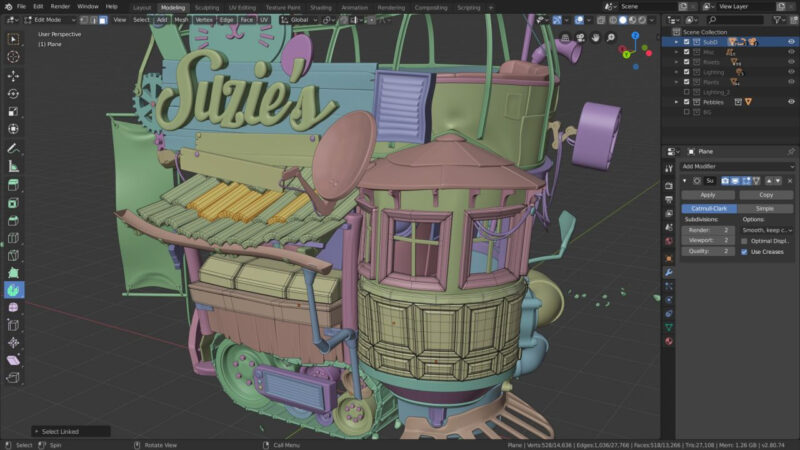
Blender is a comprehensive 3D modeling, animation, and simulation tool designed for personal and professional applications. You’ll find hobbyists using it to create low-poly models and sculpt 3D-printed miniatures. And you’ll also find professional movie studios creating high-end visual effects with Blender.
For our purposes, Blender is far more than capable and is a neat tool you can use to split your 3D models. You can customize the plane directions and angles and even define your cutting parameters. Although, there can be a steep learning curve to this process.
Another caveat of Blender from a beginner’s perspective has to be its UI navigation and the overload of features. But Blender has a sound library of tutorials that you can refer to sort out your queries.
Cura
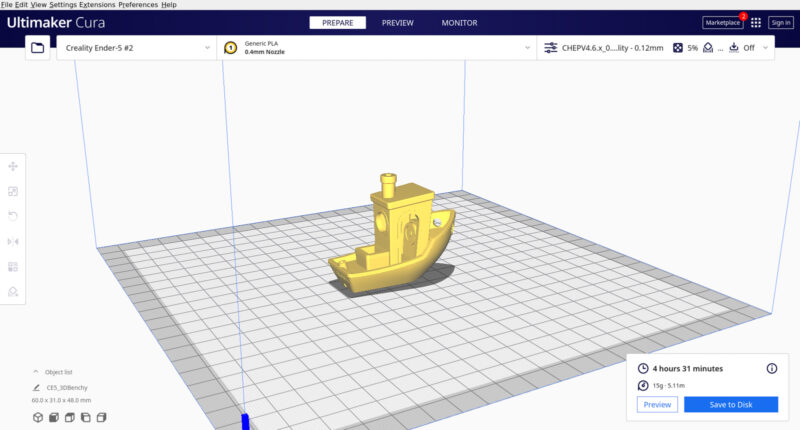
Cura gives you plenty of features when it comes to slicing your 3D models. But, with some clever techniques, you can use it for splitting your 3D files as well.
You’ll have less control over the cutting angles and might feel restricted due to the need for more specific tools for splitting your file. But while Cura is not the ideal software for cutting your 3D models, it can come in handy for executing basic and straightforward cuts.
If you’re planning on splitting large models and complex 3D prints, it’s better to steer away from Cura and use Meshmixer or 3D Builder (the next option) instead.
3D Builder
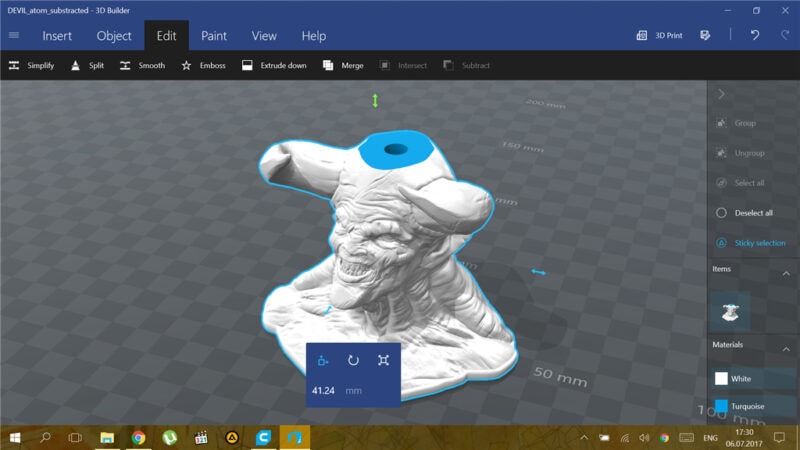
You’ll find 3D Builder a simple and easy tool to split your 3D models. It’s freely available for Windows users and gives features similar to Blender and Meshmixer, albeit not so in-depth.
It provides you with all the essential tools to create new objects and designs, but it’s better suited for previewing your STL files and editing them before you slice them up. It’s a simple alternative to Meshmixer and a good solution to use if you’re new to editing STL files and don’t want to feel overwhelmed.
Due to its unavailability for Mac and Linux computers, the overall access of this tool is limited solely to Windows users.
How to Split Models For 3D Printing
Meshmixer
Meshmixer gives you options to execute a primary plane cut and a selective cut, which is better suited for figurines and complex models. Let’s start with the basic one.
Basic Plane Cut
- Import your STL file into Meshmixer.
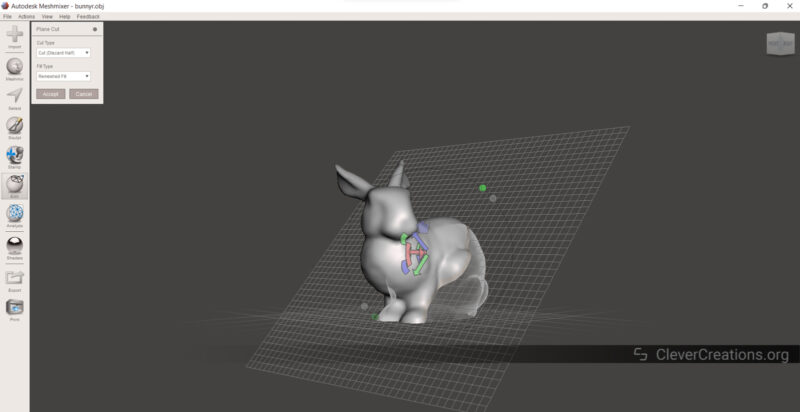
- Click on Edit in the left menu tab and Select the Plane Cut option. You’ll now have a visible plane that cuts through the entire model.
- Adjust the cutting plane as you need. You can edit your cutting height and angles using the arrow options.
- Once done, select the Cut Type and Fill Type per your needs. We’re selecting the Keep Both option.
- The Discard Half will remove the invisible part from your main model.
- The Keep Both option will retain both halves as they are.
- Click on Accept. The model will still look like a single STL file.
- Go to the Edit Menu, and Click on the Separate shells options. An object browser will open, indicating two different shells.
- You can select either of these shells and export them in your preferred format.
That’s it. You can now slice these models and 3D print them as two separate parts. But what if you merely wanted to split a specific section of the model? That’s where the selective cut comes in.
Selective Cut
- Open Meshmixer and Import the STL file,
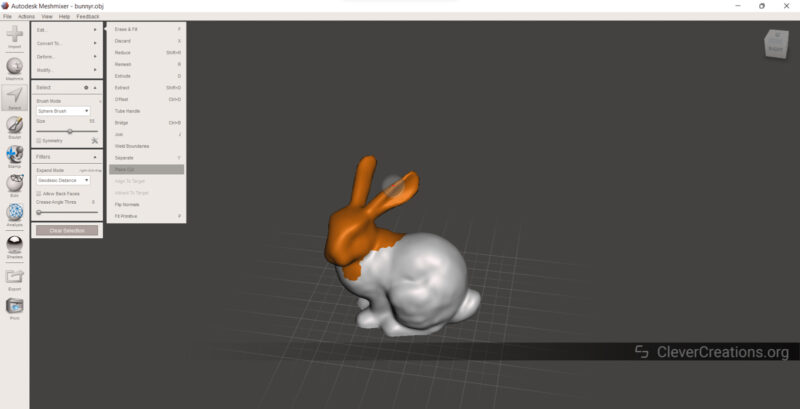
- Click on the Select Menu from the left tab.
- You can find two tools in the top left corner – a Brush and a Lasso.
- Use any of these tools to split model in specific areas.
- Once done, click Edit Menu on the top and Select plane cut.
- Specify the cutting angle and depth, and click on Accept.
- Open the Edit Menu on the left, and select the Separate shells options.
- You’ll notice only the selected area is cut, and the rest of the model is intact.
It’s a slightly advanced technique for which you’ll need some practice. Yet, once you get used to it, selective splitting can come in handy for cutting figurines and complex 3D models.
Blender
Splitting a 3D model in Blender is slightly more complex, and it’s best suited for professionals as it can be notoriously puzzling for beginners. Nonetheless, you can try it out yourself by following these steps.
- Go to the File Option in Blender, and Import your STL file.
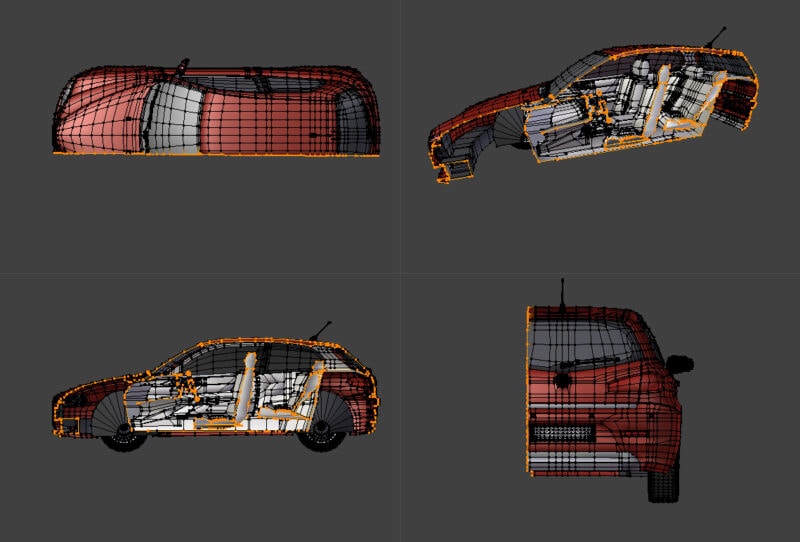
- Hit Tab key to Enter the Edit Mode. You’ll see all the points in the mesh are highlighted.
- While holding down the ‘A’ key on your Keyboard, Go to the Mesh tab, and select the Bisect tool from the menu.
- Click on two points on the model. You’ll see a split line appear. You can further adjust the angle and direction of this plane.
- Once you’ve adjusted the cutting plane, Press ‘V’ to split the two halves.
- Press CTRL+L, and you’ll notice the split section being highlighted in Blender.
- Hit the ‘P’ key on your Keyboard and click on Selection to separate the two pieces.
- Exit the Edit Object mode by hitting the Tab key once again.
- You’ll notice on the right-side panel; an extra object is generated.
- To export the selected pieces, you’ll need to check the ‘Selection Only’ box on the export window.
These steps briefly explain how to split a model in Blender. For a more detailed step-by-step guide, we recommend you use this video tutorial by 25games:
3D Builder
3D Builder is one of the most accessible tools to cut STL models. The UI is neatly laid out, and the splitting process is easiest from all the other software listed in this article.
- Import your STL model by Clicking on the Open section in the welcome window.
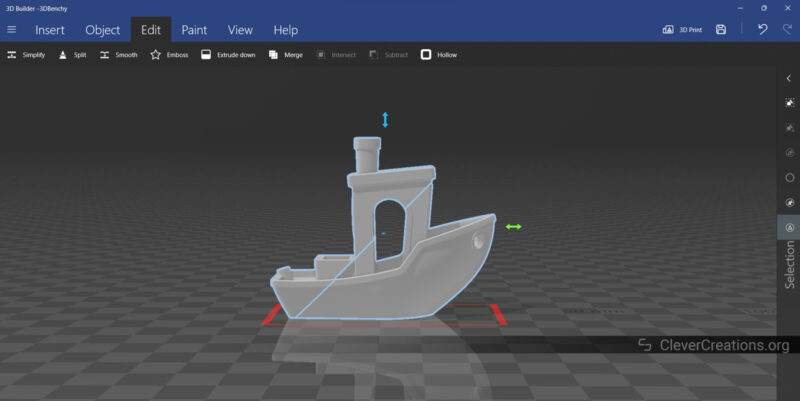
- Click on the model to select it, and open the Edit menu.
- Select the Split option. You can now adjust the angle of your plane cut and choose whether to keep both halves.
- Export the model for 3D printing once you’re content with the results.
It’s that quick and easy in 3D Builder. This software is best for beginners if you want to execute a fundamental split and cut the model into two halves.
Cura
Cura gives limited functionality to cut STL models. Yet, with some clever tricks, you can use Cura to split 3D models quickly.
Using Mesh Tools
It’s a hit-or-miss method and works best with models composed of multiple parts.
- Download a plug-in called Mesh Tools from Cura’s Marketplace.
- Load your model and right-click on it.
- You’ll notice the Mesh Tools option. Click on it and Select Split Model into parts.
- It’ll automatically split your 3D model into multiple sub-assemblies, and you can save and print them individually.
Cutting the Model on the Z-axis
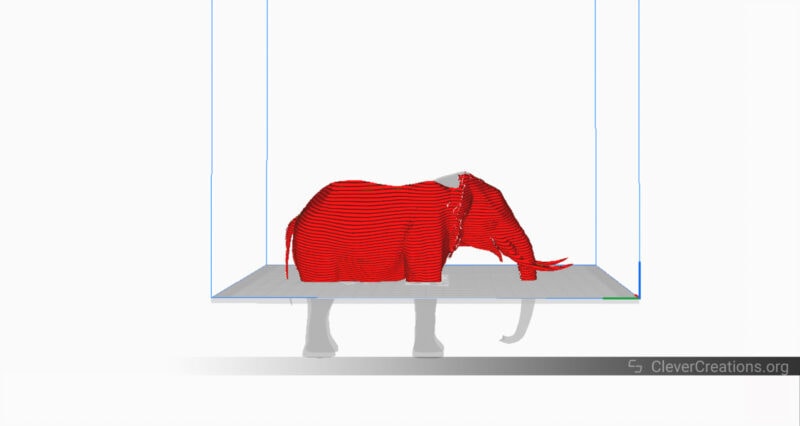
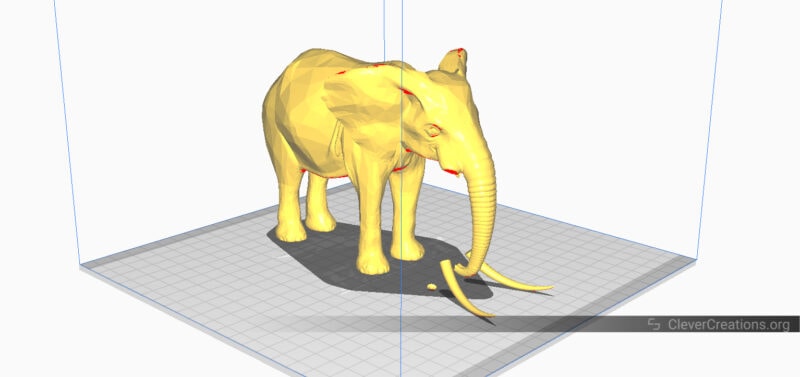
You can manipulate the positioning of your 3D model on the build plate and cut your model into two halves on the Z-axis. Let’s understand how.
- Load your model in Cura and Select it.
- The top icon on the left side lets you adjust the position of your model anywhere in the print area.
- Drag the model below the Z-axis up to your desired height.
- Slice STL file as usual. You’ll notice only the top half is sliced, while Cura has omitted the bottom half.
- Repeat the same process for the other half.
- You can combine the rotation tools to split the models at angles too.
This method, however, works only with models that fit on your print bed. Therefore, it’ll be helpful if your 3D model has steep overhangs, and not if you are trying to split a large STL that doesn’t fit in your 3D printer.
How To Assemble Split Models
In the post-processing stage, you’ll need to assemble the models you split earlier. The simplest method is to stick the two halves using super glue and cover up the split line with a 3D Pen.
We have a detailed guide on how to glue 3D prints that you can refer to assemble your 3D models. It’ll help you understand the various adhesives for different materials for PLA, ABS, PETG, and other materials, as well as assembly techniques you can use to join your 3D models.
Conclusion
In short, splitting a 3D model can help you print large models, regardless of your printer’s size. It helps save both filament material and printing time. We also hope you learned that splitting a 3D model isn’t as complex and technical a process as you might have thought.
With software solutions like Meshmixer, Blender, or even Cura, you can learn how to split 3D models in no time and your printer’s size will no longer pose a limit on your creations.
Keep 3D printing, splitting models, and making cool stuff!