
Want to turn a 2D image into a 3D model for 3D printing? There are several software choices and tools out there to help you design it even if you have no experience with 3D modeling. What software you should use depends on what type of project you are trying to make, which can make it difficult to find the right option.
In this article, we’ve found the best software and tools for making a 3D model from 2D image files. We’ll show you when to use which tool, the different ways you can use CAD software to make a 3D model from a picture, and a step-by-step tutorial showing you how to make a 3D model using free online tools.
| Software | Type | Cost | Platform | Difficulty |
|---|---|---|---|---|
| Selva 3D | 2D to 3D Tools | Free | Online | Easy |
| Smoothie 3D | 2D to 3D Tools | Free | Online, iPad | Medium |
| Reliefmod | 2D to 3D Tools | Free | Online | Easy |
| Blender | 3D Modeling Software | Free | Windows, Mac, Linux | Hard |
| Vectary | 3D Modeling Software | Free | Online | Easy |
| Microsoft 3D Builder | 3D Modeling Software | Free | Windows | Easy |
| Autodesk Fusion 360 | 3D Modeling Software | Free | Windows, Mac, Linux | Hard |
| Image to Lithophane | Lithophane Software | Free | Online | Easy |
| itsLitho | Lithophane Software | Free | Online | Easy |
| LithophaneMaker | Lithophane Software | Free | Online | Easy |
| Meshroom | Photogrammetry Tools | Free | Windows, Linux | Easy |
| Metashape | Photogrammetry Tools | $149/year | Windows, Mac, Linux | Medium |
| Insight3D | Photogrammetry Tools | Free | Windows, Linux | Medium |
2D Image to 3D Model Software Options
3D Model from 2D Image Converter Tools
Selva 3D
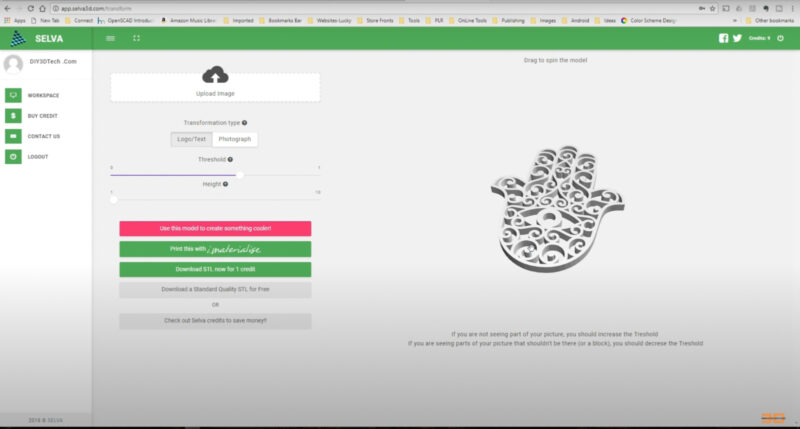
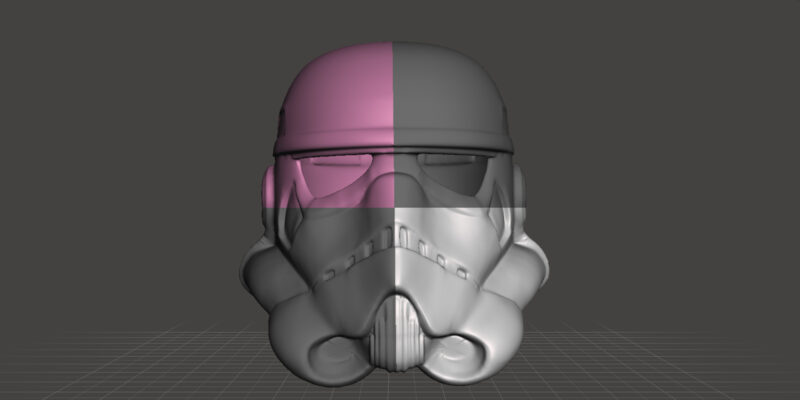
Selva 3D is a web-based service that can convert images of logos, drawings, and other basic designs into a 3D model. Things with clearly defined lines and only 1-3 colors work best for this type of service. When in doubt, start simple and build in complexity from there.
This software is unique because you can quickly add your design to items like phone cases. It has an extremely user-friendly interface where you can start creating in a matter of minutes. Once you sign up for an account and verify your email address, you can upload your image, extrude it, and add it to your desired shape in minutes.
- Cost: Free
- Difficulty: Easy
- Platform: Online
- Output: STL, OBJ
Smoothie 3D
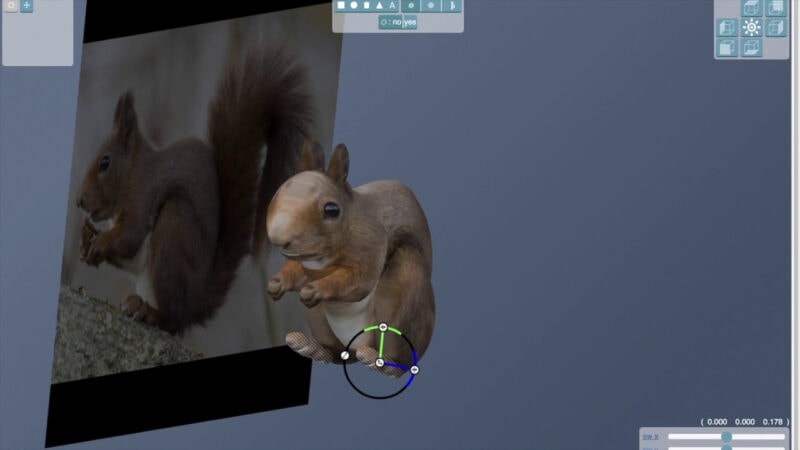
Smoothie 3D is an interesting and powerful iPad or web-based 3D tool that can make even complex organic 3D models from a 2D image. The tool works by having you draw the outline of the object you want to turn 3D for 3D printing. The tool then analyzes the area within the drawn section to turn it into a 3D shape. It also uses the color and design from the photo to give the 3D model texture.
With the Smoothie 3D tool, you can also duplicate sections to make fully symmetrical organic models. So if you are modeling an animal, you can use the software to draw one side of the face and duplicate and mirror it to automatically make the other side.
- Cost: Free
- Difficulty: Medium
- Platform: Online, iPad
- Output: STL
Reliefmod
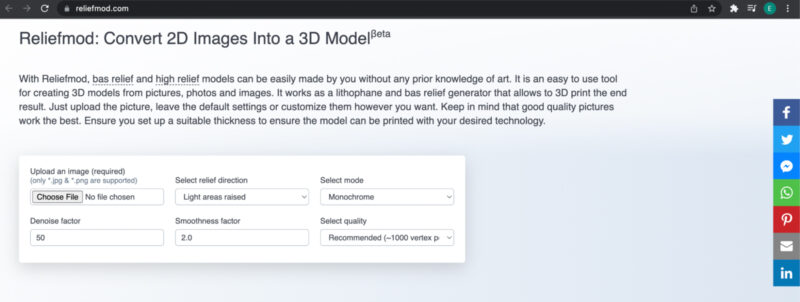
Reliefmod is a web-based lithophane (see the section below for a description of this process) and bas relief (where an object is slightly raised to give the look of a 3D effect) generator. This is one of the best tools for making a quick and easy 3D model from an image.
You can use the Reliefmod platform without even signing up for an account. You just upload your photo, change the settings in the textbox and dropdown menus, and finalize the process.
Once your 3D model is generated, you can still adjust thicknesses and sizes until you export the file. The whole process can be completed in a few minutes.
- Cost: Free
- Difficulty: Easy
- Platform: Online
- Output: STL
3D Modeling Software
Blender
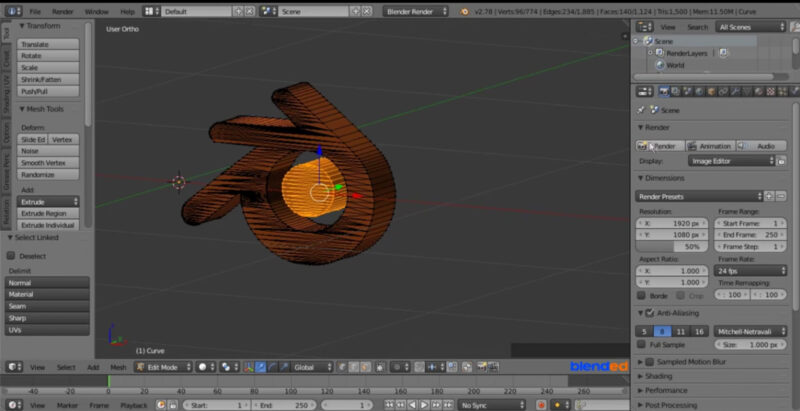
An all-around powerhouse 3D animation suite, Blender is a popular option for 3D enthusiasts and hobbyists alike. Primarily a box modeling software, Blender is mainly used to make game and film assets, animation reels, and more.
However, you can just as easily use it to create a 3D model from an image for 3D printing. Simply import an SVG file into Blender and extrude, color/texture, or otherwise edit it.
One downside of Blender is that its user interface is not very intuitive. Navigation, panning/zooming/etc. are all far more difficult to do than they need to be, and tools and menu options are difficult to find.
- Cost: Free
- Difficulty: Hard
- Platforms: Windows, Mac, Linux
- Output: STL, OBJ, etc.
Vectary
Vectary is an online 3D suite mainly designed for making product mockups and layouts, but it has some base tools that are also a great option for converting a 2D image to 3D model for 3D printing. While they have a library of pre-built 3D assets, you can quickly open a blank project file, import your image, and extrude or otherwise edit it.
Vectary is fast to use with dropdown menus for tools and easy access text-transform boxes for common functions like extrude and offset. You can also easily import and export files to and from your device, making it a great option for basic 2D to 3D conversions.
- Cost: Free
- Difficulty: Easy
- Platform: Online
- Output: OBJ, STL
Microsoft 3D Builder

Similar to Autodesk Meshmixer, Microsoft 3D Builder allows you to edit and combine 3D models as well as control your 3D printer directly from the software. It also has an extrude tool, making it a fast option to create 3D models from a 2D image.
This is a good free option for converting a 2D image for 3D printing. It also has a fairly easy-to-use interface, making it a suitable option for beginners.
It is mainly a tool for doing light edits of an existing 3D model, so its functions are rather limited and you may find it doesn’t have quite enough power to make most 3D models from scratch. However, for converting a 2D image to a basic extrusion, it has everything you need.
- Cost: Free
- Difficulty: Easy
- Platform: Windows
- Output: 3FM, PLY, STL
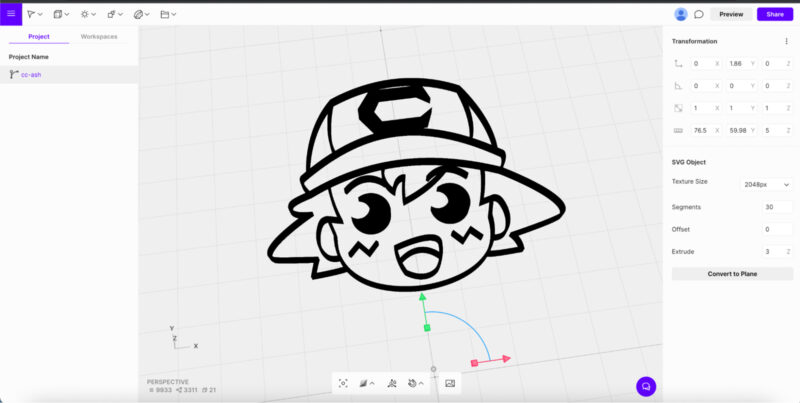
Autodesk Fusion 360
Autodesk Fusion 360 is a professional-level CAD software 3D modeling solution. While it is somewhat expensive to buy a subscription for it, you can get three years of the software for free by signing up for a student, hobbyist, or small business trial license.
Fusion 360 easily allows you to import SVG images and use the extrude tool to convert them into a 3D model. You can also use the other tools to create things like bevels on your 3D model to customize it beyond a basic extrusion.
While Fusion 360 does have a bit of a learning curve, it is one of the most versatile options on the list. It also has several learning sources to help new users navigate the software, both through YouTube videos and Autodesk’s official learning center.
- Cost: Free for 3 years
- Difficulty: Hard
- Platform: Windows, Mac, Linux
- Output: DWG, OBJ, STL
Lithophane Software
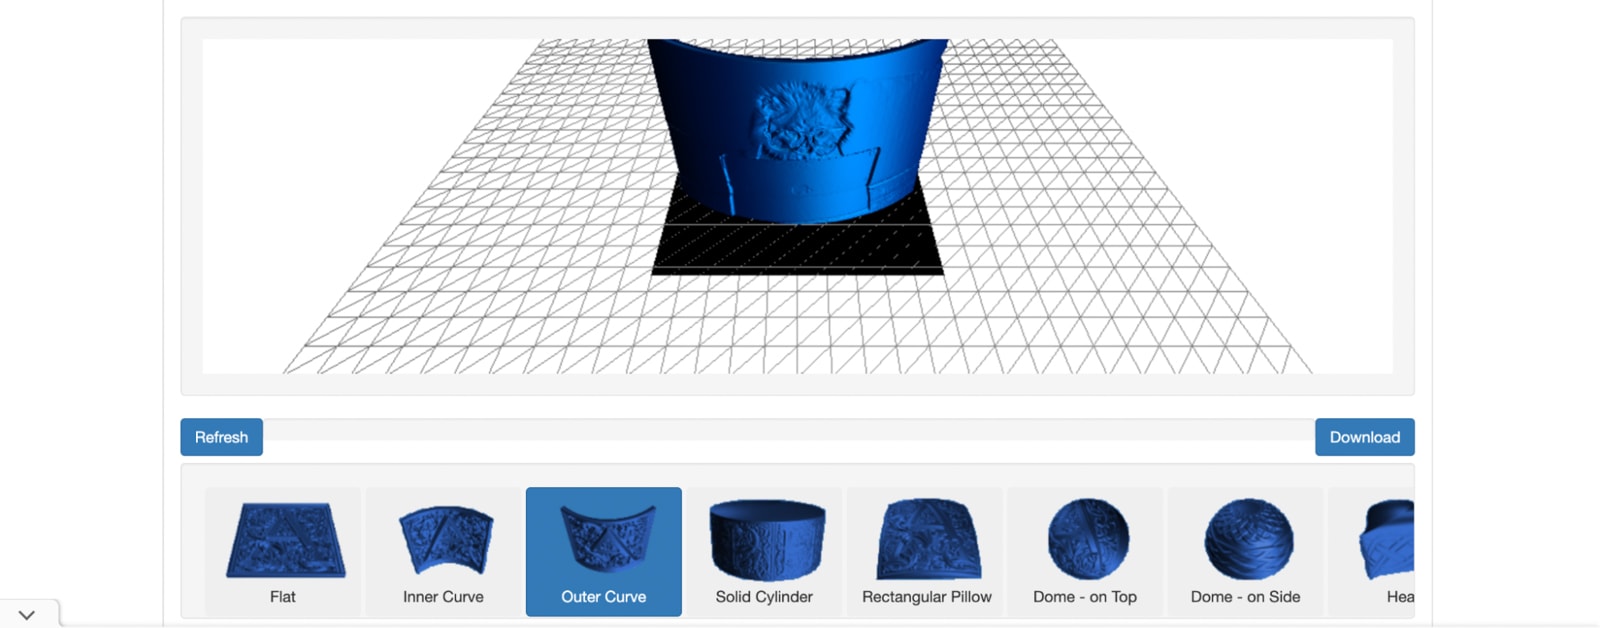
Image to Lithophane
Image to Lithophane is a great online tool that you can use to create complex lithophane designs using a single photo. You can use the photo without signing up for an account or installing anything on your computer or browser.
The tool works by first selecting a shape for your lithophane. You can choose to make a flat panel, round lampshade shape, half-round arc, sphere, and even heart shape. Then you upload your image, choose your settings for things like size, panel thickness, etc. and check the preview to ensure that everything looks the way you want. From there, you can download it to your device and 3D print it.
- Cost: Free
- Difficulty: Easy
- Platform: Online
- Output: STL

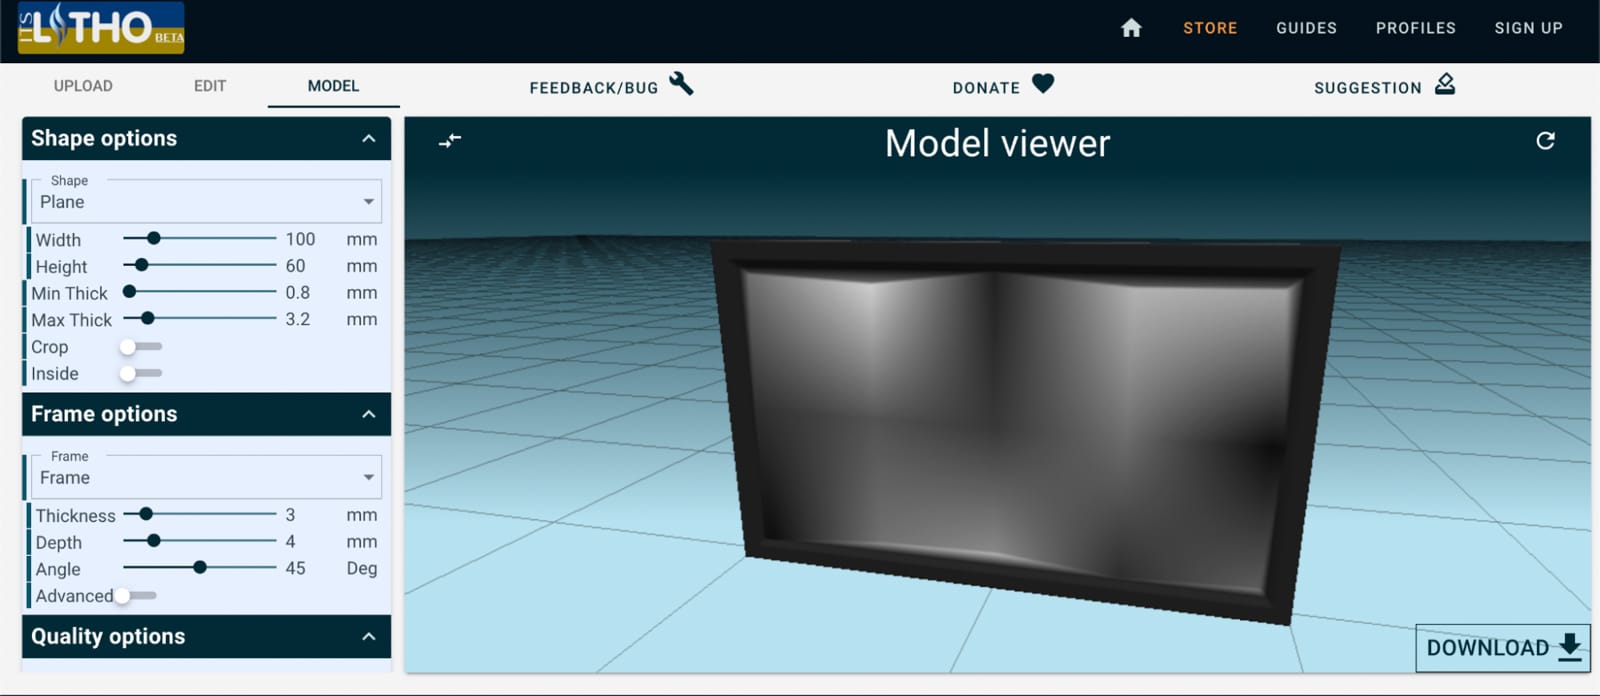
itsLitho
Another web-based lithophane tool, itsLitho gives a more sophisticated UI than other options with sliders and dropdowns for settings with real-time previews for easy editing. It offers a lot of shape and customization options to make your 3D models look exactly the way you want.
You can also customize your preview to more accurately assess that your settings will look the way you want. You can adjust where the light will come from once printed, how much light should be visible, and what color the light is.
While you don’t need an account to use the service, you can opt to sign up for an account so you can save and edit all of your lithophane projects at a later time.
- Cost: Free
- Difficulty: Easy
- Platform: Online
- Output: STL

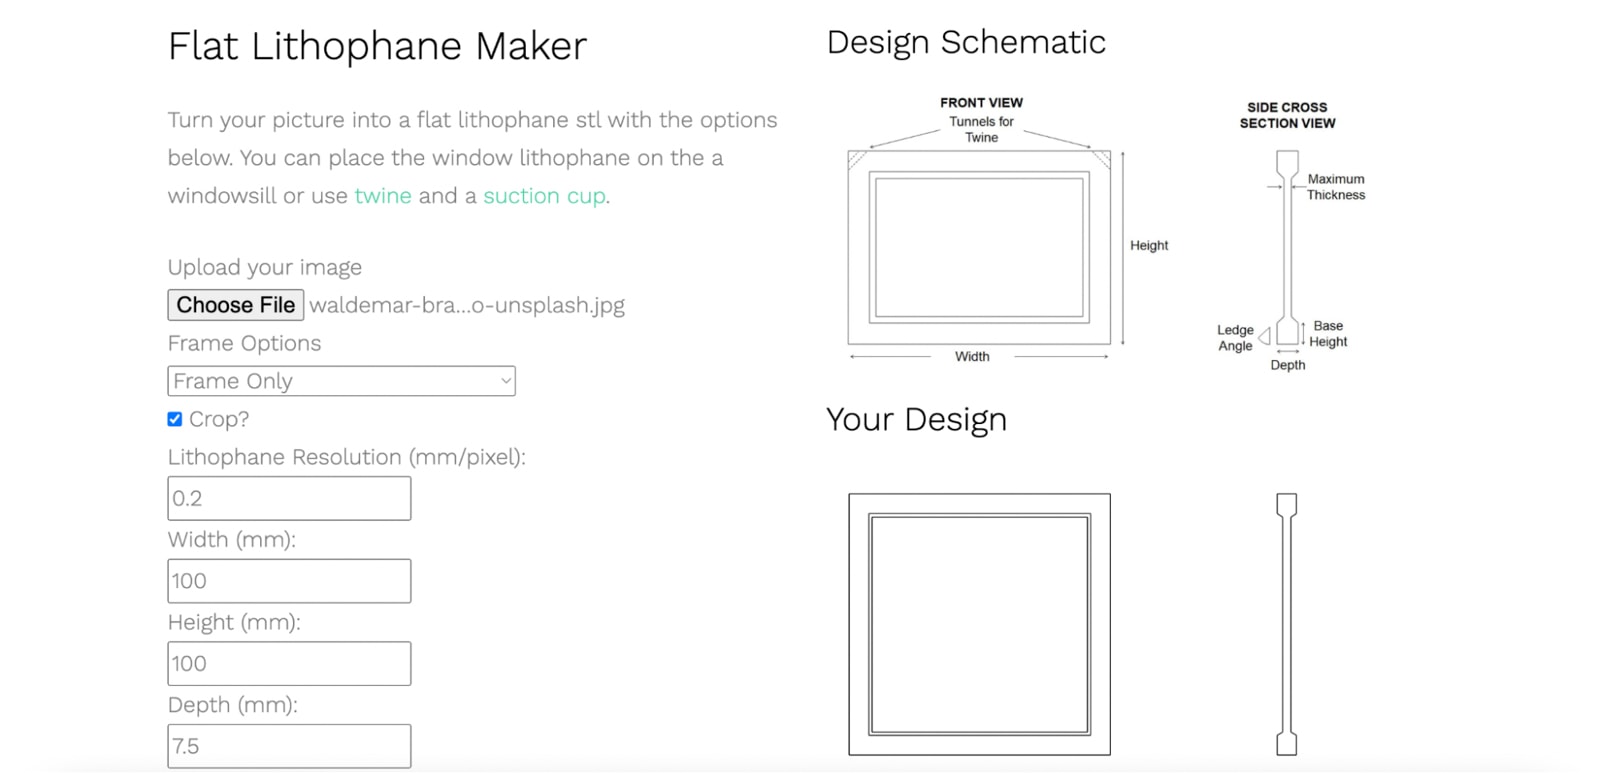
LithophaneMaker
LithophaneMaker is a fully online Lithophane generator with a bevy of different preset options. You can choose to make things like a lightbox, lampshade, or globe. Or you can choose a basic flat or curved panel, heart shape, or Christmas tree shape.
In the builder, you can upload your photo, change your settings, crop your image, and generate your lithophane file all in one place. This is one of the more advanced lithophane tools around and it offers a lot of options.
- Cost: Free
- Difficulty: Easy
- Platform: Online
- Output: STL

Photogrammetry
Meshroom
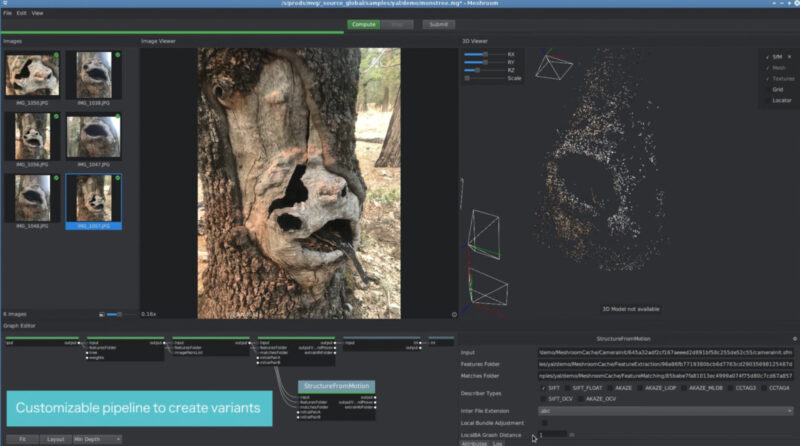
Meshroom is an open-source desktop software photogrammetry solution for Windows and Linux machines. It does not currently have a version for Macs. To make a 3D model with it, you must upload several images of the object from different angles, and the software figures out what the object looks like from the references.
This software is quite powerful, so it has a learning curve. It’s best to watch a few tutorial videos before diving in. It uses a node system like Blender, which can be confusing if you are not used to it. It lets you quickly add or change the attributes of objects in the scene, so it is a useful workflow once you get the hang of it.
- Cost: Free
- Difficulty: Easy
- Platform: Windows, Linux
- Output: STL, OBJ
Metashape
Another desktop software solution, Metashape is a little more user-friendly with its design than Meshroom. It comes in standard and professional editions, with standard being the pared-down version while the professional edition is a paid resource with full access to the software.
The standard edition of the software has fewer features than the professional version, but there is also a pretty significant price difference between the two versions. The standard license gives you access to the basic features while the professional license has more advanced features.
Some of those features are things like automatically detecting objects like clouds and powerlines. It also has built-in Python scripting for text-based commands, which can be a big time-saver for large projects.
- Cost: $3499/year (professional), $149/year (standard)
- Difficulty: Medium
- Platform: Windows, Mac, Linux
- Output: STL, OBJ, DXF, U3D, etc.
Insight3D
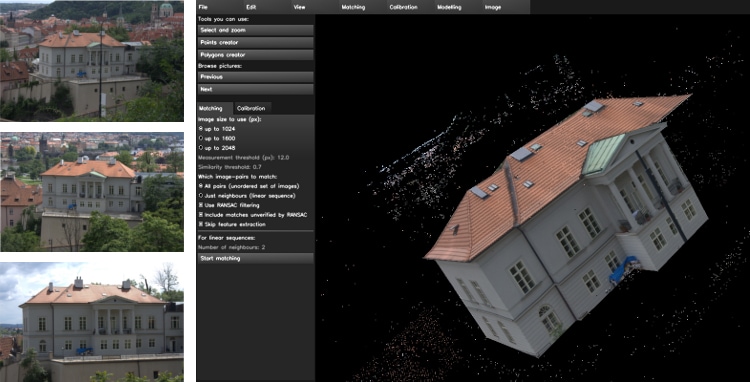
In addition to the information taken from the picture itself, you can also set points for the software to build from. You can manually add vertices to show where corners and edges start and stop.
The creators made a detailed tutorial that not only covers the basics of the software but also advises on how to get the best results from it. This includes suggestions for photography angles, camera settings, and what type of objects you should use.
- Cost: Free
- Difficulty: Medium
- Platform: Windows, Linux
- Output: Not Listed
Other Solutions
Hire from Fiverr
If you aren’t able to make your 3D model yourself, you can look at the task and freelancer platform Fiverr. You can usually find affordable options for basic design needs. The designers on the platform are usually side hustlers, beginner freelancers, and students.
Use a Professional 3D Modeling Service
If you have something more complex to do, we suggest using an established professional 3D modeling service to ensure accuracy and quality. You will pay more for this type of service than you will from a job platform like Fiverr or Freelancer, but this will ensure that tolerances and dimensions are correct.
How to Turn a 2D Image into a 3D Model
Get an SVG File
SVG (scalable vector graphics) is an XML-based vector image file. There are several types of vector file types, but many are proprietary to certain programs (like AI and EPS being designed by Adobe Illustrator) and don’t always open in third-party software options (especially 3D modeling software). SVG is a standard and widely accepted file type.
Unlike raster images like JPEG and PNG file options, SVG and other vector files are not limited to their original size. They can scale up or down by significant margins without any loss of quality. Doing the same with a raster image would result in pixelation, distortion, and other issues.
You can either use a preexisting vector file or make your own using a vector editing software option.
Use an Existing SVG
You can find free vector options online for practically any design idea you can think of. Googling your desired design followed by “free SVG” or “free vector” usually gives great results. You can also choose to use a paid design from platforms like Etsy or Creative Market.
Some great resources for finding vector files are:
Convert a Raster to an SVG
You can use the Image Trace function in Adobe Illustrator to automatically trace a raster image like a JPEG or PNG into a vector. This tool works best with images that are single-color, but it has a tracing preset for up to six colors.
Inkscape–an open-source alternative to Illustrator–has a similar function, but it only works with Bitmap files. You can convert your images to the bitmap file type fairly easily with an online conversion tool.
Create Your Own Vector
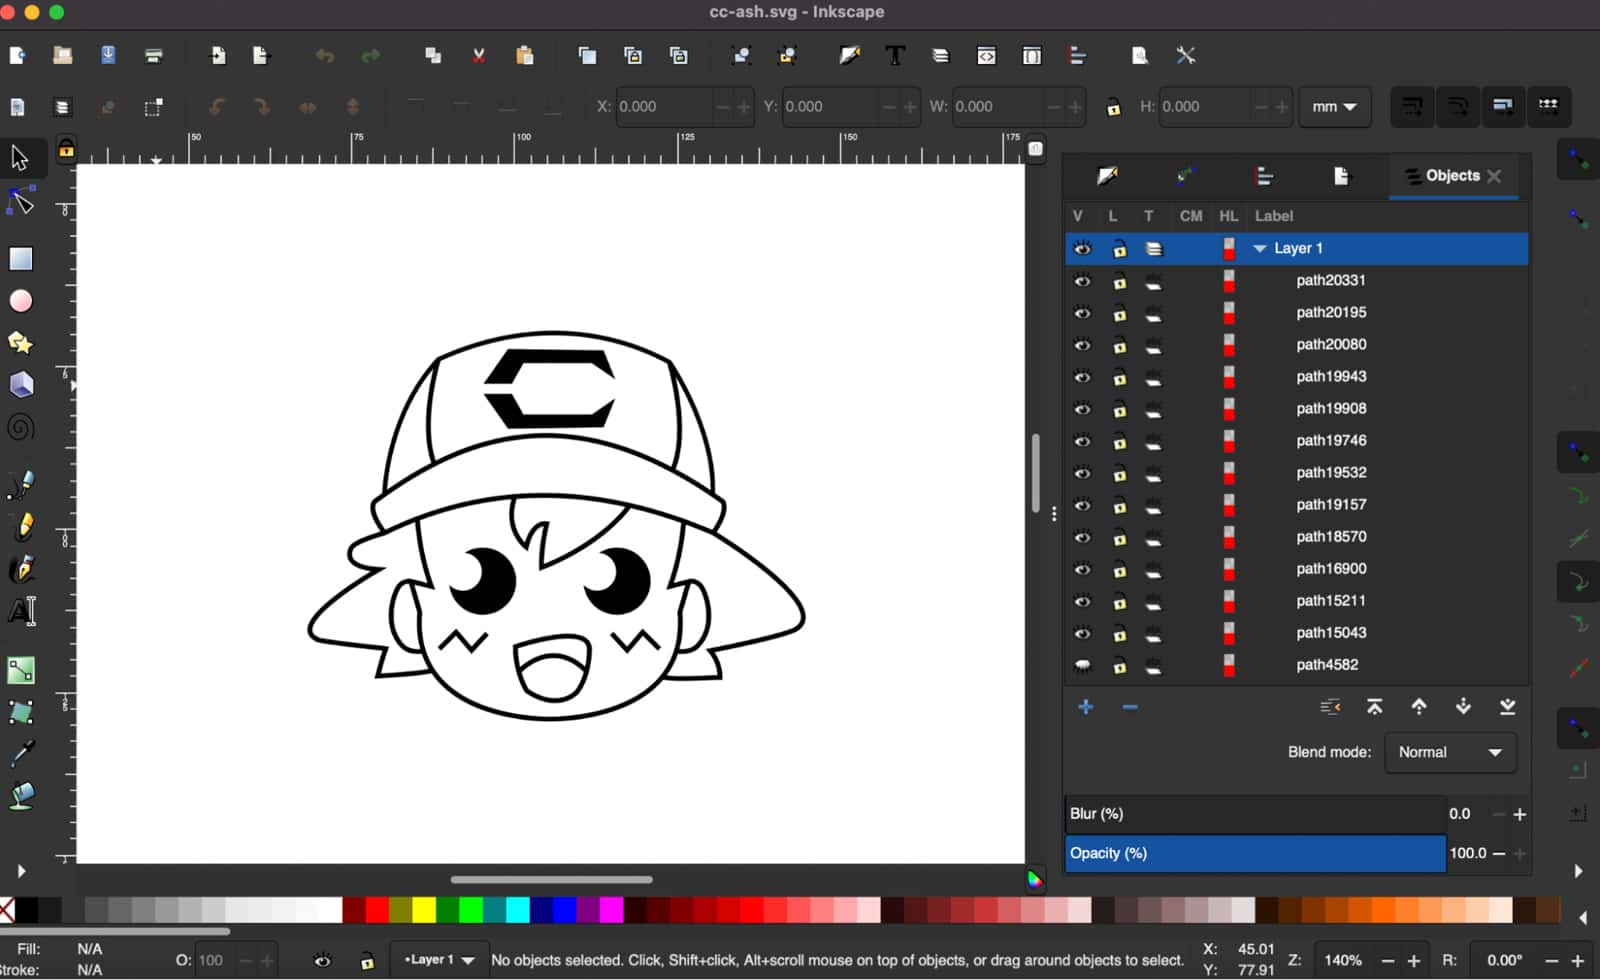
If you have any experience with graphic design software, you can make your SVG using a program like Illustrator, Inkscape, Affinity Designer, or even an online option like Gravit Designer. For this project, we’ll use a vector drawing we made in Inkscape to make a 3D design.
Design Your 3D Model
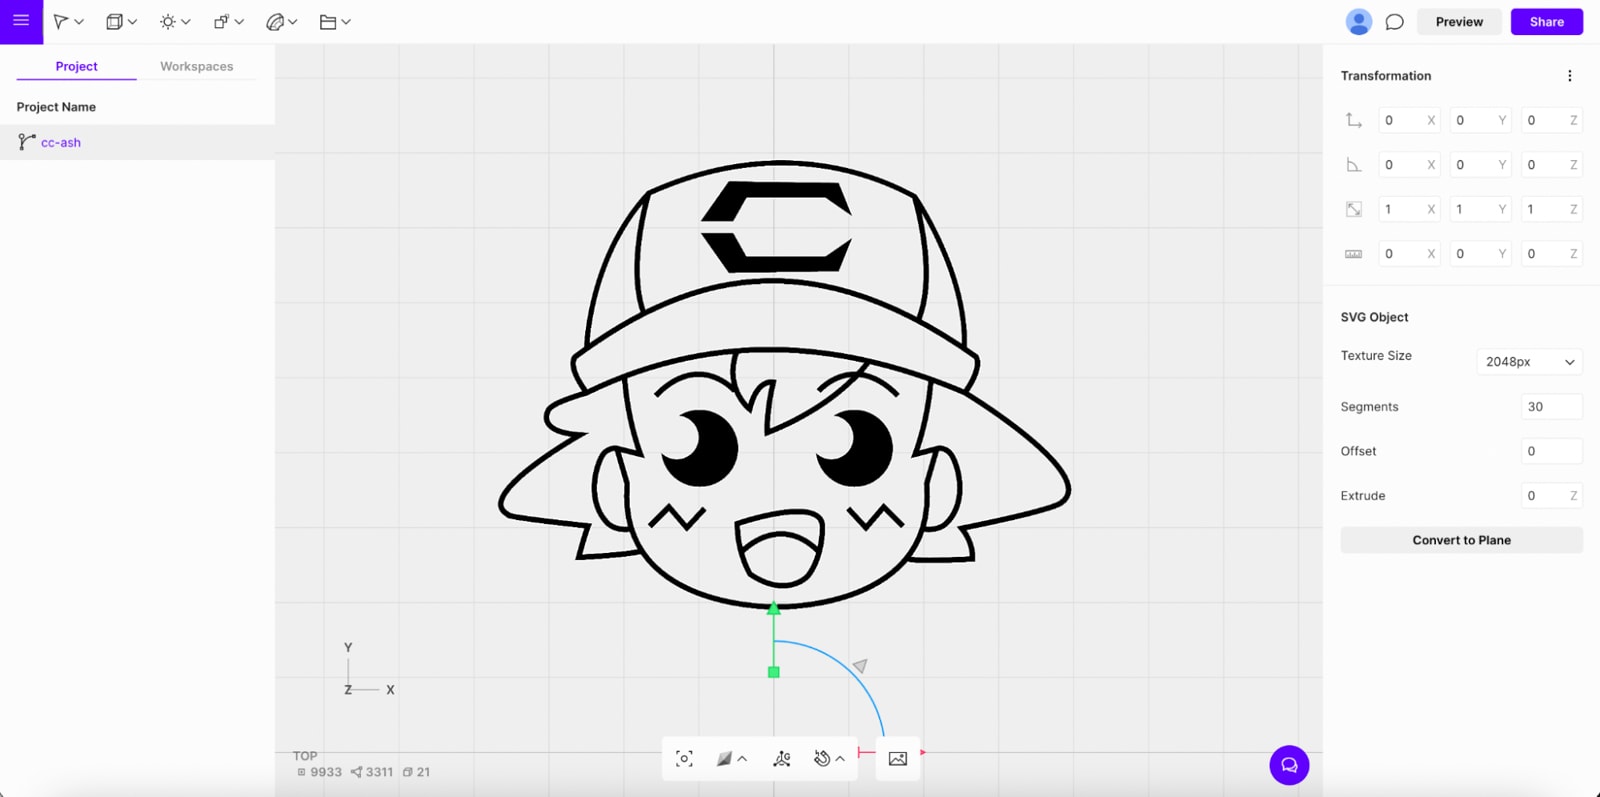
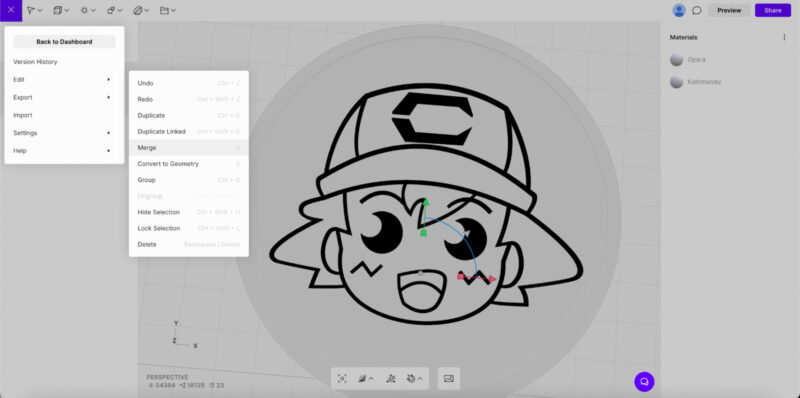
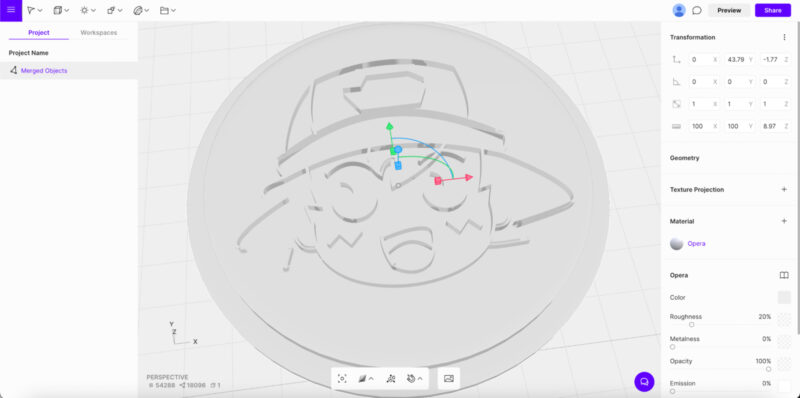
In this project, we’ll use the above-mentioned software Vectary since it’s web-based and easy to use. We’ll turn the drawing we used above to make a simple medallion using only a few tools and shapes.
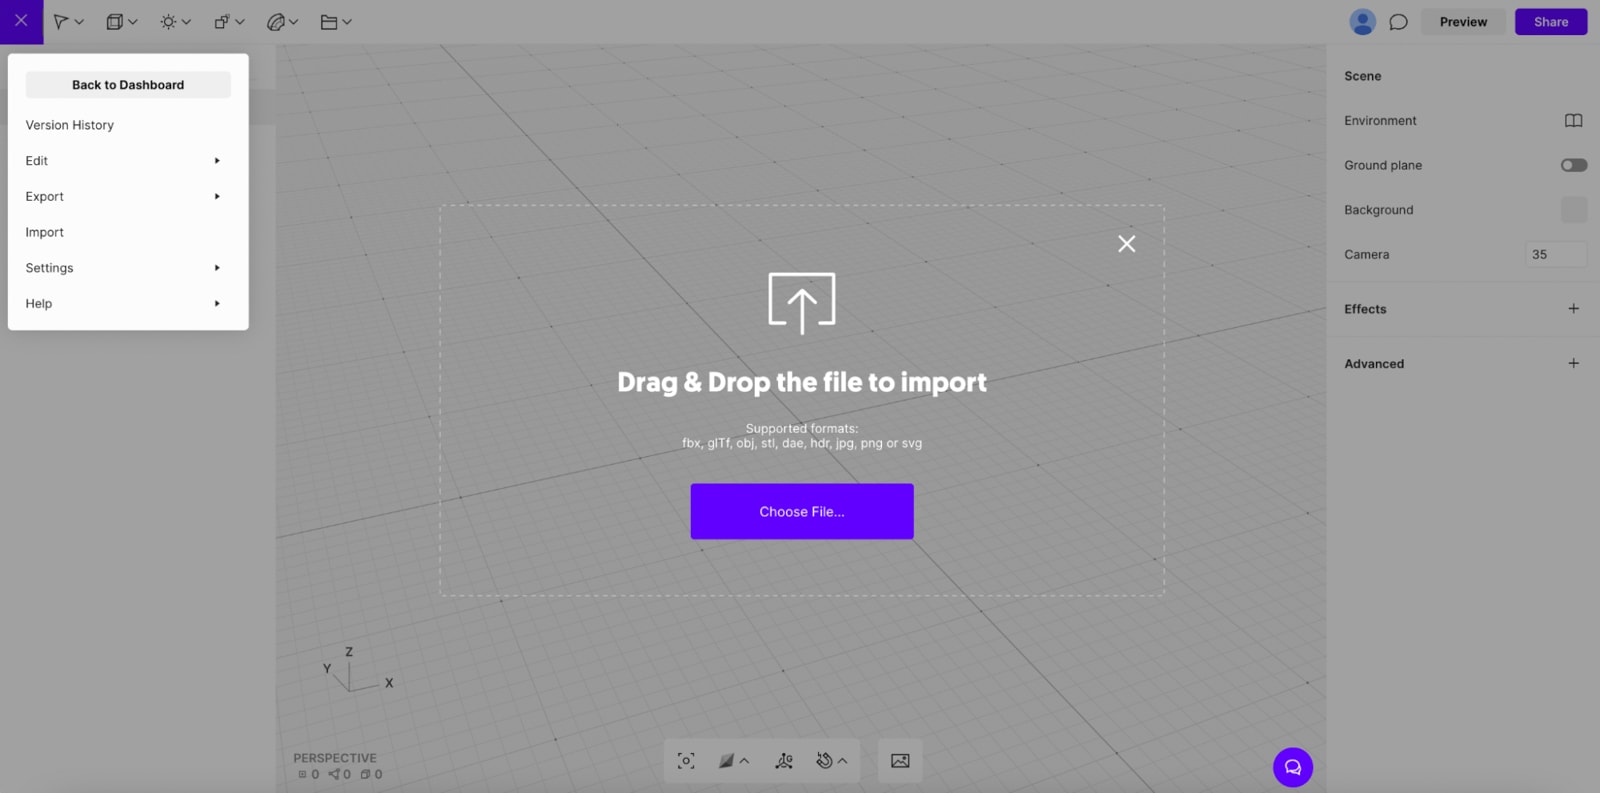
Step One: Import Your Image into a Blank Document on Vectary
Step Two: Draw Your Shapes

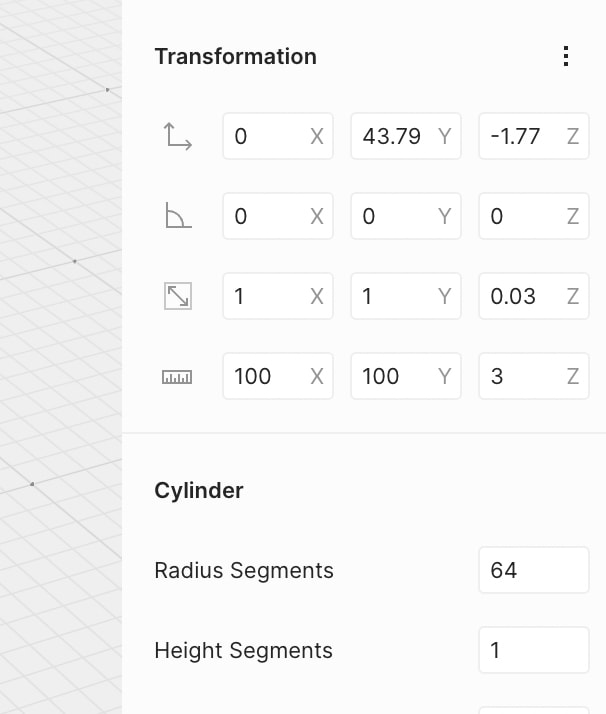
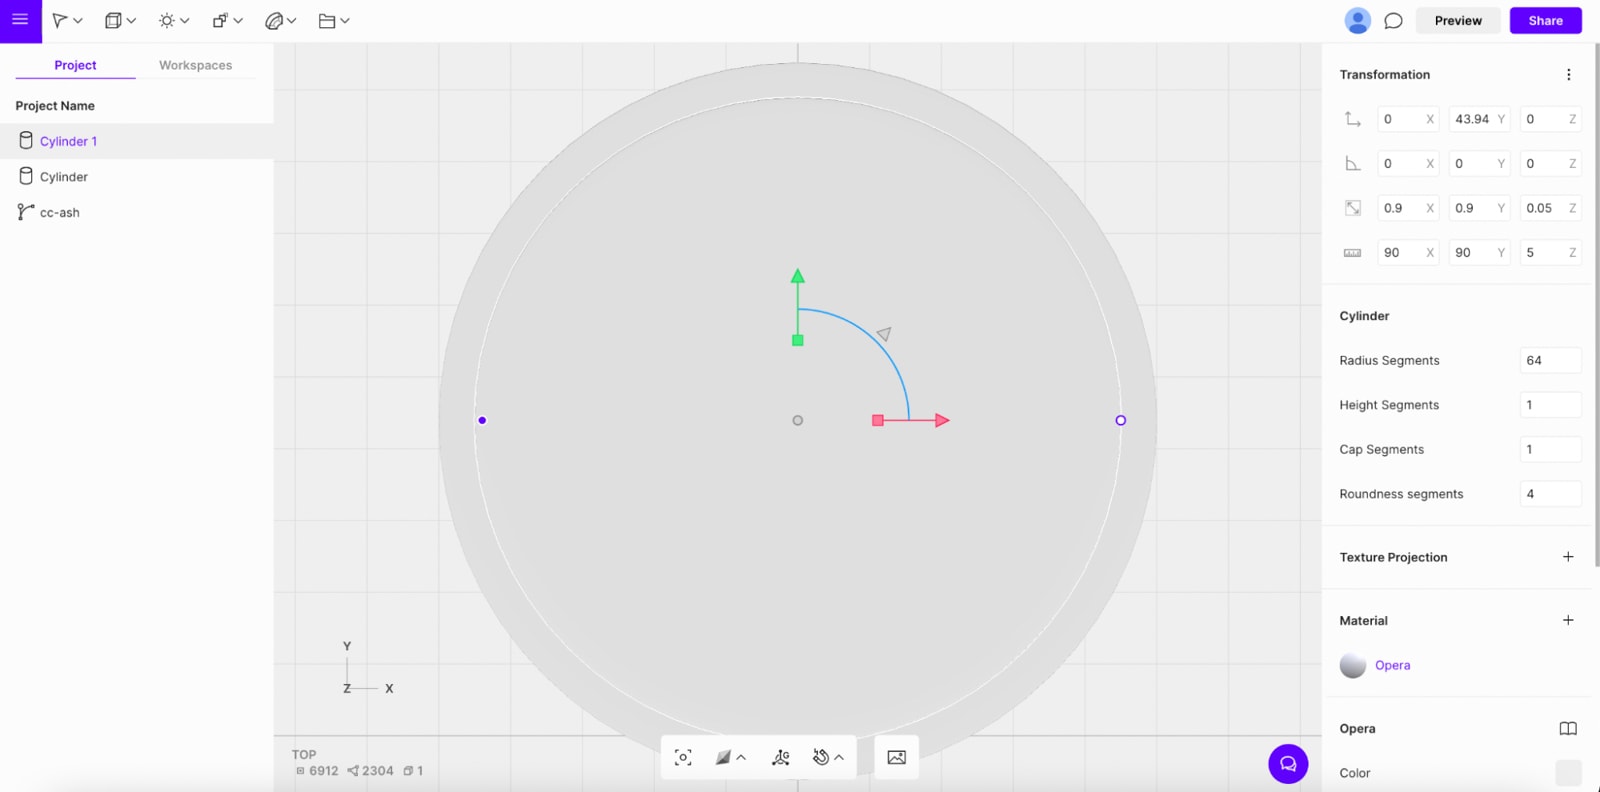
Step Three: Extrude Your Image
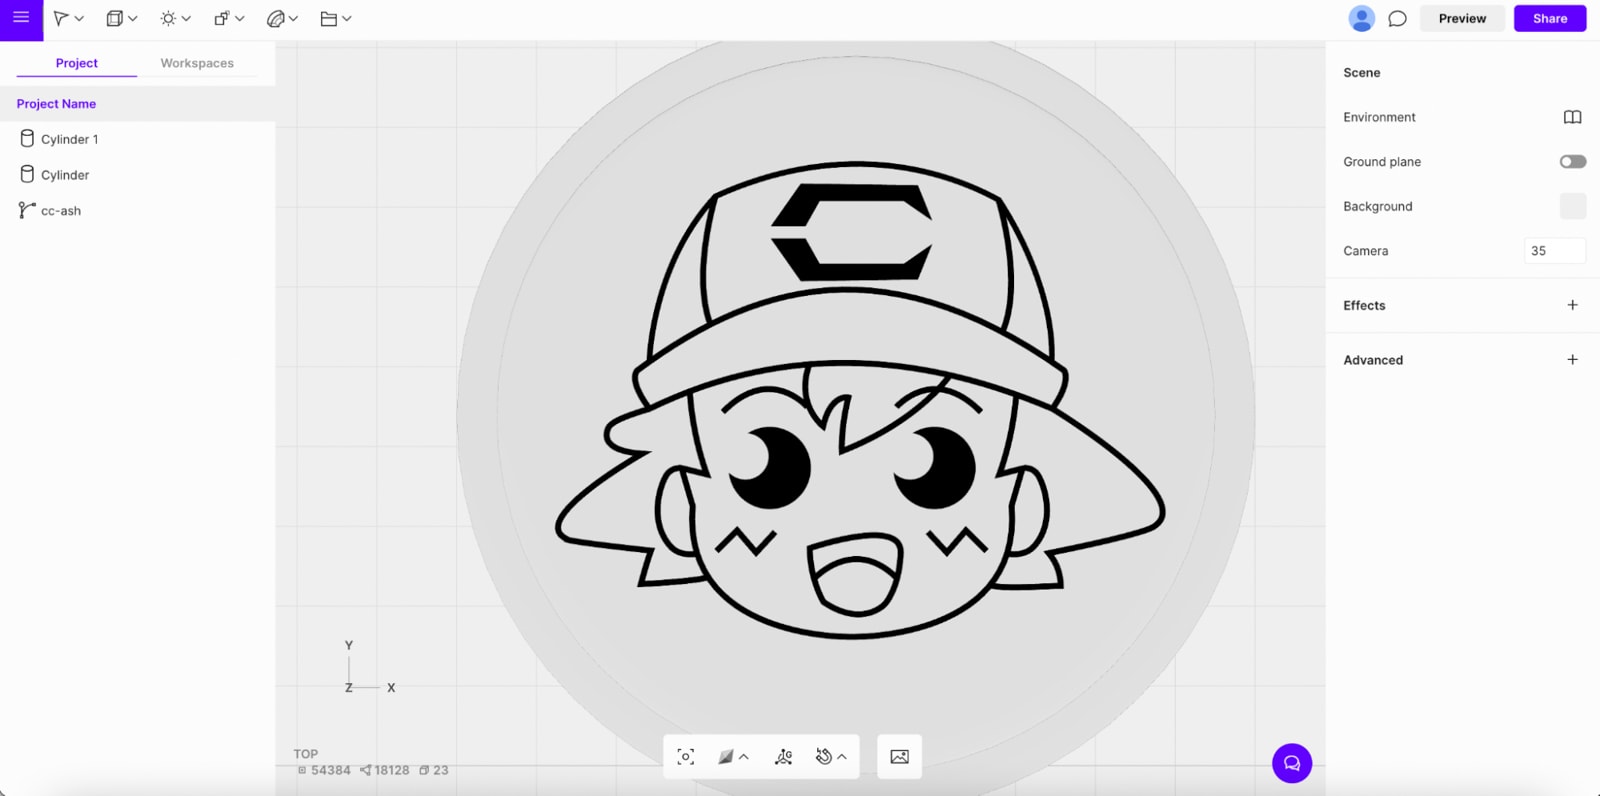

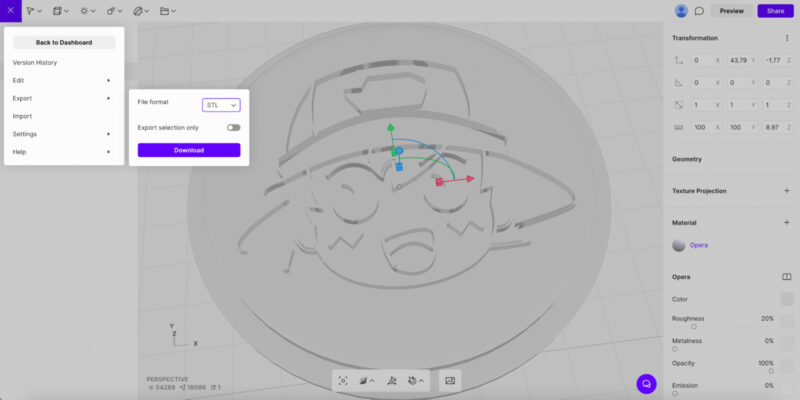
Step Four: Finish Your Project
Final Thoughts
Making a 3D model from a 2D image can be easy depending on what tools and techniques you use. Whether you’re trying to make cookie cutters, stamps, keychains, or to recreate something more sophisticated like a person or building, there are software options available to help you create any project you can think of!
While you might be able to easily create a 3D model with artificial intelligence tools, we are still waiting for the game changer piece of software to do so. For now, these solutions are excellent alternatives to create models for 3D printing from an image for free or for a small fee.
Did you find this list useful? Let us know in the comments below!