
Support structures are a core element in 3D printing. They hold up the overhangs of your pieces, making it easier to print elaborate models. But one problem with these supports is that they sometimes show up in unwanted places.
What if the printer makes support even though you don’t need it in a certain part of your print? What if you can save time and money by printing with fewer supports? This is where Cura’s Support Blocker comes in. It allows you to block support structures where they are not needed.
This piece will support you by explaining what, why, and how the Cura support blocker feature works. Follow along to learn how to achieve support-acular results on your 3D prints!
What Is Cura Support Blocker?
The support blocker or support eraser in Cura is a tool that disables the slicer’s support generation for certain regions of a 3D model. This is helpful when some parts of the model don’t need support. Adding support to those parts would waste material and slow down the 3D printing process unnecessarily.
Let’s say you are making a long bridge, and the slicer wants to generate support structure all along the length of the bridge. With the help of the support blocker feature, you may prevent the use of supports beneath specific parts of your bridge and only place them where actually necessary.
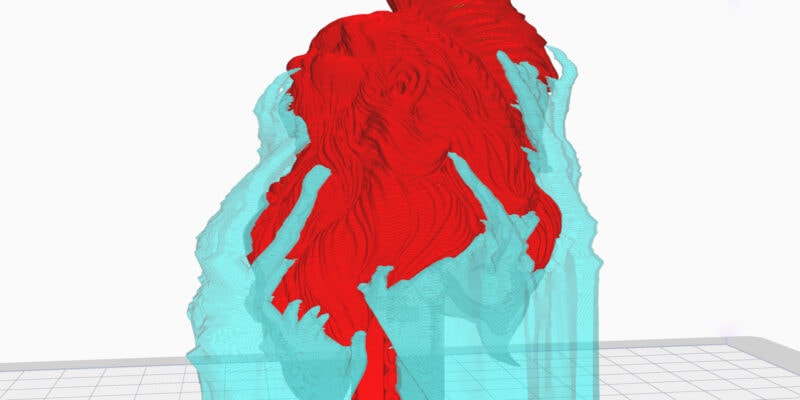
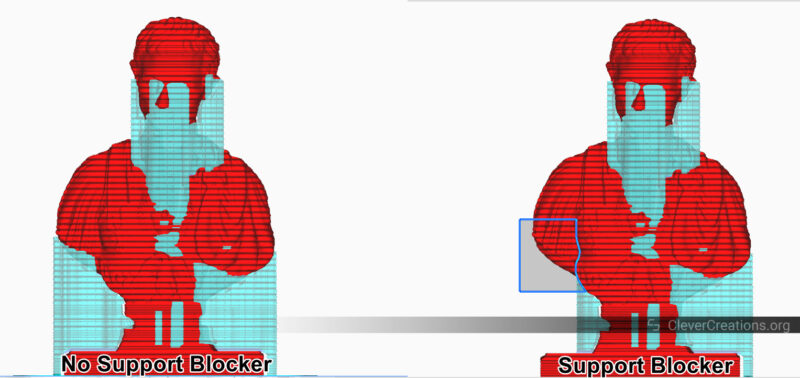
Take the Caesar bust in the picture above. After slicing in Cura, we can see that the software created far too many supports. By using the support blocker tool, we can generate support material only where necessary and still have a beautiful 3D-printed bust of Caesar.
In short, the support blockers are a way to tell Cura not to add support to certain parts of the model.
Benefits and Drawbacks
While the support blocker feature comes in handy in certain situations, there can be cases where it negatively affects print quality. Let’s take a look at the pros and cons of using Support Blocker in Cura.
Reasons To Use Support Blocker
Saves Material and Print Time
The main function of support blockers is to cut down the support structures generated for your 3D model. This directly reduces the material usage by the printer and saves considerable print time. In turn, these savings translate to reduced printing costs and energy bills.
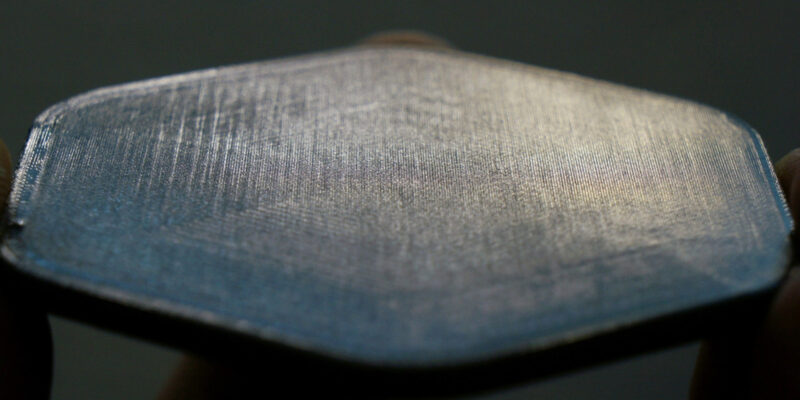
Improved Surface Quality
In some cases, supports can lead to minor imperfections or support marks on the surface of your 3D prints. Your print quality will suffer as a result, and your models will no longer look as intended.
By preventing unnecessary supports, you can choose to only add support where it is needed. This reduces any marks that remain after removing the support material and preserves the surface quality of your prints.
Saves Post-Processing Time
The process of removing support structures can require a good amount of manual effort. Maybe not for one or two prints, but as you 3D print more and more, the amount of work and time you need will add up.
By reducing support structure volume in your 3D prints with the use of support blockers, you can reclaim some of your valuable time. You won’t have the hassle of removing as many supports and will be able to use the time for other things in your 3D printing business.
Reasons Not To Use Support Blocker
Risk of Print Failure
If you use the support blocker setting in areas where a support structure is necessary, it can cause a complete print failure. It is important to be careful when using the support eraser and make sure you’re not blocking support in important parts of the design. Areas with a large support overhang angle are what you should be on the lookout for.
Increased Complexity
It can be a challenge to incorporate adding support blocker elements into your 3D printing workflow. You need to carefully evaluate the model, understand the overhangs, and be aware of the capabilities of your 3D printer. It adds another layer of complexity to your printing process.
If you’re new to 3D printing, it’s best to stick with the usual support settings and learn the basics first. Once you feel comfortable, you can start playing with the Cura support blocker setting.
How Do You Add a Support Blocker to Cura?
Adding support blockers to Cura does not take much effort. Here are the steps:
- Import the Model in Cura
- Slice and Preview the Design
- Activate the Model in Prepare Tab
- Use Support Blockers
- Adjust the Support Blockers
- Preview the Final Print
1. Import the Model in Cura
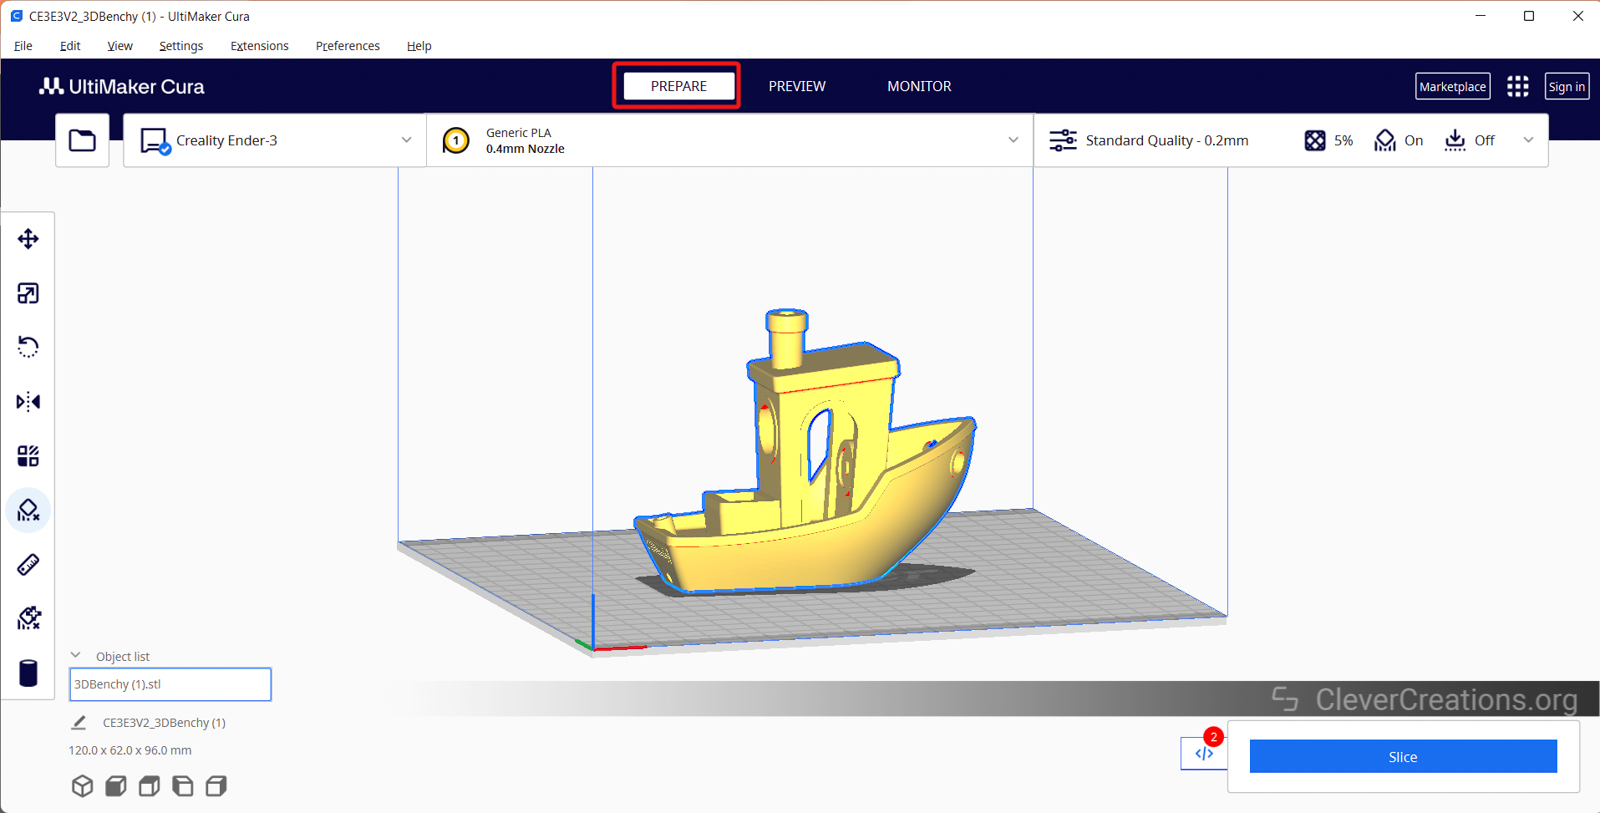
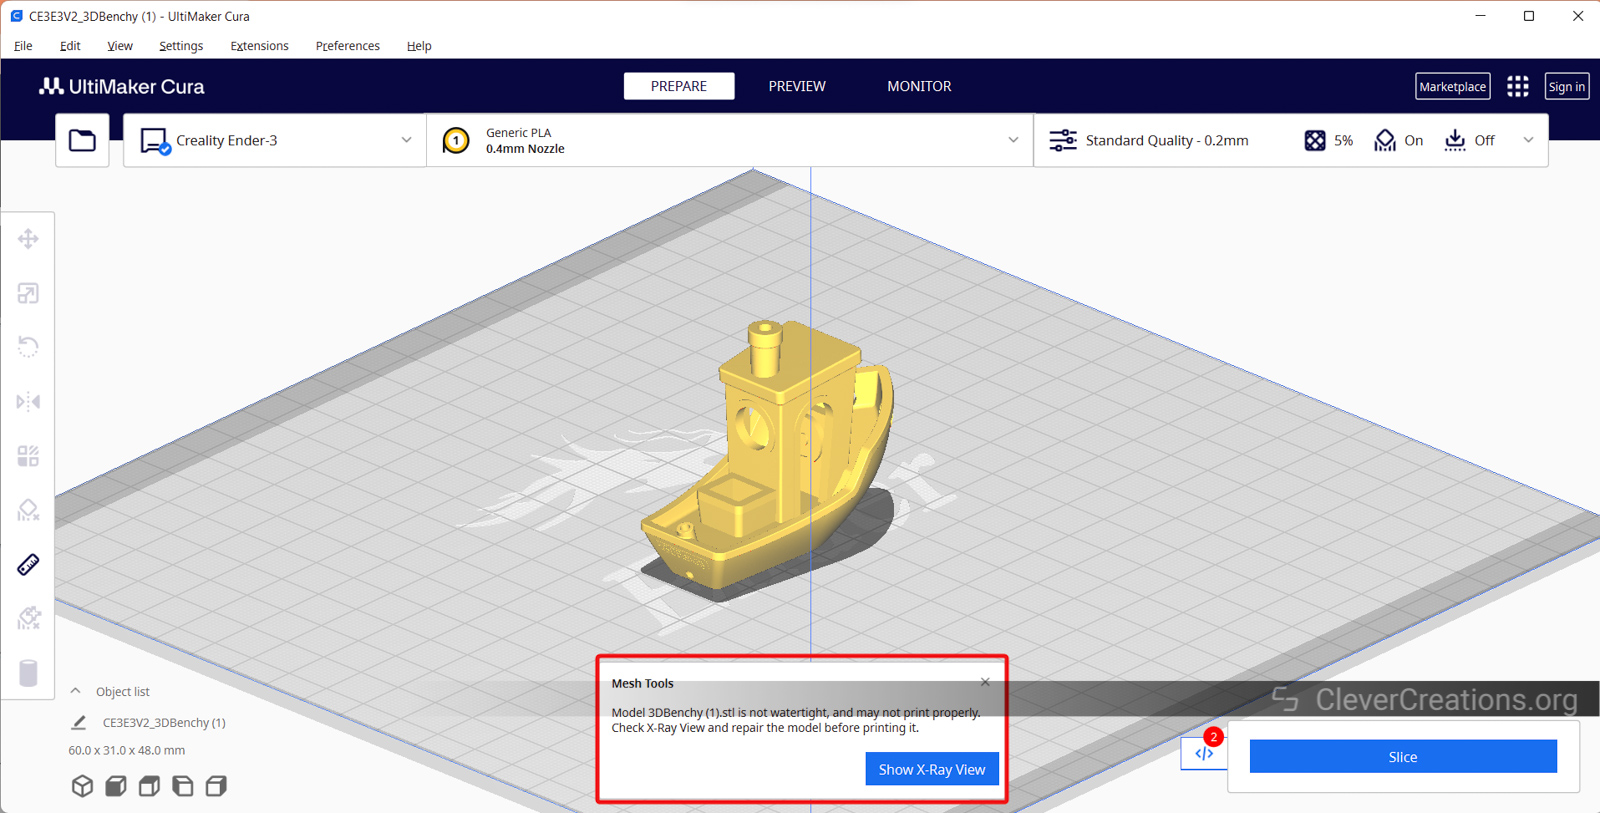
First, open Cura slicer and import your model in the 3D viewport. Make sure you’ve enabled the Supports option in the slicer settings of Cura.
2. Slice and Preview the Design
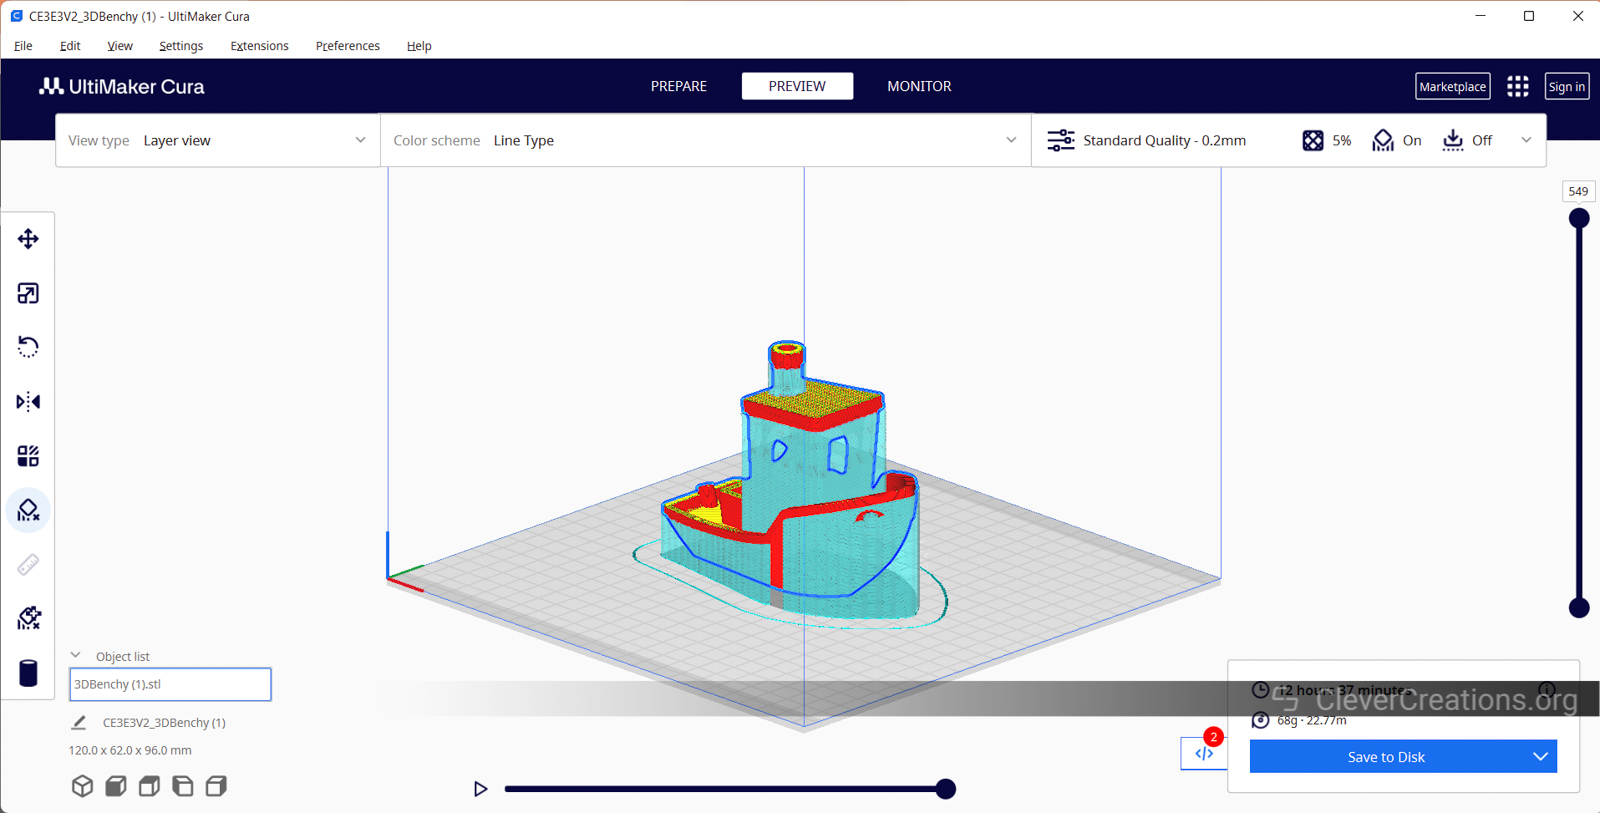
First, slice your 3D model as it is. This will give you an idea about the positioning of the support structures in your 3D print. After slicing, you can preview the supports by opening the Preview tab on the top.
3. Activate the Model in Prepare Tab

After previewing the model with the support structures, click the Prepare tab. Once you’re in the Prepare window, click on the item to make it active. A blue outline will appear around your model, and a menu will appear on the left.
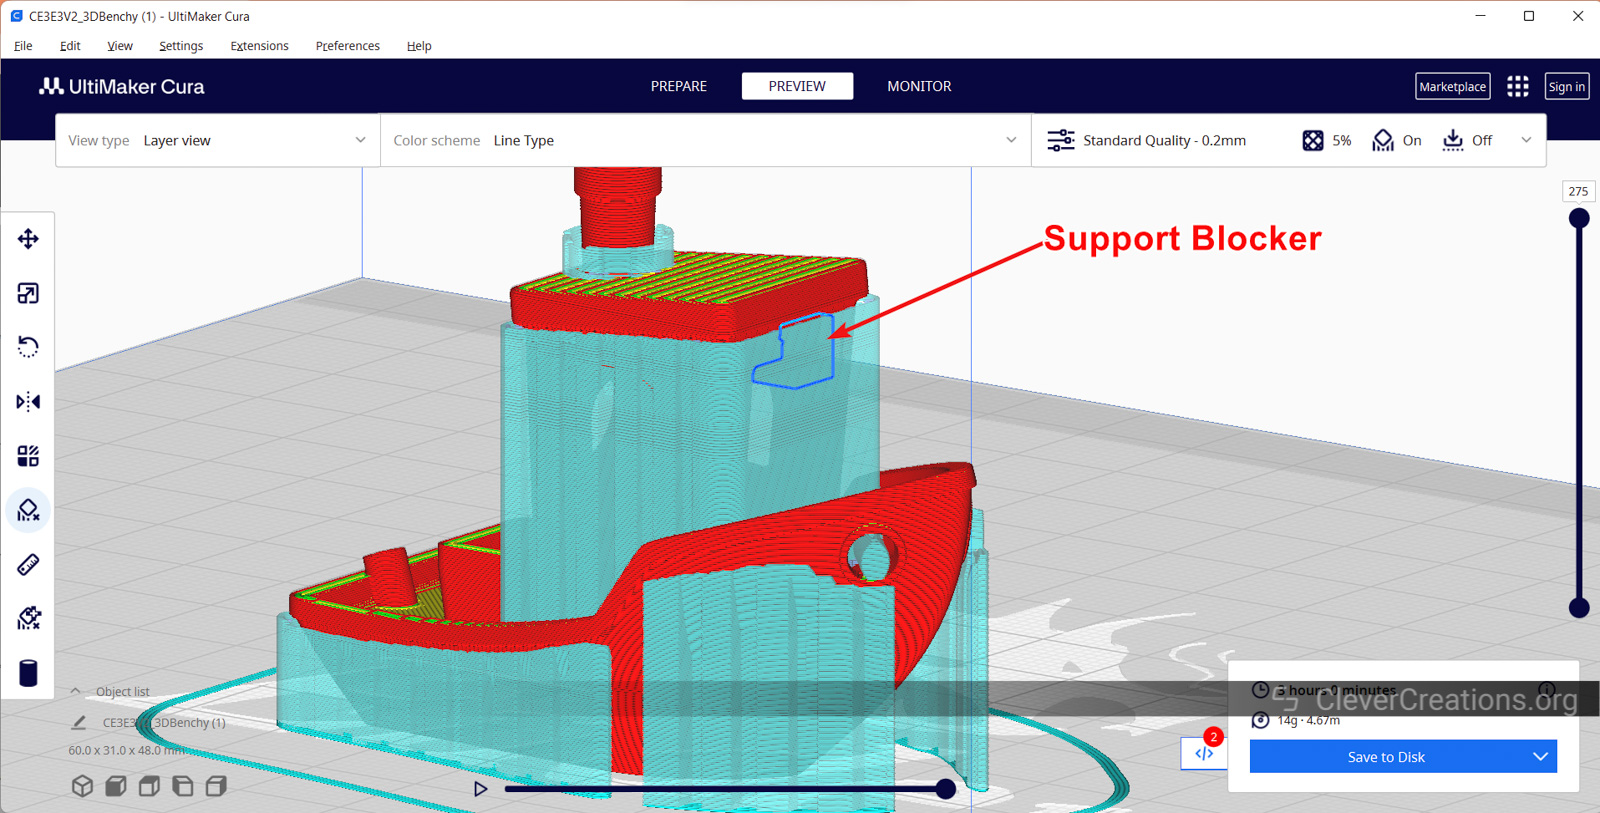
4. Use Support Blockers
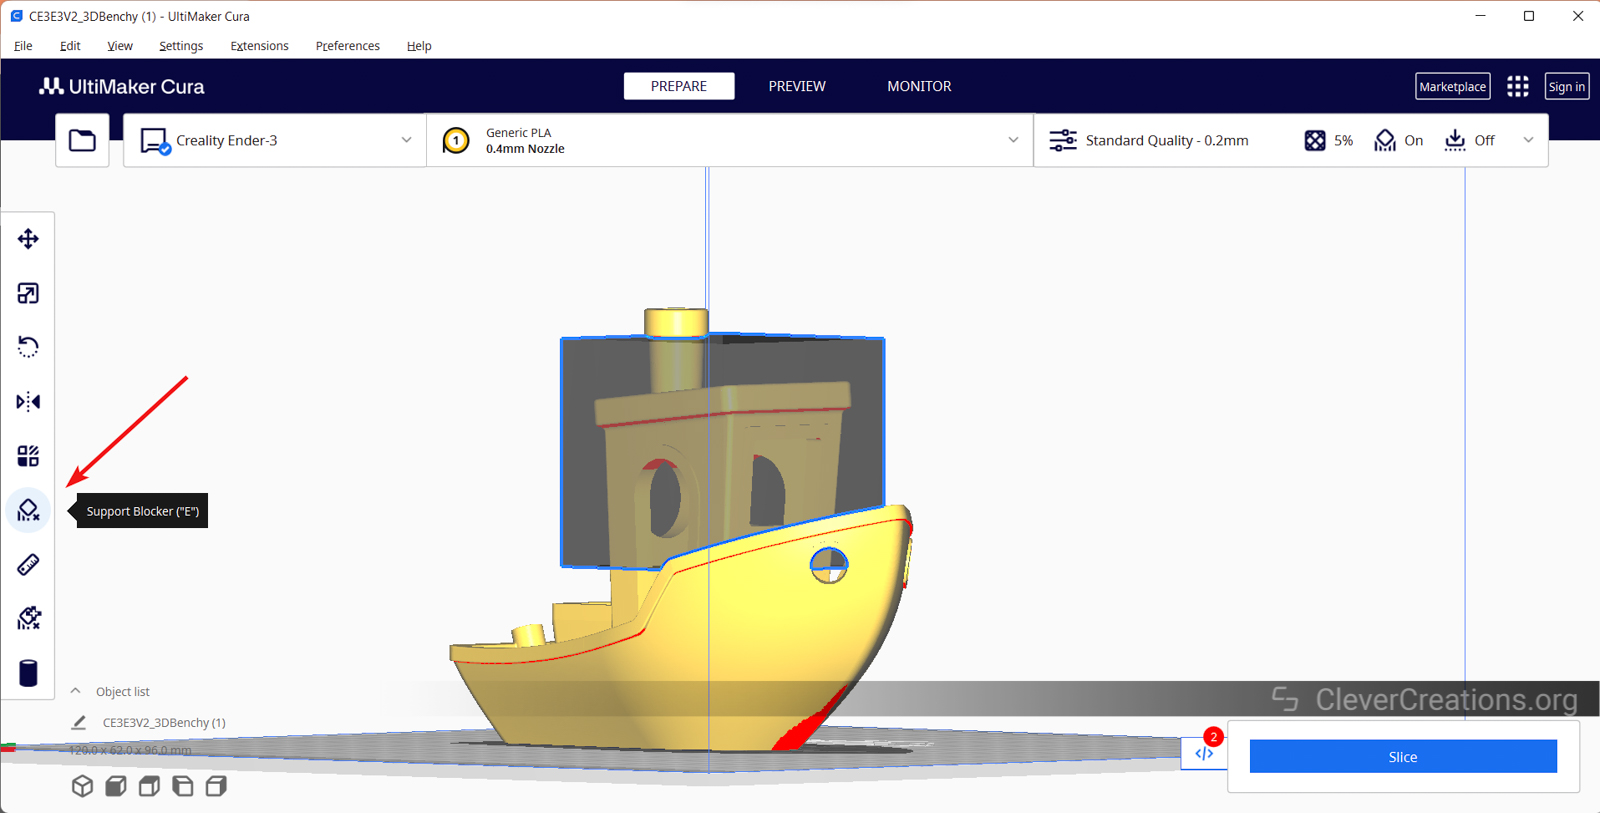
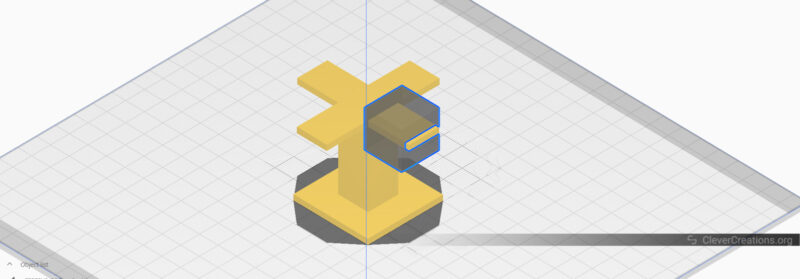
Click on the Support Blocker option from the menu. It will be fifth from the top. Select the areas of the model where you want to use support blockers. You can do this by clicking on the individual points of the model, which will let you add as many support blockers as you want. Each support block will be shown as a cube with a smoky black hue.
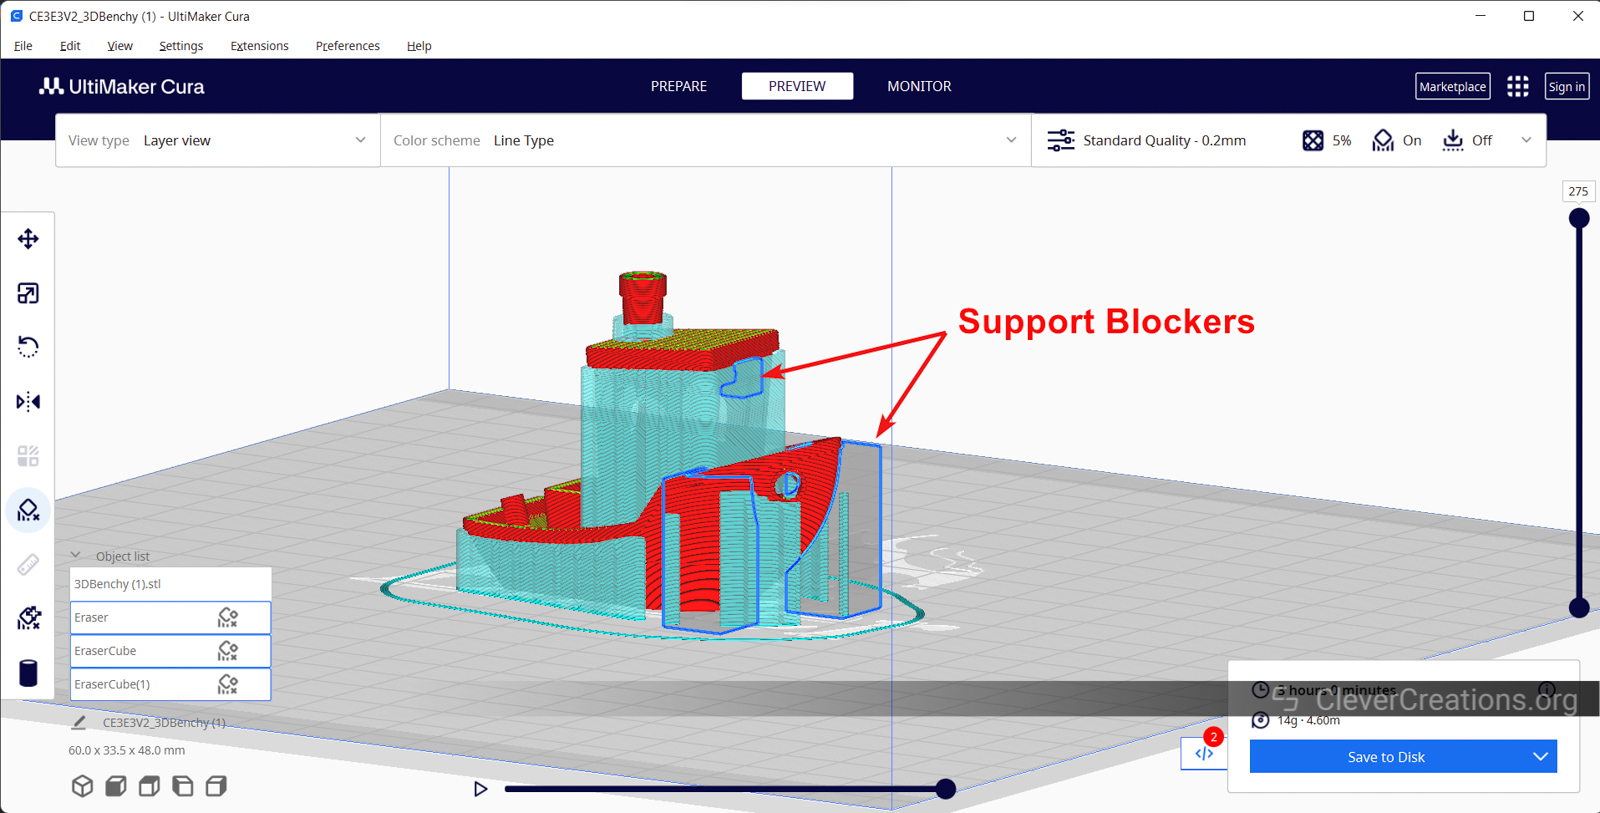
5. Adjust the Support Blockers
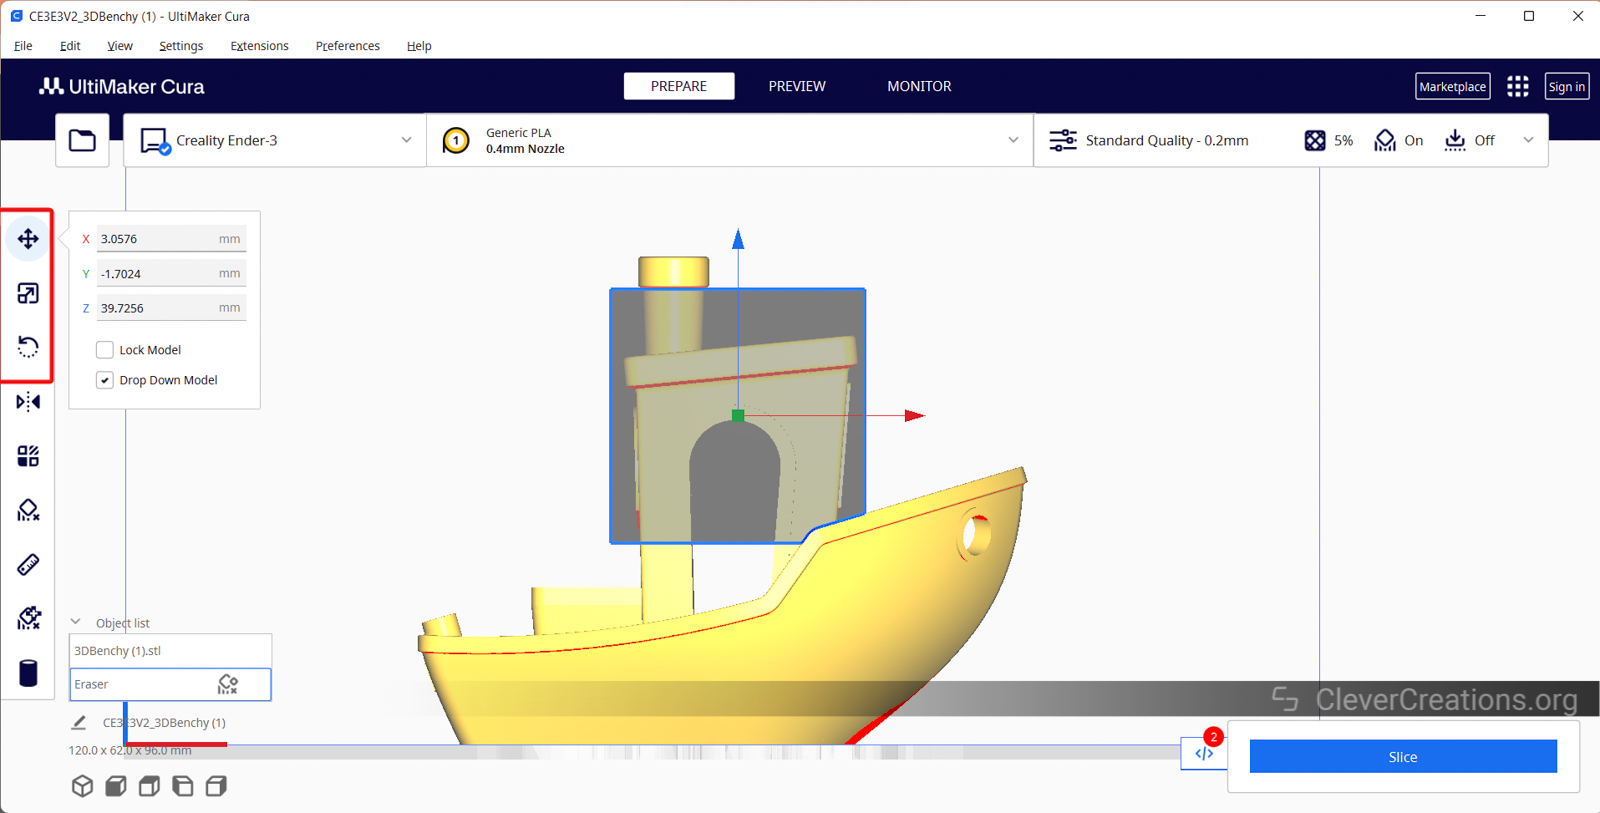
You can change the size and placement of the support blocker cube by using the Scale option.
If you want more control over the size of the support blocker features, you can uncheck the “Uniform Scaling” box. This lets you change the dimensions separately in the X, Y, and Z directions.
With the Move and Rotate buttons, you can put the blockers exactly where and how you want.
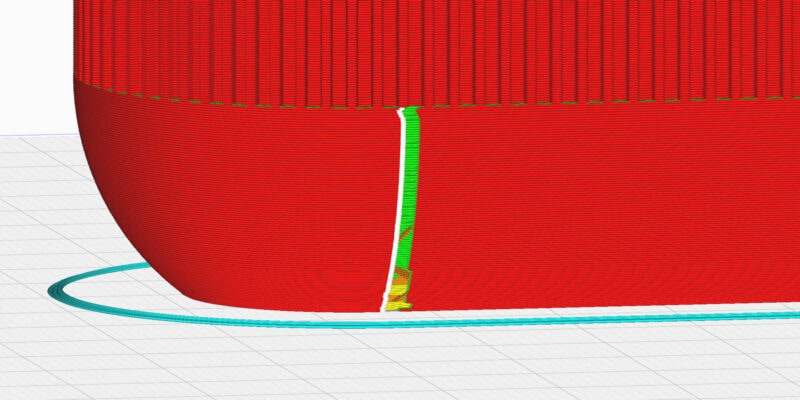
6. Preview the Final Print
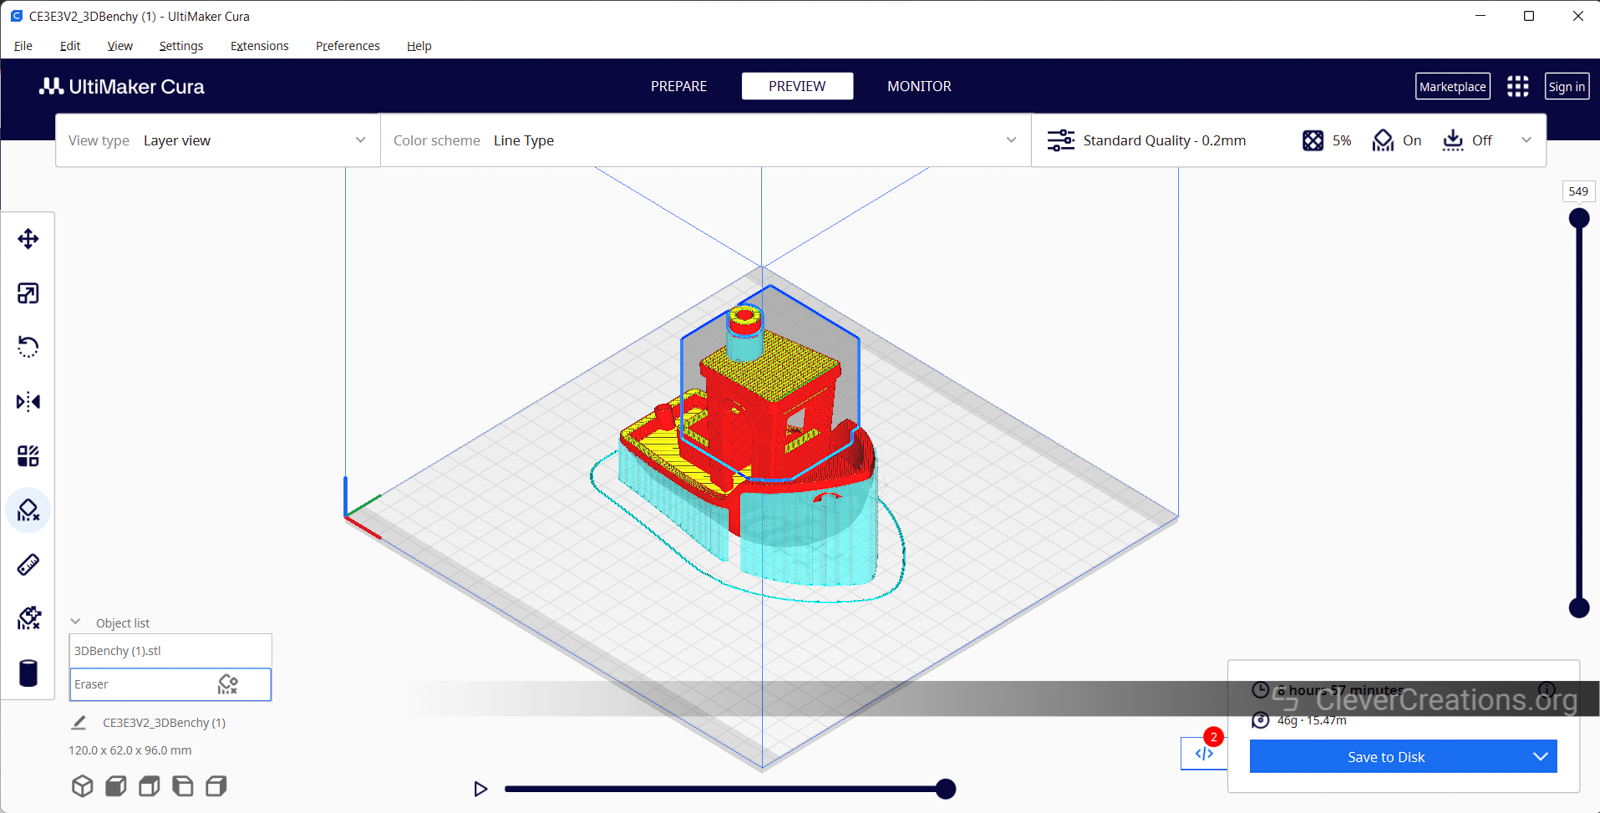
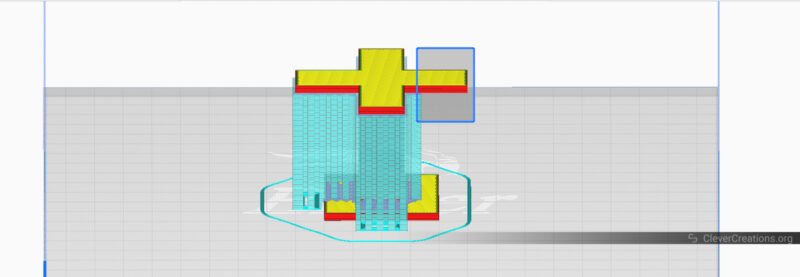
Once you’re satisfied with the placement of the support blockers, you can slice your design and preview it. You can see above that there are gaps in the support structure in several areas.
That’s it. You’re now ready to 3D print your model with more efficient use of support!
Cura Support Blocker Tips and Tricks
Start Small
When trying this function for the first time, it’s a good idea to use smaller support blockers. This will give you a better idea of how these support blocker cubes block the Cura support and by how much.
As you get more practice and learn more about how to print overhangs, you can slowly make these cubes bigger. This helps save time during the slicing stage and avoid any possible print problems.
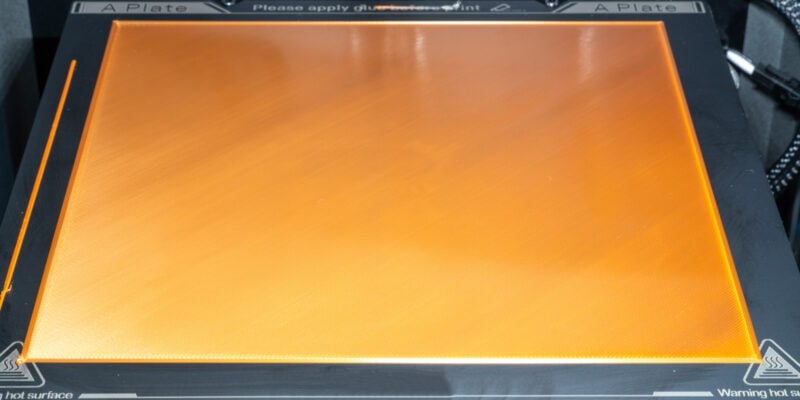
Use Support Blocker Sparingly
As mentioned previously, it’s important that you don’t use Cura support blockers in areas where support structures are necessary. When used right, support blocker sections can make 3D-printed models look better and use less material. But too much of them can weaken structures and cause print failures.
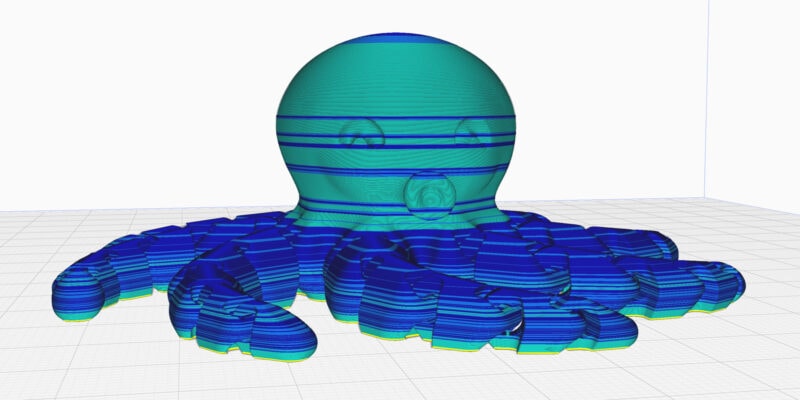
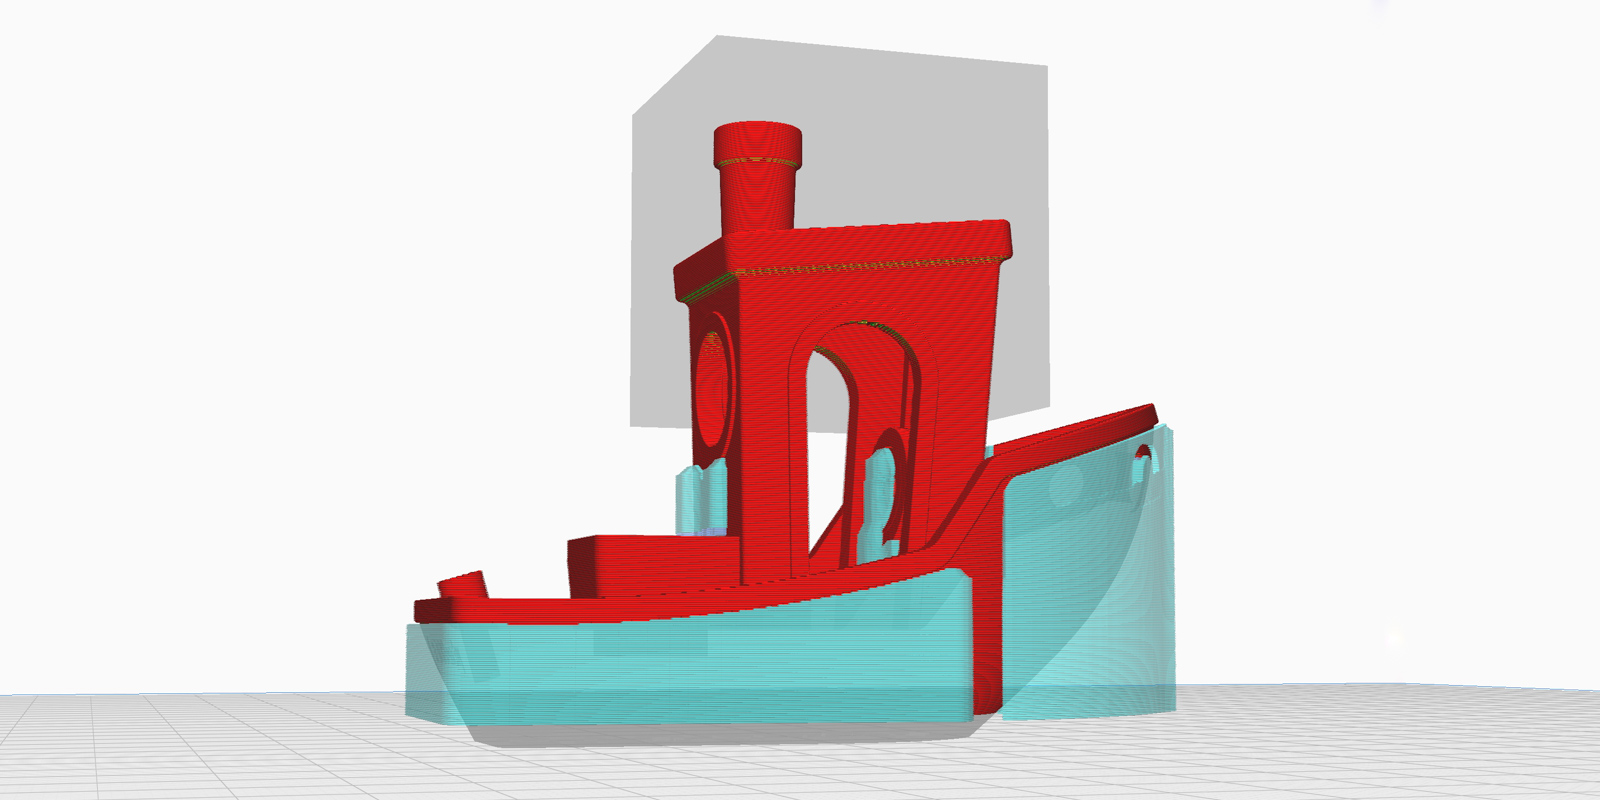
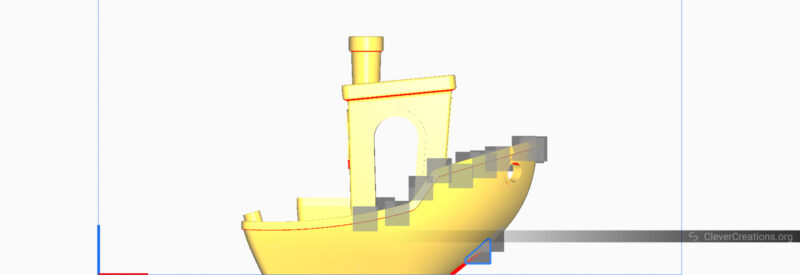
In the above image, you can see a model with several 90-degree overhangs. If you were to use support blockers here, it would cause the print to fail.
It’s best to use support blocker cubes on shallower overhangs, like those between 50 and 70 degrees. Ultimately, it depends on what your 3D printer is capable of with the filament that you are working with. In general, it’s better to have a bit more supports than a failed print.
Always Preview the Model
Always preview the sliced model when you have finished adding support blockers, moved them around, and made any other necessary adjustments. This ensures the cubes are really blocking the supports as you want them to.
If you see any discrepancies, change your Cura support blocker settings before slicing and previewing the 3D print again. This extra precaution is better than having to print the entire model over again in case the support blockers are placed incorrectly.
Troubleshooting: Why Is the Support Blocker Not Working in Cura?
There are several reasons why the Cura support blocker functionality might not work. Here are some of the most common causes and solutions:
- The Model Is Not Enclosed
- The Support Blocker Is Too Small
- Support Structures Still Present in the Model
1. The Model Is Not Enclosed
Ensure that your 3D model is error-free and that the mesh does not contain random gaps or openings. If the mesh of the model isn’t correct, Cura can have trouble recognizing the overhangs correctly, which in turn causes problems with the support blocker.
If there are problems with the model, you can use a program like Meshmixer to fix them. 3D Builder by Microsoft works just as well for fixing and repairing any holes in your 3D models.
2. The Support Blocker Is Too Small
You might run into situations where you use a support blocker, but Cura does not remove enough supports from the model in the area you selected.
This can happen when the smaller support blocker cubes are too small and your support density is set too sparse.
The best way to solve this is to increase the size of the support blocker to cover a larger area of the model. A good rule of thumb is to use a blocked area that is at least 10mm² in size. This is the smallest cube size that Cura creates by default.
3. Support Structures Still Present in the Model
The support blocker option may fail to have any effect in some circumstances. A popular workaround for this issue is to turn off the “Use Towers” setting in the support settings.
Another cause is that sometimes the functions in the slicer won’t load up properly, which in this instance could include the support blocker function. The best way to solve this is to restart Cura and check the support blockers again.
Conclusion: Should You Use Cura Support Blocker?
Cura’s support blocker is a useful tool that can help you save material, reduce print time, and improve print quality. But you should be careful about when and where you use it. Blocking supports in important parts of your print can make the whole thing fail.
If you’re a beginner who’s starting out with 3D printing, it’s best to stick to the default supports. It’s much better to take the time to learn how the slicer and the 3D printer work than to end up with frustration from failed prints. As for experienced users, go ahead and have fun while experimenting with blocking supports in Cura.
If you have any experience with this tool in Cura, feel free to share. Please let us know in the comments if there is anything we have overlooked or if you have any questions.