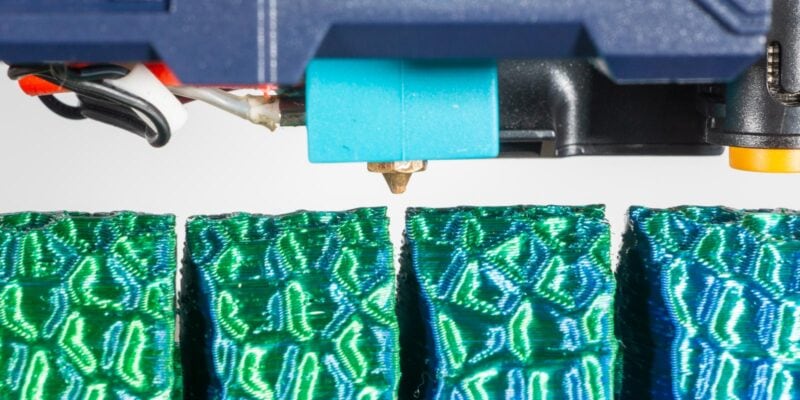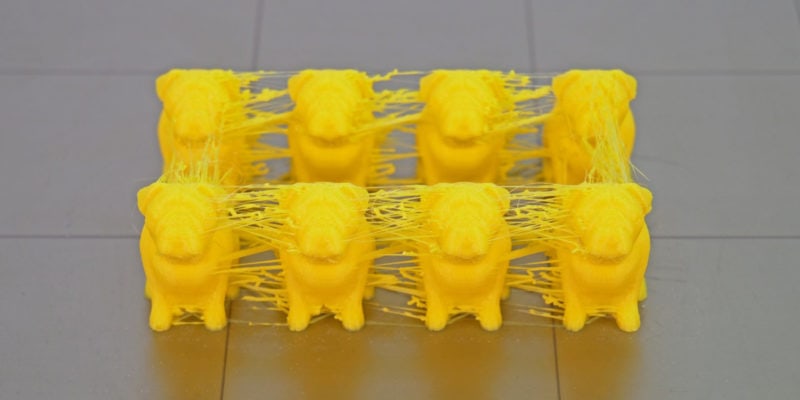

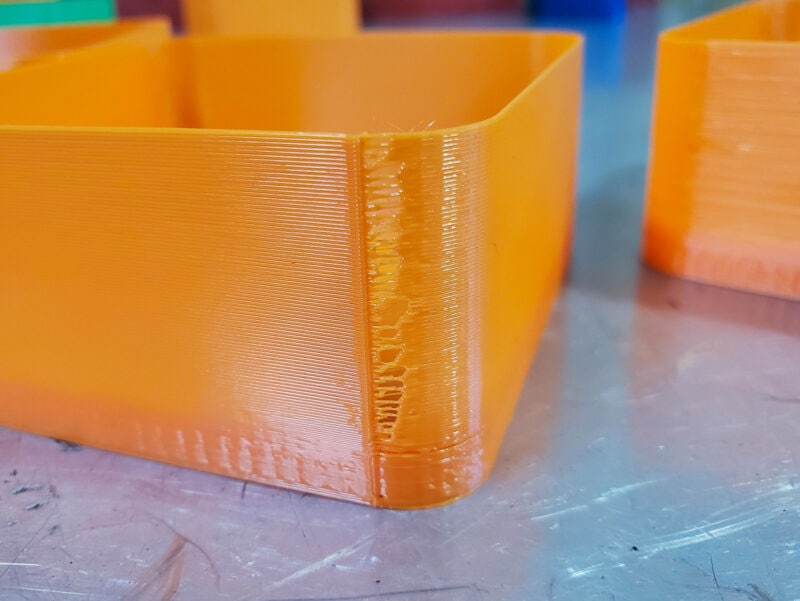
When it comes to 3D printing, the ultimate goal is to get perfect results. One of the challenges, however, that often emerges is stringing. Those pesky, unwanted strands of filament that can mar an otherwise flawless print.
Luckily, the Coasting feature in Cura is designed to alleviate the strings in your 3D prints. In this article, we delve into the world of Cura coasting, exploring what it is, its benefits, and the best settings to bid adieu to stringing once and for all.
Coast along and find out how to get your prints looking even better!
What Is Coasting in 3D Printing?

Coasting in Cura is a feature that purposely stops extruding the filament a bit before the end of a printed layer or element in your 3D prints.
Essentially, the nozzle coasts along the layer end, similar to freewheeling on a bicycle. You’re coasting downhill by not pedaling while still moving forward due to the bike’s momentum.
This intentional pause in extrusion helps to reduce the filament pressure in the nozzle and counteracts the stringing effect. The result is a cleaner 3D print with less stringing and fewer blobs and zits on the surface.
What Benefits Does Coasting Have?
Coasting offers several key benefits that contribute to enhancing the overall 3D print quality. These are the top advantages of Cura coasting:
Reduced Stringing
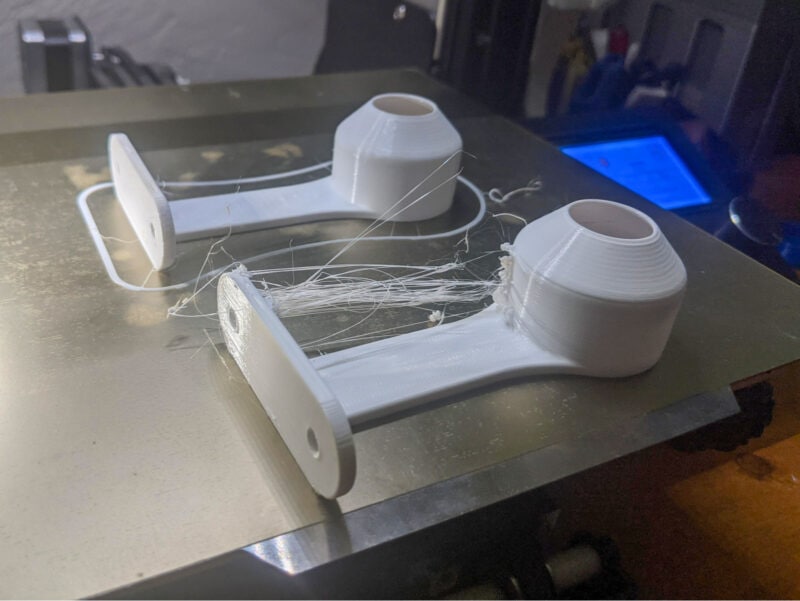
The primary purpose of coasting is to reduce stringing. This helps save you time during 3D print post-processing since there is no need to remove fine strings and blobs.
This especially comes in handy on intricate models that are hard to clean after 3D printing. By reducing small blobs or imperfections, you’ll also notice that your printed designs retain their finer details better.
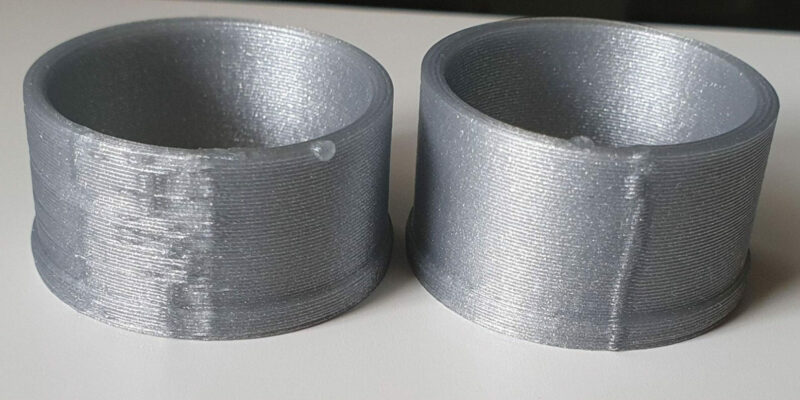
Smooth Surface Finish

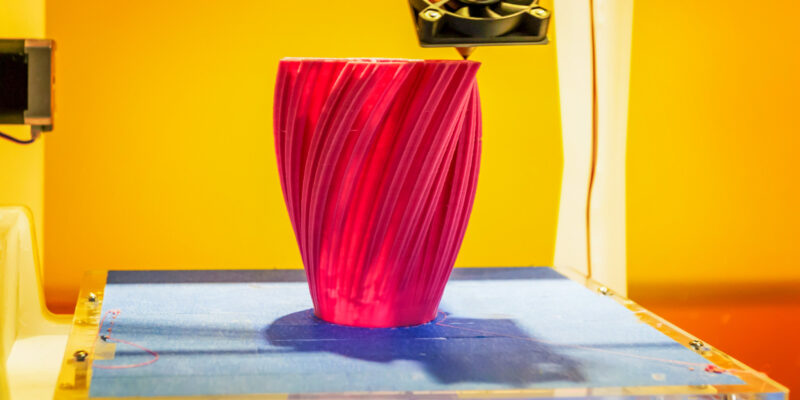
Coasting plays an important role in achieving a smoother and more refined surface finish. By preventing excess filament from oozing out of the nozzle with coasting, the final prints have a cleaner and polished appearance.
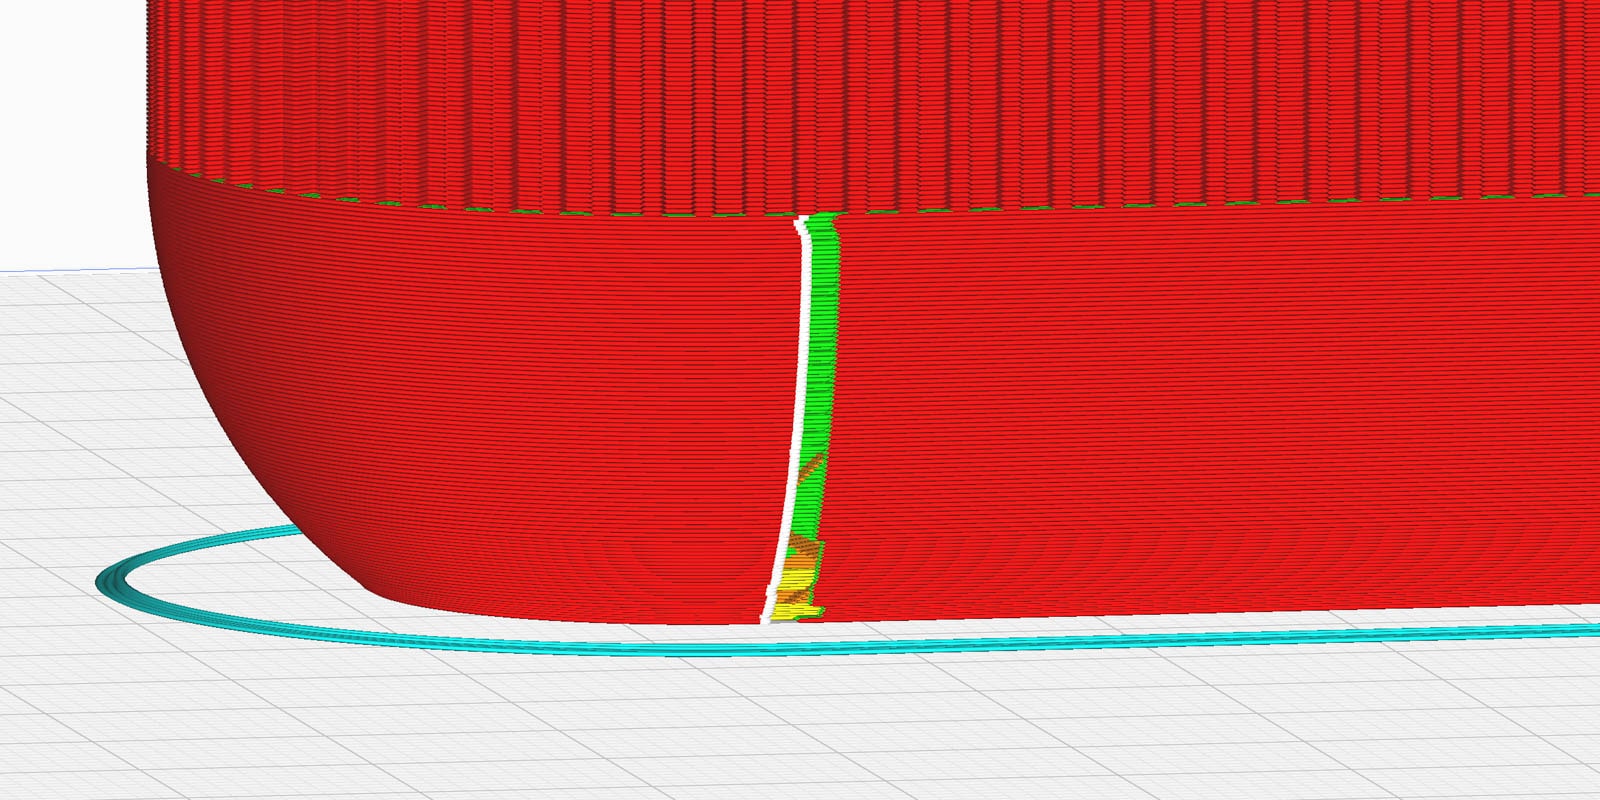
Also, coasting can help make Z-seam lines less visible, which is a common problem with 3D printing. Coasting lets the printer slow down and stop extruding before the end of a layer. This makes the shift between layers smoother and makes seam lines less noticeable.
Optimized Functional Prints
For functional parts with moving components, blobs and zits can interfere with their dimensional accuracy. Coasting prevents these blobs and ensures that your 3D prints not only look better but also perform better in mechanisms and other assemblies where a good fit is crucial.
How to Enable Cura Coasting
Enabling the coasting setting in Cura is a straightforward process that anyone can do.
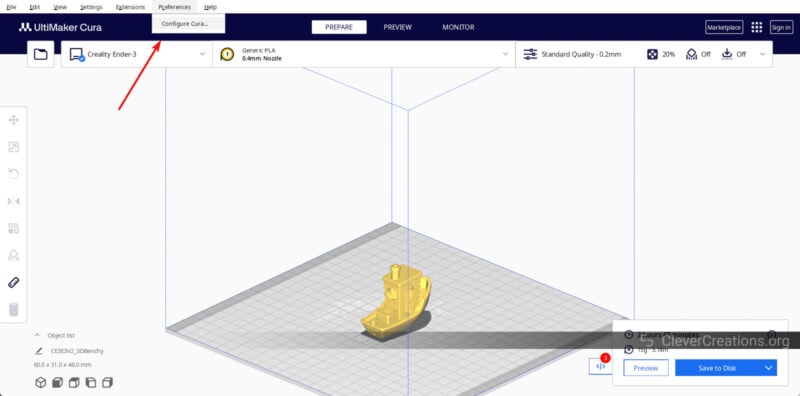
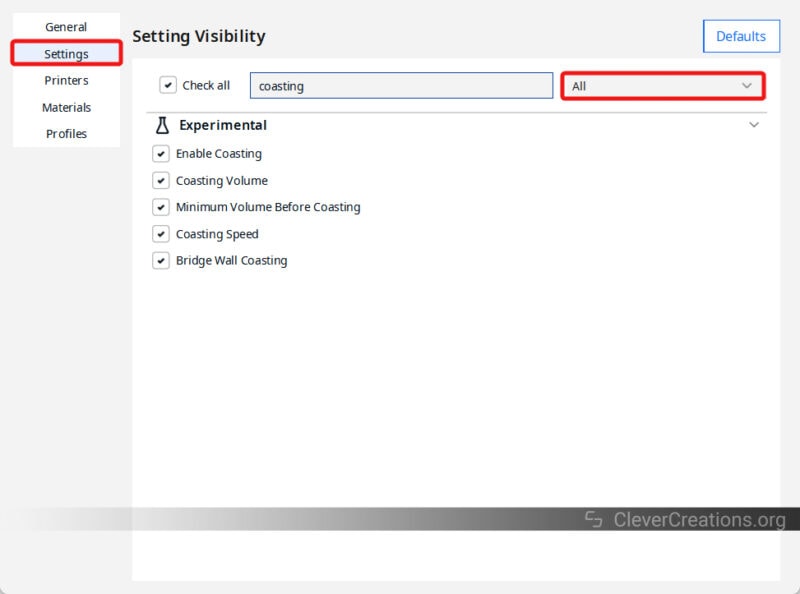
In three simple steps, you’ve enabled the Cura Coasting functionality. We’re only halfway there, however. Let’s look at the optimal settings next.
What Are the Best Coast Settings for Cura?
Fine-tuning your coasting setting options can make a substantial difference in print quality. Here are the key ones to adjust for the best results:
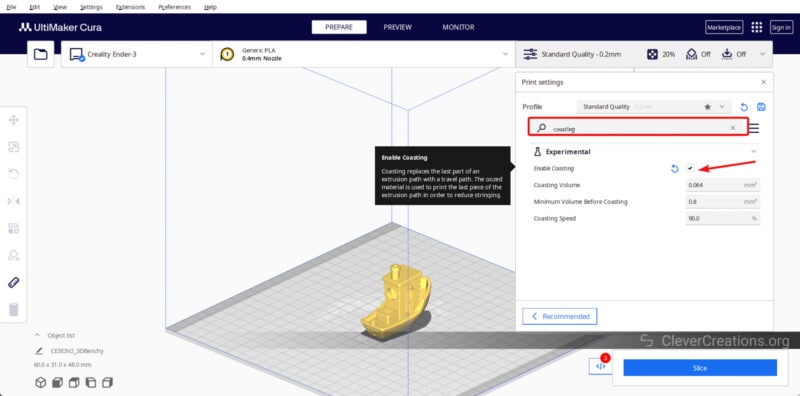
Coasting Volume
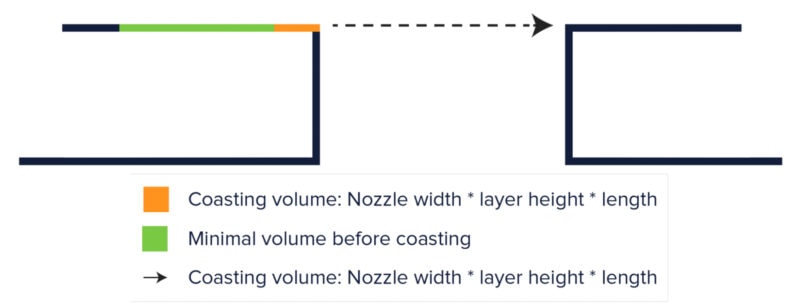
Coasting volume is the amount of filament that isn’t extruded at the end of the layer. It’s crucial to find the right balance with this Cura coasting setting.
If you set the value too high, it can cause under-extrusion because the 3D printer does not extrude enough filament.
If it’s set too low, there will still be too much pressure to prevent stringing. Cura recommends setting it close to the cube of the diameter of the nozzle.
The exact formula for calculating the coasting volume is Coasting Volume = Nozzle width x Layer height x Length [of a certain path]
With that formula, we can calculate the numbers for a standard 0.4 mm nozzle size, a layer height of 0.2 mm, and a 0.8 mm extrusion path length. This gives us:
Coasting Volume = 0.4 mm x 0.2 mm x 0.8 mm = 0.064 mm<sup>3</sup>
As you can see, this is identical to the cubed nozzle diameter that Cura recommends.
If you still find strings or filament coming out of the nozzle, it’s best to increase it in 0.01 mm³ steps. We recommend using a retraction test to fine-tune this setting.
Minimum Volume Before Coasting
This setting controls the minimum volume of material that should be present for coasting to occur. If the material volume is too low, Cura will not use the Coasting function in that particular region.
The reason is that the printer will coast unnecessarily in smaller areas, leading to under-extrusion. Cura’s default setting of 0.8mm³ works great for most prints.
Coasting Speed
Coasting speed is the rate at which the nozzle travels during the coasting move. It’s relative to your normal print speed and should always be set a bit slower.
A slightly slow speed helps the leftover material in the nozzle to flow out properly and close the gap. The 90% default speed value should be fine for most prints.
If you notice blobs or zits on the surface, slightly increase the speed, but be cautious not to set it too high, as it can cause gaps in prints. Again, using a retraction test is a good idea to determine the best coasting speed for your models.
What Is the Difference Between Coasting and Wiping in Cura?

While coasting and wiping aim to avoid stringing, they do so differently. Coasting stops extrusion before the end of a segment. Wiping involves moving the nozzle over the print after extruding, effectively “wiping” off any excess filament.
Both options are valid methods for reducing stringing, and there’s no clear winner in which is better. Sometimes it depends on the specific model that is being 3D printed. In our experience, wiping is easier to set up, but coasting can give cleaner results when dialed in perfectly.
How Do You Calculate Coasting Volume?
Coasting volume is influenced by factors like nozzle size, layer height, and length of a certain extrusion path. According to Ultimaker’s Support forum, the formula for calculating coasting volume is as follows: Coasting Volume = Nozzle width x Layer height x Length [of a certain path].
As an example, assume you’re printing with a layer height of 0.4 mm using a 0.6 mm nozzle. The length of the filament gap is calculated by the slicer and is not something that we can easily determine. To keep it close to Cura’s recommendation, let’s take it as 0.9 mm.
Using these numbers, we see that the Coasting Volume = 0.4 x 0.6 x 0.9 = 0.216 mm3 . You can change the values per your setup but try to keep it close to the cube of the nozzle diameter.
What Is the Ideal Coasting Volume for a 0.4 mm Nozzle?
For a 0.4mm nozzle, an initial coasting volume of around 0.064mm³ often yields promising results. However, this can vary based on factors like your specific printer, actual filament diameter, Bowden tube length (if you don’t use a direct extruder), and print settings.
Use the above value as a starting point, and adjust it based on your results. If you see under-extrusion, decrease the coasting volume. If you notice blobs or excess material, increase it.
Conclusion: Should You Use Cora Coasting?
Stringing might be a common woe in 3D printing, but with the Cura Coasting, it’s a problem that can be solved elegantly. By stopping filament flow and reducing pressure before the end of segments, coasting lets you say goodbye to stringing and hello to cleaner 3D prints.
The benefits are clear: smoother surfaces, preserved details, and even saved time on post-print cleaning. Coasting brings a practical edge to your 3D printing, letting you focus on more important things while it takes care of the finer details.
Have you tried coasting before? Share your experiences with us and how this feature helped resolve your stringing problems and failed prints.