
Cura has loads of features tuned toward adjusting the retraction in your 3D prints. There’s coasting, sweeping, Z-hop, and the topic of today: combing. Combing in Cura is meant to reduce stringing and improve the surface quality of your prints.
In this article, we’ll look at what combing mode is, how it works, and how to set it up in Cura. By the end, you will understand how to use Cura combing and get it working with your 3D printer.
Sit tight and keep reading as we comb through Cura and give you all the important details!
What is Combing Mode in 3D Printing?
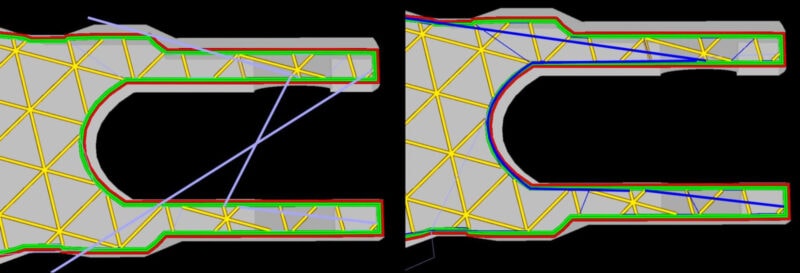
Combing mode is a feature of Cura slicing software that changes how the print head moves when it’s not printing. It’s designed to stop stringing and oozing by keeping the hot end inside the printed areas on your build plate as it moves from Point A to Point B.
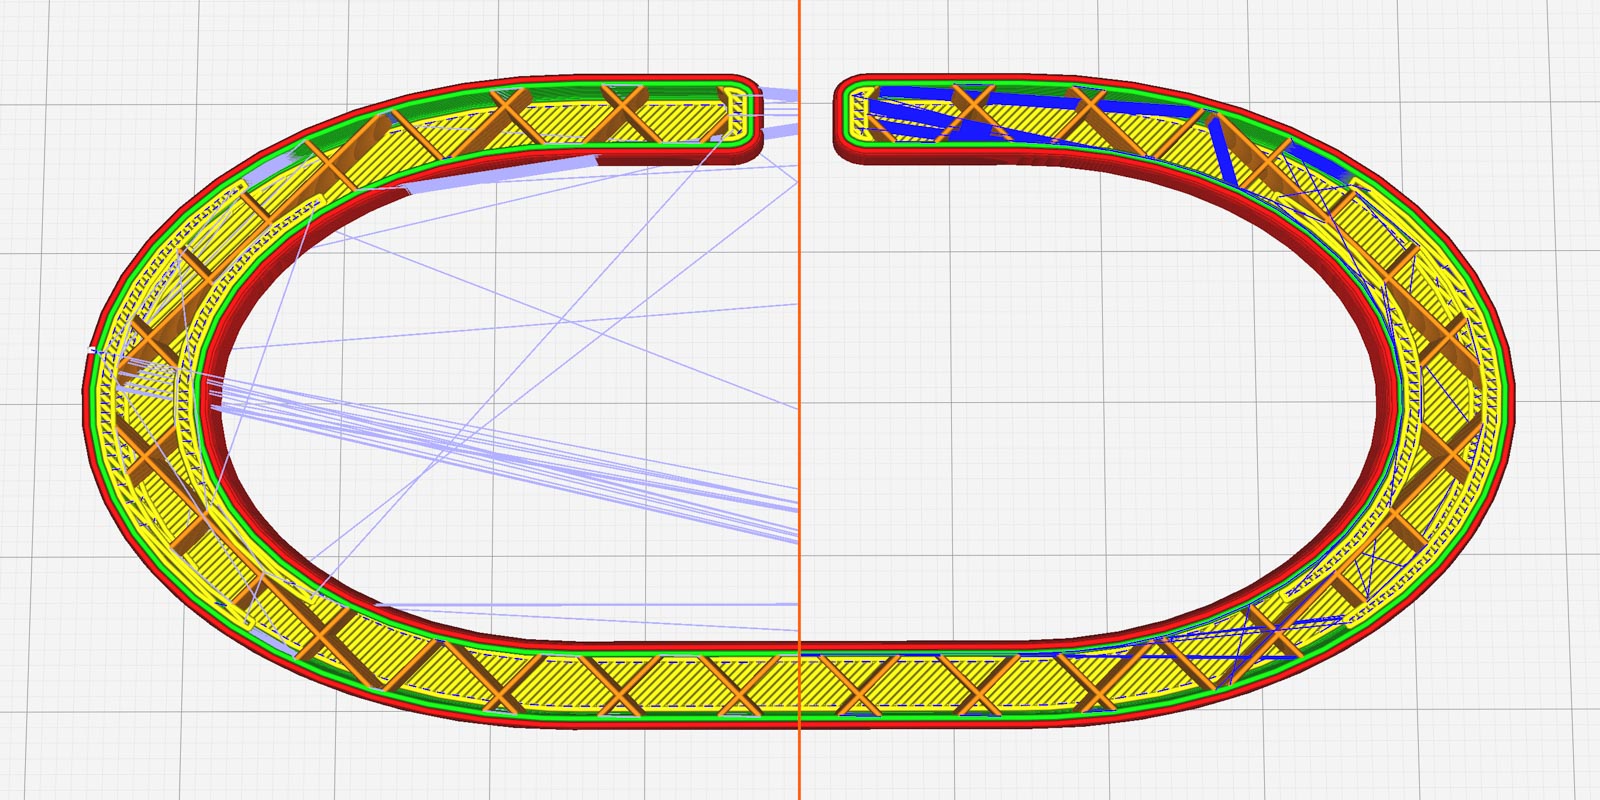
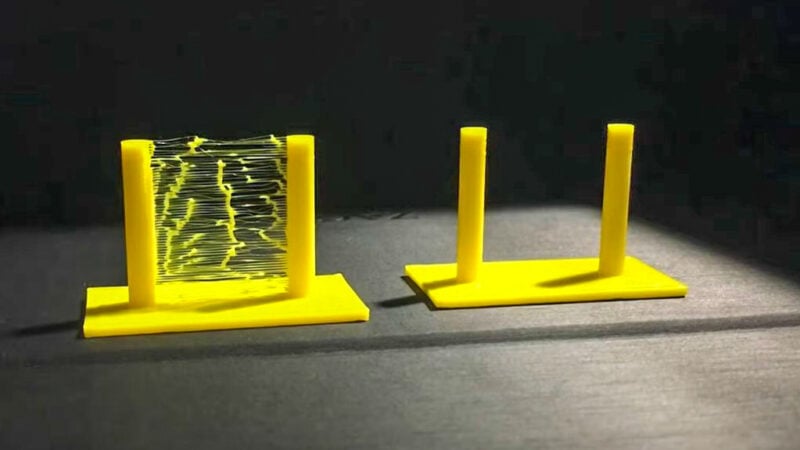
Without combing, the print head travels from one place to the next in a straight line. This is short, easy to figure out for the slicer, and keeps print time to a minimum. However, this can lead to excessive stringing between your parts if your retraction settings are not set correctly.
The main reason for this is that when the nozzle is moving in a line in exposed air, it will keep oozing out the filament as it goes. This can cause stringy bits to stick to your print and create a mess.
While you could dial in your retraction settings, like retraction distance and retraction speed, this can be a time-consuming process. For optimal results, you should do this with each combination of filament and print temperature you plan on using.
If your filament ends up absorbing too much moisture at some point, your settings will be off and you’ll have to start the process all over again. It’s a never-ending battle.
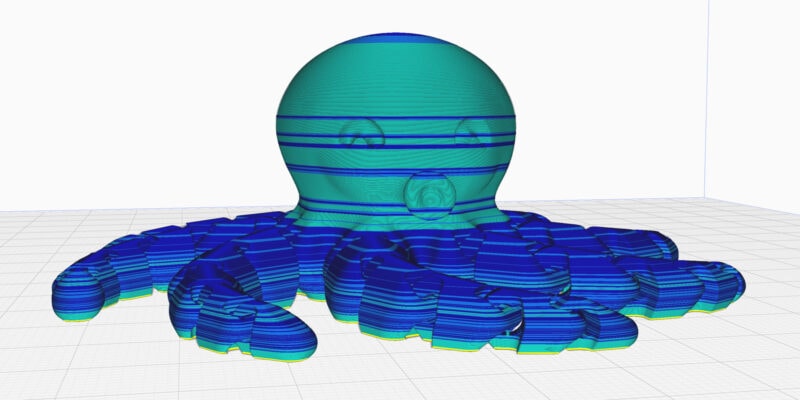
Cura combing mode bypasses a lot of this. With Combing enabled, the nozzle stays inside the printed areas, so any unwanted stringing and oozing stay inside the printed model. This makes the strings less noticeable and helps get rid of blobs and zits on the surface of your parts.
Should You Use Combing Mode?
The reasons to use combing mode in your 3D prints depend on the projects you are printing and your own tastes. It isn’t the ultimate remedy and it comes with some downsides. Here are some good reasons to use combing mode.
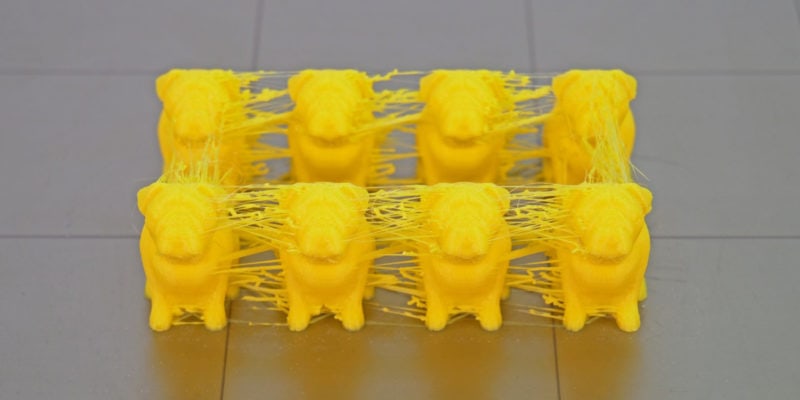
Reduces Stringing
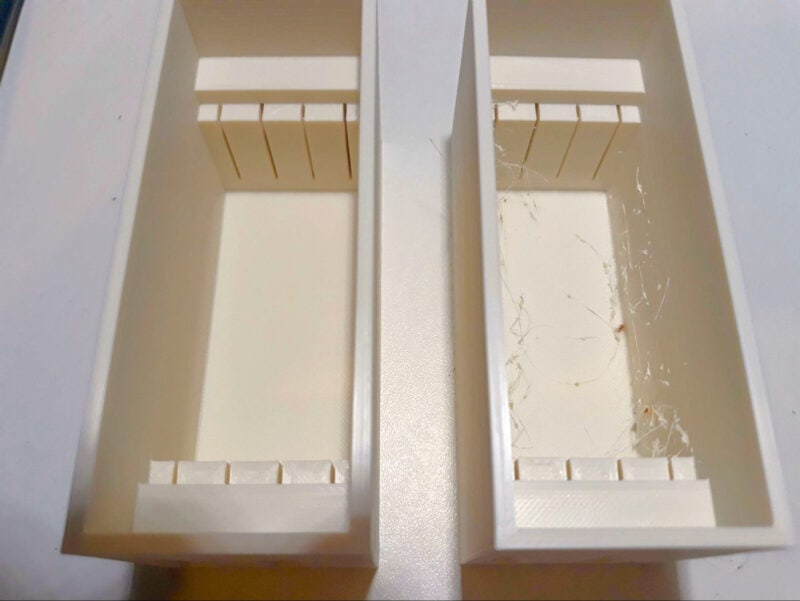
Combing keeps the print head’s moves within the limits of your parts and avoids crossing any open areas. Even if your prints have stringing, the extra filament will end up inside your parts where it won’t be seen.
So theoretically, it does not stop stringing as much as it hides it. It’s still a better bargain than visible issues and comes in handy in prints where appearance and aesthetics matter.
Fewer Retractions
Combing reduces retractions as the nozzle doesn’t have to pull the filament back very much, if at all. Any extra melted material on the nozzle just wipes off inside your prints, saving you some retraction moves.
This saves extra movement of the extruder and subsequent wear and tear. It also reduces the risk of clogging your nozzle. Some materials, like wood and carbon fiber filaments, can cause nozzle clogging issues when retracted too much or too often.
Improved Print Quality and Experience
Combing mode helps keep stringing inside your 3D prints and cuts down on some of the bumps and blobs on the surface of your part. This helps improve both the quality of your 3D prints and the 3D printing experience overall. Your parts require less post-processing after printing, and your parts look better when they are finished.
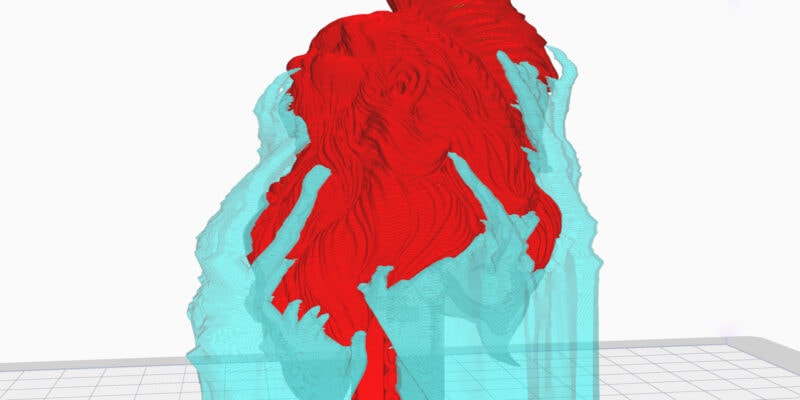
It’s usually not always possible for the print head to follow paths exclusively inside a 3D print. For example, some 3D models consist of geometry that is impossible to keep the hot end within (for example, a helmet with two horns). Some print jobs consist of multiple parts that the print head needs to move in between.
For that reason, Cura combing isn’t a guaranteed fix for all stringing-related print quality issues. Instead, it’s best to use combing mode in combination with the other retraction features and retraction settings for optimal results.
Why Should You Avoid Combing Mode?
Increased Slicing & Print Time
Because the nozzle can no longer go from Point A to Point B in a straight line, the slicer has to figure out how to move the nozzle so that it stays in the area of the part. This takes extra time to calculate.
When 3D printing, the print head also has to follow a longer and slower path, so printing time increases too. This is especially true when printing more complex 3D models.
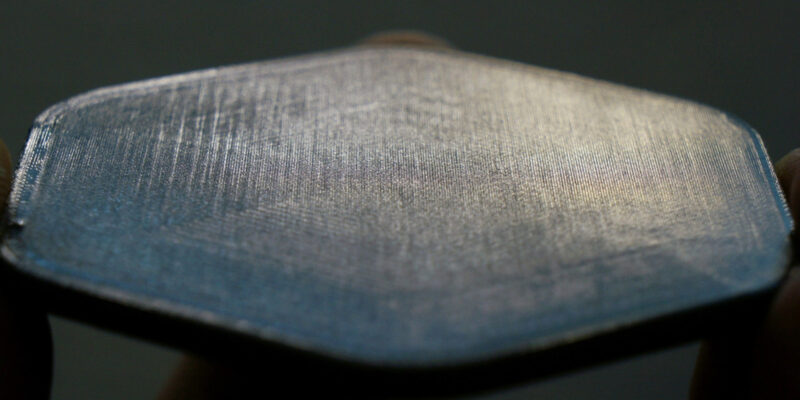
Scarring on Top Layer
Scarring usually happens when the nozzle moves over the surface of the print and drags extra filament across it. When this is caused by over-extrusion or your nozzle not fully retracting filament, combing will further increase scarring on your print’s top layers.
The likelihood of the nozzle scarring the top layer increases the more it stays within the print area. One way of reducing the chance of this would be to not use combing.
Alternatively, you can use Z-hop. It lifts the nozzle up by a few millimeters during the travel move. It’ll reduce scarring in your prints and helps you get a better-looking top surface.
Which Slicers Let You Use Combing?
Cura combing mode is unique to the Cura slicer, at least based on the name. It’s also the only slicer that gives you straightforward combing settings to keep your nozzle inside the print area.
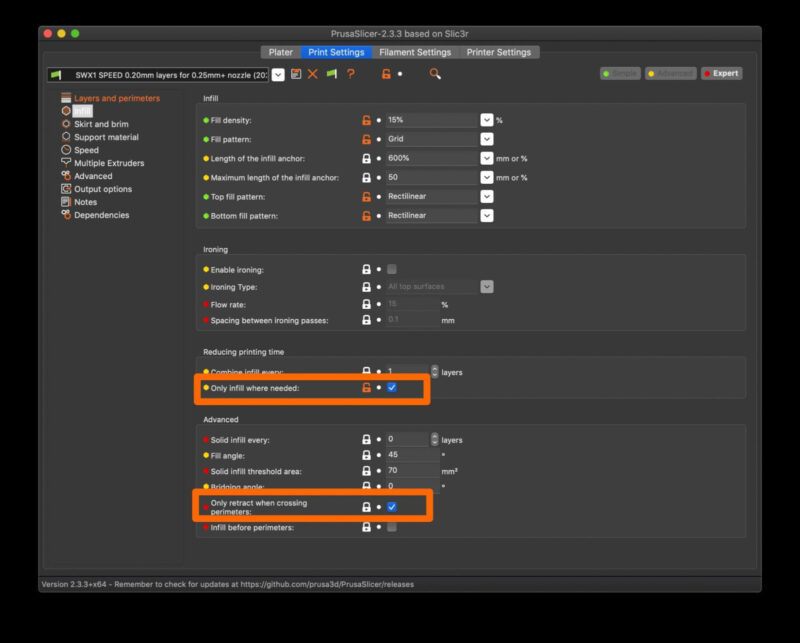
PrusaSlicer, SuperSlicer, and Slic3r all have settings that are similar to Cura combing, but not exactly the same. For example, Slic3r’s “Only Retract When Crossing Perimeters” option improves the travel movements to do as little retraction as possible.
It plans the travel moves so that the nozzle stays in the printed areas. There’s no retraction unless the nozzle wants to move from one printed part to another.
So, if you are making two cubes at the same time, the nozzle will only retract when it needs to move from Cube A to Cube B. Other times, the nozzle stays within the cube walls and does not retract.
The difference between Cura combing mode and this option is that with “Only Retract When Crossing Perimeters” you don’t have many options to enable retraction. Cura gives you more choices in that regard.
Cura Combing Settings
Cura gives you five ways to fine-tune the combing settings for your printed parts. These options give you more control over the feature and let you change the combing to fit your models. Let’s look at each of them in more depth.
Off

The Off mode completely turns off the Cura combing feature. The printer will take the most direct path between printing moves when you select this option.
It reduces the printing time and shortens the slicing time as well. The Off mode is a great choice if you have dialed in your retraction settings to perfection.
All
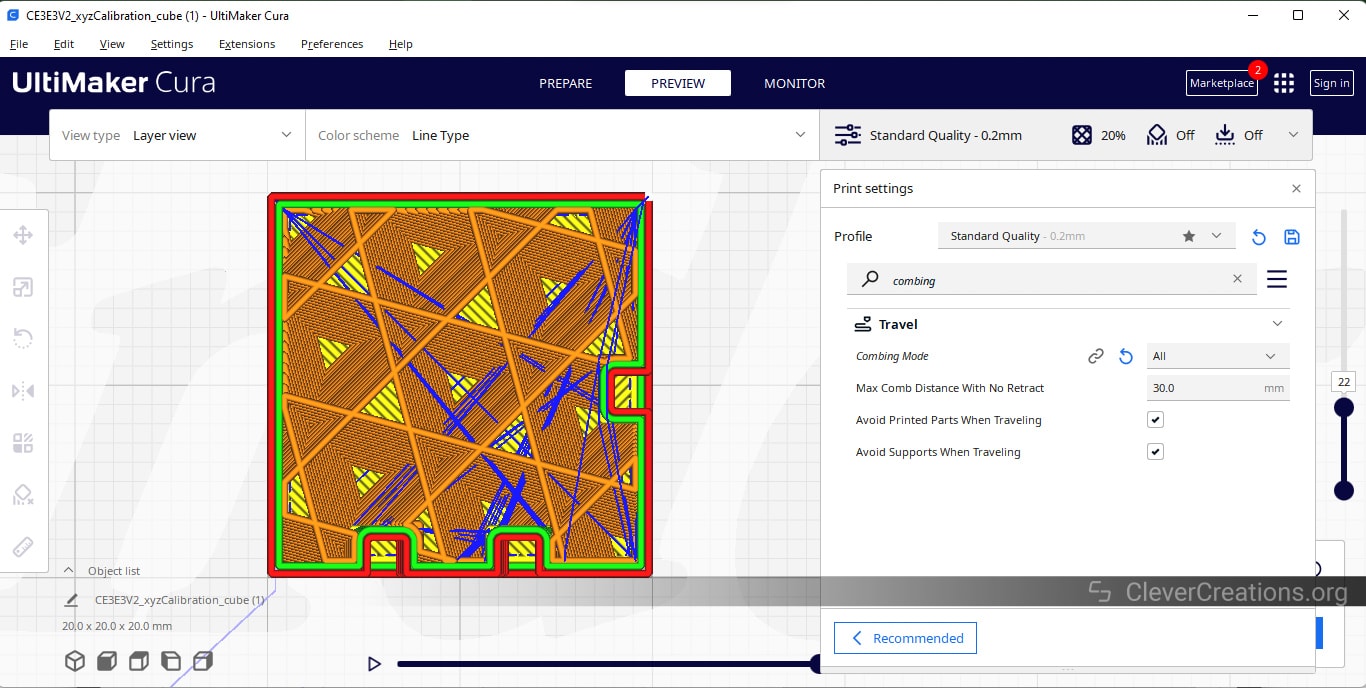
When you choose the All option, Cura will plan every move so that the nozzle stays inside the area where your model will be printed. It’ll keep the nozzle on your perimeters, infill, and anywhere except empty areas.
This choice helps considerably with blobs and other print artifacts, and you should use this option while printing parts with complex geometry.
Not On the Outer Surface
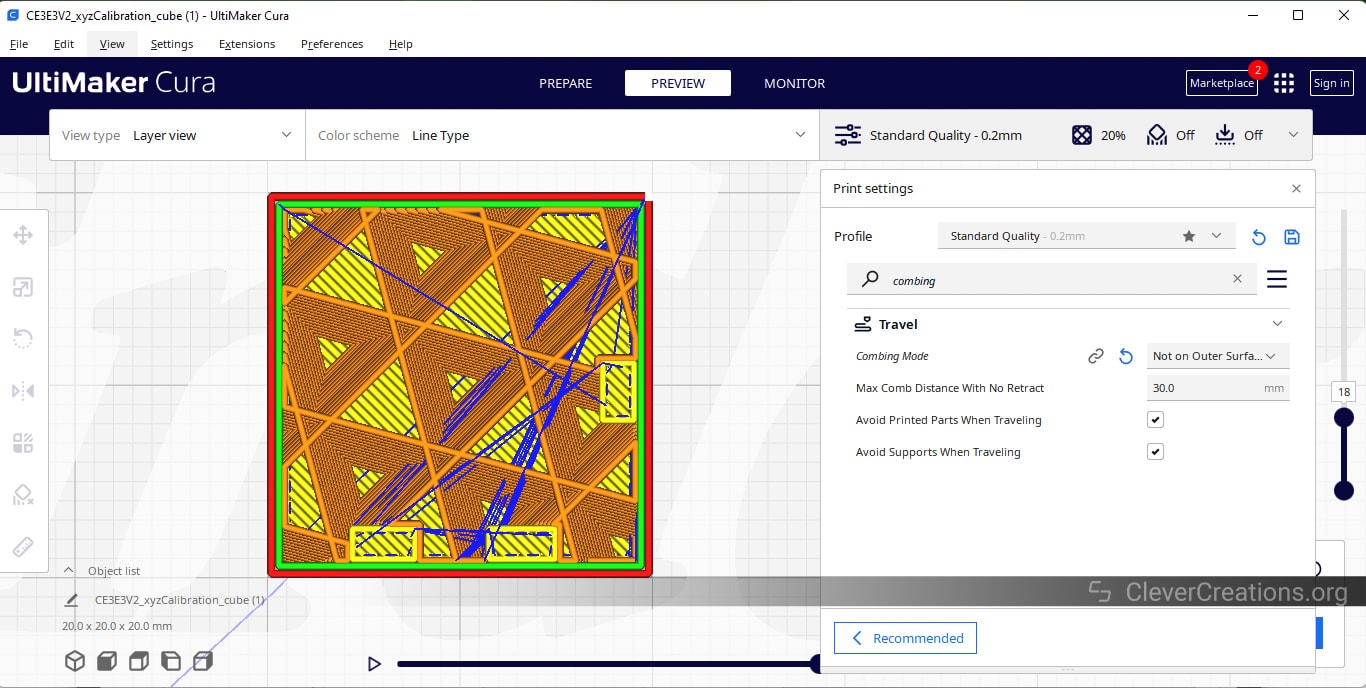
When the Not on Outer Surface mode is enabled, the nozzle will retract material and move in straight lines while printing the top and bottom layers. With some models, it will also ignore combing along the outer wall.
It reduces scarring problems in your prints and shortens the print time. It’s great for models with large top and bottom surfaces that are flat.
Not In Skin

With the Not In Skin setting enabled, the nozzle stays inside the print area, just not on the edge. So, if you’re printing with 3-4 walls, the nozzle will travel along the inner walls but not the perimeters on the outer side.
This helps reduce blobs on the walls or skins of your model and improves the quality of your printed parts.
Within Infill
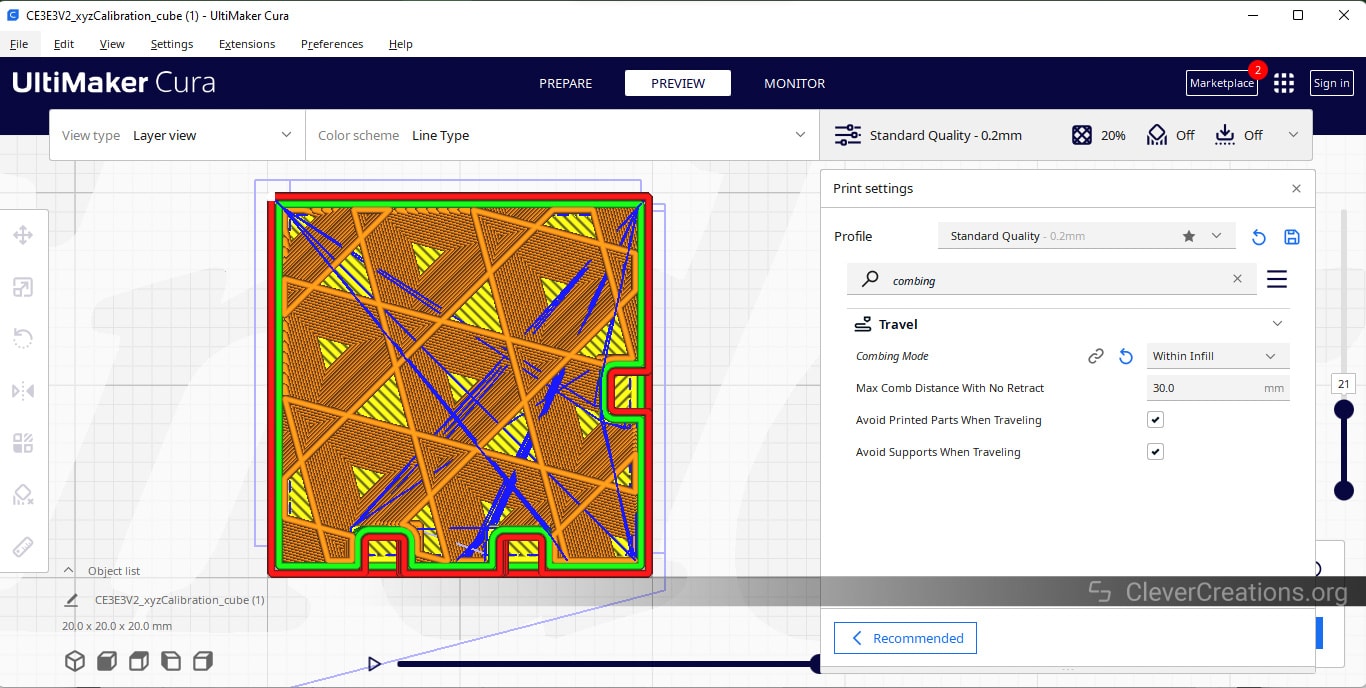
This mode restricts travel moves to “Within Infill” only. The nozzle moves inside the infill of your printed model, not along the edges or between the top and bottom layers.
It makes it less likely that filament will leak out around the edges or cause bumps on the surface. Again, this is a great way to improve the print quality of complex models.
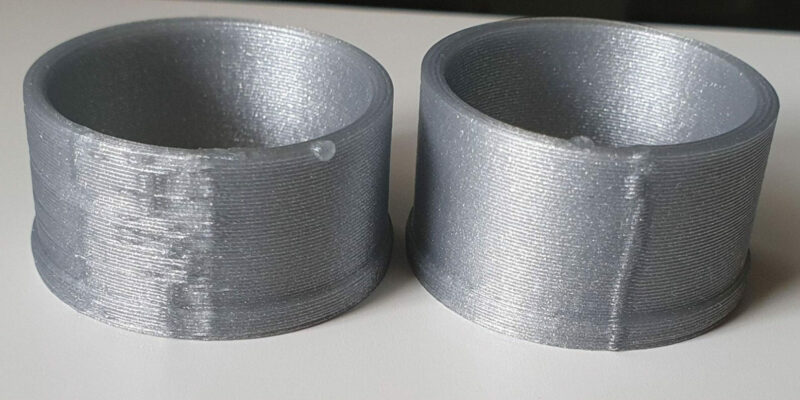
Should Combing Be On With PETG?
Enabling combing with PETG filament is a great idea to reduce stringing. PETG is well-known for its stringing issues and combing drastically reduces it.
Enable combing by turning on the ALL choice and then printing your 3D model in PETG again. You’ll notice a big drop in strings and blobs in your printed parts and a big increase in the quality of the 3D print.
Dialing in the retraction speed and retraction distance will help too, as does decreasing the printing temperature. Our dedicated article on PETG stringing will give you more information.
What Is the Maximum Combing Distance Without Retract?
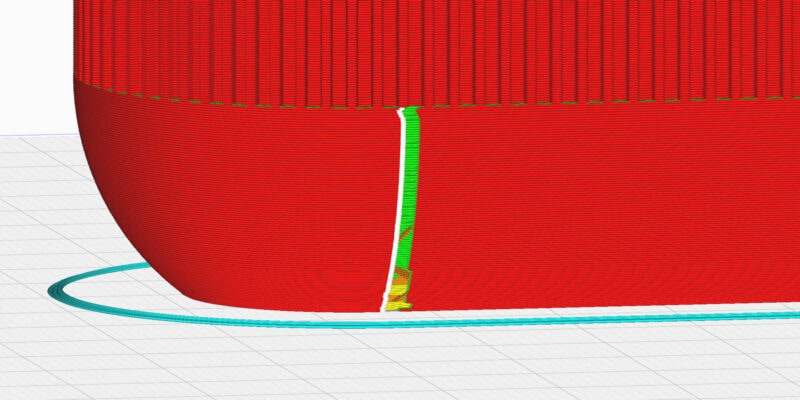
Cura has an option called Maximum Combing Distance Without Retract that lets you control the retraction setting in “combing mode.”
It indicates the minimum distance the printer’s nozzle can travel inside a printed area before having to retract the filament.
For example, if you set the number to 10 mm, the printer won’t retract any filament for a 10 mm travel move. But as soon as it needs to make a move further than 10 mm, the extruder will retract the filament to avoid stringing.
Cura’s baseline setting is 30 mm, which works well in most situations. If you want to tweak it, try out different numbers incremented by 5 mm at a time to see what works best for your 3D printing projects.
Conclusion
Cura combing mode is a valuable feature that can help improve the quality of your 3D prints by reducing stringing and oozing. When using it, it is important to think about the longer print times and scarring issues that can come with using combing in your printed parts.
Cura has many settings that let you control combing very precisely. Trying out the various settings will show you what works best for your specific needs.
If you need any assistance, this guide is here to help you out. If you still have questions about fine-tuning your combing, please leave us a comment. We’ll do our best to help you out.