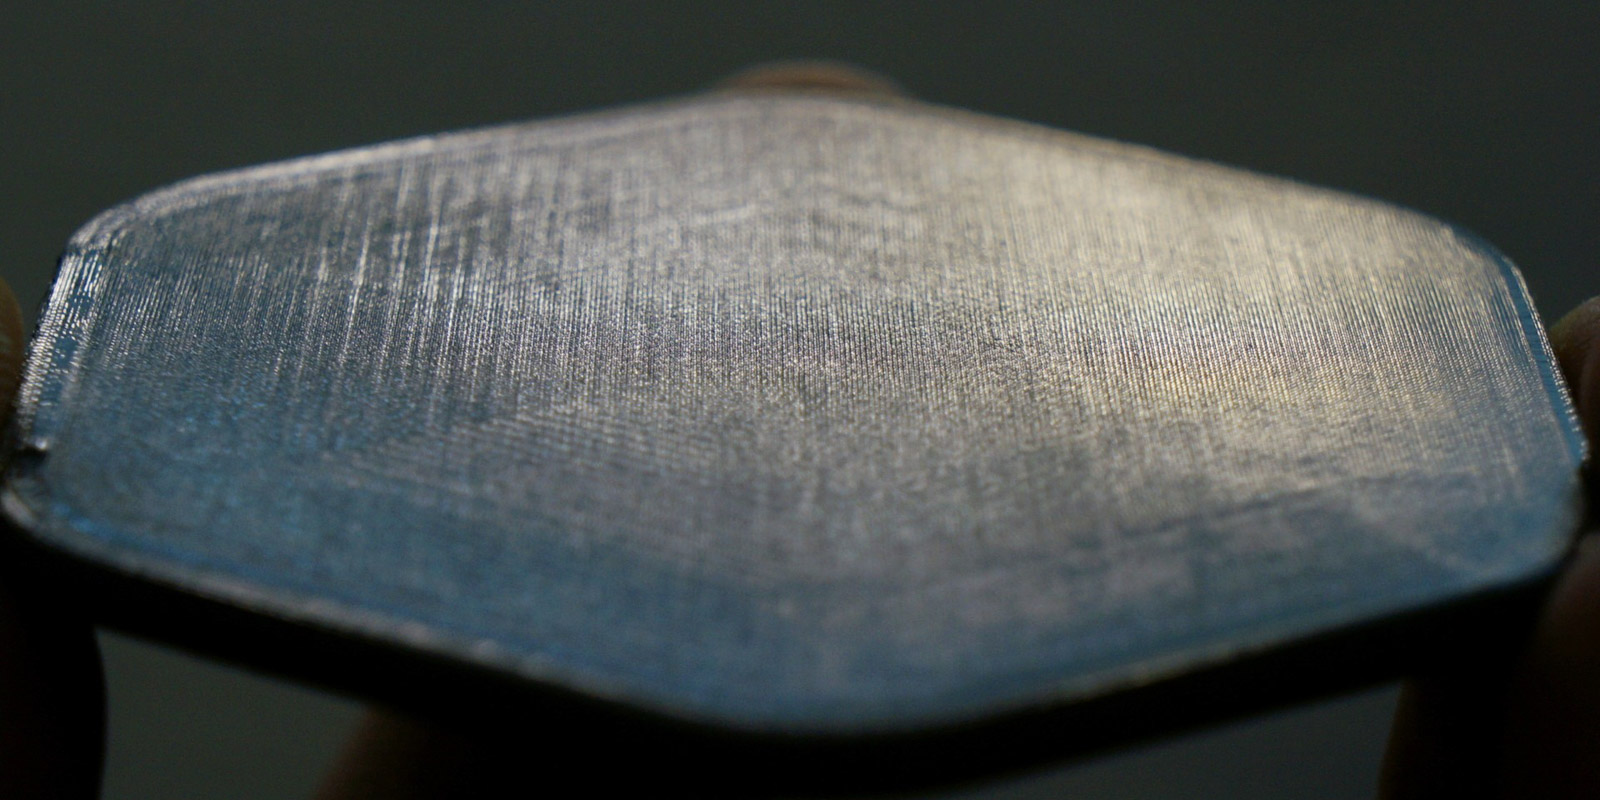

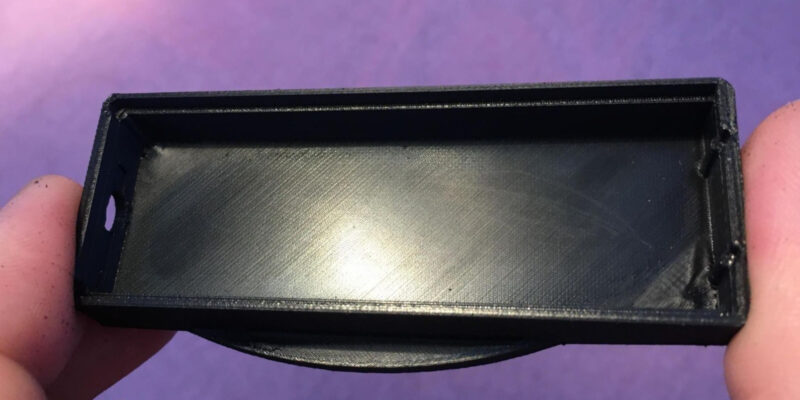
The top and bottom layers of your 3D prints often have a rough finish because of extrusion lines. These lines can give your prints an unfinished appearance and affect their overall visual appeal. Sometimes, you just need parts that look smooth and clean. Fortunately, there’s a solution—ironing.
Cura’s ironing feature smoothens the flat surface layers of your 3D prints to give them more of a finished look. It’s ideal for things like text signs, architectural models, and other decorative items.
In this article, we’ll teach you everything you need to know to use this feature. How to enable ironing, how to set the right line spacing, and all other relevant print settings.
Keep reading to get those visually appealing models we are all looking for!
What Does Ironing in Cura Do?
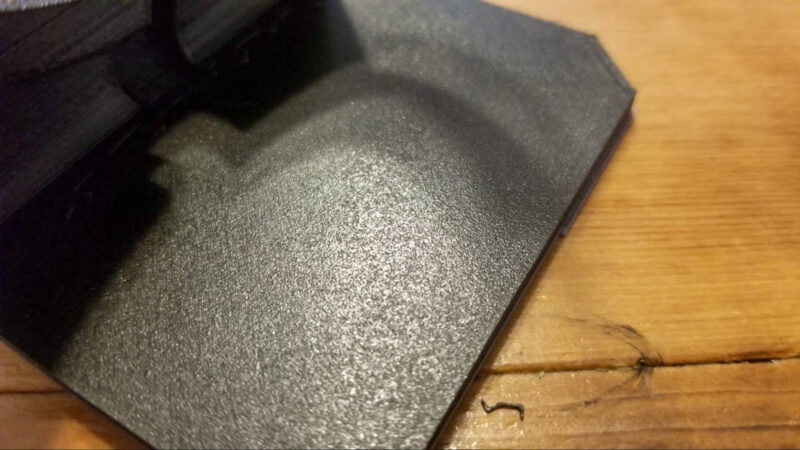
Ironing in Cura is a feature that smooths the top surfaces of a 3D print. It does this by moving the printer’s nozzle back and forth over the surface skin layers at the top of the prints in a very controlled manner, melting it ever so slightly.
This controlled action helps smooth out any bumps that may have formed during the 3D printing process. Essentially, the hot nozzle is coasting and melting the surface layer. The result is a smoother and more polished finish for your 3D-printed parts.
Cura lets you control the speed, motion, and even the flow of material during the ironing process. You can instruct the printer to extrude a slight amount of material to fill in any gaps on the top layer. We’ll find out more about these iron settings as we read on.
You can see ironing your 3D prints as the same as ironing your clothing; it makes the surface seem neater and more uniform. Because finished surfaces help a lot with selling 3D prints, this is a feature worth considering if you want to run a 3D printing business.
Should You Enable Cura Ironing for Your 3D Prints?
When choosing whether or not to use Cura’s ironing tool for your 3D prints, there are a few things you should think about.
First of all, Cura ironing is one of the best options for getting the top layer of your prints to look smoother and more finished. It is difficult to find a different print setting that gives your 3D prints the same professional look.
However, it’s crucial to remember that this technique lengthens printing time and isn’t appropriate or necessary for every print.
Additionally, ironing in Cura requires some level of expertise in terms of adjusting the settings and ensuring that the extruder moves over the print in a controlled manner. With the wrong Cura settings, you can end up with a worse print than you started with. It’s important to understand how the hot nozzle affects the top surface.
The choice of whether or not to activate Cura ironing depends on your 3D printing projects and preferences.
Advantages of Cura Ironing
Improves Surface Quality
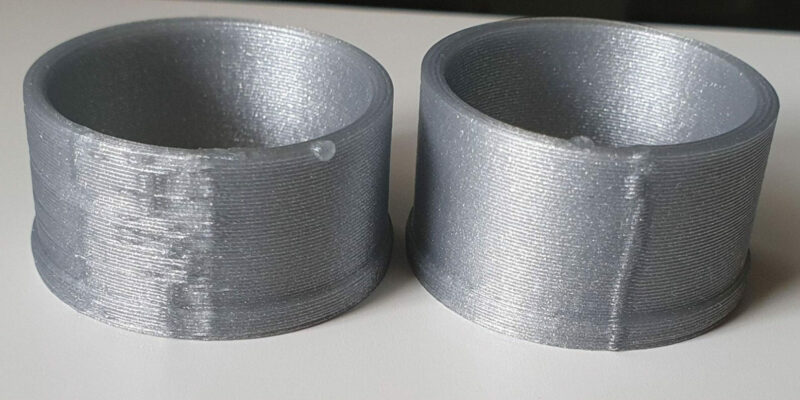
With the ironing feature enabled, the 3D printer fills any small gaps or holes on the top layers, hides the layer lines, and smooths out any flaws or zits. This improves the surface quality of your prints and makes your models look better.
Helps With Print Adhesion
If you need to glue multiple 3D-printed parts together, a smooth top surface helps them stick better to each other. Without defects or unevenness in the prints, the contact surface between the two components increases.
Saves Post-Processing Time
While ironing can add extra 3D printing time, it can also save time in post-processing by reducing the need for sanding or other finishing techniques. With an improved surface quality straight out of the 3D printer, you often won’t need any post-processing. Forget about spending your time sanding and cleaning the mess afterward.
Disadvantages
May Cause Over-Extrusion or Under-Extrusion
If you haven’t tuned the ironing settings in Cura well enough, the process can lead to over-extrusion or under-extrusion in your prints.
For example, the ironing flow setting extrudes a small amount of material as the nozzle coasts over the top layer.
If this flow of material is too much, it leads to excess material on the topmost layer causing over-extrusion in your parts. In contrast, if the flow value is too small, the nozzle deposits insufficient material, causing any small holes and gaps to remain.
Increases Print Time
The ironing feature adds an extra, slow step to the 3D printing process. The nozzle must move slowly as it irons the top layer. Otherwise, it won’t melt the lines enough and has trouble smoothening them out.
As you can imagine, this slow speed has an impact on the overall print time of your pieces. Depending on how large and flat your top layer is, this difference can be considerable. If you work on time-sensitive projects or want to maximize the output of your 3D printer(s), you might not want to smooth out the top of the 3D prints altogether.
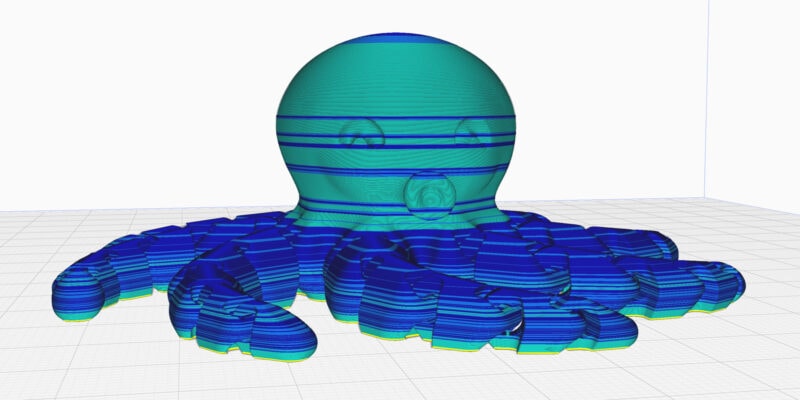
Not Suitable for All Types of Prints
Ironing doesn’t do much for parts with intricate geometries and curved surfaces. For instance, a sphere-like model won’t benefit at all from the ironing function. The highest layer simply doesn’t have enough surface area.
The same goes for Voronoi 3D prints. These models don’t have flat surfaces with areas big enough to see ironing results.
Leaving the ironing setting enabled for these models doesn’t lead to any negative effects, but there’s no obvious advantage either.
How To Enable Ironing in Cura
Enabling the ironing function in Cura is a straightforward process. Follow the steps below and you’re all set!
1. Import the Model in Cura
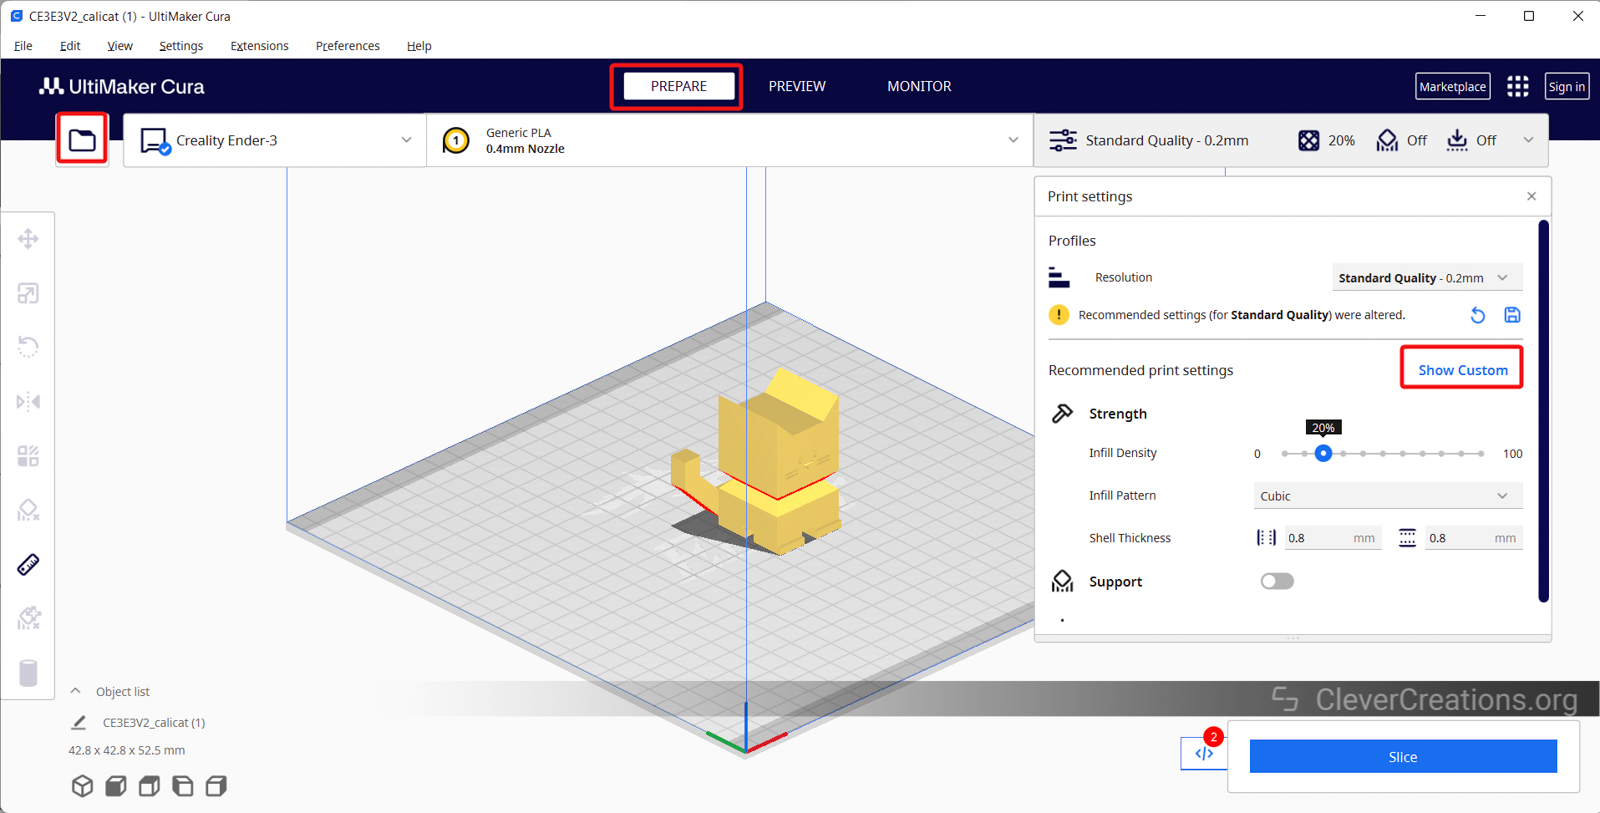
Open the Cura slicer on your desktop system and import your desired model into the 3D viewport. You can do this by going to File on the Menu Bar or clicking on the Folder icon in Cura’s window.
2. Open Custom Settings
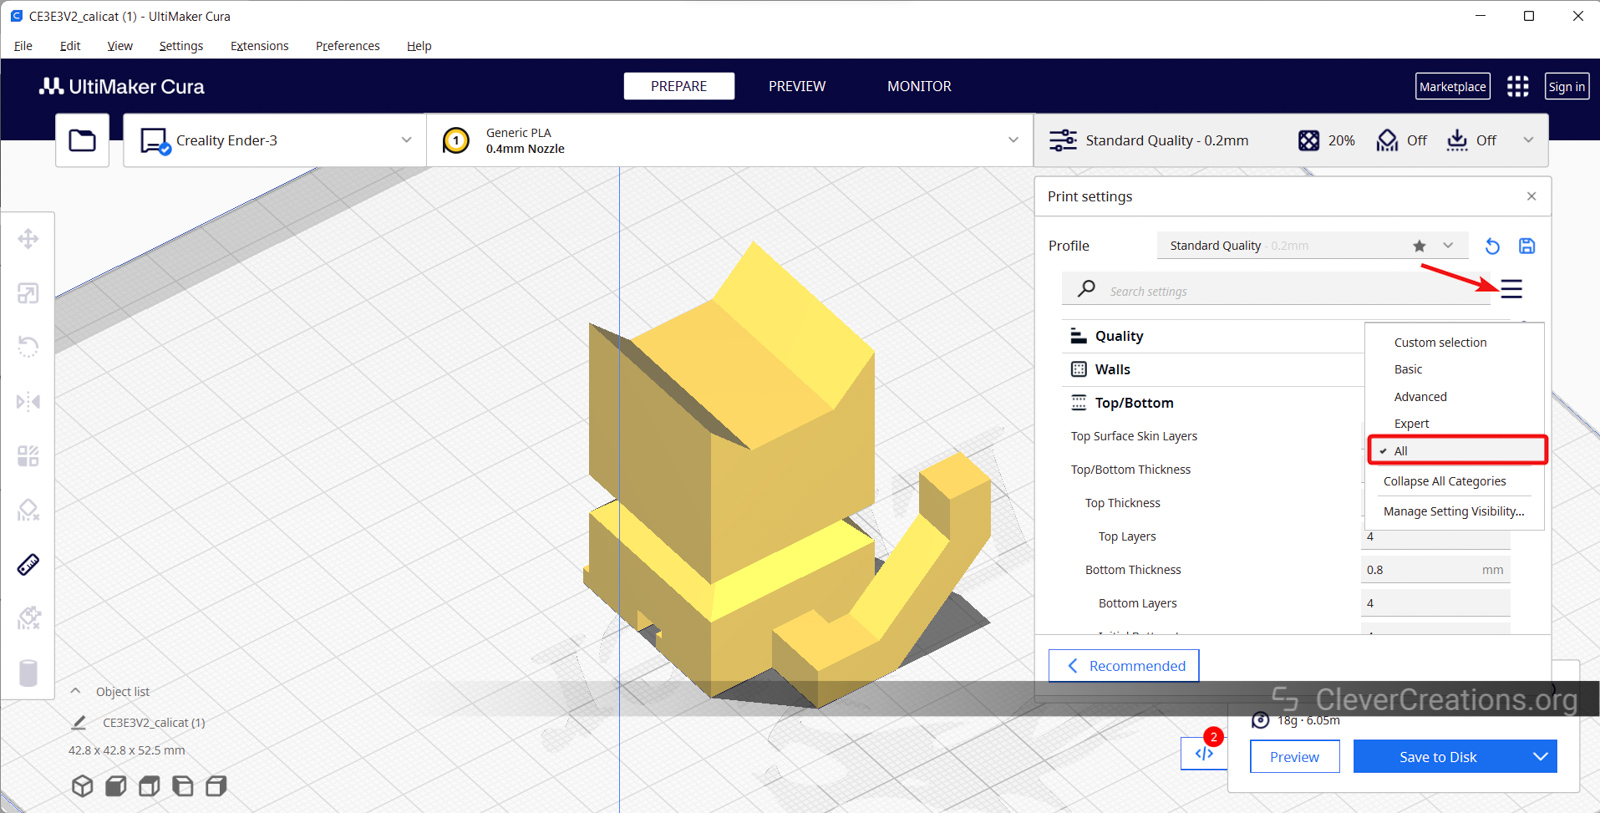
Open the custom settings from Cura’s setting window. You’ll see three straight bars next to the search bar. If you click on it, the menu for setting the display will open. Select the All option.
3. Check Ironing Option
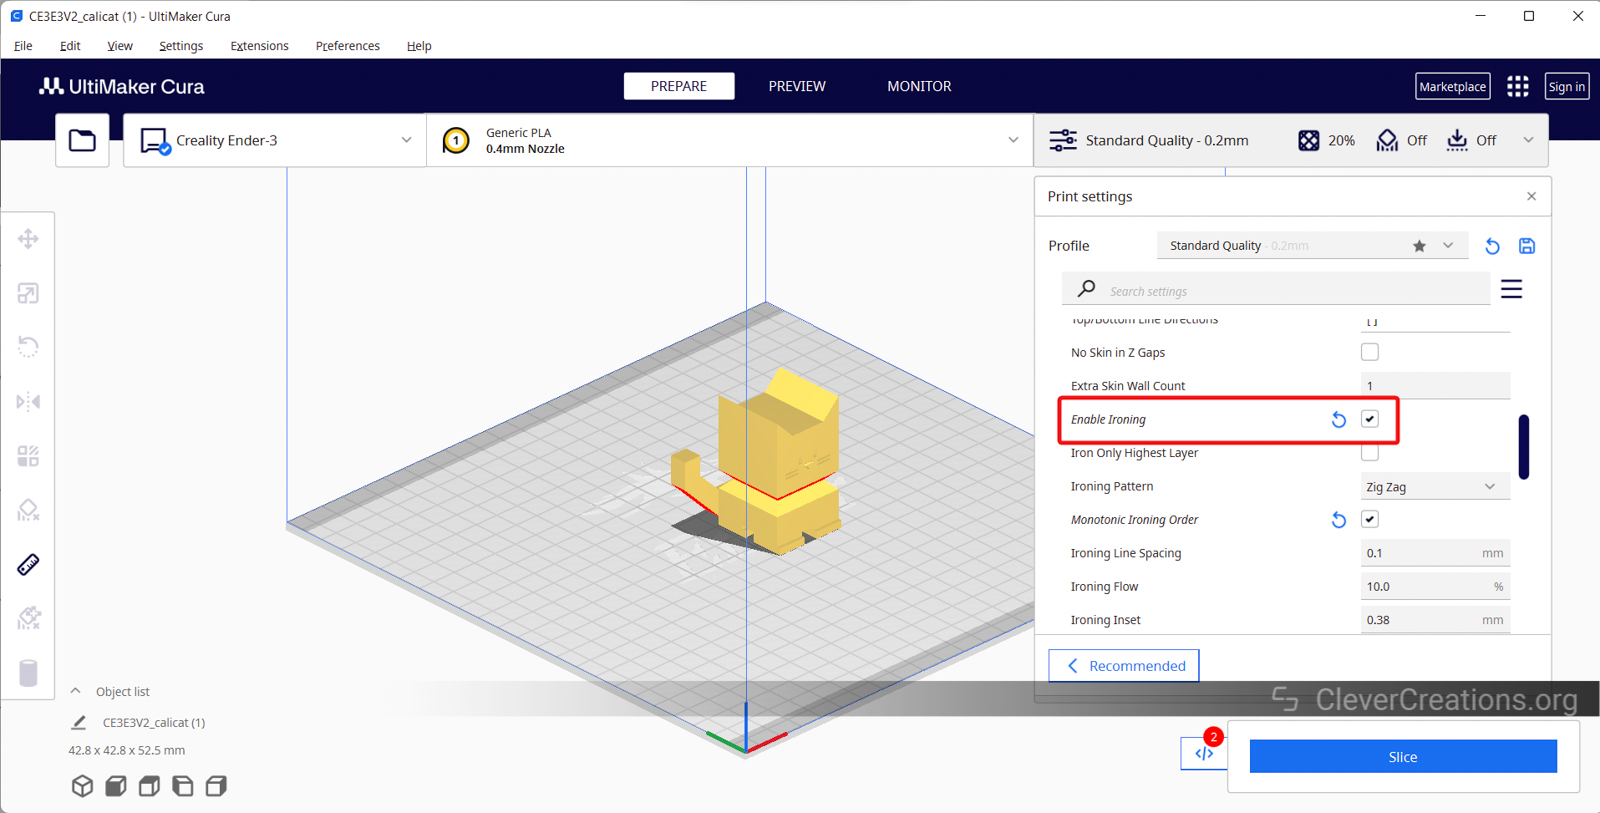
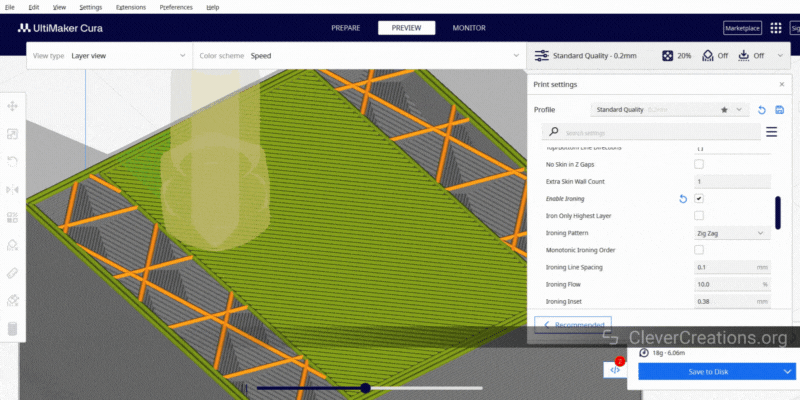
In the custom settings window, open the Top/Bottom settings menu. In this section, scroll down till you find the Enable Ironing option. Click on the box next to it and enable it. This gives you additional ironing settings, which we’ll talk about further.
That’s it! You’re now ready to use ironing in Cura.
What Are the Best Cura Ironing Settings for 3D Printing?
To achieve the best results with Cura ironing, it is important to adjust the settings to suit your needs. Here are some of the key settings you should consider.
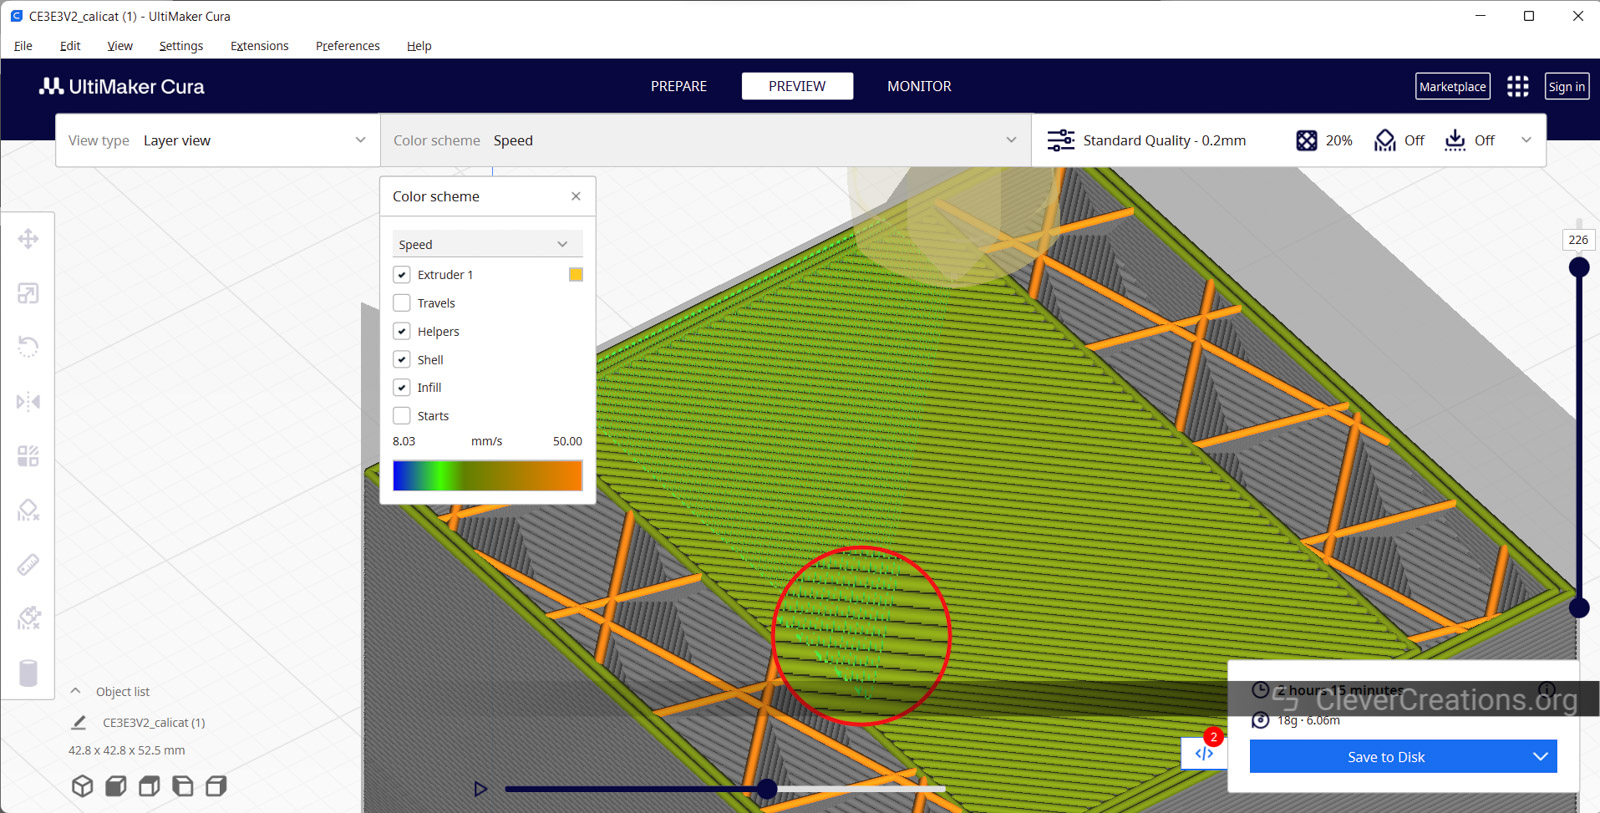
Iron Only Highest Layer
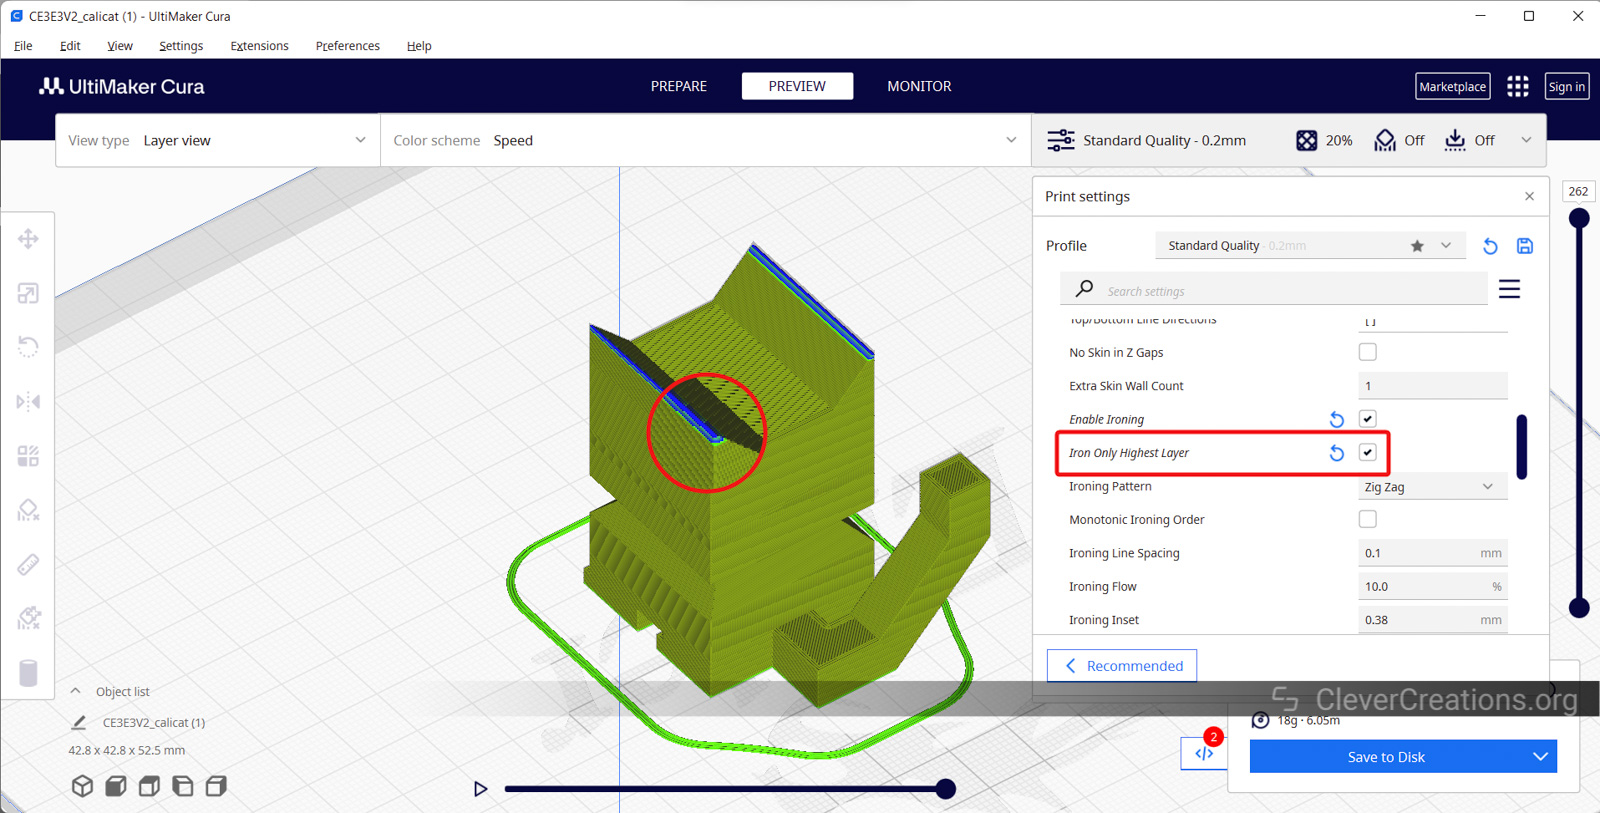
The “Iron Only Highest Layer” setting lets you choose if you want to iron only the topmost flat layer in your 3D print, or all flat layers in the model.
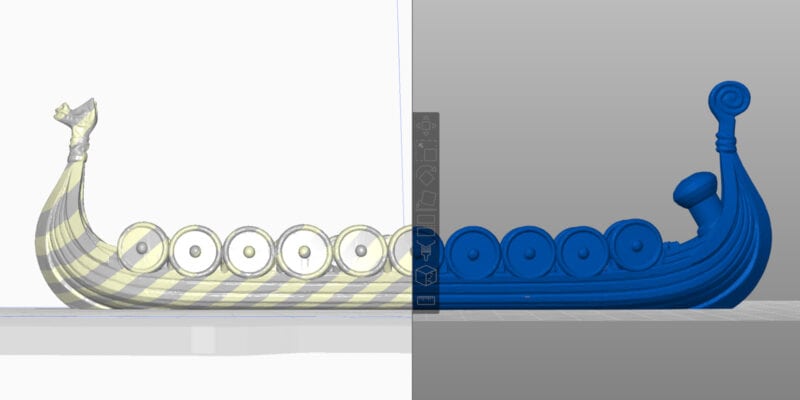
For example, in the CaliCat model above, you’ll notice the tail section and the top of the cat’s head are all flat top surfaces. If you uncheck this option, the printer also irons these areas.
If you check this box, however, Cura only selects the highest layer—the surface of the cat’s ears—for ironing.
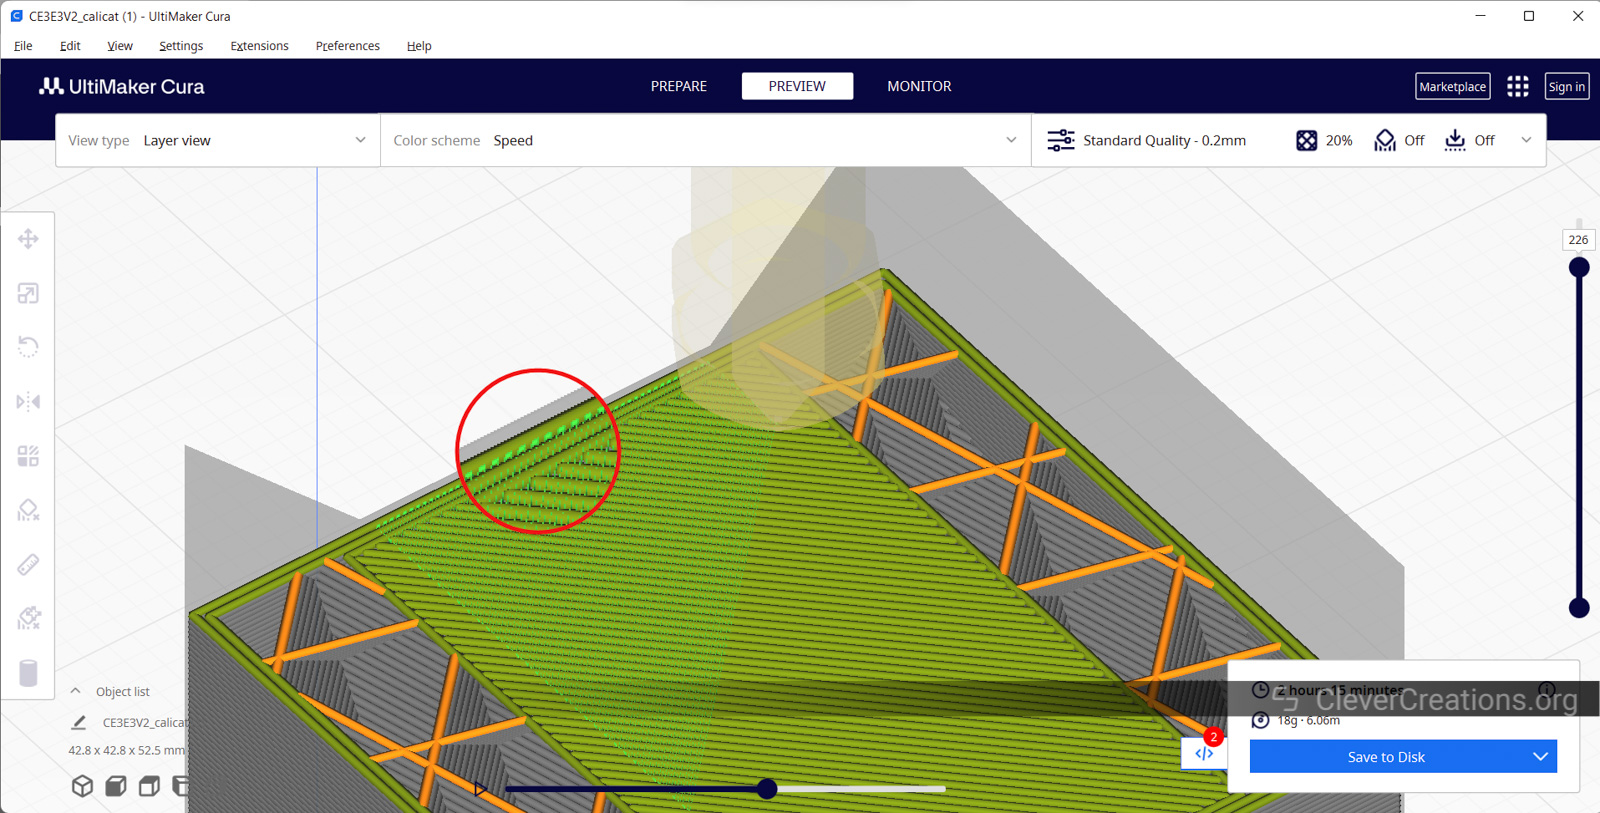
Ironing Pattern
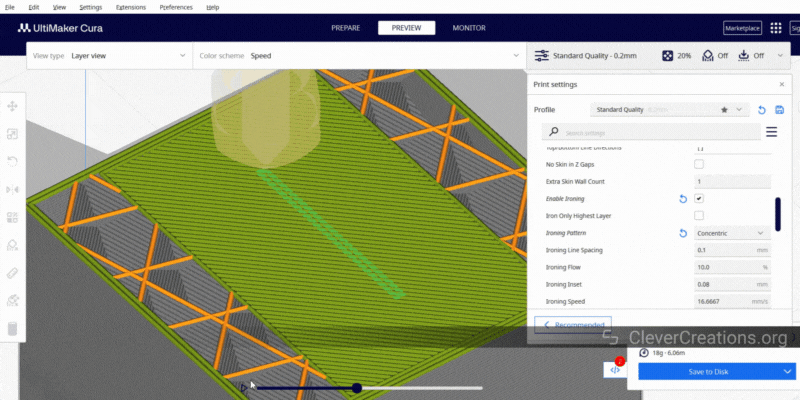
Cura’s “Ironing Pattern” setting dictates the motion of the nozzle when it’s ironing the top surfaces. There are two options to choose from – Concentric and Zig Zag.
When set to the concentric pattern, the nozzle moves as per the outline shape of the top layer. If the top layer is rectangular, the nozzle moves in a rectangular motion from the center to the outer perimeter. If you’re ironing a circular shape, it moves in small circles.
As for the zig-zag, it’s pretty self-explanatory. The nozzle will move in a zig-zag patterns from one side of the layer to another.
In the animation above, you can notice how the nozzle moves differently over the top layers. The first one shows concentric motion, and the next one is zig-zag.
There’s a slight difference in surface finish between these two patterns. You can choose whichever pattern you think looks better.
Monotonic Ironing Order
This option is visible only when you select the zig-zag pattern. The monotonic order setting prints the ironing lines such that the adjacent lines always overlap.
The overlap on the top surfaces causes the light to reflect in a more even manner, giving it a cleaner appearance.
However, this setting also increases the total length of the nozzle’s ironing movements. So you can expect your 3D printer to spend more time smoothing the printed object with this setting enabled.
It’s best to only use it if you have a larger flat surface on the top, and print time is not much of a concern.
Ironing Line Spacing
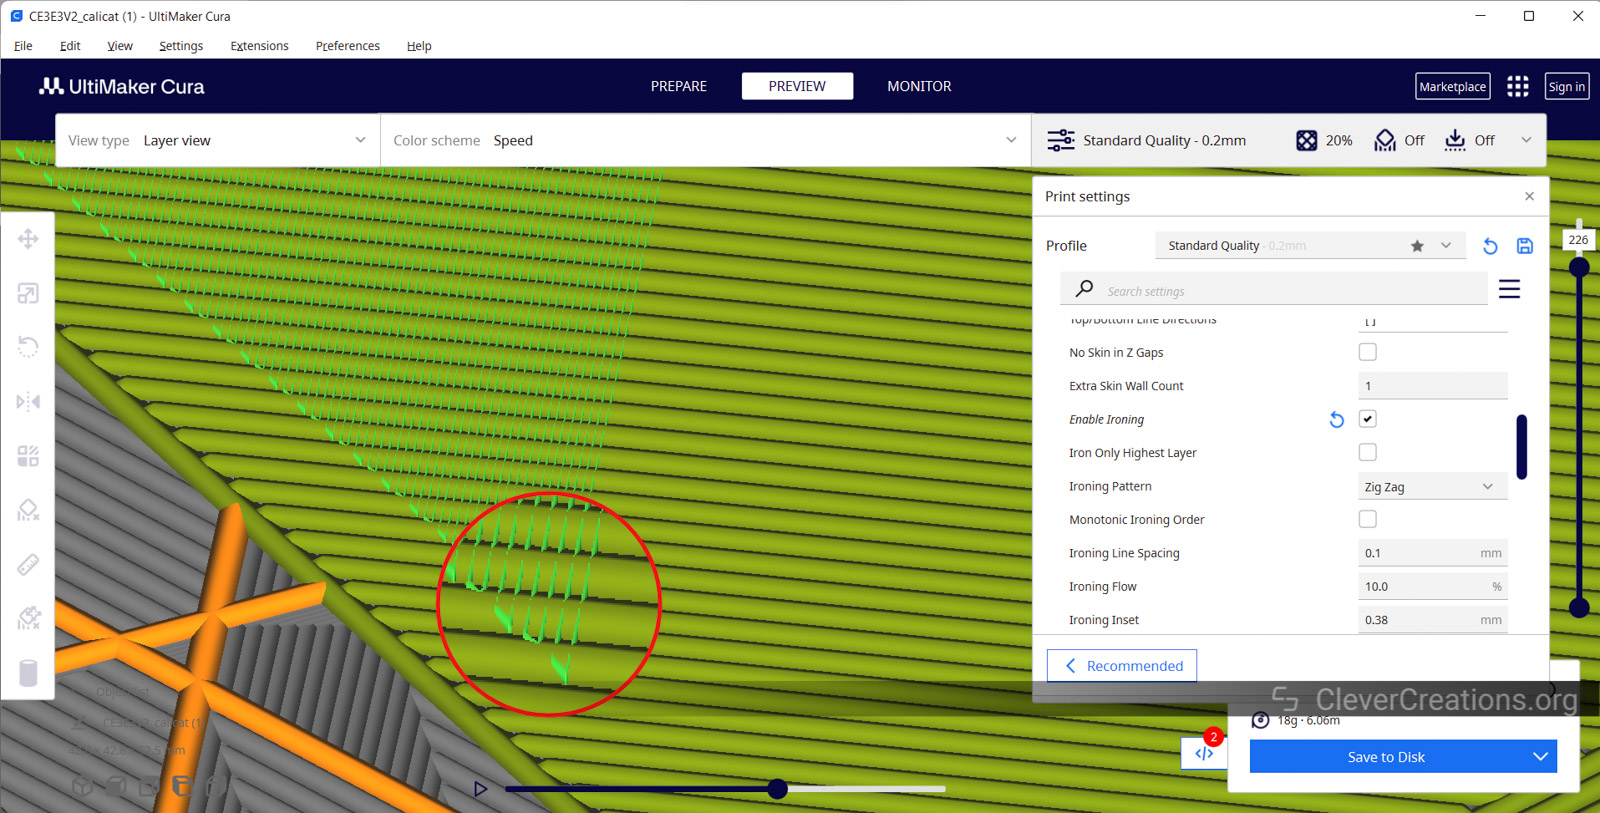
With the “Ironing Line Spacing” setting, you can adjust the line spacing between ironing passes. You can observe in the image above there’s a small gap between the two ironing movements. This is the gap that you can control using this parameter.
The default value is set to 0.1 mm and is good enough for most surfaces. Unless you’re noticing extreme overlapping of lines or over-extrusion on the top surface, there’s no need to change this setting.
Ironing Flow
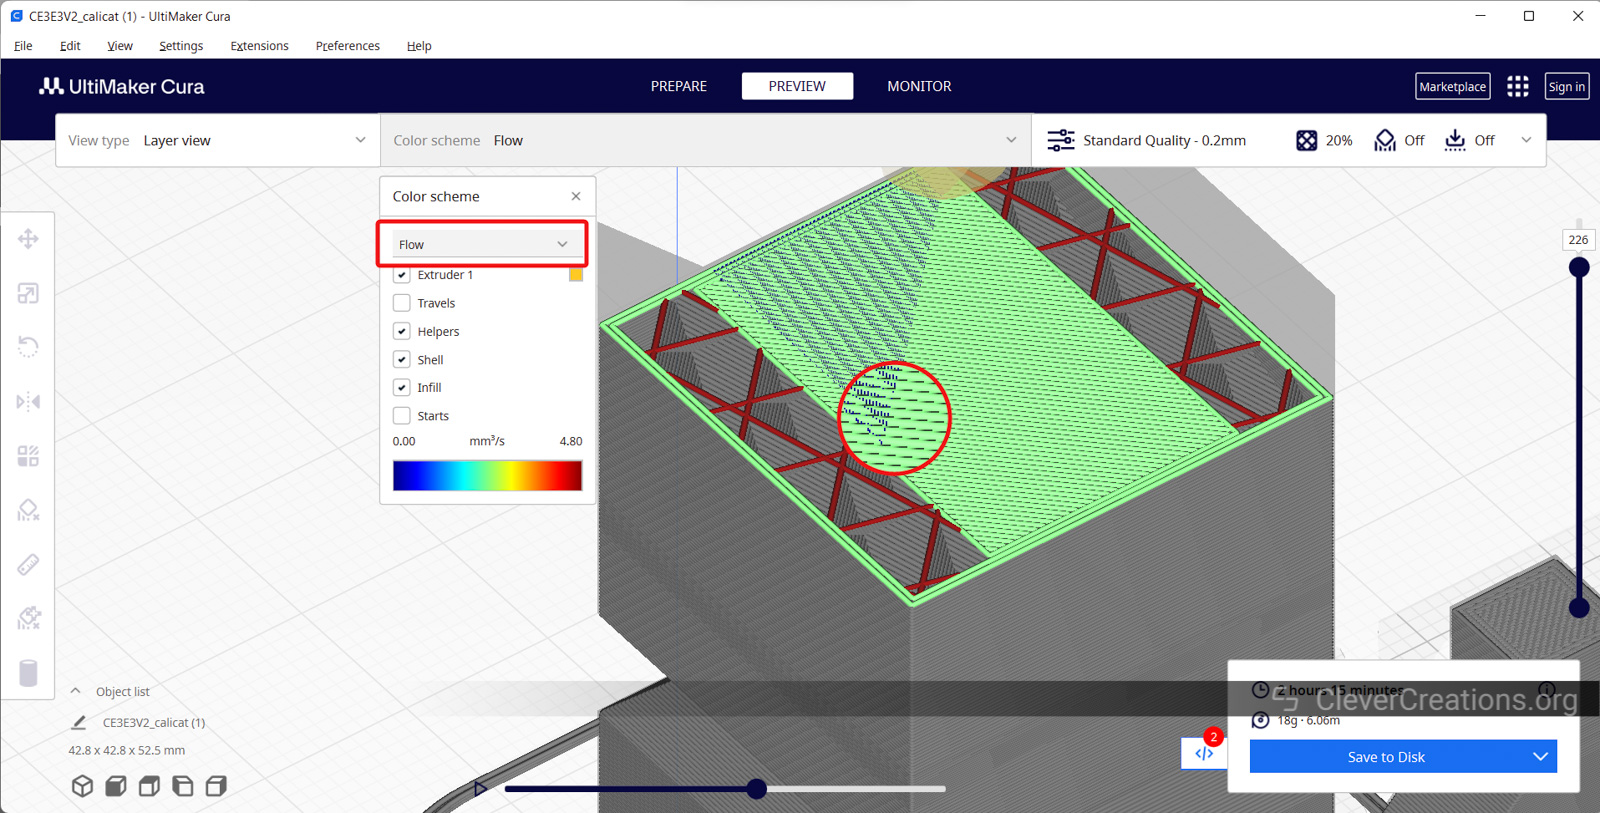
The “Ironing Flow” setting lets you adjust the flow of extruded material during the ironing process. By default, the nozzle extrudes about 10% of regular material flow while it irons flat top surfaces.
If you’re noticing over-extrusion or lumps on your top layers, it’s a good idea to reduce this value. Whereas, if the top layers have gaps or visible crevices, slightly increase this value. Adjusting this setting by 5-10% at a time gives you the best results.
Ironing Inset
The “Ironing Inset” setting in Cura refers to a specific distance between the outer perimeter and the inside of the 3D model. It tells the nozzle exactly how far to stay away from the edges of your 3D print.
The reasoning behind it is that if you iron to the edge of your model, it might cause the edge to stick out a bit. Therefore, you should always keep an inset. The default value for this setting works great, but you can adjust it accordingly if you work with particularly large or small nozzles.
Ironing Speed
Your 3D printer’s nozzle must move slowly while you use Cura’s ironing function. This allows the nozzle’s heat to melt the top layer surfaces properly and smoothen it out. If the nozzle moves too fast, the contact surface won’t melt well. Print too slowly, and you risk overheating and excessive melting.
A good guideline is to keep this value around 30-40% of your normal 3D printing speeds. For example, if your print speed is 50 mm/s, keep the ironing speed value to about 15-20 mm/s. This speed establishes a good balance between the ironing surface quality and printing time.
Troubleshooting and Tips for Ironing in Cura
Here are some troubleshooting tips and other information to consider when using Cura ironing:
- If you’re experiencing over-extrusion or under-extrusion on the top layers, try adjusting the ironing flow settings. Increase or decrease these parameters in small steps and try to get an even flow.
- If the smoothness of the surface is not to your liking, increase the print temperature or the ironing speed a bit. This usually helps even out surfaces and improves overall results.
- Cura’s ironing function is a bad fit for prints with lots of intricate details. For example, if you’re 3D printing miniatures, it’s not ideal to use ironing. It may cause the finer details to become blurred or lost in your models.
- Exercise caution when choosing where to iron in your prints. If you want to save on print times, iron only on the highest, most visible layer.
- Always perform small test prints to see the effectiveness of ironing in your prints. The XYZ calibration cube is a great model to test and fine-tune the ironing settings for your specific 3D printer, filament, and print setting combination.
Final Words
Cura’s ironing feature is an amazing option that can help you improve the surface finish of your 3D prints. By fine-tuning the ironing settings, you can achieve a polished finish that is not only aesthetically pleasing but also increases the value of your printed models.
However, it’s important for you to remember that ironing is not suitable for all types of prints. You should also calibrate the ironing parameters using test prints. This gives the best surface finish and gets you predictable results.
Use this article as a guide any time you want to smoothen your top print layers with Cura’s ironing feature. Let us know in the comments if you have any questions.
Until then, keep 3D printing!

Hi,
I’ve just started doing my own 3D work. I have a Creality 5 Plus and it is giving me fits.Anything above a 3 inch diameter does not work no matter where I place it on the print bed. Also I tried to make some pins with initials and each letter came out as a separate series of three lines.