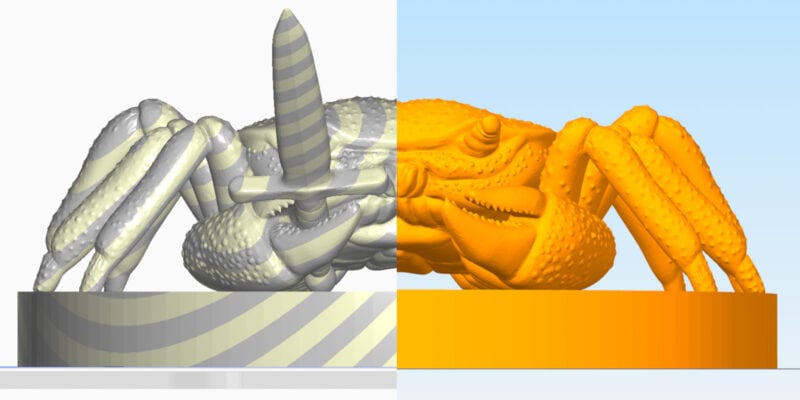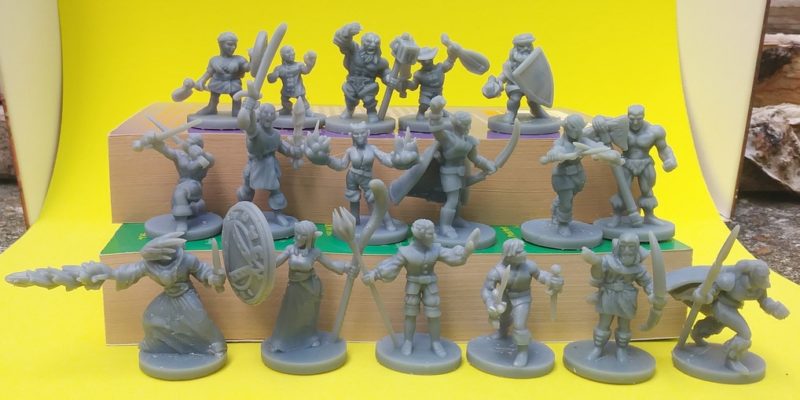

Ultimaker’s Cura and the PrusaSlicer are two of the best slicing software praised by the community. Both are open-source, free to use, and come with a unique set of features that contribute to their popularity.
Ever since their release, the debate of Cura vs. PrusaSlicer has been an ongoing topic. The features, the user interface, and tons of slicing settings have the 3D printing users divided between which is the best 3D printing slicer amongst the two.
In this article, we aim to put a full stop to this subject of discussion that has been slicing the 3D printing community. This piece will delve into the depths of both slicers, examining them in great detail with the goal of helping you make an informed choice for your 3D printing needs.
PrusaSlicer or Cura? It’s time to slice and decide!
Why Does the PrusaSlicer vs Cura Debate Matter?

PrusaSlicer and Cura are both popular slicers that are special in their own way. The argument is important because of the similarities and key differences between the two 3D printing slicers.
Both Cura and PrusaSlicer are free, open-source, have a lot of advanced features, and work with more printers without additional setup. However, the user and overall 3D printing experience offered by each is rather different.
PrusaSlicer is a finely tuned version of the original Slic3r software but designed specifically for optimal use with Prusa printers. While Prusa Research has worked hard to make this slicing software perform optimally with their Prusa machines, you can still use it with other printers from different companies.

The Ultimaker Cura is similar in this way. For Ultimaker printers specifically, Cura offers improved integration functions and specialized features. But again, there is plenty of support for third-party printers in Cura.
The most noticeable difference between Cura and PrusaSlicer is in the user interfaces, slicing settings, and printing experiences they offer.
As a 3D printer user, it’s up to you to select the ideal slicer to meet your requirements. You shouldn’t miss out on the best that 3D printing has to offer simply because the slicer you are used to doesn’t have a particular function.
The next sections will highlight the unique features you might be missing out on. After reading the entire Cura vs Prusaslicer comparison, you will have a clear picture of which slicer is best for your particular needs.
Comparing PrusaSlicer vs Cura
Unique Features
Each slicer comes with its distinct set of features that help it stand apart from the crowd. Here, we’ll look at some of the most significant differences between the most recent versions: PrusaSlicer v2.6.0 and Cura v5.4.0.
PrusaSlicer
Resin Printer Support

Both PrusaSlicer and Cura are mainly made for Fused Deposition Modeling (FDM) 3D printers. But, with PrusaSlicer, you get support for resin printers as well.
This mostly applies to Prusa’s own SL1 3D printers. There’s a profile for the Anycubic Photon Mono X as well, but that’s about it in terms of support of third-party resin printers.
If you’re into the Prusa ecosystem and only use their machines, having an all-in-one slicer can be a big advantage. You’ll have access to all the machine’s features, settings, and presets, and you only have to get used to a single slicer software.
Shape Gallery

PrusaSlicer has a collection of about 14 popular shapes that you can place straight into the slicing environment. Examples of these are spheres, cubes, signs, and screws, but also recycling labels. If that’s not enough, you can add your own shapes as well.
This makes it easy to quickly 3D print common items without the need for any 3D modeling software. What’s even better is that you can use these shapes to modify existing designs, giving you more flexibility when it comes to your 3D printing projects.
Paint-On Supports and Support Blockers

The paint-on supports on the PrusaSlicer are a neat feature. It allows you to modify the placement of each pillar individually. All you have to do is use a brush to paint on the supports, and the PrusaSlicer will make supports only in those areas.
You can use the same tool in PrusaSlicer to block the supports in any unnecessary areas of the model as well. This saves your 3D printer from printing unneeded support structures and cuts down on printing time and material wastage.
Cura also comes with paint-on supports and support blocker functions. However, we find them to be much better implemented in the current version of PrusaSlicer.
Text Embossing Tool
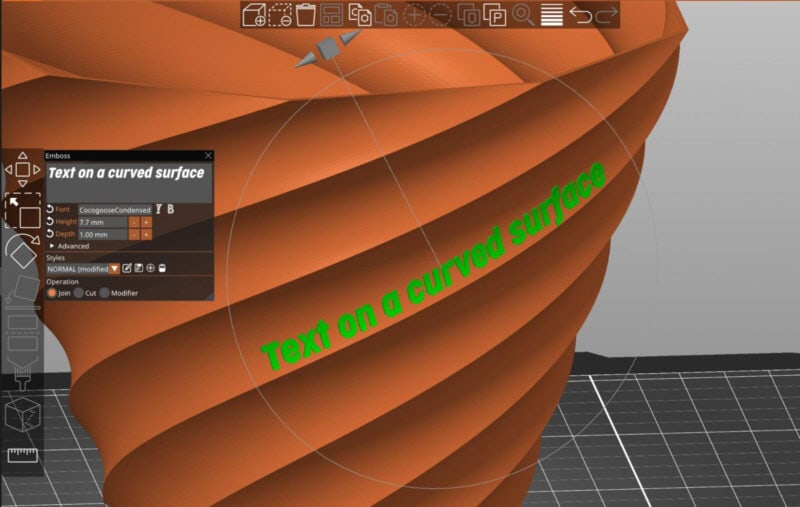
PrusaSlicer gives you an easy and intuitive way to mark your 3D models with its text embossing tool. You can quickly write custom text in any font on your 3D design right in the slicer software.
This increases the customizability of your designs and makes it very easy to personalize a 3D model without using external software.
Compare Presets

PrusaSlicer’s compare presets option is an interesting feature that shows two presets side by side. It lets you quickly see the differences between the two slicing profiles to better understand how their settings compare.
We have found this to save a lot of time compared to loading each template separately to look at its slicing settings. Simply use this tool, compare the options, and load the profile that works best for the 3D printing project at hand.
Cut Tool

PrusaSlicer’s cutting tool is one of the best among any 3D printing slicers. It was recently updated in the 2.6 release and has lots of practical applications.
It has a simple user interface that lets you split a 3D model at any angle and any height. You also have the option to add connectors and customize their shapes and sizes.
The tool is intuitive to use and gives you the ability to print large models in parts with a limited print volume.
Cura
Cura Plugins

Cura’s Plugin library provides a wide variety of useful add-ons that you can use with the slicer. Most of these plugins are made by individual users and add features to the slicer that aren’t there by default. This is something that PrusaSlicer does not have at all.
Mold 3D Printing
Cura has a Special Modes section that has a Mold setting. The mold printing mode lets you create a negative volume around your 3D model. The cast is more like a shell around the original shape.
We’ve found that the final results aren’t as good as making a real mold with design software and 3D printing that mold. The end result with Cura also depends a lot on the shape of the model. Still, it’s a great feature to play around with and can work well for simpler 3D prints.
Experimental Features
Cura has a whole section dedicated to experimental features that are still being tested out in the slicer. A few notable ones are wire printing, slicing tolerances, conical support structures, and adaptive layer height.
Some of these features might make it to the main settings section if they perform well, are liked by the users, and after they are optimized. Cura tree supports was one such experimental feature before it was officially included as an alternative to pillar support structures.
Custom Scripts

You can change the G-Code in Cura by using Custom scripts. These scripts allow you to pause the print at a certain height, change the filament, insert a specific G-Code, and do lots of other functions.
These scripts are useful for many things. For example, you can embed magnets and circuit boards, or create a seamless design without any support. It is present in PrusaSlicer as well, but it’s easier for beginners to pause and change filament in Cura with this feature.
Settings
Cura

Cura offers three different setting modes configured for different user levels. The slicing settings go very in-depth (if you want to), and you won’t have any trouble configuring each aspect of your 3D print.
Some of the unique slicing settings in Cura are its coasting and combing features. These help you get better print quality and alleviate the stringing issues.
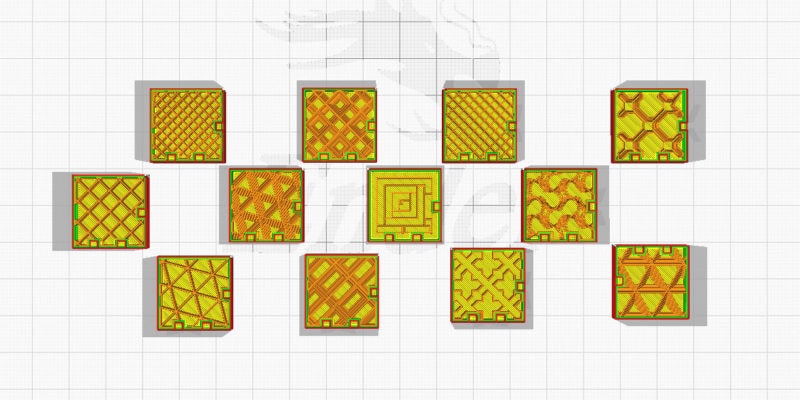
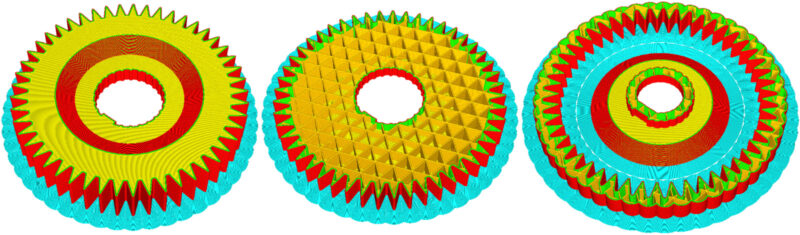
The collection of Cura infill patterns is great as well. There are 14 different infill types to choose from, and each pattern has its own benefits and drawbacks.
PrusaSlicer

PrusaSlicer settings are grouped slightly differently than Cura’s. This makes it easier for advanced users to set things up, but beginners can have a harder time getting used to the navigation.
With PrusaSlicer, you get support for multiple extruders, regardless of your printer configuration. Adding custom G-Codes is also quite easy in PrusaSlicer. And the Arachne perimeter generator does a great job of improving the accuracy of your 3D-printed walls.
Additionally, PrusaSlicer provides 17 different infill patterns, including the Honeycomb pattern, which is not available in Cura.
Verdict
Cura and PrusaSlicer offer plenty of diverse slicer settings for you to choose from. The basic slicer settings on both these output great print quality and you can achieve excellent print results with further tuning.
User Interface
The User interface (UI) is often one of the deciding factors for several users. The slicer UI guides you to its settings, features, and various functions and is responsible for the overall user experience.
Cura
We find Cura’s UI to be better presented than PrusaSlicer’s. There’s a single settings window with different subsections for each setting. The menus are well laid out, and navigating through the various options is a breeze.
You can quickly toggle between the recommended and custom settings menu with a simple button. The preview mode is highlighted well enough, and you can get a quick overview of the sliced model’s print time and material in a separate window.
PrusaSlicer
PrusaSlicer’s user interface is designed to be cleaner and minimalistic in ways. The main window has a bar on the side with a few buttons and a bar at the top with more options.
The PrusaSlicer settings are categorized into three different sections – Printer, Print, and Filament. As a beginner, it can be hard to find your way around these options, and there is a learning curve.
That said, manipulating and controlling the 3D models is very easy in PrusaSlicer. The controls for moving, rotating, and resizing are far more refined than those in Cura. The custom supports and variable layer height adjustment are also well implemented in PrusaSlicer.
Verdict
In general, Cura has a better user interface than PrusaSlicer. It’s easier to get around and feels friendlier to use. On the other hand, PrusaSlicer does have more advanced features and the general navigation around the user interface feels more speedy and crisp.
Print Quality
Cura

The basic slicer settings in Cura work well for most 3D printers. These are thoroughly tested by the community, and with a bit of tuning for your specific machine, you can get good print results.
You get access to lots of settings, and the beginner-friendly UI makes it easy for amateurs to adjust these parameters and get better print results. However, it’s worth noting that Cura’s support quality is not as good as PrusaSlicer’s.
PrusaSlicer

The PrusaSlicer, similar to Cura, gives you plenty of settings to get good print quality. The default print settings work very well and give you good print results.
The infill and supports on PrusaSlicer are far better in terms of quality and removal. It also hides the Z-seam better than Cura, giving you marginally better prints.
Verdict
More than the slicer itself, it’s the settings and 3D printer that play a role in the print quality of your model. The print quality from both Cura and PrusaSlicer is mostly identical. It all comes down to how finely tuned your printer and print settings are.
Slicing Speed
Cura
Cura lags far behind PrusaSlicer in terms of slicing speeds. Complex designs can take a long time to slice, especially on computers with older processors. Even the general navigation through the menu and searching for settings can be slow if you have a large model on the printer plate.
Tree supports can take forever to slice if you have an intricate design. Cura can sometimes even crash if it’s generating tree supports for big models.
One of the reasons behind this can be its Python tech stack. While Python is easy to code and understand, it requires lots of computer resources. This slows down the system and, in turn, affects the slicing speeds.
PrusaSlicer
PrusaSlicer is programmed mostly in the C++ language. This language uses far fewer resources, and as a result, its functions are executed much more quickly.
Because of this, you’ll see a more snappy performance from PrusaSlicer. The models are processed quite fast, and any change in the settings is reflected almost in real-time on the sliced model.
It can take some time to generate organic supports and slice large models. However, it is still a faster and better experience than Cura.
Verdict
If you want quicker slicing speeds, PrusaSlicer is hands down the best slicer of the two. It loads up models quicker, and the slicing is almost instantaneous, regardless of the print quantity or settings.
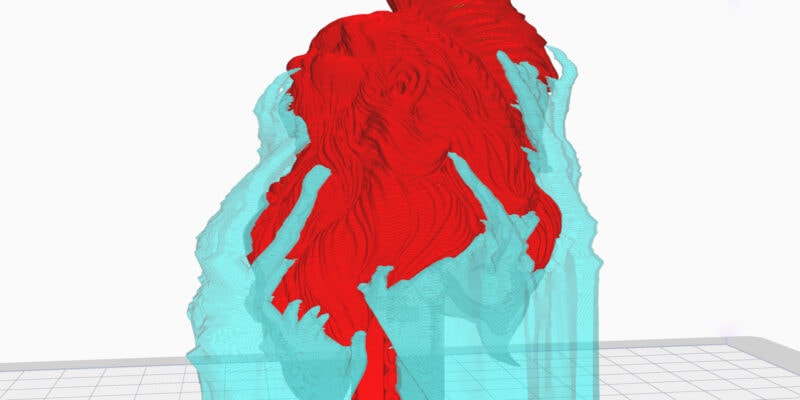
Support Material
Having a good support structure can make or break your 3D printing experience. Both Cura and PrusaSlicer feature at least two different styles of supports, with Cura having an additional experimental, conical support structure.
PrusaSlicer

PrusaSlicer supports generally have better quality and are easier to configure and remove. The 2.6 release of PrusaSlicer also brought organic support as a competent alternative to Cura’s tree support.
Organic supports have a sturdier structure and leave minimal marks on the 3D print’s surface. They’re similar to the support structures offered in SLA printing and give you a lot of flexibility in how you can orient your model.
Cura

Cura introduced an innovative alternative to the traditional pillar-style support structures for slicing. The tree supports in Cura are exceptional as they use less material and provide great overhang support.
The support settings themselves are plenty, and you have lots of room to customize the structures. That said, removing non-tree supports can be a task and is a known issue with Cura slicing software.
Verdict
Both Cura and PrusaSlicer’s support material options are good. The material and printing time for each support structure are fairly similar, and there’s no clear winner in this area.
But, PrusaSlicer’s organic supports take the lead in terms of overall quality and results. The paint-on supports feature also improves the user experience compared to Cura.
Price
Cura and PrusaSlicer are both completely free 3D printing slicers. They’re open-source, and if you want, you can even develop your own custom version of either slicer free of charge.
Ultimaker, however, does sell a Professional Cura Plan for its premium 3D printers, like the Ultimaker S5 and S7 series. This plan includes a few enterprise-level and printer-specific features. It’s not something we are generally a fan of, but as long as hobbyists can use the wide range of base features for free, it’s all good.
Updates & New Features
Cura and PrusaSlicer are both updated frequently. Being popular open-source software, the community around each of these slicing software is active.
Plus, Ultimaker and Prusa make sure to keep them up to date for their machines because they are also standard slicing software for their high-end 3D printers.
Every time an update comes out, the slicers try to add new features and fix bugs that were in the earlier versions. The Prusa 2.6 version is a great example of this.
Community Support
There’s no lack of community support for either of these slicers. PrusaSlicer and Cura are at the top of everyone’s list of 3D printing slicers.
You have dedicated slicer forums, plenty of information on various subreddits, and numerous articles on both slicers. Rest assured, if you run into any issues related to these slicers, you can count on someone who will help you out.
System Requirements & Platforms
Cura
- Graphics: OpenGL 2 compatible graphics card (OpenGL 4.1 compatible graphics card for 3D layer view)
- Memory: 4GB RAM memory (8GB or more recommended)
- CPU: Intel Core 2 (Intel i3 or AMD Athlon 64 recommended )
- Operating Systems: Windows, Linux, MacOS
Note: Ultimaker Cura supports 64-bit machines only and, therefore isn’t available for older 32-bit systems.
PrusaSlicer
- Graphics: OpenGL version 2.0 and newer
- Memory: Minimum 4 GB RAM, recommended is 8 GB or more
- CPU: Multi-core and multi-threaded CPU
- Operating Systems: Windows, MacOS, Linux, Chrome OS
Verdict
The minimum specifications you need to run Cura or the PrusaSlicer are similar. It’s important to note that the performance of both slicers will improve with better computer specifications. The faster your computer, the faster your slicing times and overall experience.
Supported File Formats
Cura

Cura supports 3D models as well as a few 2D image formats. The list of supported file types by Cura is quite extensive too. Here’s a list –
- 3D models: 3MF File or Ultimaker Cura Project (.3mf), STL file (.stl), Wavefront OBJ File (.obj), AMF File (.amf), COLLADA Digital Asset, Exchange (.dae), Compressed COLLADA Digital Asset Exchange (.zae), Open Compressed, Triangle Mesh (.ctm), Stanford Triangle Format (.ply), X3D file (.x3d), glTF Binary (.glb), glTF Embedded JSON (.gltf)
- Images: BMP image (.bmp), GIF image (.gif), JPEG image (.jpeg), JPG image (.jpg), PNG Image (.png)
- G-Code: G file (.g), G-code file (.G-Code), Compressed G-code file (.gz), Ultimaker Format Package (.ufp)
PrusaSlicer

PrusaSlicer supports only 3D file formats. However, it can import 3D models in the STEP file type directly from your 3D modeling software. This eliminates the need to convert your 3D model into STL, and you can directly drag and drop the object into PrusaSlicer.
- The file formats supported by PrusaSlicer are – STL, STEP, 3MF, OBJ, and AMF.
Verdict
Both Cura and PrusaSlicer provide excellent support for different file formats. Cura, in particular, has the added advantage of being able to import images. This feature is especially useful when creating 3D-printed lithophanes quickly.
PrusaSlicer, on the other hand, supports the STEP file format, which is a great deal for 3D designers. This allows the designers to keep the CAD model and the 3D printed model exactly the same, making any modifications quite easy.
Should You Use Cura or Prusaslicer?
Cura and PrusaSlicer are two distinct slicers with their own advantages. While PrusaSlicer offers faster slicing, Cura boasts a more organized user interface. It’s important to consider which slicer aligns best with your needs.
Reasons to Use PrusaSlicer
PrusaSlicer is an efficient 3D printing slicer. It has better support features, the slicing speed is fast, and the overall print quality is good too.
The advanced features in PrusaSlicer are diverse and give you a lot of control over your 3D prints. The cutting tool is great, text embossing is just effortless, and the organic supports work excellently for complex models.
It has a decent set of printer profiles, and if you use a Prusa printer, this is THE slicer for you. Plus, you get honeycomb infill which is the strongest infill pattern in 3D printing.
Reasons to Use Cura
Easy to use. Nice Interface. A good set of features. These three things summarize the Cura experience well.
For beginners, Cura is the best slicing software to learn the ins and outs of the 3D printing process. You get access to a lot of advanced features, a great plugin library and things like wire printing and mold surface options are great ways to play around with your 3D prints.
Cura is regularly updated, just like PrusaSlicer, and the excellent community support you get is handy during the occasional print failure. From beginners to advanced users, Cura is a great slicer software for preparing your print jobs.
Can You Use Cura With Prusa Printers?
Yes, you can use Cura with Prusa printers, but it has limited support for them. There’s almost no way to add a profile for multi-material printing in Cura and there’s no support for the Prusa SLA and Mini 3D printers either.
Can You Use Prusaslicer With Ultimaker 3D Printers?
Yes. PrusaSlicer has a built-in profile for Ultimaker S2 3D printer. Unfortunately, it is not compatible with any of the other S series Ultimaker 3D printers. The S5 and the S7 use Griffin G-code flavor which is not supported by PrusaSlicer.
Even if you were to create a custom printer profile in PrusaSlicer, the resulting G-code file would not be compatible with Ultimaker 3D printers.
Conclusion: Cura vs PrusaSlicer – Which One to Choose?
Cura and PrusaSlicer are both good slicing software. Some users have gotten excellent results with Cura, others with PrusaSlicer. With proper fine-tuning, know-how of the features, and experience, you can get great 3D prints with both slicers.
Cura is known for its more user-friendly experience and wider range of supported 3D printers. The plugin library comes in handy for customization options, and with its experimental features, you can try a thing or two with your 3D printing projects.
As for PrusaSlicer, its fast slicing speed and plenty of settings options give you great control over your 3D prints. Its organic supports work very well, and the feature set is equally great.
Both slicers offer similar features for beginners, good default settings and material profiles, and support many other 3D printers. You aren’t just limited to Prusa printers or Ultimaker printers with either.
Ultimately, there’s no need to limit yourself to one or the other. Both slicing software does a good job, and you can switch between using PrusaSlicer and Cura whenever you want. Use this guide to learn more about the two most popular slicers, and choose the one that best suits your needs.
Till then, keep slicing and printing!