
Honeycomb infill is the strongest infill pattern in FDM 3D printing. The honeycomb structure distributes weight equally on its six sides. It leads to a strong 3D printed part that has great strength in all directions. Honeycomb infill is suitable for printing parts that need to be lightweight, yet have a high load-bearing capacity.
3D printing infill gives internal strength and rigidity to your 3D printed parts while keeping it relatively lightweight. Using the best infill patterns can help you get the ideal strength-to-weight ratio for your 3D prints. It will help you save your filament material and printing times, reducing the overall cost of your prints.
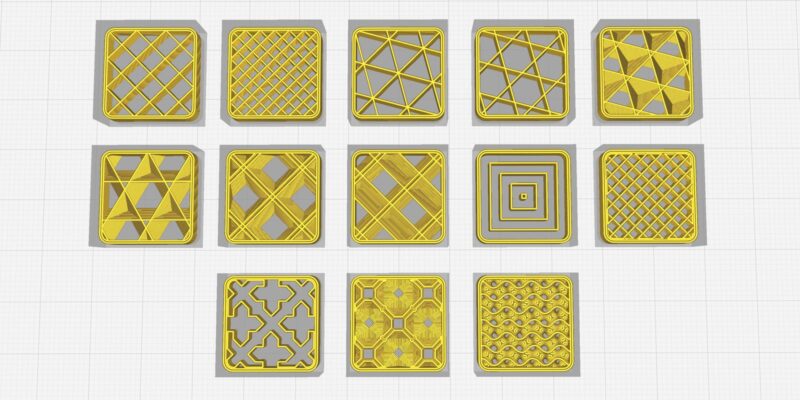
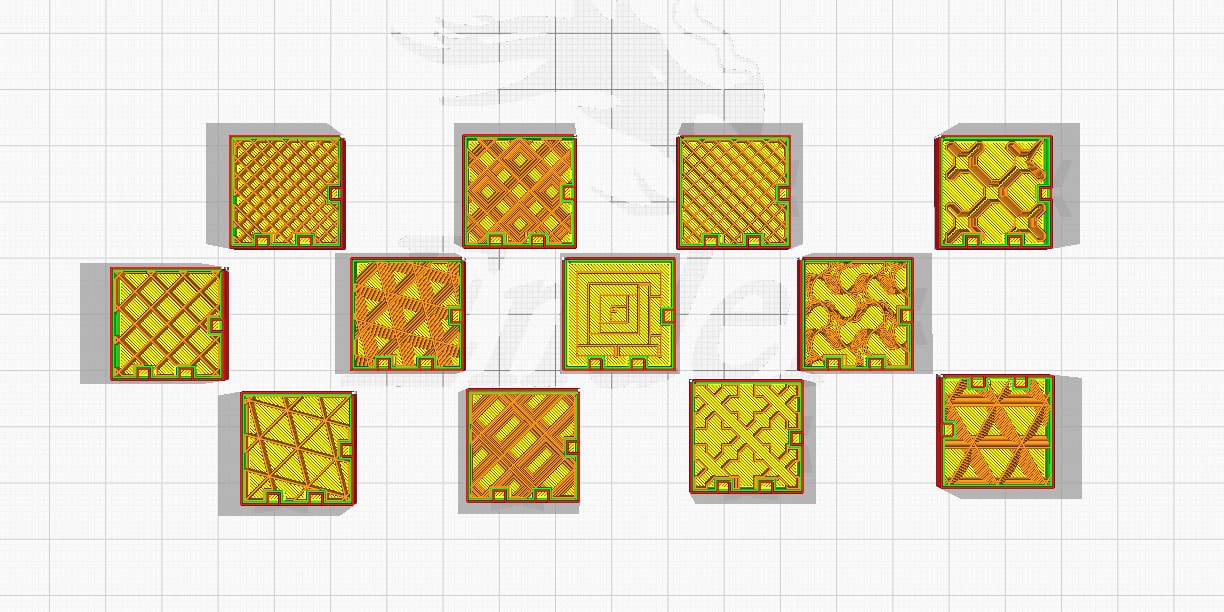
If you look at the three popular slicers in 3D printing, Cura, PrusaSlicer, and Simplify3D, you’ll find over 20 infill patterns to choose from. Only a few are designed for strength, while others serve more of an aesthetic purpose.
In this article, we’ll take a look at the strongest infill patterns for 3D printing and how they compare to other popular infill patterns. We’ll also provide some recommendations on when to use each pattern.
Strength Considerations
To test the strength of an infill pattern, we will first need to define two crucial factors when it comes to mechanical strength – the direction of the force and the type of the force.
This will help us determine how different infill patterns will perform under different stress and strain conditions.
Force Direction
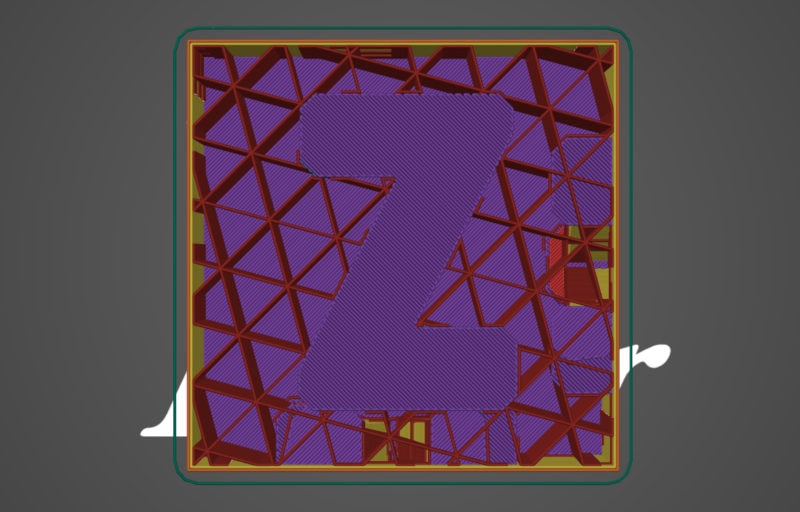
The strength of infill patterns varies depending on the direction of the force. For example, grid, zig-zag, and rectilinear infill patterns are better able to withstand loads in a direction perpendicular (at a 90° angle) to the infill lines. In contrast, they’ll fail quickly if the force direction is transversely applied.
For example, a cube with a grid infill pattern will not fail if you apply the load from its sides horizontally. But if you apply the load in the vertical direction on the Z-axis, the cube will not be able to take the same load as before.
In contrast to these, the honeycomb, gyroid, and cubic infill patterns have greater strength in all directions. These patterns will give you consistent and predictable results in their load-carrying capacities.
Force Types
Your 3D printed parts will likely be subjected to either tensile or compressive forces. Tensile forces cause the part to be stretched along an axis, while compressive forces tend to crush the object. Understanding which type of force your application will experience is crucial in choosing the strongest infill pattern.
Generally, 3D printed parts perform better under compression loads. This is because of the plastic properties and the layer-by-layer manufacturing process of FDM 3D printing.
Layer-by-layer manufacturing can lead to delamination under tension. Delamination is a type of failure where the layers of the 3D printed object start to separate from each other. Under compression, the parts are pushed together, which reduces the risk of delamination.
What is the Strongest Infill Pattern?
The honeycomb infill is the strongest infill pattern in the 3D printing arena. This result is the conclusion of a scientific study that lists the honeycomb pattern as the strongest infill type under compression loading. Another 2020 study that tests the various 3D prints under tensile loading conditions, concludes with the same result.
While the honeycomb infill is the strongest, it is not without its flaws. Let’s dive into the strongest infill patterns one by one to see all their strengths and weaknesses.
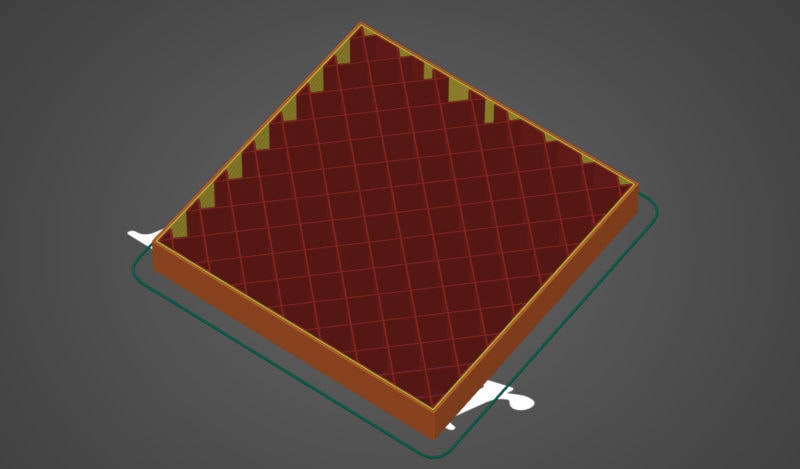
Honeycomb Infill Pattern
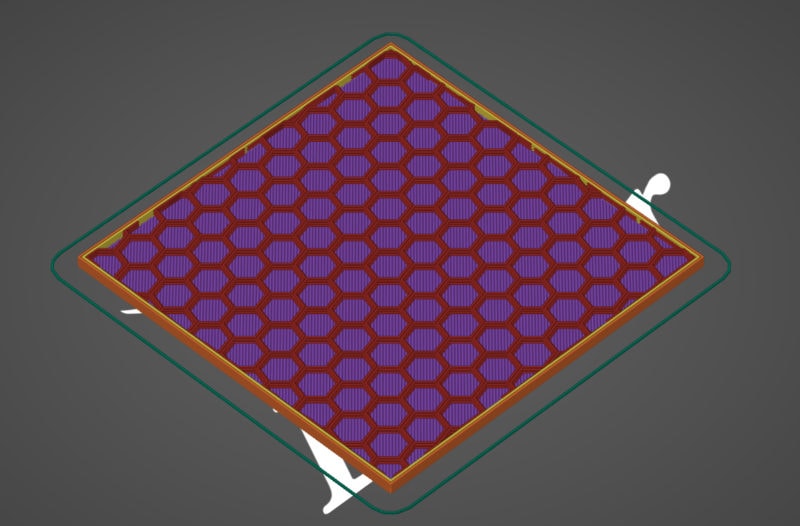
The honeycomb infill pattern consists of a three-dimensional hexagonal infill structure. This design gives the pattern its strength, as the acting load is distributed on all the six sides of the hexagon. The aforementioned compression study results show that a 25 mm PLA cube with 40% honeycomb infill can withstand loads of over 900 Kg.
This high load-bearing capacity is equal in all directions of forces. It eliminates any weak sections or failure points in the 3D printed part. This makes the honeycomb pattern suitable for structural 3D prints, tools, and load members.
The notable downside is the long printing times needed for honeycomb infill. The printhead has to execute frequent direction changes. It results in increased travel paths, increasing the 3D print times.
It is also not recommended to print the honeycomb pattern at higher densities as this causes your printer to rattle and increases 3D printer noise.
Triangle Infill Pattern
A noteworthy alternative to the honeycomb pattern is the triangle infill structure. The triangle pattern distributes the forces on its three sides, resulting in an equal load-bearing capacity in all directions. The load capacity is more or less like that of the hexagon pattern under tensile and compression conditions.
It outperforms the honeycomb infill in print times and speed. The triangle pattern consists of straight lines in all three directions. These need more minor direction changes resulting in fast printing speeds. It is suitable for parts such as shelves, robotic arms, walls, and small tools.
The tri-hexagon infill is a good infill pattern and an excellent alternative to the honeycomb and triangle infills. It gives you the benefits of both the infill patterns and minimizes the downsides of the honeycomb pattern.
Grid Infill Pattern
The grid infill pattern consists of a rectangular grid of filament material. The rectangular grid is designed to give you strength in the XY plane, resisting forces in the horizontal directions. CNC Kitchen’s infill pattern test ranked the grid pattern as one of the strongest infill patterns.
When using the grid infill type, your 3D printer uses long straight printing paths. These are easy to print and let you achieve high print speeds. Ideal if you want to minimize 3D print time when making money with your 3D printer.
3D printing with a grid infill is recommended when you need strong, stiff prints in the XY direction. These include 3D printed parts such as brackets, clamps, and other similar objects.
The pattern consumes a sizable amount of material per layer, however, increasing material usage. And due to the lack of any vertical support structure, there is little strength along the vertical Z-axis.
Rectilinear Infill Pattern
The rectilinear pattern appears to be the same as the grid infill pattern in the first look. But it prints the infill lines only in a single direction per layer. In the next layer, the direction of these infill lines changes and is perpendicular to the previous ones.
This altering layer design results in an infill pattern that has a similar strength to the grid pattern. But, as the material used per layer is less, the rectilinear pattern can print quicker infill layers at high speeds. It is suitable for 3D printed parts that need to be lightweight while still being strong.
Like the grid pattern, the rectilinear infill pattern has no vertical strength. It will fail with ease if you apply the load on the Z-axis.
Gyroid Infill Pattern
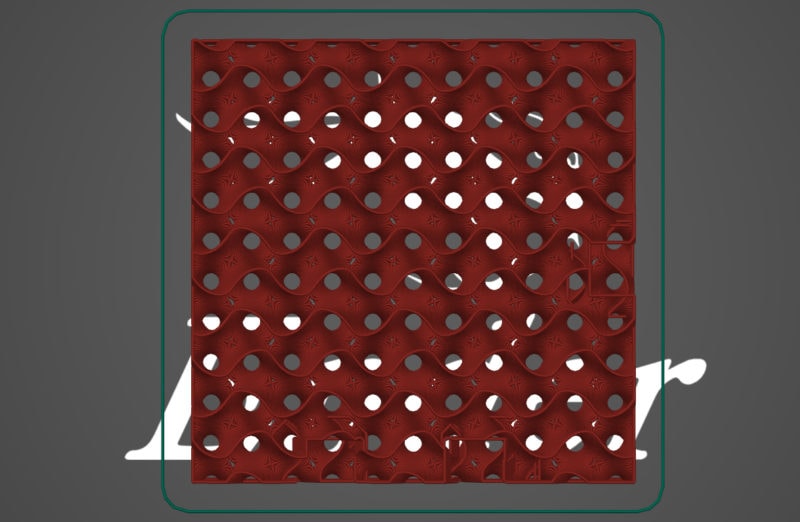
The Gyroid pattern is one of the most exciting infill patterns in 3D printing. It has a wavy, geometric structure that is unique in every regard. This structure gives the gyroid pattern its isotropic properties. The gyroid design is suitable for bearing loads from all directions, similar to the hexagonal infill pattern.
However. the Gyroid pattern’s unique geometry lends an excellent strength-to-weight ratio that’s higher than the honeycomb pattern. The wavy lines also cut the need for constant direction changes when 3D printing, resulting in faster print speeds and a quicker print time.
The Gyroid pattern is suitable for structural components and functional prints and is an excellent alternative to the honeycomb pattern.
However, as the structure’s geometry is complex, the gyroid infill pattern needs longer slicing times. The gyroid infill pattern can also put significant stress on the 3D printer’s components at higher print speeds..
What is the Strongest Infill Percentage?
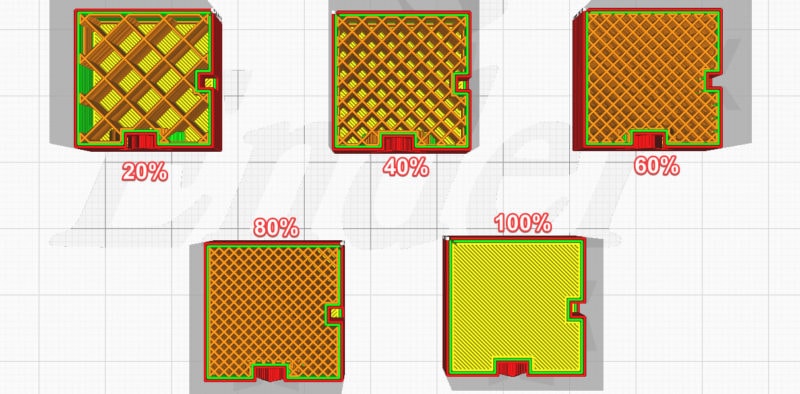
While the strongest infill percentage is 100%, this is rarely worth using. It does not add much strength compared to lower infill percentages and significantly increases print times.
Instead of using a 100% infill percentage, a 40-60% infill density offers great results at lower 3D printing costs. These infill percentages give a great balance between strength, material, and printing times.
A recent study on the effects of infill densities and different infill patterns confirms these observations in its results. The study concludes that the load capacity is substantial between the 40-60 % infill density range and offers diminishing returns when going higher. Except for the honeycomb pattern, no other infill pattern even benefits from the increased infill densities above 80%.
If you print your objects within this infill range, you will use less material while still giving your 3D printed part substantial strength. You will also have less printing time and can 3D print more parts in the same amount of time.
For these reasons, it is more important to choose the right infill pattern than the best infill density for your 3D prints.
Which Infill Pattern is the Fastest?
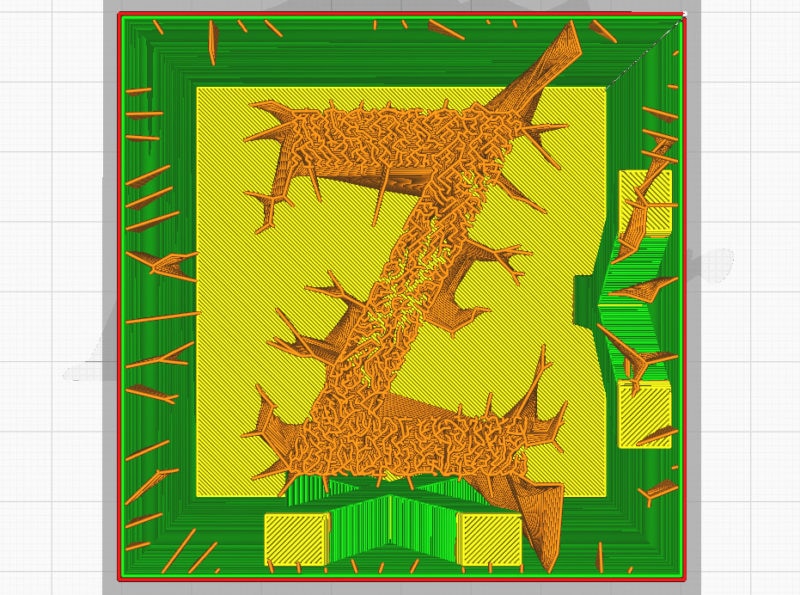
The Lighting infill in the latest release of the Cura slicer is the quickest infill pattern. The lighting bolt-like infill pattern is designed and optimized for faster print speeds and lower printing time. It is a unique design and great for printing small, non-functional parts with fewer overhangs.
The Lines infill pattern provides an outstanding balance between strength and printing time. It prints lines along a single axis during a layer and alternates the line direction for every layer. This results in a solid criss-cross pattern that holds considerable weight while taking less time to print.
Other Factors That Influence 3D Print Strength
Print Orientation
The part orientation influences the strength of your 3D printed part and its infill pattern. Because of the layer-by-layer printing method of FDM printing, parts tend to ‘delaminate’ under conditions where the force is perpendicular to the layer direction.
The maximum load of the various infill patterns can also be optimized by changing the print orientation. For example, the grid pattern has strong lateral strength but will fail under vertical loading. Orienting the part differently can make sure that the load is spread in the right direction.
While 3D printing a part for maximum strength, you need to know its loading conditions and orient your model for the most optimal strength in your slicer. As an easy tip, try to orient your layers parallel to the direction of the force. It will give you the best results under tensile and compressive loading, and your part can bear considerable loads before failing.
Filament Material
While you don’t need to use the strongest 3D printer filament, the filament is still is crucial for the strength of your 3D printed part. It plays an essential role in determining the infill strength of your part. In a carbon fiber PLA study, researchers found that parts printed with carbon fiber PLA had the greatest strength. They could withstand large loads before the failing point.
Nylon, PETG, and ABS can impart great strength to your 3D prints. You’ll find PLA+ filaments with extra additives to enhance the PLA’s mechanical characteristics. Fibrous filaments will result in stronger infill patterns and give you high-strength 3D prints.
If you use a dual extruder 3D printer, you can use a different material for your shells and infill pattern resulting in a strong part yet costing less. Knowing the properties of your filament material can help you choose the correct infill patterns.
Filament Quality
The filaments you use can also affect the mechanical strength of your 3D prints. If you want to produce high-strength 3D prints, using better quality filament is a must. A high-quality filament will have tighter tolerances, no impurities, and give you predictable results for your 3D prints.
Always use fresh and dry filaments from a reputable manufacturer to get the best results. Brands like Polymaker, Prusa3D (Prusament), and Hatchbox are some of our go-to filaments for high-quality 3D printing results.
Using lower quality filament can introduce warping, voids, and other printing defects that affect the final strength of your 3D prints.
Over Extrusion
Over extrusion of your filament material in the infill will help you to get a stronger infill structure. You can increase the material’s width or flow rate while printing, or configure this from the slicer settings. It’ll improve the surface area of the infill pattern and increase strength.
The resulting structure will withstand high-capacity loads due to the distribution of the force over a wider area. Do keep in mind that over-extruding your infill lines might cause the shells to bulge out. It can ruin the aesthetic appearance and reduce the precision of your 3D prints.
Number of Shells and Their Thickness
Often the shell of your 3D printed part will have more effect on your part’s mechanical strength than the infill pattern itself. Stephan from CNC kitchen has demonstrated it in his detailed Youtube video experiment.
The shells affect the thickness of your part’s outer layers and contribute to improving its strength. The increased wall thickness leads to thick layers, giving the outer perimeter greater strength. If you can print with a high number of shells, you can get away with using lower infill densities. This saves 3D printing time and materials while still having an equally strong part.
Conclusion
Infill patterns influence the strength of your 3D printed part significantly. Choosing the correct infill patterns will help you reduce your printing costs and improve your efficiency without sacrificing the part quality or strength.
As per the various studies, the honeycomb pattern is the strongest infill pattern that gives equal strength in all directions. It can withstand high-capacity loads from any direction and provides the print with an almost isotropic nature. It does take the longest to 3D print, however, and can rattle your 3D printer at high speeds.
If strength is your primary criterion, the honeycomb pattern will be excellent for your 3D printing workflow. Otherwise, you can use the triangle and rectilinear infill patterns to balance strength, print quality, and printing time.
If you want to use the quickest infill pattern, Cura’s lightning pattern is the way to go. However, it is not strong in all directions and might not be ideal if you’re looking for a part that can withhold high loads.
As for infill percentage, a 40-60% infill density is often the best way to go to optimize part strength. Anything higher than that, and you are quickly going to run into diminishing returns.
Let us know your experiences with these infill patterns and which ones have given you the best results. If you have anything else to add, feel free to comment below.