Each of Cura’s nifty features contributes to an overall better 3D printing experience. Ranging from tried-and-true standards to novel experiments, the slicer has a lot that helps you. One of the more experimental settings we’ll examine today is Cura’s Adaptive layers.
Adaptive layers are a handy feature in Cura. It automatically adjusts the layer thickness in your 3D-printed models based on their geometry. The result is a faster print time and better-looking prints. Sounds too good to be true, right?
In this piece, we will show you exactly how the Cura adaptive layers feature works, what settings you should use, and in what situations you should (and shouldn’t) use it.
Let’s layer up your 3D prints!
What Do Adaptive Layers Do in Cura?
Cura’s Adaptive Layers is a feature in the slicer that lets you 3D print a model with varying layer heights. Instead of making all the layers the same thickness, Cura changes the height of each layer depending on the geometry of the item that will be 3D printed.
The goal of adaptive layers is to improve the surface finish of the print and shorten the overall time it takes for the model to be printed.
Cura is able to do this by examining the 3D model’s geometry. Its slicing algorithms can identify different parts of a design, such as slopes, curves, vertical features, and more. It will then automatically adjust the layer heights in these parts based on their shape.
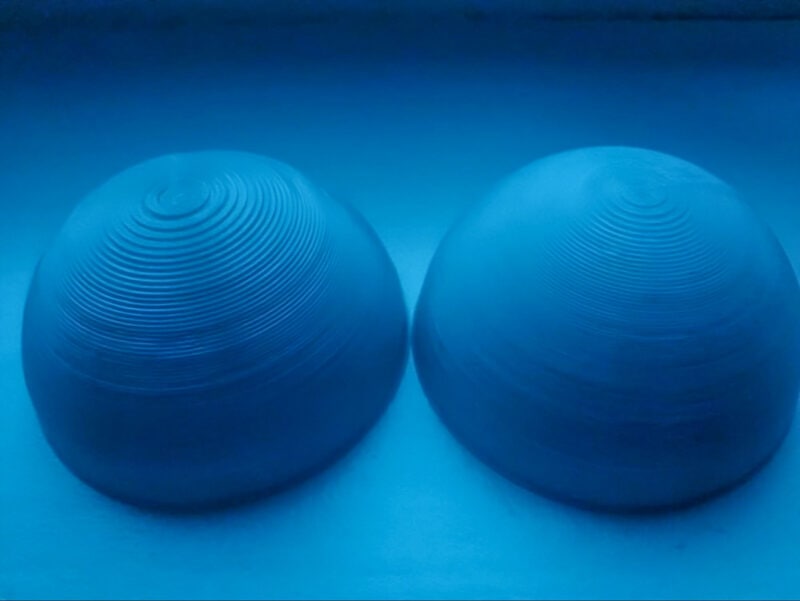
Curves and places where the shape changes a lot are made with a finer layer resolution. On the other hand, parts that are straight and flat are made with slightly thicker layers. This makes curves and changes smoother and achieves increased detail in these sections.
Because the straight sections don’t have much detail, their thicker layers help reduce print time without sacrificing print quality.
Should You Use The Cura Adaptive Layers Setting?
Using adaptive layers in Cura comes with a few benefits as well as a few drawbacks. An Ultimaker case study shows that the benefits outweigh the drawbacks of this feature, but let’s still take a quick look at the pros and cons of using adaptive layers.
Benefits
Improved Print Quality
When printing complicated geometries, the use of adaptive layers can improve the surface quality of the final 3D print. The adaptive layers allow for optimized layer heights, which can result in a more polished end product.
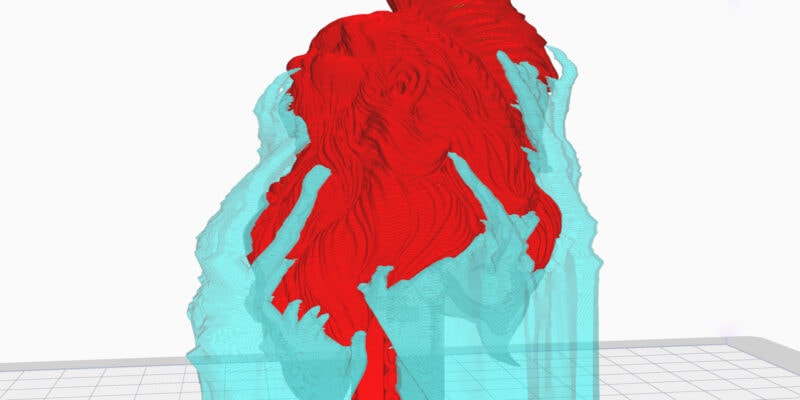
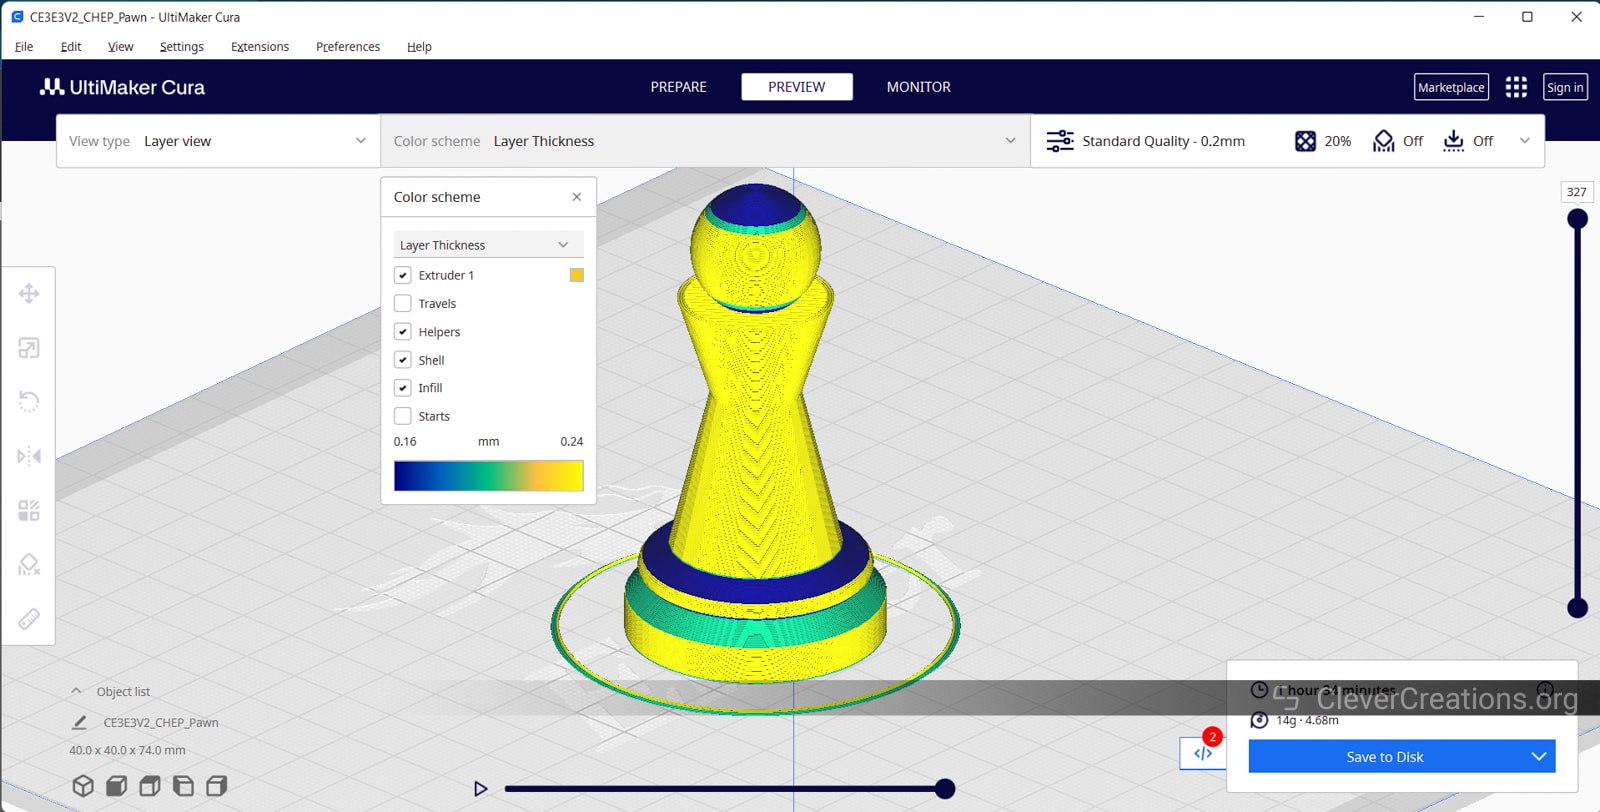
Take a look at the Pawn model above as an example. With Cura Adaptive Layers enabled, the layer height in the middle ranges from 0.20 to 0.24 mm. The top ones (the smooth curves in blue) are thinner layers printed at 0.16-0.2 mm. This makes the surface smoother and improves the print quality exactly where it’s needed.
Reduced Printing Time
In most cases, Cura’s adaptive layers feature decreases the overall number of layers to be 3D printed. Because the slicer dynamically alters the layer thickness, it tends to reduce the number of overall layers to 3D print, and, in turn, the print time.
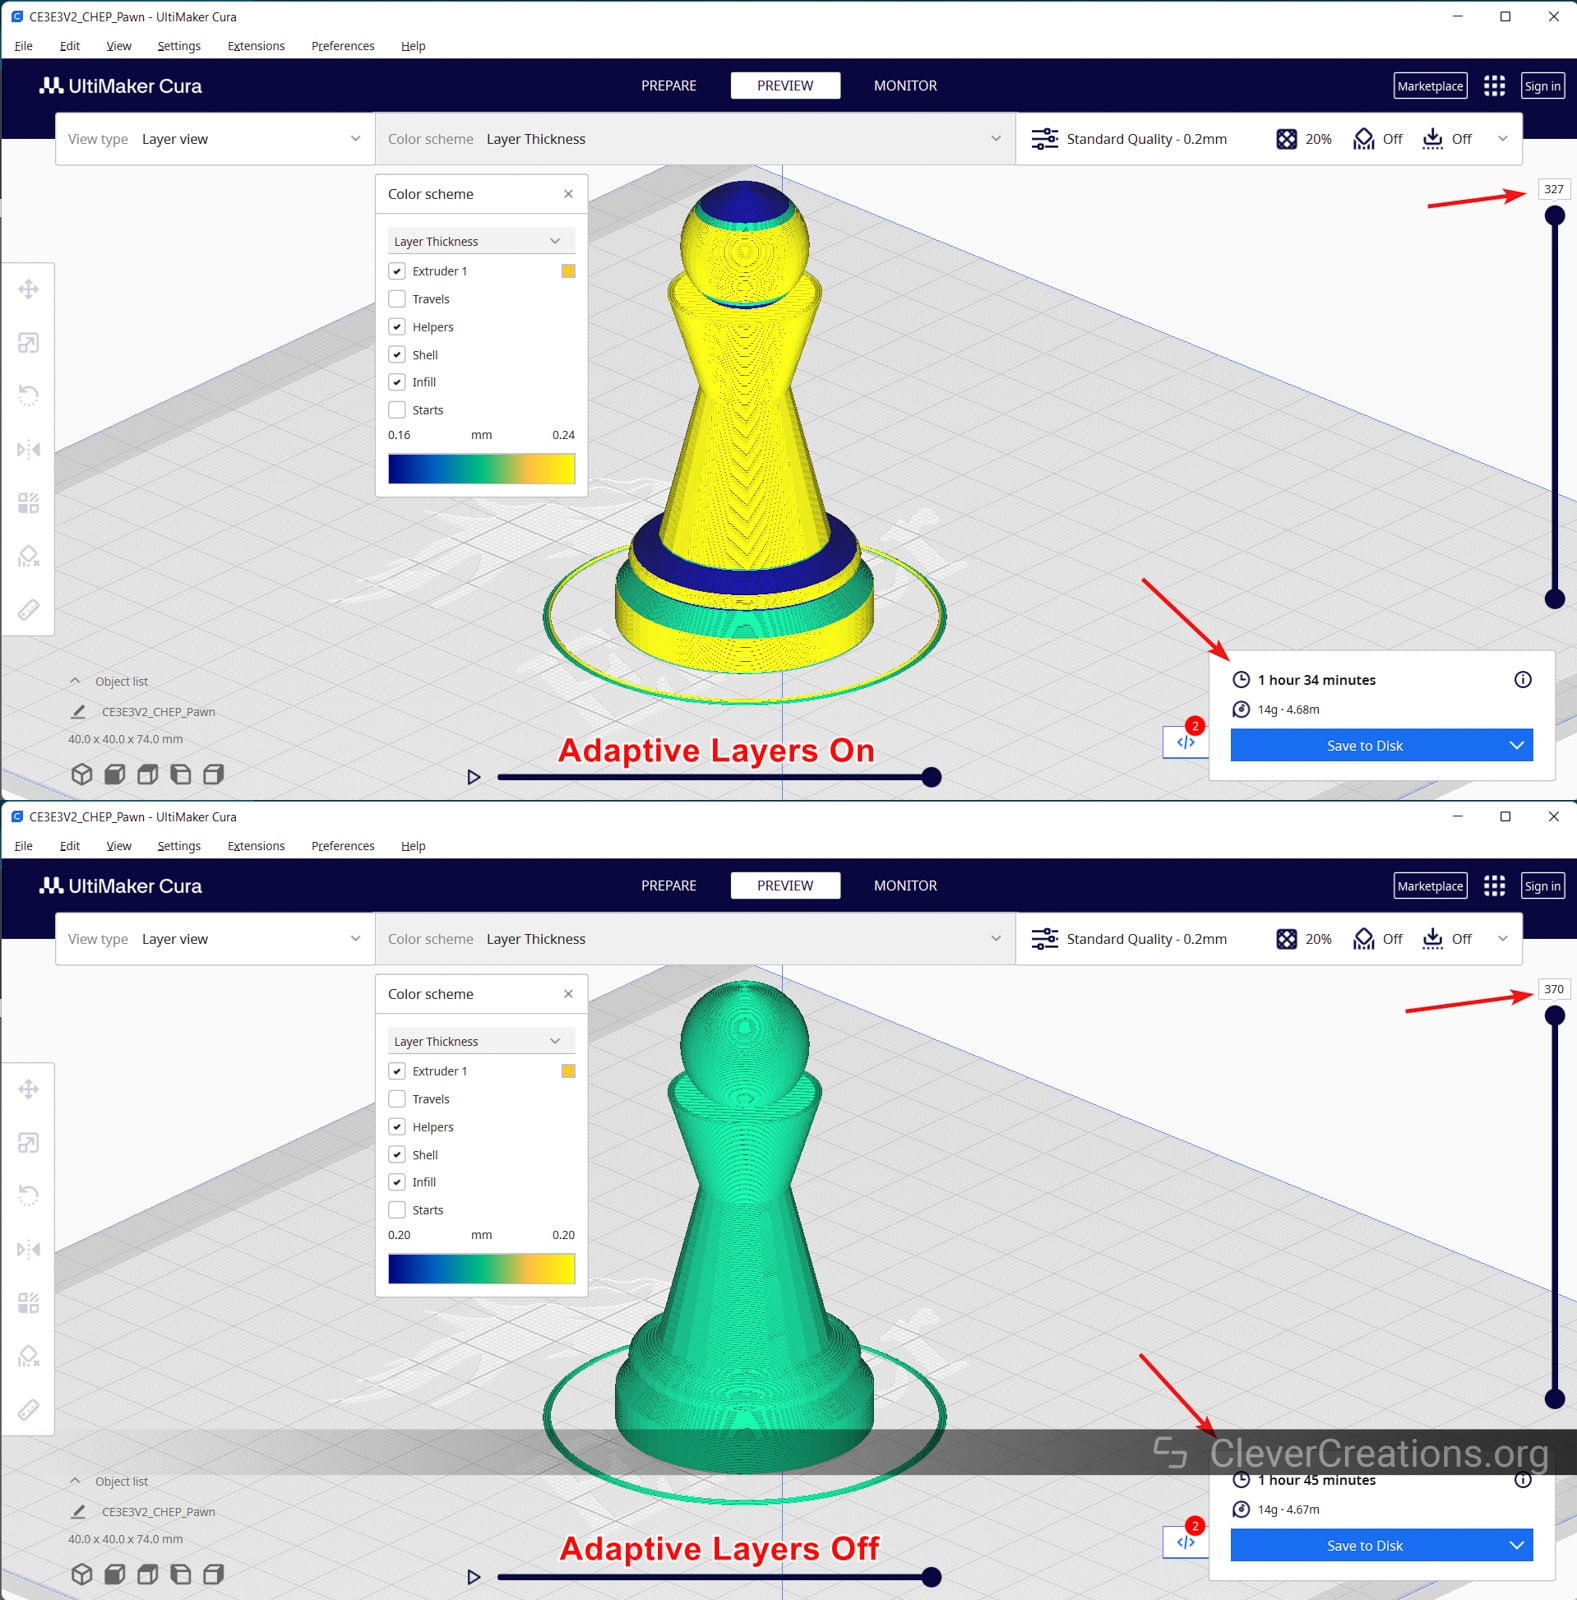
Take the same Pawn 3D print from earlier. With a variable layer thickness, you can see the object is only made up of 327 print layers. However, the same design requires 370 layers when we print it with a constant layer height.
In terms of print time, that gives our 3D printer 11 minutes less work. A difference of over 10%!
Drawbacks
Longer Slicing Times
One drawback of using adaptive layers is that it lengthens the time it takes to slice your models. Cura needs more time to compute and evaluate the various parts of your model.
The increase in slicing times depends on the geometry, size, and complexity of the design. Since the 3D models you want to be using adaptive layers for tend to be more complex than simple, you can see where this is going.
Can Negatively Affect the Print Quality
Adaptive layers are still located under Cura’s Experimental tab for good reason. Aside from not being straightforward to configure at the moment, it also doesn’t function perfectly on all 3D models. For example, sometimes it will produce thicker layers when you need thin ones, and vice versa.
Depending on the calibration, configuration, and overall build quality of your 3D printer, the machine might also be unable to deal with some of the requested layer heights. For example, Z-axis issues can give you worse results on thinner layers with adaptive layers enabled.
What Are the Best Cura Adaptive Layers Settings?
To achieve optimal 3D print results, it is crucial to adjust the adaptive layer parameters. You can access these after you enable the main Adaptive Layers setting in Cura. Below are the best Cura adaptive layers settings to focus on.
Maximum Variation
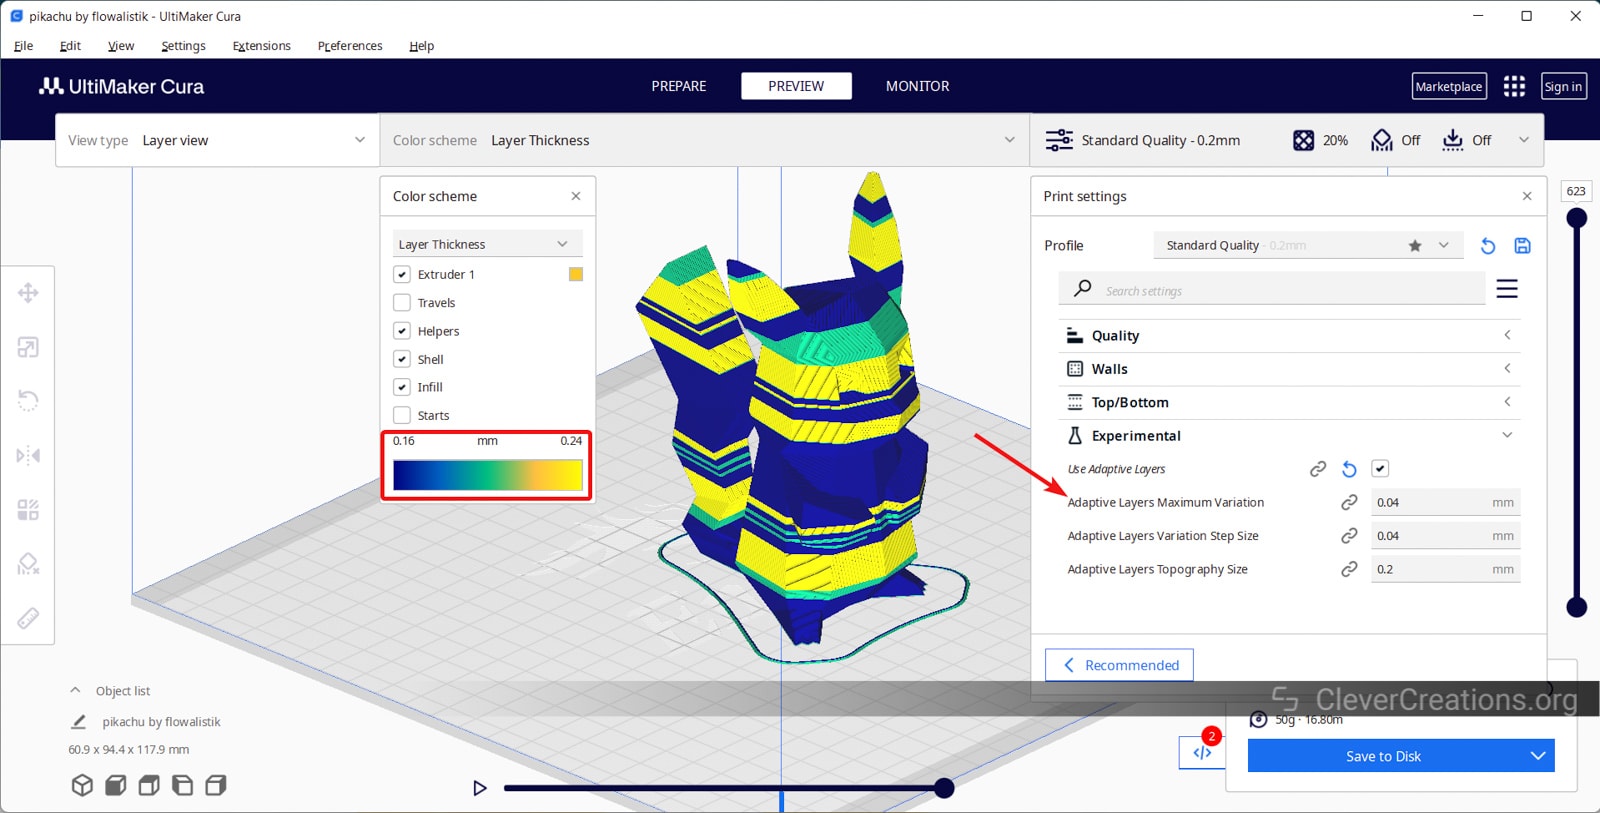
The Maximum Variation option controls how much variation there can be in layer thickness. It is an offset from the base layer height that you have selected for the 3D print.
For example, if your base layer height is set to 0.2 mm and the maximum variation is 0.04 mm, then your models will have layer heights between 0.16 and 0.24 mm.
A higher maximum variation lets you 3D print with a thicker layer height in low-detail areas, which speeds up the printing process. However, it may also print many unnecessarily thin layers in complex geometry areas, pulling the print time in the other direction.
A smaller maximum variation, on the other hand, doesn’t change your print all that much. For example, you won’t see much difference between a model that was printed with 0.2 mm layers, or one that was printed with layers between 0.18 mm and 0.22 mm in thickness.
In the end, like with most 3D print settings, it’s a matter of finding the right balance.
The default 0.04 mm setting gives good results for most users (with a 0.2 mm layer thickness). If it doesn’t for you, you can try changing the distance in 0.02 mm steps.
If you 3D print with thicker layers by default, it is a good idea to keep the maximum variation proportional to the base layer height. So if you print with a 0.4 mm layer thickness, a 0.08 maximum variation would work well.
Variation Step Size
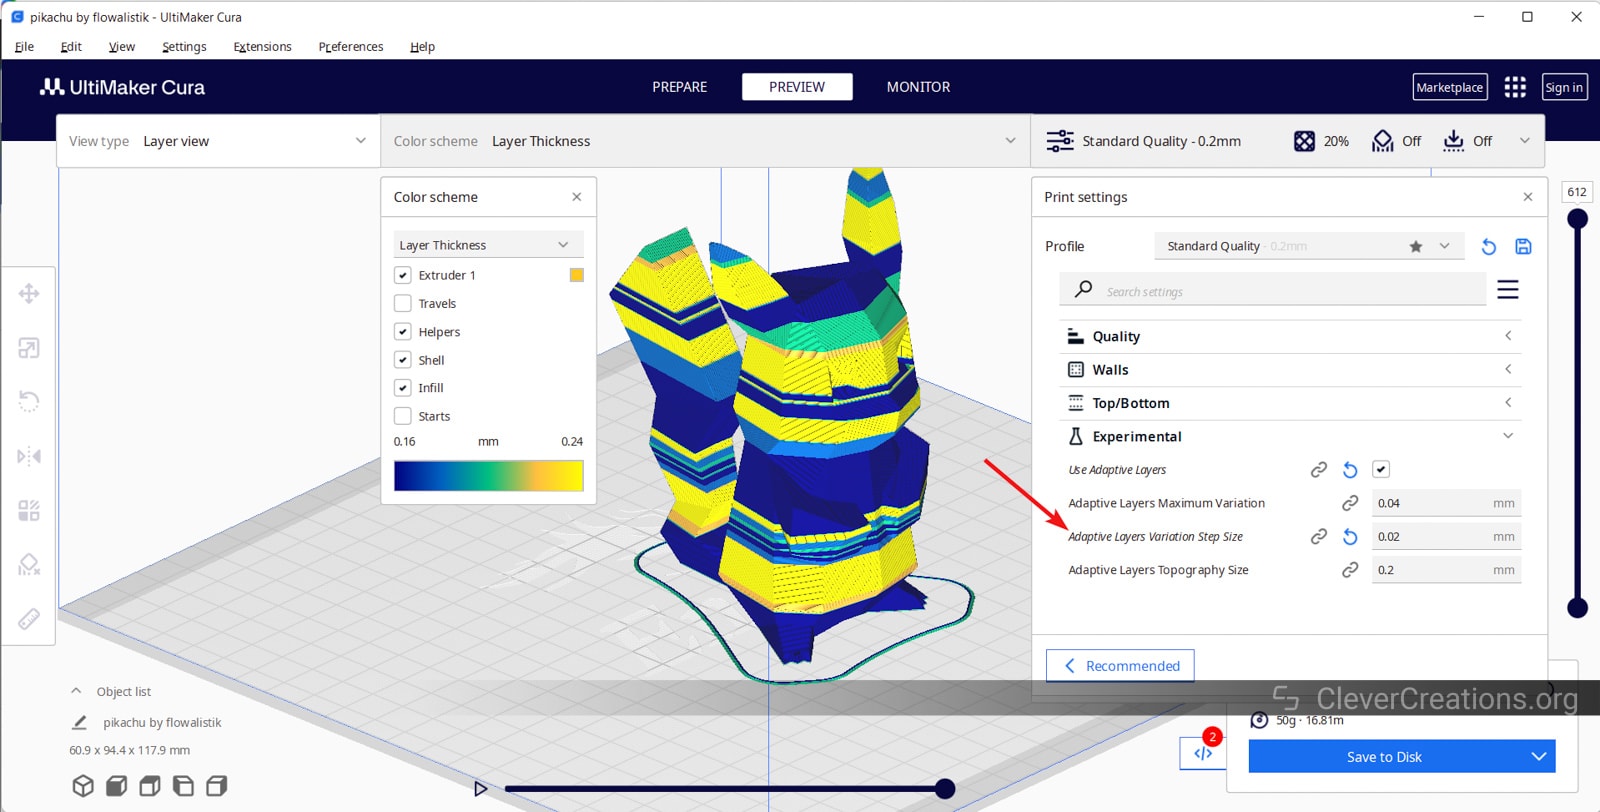
The variation step size determines how much the printer changes the layer height with each new layer. Prints with a smaller variation step size are smoother and more detailed, but they take longer to print as a result.
In Cura, for instance, the standard number is 0.04 mm. Therefore, the difference in layer height between the two regions is smaller than 0.04 mm. If you change it to 0.02 mm, the transition will be less abrupt, and the surface will be more polished.
There is little need to deviate from the default because it consistently produces the finest results. If you do want to try something new, try not to stray too far from this number and make small changes.
Topography Size
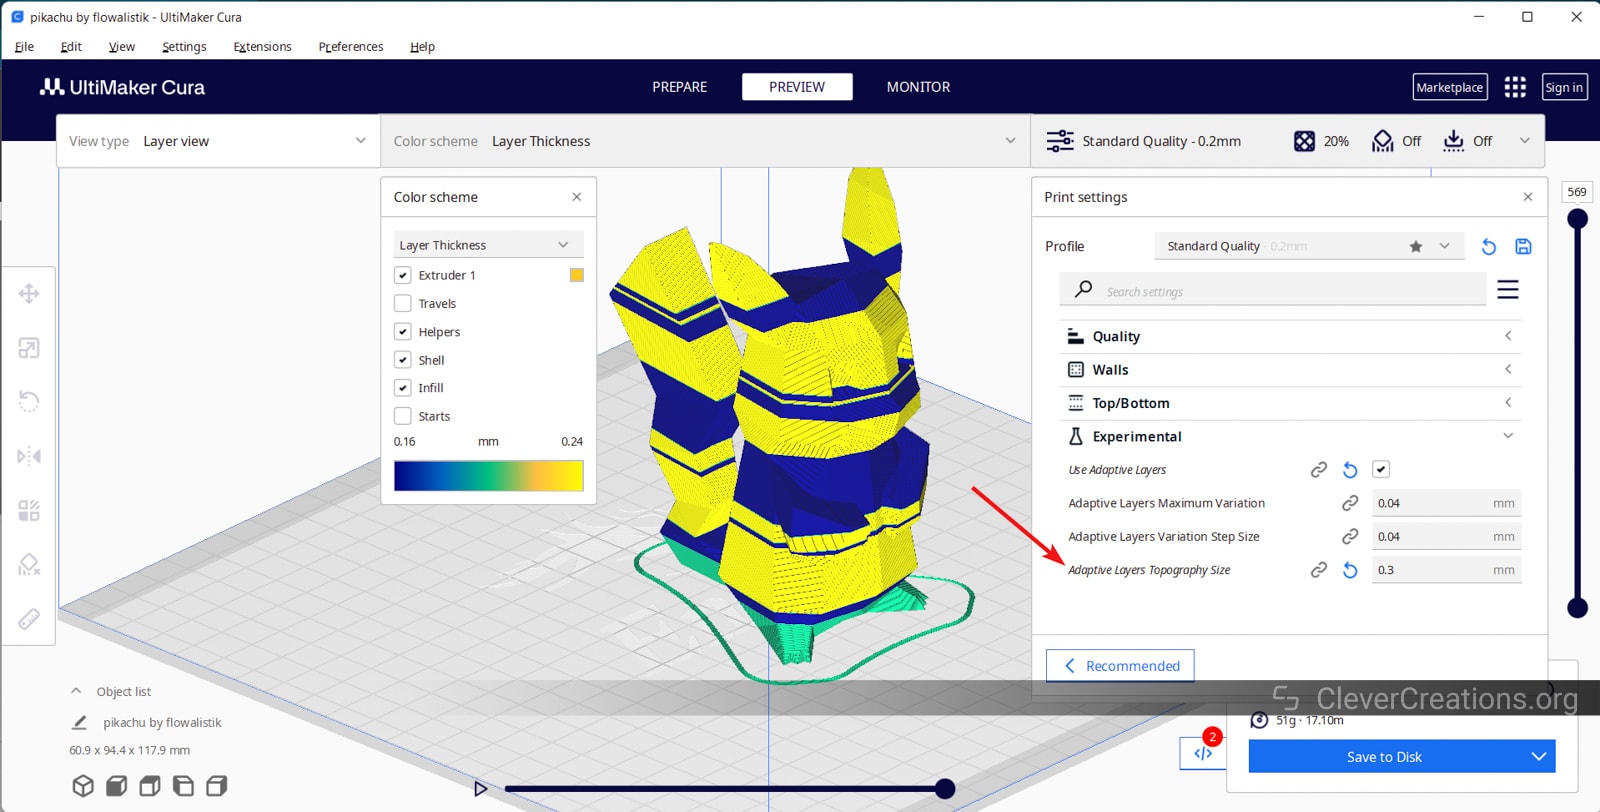
This setting was originally known as the Adaptive Layers Threshold. Its name was later changed to the Topography size for simplicity’s sake. This function adjusts the horizontal distance between two sequential layers in your model.
Adjusting the topography size setting in Cura is most useful when you are running into problems with steep overhangs. Sometimes, on steep overhangs, the next layer does not overlap with the current one, and instead prints in mid-air. By adjusting the topography size, Cura adjusts the layer height to ensure more horizontal overlap between layers.
A lower value will give you thinner layers and better detail in your prints, with the increase in the number of layers and print time. The default value is 0.2 mm; however, you may lower it for detailed prints or raise it to speed up the printing process.
Cura Adaptive Layers vs. PrusaSlicer Variable Layer Height
While Cura’s adaptive layers feature is one of the most popular options for variable layer height, it’s not the only one. Prusaslicer also offers a variable layer height feature that works similarly to Cura’s adaptive layers. There are, however, distinctions between the two.
The PrusaSlicer option lets you make custom layer heights based on the shape of your model. On the other hand, Cura’s adjustable layers are built on a set of predetermined heights for each layer, which makes it harder to customize.
Furthermore, you have more control over the variable layer height settings in different areas of the model with the PrusaSlicer. You can easily change the height of layers using a slider and define the quality of your prints. This makes it easy to quickly adjust the heights of the layers, and it’s very useful for visualizing complicated projects with different levels of detail.
Which Types of 3D Prints Benefit Most From Variable Layer Height?
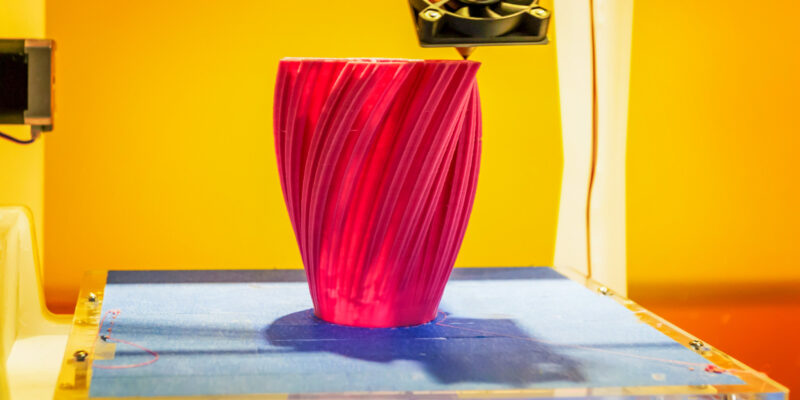
Some of the types of prints that are likely to see the greatest improvements include those with complex geometries, curved surfaces, and fine details. 3D-printed miniatures, decorative pieces, vases, and statues fall under this category.
Additionally, prints that require a high level of surface finish, such as those used in the medical or dental industries, may also benefit from adaptive layers.
Conclusion: Are Cura Adaptive Layers Worth Using?
The adaptive layers feature in Cura is a strong tool to improve the speed of your 3D prints and achieve increased detail. For complicated or intricate models, the advantages of adaptive layers—a higher print quality and lower print time—are worth the drawbacks.
By experimenting with different settings and exploring other variable layer height options, you can find the ideal solution that best suits your needs. Whether you’re an expert at 3D printing or just starting out, we think adaptive layers are something that you should have in your slicing arsenal.
Give Cura’s adaptive layers a try and let us know how it went in the comments!