
- Delivers quality prints
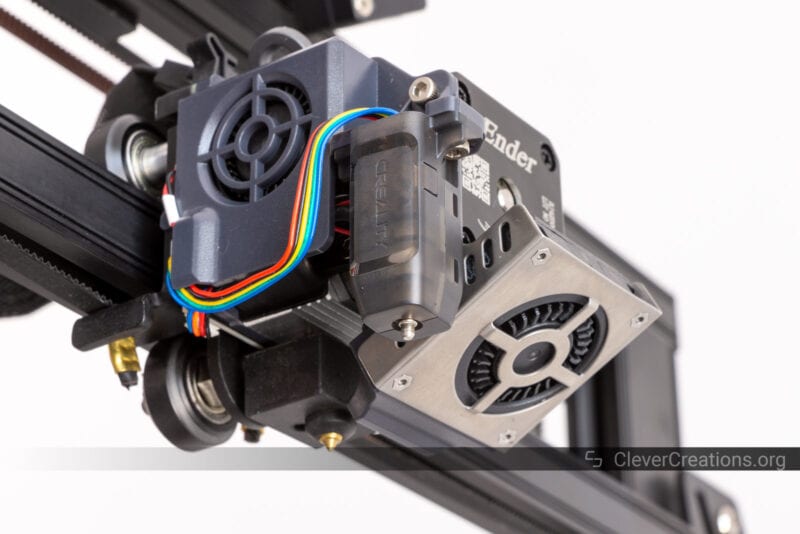
- Sprite extruder
- Automatic bed leveling
- Easy to use touch screen
- Excellent safety features
- Assembly is as easy as it gets
- Good bed temperature uniformity for its size
- Impractical print cooling fan placement
- Print bed gets up to temp slowly
- Rubber feet leave residue on surfaces
- No all-metal hot end
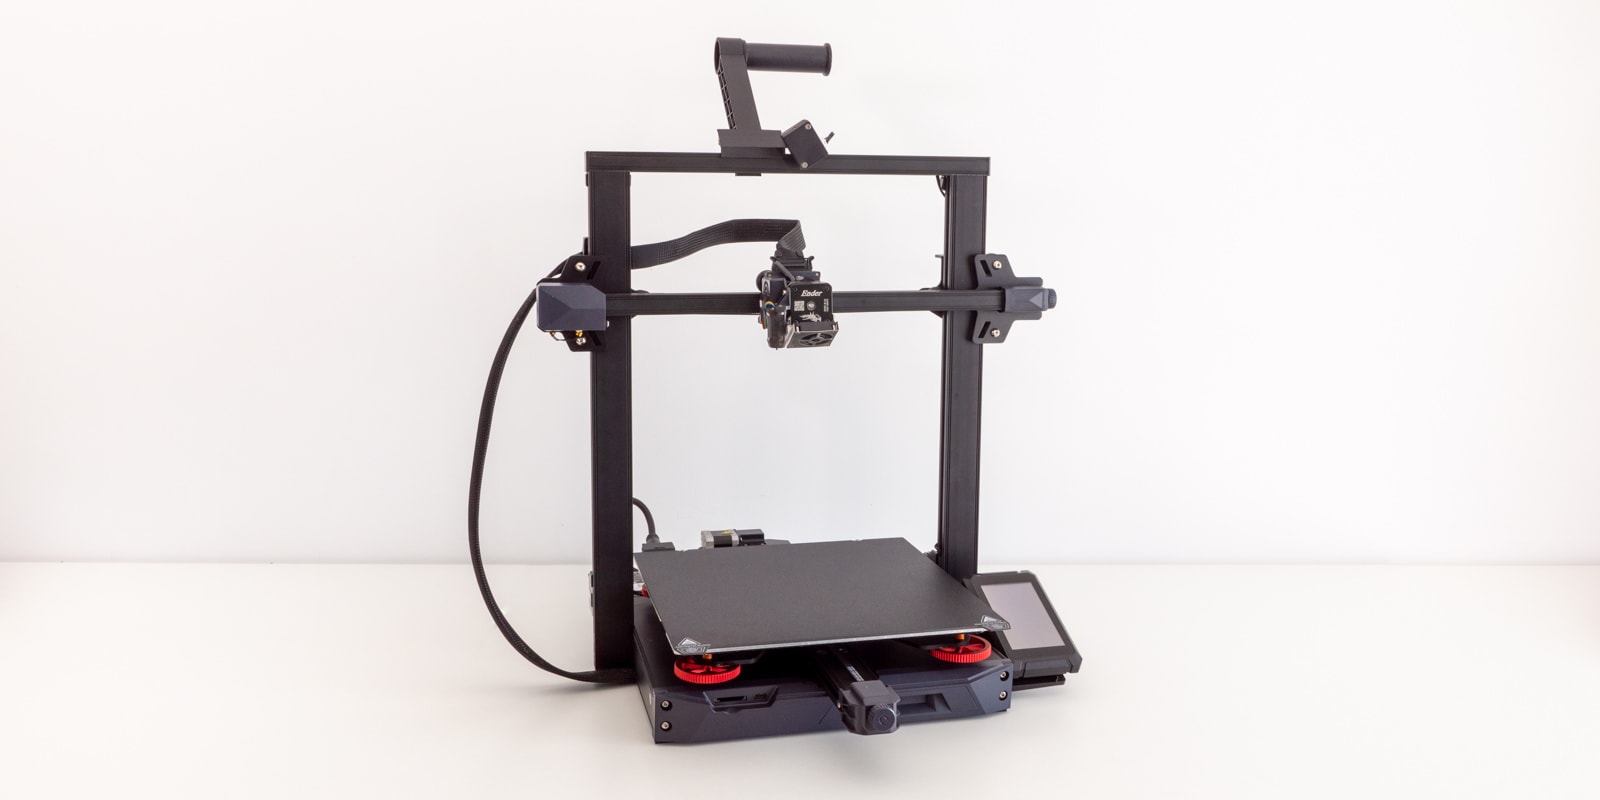
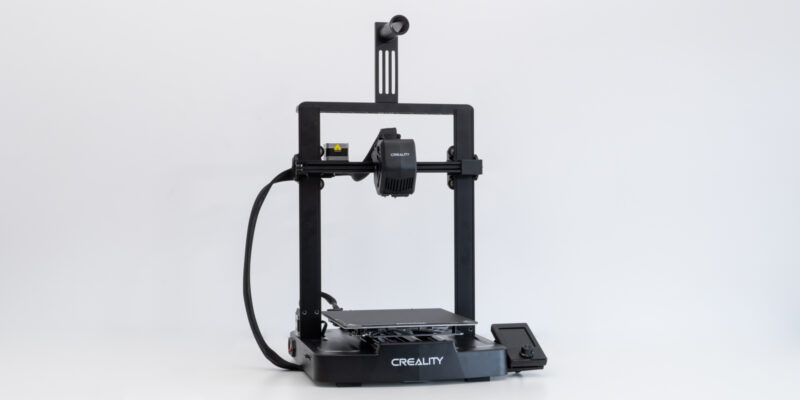
The Ender 3 S1 series is Creality’s new line of mid-range 3D printers. It builds on the original Ender 3 line, which with its V2, Pro, and Max models, has become one of the most popular entry-level 3D printers on the market.
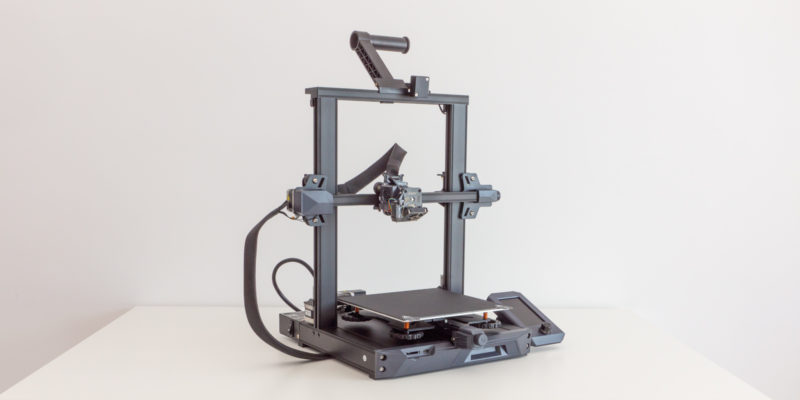
The S1 Plus is the latest release in the S1 series. With its features, it is a mix of the regular S1 and S1 Pro. Despite that, it also has a couple of unique features. For example, its build volume is significantly larger than that of both of its siblings.
In this Ender 3 S1 Plus review, we’ll put the 3D printer to the test and see how it performs. We’ll also take a look at its key features and see if it is worth its current asking price.
Since we already made in-depth reviews of the Ender 3 S1 and Ender 3 S1 Pro, we will not cover the Plus as extensively as we typically do. To get a more comprehensive overview of this 3D printer, you might also want to check out our other reviews of the S1 models.
Ender 3 S1 Plus Specs
| Creality Ender 3 S1 Plus Specifications | |
|---|---|
| Price | Creality | Amazon | Creality3DOfficial | AliExpress |
| Build volume | 300x300x300 mm |
| Layer height | 0.05 – 0.4 mm |
| Supported filaments | PLA/TPU/PETG/ABS |
| Connectivity | Type-C USB, SD card |
| Maximum nozzle temperature | 260 °C |
| Maximum bed temperature | 100 °C |
| Build surface | PC Spring Steel Magnetic Plate |
| Leveling mode | CR Touch automatic leveling |
| Resume printing | Yes |
| Filament sensor | Yes |
| Dual Z-axis | Yes |
| Machine dimension | 557x535x655 mm |
| Net weight | 10.25 mm |
Unboxing
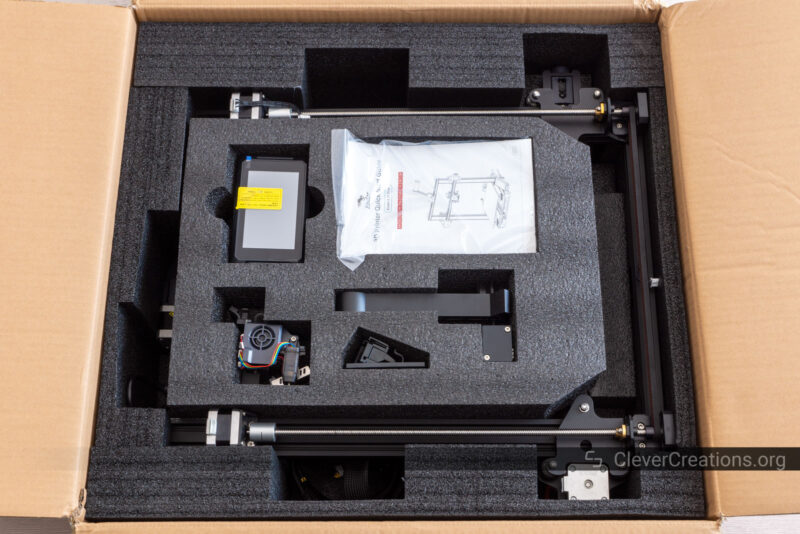
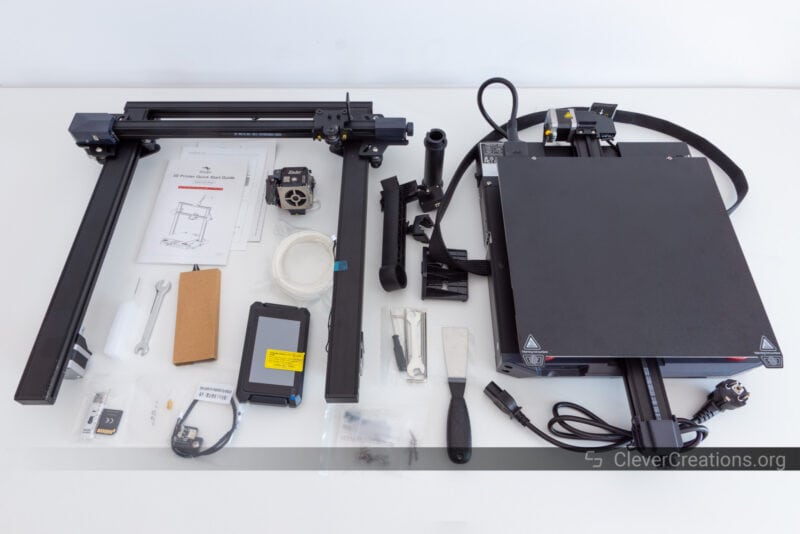
As we are used to from Creality, the Ender 3 S1 Plus 3D printer is well-packed in a box with thick foam. The most sensitive components (touch screen, extruder) are positioned near the middle of the box, which helps protect them during shipping.
Also common in the S1 series is the partially pre-assembled nature of the 3D printer, along with the inclusion of a variety of tools and accessories. Included in the box are:
- 3D printer base
- XZ gantry
- “Sprite” direct drive extruder
- Touch screen and mounting bracket
- Spool holder
- Various bolts for assembly
- A set of 3D printing tools
- Spare nozzle
- SD card
- Power cord
- Small sample of white PLA filament
- Quick start guide and other documentation
This is all you need to both assemble the Ender 3 S1 Plus and to get you started with printing right away. Since the machine uses a PC-coated spring steel print surface, you won’t need to buy Magigoo or another print bed adhesive.
Getting Started
We usually cover the assembly and setup processes of the 3D printers we review to give a good idea of what is expected of you after purchasing. It also allows us to show you steps that are missing from the documentation or clarify those that are unclear.
In the case of the Ender 3 S1 Plus, we will not go into as much detail about this process as we have with other 3D printers. This is because the process is fairly identical to that of the Ender 3 S1 and Ender 3 S1 Pro, which we have already documented.
Assembly
There are still a couple of things that stand out with the S1 Plus assembly that we would like to point out.
The first is that the XZ gantry is mounted to the side of the base instead of to the top. This means that you won’t have to flip the machine on its side to insert the mounting bolts through the bottom of the base. This is a small change, but it’s one that saves you some time and effort.
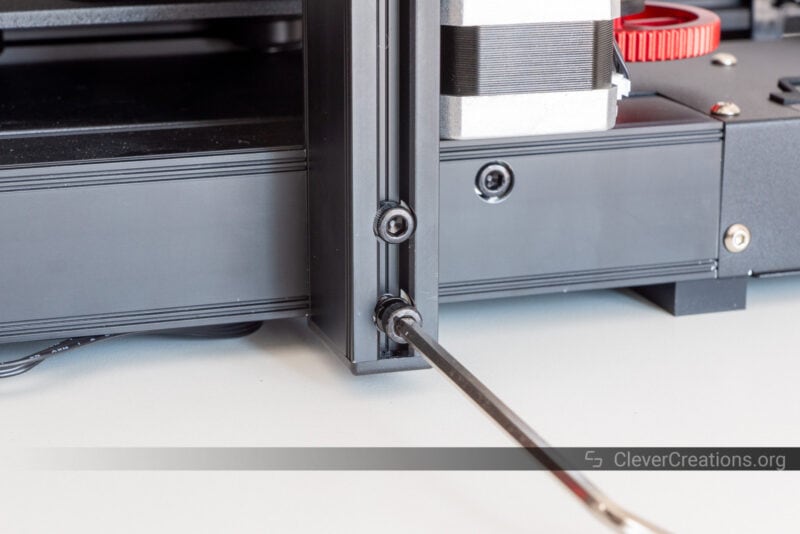
We’ll go into more detail later on how this affects the 3D printer in use because it also has a few implications for the rigidity of the machine.
The other thing that stands out is that the Ender 3 S1 Plus routes its Z-axis and filament sensor wiring out of the way of the print bed.
This was an issue that we ran into when reviewing Creality’s CR-10 Smart Pro. On that machine, we needed to tape down the wires to prevent them from getting caught by the leveling wheels of the moving print bed.
Here, the wiring is neatly tucked away by default, so there is no need for taping or other creative wire management solutions. A good improvement from a safety standpoint.
Altogether, these minor improvements let you assemble the Ender 3 S1 Plus in about 10 minutes. It’s about 5 minutes less than we typically see for most other pre-assembled machines.
Compared to low-budget machines with a similar build volume, like the Longer LK5 Pro, the assembly of the Ender 3 S1 Plus is short and painless.
Setup
Unfortunately, as is common with Creality’s documentation, the steps for removing any slack from the 3D printer after assembly are missing.
This refers to the process of tensioning the timing belts and adjusting the eccentric nuts on the X-, Y-, and Z-axis. Doing this helps ensure that there is no play in any of the moving parts.
You can find the instructions for this in our other Ender 3 S1 series reviews and we want to make sure you don’t forget about them. Skipping these steps will lead to inaccurate and messy 3D prints.
The process of leveling the print bed is also identical to that of the other S1 machines. The instructions for this are clear, and with the included automatic bed leveling sensor it is a very quick and easy task.
Creality Ender 3 S1 Plus Features
Build Volume
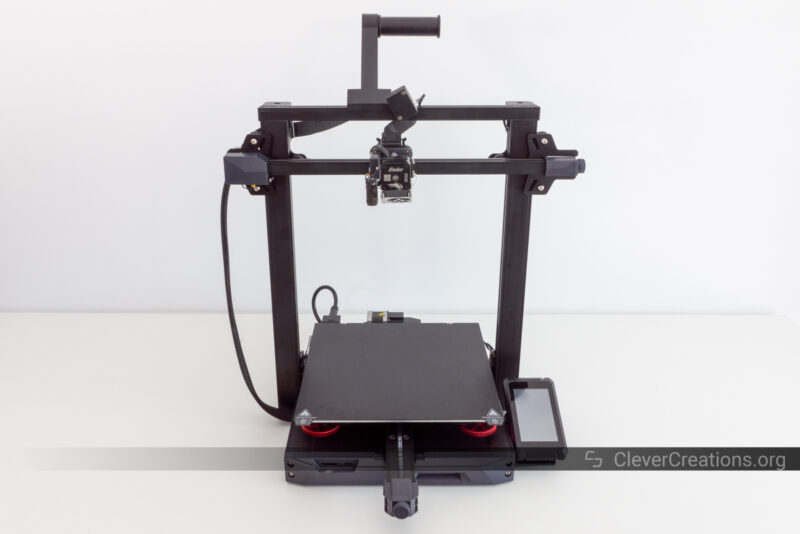
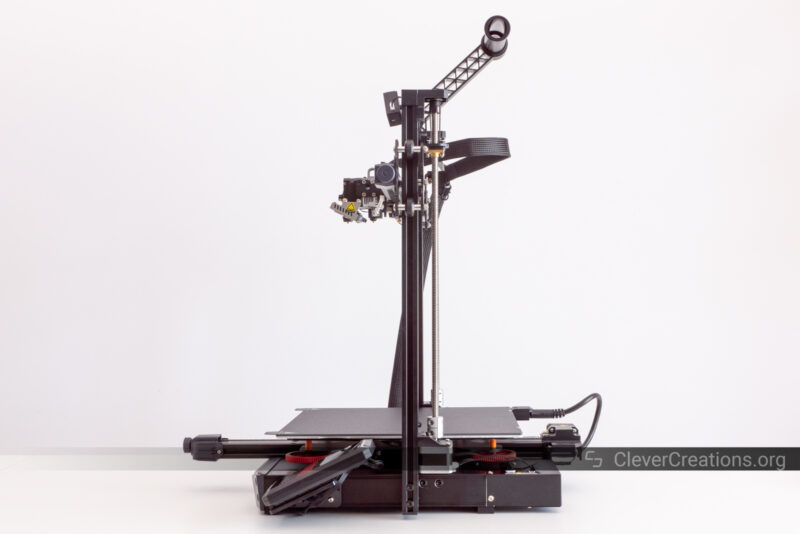
Unlike the other 3D printers in the Ender 3 S1 line-up, which have a 220x220x250 mm build volume, the S1 Plus comes with a 300x300x300 mm print area. This classifies it as a large 3D printer, and it is good to see that Creality added a machine with a larger print volume in the S1 line-up.
In that regard, the S1 Plus is similar to the Ender 3 Max, which was the largest option in the original Ender 3 series. That machine has since been superseded by the newer Ender 3 Max Neo. The Max Neo is not that different from the S1 Plus, but it comes without a touch screen and Creality’s new “Sprite” direct drive extruder.
The 300x300x300 mm print volume of the Ender 3 S1 Plus is more than enough to comfortably print most things that you would want to make. Unless you have specific requirements that demand real large-format 3D printing, this machine will provide you with enough space.
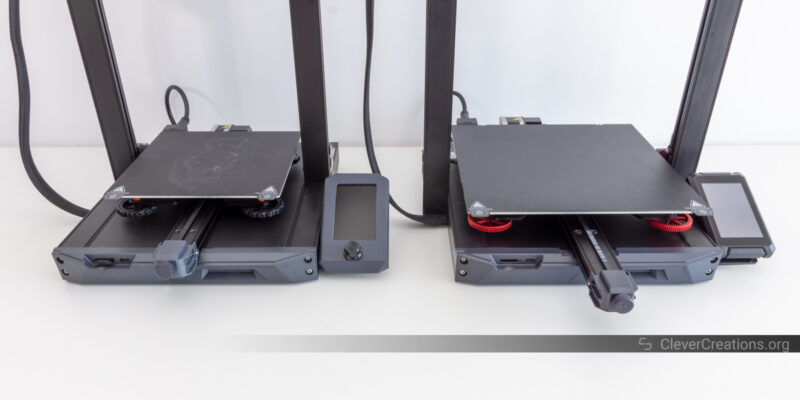
A nice thing about the extra build volume of the S1 Plus is that it does not increase the footprint of the machine by much. Because the vertical arms of the XZ gantry are bolted to the side of the base, the footprint is only marginally bigger than the regular Ender 3 S1.
In fact, putting the S1 and S1 plus side by side, it is clear that both 3D printers use the exact same base. So it’s the XZ gantry, heated bed, and LCD screen of the Plus that make the difference between the two.
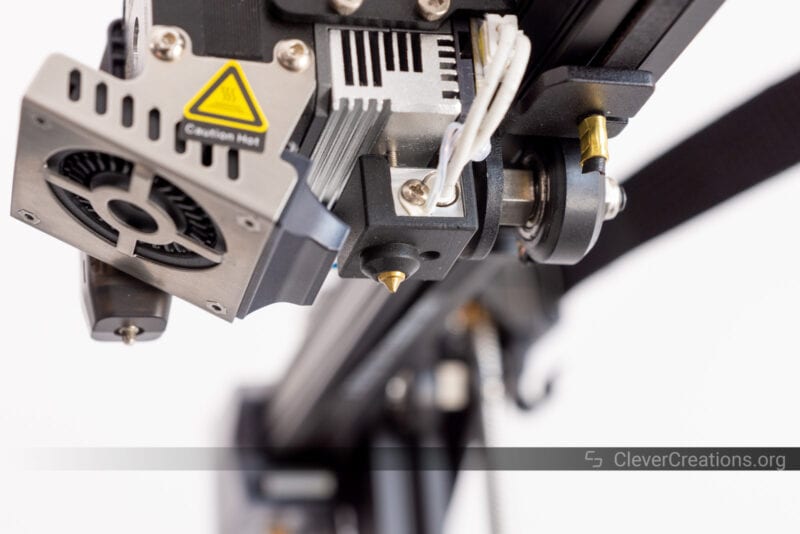
Extruder
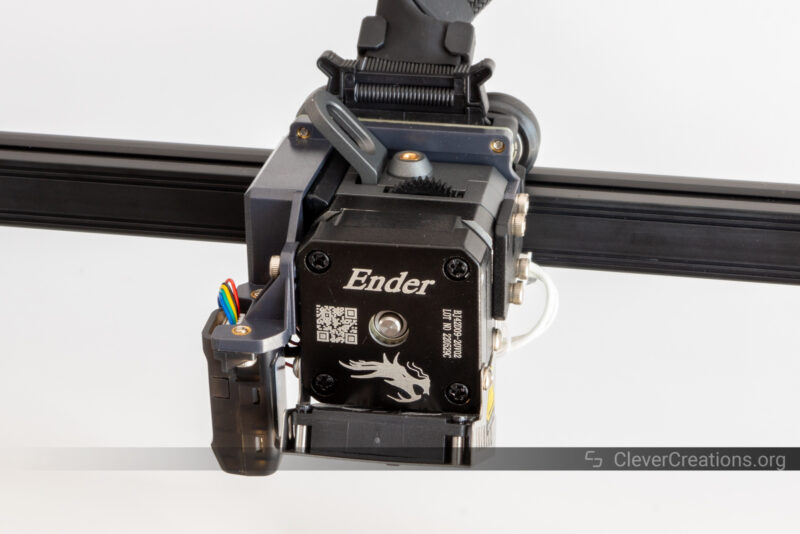
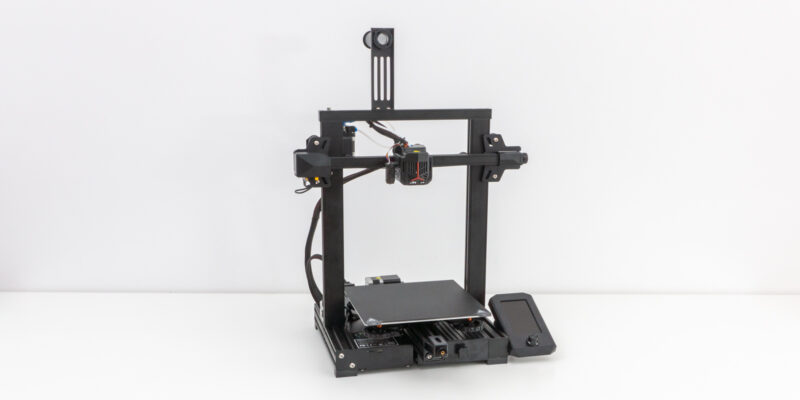
Just like the 3D printer base of the S1 and S1 Plus are the same, so is the extruder. It is the new “Sprite” direct drive extruder that we have been seeing a lot in Creality’s new 3D printers. For example, the enclosed Sermoon V1 Pro makes use of it as well.
The Sprite has proven to be a good direct drive extruder in our testing. Its geared design means that it can apply more force to the filament than other 3D printer extruders. And because it uses a dual drive gear setup, that force is delivered to the filament effectively without stripping the filament.
So far, all filaments we have thrown at it, from PLA to ABS, PETG, and TPU, have been fed smoothly without issues.
That said, the regular “Sprite” extruder of the S1 Plus does not have an all-metal hot end, so it can only reach temperatures up to around 240 °C. As such, it is not suited for high-temperature ABS or any engineering plastics.
The extruder is listed to have a maximum temperature of 260 °C, but you don’t really want to go there for too long. This temperature will degrade the PTFE liner of the hot end.
You can always upgrade to the “Sprite Pro” version of the hot end later, which has an all-metal design and can reach temperatures up to 300 °C. This is a popular Ender 3 upgrade and it is even easier to upgrade with on the S1 Plus.
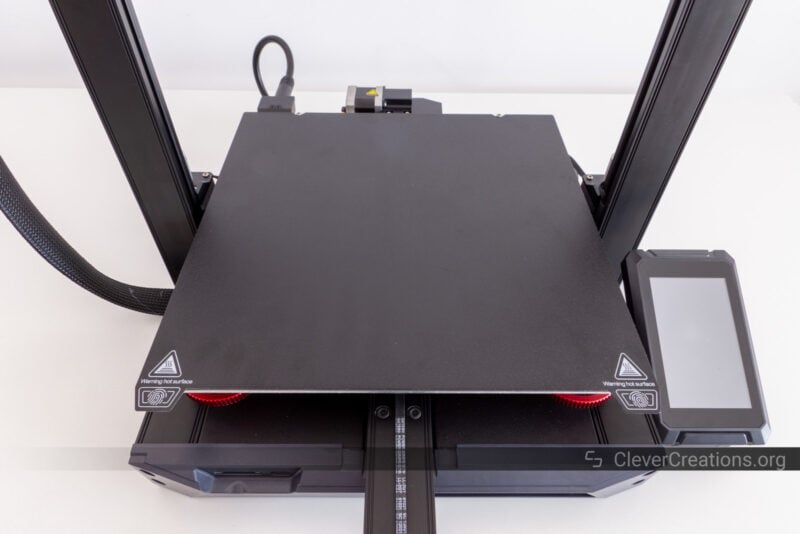
Print Bed
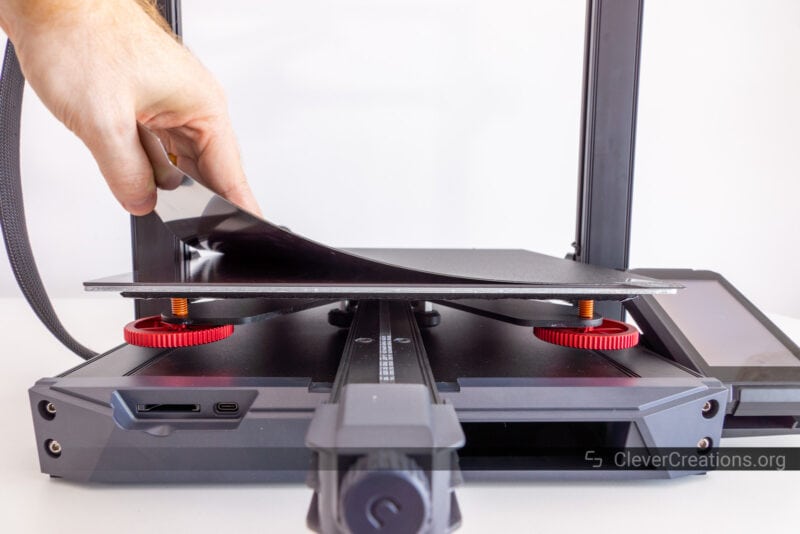
Just like the rest of the S1 series, the S1 Plus comes with a flexible magnetic build plate. It provides you with a quick and easy way to remove 3D prints from the bed. Flex it and the prints pop right off.
The build plate itself is PC-coated. In our experience, that makes it a bit more difficult to work with than a PEI-coated build surface. The latter is what the S1 Pro comes with, and we think that Creality should have included it on S1 Plus as well.
The main difference between PEI-coated and PC-coated print surfaces is that filament is sometimes too difficult to remove on the PC-coated beds. This leads to having to force print removal, which in turn wears out the print surface quicker than a PEI-coated one would.
The included print surface is still an overall excellent print bed to work with, and with its 100 °C maximum temperature it is suitable for 3D printing ABS and other high-temperature filament materials.
One thing to be aware of is that you shouldn’t use TPU or other flexible filaments with this type of print bed. It will never come off after 3D printing. Instead, we recommend using a glass print bed.
Temperature Uniformity
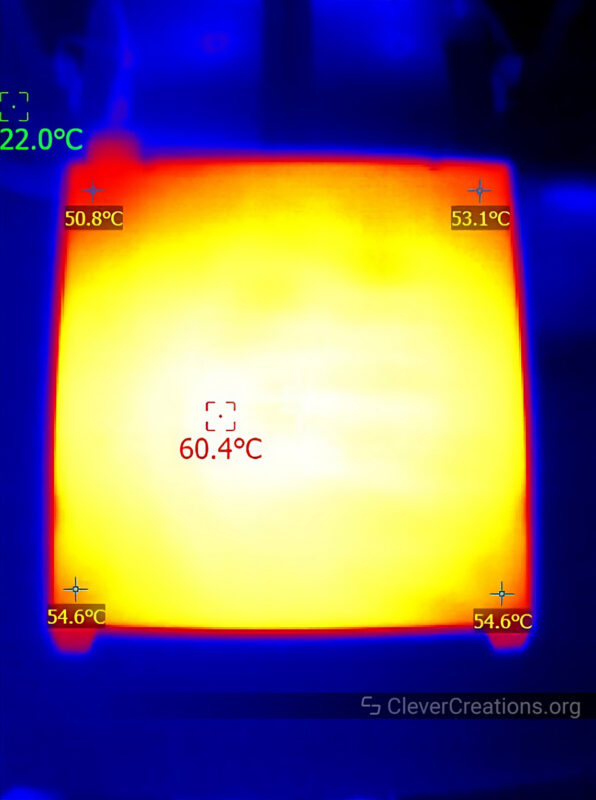
The print bed of the Creality Ender 3 S1 Plus has slightly less temperature uniformity than that of the S1 and S1 Pro. Because of its increased size, that is to be expected.
It is only the four corners of the bed that fall below the setpoint temperature. The vast majority of the print surface is still close to the target temperature.
This means that you can make larger 3D prints in materials with higher thermal requirements without having to deal with excessive warping or delamination.
Heating Times
The 300×300 print bed of the Ender 3 S1 Plus heats up slowly. It takes 3 minutes 36 seconds to reach 60 °C, whereas the maximum 100 °C temperature requires you to wait a whopping 12 minutes 27 seconds.
This does not come as a surprise. Large DC-powered print beds like these tend to take a while to get up to temperature. They are nothing like the AC-powered print bed of the Sidewinder X2, for example.
Auto Bed Leveling
It’s no surprise that the Ender 3 S1 Plus also includes automatic bed leveling functionality. It uses a CRTouch bed leveling sensor, which is essentially Creality’s version of the BLTouch.
Both the sensor and its 25-point probing mesh implementation are great and provide an easy way to automatically adjust for slopes or other unevenness in the bed surface.
As a result, there’s no need for you to spend time on manual leveling with the S1 Plus. However, you still have the option to fix large misalignments in the print bed with the pre-installed aluminum bed leveling wheels.
That should be a one-time thing, though, and after that, the firmware can use the bed leveling sensor to adjust for small bed height discrepancies automatically.
Other Features
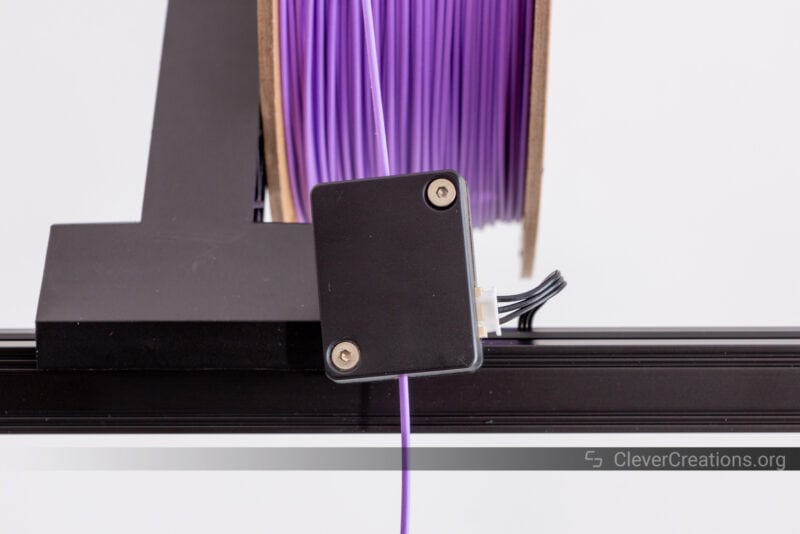
As for the other features of the Creality Ender 3 S1 Plus, you can find a filament sensor as well as a resume print function.
The first is an addition that will automatically pause your 3D print if filament runs out, snaps or tangles. The second is a safety feature that allows the 3D printer to continue printing from where it left off in case of a power outage.
Combined, they reduce the risk of your large 3D prints failing (small ones as well) when something goes wrong.
You won’t find any of the fancy features of the S1 Pro on the S1 Plus. For example, the LED light bar and print bed handle are both not present. Neither is the spool holder with integrated bearings.
None of those features are very important, in our opinion. If you want them, you can always go the DIY route and add them yourself.
Build Quality and Construction
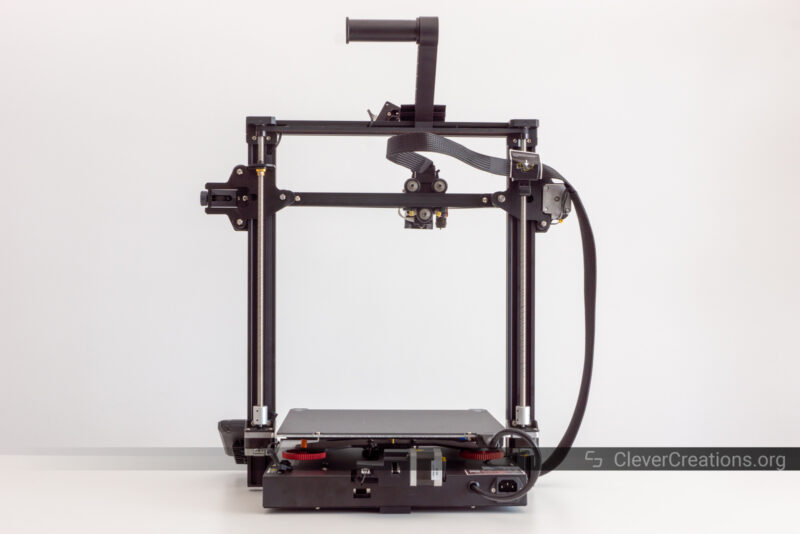
Frame
Unlike most large open-frame 3D printers, the Ender 3 S1 Plus does not come with reinforcing pull rods on its frame. These help form a stable triangle that increases the stability of the 3D printer. That, in turn, gives you higher print speeds without sacrificing print quality.
That said, the 300 mm print height of the S1 Plus is less than the more typical 400 mm of that of large 3D printers like the CR-10 Smart Pro, or Sidewinder X2. So there is less need for extra reinforcement.
In addition, the XZ gantry of the S1 Plus is mounted to the side of its base. This gives a bit more rigidity than when the gantry is mounted on top of the frame, as is the case with many other open-frame FDM 3D printers.
As a result, you shouldn’t have to worry about the S1 Plus frame being too flimsy.
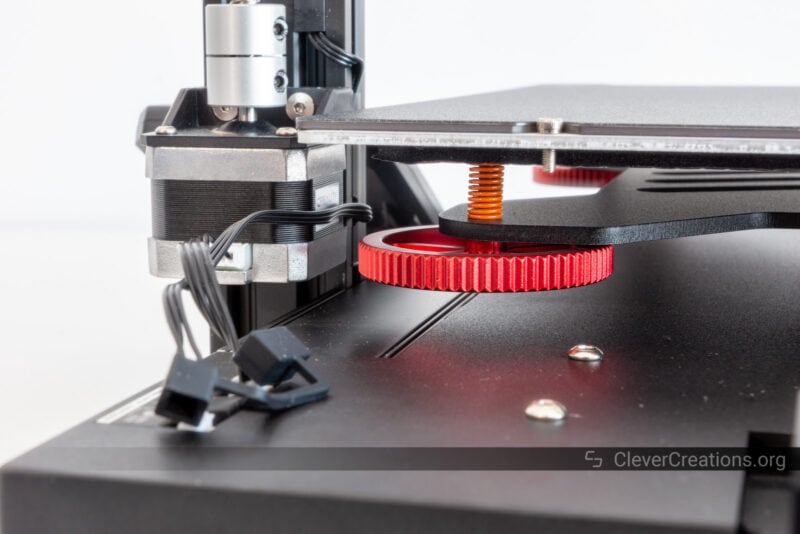
Dual Z-axis
Part of the reason for the good print quality of the Ender 3 S1 Plus is its dual Z-axis setup. This uses two lead screws and stepper motors on each side to drive the Z-axis carriage up and down.
It’s a common setup that reduces Z-banding and vibration, giving you better quality 3D prints.
Most 3D printers in this size category come with a dual Z-axis setup. A notable exception we encountered recently is the extremely budget-friendly Longer LK5 Pro. That 3D printer uses a single Z-axis lead screw instead, which showed up negatively in its print quality.
Electronics & Wire Management
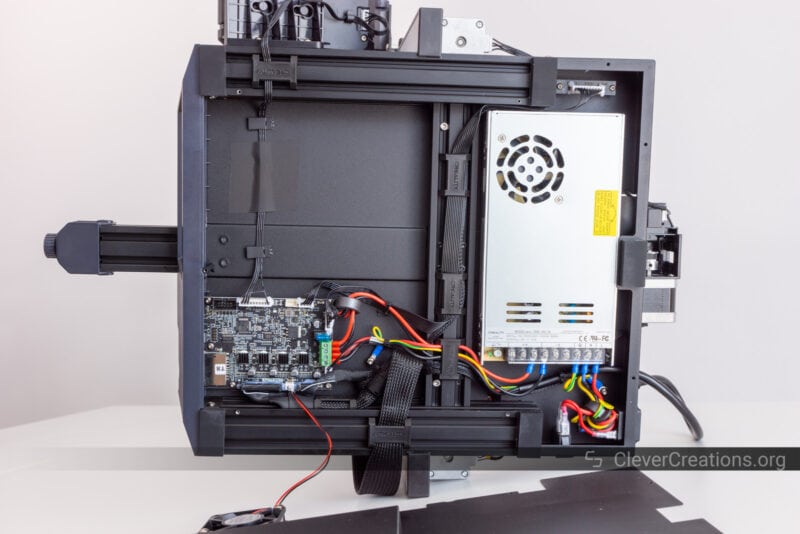
As for the electronics of the Creality Ender 3 S1 Plus, it’s all the same as the rest of the S1 3D printers. The same 32-bit 3D printer controller, the same cable management, and the same excellent approach to safety.
This safety is something that Creality’s current 3D printers excel at. Even though solid safety features are something that we expect at this price point, there are still some manufacturers that cut corners for cost-saving purposes.
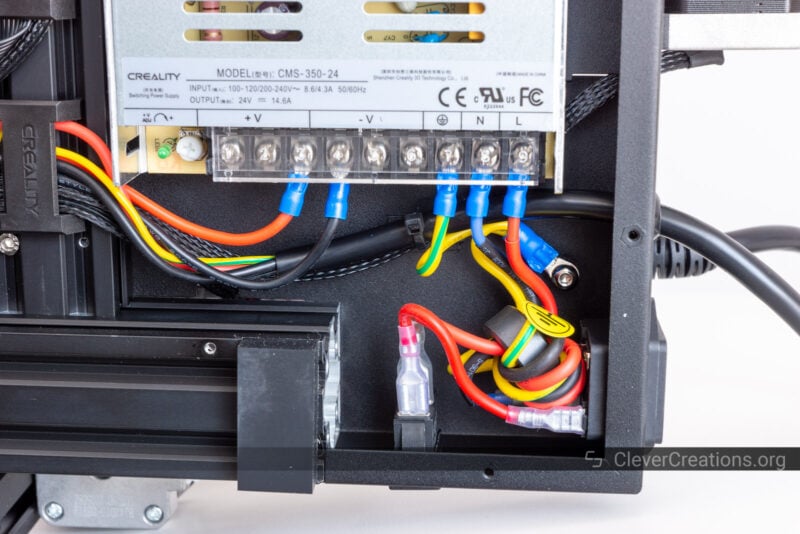
One improvement of the S1 Plus is the addition of wire crimping ferrules to the high-current wiring. This is something we have called Creality out on with some of its previous 3D printers, like the S1 and S1 Pro.
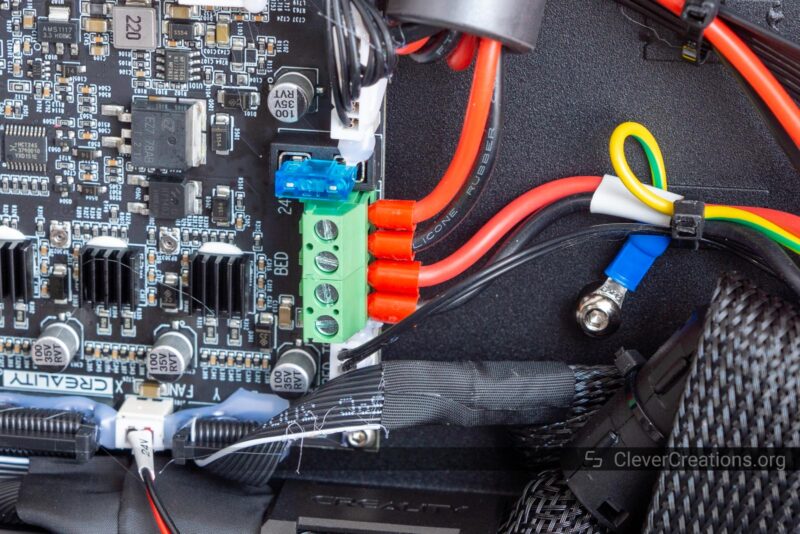
Using crimped instead of tinned wires improves the long-term safety of the 3D printer.
When tinned wires repeatedly expand and contract, they start to make poor contact. This can lead to increased resistance and potentially create dangerous situations, like a fire.
Noise Levels
The Creality Ender 3 S1 Plus is relatively silent, and there is little fan noise. What stands out most when 3D printing is a low-frequency vibration that travels through the frame of the device.
Depending on whether you have the machine placed on a cabinet or a solid 3D printer table, this low-frequency sound might or might not get amplified.
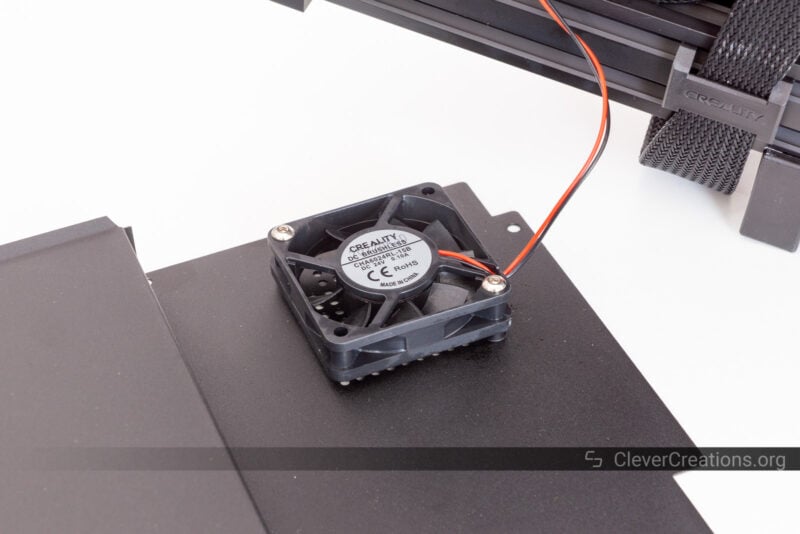
It’s not bothersome in most cases, but if you find it to be a problem, you can always swap out the 60x15mm 24V fan that is responsible for these vibrations.
Ease of Use
You’ll find that the Ender 3 S1 plus uses the same 4.3″ touch screen as the Pro version in the S1 line-up. It’s different from that of the regular S1, which uses a plain LCD screen with a rotary knob.
The touch screen is a bit more practical to use, even though we found that once we got used to the rotary knob, it was easy enough to use as well.
Something that stands out with Creality’s latest touch screens is that you have to press them a bit harder than is typical in order for a click to register. The S1 Plus is the same in that regard, but it is not something that we found to be a problem.
The interface of the Ender 3 S1 Plus is the same as that of the other S1 models. It’s straightforward and intuitive, and it is clear that time has been put into making it user-friendly.
For example, there is no need for you to manually save any configured offsets or bed probing results, it’s all done automatically.
The S1 Plus also comes with the same language options as the Pro version. Whereas the regular S1 only gives you the choice between an English and Chinese interface, the Pro and Plus add German, Spanish, French, Italian, Portuguese, Russian, and Turkish to the mix.
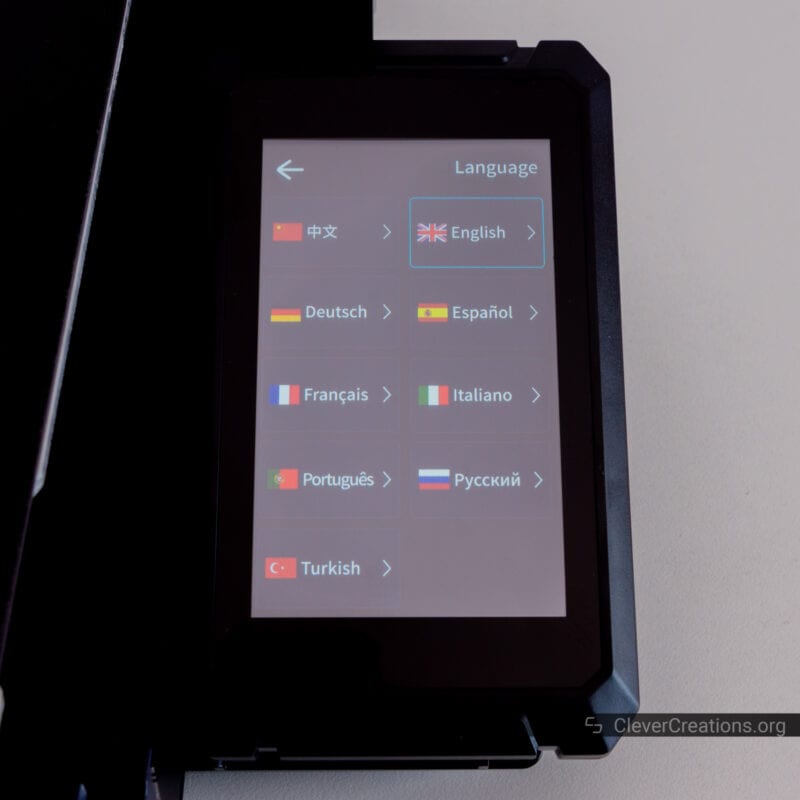
This addition makes the 3D printer more accessible to a wider audience. Even though we do not like to see that this arbitrary language limit was placed on the S1, it is still good that it has been lifted for the Plus and Pro.
Ender 3 S1 Plus Print Quality
Just like Creality’s other S1 models, the Ender 3 S1 Plus scores high in the print quality department. With the same extruder, same dual Z-axis setup, and same rigid frame, this is not surprising.
Cat
The cat Gcode file that comes with the SD card came out near perfect. There is a tiny amount of stringing, but that is to be expected after grabbing a random roll of filament off the shelf.
All overhangs printed without issue, and the fine details came out great. No prominent layer lines, blobs, zits, or other defects anywhere either. Very impressive!


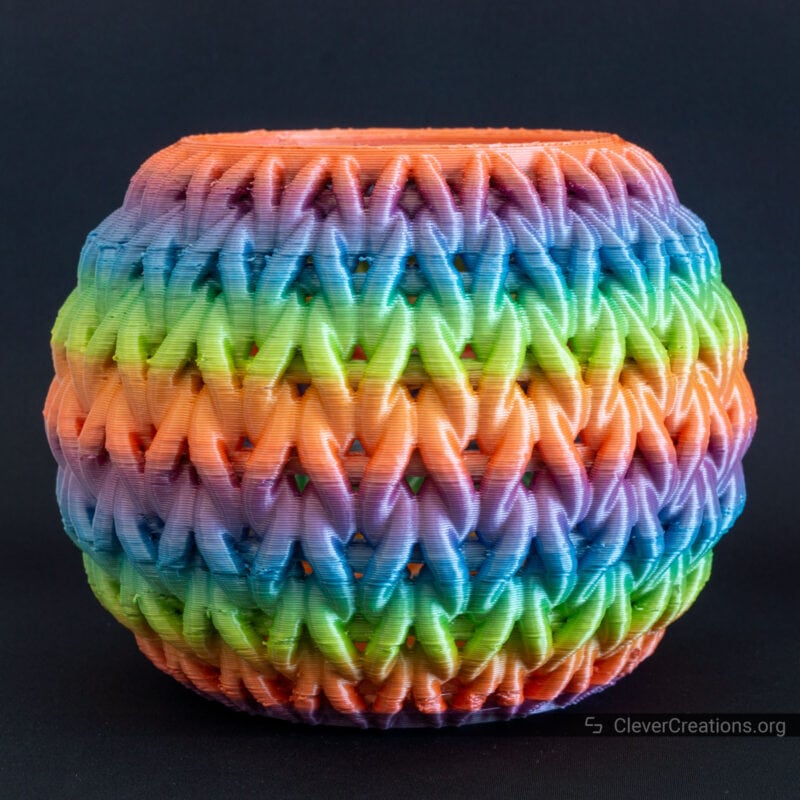
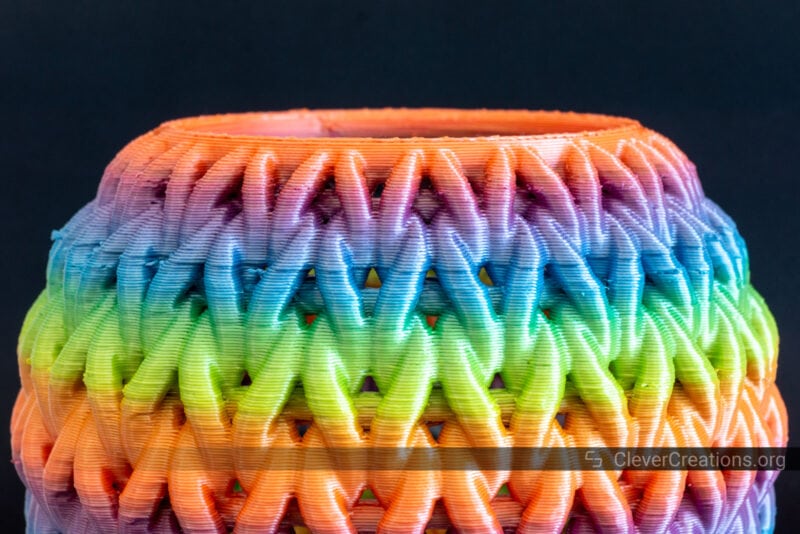
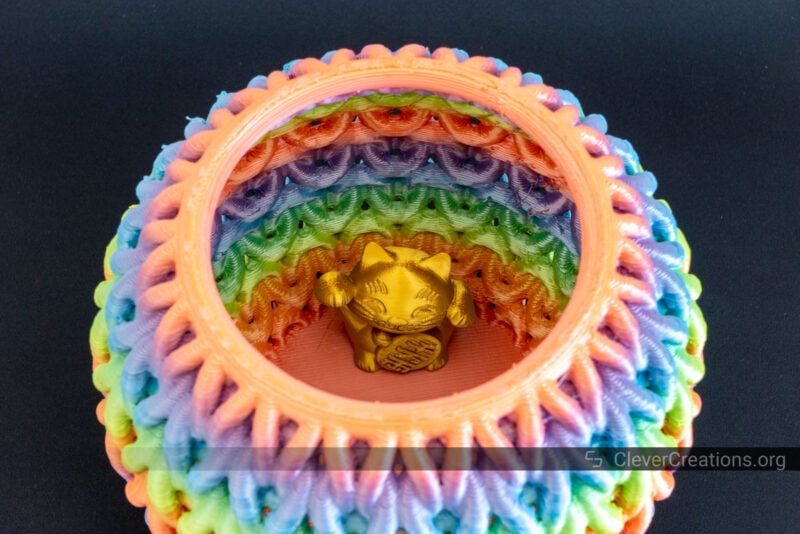
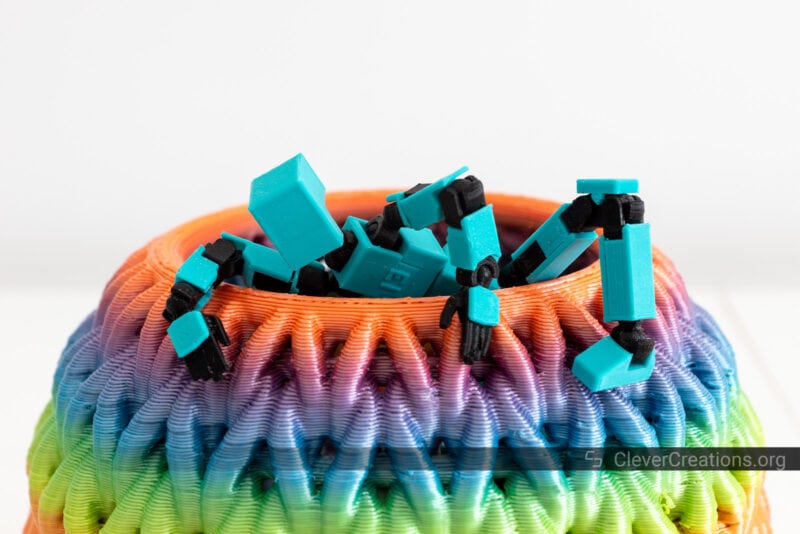
Knitted Bowl
To test the large print volume of the Ender 3 S1 Plus, we decided to 3D print a scaled up version of this knitted bowl. We swapped the stock nozzle out with a 0.8 mm V6 nozzle and extruded 0.6 mm layers to make sure that the print would finish in a reasonable amount of time.
The scale might not be clear from the images, but the dimensions of the bowl are significant. The total weight of filament used was around 0.7 kg (1.5 lbs).
Overall, the result is not bad, but there are definitely a couple of issues we ran into. Most notable are the layer lines. After the first couple of layers, it was clear to us that the hot end had trouble quickly pumping heat into all this filament. Even after turning the print speed down to 40 mm/s, the results were not ideal.
Because we printed round (tall but not that wide) layers, the overhang performance was not great either.
Both of these things were because we pushed the S1 Plus to its limits, and not because there was anything wrong with the printer.
If you want to print large parts quickly, upgrading the S1 Plus with a Sprite Pro extruder or an E3D Volcano hot end lets you melt large volumes of filament a lot quicker.
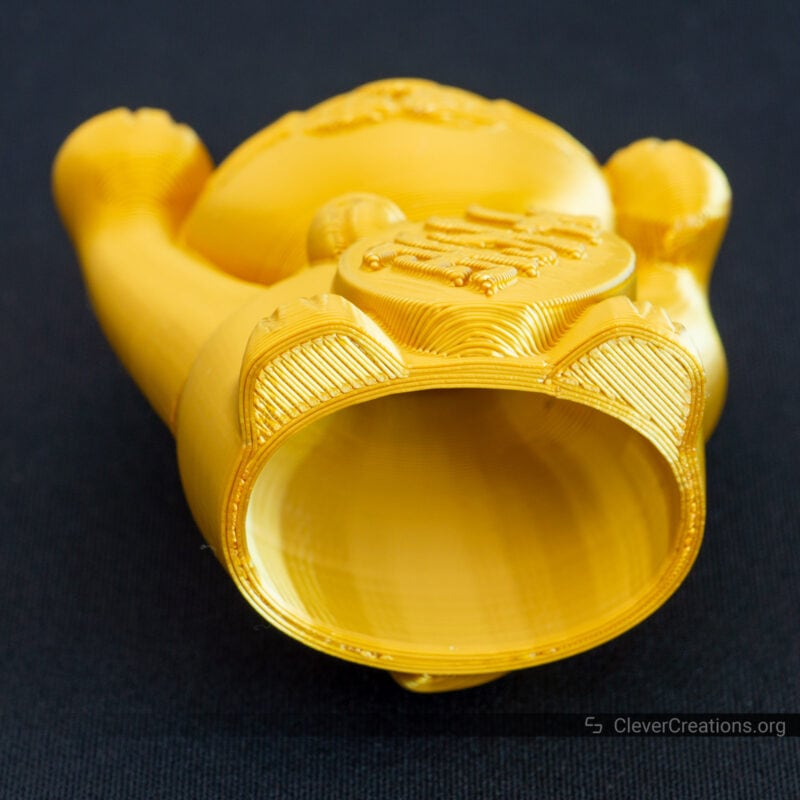
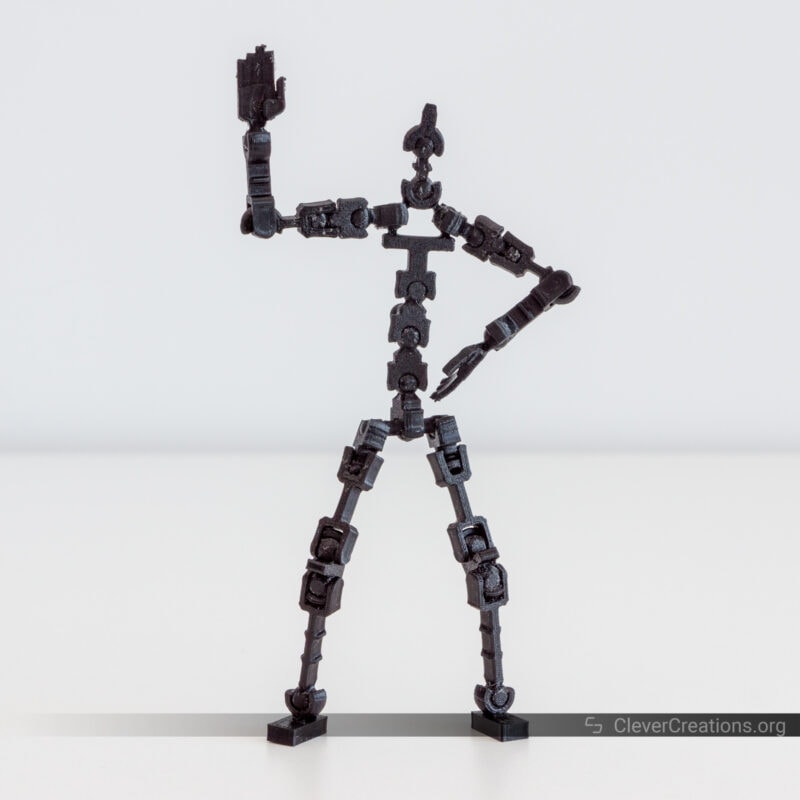
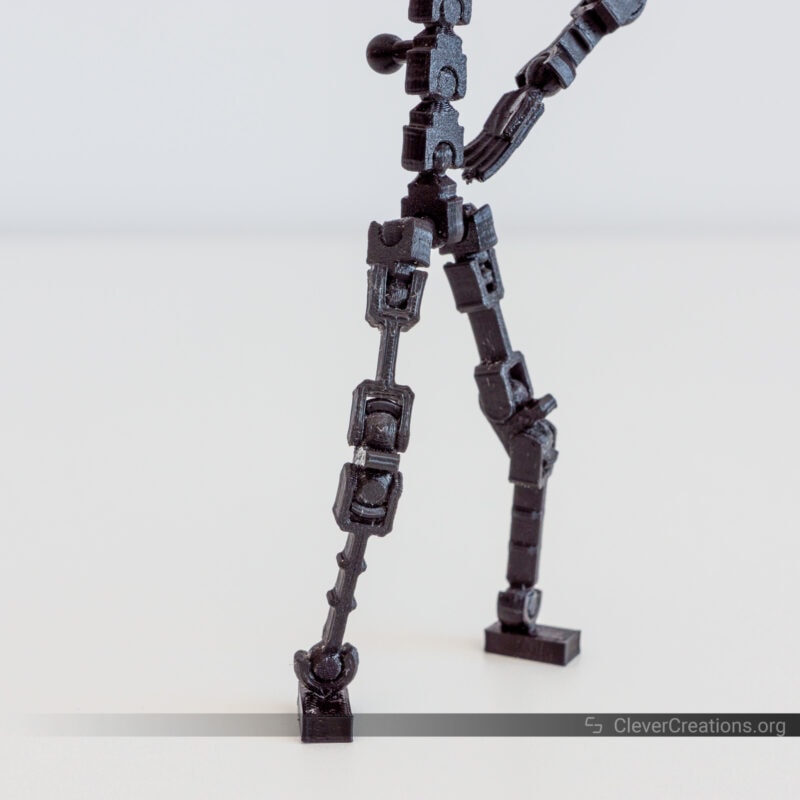
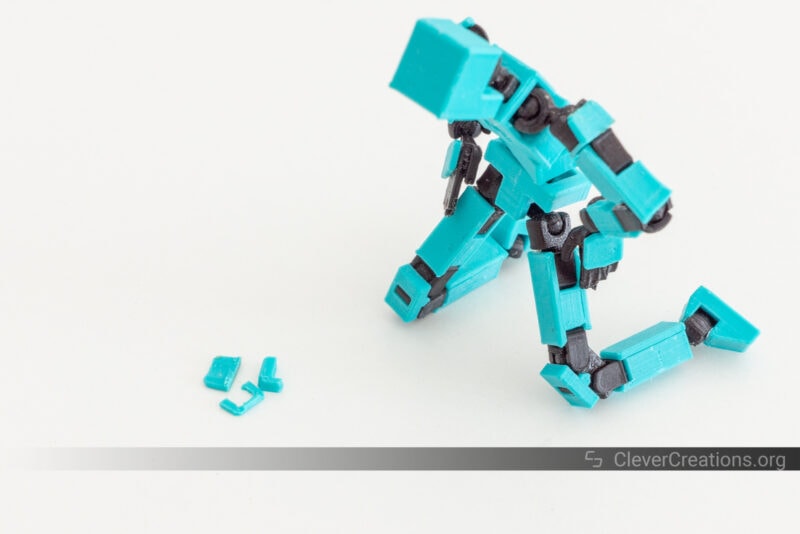
LUCKY 13 Jointed Figure (1)
To test the performance on the small side of the spectrum, we 3D printed this jointed figure. Its tiny features and joints are a great (or should we say small?) test for any 3D printer.
The figure printed out without any issues whatsoever. All the tiny features stuck to the bed well and all the joints fit just right after assembly. Not too loose, and not too tight.
There was a minor amount of stringing on the pieces, but that is easily remedied with a bit of post-processing. A small butane torch takes care of that within seconds.
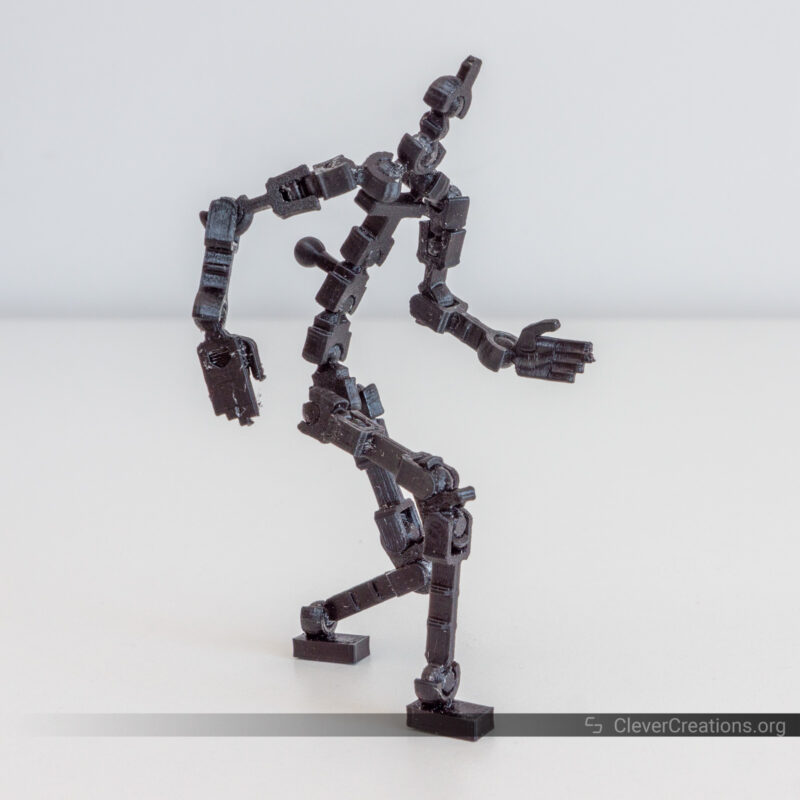
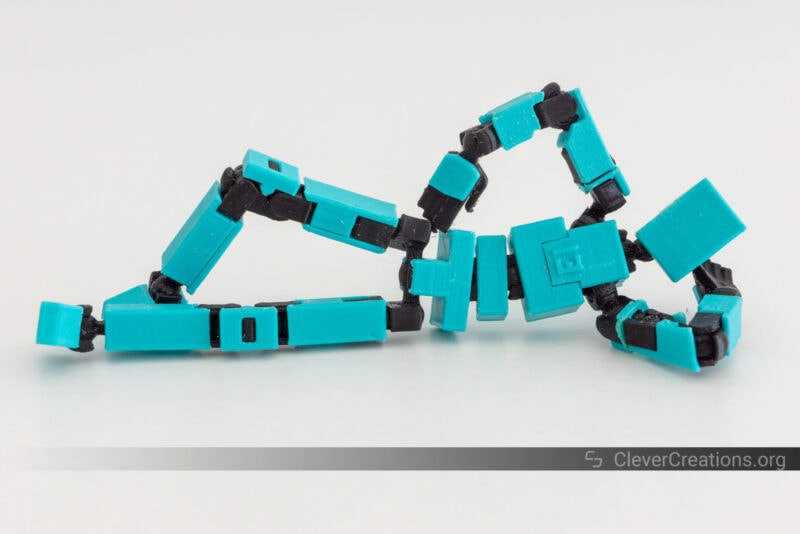
LUCKY 13 Jointed Figure (2)
To prevent our guy from getting cold, we might as well 3D print him a skin. We used PETG to see how the S1 Plus would deal with that filament material.
The overall performance was good again, even though we did have several tiny parts break on us during assembly. Their fit wasn’t quite right and we ended up applying too much force while putting them together.
Aside from that, the print quality was good. Just like with the PLA, there was a bit of stringing. Based on the popping sounds from the hot end, this was caused by moisture in our aging roll of PETG.


Conclusion
The Creality Ender 3 S1 Plus 3D printer is a solid machine that is capable of delivering a quality, reliable 3D printing experience. With its rigid frame, dual Z-axis lead screws, and excellent approach to safety, it is clear that this 3D printer was designed with quality in mind.
Compared to the other 3D printers in the S1 line-up, it falls somewhere in the middle. It is not as feature-rich as the Pro version, but it does come with a few notable upgrades over the regular S1. Its increased build volume makes the Plus stand out from both.
That said, the current $529 asking price of the plus feels a bit too high to us. At the moment, the Anycubic Kobra, with its 2.7 times larger build volume, costs less. The same goes for the slightly larger Artillery Sidewinder X2.
These two other 3D printers are similar in many ways, and you are essentially asked to pay more for Creality’s build quality and the Sprite direct drive extruder.
In our experience, these two elements are superior to those of the competition. However, we aren’t sure if they are enough to compensate for the smaller build volume and increased cost.
In the other price direction, you only have to pay about $200 more to get a CR-10 Smart Pro with all the bells and whistles. A PEI-coated build plate, Sprite Pro extruder, increased build volume, reinforced frame, built-in Wi-Fi, remote camera monitoring, and more.
So while the S1 Plus is a good 3D printer, we feel like it is priced just a bit too high. If you can find it on sale, then it is definitely worth picking up. But at full price, you might be better off with one of the other options.
Just got the ender 3 s1 plus took it out of the box put together leveled the bed and started printing I have 3 enders 3v2’s and a ender 5 plus the 3 s1 plus is by far the easiest I have put together and ran right out of the box. I like it.