
- Good print quality
- Auto bed leveling probe
- Generous build volume
- Stable dual Z-axis
- All-metal Bowden extruder
- Solid safety features
- Impractical spool holder
- Slow heating print bed
- No flexible print surface
- Noisy fans
- Uneven print bed temperature uniformity
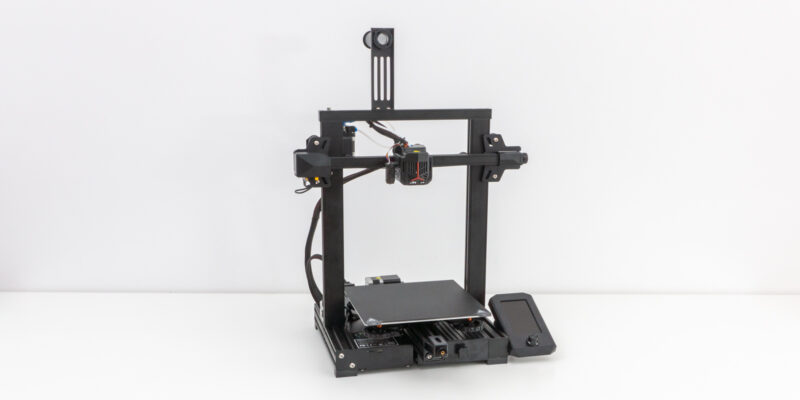
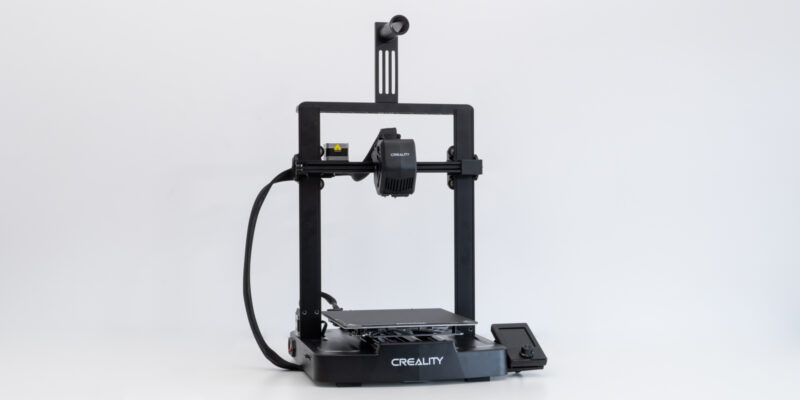
Creality’s ‘Neo’ refresh of the Ender 3 line-up is meant to bring a breath of fresh air to this popular (but aging) 3D printer series. The Ender 3 Max Neo is a refresh of the Ender 3 Max, with new features that aim to make it more user-friendly and bring it up to speed with 3D printers on the market today.
The Max Neo is the biggest of the three machines in the new series. As such, it comes with more features oriented toward 3D printing larger projects, such as a larger print volume, a dual Z-axis setup, and a filament runout sensor.
There’s a lot more to cover, however, so let’s dive in and see what Creality Ender 3 Max Neo has to offer and if it is worth spending your money on.
Creality Ender 3 Max Neo Specs
| Ender 3 Max Neo Specifications | |
|---|---|
| Price | Creality | Amazon | Creality3DOfficial | AliExpress |
| Build Volume | 300x300x320 mm |
| Recommended Print Speed | 60 mm/s |
| Maximum Print Speed | ≤120 mm/s |
| Printing Precision | ±0.1mm |
| Layer Height | 0.05-0.35mm |
| Filament Diameter | 1.75mm |
| Nozzle Diameter | 0.4 mm (standard) |
| Max. Nozzle Temperature | 260℃ |
| Max. Heat Bed Temperature | 100°C |
| Build Surface | Carborundum Glass |
| Extruder | Bowden extruder |
| Extruder Material | Full-metal |
| Leveling Mode | CR Touch Auto-leveling |
| Display | 4.3” Color Knob Screen |
| Mainboard | 32-bit Silent Mainboard (V4.2.2) |
| Slicing Software | Creality Slicer, Cura, Repetier-Host, Simplify3D |
| Data Transmission Method | Micro USB, TF Card |
| Supported Filament | PLA, PETG, ABS, Wood Filament |
| Machine Size | 516x582x590 mm |
| Net Weight | 10.3 kg |
Unboxing
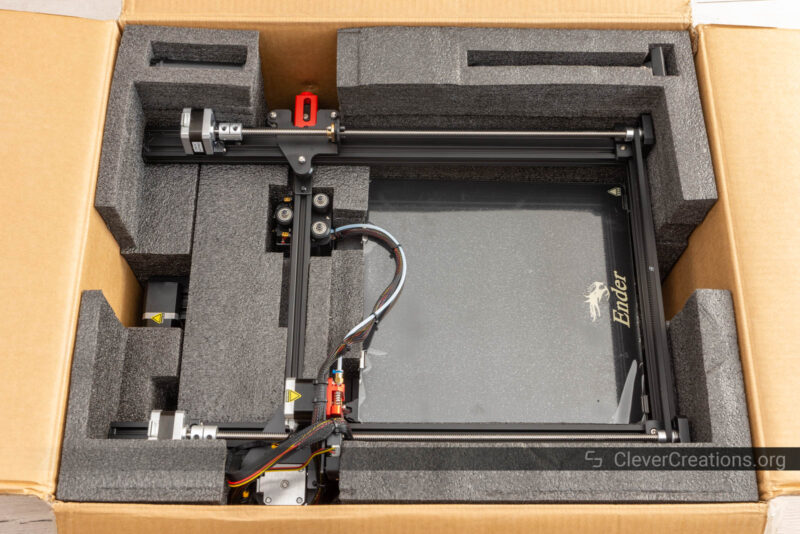
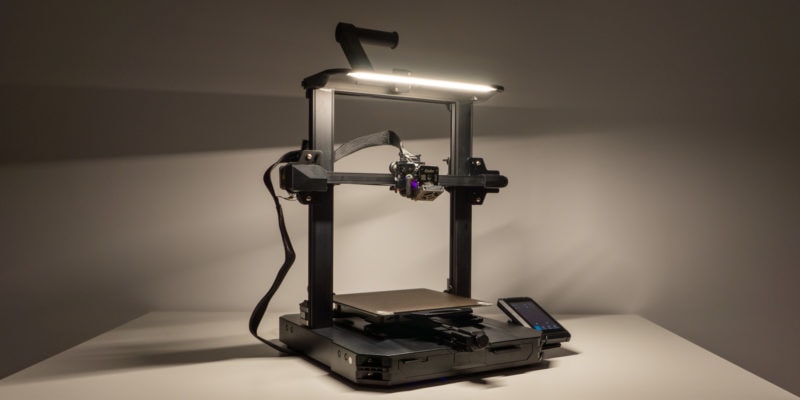
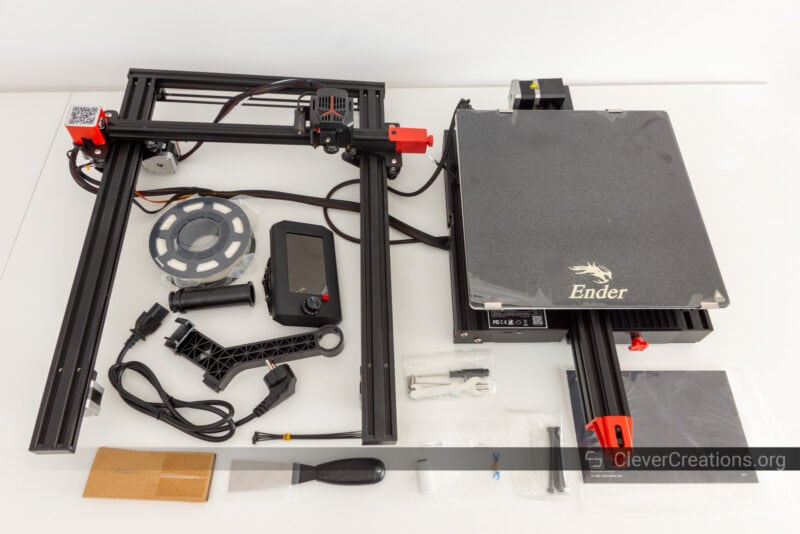
The Ender 3 Max Neo is a large 3D printer and with that comes a large box. It comes mostly assembled and you are expected to unpack a couple of big component assemblies before you can start putting the machine together.
Because the print head on the XZ gantry is pre-wired to the electronics in the base, you have to be careful during the process. If you move these two parts too far apart, you can damage the wiring.
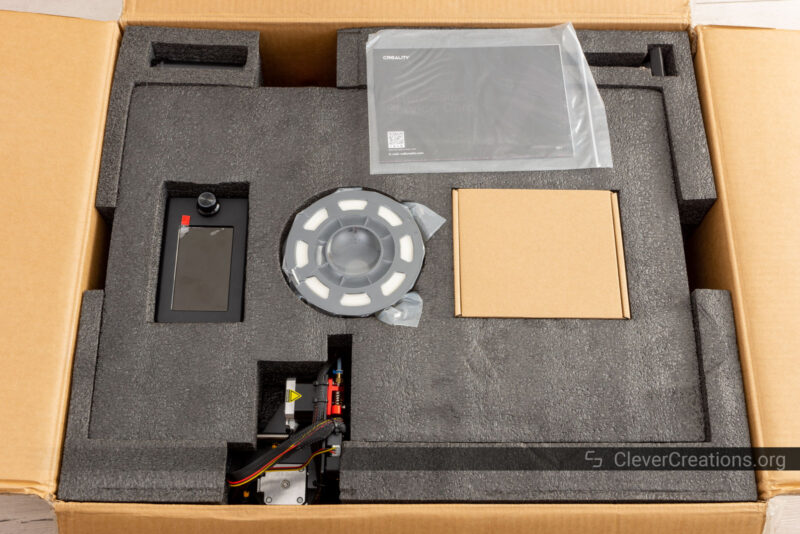
Included in the box is a standard range of components and accessories:
- Base frame
- Gantry frame
- Spool holder
- Touch screen
- Small roll of filament
- Various bolts for assembly
- Various tools for assembly
- An assortment of 3D printer accessories (print removal spatula, snippers)
- Several spare parts (nozzle, Bowden collet clips)
- TF card + reader
- Power cable
You won’t need much else to get started printing, aside from Magigoo or a basic glue stick. Because the Ender 3 Max Neo comes with a glass build plate, the filament needs extra help to stick to the bed.
Getting Started
Creality’s machines have gotten easier and easier to assemble with each generation. The Ender 3 Max Neo 3D printer is no exception. There are a few straightforward steps you need to complete before you can use the machine.
In total, you can expect to spend 10 minutes on the assembly. After that, about 15 minutes more for basic setup and calibration.
The assembly process is well documented in the manual, but there are a couple of steps worth paying extra attention to. They are similar to what we covered in our Ender 3 V2 Neo review, but we’ll quickly go over them again.
To start, when attaching the XZ gantry to the base, you might notice that the bolt doesn’t thread in that easily. Or at least, this is what we experienced on our machine.
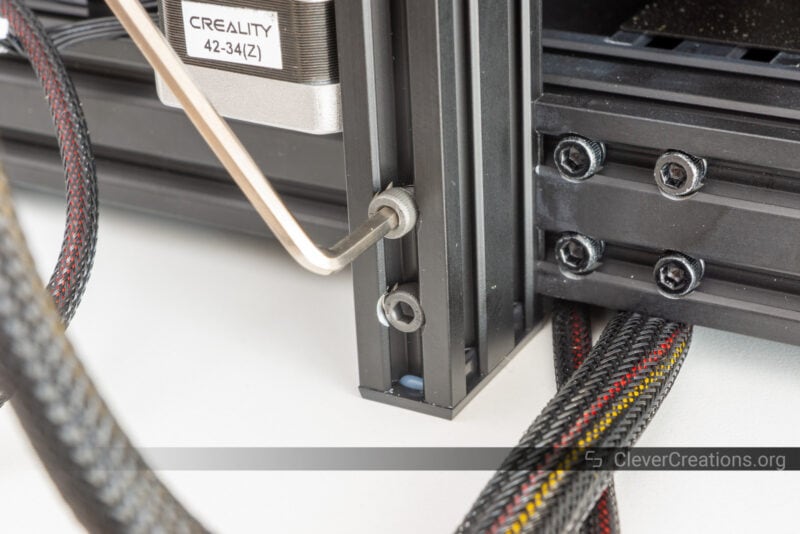
Just like with the V2 Neo, this is caused by subpar machining quality—it is a budget 3D printer after all—that results in coarse threads. It’s not a big issue and can be solved with a bit of extra force if necessary.
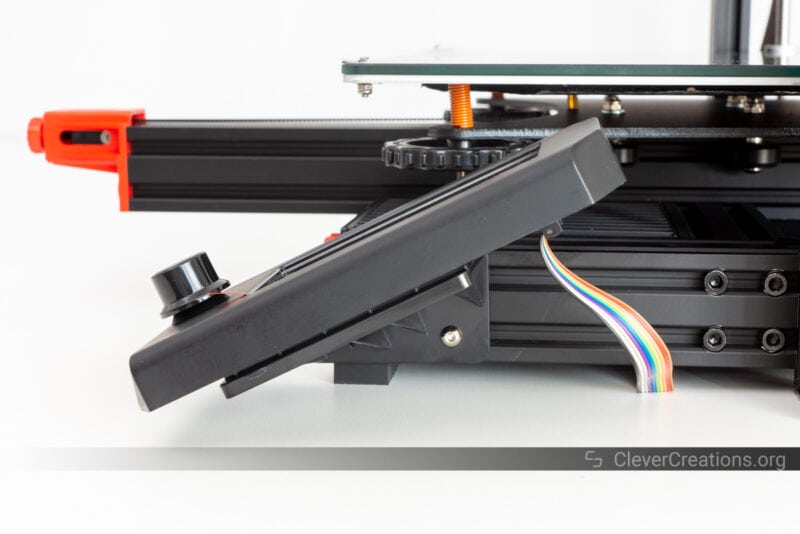
Also similar to the V2 Neo is the attaching of the touch screen. You have a lot of freedom over its position. We recommend moving it as far forward as possible to get good access to the controls.
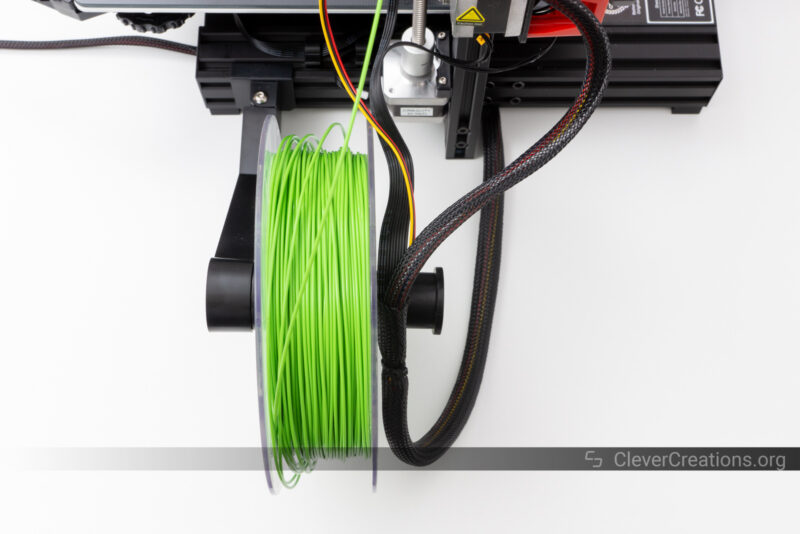
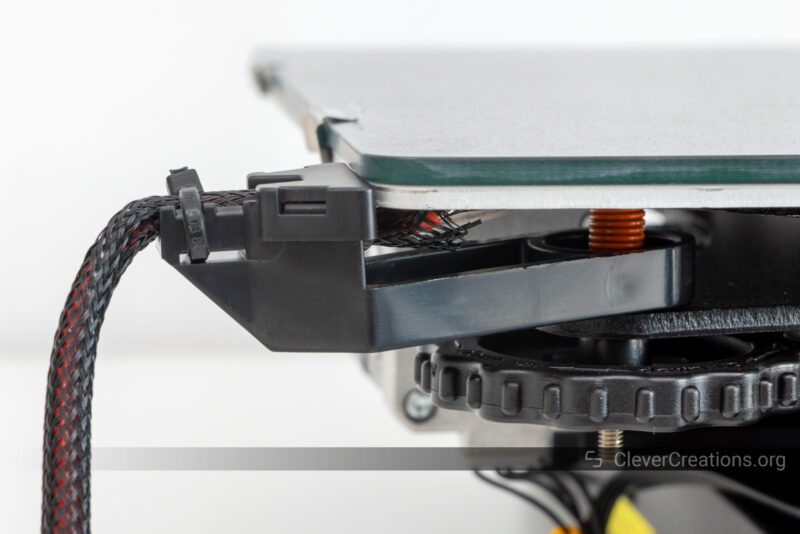
The spool holder hooks and floats onto the right rear side of the Ender 3 Max Neo. Its exact position doesn’t matter too much right now, but while printing you want to move and angle it back as much as possible.
That way, the spool doesn’t interfere with the wiring of the 3D printer. There is little cable management on the machine and you don’t want the wires to hook under the spool at some point.
Next is to plug in the wiring, but it’s only two Z-axis stepper motor wires that you have to take care of.r
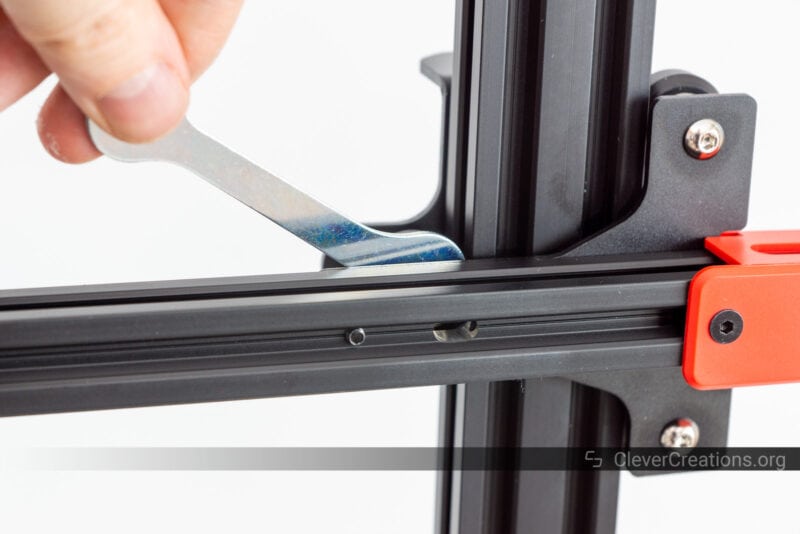
After this, you want to make sure to tighten the eccentric nuts and X-/Y-axis timing belts. These components will likely have loosened during shipping and you want them to be tight for optimal print quality and accuracy.
Then follow the automatic bed leveling instructions from the manual and you are ready for your first print!
Ender 3 Max Neo Features
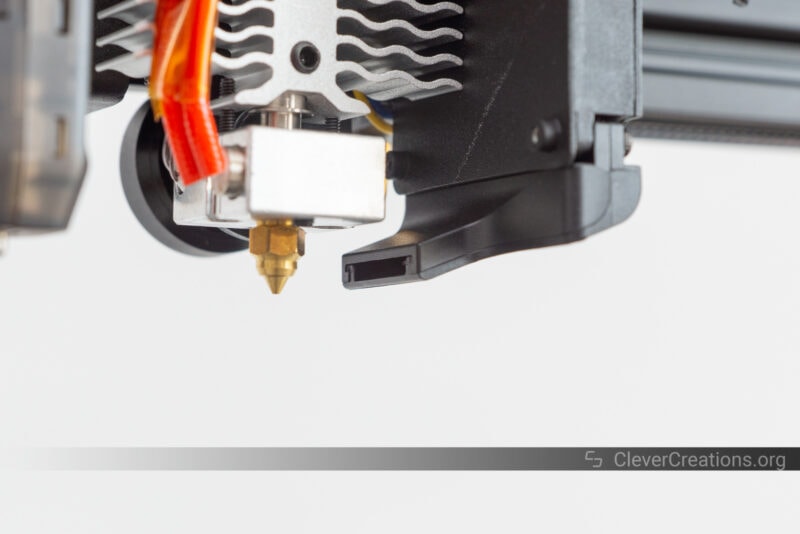
Full-Metal Bowden Extruder
Bowden extruders have their strengths and weaknesses. For example, while they provide a lightweight print head, their long PTFE tube to the print head makes retraction more difficult.
Another common issue is that on budget 3D printers, Bowden extruders often use plastic parts. This was the case with the Ender 3 V2, for example. For that reason, upgrading the Ender 3 V2 extruder with metal parts is a popular change to make.
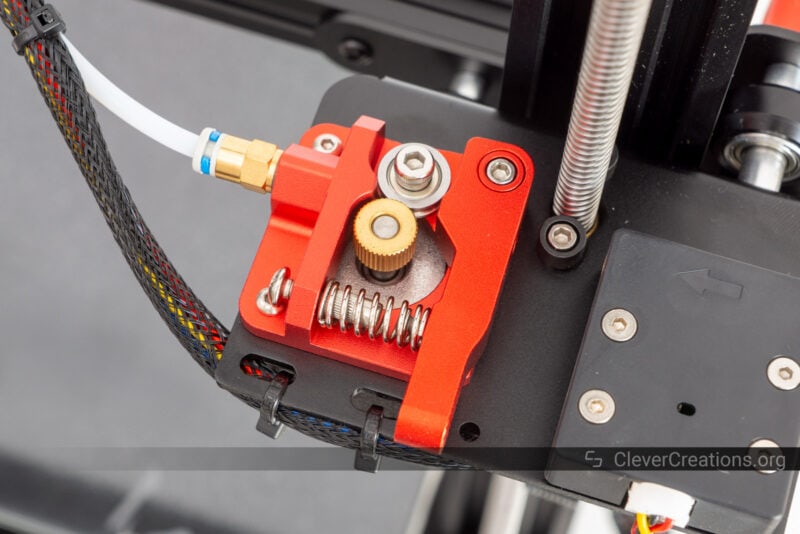
Luckily, Creality has not done this with the Ender 3 Max Neo 3D printer. Instead, they included a more smooth feeding full-metal Bowden extruder. You could already find one on the original Ender 3 Max, but we are glad that it is also part of the Neo version.
In practice, the upgraded Bowden extruder works well. You won’t achieve high feed rates with it, however. Its single filament drive gear and Bowden nature limit the Max Neo’s performance. But as long as you don’t have specific needs for a fast 3D printer, that should be fine.
Another limitation inherent to Bowden extruders is that they don’t do well with TPU. Flexible filaments have a tendency to buckle up inside of the PTFE tube, so it’s best to use the Ender 3 Max Neo for filaments like PLA, PETG, and perhaps ABS with an enclosure.
Unlike the V2 Neo, the Max Neo does not include a knob on the extruder to manually feed filament. We are a bit disappointed with this, as it makes the manual (un)loading of filament a bit easier
CR Touch Auto Leveling
Creality doesn’t seem to ship their 3D printers without auto bed leveling probes anymore and we are glad about that. There is no reason for anyone to spend their time manually leveling a 3D printer bed in 2026.
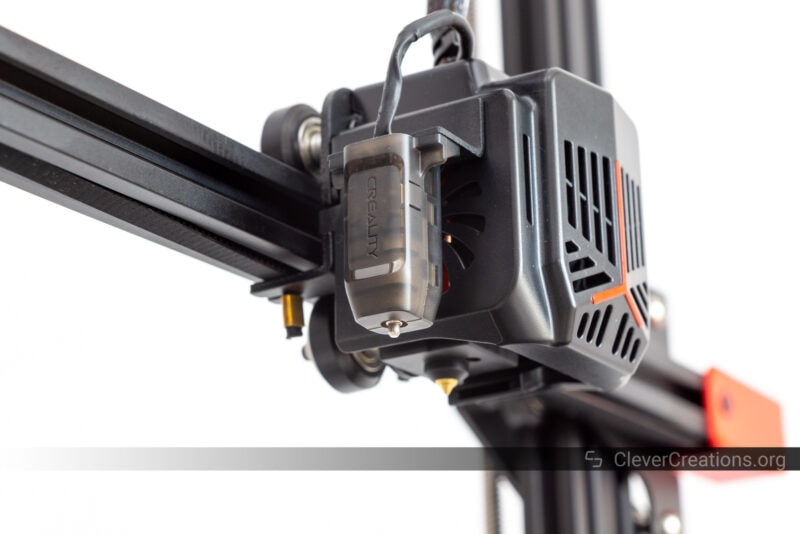
The included CRTouch probe does a fine job of measuring the slopes in the print bed. The firmware of the 3D printer controller board then adjusts the print head during 3D printing to compensate for any non-flatness.
One downside of the probe is that the print head now has one less print cooling fan. The original Ender 3 Max 3D printer did not have a probe but came with two print cooling fans, one on either side of the nozzle.
The result is that the print cooling on the Max Neo is not as good as on its predecessor. For the best quality overhangs and bridging, you’ll have to slow down the print speed a bit. The included small print cooling fan isn’t powerful enough to quickly cool filament on its own.
Glass Print Bed
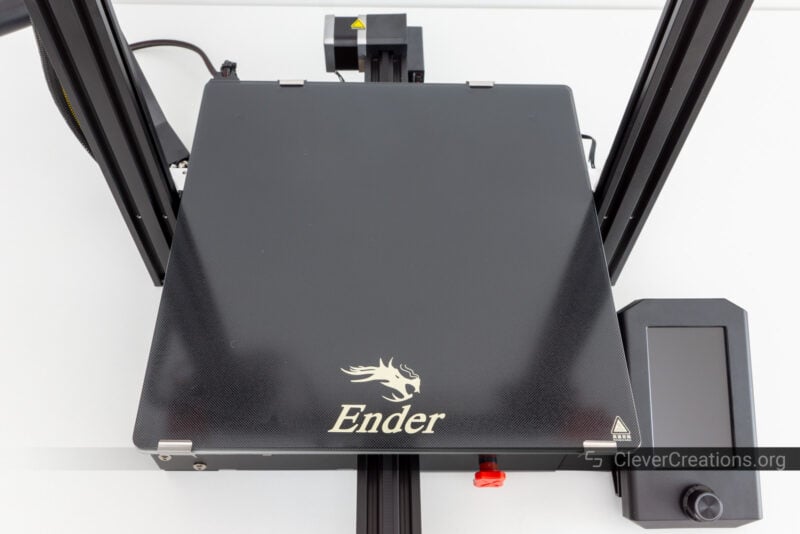
The Creality Ender 3 Max Neo doesn’t include a magnetic flexible PC- or PEI-coated print surface. Instead, you’ll have to settle for a good old-fashioned glass bed.
This is no surprise given that the budget range of the Ender 3 series has never included flexible print beds. For that, you’ll have to look at the Ender 3 S1 series and up.
The glass bed still works great. It gives your 3D prints a smooth finish on the underside. With the right bed adhesive, your prints stick well to the glass bed.
That also brings us to the problem with glass beds. Sometimes 3D prints can stick too well and it can be a hassle to remove them. We haven’t found this to be an issue when using the Ender 3 Max Neo and a cheap glue stick, however.
Temperature Uniformity

The Ender 3 Max Neo print surface is not even in temperature. With a target temperature of 60 °C, there is over 10 °C difference in temperature between the center and the far corners of the bed.
While there is insulation material present on the underside of the bed, it does not extend all the way to the edges, likely contributing to the uneven heating.
Considering the large bed size, there is still a large area available where the temperature is reasonably uniform and should be sufficient for most prints. However, it is not an optimal print surface for larger 3D prints in materials like ABS.
We recommend you keep your prints near the bed center to improve your chances of success.
32-bit Controller Board
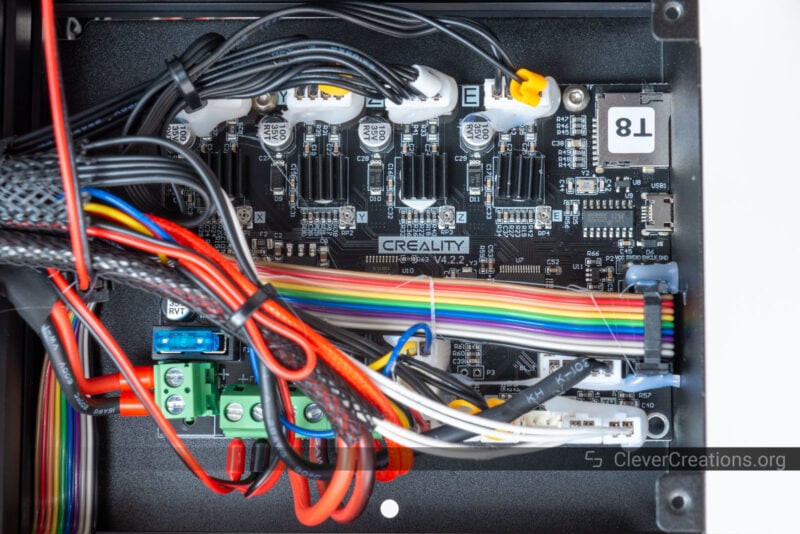
The Ender 3 Max Neo is controlled by Creality’s V4.2.2 mainboard. Based on the sound of the stepper motors, it is the version with silent TMC2208 drivers and not the one with louder A4988s.
In practice, this means a more silent operation of the 3D printer. Because the electronics area cooling fan of the Max Neo is fairly loud, however, the printer still isn’t very silent.
Most of this noise has a high frequency and not low-frequency vibrations that travel through your 3D printer table to nearby rooms. So overall, the sound is not that bad.
There is also support for the Max Neo on the Sonic Pad by now. Most of the issues we found in our Sonic Pad review have been resolved by Creality, so this is worth a shot if you are interested in faster 3D printing and more features using Klipper firmware.
Other Features

Other, smaller features you can find on the Ender 3 Max Neo 3D printer are a filament sensor and resume printing function. This double protection is standard but useful for large 3D printers like these.
You don’t want to start your 3D print over when the power suddenly goes out or if you run out of filament. Having the filament sensor and power loss recovery ensure that you can continue your print where it left off.
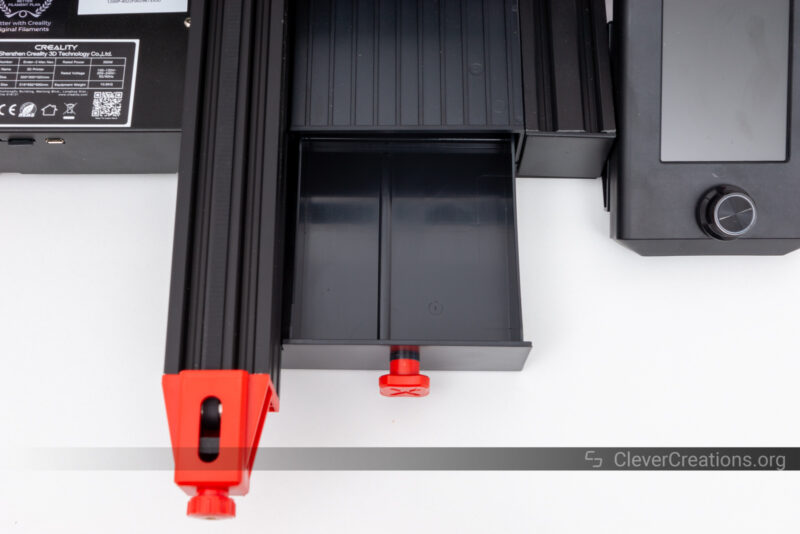
Also included is a small tool drawer on the front of the machine. It’s partially blocked by the Y-axis extrusion, so there is less space for you to store tools and parts than on the S1 series.
Still, it is better than nothing and a good place to keep spare nozzles in, for example. It’s also an improvement over the previous Max Neo. That 3D printer had more of an open base with lots of unused space.
Build Quality & Construction
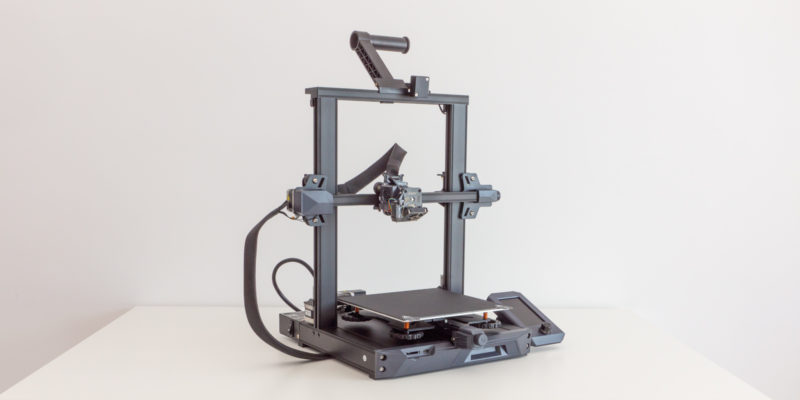
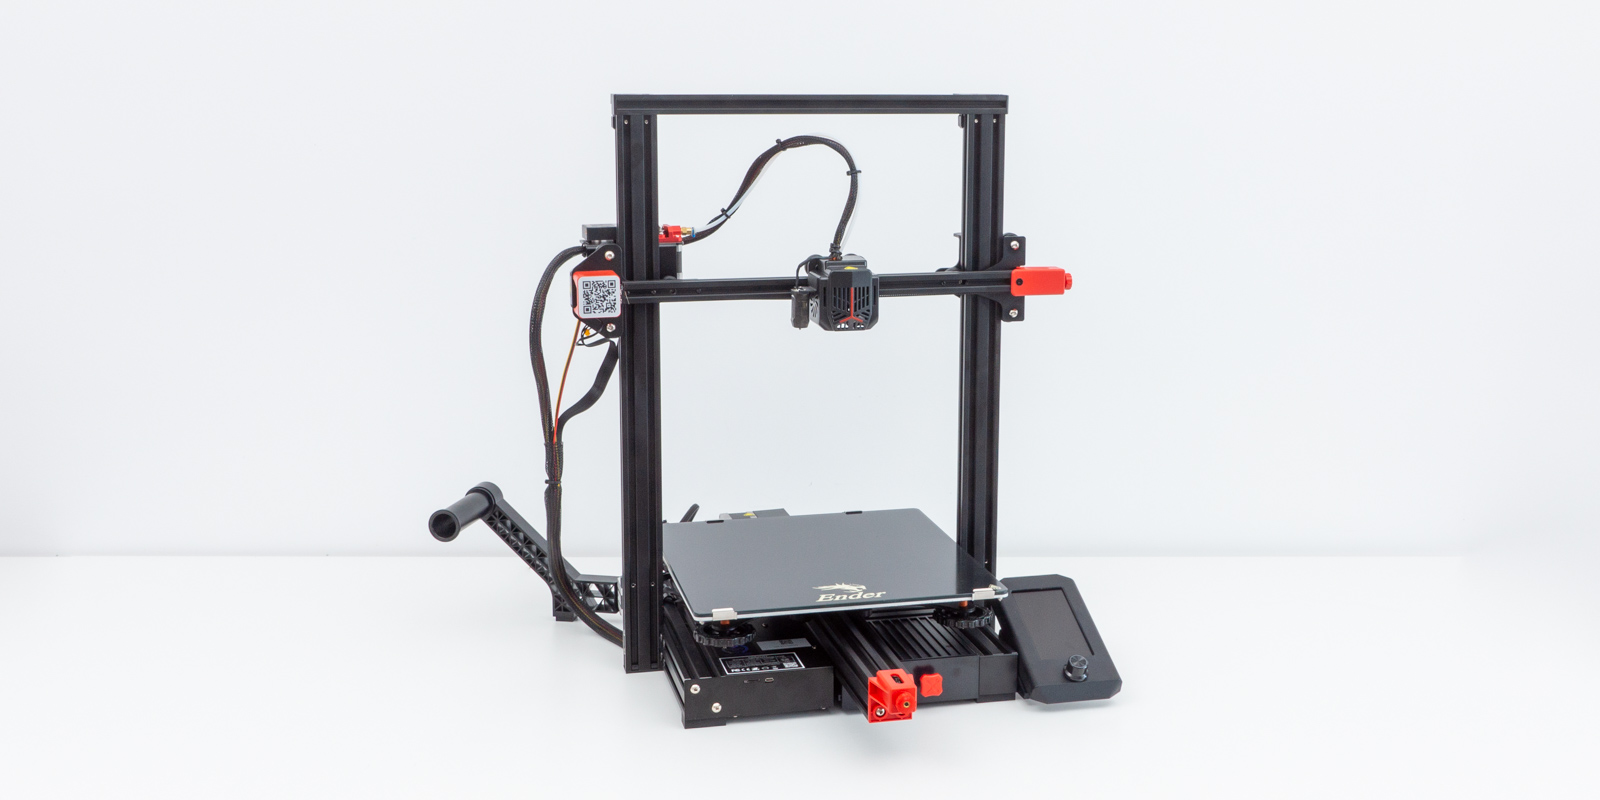
Large Build Volume

With a build volume of 300x300x320 mm, the Creality Ender 3 Max Neo falls into our classification for a large 3D printer. Its build volume has sufficient space for medium to large 3D prints and is great for batch printing as well.
Interestingly, the total print height of 320 mm is 20 mm less than that of the Ender 3 Max (340 mm). Whether or not Creality has reduced this to increase the stiffness of the frame, we are not sure.
On Creality’s CR-10 Smart Pro flagship, the frame is reinforced with diagonal braces. Even though its total print height is 400 mm, such an upgrade could be practical on the Ender 3 Max Neo as well.
That said, as long as you stick to 50-60 mm/s print speeds, you won’t notice any issues with the stiffness of the Max Neo’s frame.
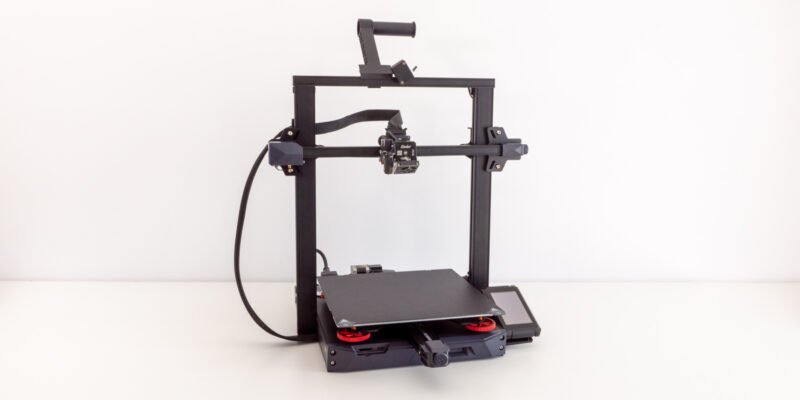
Spool Holder
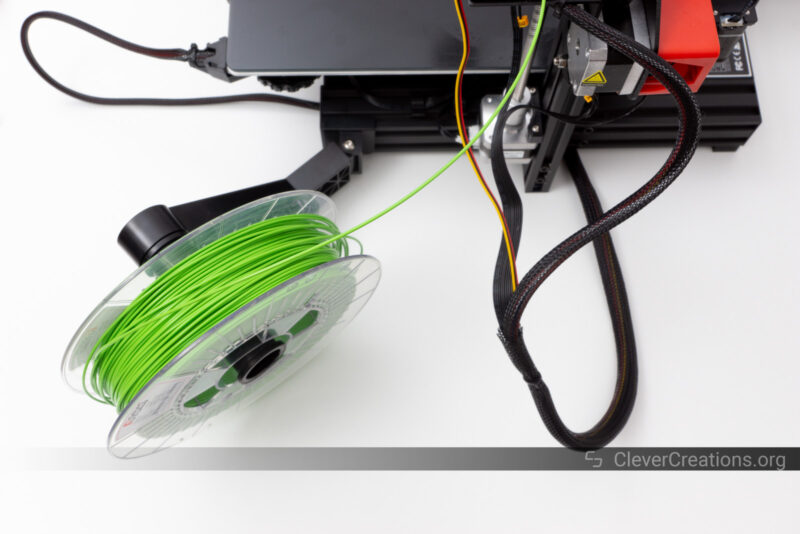
One of the gripes we have with the Ender 3 Max Neo 3D printer is with its spool holder. It’s a hinged spool holder that mounts onto the side of the base.
Not only does it (along with the spool) take up additional desk space, but the extruder/X-axis wiring can also catch onto the filament spool when the Z-axis moves up and down. This can only happen when the spool holder is angled too far inwards, but it is still not ideal.
We would have much rather seen a top-mounted spool holder, like on the Ender 3 V2 Neo. This only takes up vertical space and gives you are more organized desk.
If you are wondering whether Creality has done this to save vertical height, we don’t think so. Even the 400 mm tall CR-10 Smart Pro has a top-mounted spool.
Instead, the side-mounted hinged spool holder seems to be a carry-over from the Ender 3 Max. In our opinion, there is not much reason to keep this design around. It’s bulky and impractical. You can upgrade this part yourself if you want to at some point.
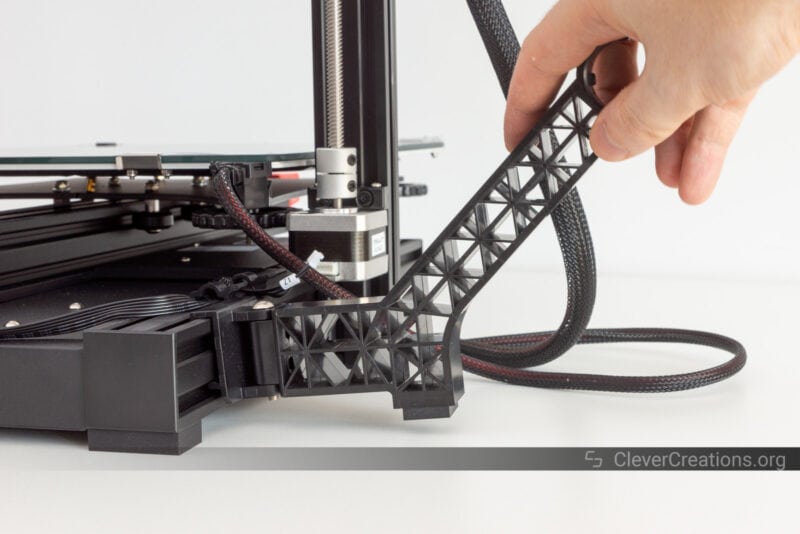
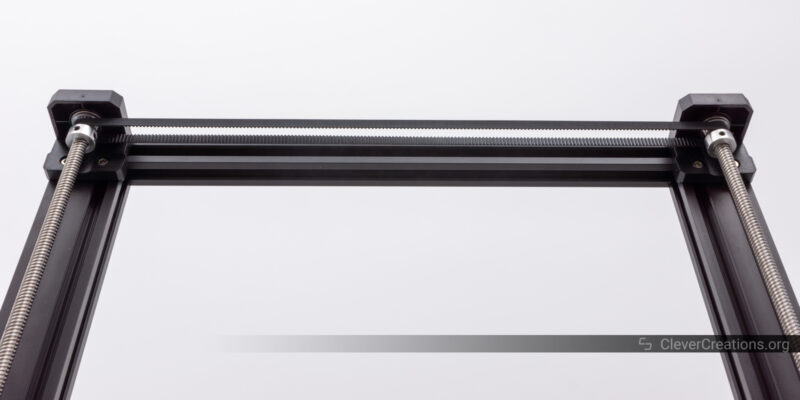
Dual Z-axis
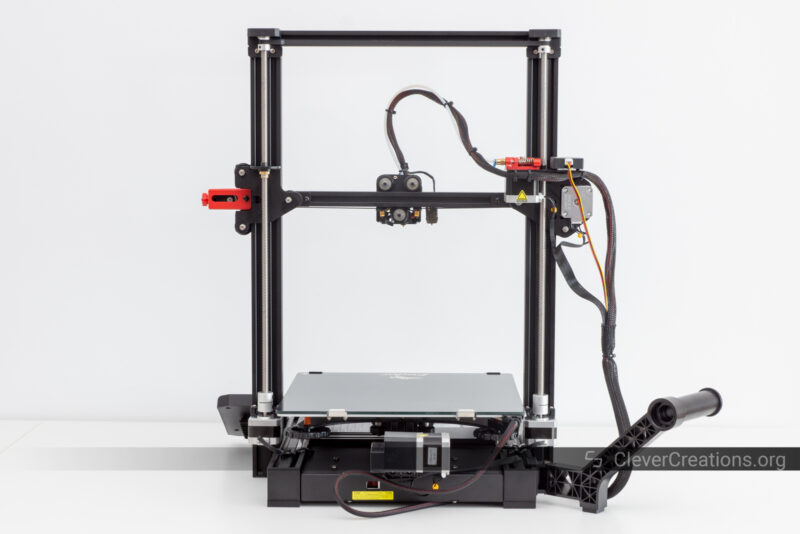
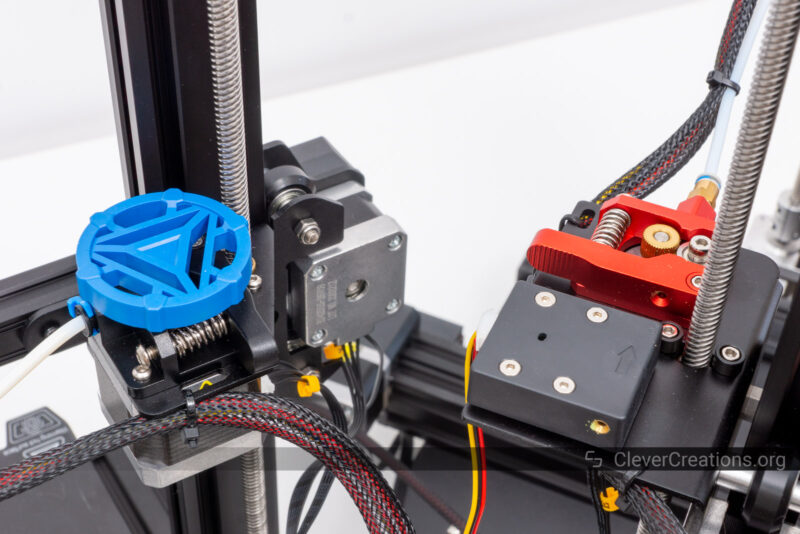
On the plus side, the Creality Ender 3 Max Neo has a dual Z-axis arrangement that prevents X-axis sagging and Z-wobble. You won’t find this on the smaller Ender 3 V2 Neo, but on a larger printer like this, it is a necessity.
Both stepper motors are driven by a single stepper motor driver and kept in sync with a timing belt and set of toothed pulleys at the top.
It doesn’t have a fancy Gates timing belt, like on the S1 series, but that’s fine. The dual Z-axes work more than well enough to keep the Max Neo stable during printing.
We specifically tested the Ender 3 Max Neo with taller 3D prints to see if we could detect any Z banding, but the results were excellent. You’ll see these further down in this review.
Safety
We were surprised to find that the safety aspects of the Creality Ender 3 Max Neo 3D printer are all up to par. On the V2 Neo, we found that several safety features were lacking. We were expecting the same on this Ender 3 Neo-series 3D printer.
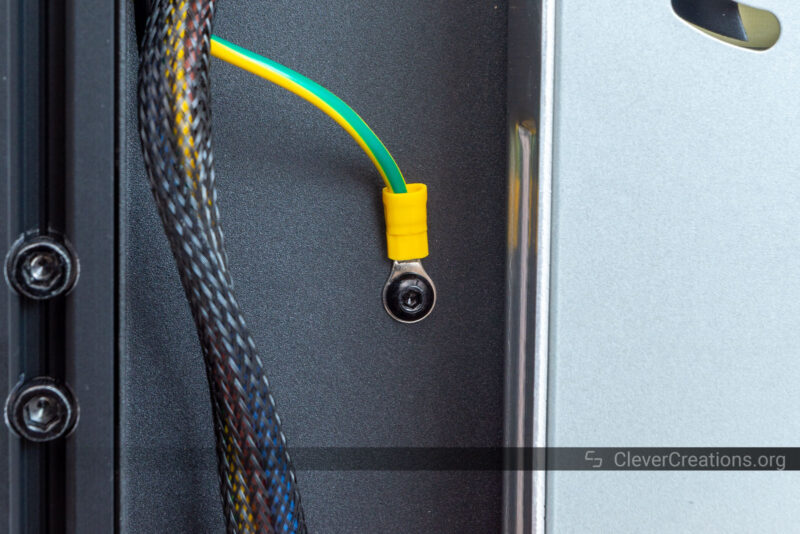
Thankfully, that is not the case. The machine passes all checks that we typically carry out. For example, the frame is properly grounded to protect you from electric shocks if there is a critical failure in the machine.
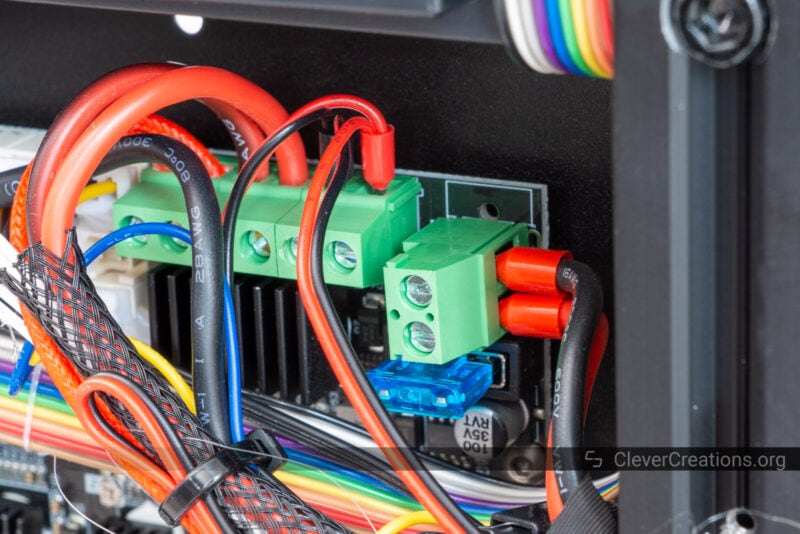
In the same gist, Creality decided to ferrule crimp the high current wiring. This is key to preventing fires in the 3D printer’s electronics once the machine starts to age.
The power supply is decent too. It’s Creality’s brand that, as far as we know, is safe to use and has no reliability issues. It’s better than a no-name bargain bin PSU, but probably not as good as a real MeanWell-branded one.
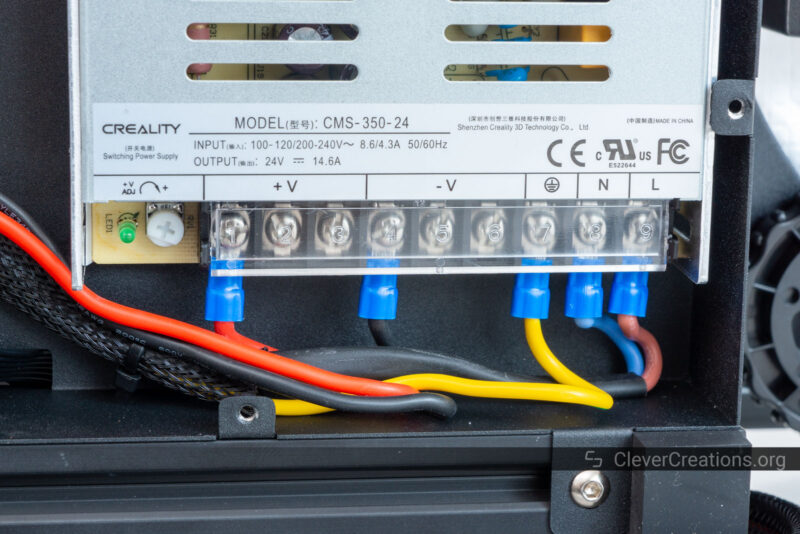
What we can say for sure about the power supply is that it is underpowered for a print bed this size. With only 350W available, heating the bed to its maximum temperature of 100 °C takes long. 14 minutes to be exact, even though the total will depend on your ambient temperature.
Another thing to note is that just like on the Ender 3 V2 Neo, there is barely any cable management present. This leads to the aforementioned problem of the wiring flopping around the spool holder, but it also makes the Ender 3 Max Neo look messy.
In short, the build quality and safety are good. But there are certainly a few areas that Creality can improve on.
Ease of Use
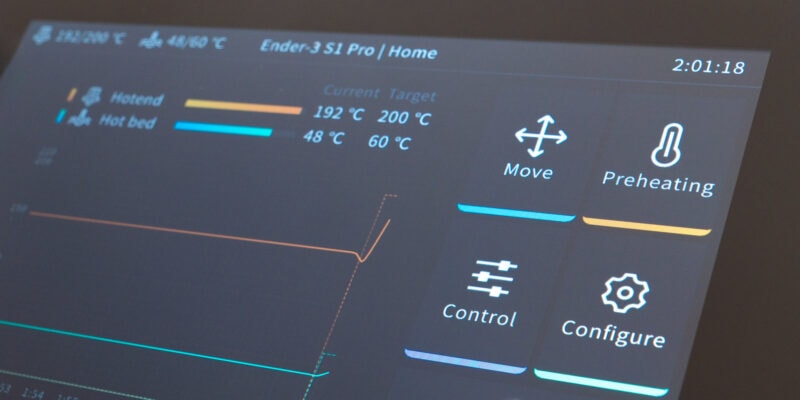
4.3″ Color Screen with Knob

As we are used to from Creality’s budget line-up, there is no touch screen present on the Ender 3 Max Neo 3D printer. Just their standard 4.3″ color screen with a rotary/press knob.
It’s good for quick navigation once you are used to the interface, but it can be less intuitive than a touch screen for less experienced Ender 3 users.
Compared to the Ender 3 Max, the new color screen is a big upgrade. That 3D printer uses an outdated monochrome LCD that only displays limited information. We rarely see those types of screens anymore, with the exception being the Sovol SV06 we covered recently.
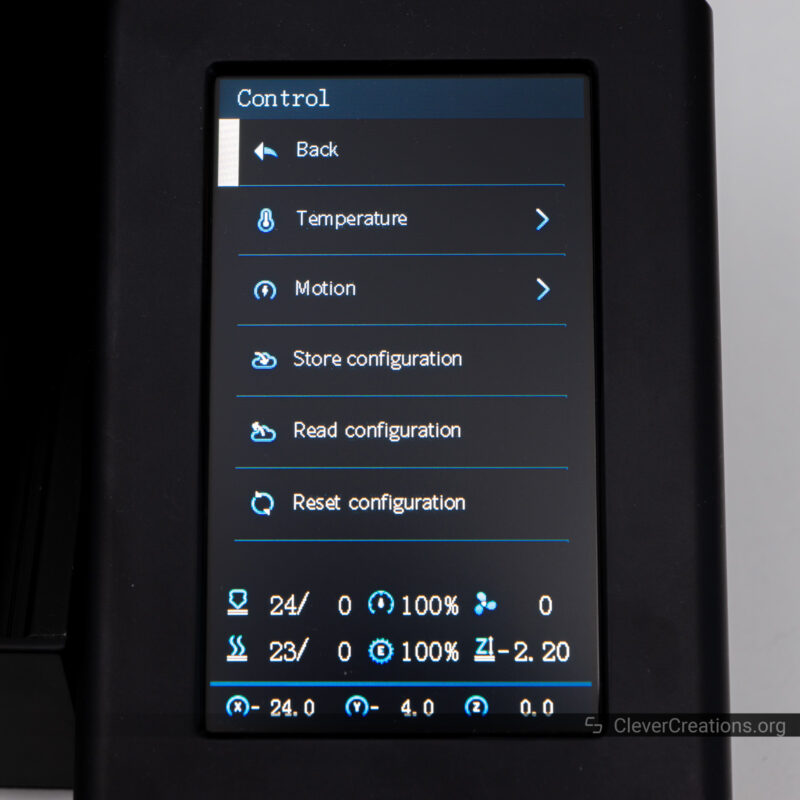
User Interface

At this point, we’ve covered Creality’s user interface for the V4.2.x-type boards plenty of times. It’s the same one found on all budget Ender 3-series machines and is more than enough for most users.
You can access and set basic parameters like the bed temperature, extruder temperature, and fan speed. There are also some more advanced settings directly accessible, such as maximum feed rates, acceleration, and jerk settings.
If you want more, it is easy to flash custom firmware. A popular choice is Marlin 2.0 to get access to features like linear advance. Linear advance continuously anticipates pressure in the hot end and adjusts the printer’s parameters accordingly to achieve better results.
This isn’t user interface related, but it will help your print quality. It’s worth looking into if you want to get the most out of your Ender 3 Max Neo. Or any budget 3D printer for that matter.
Maintenance & Repairability
Depending on what you want to work on in the Creality Ender 3 Max Neo, getting access can be a challenge.
Working on the hot end is easy. Remove a couple of bolts and you have access to the entire assembly. But if you want to work on the logic board or power supply, things can get tricky.
The electronics compartment is hard to access and requires you to remove a variety of impractically placed bolts. Once you have access, the space around the control board is limited and lots of wiring is in the way.
This is far from ideal and worse than most other 3D printers. It’s clear that this 3D printer line-up hasn’t been designed with easy access to the electronics in mind.
Ender 3 Max Neo Printing Quality
Now that we know about the hardware of the Creality Ender 3 Max Neo 3D printer, it’s time to review some test prints. You’ll notice that some of these have some issues with stringing. This is caused by a combination of aging filament and working with a Bowden extruder.
To prevent this, make sure to put any moist filament in a filament dryer and to spend time dialing in the optimal retraction settings for each 3D printer & filament combo.
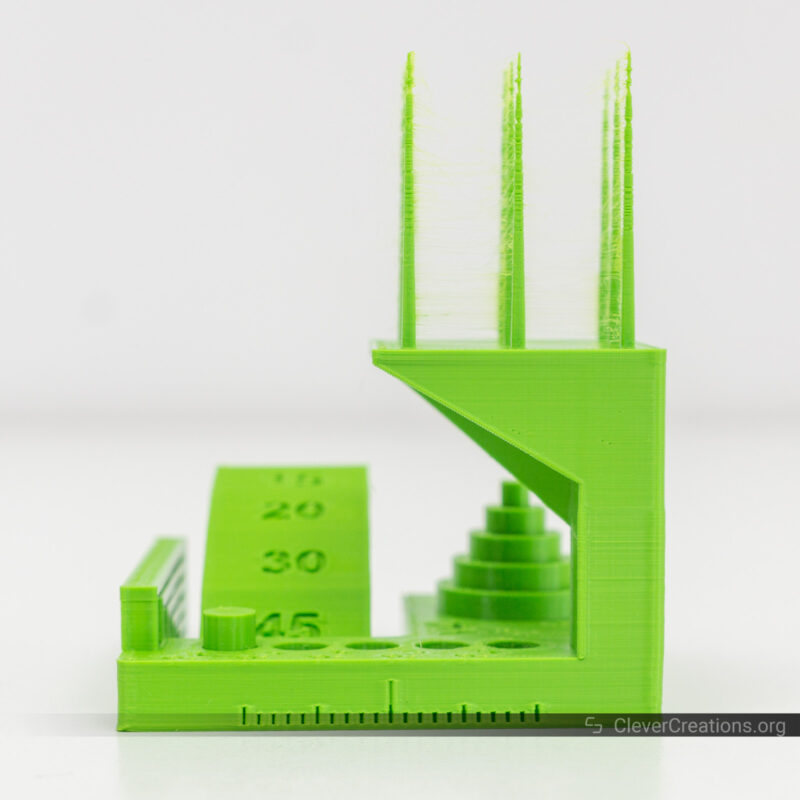
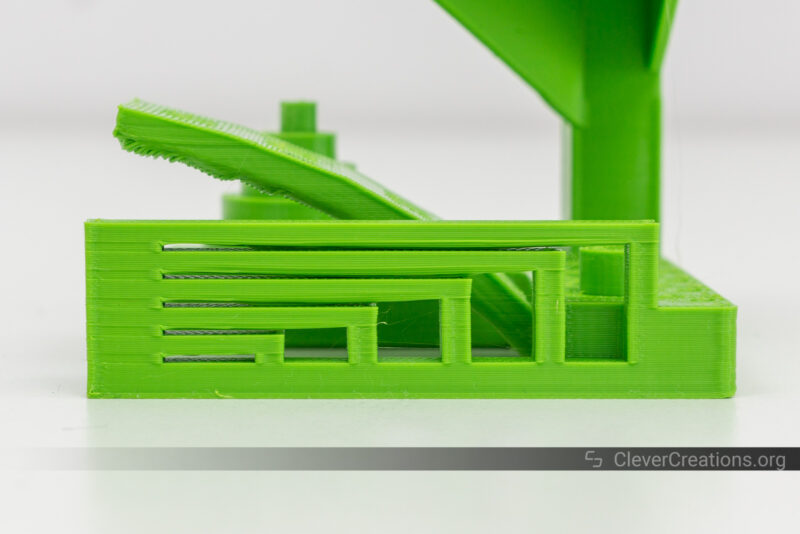
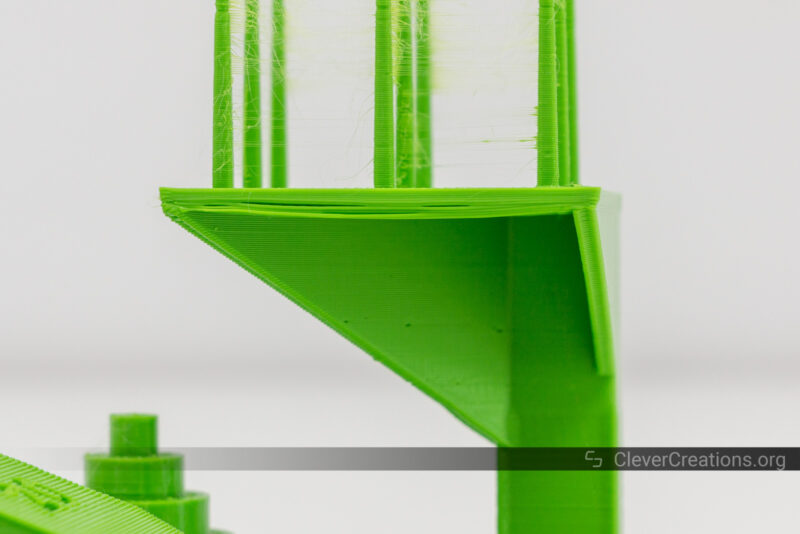
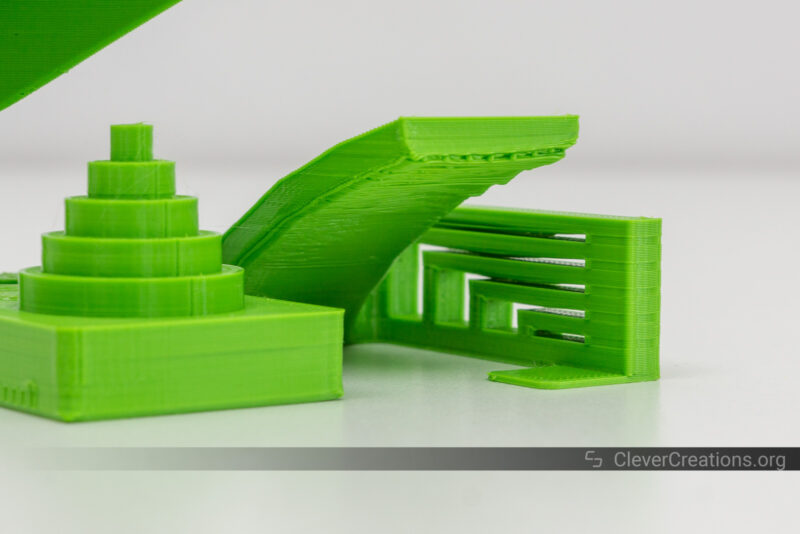
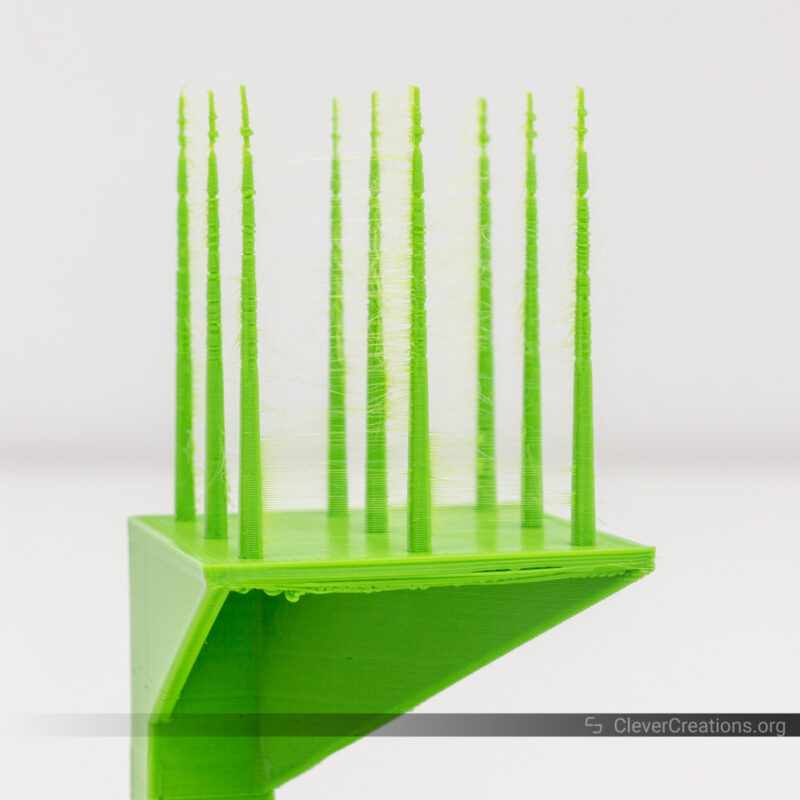
Autodesk FDM 3D Printer Assessment
This Fused Deposition Modeling 3D printer assessment is one of our go-to benchmarks, as it tells you a lot about the capabilities of a 3D printer.
The Max Neo performed all right on this assessment. Overhangs and bridging are decent for the capabilities that the machine has. The same goes for the surface finish and dimensional accuracy.
There is some stringing present, and the fine feature flow control has a couple of minor defects. It’s all expected from a Bowden extruder with a single print cooling fan, and we don’t see any major red flags for basic 3D printing purposes.
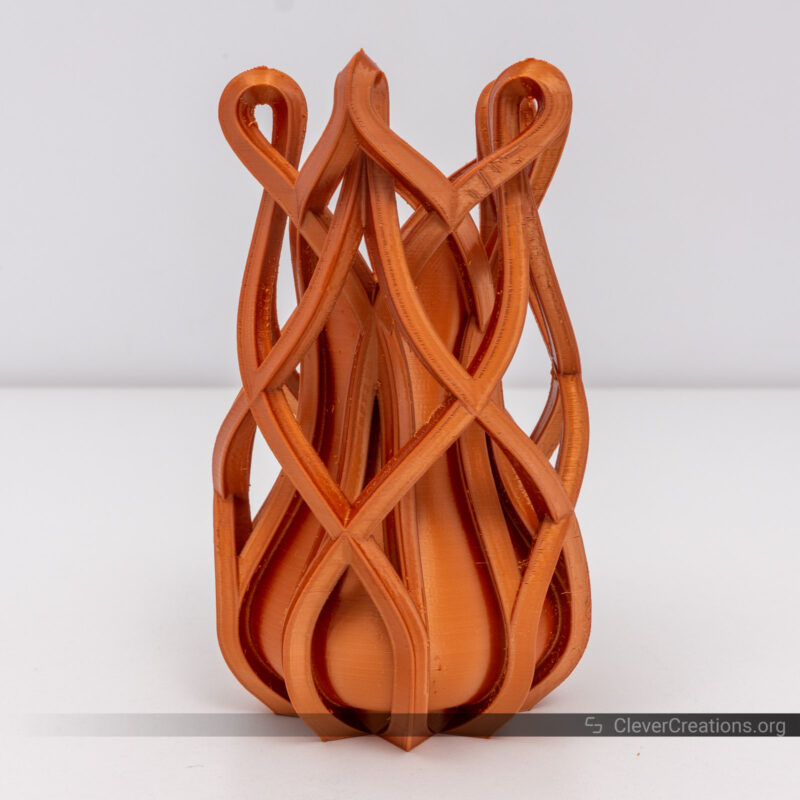
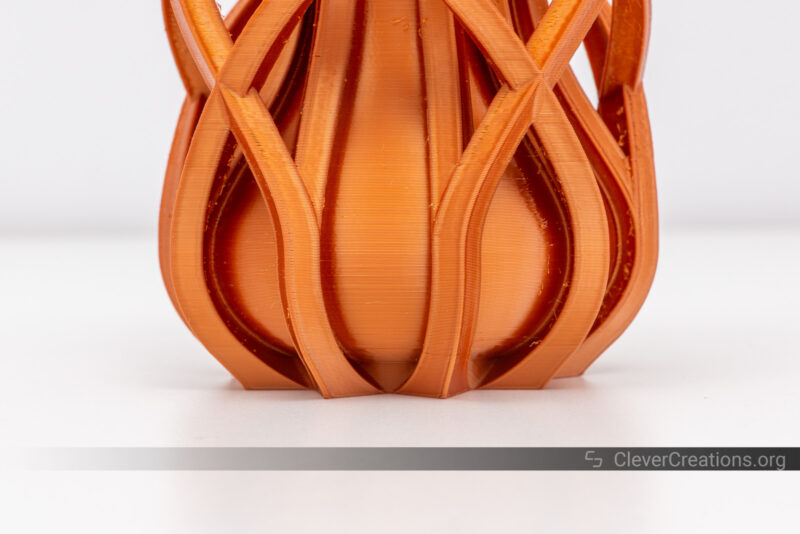
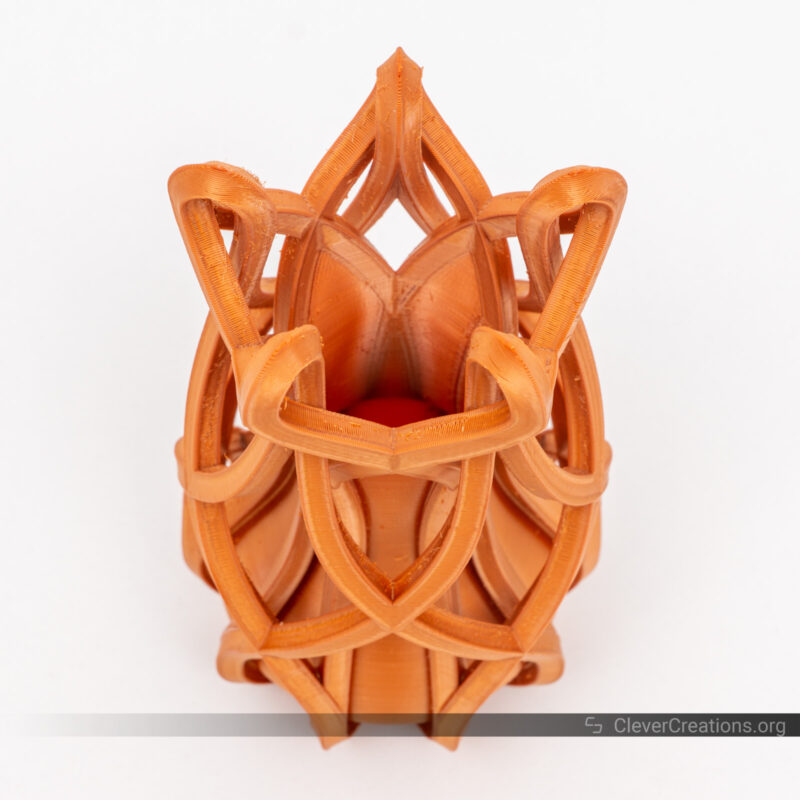
Knotted Vase
This knotted case came out way better than expected. We thought we would see more drooping on the overhangs, but the Ender 3 Max Neo held them up well. Very impressed with the results here.
There was again some stringing present, but a quick pass with a small torch took care of that rather quickly.
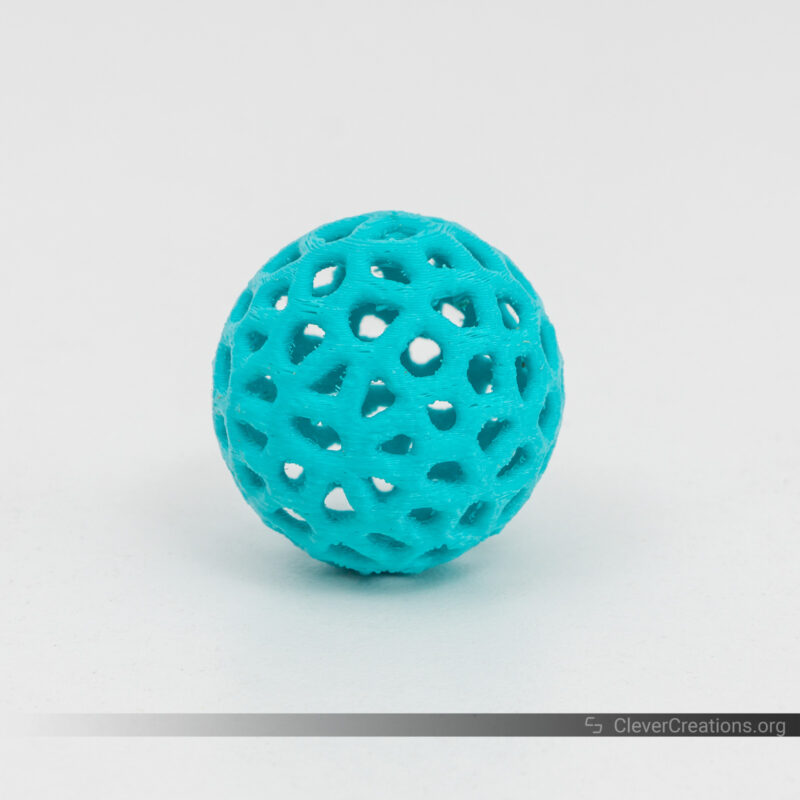
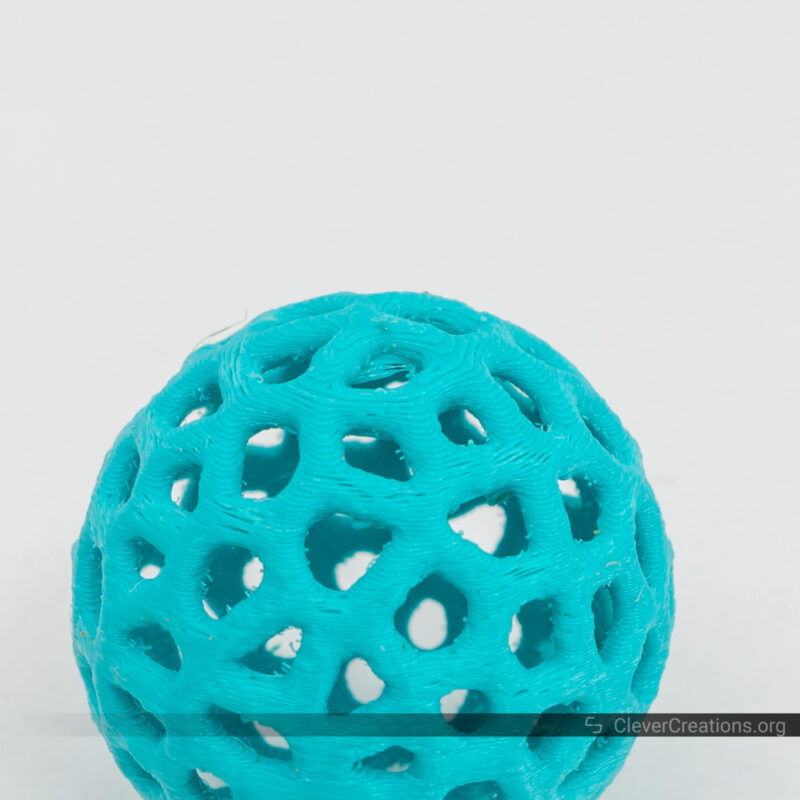
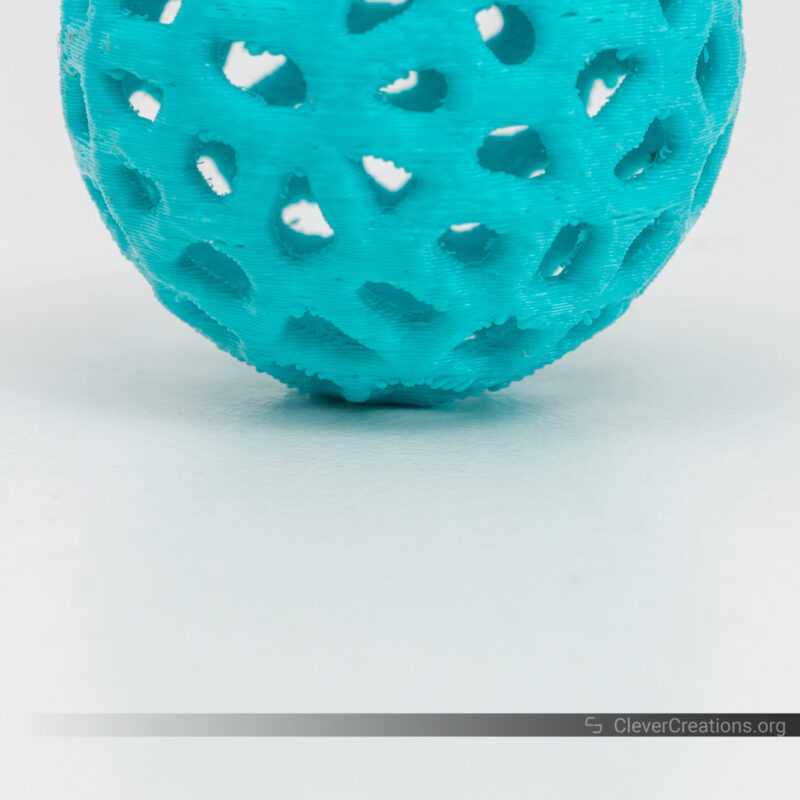
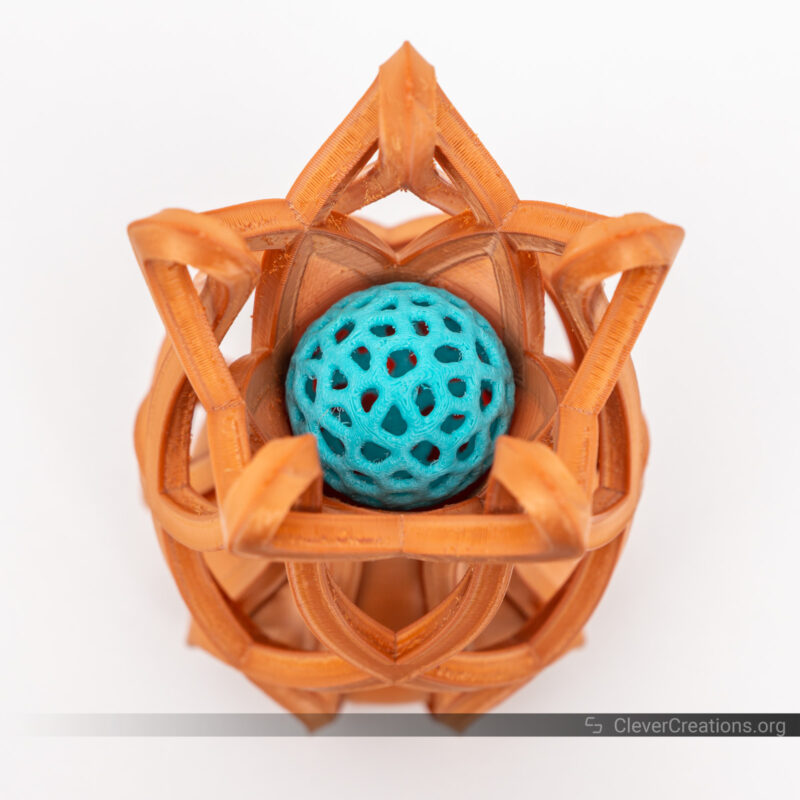
Voronoi Cat Toy
Moving on to PETG, this cat toy provides a good test for both retraction and overhangs. Once more, the Ender 3 Max Neo did well on the overhangs. No issues with PETG stringing either, even though we were probably a bit too aggressive on the retraction.
Interestingly, we had to bump the nozzle temperature up 10 °C from what we typically use for this filament. Without it, we had issues with layer adhesion. Perhaps the hot end thermistor is not that accurate at higher temperatures.
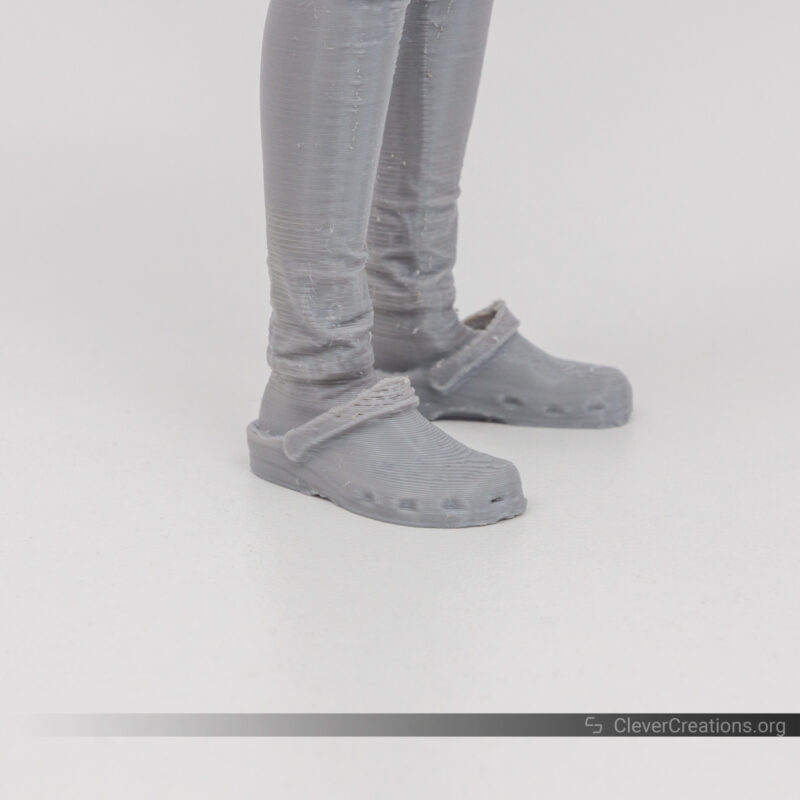
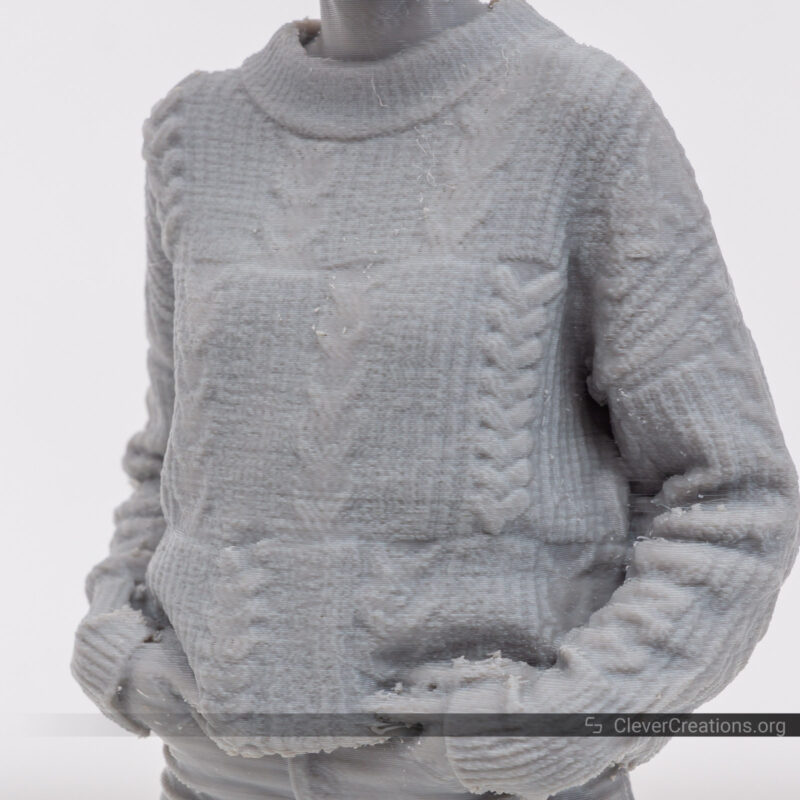
Printed 3D Scan of a Person
We’re most impressed with the print results of this 3D scan we took with the Shining 3D Einstar. Nearly all detail from the scan was preserved. Especially the sweater fabric was printed nicely.
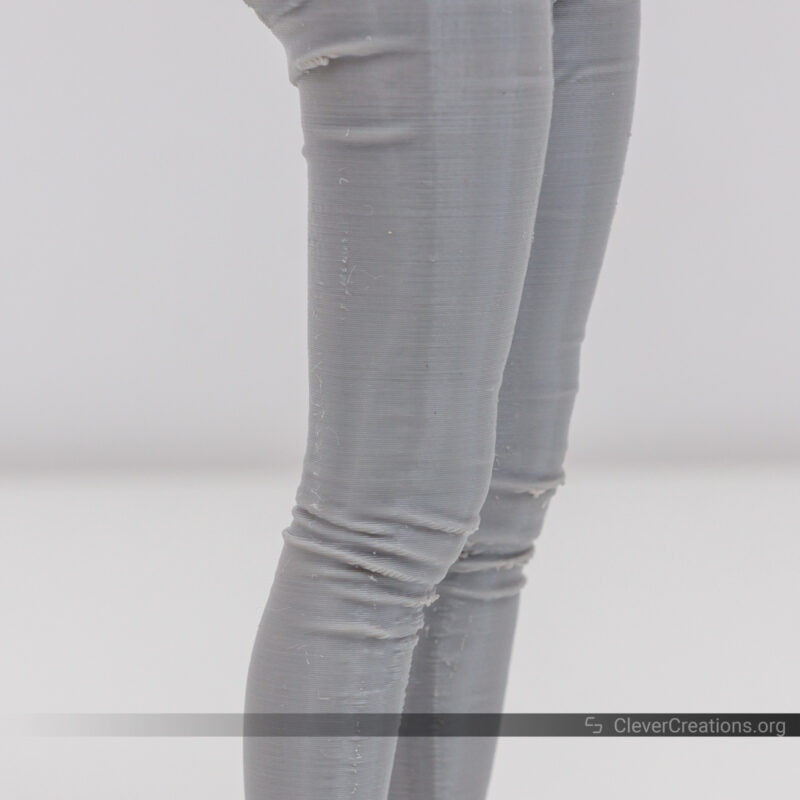
Some of the big overhangs from the sweater were supported, but the Ender 3 Max Neo pulled off the small overhangs well by itself.
The 3D print is quite tall (25 cm / 10″), but even at the top we did not run into any Z banding issues.
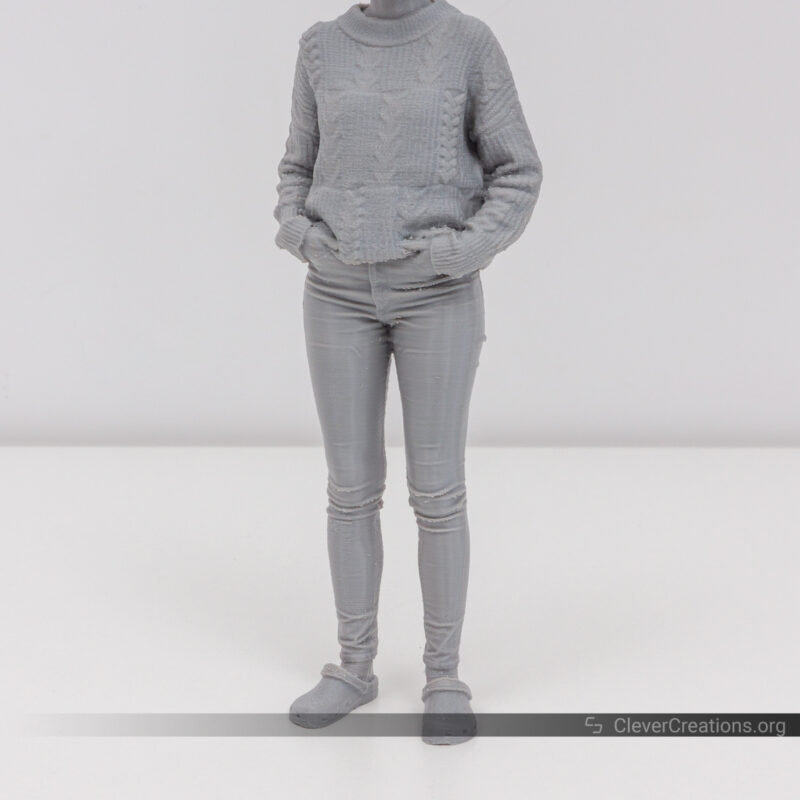

For comparison, this is the 3D model that we scanned and printed:
Alternatives to the Ender 3 Max Neo
Artillery Sidewinder X2
The Artillery Sidewinder X2 is a 3D printer that exceeds the Creality Ender 3 Max Neo in several categories. However, it also costs more to balance that out.
It comes with an AC-powered bed to give you faster heating times, as well as a touch screen and direct drive extruder. The build volume is larger too, with the machine making less noise while 3D printing.
As for the downsides, its build quality is notably worse than that of the Max Neo. You’ll also find that its taller frame is less stable, with more Z wobble at higher print speeds.
That said, if you don’t mind its lack of quality and paying a bit extra, the Artillery Sidewinder X2 can be a great 3D printer for large 3D prints. Just be ready to upgrade it here and there to get the most out of it.
Anycubic Kobra Plus
The Anycubic Kobra Plus also looks like a great Ender 3 Max Neo alternative. It shares a lot of similarities, but also has several features you won’t find on the Max Neo.
For example, it shares a similar print volume, print surface, filament compatibility, and ABL sensor. In that regard, it’s just as capable.
However, it has a touchscreen interface, better print cooling, and boasts faster maximum print speeds. Those can be great advantages if you want to print more quickly.
We have only had our hands on the Anycubic Kobra, but based on that, the build quality of the Kobra Plus should be good. There are good reasons why the base model came out on top of the best 3D printers under $300.
If those are features you are looking for, then the Anycubic Kobra Plus should be worth considering. Just like the Sidewinder X2, it costs more than the Ender 3 Max Neo. But it also comes with extra features.
Longer LK5
Compared to the Ender 3 Max Neo, the Longer LK5 is cheaper with a larger build volume. It also comes with a 4.3″ touch screen, a reinforced frame, and better print cooling.
But that’s where the strengths of the LK5 end. Its build quality is pretty bad, safety standards are subpar, and it misses out on a dual Z-axis setup and an automatic bed leveling probe.
We only recommend the Longer LK5 if you are on a very small budget and need to have a large print volume. Otherwise, the Max Neo or one of the other options on this list are much better alternatives.
Bottom Line: Is the Ender 3 Max Neo the 3D Printer for You?
The Creality Ender 3 Max Neo is a surprisingly good 3D printer. It has a solid build quality and the print quality is better than we expected based on its specifications.
Its new quality-of-life features, like the CR Touch auto leveling, and full-color LCD screen, are great additions to the Neo model. The dual Z axes are a welcome addition for better stability and print quality as well.
Of course, it’s not perfect either. Even though the Bowden extruder performs well, it still gives worse print results than you would get with a direct drive extruder.
The impractical spool holder and slowly heating print bed are also things that Creality could have improved on in this refresh but chose not to.
For its current $369 price, however, we think the Ender 3 Max Neo is a good pick for larger 3D printing projects. While it’s not the fanciest 3D printer on the market, it offers a good balance of features and performance at a reasonable price. It fits nicely between the previous Max and the S1 series.