
First layer adhesion issues or the extruder skipping steps during the initial layers are common problems when working with 3D printers. They are often caused by improper bed leveling and can significantly affect the quality of your 3D prints and, consequently, your 3D printing experience.
To aid in bed leveling and alleviate these issues ANTCLABS has created the BLTouch automatic bed leveling sensor. First released in 2015, it uses a progressively designed solenoid and hall sensors to offer you a high precision auto leveling solution for your 3D printer.
In this article, we’ll give you everything you need to know about the BLTouch sensor. From how it works to how you can install it on your Creality Ender 3 V2 or other 3D printer. Let’s see how to get you that perfect first layer!
What is a BLTouch Sensor?
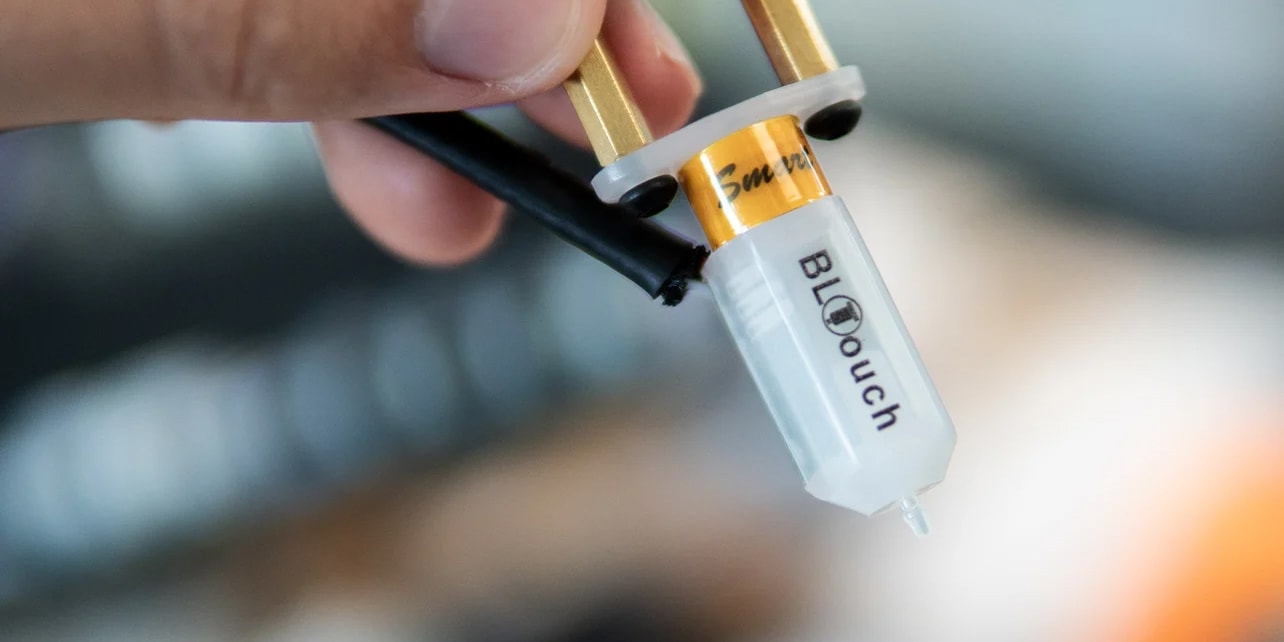
The BLTouch is an auto bed leveling sensor that helps you get a good first print layer. With the help of its push pin, it precisely measures the distance between your 3D printer’s build plate and the nozzle. Your 3D printer’s firmware can then use that information to adjust the distance between the extruder and print bed accordingly.
You can not only use this to measure the Z axis height of a single point on your print bed, but also of a variety of points on a grid. This completely removes the need for you to manually level the bed, as the 3D printer can compensate for any misalignments as it is 3D printing.
The BLTouch started as an Indiegogo project, and it has now become one of the most commonly used auto leveling sensors available for 3D printers. Its low price combined with its open-source nature and ease of use has greatly contributed to its popularity.
How Does the BLTouch Sensor Work?
As its name suggests, the BLTouch sensor works by actually touching the bed’s surface. The main components of the sensor are a microcontroller, a solenoid switch, a Hall sensor, and a push pin probe.
The pushpin probe is extended out of the sensor body during the homing procedure. As the tool head lowers, the probe contacts the bed’s surface. The hall sensor is then triggered, and the solenoid switch is activated. It retracts the probe back into the sensor, and the height data at that point is measured and recorded to the firmware.
By measuring the bed’s surface at various points in a grid, the 3D printer’s firmware can form a digital representation of the print bed.
A basic measuring grid has a 3×3 dimension, measuring a total of 9 points. Configuring the grid to be more dense (e.g. 5×5 or 9×9) increases the measuring resolution and gives your firmware more accurate data to work with.
The more accurate the data, the better it can compensate for the valleys and hills on your print surface. You don’t want to set the grid too dense, however. Too many probing points and your 3D printer will spend lots of time probing for diminishing returns.
Alternative Leveling Sensors
The BLTouch is one of many different types of auto bed leveling sensors. All leveling sensors have the same goal of measuring the distance between the nozzle and the print bed, but how they achieve it differs slightly.
Let’s look at three other common types of bed leveling sensors.
RC Servo + Micro Switch
A servo with a micro switch was one of the earliest methods for bed probing and auto leveling on hobbyist 3D printers. It combined a servo motor with an arm and an end stop (micro switch).
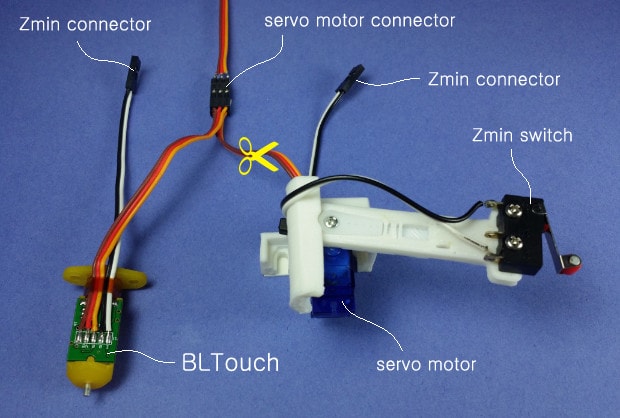
The servo arm extends to correctly orient the microswitch towards the bed. When the tool carriage lowers (or the print bed raises) on the Z axis, the switch triggers when it comes in contact with the print bed. After that, the servo arm retracts to move the switch up again.
While this is a relatively reliable and repeatable method of measuring, it is fairly bulky and impossible to integrate in a compact extruder carriage.
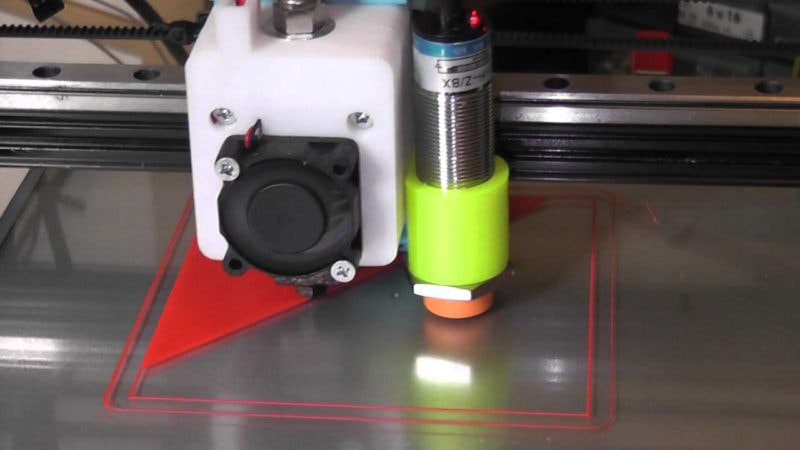
Inductive Sensor
Inductive sensors are the non-contact kind of bed leveling sensors that work on the principle of electromagnetic inductance. These sensors produce a magnetic field and measure the interference in this field when any metal object comes near it.
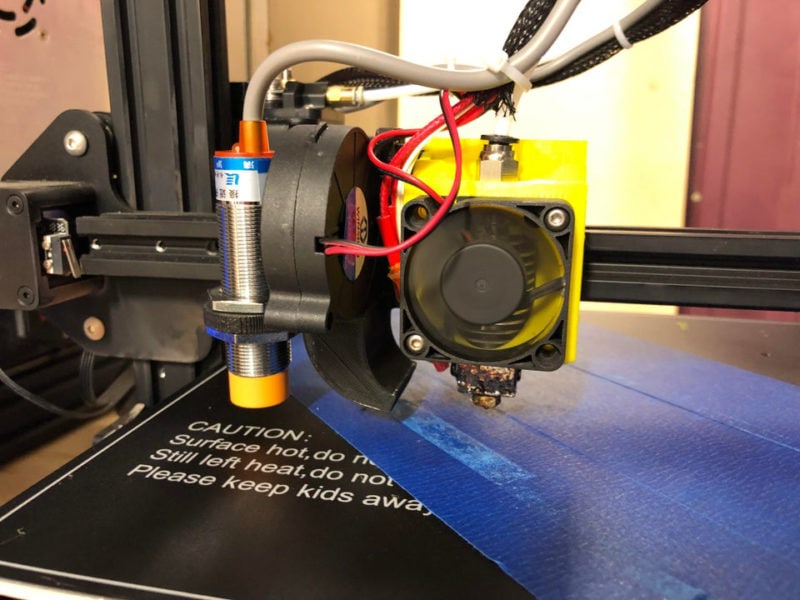
Consequently, these sensors only work with metal beds and typically cost more than other sensors. However, they are highly accurate under the right conditions and deliver precise results every time. Because they do not contain any moving parts, they do not lose accuracy over time and have a very long lifespan.
Capacitive Sensors
Capacitive sensors are another kind of non-contact auto bed leveling sensor. These measure the change in capacitance (how much energy the onboard capacitor can hold) when the probe comes near a surface. The surface can be a glass, metal, polycarbonate, or even a PEI sheet.
In terms of bed materials compatibility, they are an improvement over the inductive sensors. However, these sensors are highly susceptible to temperature and humidity changes. And each time you switch between bed surfaces, you’ll have to adjust the z-offset of these sensors.
How to Install the BLTouch
The procedure of installing the BLTouch is relatively straightforward. Depending upon your 3D printer controller, you would either have an in-built port for the BLTouch, or you would need to buy a separate break-out board.
For this article, let’s understand how to install and configure the BLTouch for the Creality Ender 3 V2. It is probably one of the most important Ender 3 upgrades or Ender 5 upgrades you can do to improve your 3D printing experience, along with using the best Ender filament.
1. Hardware
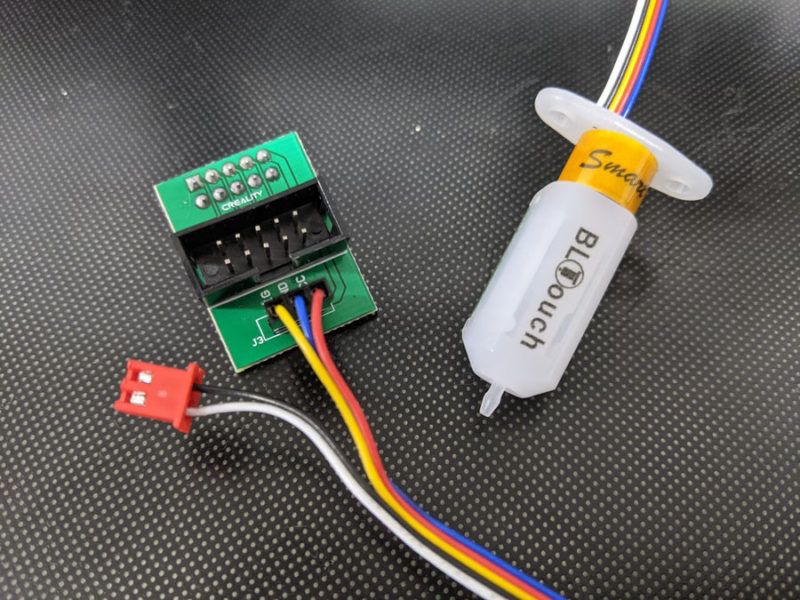
For 3D printers like the Ender 3 V2, you can directly buy the entire BLTouch kit. It comes with the sensor itself, the required mounting hardware, and the wiring to attach the sensor to the tool head. Attach the sensor to the tool head using the provided mount and then use the wires to connect it to the 3D printer’s mainboard.
Make sure to remove the original Z endstop as well, as you won’t need it anymore.
2. Firmware Update
Download and install the Marlin Firmware by Jyers on your V2. It is specifically configured for using BLTouch with the Creality Ender 3 V2 and comes with many smart functions.
3. Setting XY Offsets
Offsets are used to determine the BLTouch’s pushpin position relative to the 3D printer nozzle.
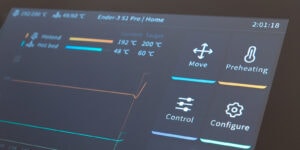
Once you boot up the Ender 3 V2, set the X and Y offsets under the Advanced section.
The X offset is the distance between the pushpin and the nozzle along the X-axis. Similarly, the Y offset is the distance between those two along the Y-axis.
Measure these offsets using a ruler and note down the values. It’s okay if they are approximately right. Enter the measured values as a negative value (e.g. -40 and -10 if you measured 40mm and 10mm) in the X offset and the Y offset sections and save the settings.
4. Setting Z Offset
Since we removed the Z end stop, we have to configure the BLTouch to home the Z-axis too. You’ll notice that when you home the 3D printer now, there’s a considerable gap between the nozzle and the build plate. We have to correct for the new distance between the BLTouch probe and the nozzle.
To do this, we recommend 3D Printscape’s video on setting the Z offset correctly on the Ender 3.
Slicer Settings
Now that we’ve configured the hardware and the firmware, all that remains is to configure the slicer. As the bed leveling is carried out at the start of every print, we need to modify the start gcode for the V2 in our slicer.
Suppose you’re using Cura, head over to the Machine Settings tab. Enter the “M420 S1” command after the “G28” line. It will initiate the mesh bed leveling once all the axes are homed. That’s it. Chuck (CHEP) has a great YouTube video detailing all these steps for the Ender 3 V2.
Troubleshooting
The BLTouch Push Pin Won’t Deploy
Check for any dirt or grime on the push pin or inside the sensor itself. If there’s any, clean the dirt and try again.
Another reason might be a weak magnetic force between the push pin and the solenoid. Adjust the magnetic control knob on the top of the sensor in small steps, using an Allen key, and see that fixed the issue.
My BLTouch LED Light Keeps on Blinking
The BLTouch’s red light will blink when it is unable to successfully self-test. A failing self-test is typically caused by a wiring issue (for example, reversed black/white wiring), or if the push pin fails to deploy.
Double-check the wiring and make sure that the push pin is free from any oils or particles. It needs to be clean and grease-free.
A successful self-test involves the BL touch extending and retracting the push pin several times.
BLTouch Failed to Verify the Sensor State
This issue commonly occurs when using the BL Touch sensor with Klipper firmware. Ensure all the wiring is correct and you have the latest version of the Klipper.
Then (again, being sure that the wiring is correct), you can add the following code to the BLTouch section of the firmware:
pin_up_touch_mode_reports_triggered: False
This disables the sensor check, fixes the ‘failed to verify the sensor state’ message and gets the BLTouch working.
Different BLTouch Versions
So far, the BLTouch has had three main hardware versions, and each hardware version has its sub-version with minor firmware updates.
The BLTouch Classic V1.x was the first version of BLTouch and did not come with self-test features or any red LED alarm release. The first version also had an aluminum push pin instead of the plastic one in the later versions.
Then ANTCLABS released the BLTouch Smart V2.x, which featured red and blue LEDs to detect wiring defects. It was also the first BLTouch to come with a plastic push pin. This has the advantage that it does not damage your print bed when it crashes into it. The plastic push pin can simply be replaced when bent, which is significantly cheaper than a new bed.
The latest version, i.e., the BLTouch V3.x, improved the timings and fine-tuned the PWM settings in the auto leveling sensor. The stroke of the push pin, too, is 1.6 mm longer than the previous version.
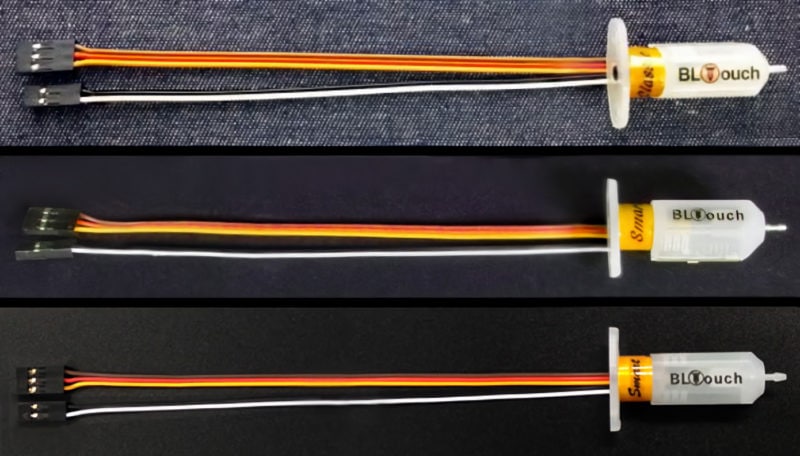
When buying a BLTouch, always get the latest version. As of writing, this is v3.1. There’s never any need to go with an old version if you happen to happen to encounter one for sale.
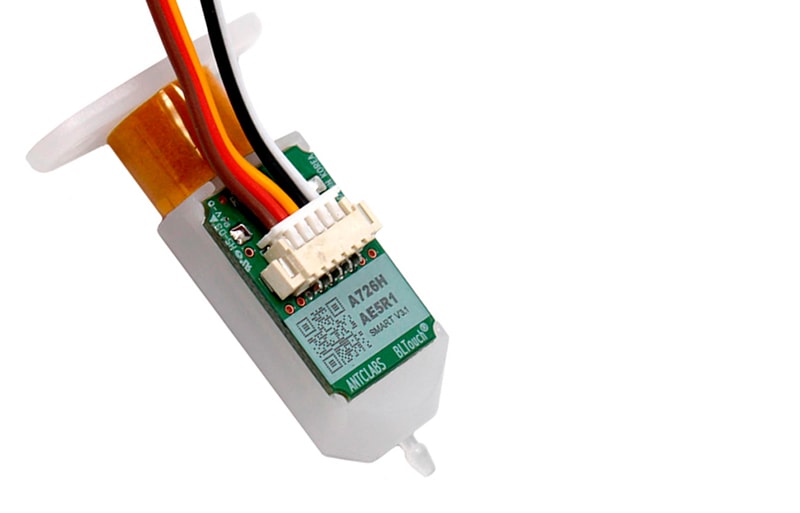
Pinout/Wiring
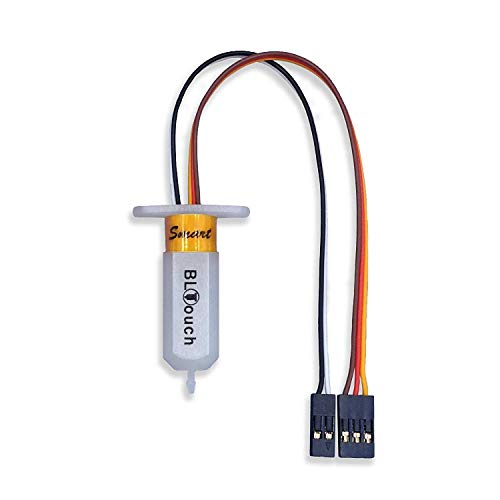
In total, the BLTouch has five wires, grouped in two separate 3-pin and 2-pin connectors. The 3-pin connector has brown, red, and orange-colored wires. The brown one connects to negative/GND, the red one to +5V, and the orange wire is for the PWM control signal of the solenoid that extends/retracts the push pin.
The 2-pin connector has two wires (black and white) and is meant to go into the Z end stop of your motherboard. The black wire is for GND, and the white one is for the Zmin connection.
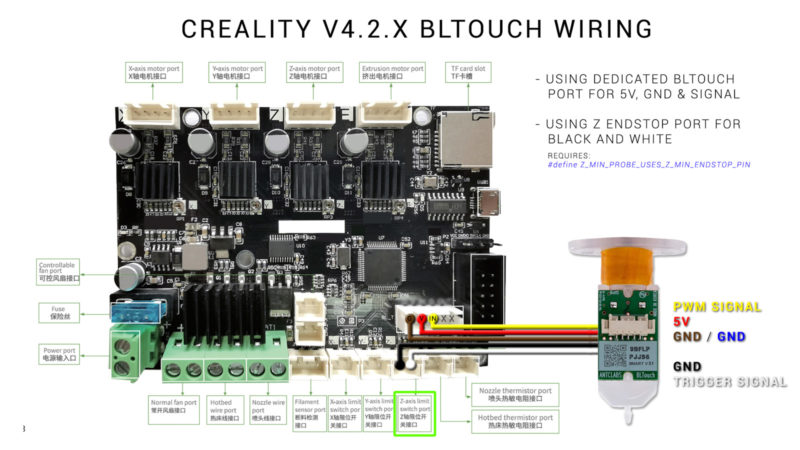
You need to wire each connection correctly to your printer motherboard to ensure that your BLTouch works appropriately. The correct wiring for the Creality v4.2.x Ender 3 V2/Pro boards is shown above. If you use a different 3D printer controller board, you’ll need to look up the correct wiring for that one.
Genuine vs Clone BLTouch Probes
Aside from the original BLTouch from ANTCLABS, you can also find BLTouch clones for sale online. The BLTouch clones are more affordable than the original, but come with downsides.
The clones have a poor quality of components and are more likely to give you problems. Not only are these problems difficult to troubleshoot, you also won’t have any manufacturer support when buying these clones. This can be a very frustrating experience.
The original BLTouch comes with a printed QR code which you can scan to verify its authenticity. The original sensor is made in South Korea using high-quality materials, is more reliable, and ANTCLABS provides excellent support for the sensor in case you run into issues.
The slightly higher price of the original BLTouch is worth it in the long term. You are likely buying the BLTouch to save you time and hassles in the first place, after all.
How Much Can BLTouch Compensate for?
The BLTouch sensor does not level the bed but rather gives your 3D printer firmware data that helps compensate for the tilt and inconsistencies of the print bed. It can precisely measure a deviation as small as 0.01 mm, and there’s no exact value for maximum tilt compensation.
Which BLTouch Version Do I Have?
If you open the sensor body on the PCB, you can see the version number. If you have the latest BLTouch, it should be printed as V3.1. The 3 stands for the 3rd iteration of the hardware, and the 1 stands for the first iteration of the firmware.
Why is My BLTouch Blinking?
A blinking red LED indicator on a BLTouch functions as a wiring defect indicator or indicates a problem with the self-test. Check if all your wires are in the correct place and ensure your BLTouch does not have a stuck push pin probe.
Which BLTouch to Get for the Ender 3 Pro or Ender 3 V2?
For any 3D printer, including the Ender 3 V2/Pro 3D printers, you are best off with the latest BLTouch v3.1 (or v3.0). Both sensors are compatible with these machines, with the V3.1 being a slight improvement over the previous version.
How Can I Tell if My BLTouch is Genuine or Fake?
A genuine BLTouch has a QR code printed on the PCB of the sensor, and you can scan this code to verify its nature. Cheaper clones come without a QR code. The price you paid for the BLTouch might also be an indication of its genuineness, but not a guarantee.
Conclusion
The ANTCLABS BLTouch is a great alternative to manual leveling and removes the need to get a perfectly leveled bed. It is affordable, high-precision, widely supported, and easily accessible. On top of that, it works with any print bed surface and can be mounted on a wide variety of 3D printers.
If you want to explore the world of automatic bed leveling, the BLTouch is the best upgrade to add to your 3D printer. Let us know your experiences with the BLTouch in the comments below.