
- Fast 3D printing
- Wide filament compatibility
- Stock Klipper firmware
- CoreXY mechanics
- Amazing print cooling
- Fully enclosed
- Generous build volume
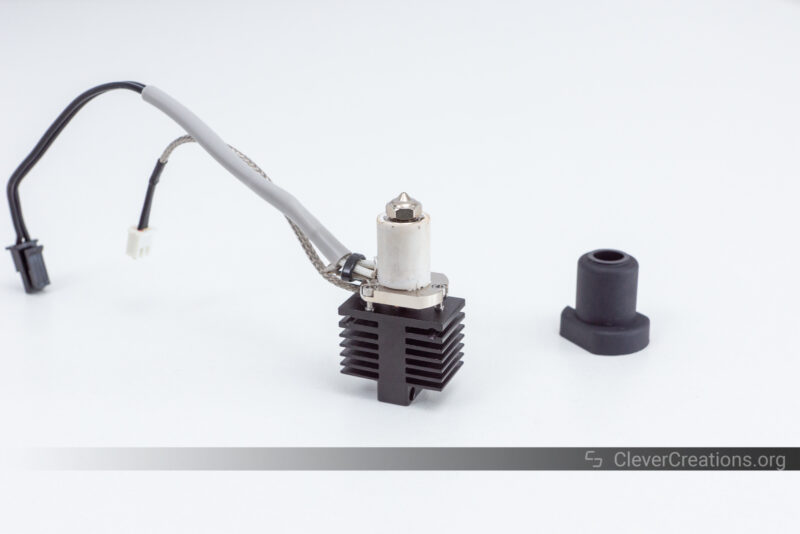
- Comes with additional hot end
- Packed with practical features
- Louder than your typical 3D printer
- Dry box is hard to access
- Bed adhesion could be better
- CF rods require extra care
- No air filter
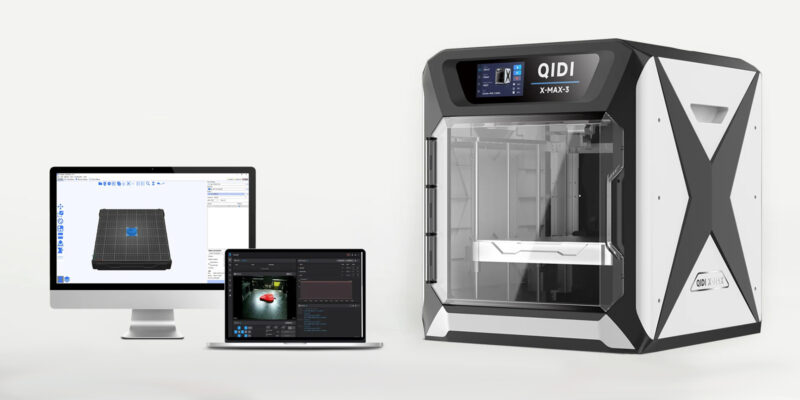
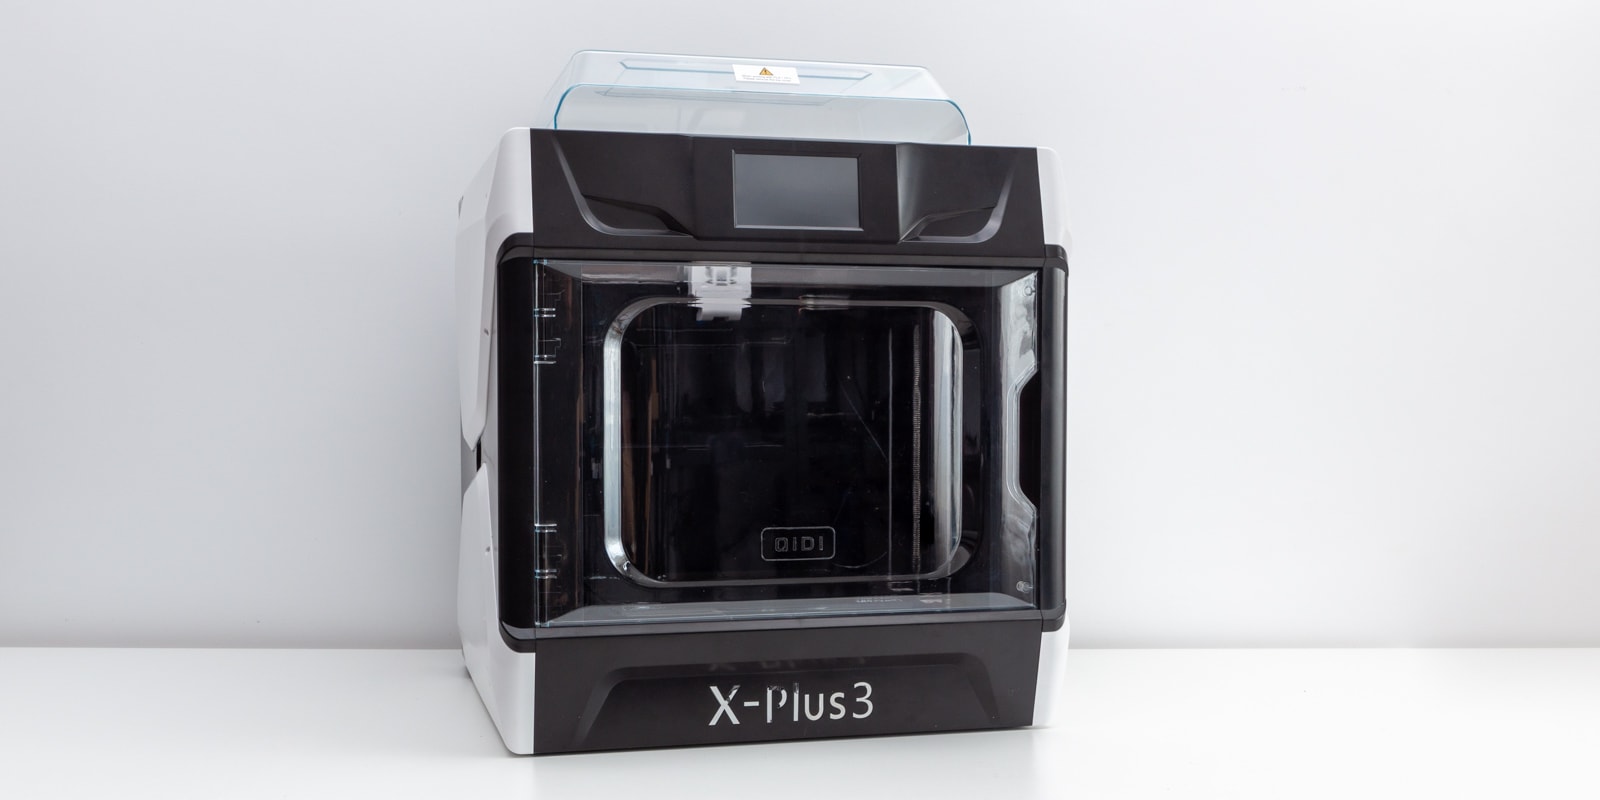
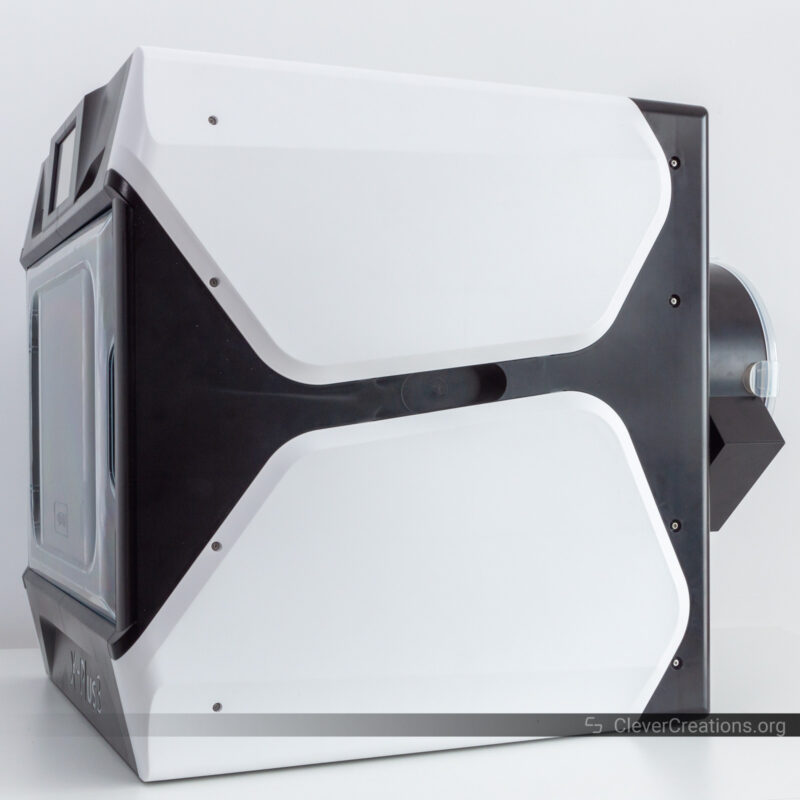
The QIDI X-Plus 3 is the newest machine in QIDI’s line of enclosed 3D printers. With features like a heated chamber, a high-temperature extruder, CoreXY mechanics, and stock Klipper firmware, it promises a high-speed and versatile printing experience.
In this QIDI X-Plus 3 review, we’ll test its key features and performance with a variety of filaments. We’ll also compare it with similar 3D printers on the market, so you can make an educated decision when it comes time to buy.
Let’s dive in!
QIDI X-Plus 3 Specs
| QIDI X-Plus 3 Specifications | |
|---|---|
| Price | QIDI | Amazon |
| Build volume | 280x280x270 mm |
| Dimensions | 511x527x529 mm |
| Net weight | 19.5 kg |
| Printing speed | ≤ 600 mm/s |
| Extruder flow | 35 mm³/s |
| Extruder temp | ≤ 350 °C |
| Hotend (Included) | 1x Copper alloy nozzle hot end 1x Hardened steel nozzle hot end |
| Auxiliary part cooling fan | ✔ |
| Chamber temperature control | 65°C Independent chamber heating |
| Screen | 5.0-inch touch screen |
| Seal print | Dryer box + desiccant |
| Connection options | Wi-Fi, USB flash drive, ethernet cable |
| Rated power | 800 Watts |
| Recommended filament | PAHT-CF, PET-CF, PA12-CF |
| Compatible filament | PLA, ABS, ASA, PETG, TPU, PET-CF, PA12-CF, PC, UltraPA, Nylon, etc. |
| Structure | CoreXY |
| Z-axis | Double Z axis |
| X-axis | Hardened Wear-resistant Carbon Fiber Rod |
| Firmware | Klipper |
| Printing acceleration | 20000 mm/s² |
| Printing accuracy | ± 0.1 mm |
| Filament diameter | 1.75 mm |
| Bed leveling | Automatic Leveling |
| Extruder transmission ratio | 9.5:1 |
| Hot end | Ceramic heating core |
| Extruder | High-flow direct drive extruder |
| Nozzle diameter | 0.4mm (0.2, 0.6, 0.8 mm optional) |
| Hot bed temperature | ≤ 120 °C |
| Printing plate | Double-sided flexible magnetic HF plate |
| Filament detection | Yes |
| Resonance compensation | Yes |
| Pressure advance | Yes |
| Main processor | Cortex-A53, 64-bit processor |
| 1.5Ghz, 8G-EMMC, 1G DDR3 | |
| Slicer | QIDI Print and other third-party software, such as Ultimaker Cura, Simplify3D, PrusaSlicer, etc. |
| Operating system | Windows, MacOS, Linux |
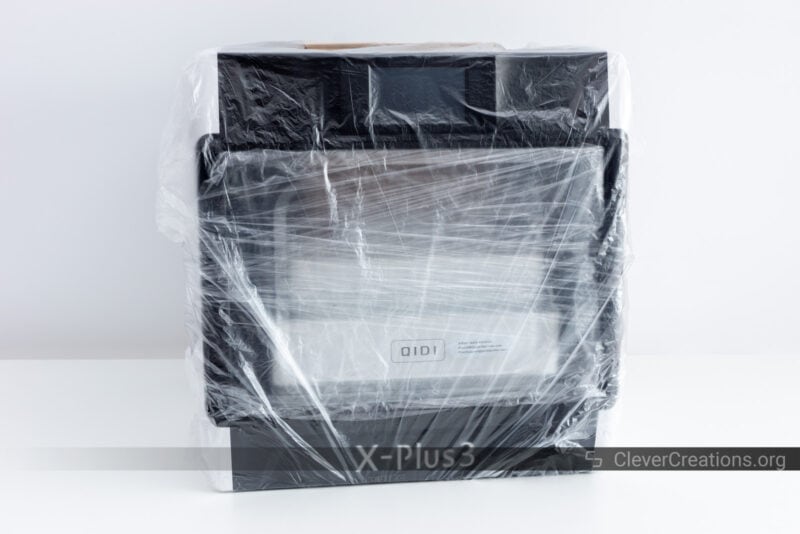
Unboxing
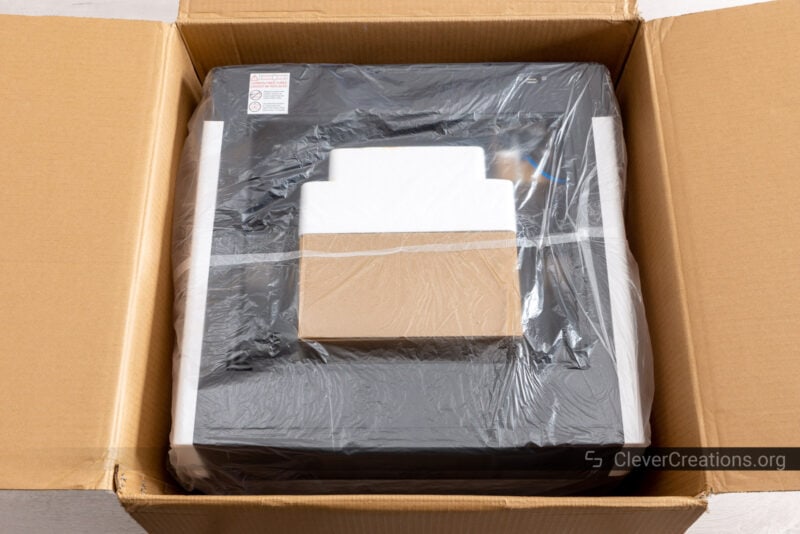
Unboxing the QIDI X-Plus 3 is a simple task, as long as you have a second person helping you. Doing it by yourself can be a challenge since the printer is both large and heavy.
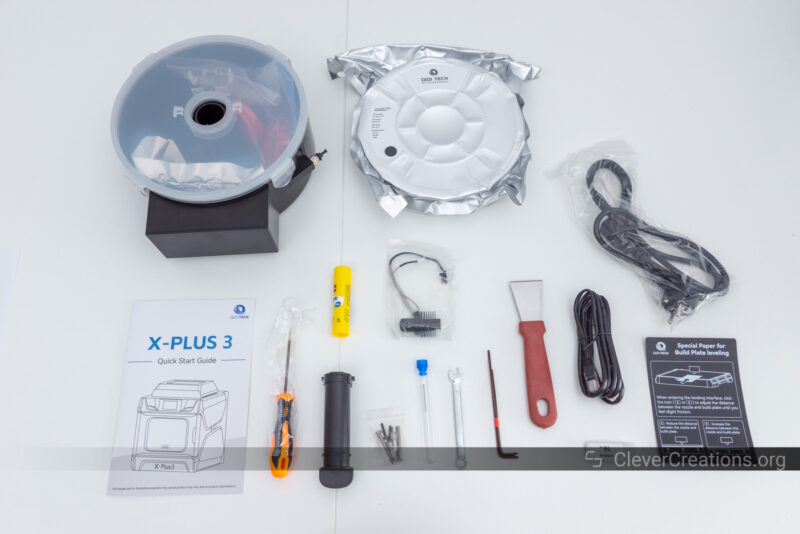
Once you’ve got the QIDI X-Plus 3 out of the box, however, you’ll find all of its 3D printer accessories nearly packed inside the printer itself. This includes any tools you might need, but also a roll of filament (UltraABS-GF25) and spare parts.
In total, you get:
- QIDI X-Plus 3 3D printer
- Dryer box
- 500g of UltraABS-GF25 filament
- Filament spool holder
- Power cord
- Ethernet cable
- Print bed scraper
- Various tools
- USB flash drive
- Glue stick
- Spare parts kit
- Extra hot end
It’s nice to see something different than plain PLA filament included in the package, and the addition of the glue stick and even an Ethernet cable show that QIDI is paying attention to what customers need to get up and running quickly.
Getting Started
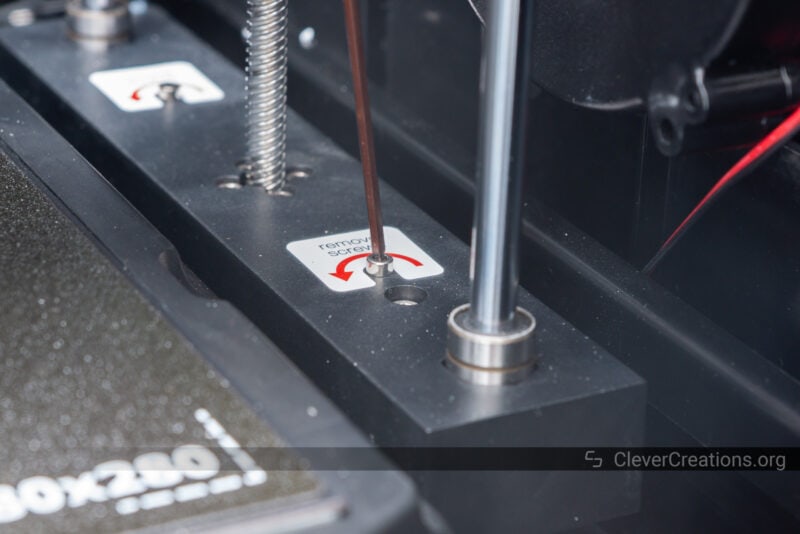
Altogether, you’ll have the QIDI X-Plus 3 up and running in about 15-20 minutes. The 3D printer is more than 95% pre-assembled and you only have to do some minor tasks, such as removing tie wraps.
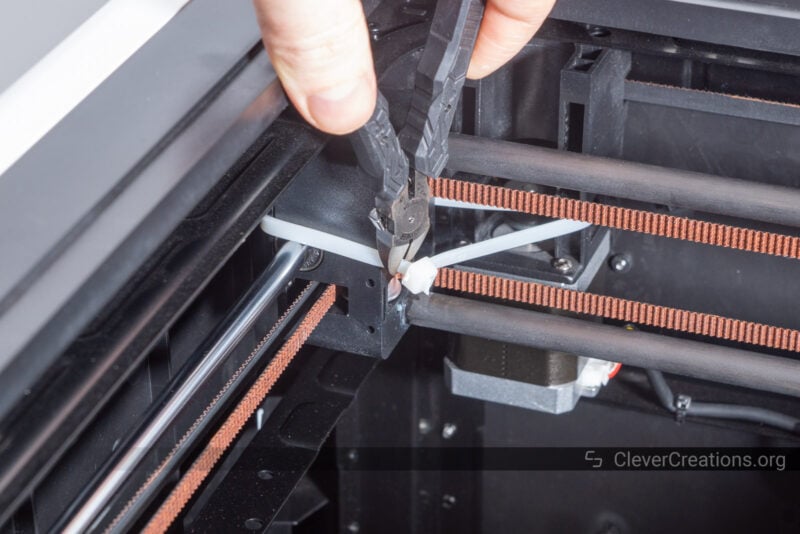
These hold the components in place during shipping to prevent accidental damage. Similarly, there are a couple of screws for you to remove that hold the components of the Z-axis in place.
QIDI has paid a lot of attention to making sure that the X-Plus 3 arrives in one piece. We regularly receive 3D printers with components that came off during shipping. There’s not much chance of that happening here.
The getting started instructions are listed in the manual, but you can also find them on the machine itself after you boot it up. It’s a neat addition that shows QIDI is thinking about the user experience.
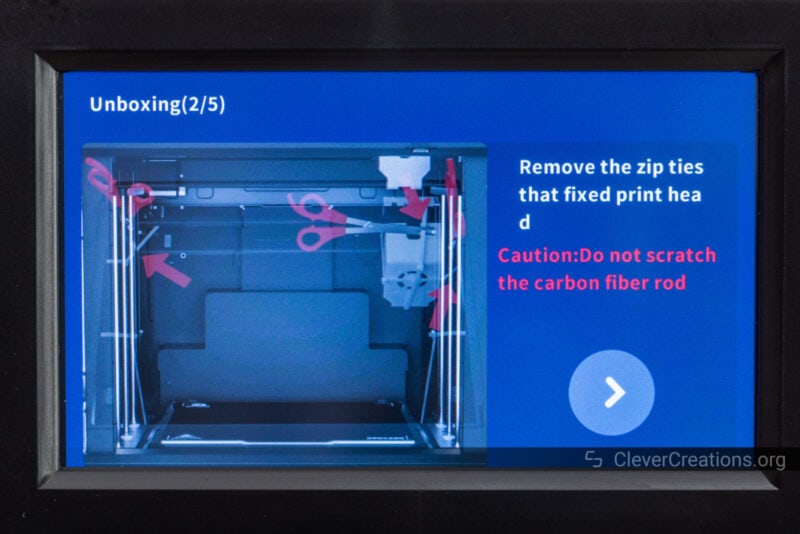
The on-screen steps guide you through the whole setup process, including leveling the bed, running Input Shaper, and cleaning the carbon fiber rods. We’ll discuss those last two in more detail later in this QIDI X-Plus 3 review.
As an overall experience, getting the X-Plus 3 up and running was a breeze. Compared to some of the other 3D printers we’ve tested, there is little room for error.
If you’d like to remove the stickers from the windows of the 3D printer, we recommend removing the sticky residue with a paper towel soaked in oil (e.g. olive, sunflower).
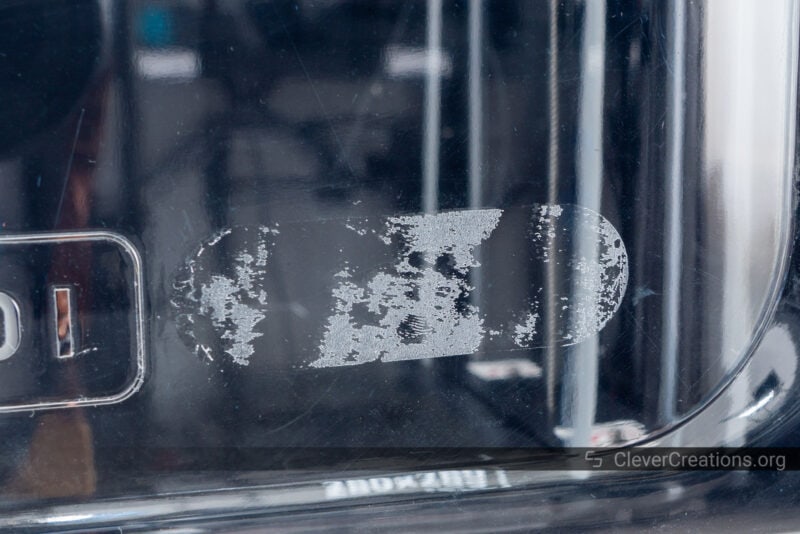
Alcohol doesn’t work well on the stickers, and acetone destroys the acrylic surfaces of the 3D printer. We made the mistake of using acetone and it left some unsightly patches on the front window. Learn from our mistakes!
QIDI X-Plus 3 Features
The QIDI X-Plus 3 3D printer is chock-full of features, and we have done our best to cover them all in this review. Let’s take a closer look at some of the most notable now.
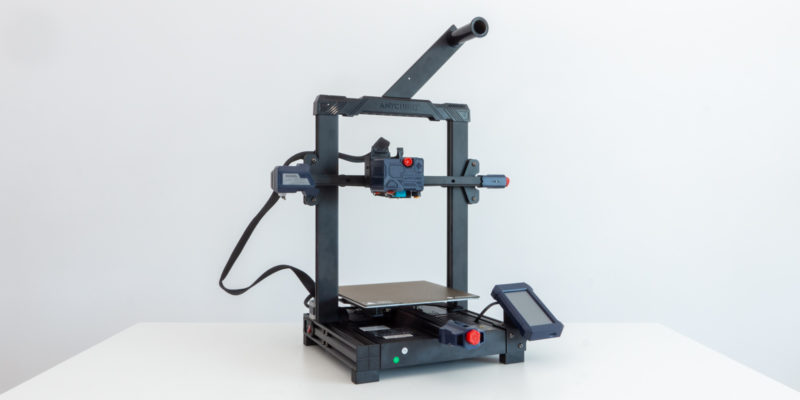
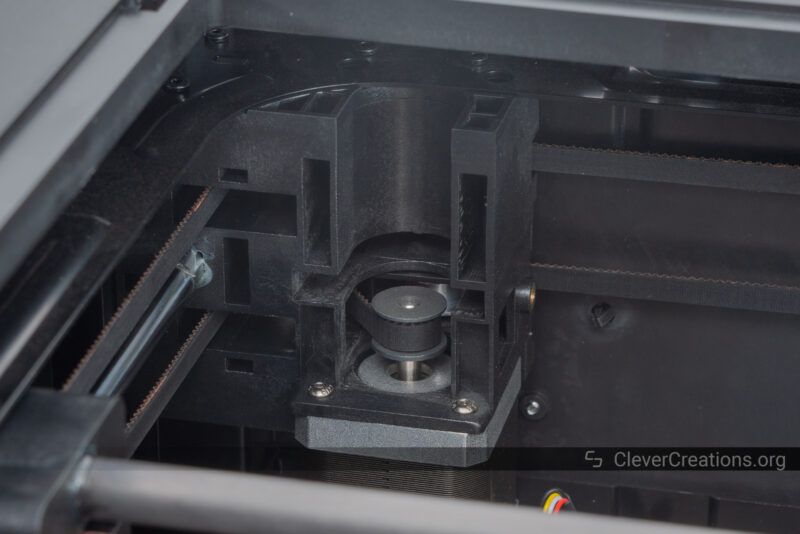
Geared Extruder
The print head of the QIDI X-Plus 3 contains a powerful 9.5:1 geared extruder. Not only is it capable of pushing sufficient plastic at high print speeds, but it is also able to provide the necessary torque for printing with more abrasive filaments.
Its extruder stepper motor is not your typical NEMA17 stepper motor. Instead, it’s a pancake stepper motor that neatly fits between the carbon fiber X-axis rods.
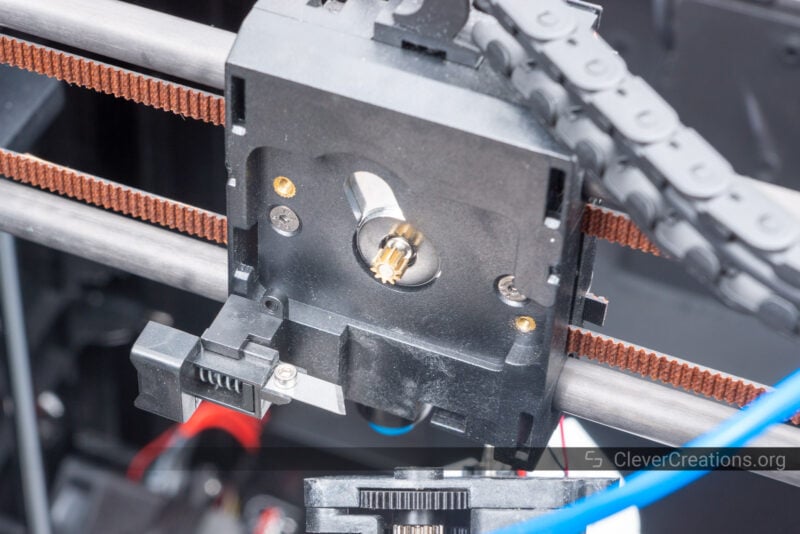
This provides both a lightweight print head and a more balanced weight distribution, reducing resonance in the printing process. The result for you is higher print speeds, more aesthetically pleasing prints, and better reproduction of detail.
The gearing in the extruder is part metal, part plastic. Depending on the plastic used, the gears could wear faster than expected. It is worth keeping an eye on, but we don’t see any immediate cause for concern.
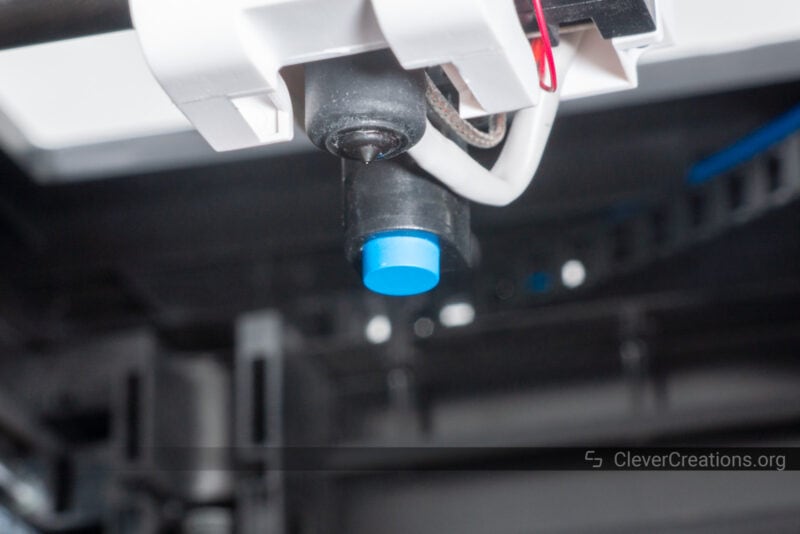
High-Temperature Hot End
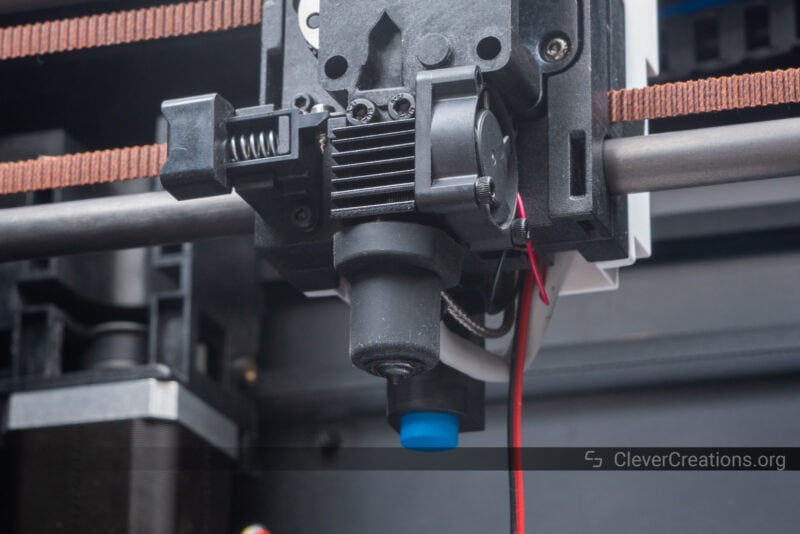
To melt the filament, the QIDI X-Plus 3 uses a relatively small all-metal 3D printer hot end that can reach up to 350 °C. This makes it possible to print with more exotic materials and allows you to print with filaments like polycarbonate, nylon, and more.
It would have been nice to see a 400 °C maximum temperature to allow for printing with PEEK and other fancy engineering materials, but since the print bed itself maxes out at 120 °C, the X-Plus 3 isn’t able to handle those anyway.
Compared to other 3D printers, the hot end heatsink is rather small. Despite that, we haven’t noticed any extrusion problems or issues with heat creep.
The hot end uses a circular heater cartridge for better heat distribution. It draws somewhere between 50W and 60W, which causes it to heat from room temperature to 200 °C in a whopping 29 seconds.
It’s one of the fastest heat-up times we have seen so far. However, because the print bed is DC-powered (slow heating), you’ll be waiting for that to heat up anyway.
Still, if you want to quickly swap filaments, the hot end will be ready for you in no time. It also has more than enough power for the high feed rates of the X-Plus 3.
A great addition is the second hot end that you get with the machine. Unlike the primary hot end, which features a more conductive copper alloy nozzle, the extra one has a hardened steel nozzle.
This lets you work with more abrasive filaments, like carbon fiber-filled, wood-filled, glow-in-the-dark, etc., without the nozzle wearing out fast.
Overall, the hot ends performed well for us and we haven’t noticed any major issues with it. We’ve thrown a variety of filaments at them—including engineering plastics like PA-12CF—and they have been able to handle them all.
Powerful Print Cooling
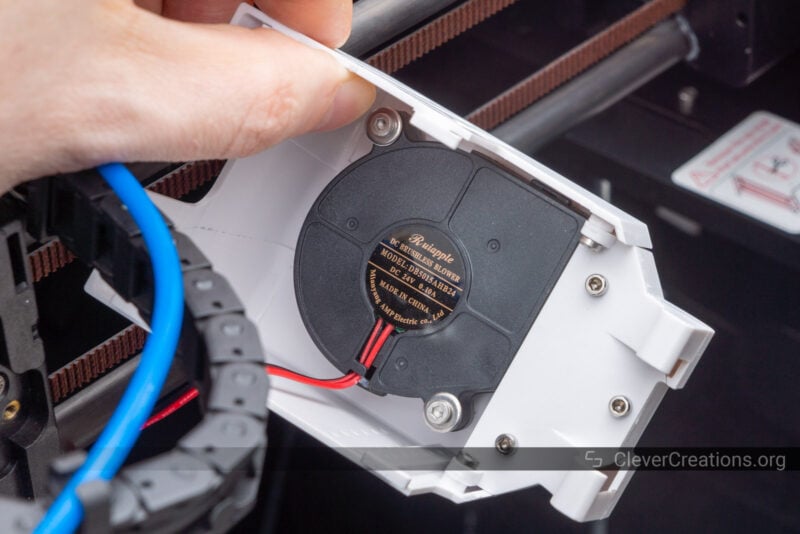
The print cooling of the QIDI X-Plus 3 3D printer can only be described as impressive. The print head uses a 50×15 mm radial fan to cool the plastic as it is being extruded. Compared to the more typical 40×10 mm fans, this is a massive improvement.
Even more impressive, however, is the massive blower fan located in the enclosure.
It sucks air from the bottom of the chamber and directs it through a wide opening that is placed at nozzle height.
The result is a voluminous stream of air that is delivered to your freshly extruded plastic. It’s a godsend for overhangs, bridging, and just being able to print faster in general.
One caveat is that this fan is mostly useful for low-temperature filaments like PLA and TPU, which are not prone to warping or delaminating when exposed to a stream of air.
If you intend to mostly use higher-temperature filaments, then the print cooling system will be less useful, and you’re better off leaving this fan off.
Something else to note is that the fan is loud. Because since the QIDI X-Plus 3 is already a loud 3D printer to begin with, it’s not that noticeable. We’ll cover the sound levels in more detail later in this review.
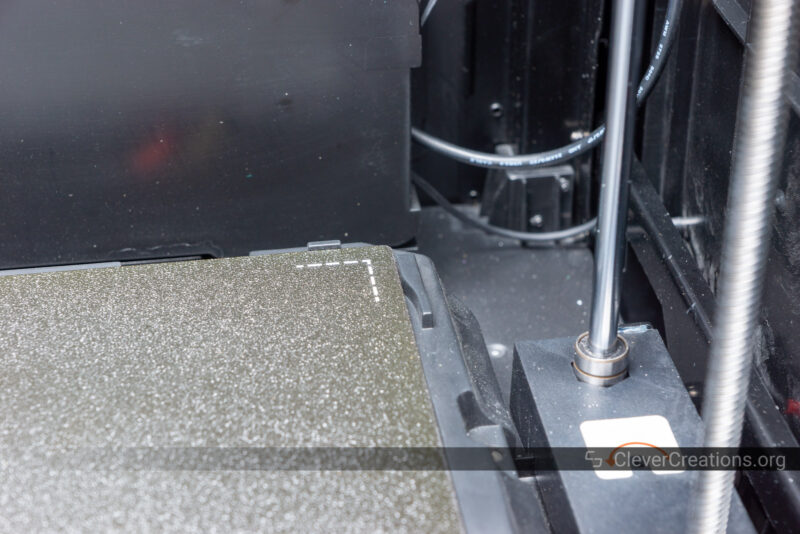
Carbon Fiber Rods
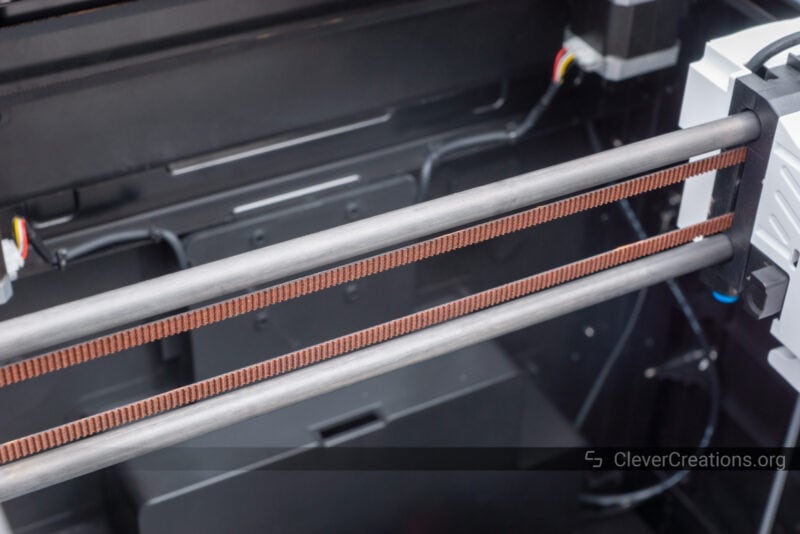
A standout feature of the QIDI X-Plus 3 is its carbon fiber rods. On a 3D printer that is focused on fast 3D printing, you want to reduce moving mass as much as possible. These rods do exactly that.
Not only are carbon fiber rods lighter than your typical stainless steel rods, but they are also stiffer. This combination lets you print at faster speeds with fewer ringing and other print artifacts.
The carbon fiber rods on the X-Plus 3 are 10 mm in diameter and are epoxied to the Y-axis carriages. As a result, you’ll need to be very careful to not scratch them. You won’t be able to replace them if you do.
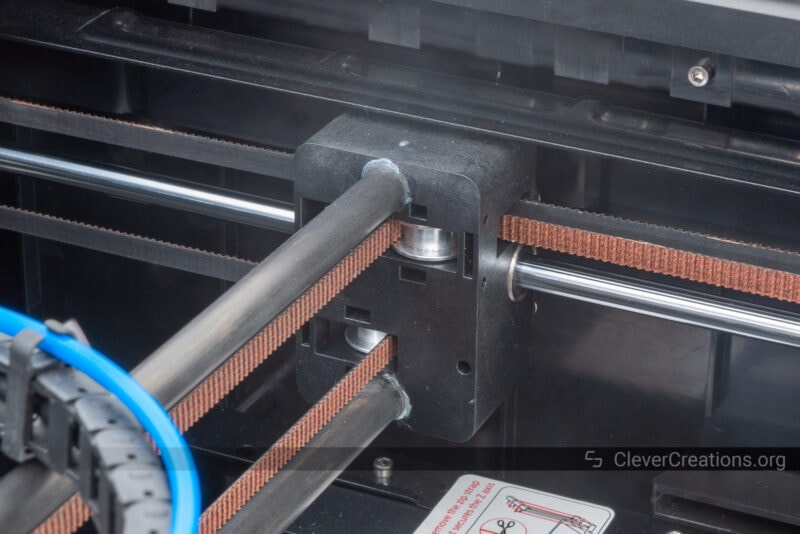
Another difference between the carbon fiber rods compared to standard stainless steel ones is that they don’t use any grease or lubrication. Because the X-carriage uses bushings instead of bearings, the rods should be kept dry.
To keep them clean, the manual recommends wiping them down with isopropyl alcohol every 1-2 weeks, or whenever they get dusty.
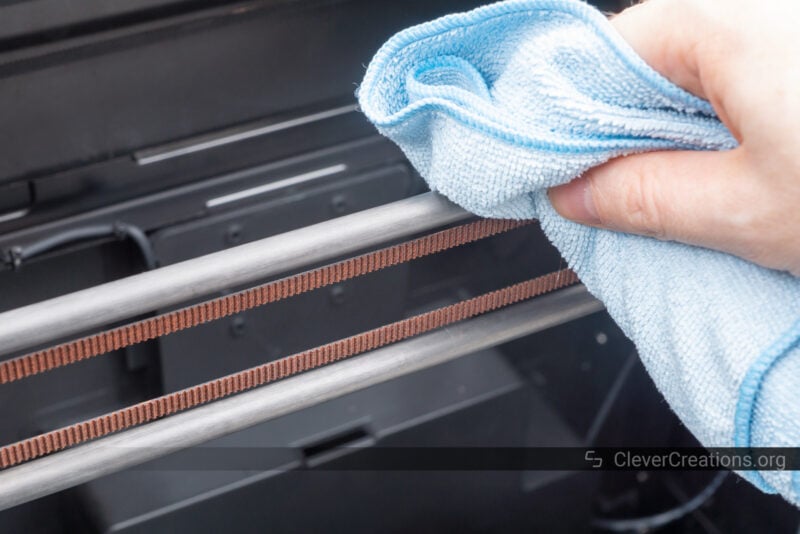
In our experience, the 1-2 week time frame is accurate. After a week of intensive testing, the rods already had a layer of dust on them.
This creates more maintenance than with other machines, and the fact that you have to be very careful not to scratch the rods adds an extra thing to keep an eye on as well. But if your priority is fast 3D printing, the performance increase is worth it in our opinion.
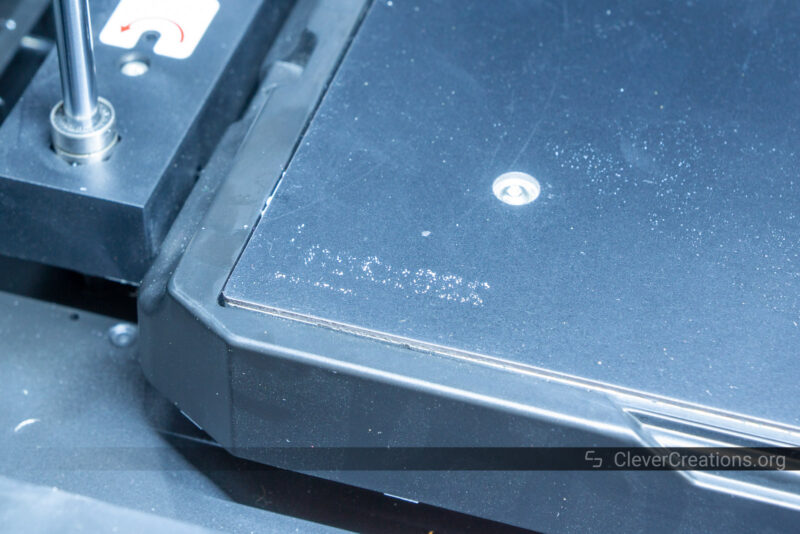
Flexible Print Surface
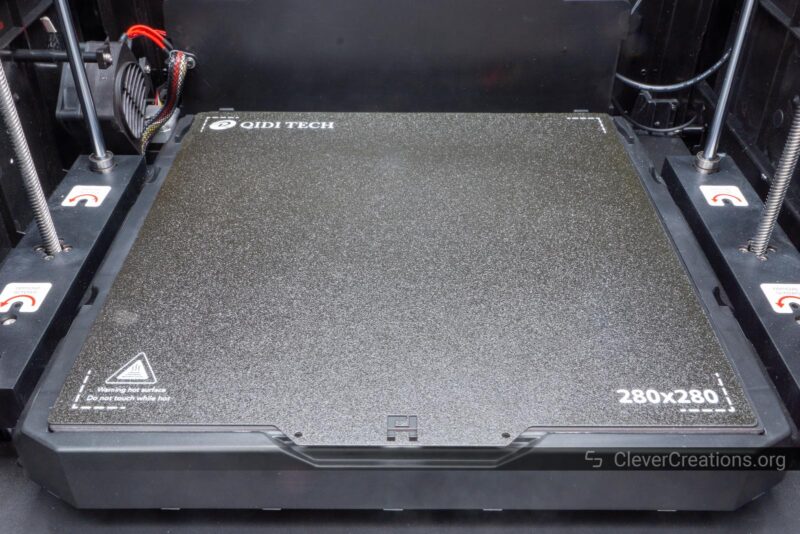
The print surface QIDI X-Plus 3 3D printer is something we are not that impressed with. As with most printers nowadays, it’s a flexible magnetic sheet that sticks to the heated bed.
In theory, it’s a great solution since you can easily remove prints from the surface after they are finished. In practice, however, the surface does not stick that well to some filaments.
More specifically, we had issues with one color of PLA and one of PETG that did not adhere as expected.
This was with a correctly set Z-offset and a leveled bed, and with filaments that work well with other machines.
Luckily, a simple application of glue stick to the print surface solved the issue. This might also be the reason why QIDI includes a small glue stick in the box.
All other filaments we tested (ABS, PETG, PC-FR, PA12-CF) stuck perfectly without bed adhesive and didn’t even need a raft or brim.
The print surface is double-sided, but since both sides are PC-coated, you don’t have the option to use different sides for different filaments. The other side is more useful as a backup.
We would have liked to see at least one of the surfaces PEI-coated instead. A high-quality PEI coating offers more adhesion than the current surface and would work with more filaments without the need for a glue stick.
What we do like are the alignment tabs at the back of the print bed. When placing the print surface back on the bed after removing a print, they help a lot with alignment.
With other 3D printers, the alignment process of a magnetic print surface can be a small source of frustration, but it’s super easy with the X-Plus 3.
Something we noticed about the print surface is that its paint comes off at high temperatures.
This is similar to what we saw on the Sovol SV06 and Sovol SV06 Plus. In this case, the paint is not likely to affect your prints—it’s only placed at the corners—but we do believe this is indicative of the general quality of the print bed.
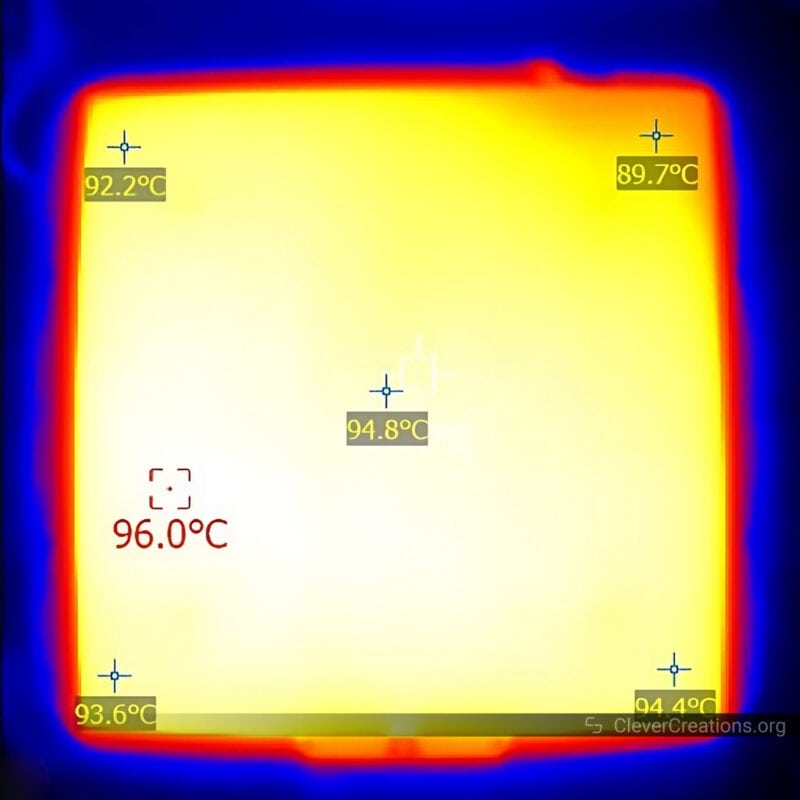
Temperature Uniformity
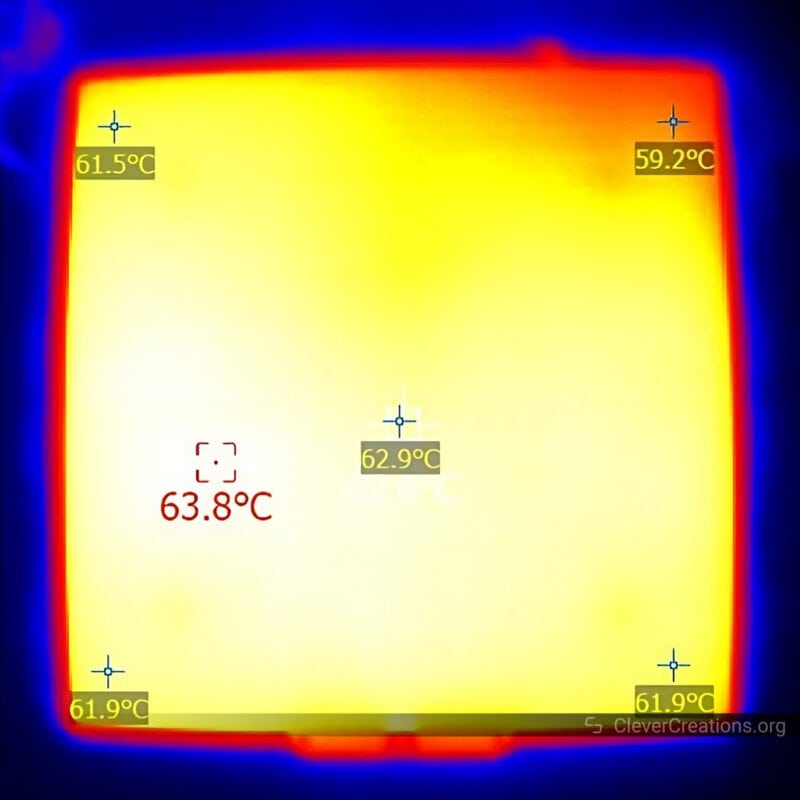
On a more positive note, the temperature uniformity of the QIDI X-Plus 3 print bed is great. During our tests, we achieved consistent temperatures across the entire bed at its entire temperature range.
This was a bit surprising to us, as the print bed does not have any insulation underneath. The fact that the 3D printer is enclosed certainly helps, but the temperature evenness can also be attributed to a good design of the bed PCB traces.
Heating Times
As mentioned earlier, the bed takes a while to heat up. Starting at 25 °C, the bed takes 2:27 minutes to reach 60 °C. Reaching the full 100 °C takes a whopping 7:27 minutes.
Both measurements were done with the enclosure door closed and the enclosure top off. These are similar conditions as when 3D printing PLA or TPU.
Closing the top of the QIDI X-Plus 3 and turning on the heated chamber would reduce the heating times.
To speed up the bed heating, we could have loved to see AC (alternating current) bed heating instead of DC. The 280×280 mm print bed area takes lots of power to heat, and AC would be more efficient here.
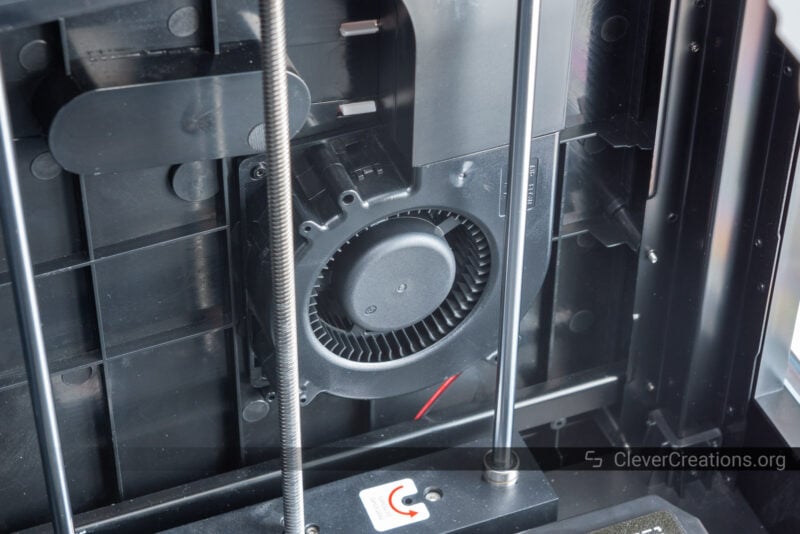
Heated Chamber
To help reduce warping and delamination of high-temperature prints (ABS, nylon, etc.), the QIDI X-Plus 3 3D printer has a heated chamber that keeps the enclosed environment at a consistent temperature.
The maximum temperature that can be reached is 65 °C and is adjustable per print job.
For the chamber to the desired temperature, the 3D printer uses a heating element and fan to heat the air inside and then circulate it around.
It’s another source of noise, but not a horrible one. In our experience, the heated chamber does indeed help with prints that require higher temperatures and reduces warping and delamination.
You don’t want to use it with PLA or other low-temperature filaments, as it can lead to sagging, elephant’s foot, and other issues.
It’s also important to keep in mind that the heated chamber is the reason why the QIDI X-Plus 3 comes with a second, 400W power supply. At full power, just the heated chamber itself draws about 350W!
If you care about your electricity bill, this could be something to keep in mind. Then again, you would run into the same issue with other 3D printers with a heated chamber. It’s just the cost of warp-free printing of high-temperature materials.
As for the heating times, you can expect the chamber to heat from 25 °C to 50 °C in about 3:20 minutes. Reaching the maximum 65 °C takes 8:42 minutes.
These measurements were made with the X-Plus 3 fully enclosed and only the chamber heater on.
With the heated bed and hot end on, you can expect the chamber to heat up faster. But the times above are the minimum times you can expect.
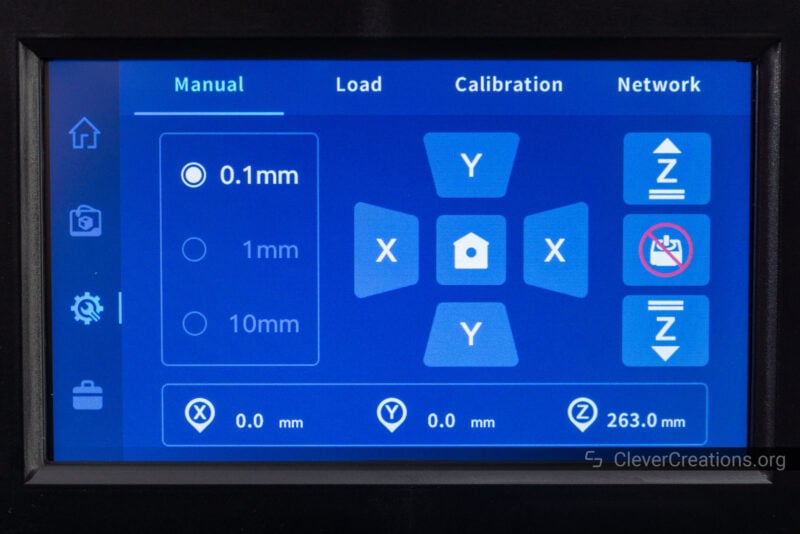
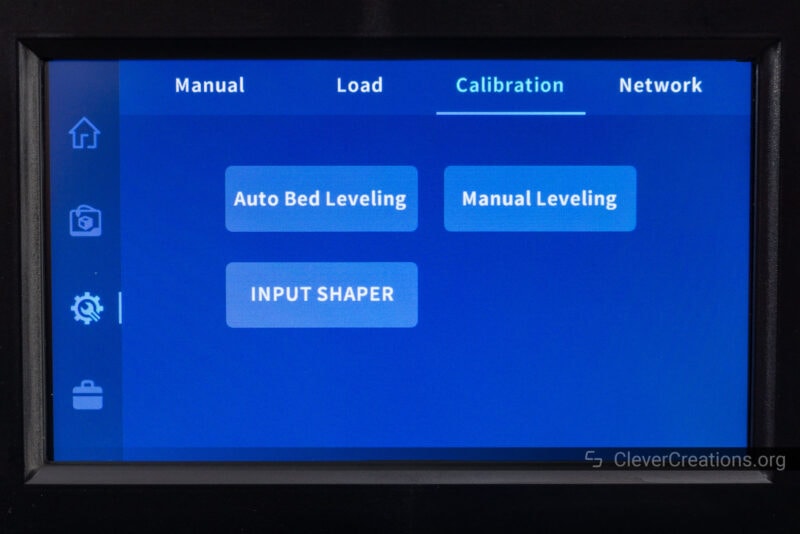
Automatic Bed Leveling
Just like all other modern 3D printers in its price class, the QIDI X-Plus 3 uses an automatic bed leveling sensor that allows the firmware to adjust for unevenness in the print bed.
It’s a capacitive probe that detects the metal print surface. While it works well with the included surface, you won’t be able to use it with a glass one.
If you care about your 3D prints having a perfectly smooth surface on the underside, that could present an issue for you. Otherwise, it is fine.
Because the measuring grid consists of 16 points, it takes a while for the sensor to go over them all. But because you don’t need to run the ABL sequence before every print, it’s not a big inconvenience.
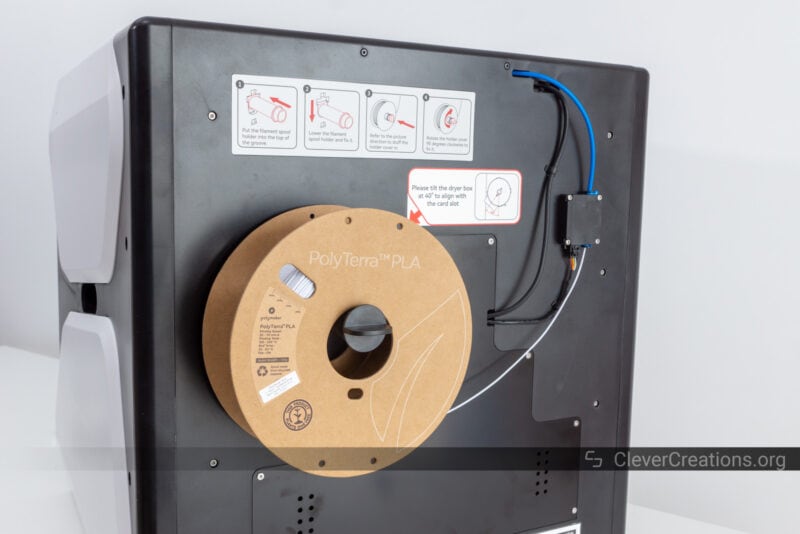
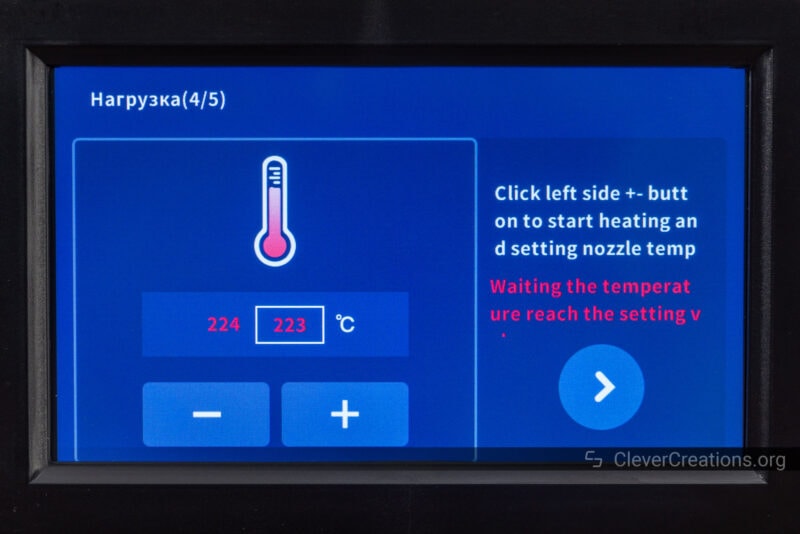
Filament Dry Box
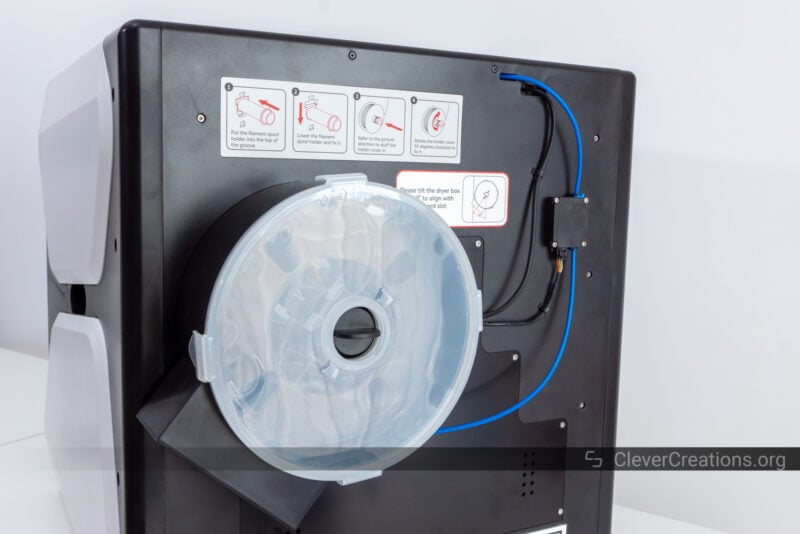
Another cool feature of the QIDI X-Plus 3 3D printer is its built-in filament dry box. You can use it to keep the current spool of filament you are using free of moisture. A perfect solution if you live in a humid climate or want to avoid dealing with brittle filament.
It’s especially useful if you 3D print with Nylon, PETG, or other moisture-sensitive materials that tend to absorb moisture from the air quickly. While you could take the spool out of the 3D printer at the end of your printing session, it’s often more convenient to just leave it in.
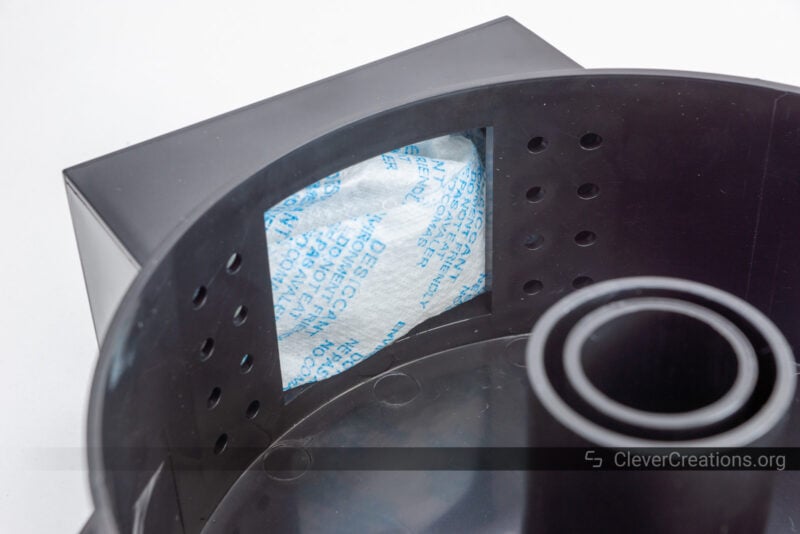
The dry box itself consists of an enclosed compartment that attaches to the rear of the X-Plus 3. It contains a compartment for a desiccant pouch (included) that helps keep the filament dry.
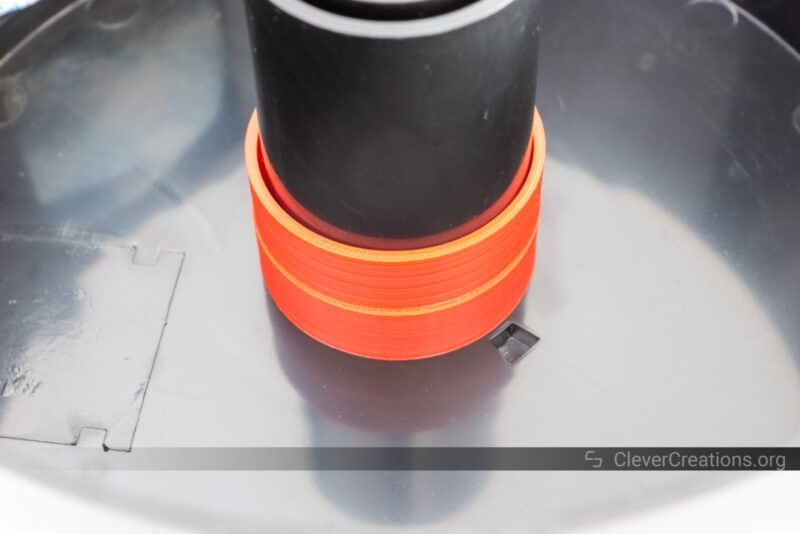
The box fits common spools up to 1 kg, and it even comes with two 3D printed adapters that you can use to accommodate differently-sized spools.
We haven’t used the QIDI X-Plus 3 long enough yet to see how big of a difference the dry box makes, but none of the moisture-sensitive filaments we’ve placed in it for several days developed issues.
The box seals well and we don’t see any reason why it shouldn’t protect filament well in the long run.
Because the dry box is placed on the rear of the machine, it can be hard to access. One point of feedback we have for QIDI is that mounting it on the side would make it a lot easier to swap out filaments. Right now, you have to move the large and heavy X-Plus 3 away from the wall if you want to access the dry box.
Apart from that, it’s a great feature and we’re sure many users will find a use for it.
Of course, you can also run the X-Plus 3 without the dry box and just place a spool of filament on the spool holder arm itself. It’s a versatile design and you can use it however you want.
We prefer to use it with the dry box because its PTFE tube guides the filament to the filament sensor without any kinks or sharp bends.
Additional Features
Even after all those features of the QIDI X-Plus 3, there are still a bunch that we haven’t covered.
For example, the print head comes with a small physical filament cutter that lets you cut the filament right above the hot end.
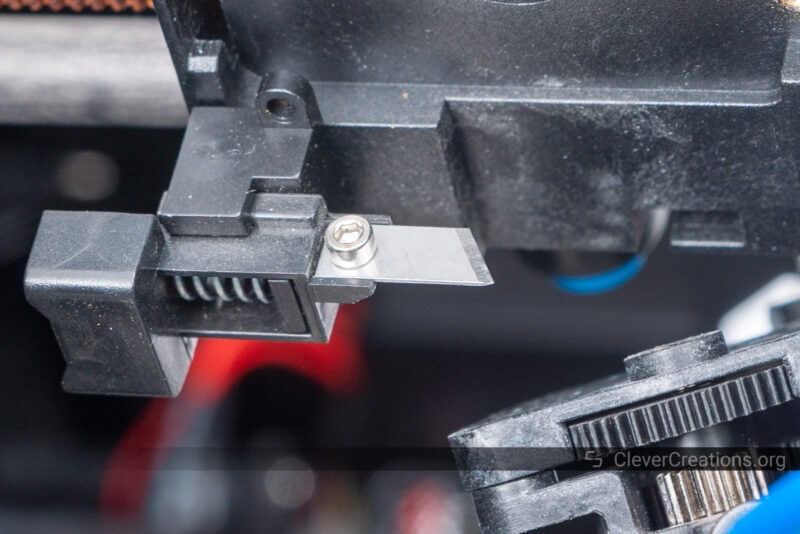
We didn’t find it that useful for swapping filaments. It’s just as easy to heat the nozzle and pull out the currently loaded filament.
What the cutter is more useful for is swapping the hot end. You can cut the filament off, keep the nozzle cold, and avoid handling a 200°C+ object. It’s much safer.
When you work with carbon fiber-filled filament, you’ll notice that the cutter blade has a hard time cutting through it. It’s likely to dull the blade over time, but the X-Plus 3 comes with two spare blades to account for that.
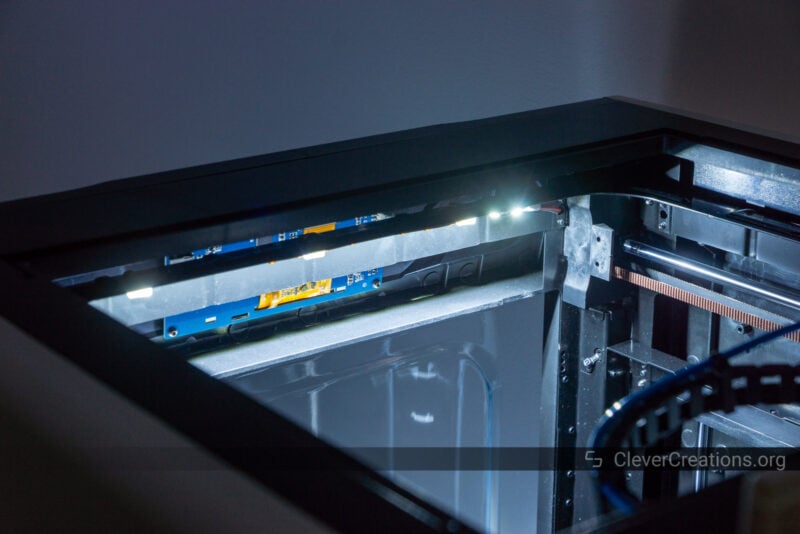
Also useful are the LED lights that are integrated into the enclosure. They are plenty bright and have a bluish color temperature. In an enclosed 3D printer where light has trouble reaching things, they are a welcome addition.
Build Quality and Construction
CoreXY Kinematics
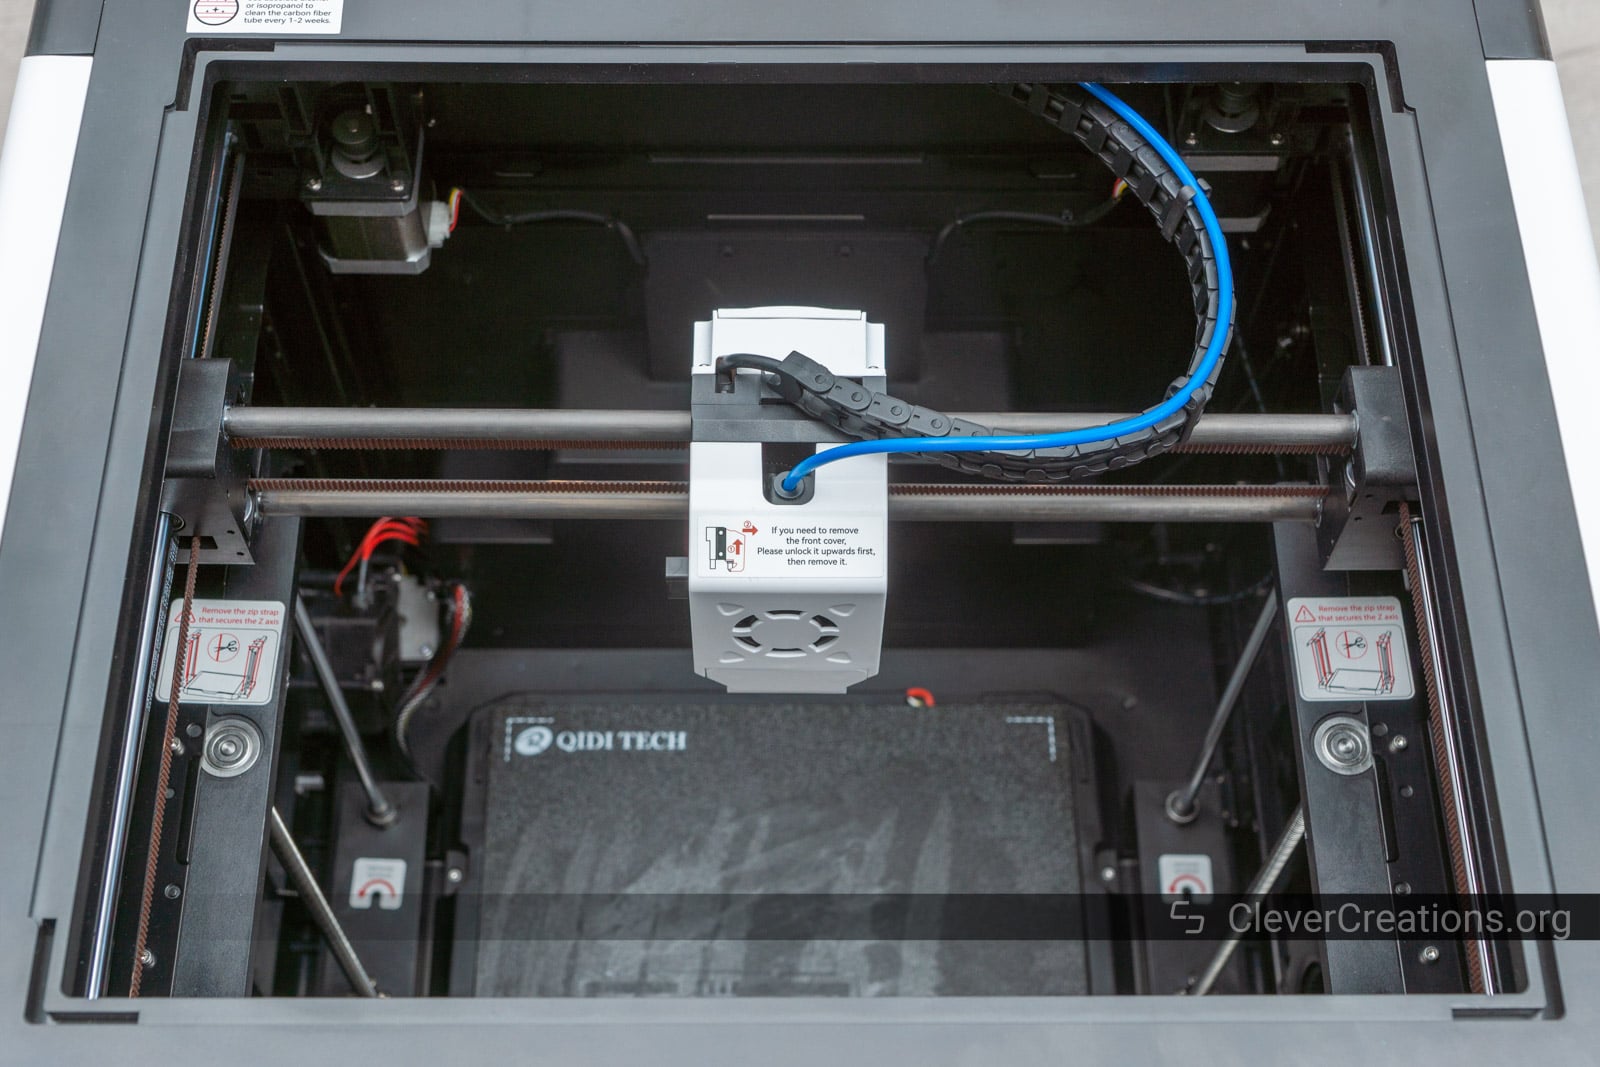
We were happy to see that the QIDI X-Plus 3 uses a CoreXY arrangement to achieve its fast printing speeds.
CoreXY 3D printers have their X and Y stepper motors mounted on their frame. This reduces the amount of moving mass and lets the 3D printer make faster movements.
Some other recent 3D printer releases, like the Ender 5 S1, that focused on high print speeds, neglected to use CoreXY kinematics. We believe that QIDI got this part right with the X-Plus 3.
It’s also great that the X-Plus 3 comes fully preassembled. Most previous CoreXY 3D printers came as a kit, which could be a daunting assembly for new 3D printer users.
Full Enclosure
Another thing we love about the QIDI X-Plus 3 3D printer is that it is fully enclosed. This lets you work with high-temperature filaments without having to worry about delamination or warping of your models.
This stands in contrast with open-frame or partially enclosed 3D printers, where you have to buy (or make) a separate 3D printer enclosure to get the same result.
Another advantage of the X-Plus 3 is that its top lid is removable. This means that for PLA, TPU, and other lower-temperature materials, you can just open the lid to let the freshly extruded plastic cool down quickly.
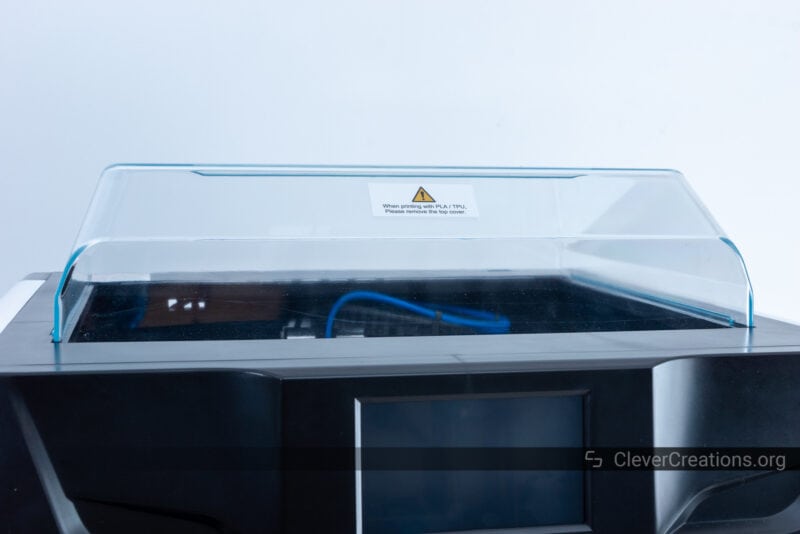
One shortcoming is that the enclosure does not have air filtration. 3D printer fumes will leak out and you will end up smelling them. The smell is less strong than with (partially) open 3D printers, however.
Build Volume
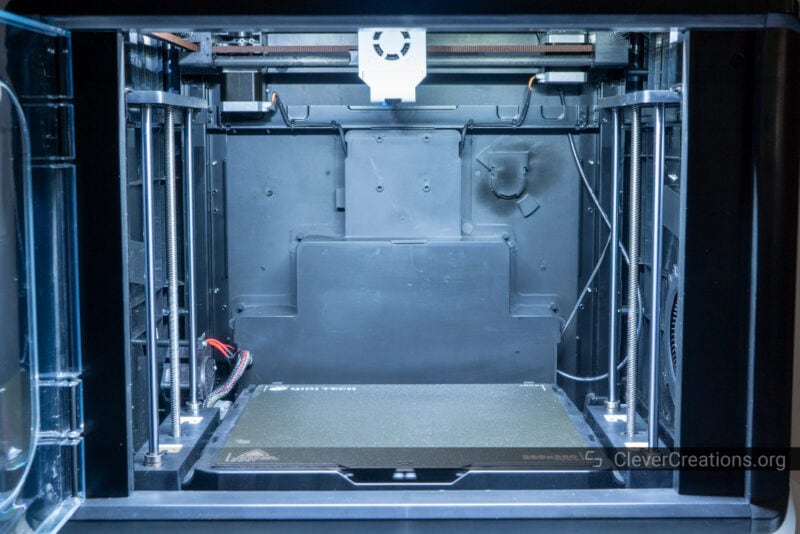
For an enclosed 3D printer, the X-Plus 3 has a generous 280x280x270 mm print area. At its price, there is currently no other enclosed machine that lets you print as big as this.
Of course, because of its enclosure, the 3D printer is significantly bigger than open-frame machines. You will need to keep this in mind when looking for a spot to place it. For just the machine itself, you need about 51×52 cm of space on your 3D printer table.
You’ll also have to take into account the space in front for opening the front panel door, access to the rear for swapping out spools, and perhaps even space above the machine to be able to remove the top lid. It’s not an easy machine to fit into small workshops.
Component Quality
The general build of the QIDI X-Plus 3 is plasticky. Not only is the enclosure made of plastic, but so are some of the critical components of the motion mechanism.
For cost reasons, we don’t expect the entire machine to be made of metal. Metal parts for some of the CoreXY components, like the Y-carriage and motor mounts, would have been good for rigidity, however.
That said, the Input Shaping feature of the Klipper firmware does a great job of smoothening out unwanted movements and reducing resonance, which makes up for any lack of rigidity.
The cuboid frame also helps make the whole machine rigid. Even though it is also made of plastic, it still provides more rigidity than an all-metal open-frame machine.
One thing we would like to see improved is the mounting of the hot end. After roughly a week of use, we noticed that one of its bolts had vibrated loose.
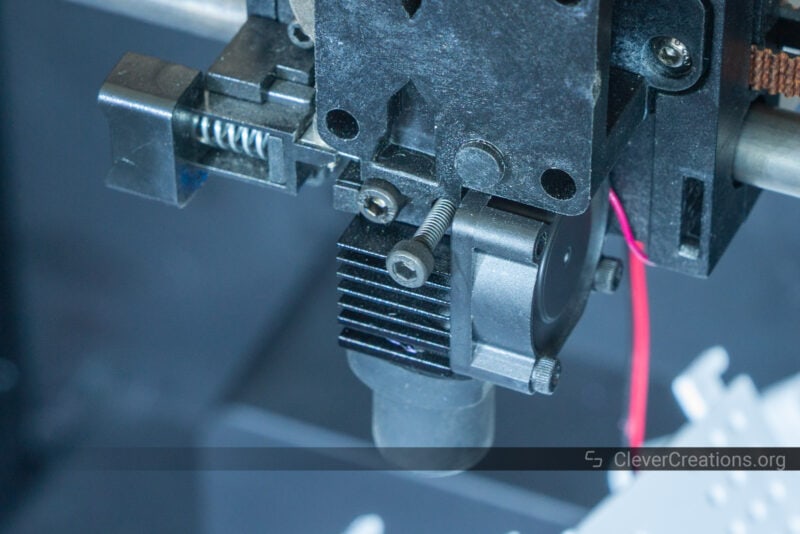
In a high-vibration environment like a print head, these types of components must be secured better. You can easily fix this by applying Loctite 243 to the ends of these bolts, but it would be better if QIDI did this at the factory.
Electronics
3D Printer Controller
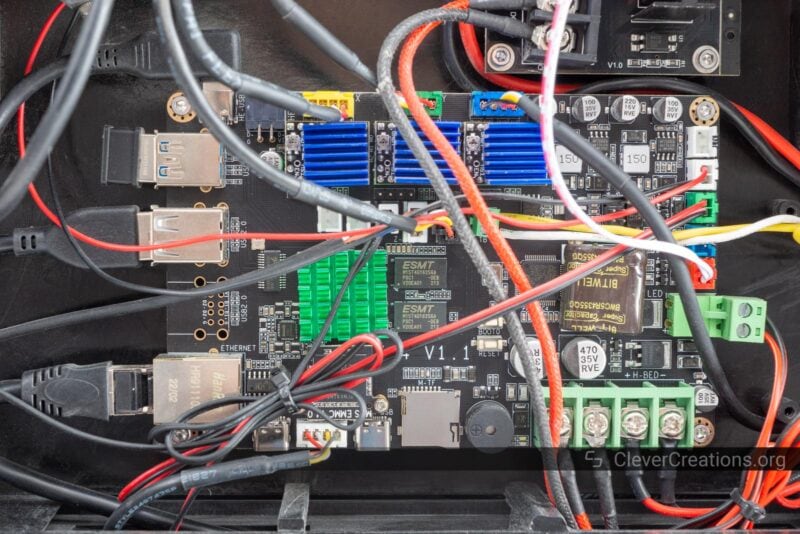
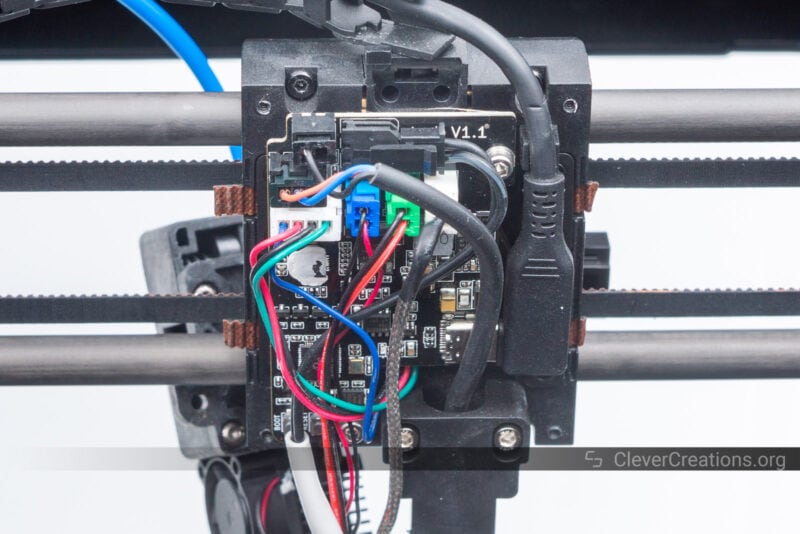
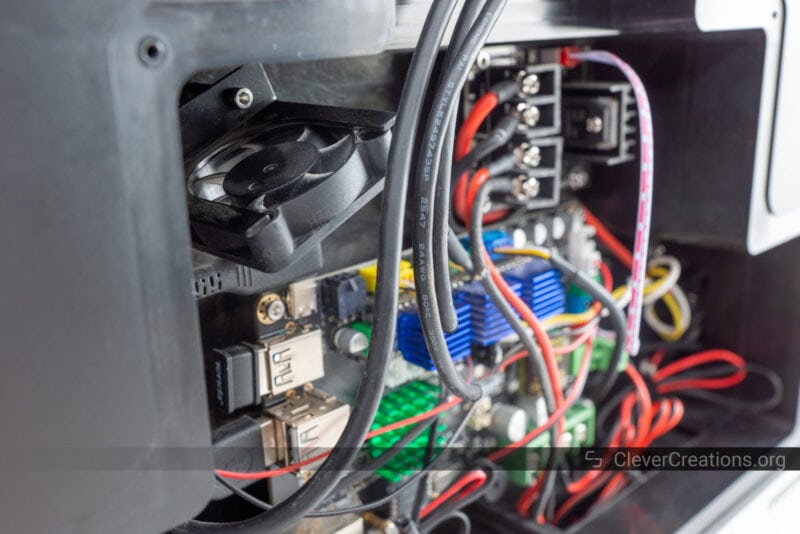
Now that we are starting to see 3D printers with out-of-the-box Klipper firmware, it’s no surprise that the processors on the 3D printer controller boards are getting more powerful.
The QIDI X-Plus 3 is no exception. With a Cortex A53 1.5 GHz CPU and 1GB of DDR3, it has plenty of processing power to carry out fast prints and complex motion profiles. As such, there is no need for an external Klipper Pad, like the Creality Sonic Pad or FLSUN Speeder Pad.
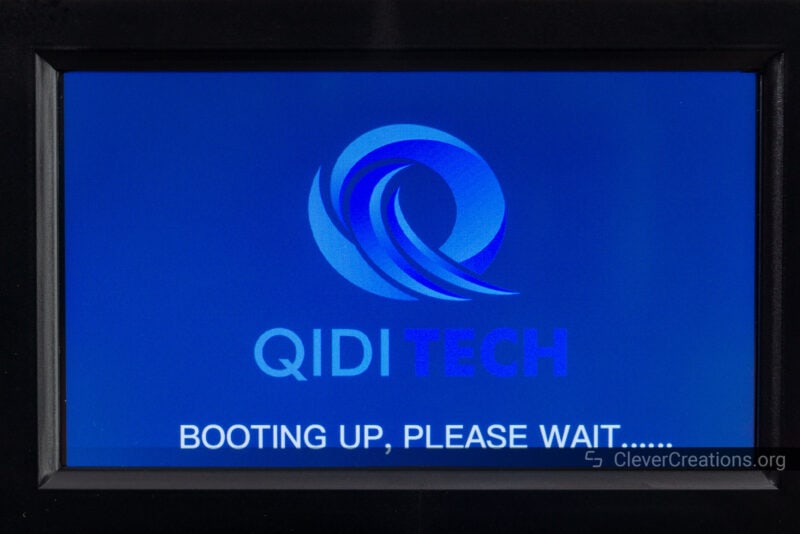
One downside of the X-Plus 3 controller board we noted is that it takes a long time to boot up. It takes 30 seconds of waiting for the firmware to boot, after which you can start using the 3D printer.
Another quirk is that when you start the machine right after turning it on, the system throws an error telling you to turn off the 3D printer, wait a bit, and then restart it.

Both are not major inconveniences. And once you’ve got the machine booted up, everything works quickly and smoothly.
Power Supplies
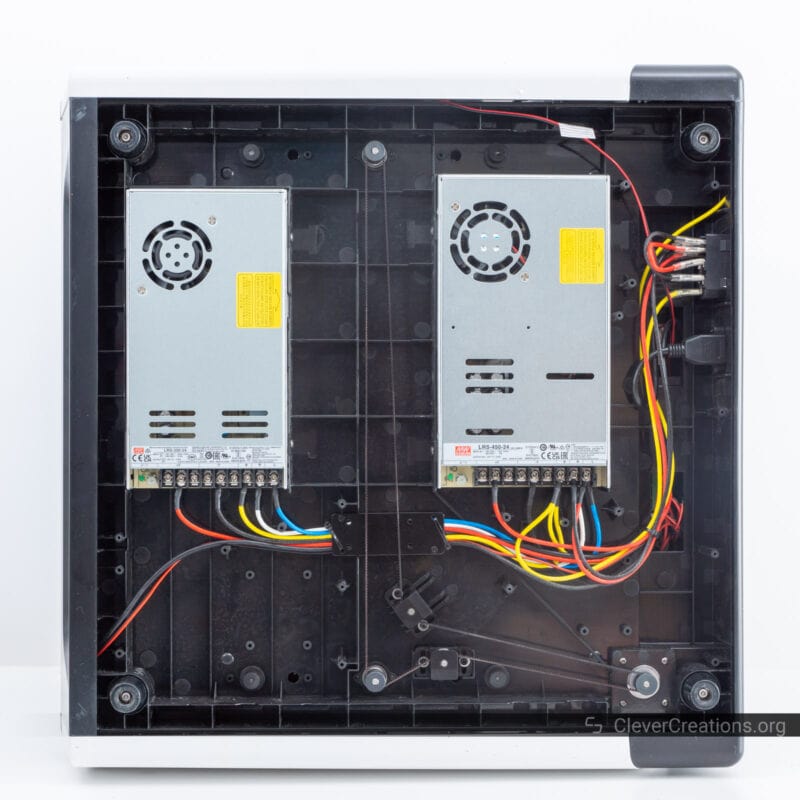
Because the QIDI X-Plus 3 3D printer uses a heated chamber, its power requirements are much higher than most other 3D printers. For this reason, the machine uses two separate power supplies (350W and 450W) to power the heaters (hot end, bed, chamber), fans, and electronics.
The two power supplies are good quality Mean Well units. It’s another example of QIDI’s dedication to build quality on the X-Plus 3.
As mentioned above, using the 3D printer at full load will rack your electricity bill up quickly. We recommend keeping the heated chamber off (or at least as low as possible) whenever you can to save money.
We’re not sure why QIDI didn’t choose an AC-powered chamber heater. The cost of adding a single solid-state relay to control an AC heater would have been much lower than the extra power supply they had to add.
Regardless, the power supplies on the QIDI X-Plus 3 are excellent quality and you won’t have to worry about them failing anytime soon. They are both actively cooled, so they can deal with the increased thermal stress of the nearby heated chamber well.
Safety
Everything is A-okay on the safety front with the QIDI X-Plus 3. The electronics are properly grounded, the power input is fused, and all high-current wiring is crimped instead of tinned.
We don’t expect otherwise from a 3D printer in this price class, but it’s good to verify that QIDI is following industry safety standards.
Cable Management
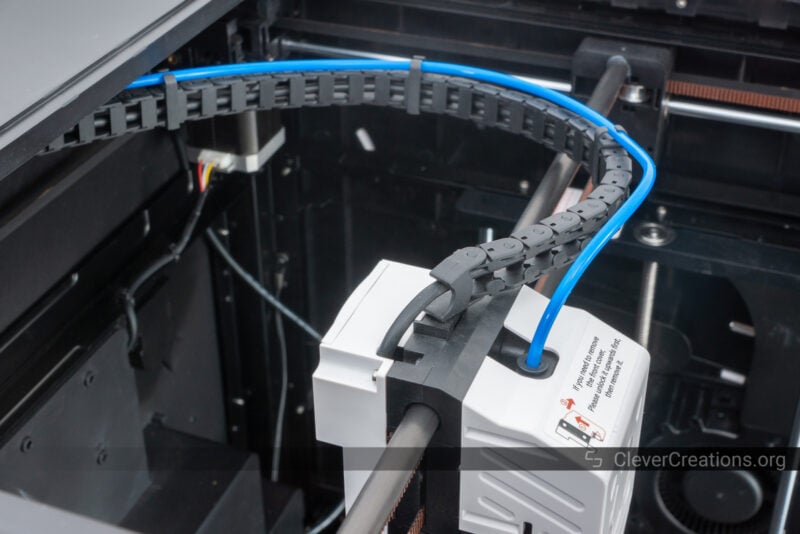
All cables of the X-Plus 3 are nearly tucked away, and there is no risk of them snagging on anything. In fact, because it is a CoreXY 3D printer, the only moving wires are the ones to the print head.
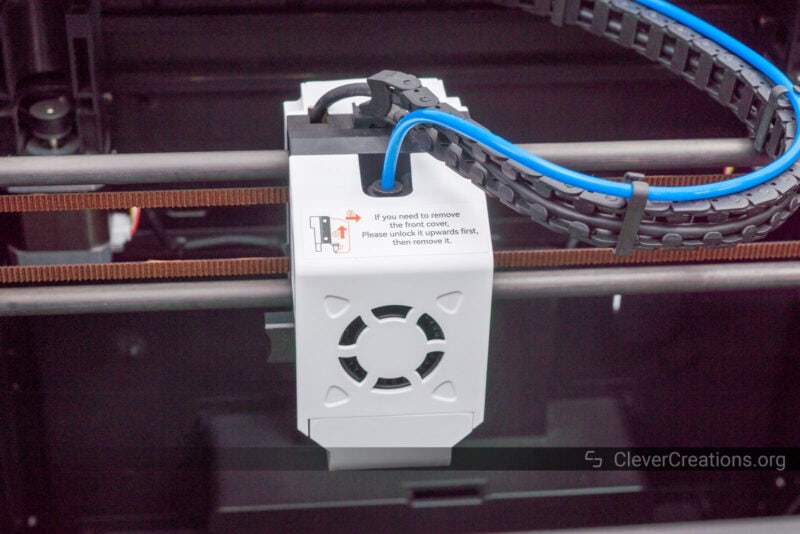
The printhead has a PCB on the back that controls the extruder stepper motor, hot end heater, fan, and ABL sensor. As a result, there’s only one thick cable that runs to the print head itself. It’s placed in a small cable chain to keep it from flopping all over the place.
The rest of the wiring is all stationary and out of sight. Because you won’t go through the assembly process yourself, you won’t even know the rest of the wires are there.
Sound Levels
One gripe that we have with the QIDI X-Plus 3 gets loud. The 3D printer contains a plethora of fans that are on or off at any given moment.
For example, there are two fans in the actively-cooled power supplies (one each), one in the electronics compartment, two in the print head (one for the hot end, one for print cooling), the massive print cooling fan in the print chamber, and the fan of the chamber heater.
All this together creates a cacophony of fan noise that can be bothersome. It doesn’t help that the electronics cooling fans toggle on and off when the temperature of the electronics reaches a certain threshold. So it’s not a consistent noise either.
Because the machine is enclosed, this sound is muffled a bit. But regardless, don’t expect to be able to run the X-Plus 3 in the background without you noticing it is 3D printing.
Ease of Use
Overall, the QIDI X-Plus 3 3D printer is easy to use. It’s a machine that is focused more on giving you a reliable experience instead of geared toward enthusiast users that want to tinker.
Touch Screen
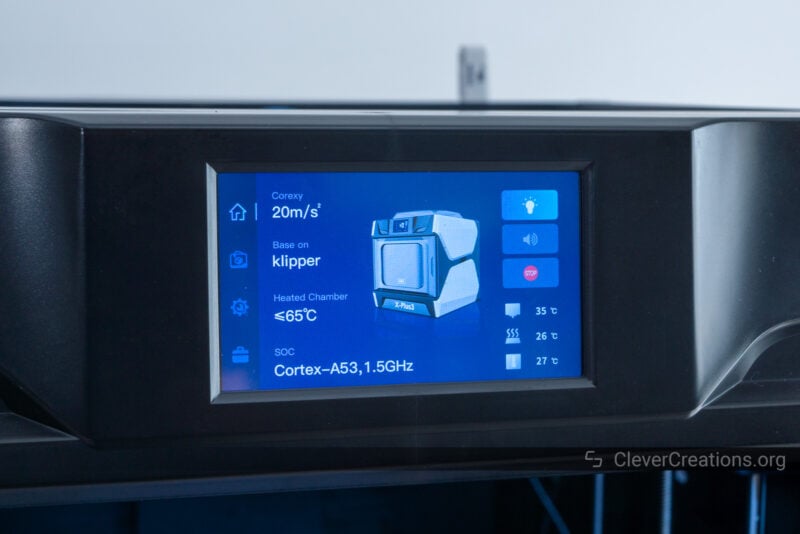
To interact with the X-Plus 3 you use a 5″ touch screen. It’s bigger than the typical 4.3″ touch screen on most other modern 3D printers, so it’s easier to interact with.
Another thing that helps is that the touch screen is mounted at the top of the machine. So you won’t need to contort yourself to interact with it. The screen is pretty much at eye level when it is placed on your desk and you sit in front of it.
One thing to note is that the screen requires you to press with some force to get a click to register. This can take some getting used to. It’s not a sensitive touch screen like you might find on a smartphone.
User Interface

The user interface of the QIDI X-Plus 3 3D printer is great for beginner users, but less so for the more experienced user. The interface is well organized and intuitive, so it’s easy to understand what all the various settings do.
That said, there are no advanced settings available for you to adjust through the user interface. If you want to get into more in-depth tweaking and tuning, you’ll need to use GCode instead.
For example, the device menu doesn’t let you adjust stepper motor current, acceleration or jerk settings, or other more in-depth parameters.
You also aren’t able to adjust Klipper settings directly through the UI, like pressure advance. You can start the Input Shaper calibration sequence, but that’s about it.
In addition, you will come across the occasional text that has not been translated properly.
To summarize, the UI is a bit limiting and unpolished. It’s not a big problem, but it’s still something we hope that QIDI will update with future firmware versions.
QIDI X-Plus 3 Print Quality
We’ve tested the QIDI X-Plus 3 3D printer with a variety of filaments. The thing that stood out most was that—exactly as advertised—all high-temperature prints were free of warping and delamination.
Aside from that, the high-speed prints were of impressive quality, with smooth surfaces and good detail reproduction. The Klipper firmware combined with the high-powered print cooling fan works wonders in that regard.
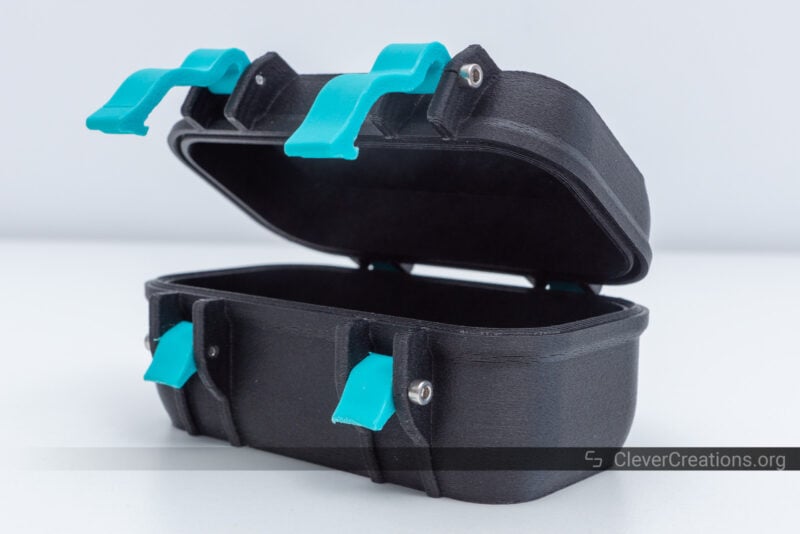
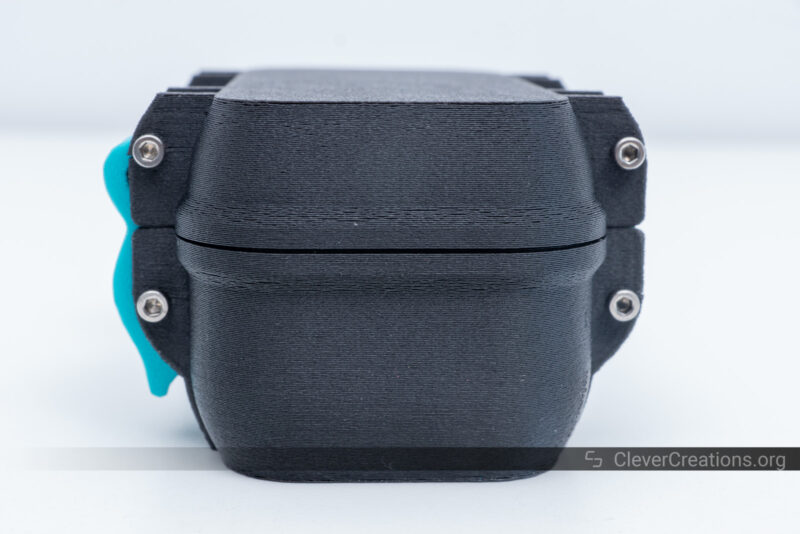
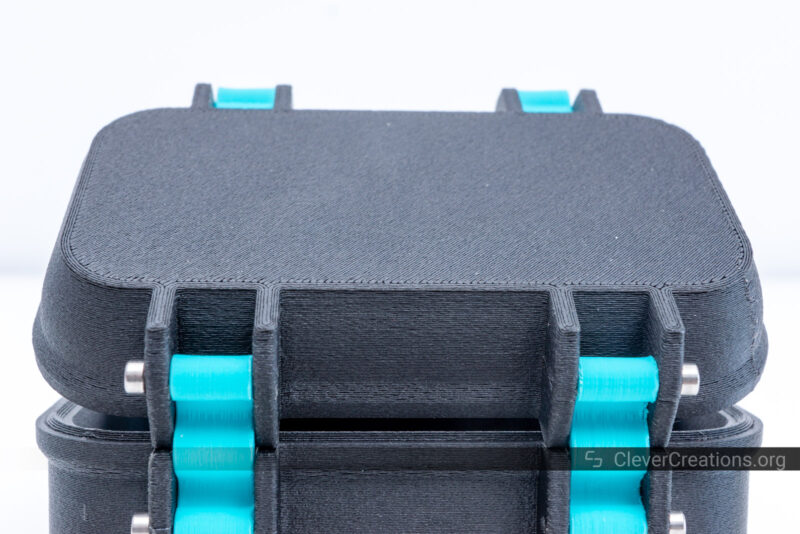
Waterproof Box
To test the performance with ABS and PETG we printed this durable waterproof box. We pushed the hot end to the limit with high print speeds, a large layer height, and a high print temperature. Regardless, the QIDI X-Plus 3 managed to keep up without complaining.
We used the included UltraABS-GF25 filament for the box, and it worked without problems. There was no need for a raft or brim and the heated chamber prevented any delamination or warping. It’s one of the easiest ABS prints we’ve done. It just worked on the first try.
Up close, the outer shell of the box is a bit wavy. We believe this to be because of the larger layer height in combination with the high print speed. A slower print speed, thinner layers, or even a higher nozzle temperature would have improved the surface finish.
The blue hinges and latches are made with PETG. There was little PETG stringing, but we did lower the nozzle temperature to achieve this.

Candlestick Holder
To test the performance with Polycarbonate filament, we printed Candlestick Holder in Polymaker’s fire-resistant PolyMax Tough blend.
Overall, the X-Plus 3 handled the filament well, but the surface finish of the print left a lot to be desired. During the printing, we also noticed a rattle from the printer, prompting us to investigate.
This was when we noticed the loosened hot end bolt in the print head that we mentioned earlier in this review. It explained both the rattle and the poor surface finish.
After applying Loctite and re-tightening the bolt, none of the other prints showed the same problem.
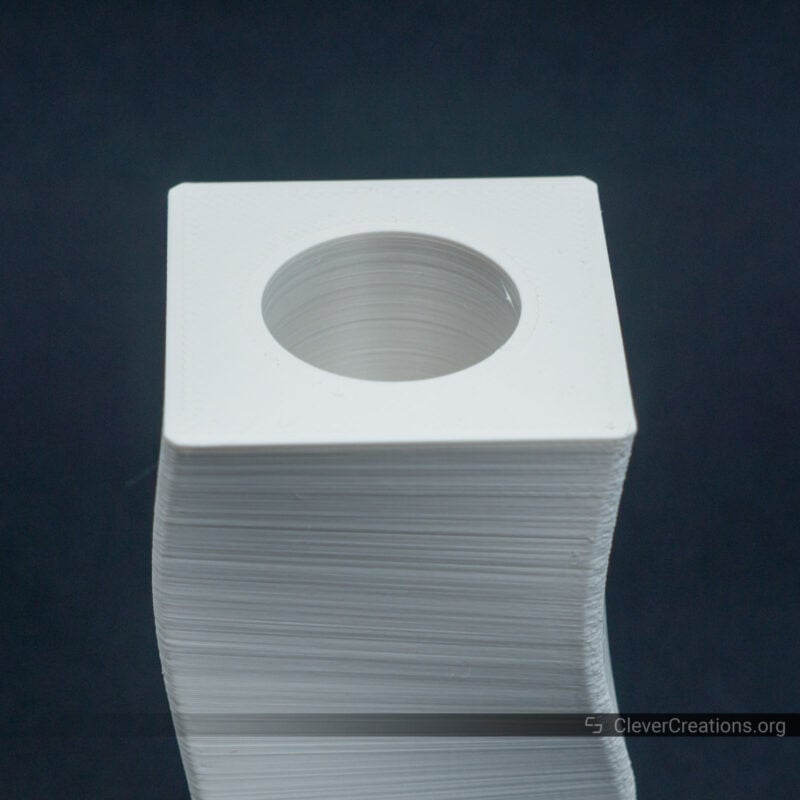
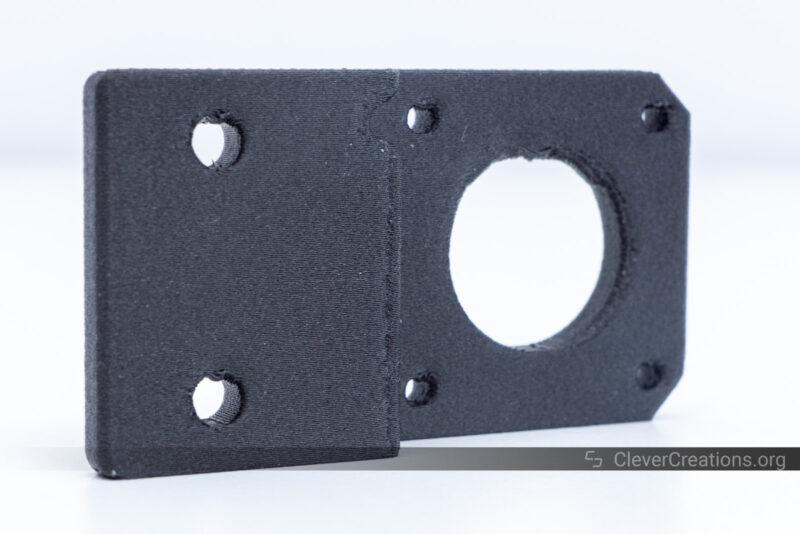
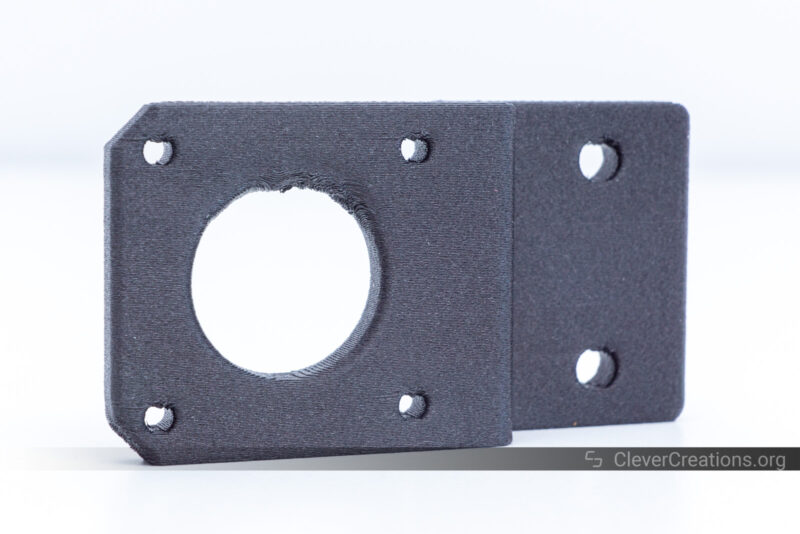
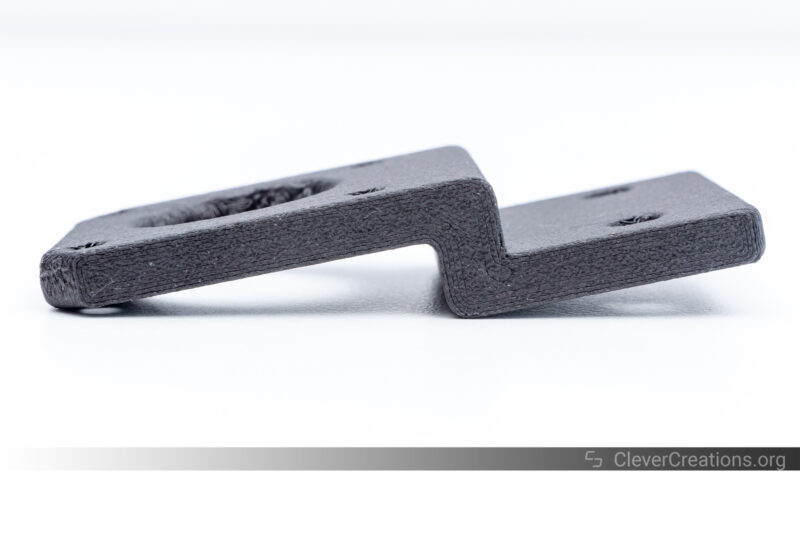
Custom NEMA17 Bracket
Excited to print with some carbon fiber-filled filament, we 3D printed this custom NEMA17 bracket on the X-Plus 3 in PA12-CF.
Overall, we are happy with the print. It was easy to remove from the build plate and showed no signs of warping. Again, we didn’t use a brim or raft, so it’s a testament to the heated chamber.
There’s a bit of sagging on the large overhang, but that’s because we didn’t dial in the bridging settings and didn’t use support material. When using expensive filaments, we prefer to save as much material as we can.
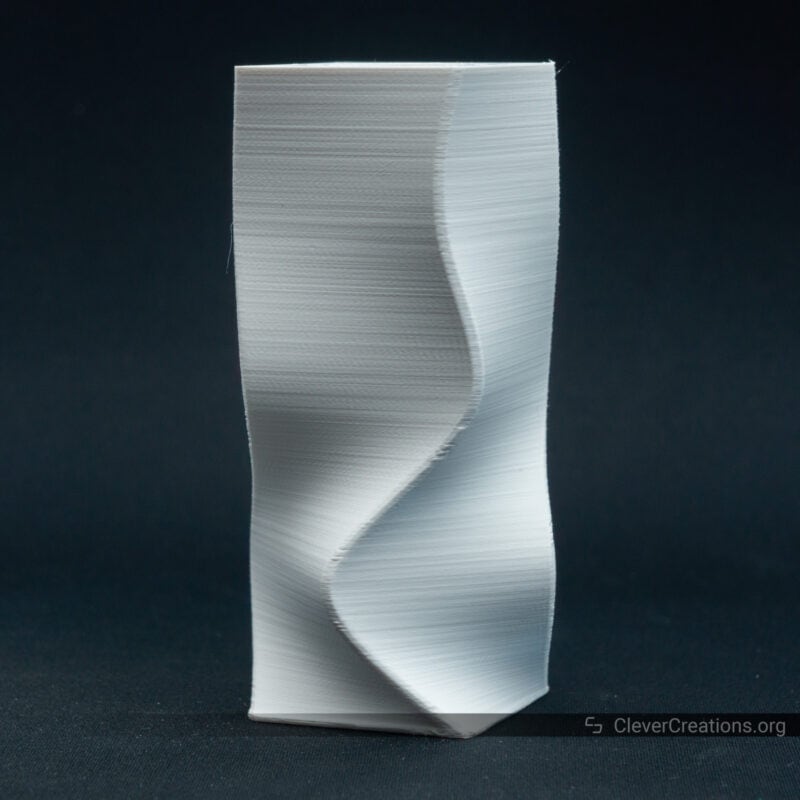
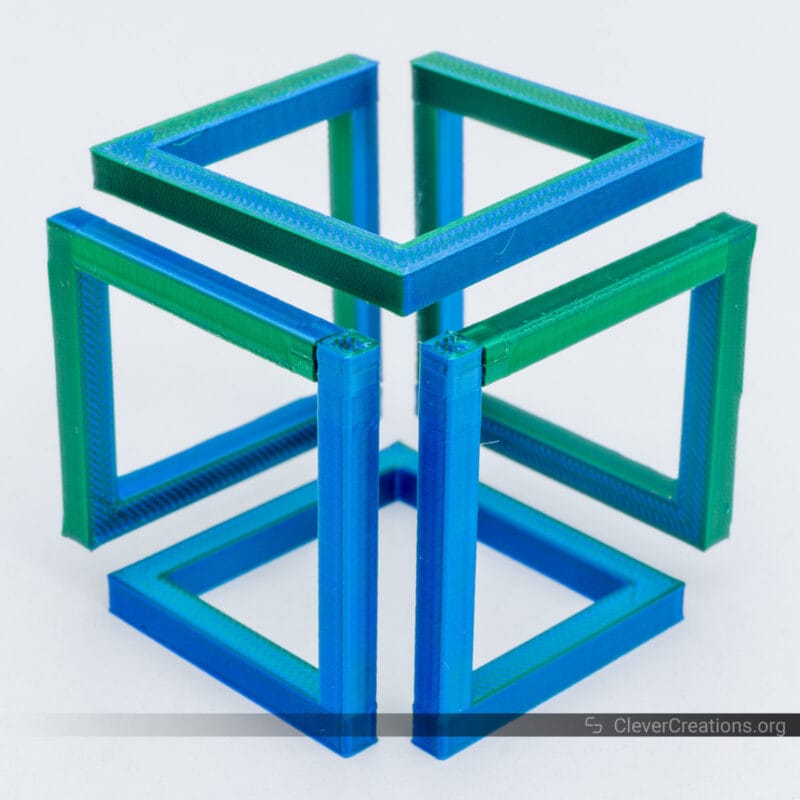
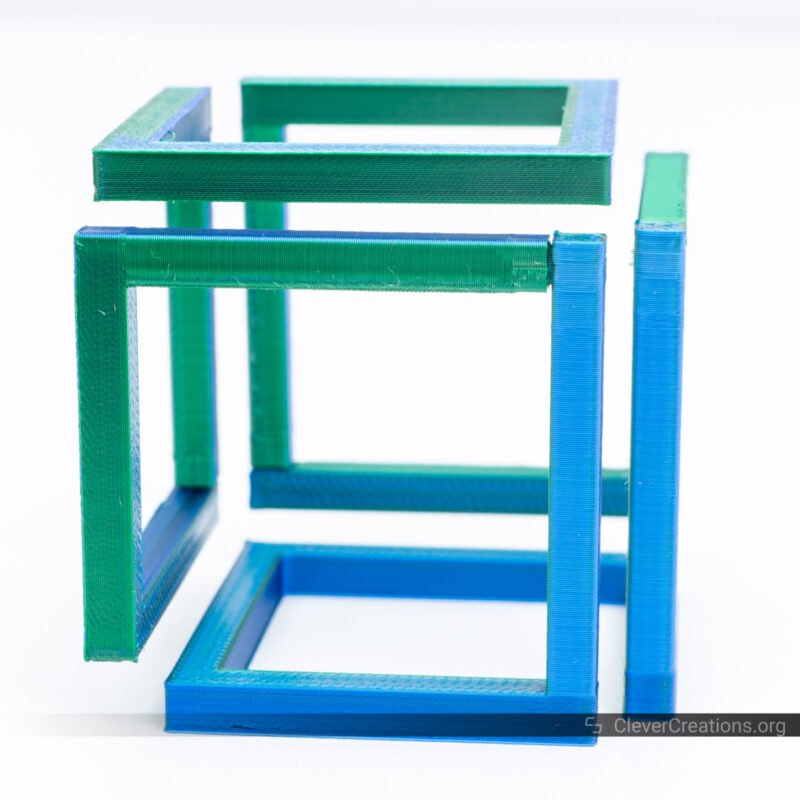
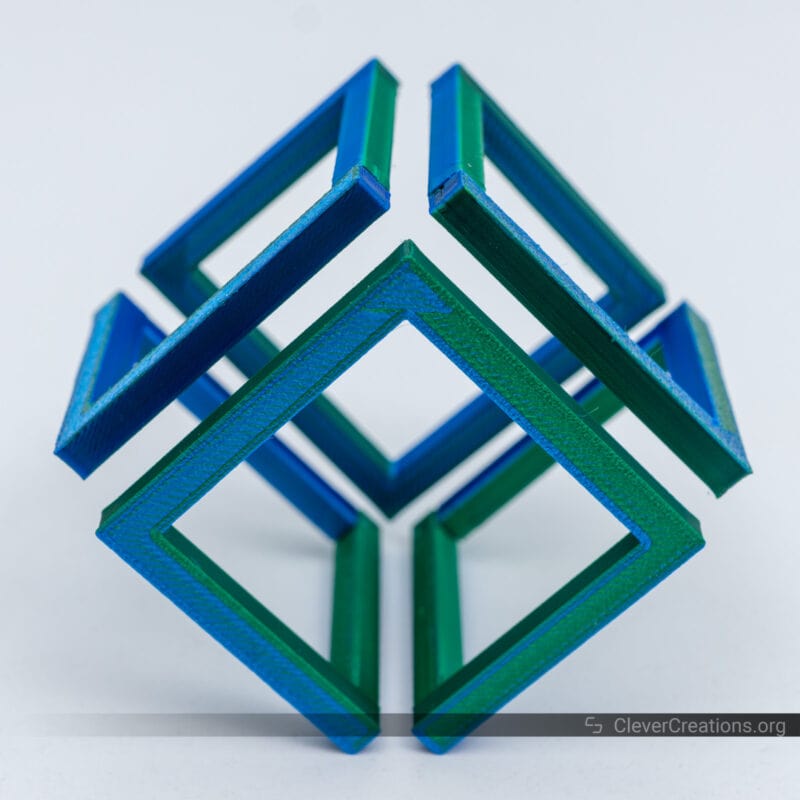
Illusion Cube
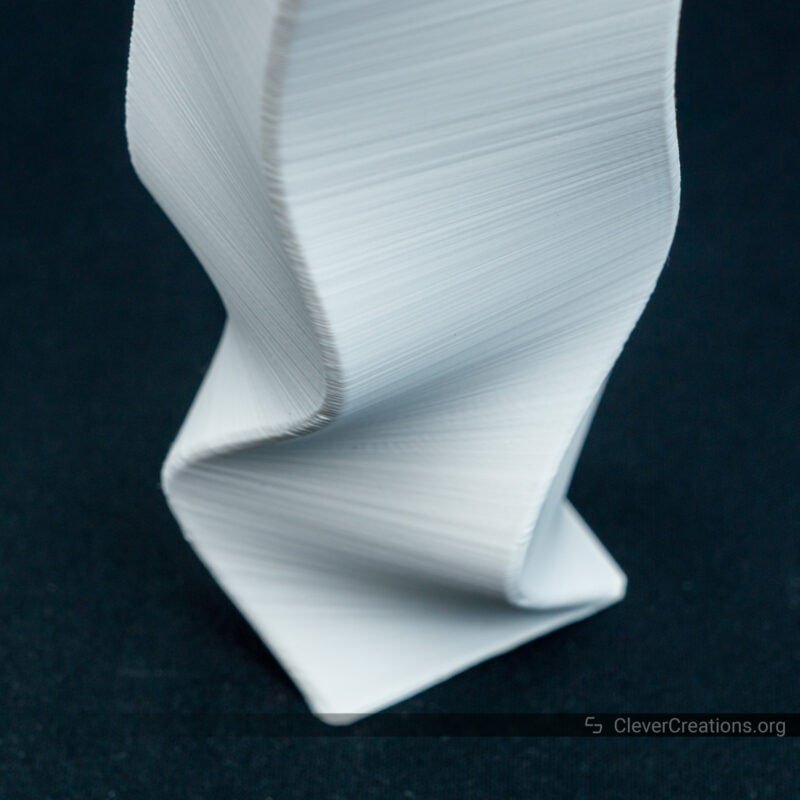
Since these engineering plastics all look a bit boring, we wanted to finish on a more colorful note. We printed this Illusion Cube at 200 mm/s in dual-color PLA filament.
In hindsight, we should have put some more planning into the bed arrangement of the separate parts. Once assembled, the colors of the parts don’t fully line up, affecting the illusion.
But other than that, we are happy with the results. The print quality was great at that print speed, and we didn’t encounter any problems.
Alternatives to the QIDI X-Plus 3
There are a couple of alternatives to the QIDI X-Plus 3 that you may want to consider. None of them provide the same value for money from our perspective, but they can still be good options for you depending on your needs.
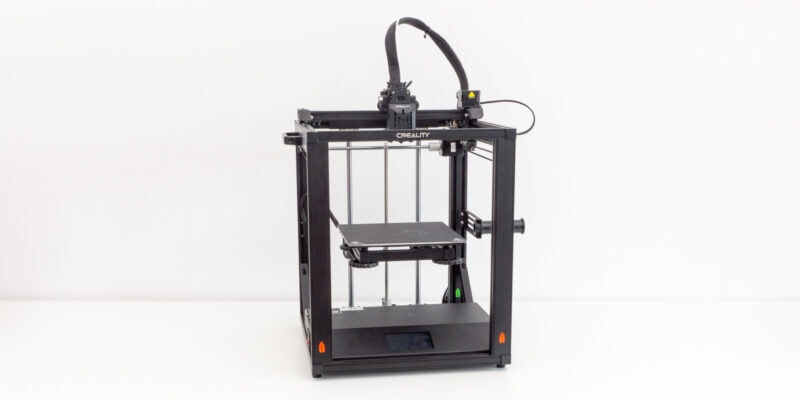
QIDI X-Plus MAX vs X-Plus 3
The QIDI X-Plus MAX is the bigger brother of the X-Plus 3. The MAX is similar in most functionality, but a few differences can make it worth considering.
The most notable difference is the 325x325x325 mm build area. Compared to the 280x280x270 mm of the X-Plus 3, that is a more than 1.5x increase in volume.
Another difference is that the MAX comes with a chamber circulation fan with an activated carbon filter. This is most useful if you work with ABS or other materials that release potentially harmful fumes during printing.
Other than that, the machines are practically identical. At a price increase of $300, it is worth considering whether these few differences are worth the money for you.
We can only see it being worth it if you will make use of the bigger build area. The fan + activated carbon filter isn’t that hard to add yourself on any enclosed 3D printer.
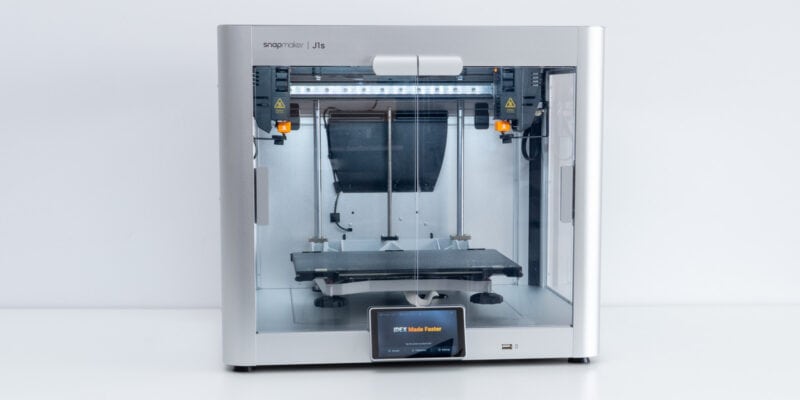
Bambu Lab X1-Carbon
The Bambu Lab X1-Carbon is another example of an enclosed CoreXY 3D printer that you could consider for your high-speed 3D printing needs.
Compared to the QIDI X-Plus 3, it has several notable features. For example, it offers multi-color/multi-material 3D printing and has built-in camera monitoring.
The X-Plus 3 has a higher-temperature hot end (350 °C vs 300 °C) and wider filament compatibility, a larger print volume (280x280x270 mm vs 256x256x256 mm), and a much lower price.
In addition, Bambu Lab’s patent approach has raised some questions recently, which is also something to keep in mind when considering the X1-Carbon.
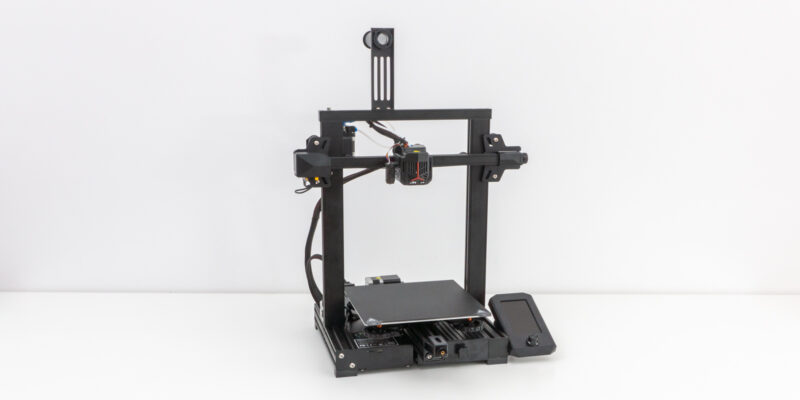
Flashforge Adventurer 4
On the cheaper end of the spectrum, the Flashforge Adventurer 4 is an enclosed 3D printer that costs $300 less than the X-Plus 3. It doesn’t print as fast or supports as wide of a range of materials, but it comes with many features that make your life easier.
For example, it has a built-in camera, a HEPA13 air filter to deal with fumes, quick-swappable nozzles, and its spool holder is easier to access.
The X-Plus 3 is the faster and more powerful option, whereas the Adventurer 4 stands out for its ease of use and lower price. If you’re looking for something in the 3D printer under $1000 price bracket, it’s worth considering both of them to find the best fit for you.
Verdict: Should You Buy the QIDI X-Plus 3?
If you want to reliably 3D print with materials ranging from PLA to fancier engineering plastics like PC and Nylon, the QIDI X-Plus 3 3D printer is an excellent choice.
The machine offers a great combination of filament compatibility, build volume, and features, all without costing an arm and a leg.
To us, its most impressive features are its high-temperature hot end, powerful print cooling, as well as its high-speed printing capabilities.
Its build quality and ease of use can both be improved. Some of its plastic construction isn’t up to par with modern standards, and swapping our filaments or hot ends is more time-consuming than we would like.
Regardless, you’ll be hard-pressed to find better value for money in the ~$1000 price range. We recommend this 3D printer to any enthusiast looking for a powerful workhorse in their home or workshop.