
- Independent dual extruders
- Produces great prints
- Fully enclosed
- Exceptional build quality
- Wide material compatibility
- Smooth user interface
- Automated nozzle wiping
- Built-in lighting
- Cantilevered bed causes slight Z-wobble
- Uneven print bed temperature
- Calibration can be hit or miss
- Short spool holders
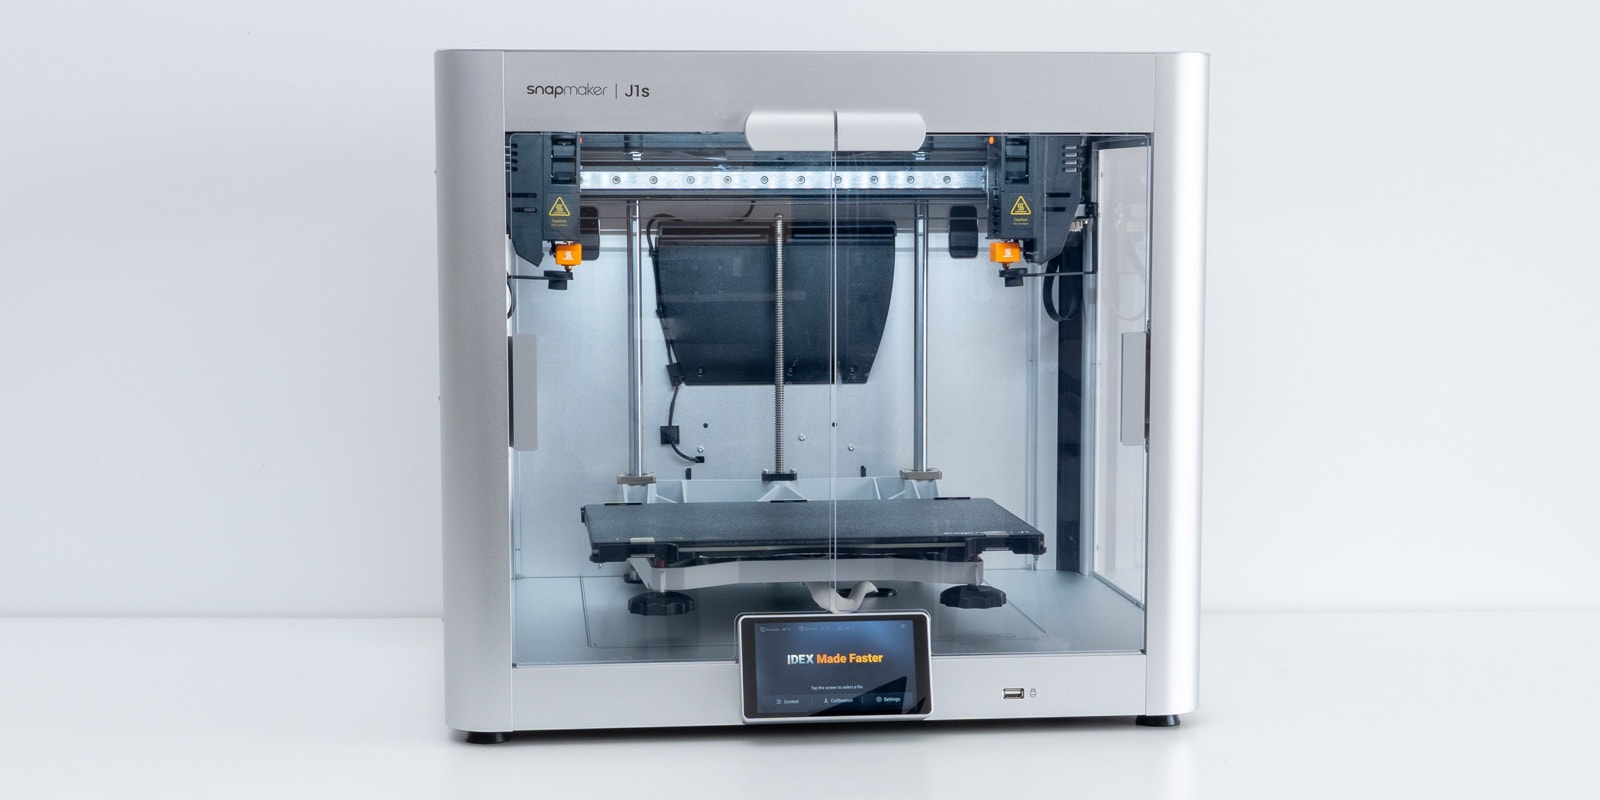
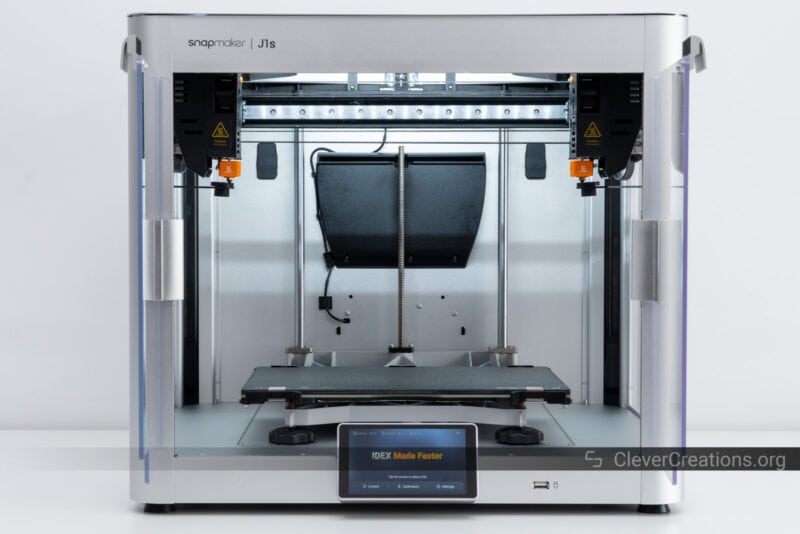
The Snapmaker J1s is a brand-new dual-extruder 3D printer that is focused on fast printing. While dual extruder 3D printers are not uncommon, the addition of fast printing speeds makes the J1s an appealing option over its competitors.
Given Snapmaker’s reputation for high build quality and ease of use, we’re excited to test the J1s and see how it performs. With plenty of bells and whistles to explore, let’s dive into the details of this standout 3D printer. From multi-color and multi-material printing to mirroring and cloning 3D prints, we’ll show you how the J1s performs in the real world.
Snapmaker J1 vs J1s
Before diving into the J1s, we should explain the difference between the Snapmaker J1 and J1s models. These two 3D printers were released not far apart, have a similar name, and have many similarities. So what’s the deal?
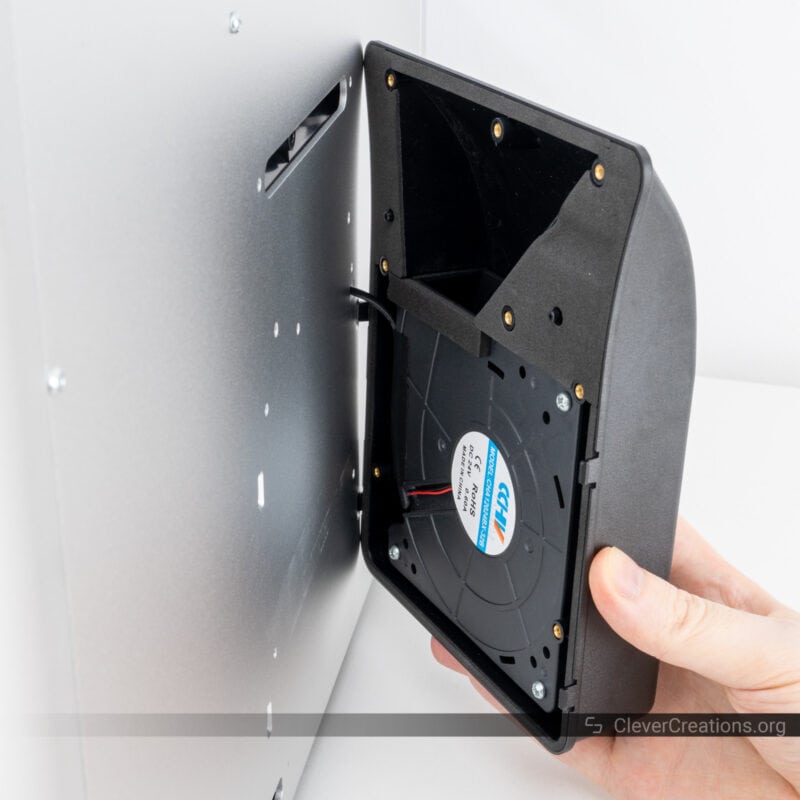
The only difference between the J1s and the J1 is the large cooling fan that is included with the ‘s’ version. The fan is an accessory is separately available in an upgrade kit, so you can turn a J1 model into a J1s if you so desire.
Because the two models are practically identical, you can consider this article to be a Snapmaker J1 review as well.
Snapmaker J1s Specs
| Snapmaker J1s Specifications | |
|---|---|
| Price | Snapmaker | Amazon | MatterHackers |
| Technology | Fused Filament Fabrication (FFF) |
| Extruder | Independent Dual Extruders (IDEX) |
| Print modes | 1. Default mode 2. Backup mode 3. Copy mode 4. Mirror mode |
| Print volume | Default mode: 300x200x200 mm Copy mode: 160x200x200 mm Mirror mode: 150x200x200 mm |
| Max print speed | 350 mm/s |
| Print bed | PEI glass platform (double-sided) |
| Nozzle diameter | Included: 0.4mm Purchase separately: 0.2mm, 0.4mm (hardened steel), 0.6mm, 0.8mm |
| Max nozzle temperature | 300 °C |
| Filament diameter | 1.75 mm |
| Connection mode | Wi-Fi, USB cable, USB flash drive |
Unboxing
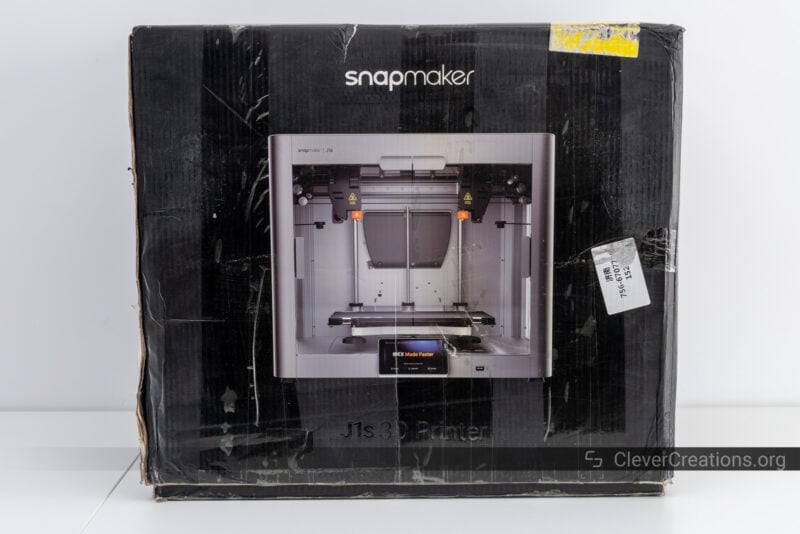
The first impression we got of the Snapmaker J1s 3D printer, even before unboxing, is that it is a well-built machine. The machine and its box aren’t that large, but they weigh a ton. Well, about 25 kg, but you get the point.
For that reason, we recommend handling the 3D printer with two people. You can try it by yourself, but it’s not a pleasant experience for your back.
To get to the printer, you only have to lift the box’ lid off. We found this a lot more practical than what we typically see, having to reach into a box to get the 3D printer out.
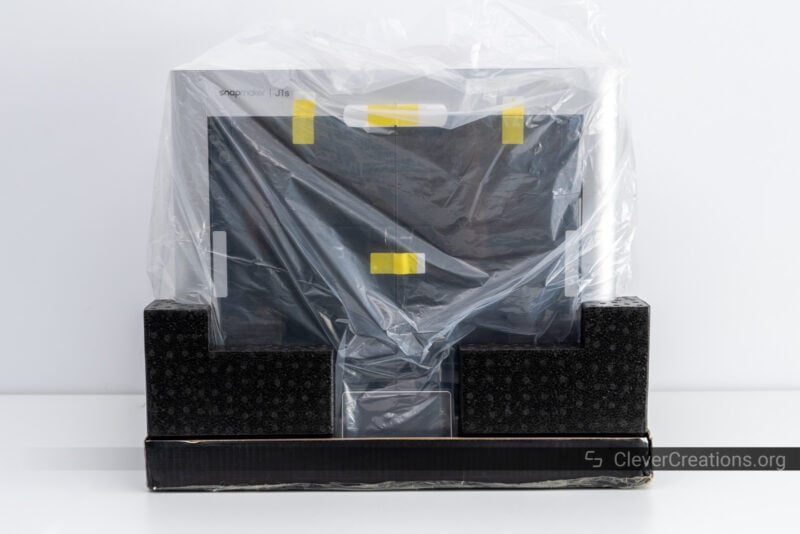
It’s one of the many small details we came across that show that Snapmaker cares and thinks about the user’s experience with the product.
After removing the lid, you’ll find the unpacking guide on top of the 3D printer. It shows you all the steps you need to do to get the machine ready for calibration.
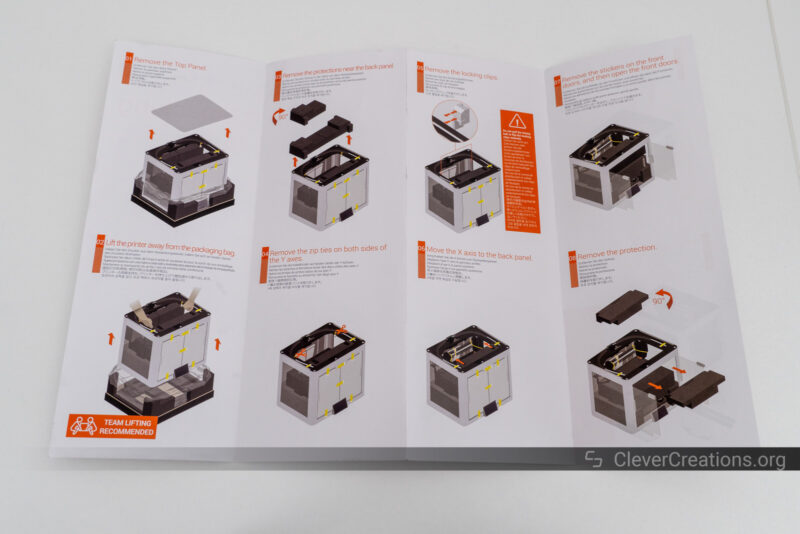
It involves removing tie wraps from components that were secured for shipping, removing foam pads, and that sort of stuff.
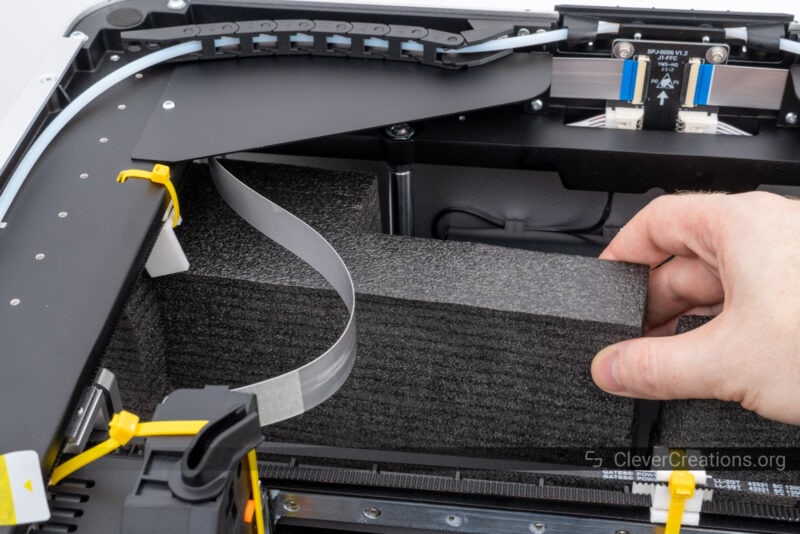
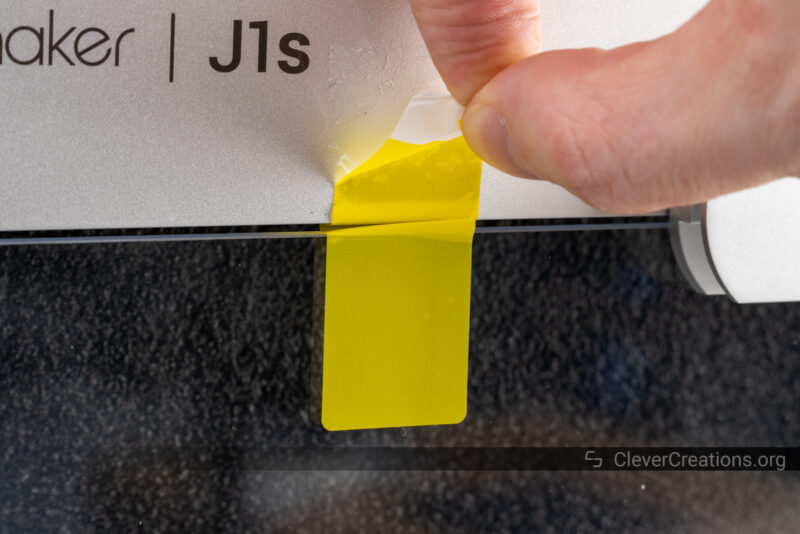
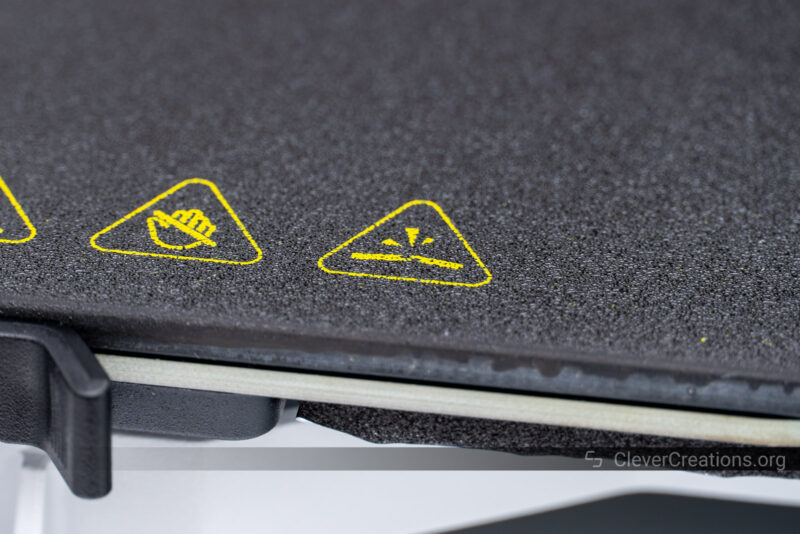
You’ll also come across several yellow stickers on the top and front panels. We recommend peeling them off slowly to reduce the chance of leaving sticker residue behind.
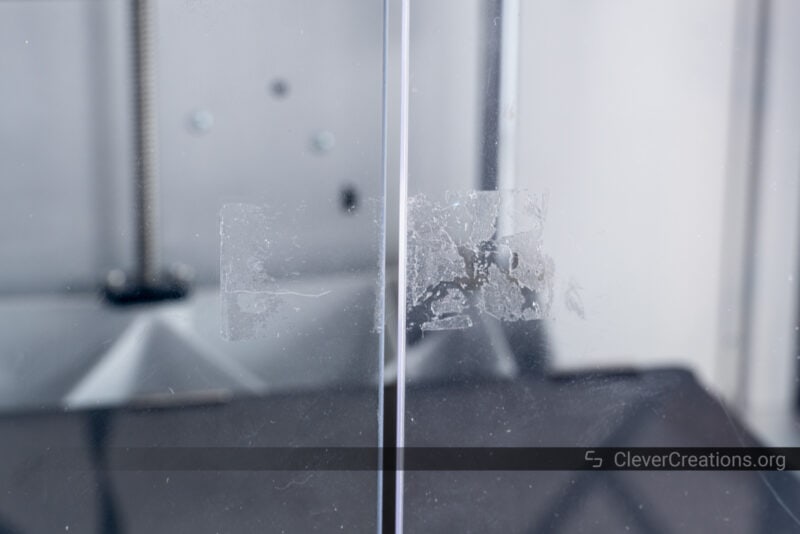
If you happen to end up with left-over sticker residue, as we did, we recommend using a microfiber cloth or Q-tip with some alcohol to remove it. Don’t use acetone, because that will damage the acrylic panels.

As you unbox the J1s, you’ll find the accessory box inside the machine. It contains all the accessories and filament that come with the 3D printer. This box has four different foam-padded layers with stuff, so make sure to get everything out.
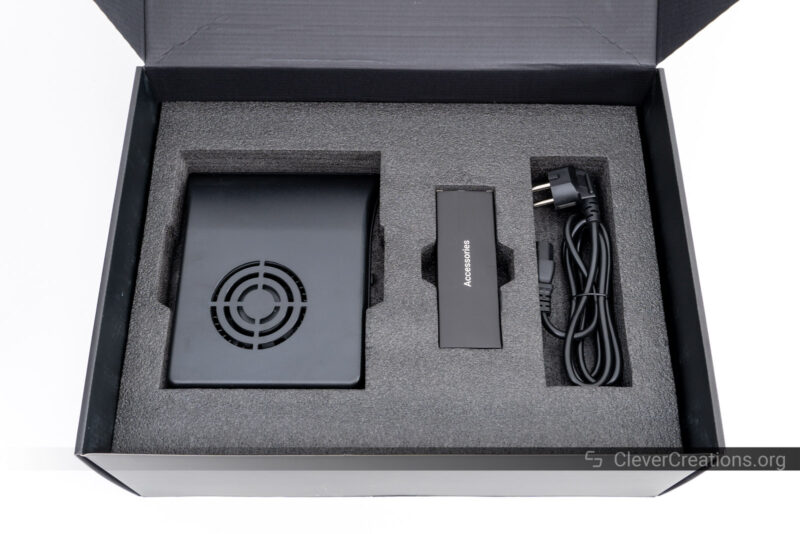
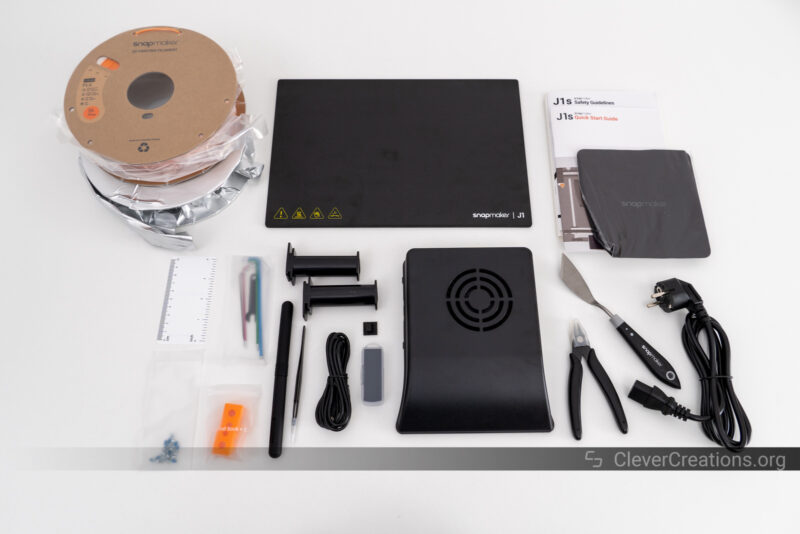
Altogether, you get the following things along with your Snapmaker J1s:
- Print cooling fan
- PEI glass plate
- 500g of orange PLA
- 500g of breakaway support for PLA
- Power and USB cables
- Two spool holders
- USB flash drive
- Various 3D printing accessories (diagonal cutters, tweezers, palette knife, wire brush)
- Calibration card
- Documentation
- Tools for maintenance (wrench, hex keys)
- Two spare hot-end socks
What we have observed with Snapmaker’s machines is that the accessories are of just as high a quality as the machines. From the tools for assembly and maintenance to the bolts with pre-applied Loctite, it’s all top-notch.
In theory, the included accessories are sufficient to get started, but from our experience, it’s a good idea to have at least one other roll of PLA at hand.
When we went through the calibration sequence—which requires two colors of filament—the included breakaway support filament did not give us good results. It did not stick well to the included orange PLA. Great when you want to use it for easily removable supports, but not so great for the calibration process.
So make sure you have additional PLA filament ready to get the machine set up.
Getting Started
A downside of Snapmaker’s 3-in-1 3D printers, like the Snapmaker 2.0 and Snapmaker Artisan, is that they require extensive assembly work before you can use them. To get one up and running, you have to be ready to set aside an afternoon and/or evening.
With the Snapmaker J1s, this is not an issue. The machine is nearly fully assembled out of the box. The only thing you’ll be spending time on before you can start printing is installing the large cooling fan of the -s model and going through the calibration process.
Now, the calibration process is quite long. Dual-extrusion 3D printers need a high level of accuracy and precision to deliver good results, so thorough calibration is essential.
But despite being time-consuming, the process itself is relatively straightforward. The J1s explains all steps on its LCD screen, along with high-quality animated gifs that guide you through each step.
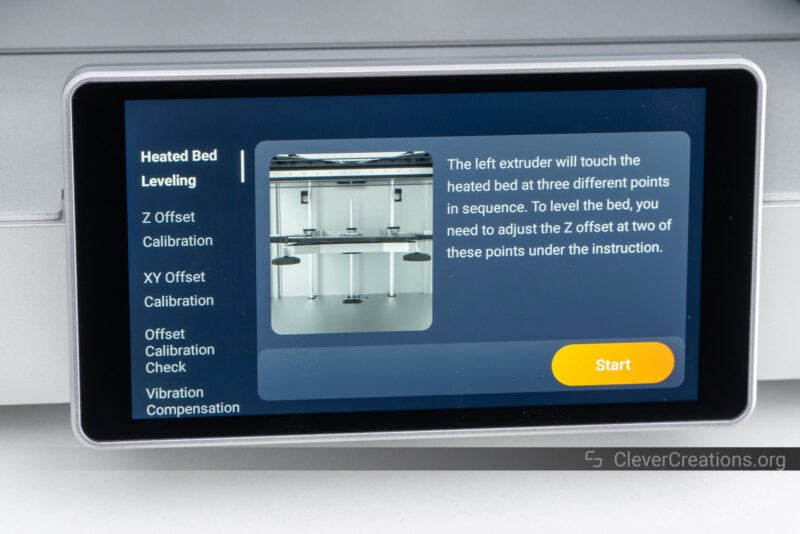
We typically don’t spend much time discussing the calibration process in our 3D printer reviews. For most machines, it’s the same. With the J1s, however, the process is unique, so we’ll briefly show you how it works.
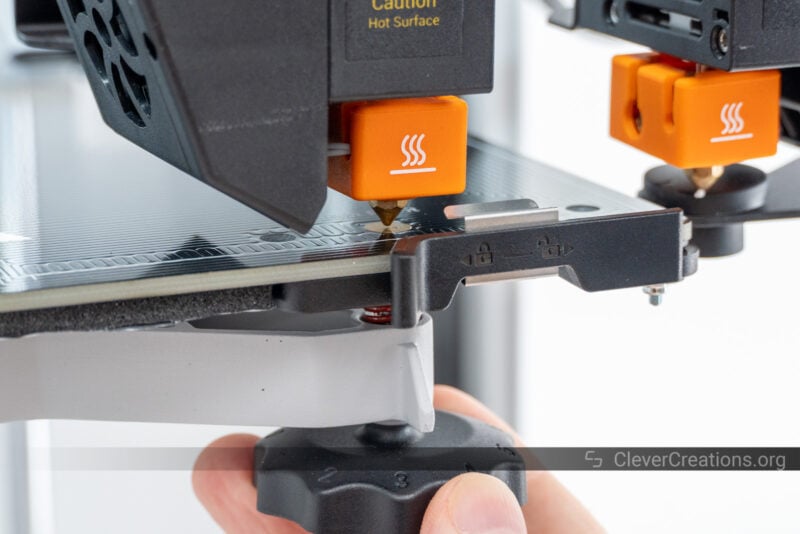
To help level the bed, the print bed has three exposed copper pads that connect to the 3D printer’s electronics.
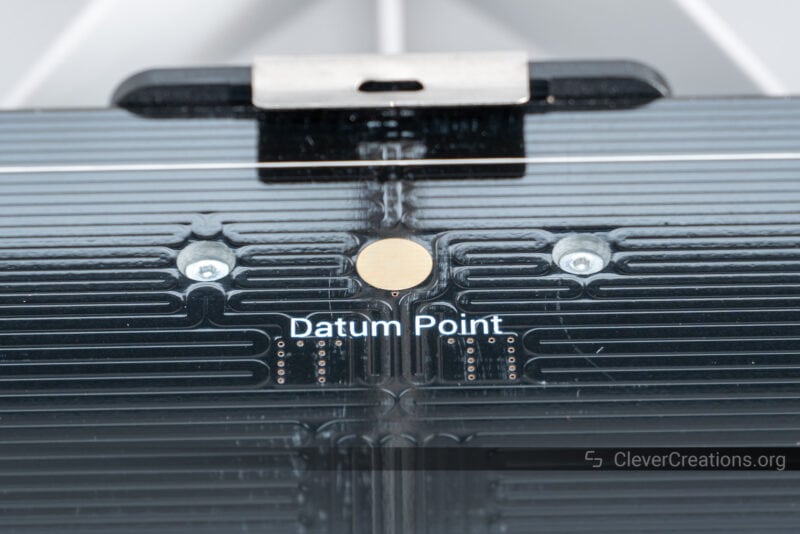
By touching one of the nozzles to the center pad, the datum point, the 3D printer knows the Z position of the nozzle is the same as that of the print bed. Then it moves the nozzle over the left pad, and it is your job to adjust the bed’s left wheel until that side of the bed is at the same height.
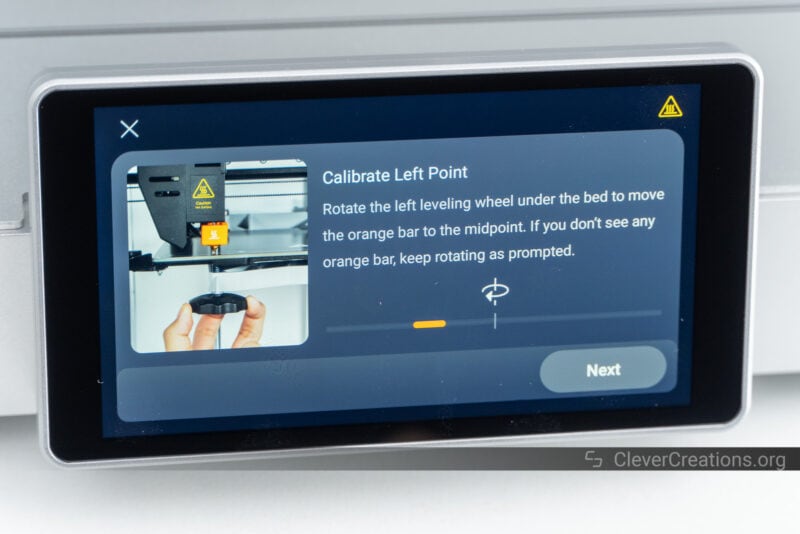
After that, you do the same thing on the right side of the bed, and the bed is leveled. It’s a clever system that takes most of the frustration out of the manual bed leveling process.
In practice, we found it to work well on the first try, and we didn’t find ourselves having to adjust it again during our review period.
You’ll also use the pads for setting the correct Z-height of the second (right) print head nozzle. Its nozzle needs to be at the same height as the left nozzle, and the print bed pads are the reference point.
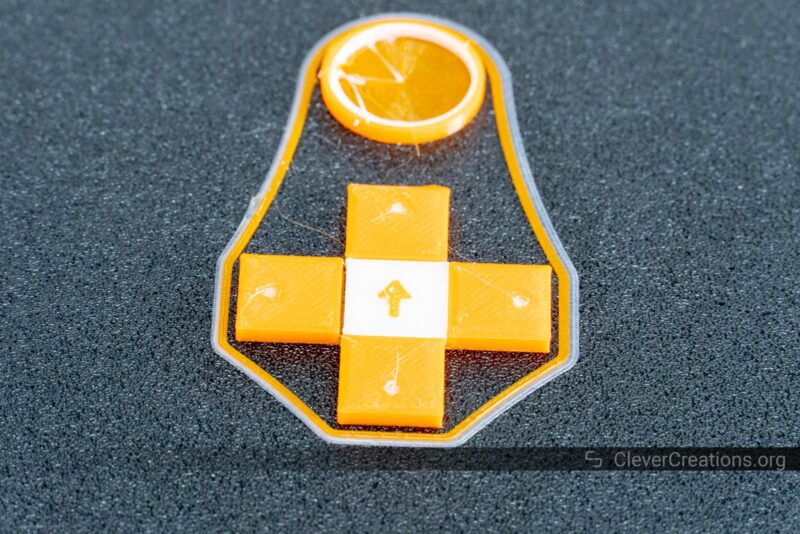
That takes care of all the calibration on the Z-axis, but we already hear you wondering how the machine calibrates the XY offset between the two nozzles.
That’s where the mysterious square hole on the print bed comes in.
Just like the exposed circular pads, this copper-lined hole is connected to the J1s’ controller board. By moving the left nozzle against each edge of the hole, the 3D printer understands where the nozzle is located on the X and Y axis relative to the bed.
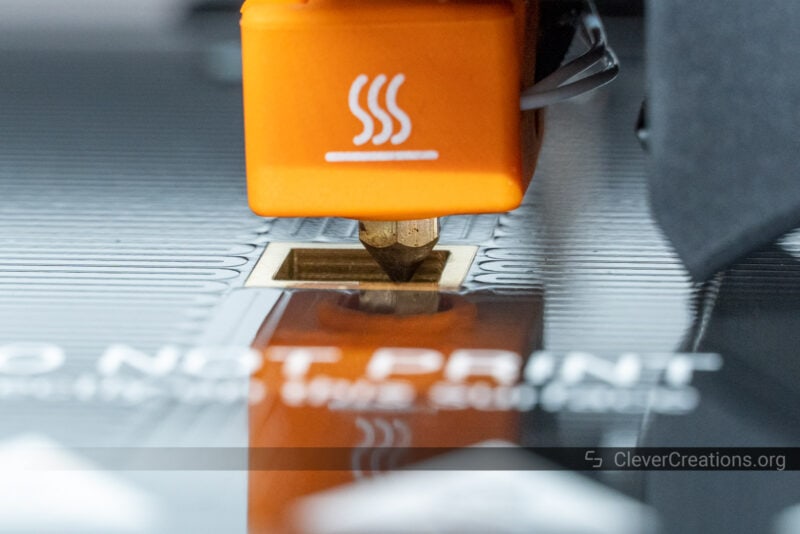
By repeating this step for the right nozzle, the J1s knows exactly how far apart the two nozzles are from each other.
Our results were not ideal on the first try, as you’ll see from the calibration print below. To fix it, we had to run this step a second time.
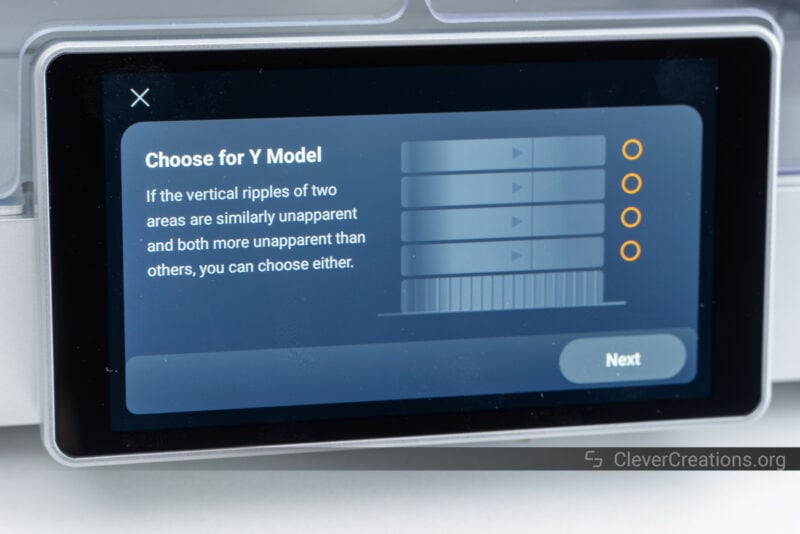
The second-to-last step is to set up the vibration compensation. This solution can be compared to Klipper’s input shaping, but the calibration works a bit differently.
With Klipper’s input shaping, you typically use an accelerometer to measure the resonances of a 3D printer. After measuring this, the firmware knows at what frequencies the printer resonates and then adjusts for them.
In Snapmaker’s implementation, there is no accelerometer. Or at least, not from what we can see. Instead, the machine prints a calibration model with five different compensation settings spread over different heights.
By telling the J1s which section has the least ringing (i.e. which section looks best), it knows exactly which settings it should use to compensate for the ringing caused by high-speed printing.
In the image above, the middle section looked best to us, so that’s what we selected on the screen.
It’s a straightforward process that we think is made possible by the rigid construction and consistent build quality of the J1s.
Compared to cheaper 3D printers that are assembled by the user, the J1s is way more predictable in its behavior. As a result, picking between five different settings is enough to get the right compensation setting.
After this, you can place the glass print surface on the print bed, run a final calibration print, and analyze the results.
If all is well, you’re ready to print. If not, you can re-do specific steps that address the issue, do the calibration print again, and analyze the results once more.
Overall, the calibration process of the Snapmaker J1s is easy to follow and relatively straightforward. But in our experience, some of the steps need to be re-done if the calibration is not perfect on the first try.
Snapmaker J1s Features
With so many features packed into the Snapmaker J1s, it takes a lot of work to cover everything. For the sake of this review, we’ll have to limit ourselves to the ones that make the J1s stand out from the rest.
Fast 3D Printing
One of the most notable features of the Snapmaker J1s is its ability to print with speeds up to 350 mm/s and accelerations of 10,000 mm/s². We’re seeing a clear trend in the industry towards faster 3D printers, and we are glad that Snapmaker is on board.
These higher print speeds are made possible by a variety of features. For example, the rigid frame, all-metal components, powerful cooling fan, and firmware vibration compensation all contribute.
We’ll delve into these aspects in more detail in the rest of this Snapmaker J1s review to show you exactly how these features work.
In practice, we found mostly limited ourselves to ~200 mm/s while testing the J1s. At higher speeds, we saw a decrease in print quality that we found unsuited for decorative parts.
For structural, low-resolution, or other non-cosmetic parts, the 350 mm/s speed works perfectly fine. It’s a great way to get more parts out in a fraction of the time.
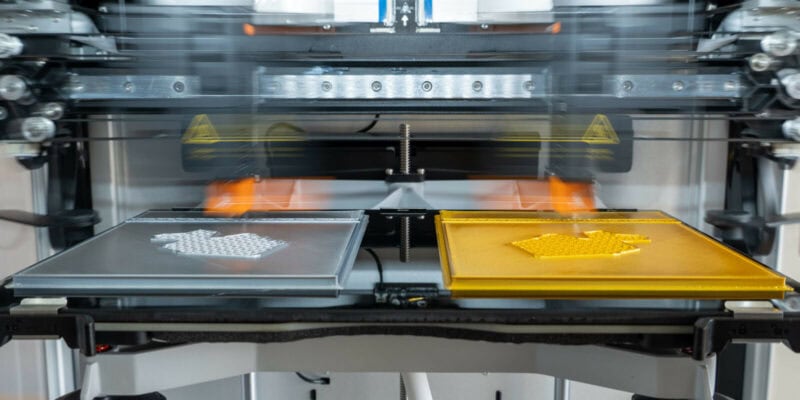
Dual IDEX Extruders
We’ll admit, the title of this section is a bit redundant. IDEX stands for Independent Dual Extruder, so ‘Dual IDEX Extruders’ is similar to saying ‘PIN number’ (personal identification number number) or ‘LCD display’ (liquid crystal display display).
Regardless, the two independent extruders of the Snapmaker J1s let you do a whole lot of things that you can’t do with a single extruder 3D printer.
For example, you can print with two different materials at once. This can be helpful in a variety of applications, such as creating functional parts with multiple materials, PLA and TPU, or printing with support material that dissolves in water for complex geometries.
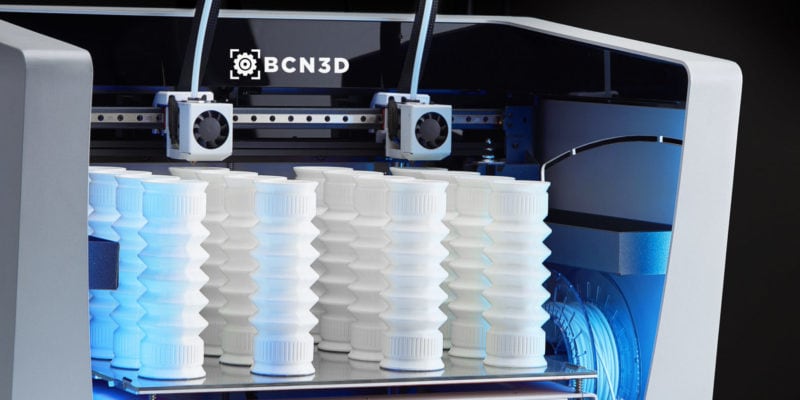
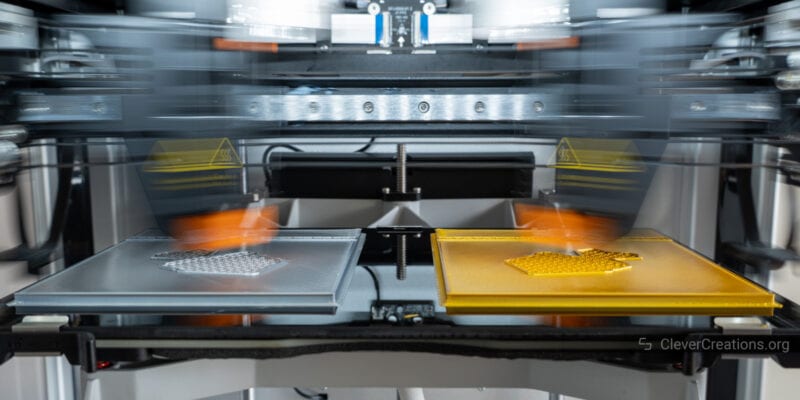
You can, of course, also print with multiple colors of the same material at once, and print multiple objects simultaneously.
The latter you can do in ‘duplicate’ or ‘mirror’ modes, so regardless of whether you want an identical copy or an opposite left/right-hand version of a part, you can do so. The possibilities are not quite endless, but certainly plentiful.
The print heads themselves are powerful and have a whole lot of features packed into a small package. It’s the type of stuff we geek out over at our office.
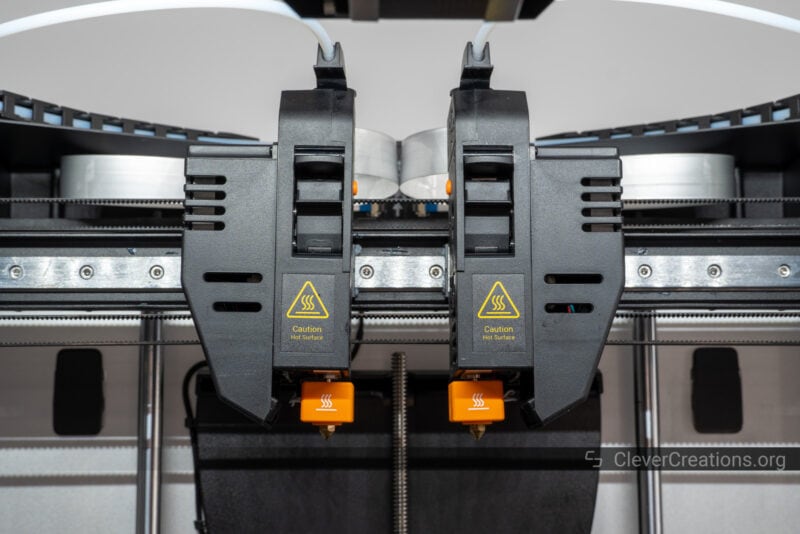
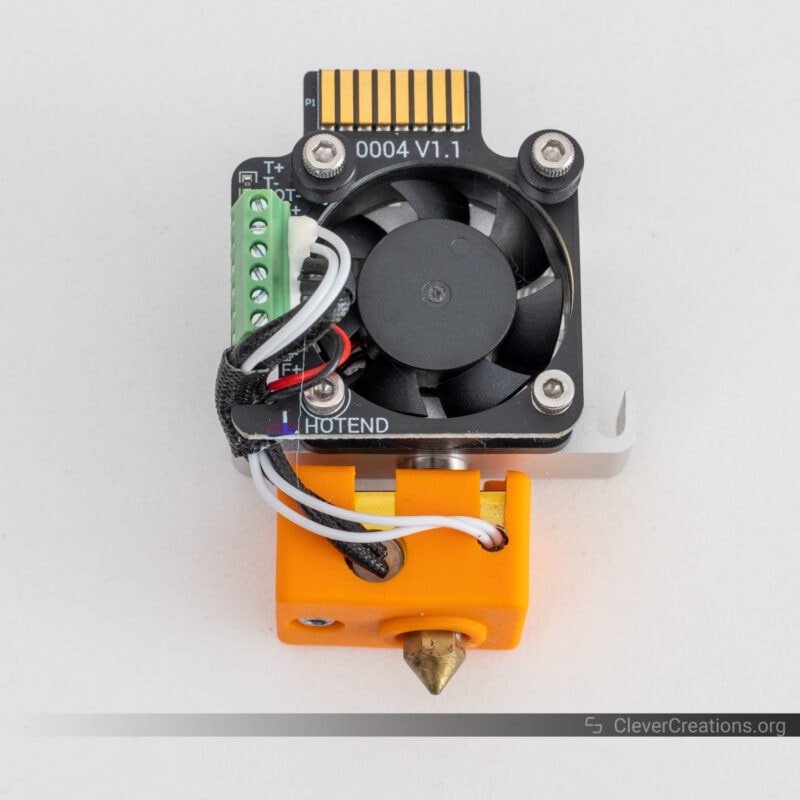
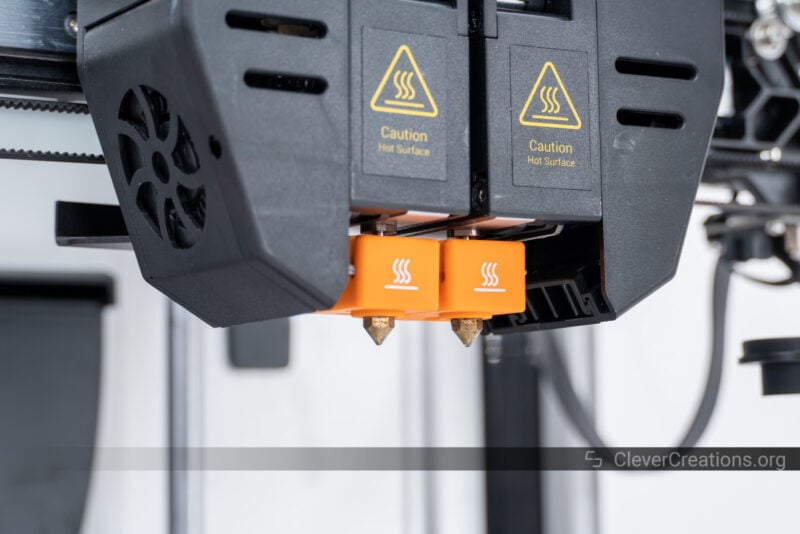
Hot Ends
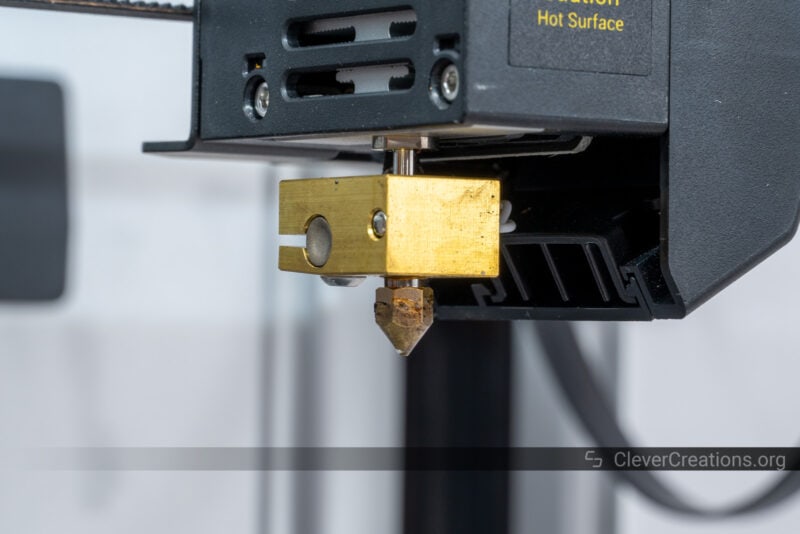
The two stock hot ends on the Snapmaker J1s 3D printer are largely identical. They both have a 0.4 mm brass nozzle, a 50W heater cartridge, and feature a silicone sock (not pictured above) to insulate and protect the hot end from cold drafts.
The only difference between the two hot ends is that their orientation is mirrored. So you get one left-handed hot end and one right-handed hot end.
We found removing the hot ends effortless. It only requires the removal of two bolts. After that, you can pull the hot end out of the print head.
This makes it very easy to troubleshoot should something go wrong. It also makes it fast to switch out the hot ends in case you want to print with different nozzle sizes.
Snapmaker sells hot ends with smaller nozzles, larger nozzles, and hardened nozzles you can use for abrasive materials. They come in a set of two (one left-handed version and a right-handed version), so you can swap both hot ends at once.
At $99 per two, they are expensive compared to just getting different nozzles. This is an option for users who prefer the easy route and don’t want the mess of replacing nozzles themselves.
There’s no reason why you can’t simply swap out the nozzle, but Snapmaker doesn’t offer any nozzles separately. So if you want to go down that route, you’d need to buy compatible nozzles elsewhere yourself.
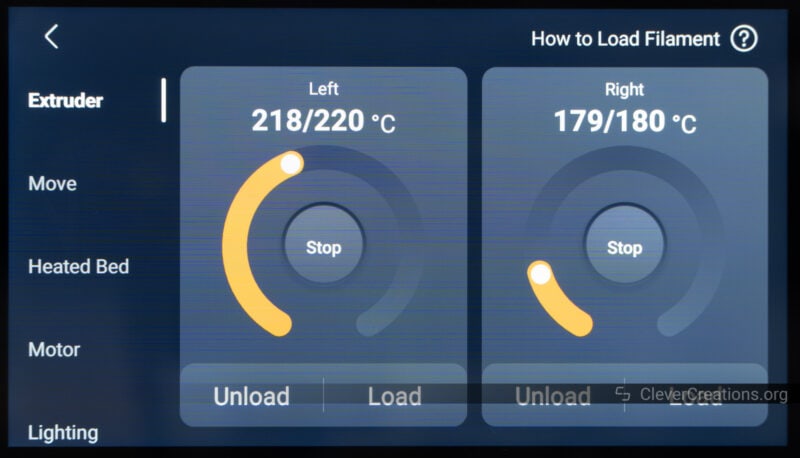
The maximum nozzle temperatures are 300°C, so you can print filaments like PLA, PLA+, ABS+, ASA, Nylon, TPU, PVA, and HIPS with it, with no problem. For Nylon and reinforced filaments, you are best off using a hardened nozzle due to their increased wear.
In practice, we found the hot ends to work great. We didn’t run into any clogging and they heat up quickly. To be exact, one and a half minutes to get up to 200°C, and two and a half minutes to get to 300°C. You won’t have to do much waiting.
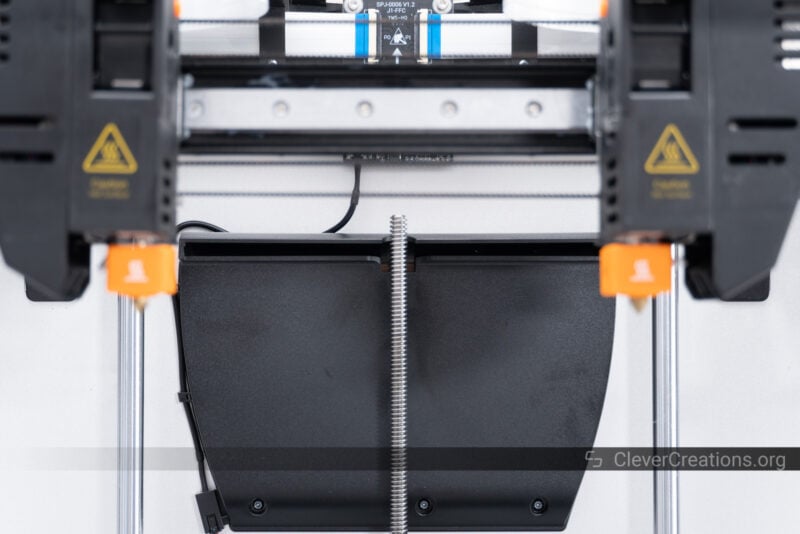
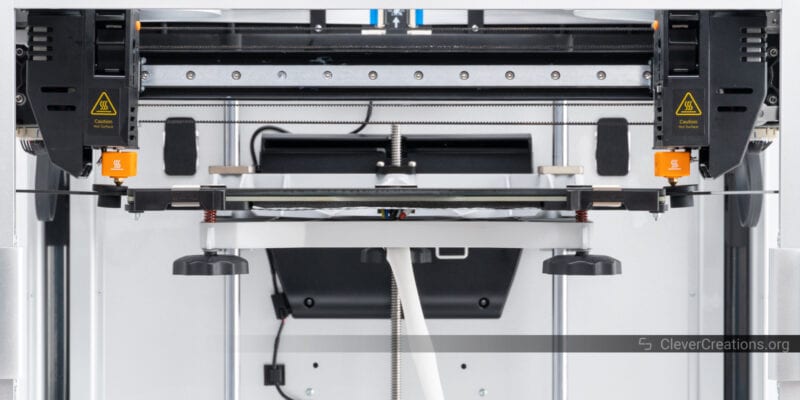
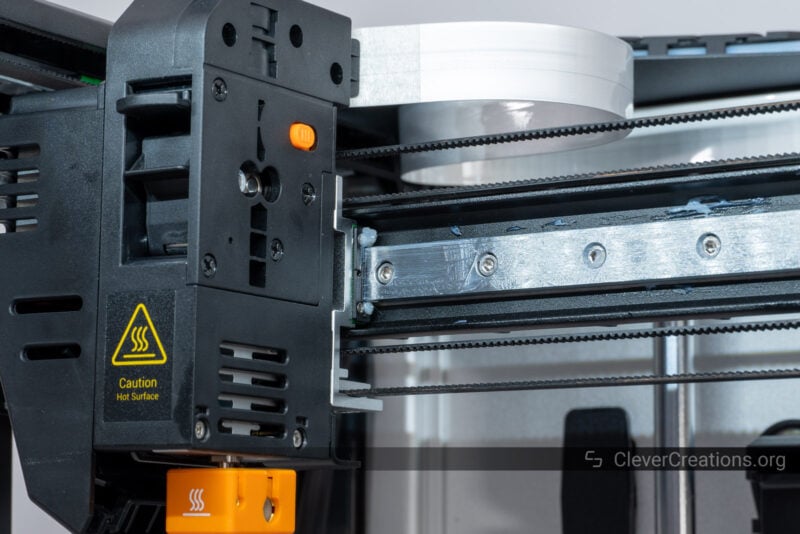
Nozzle Wipers
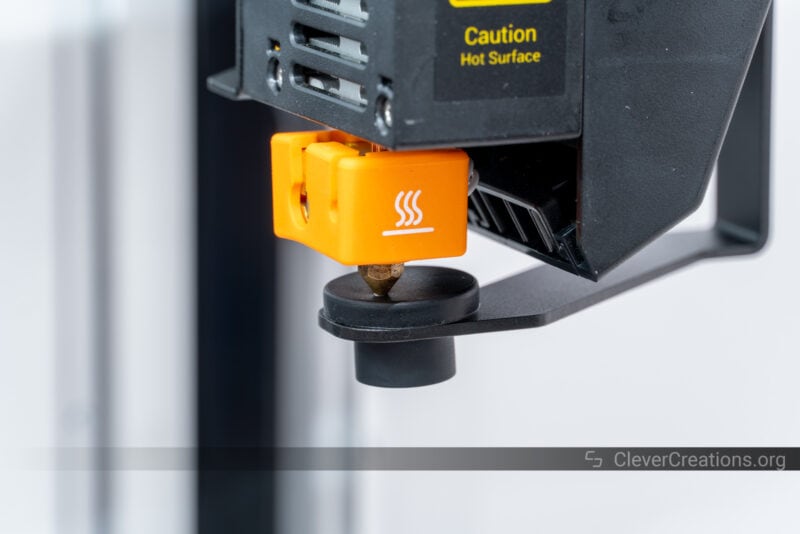
One feature we really like about the Snapmaker J1s are its built-in nozzle wipers. Each print head has one. It is mounted off to the side on the corresponding Y-carriage.
The nozzle wipers are used to clean off any leftover filament that is stuck to the nozzles. When one nozzle gets ‘parked’ off to the side when it is not in use, the wiper wipes it clean.
Because the nozzle is placed on top of the wiping pad when it is idle, there is no filament oozing out of it either. It’s a great way to keep the nozzles nice and clean.
The wiping pad is made of rubber, so it’s gentle enough not to damage the nozzle orifice but tough enough to wipe the stuck filament away.
In practice, we find the wipers to do their job adequately. We did notice that they wear out over time from the nozzle moving over them repeatedly.
They will still last a long time, especially because you can rotate the wiping pads. But it is a component that will need to be replaced at some point. We couldn’t find the part in Snapmaker’s store—there are barely any spare parts for the J1/J1s available—so we hope they’ll get sold in the future.
Print Cooling
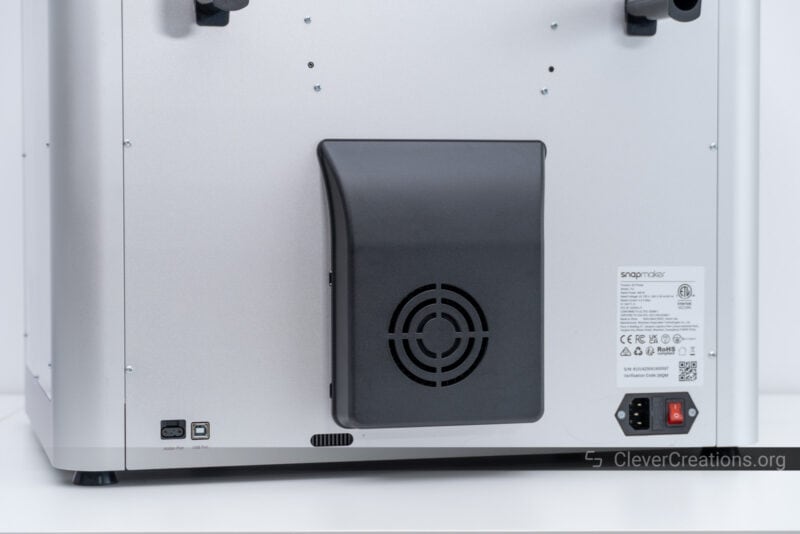
On the Snapmaker J1 3D printer, the print cooling is not ideal. The machine does not have a large cooling fan and many users resorted to modding the machine with additional fans to cool prints better.
The new Snapmaker J1s features a large, robust cooling fan that is integrated into the back of the machine. Through a plastic duct, the fan draws in cold air from the outside and forces through a slot onto the freshly extruded 3D print(s).
It’s plenty powerful and we found it to help a lot when 3D printing low-temperature filaments like PLA. Overhangs and bridging are significantly improved, and small details retain their shape much better.
The two print heads have their own print cooling system as well. It’s a standard 40x40x10mm blower fan with a shroud that directs air to the area under the nozzle.
In practice, the small fans don’t work well on their own in a warm enclosed 3D printer. We are glad that Snapmaker decided to release the J1s to address this lack of print cooling in the J1.
Print Bed
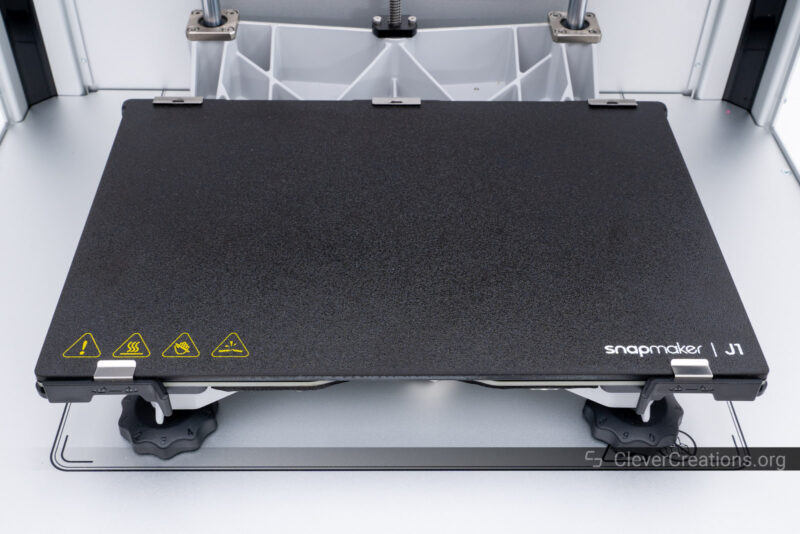
What we are happier with is the print bed on the Snapmaker J1s. It’s a glass bed with a PEI-coated top that we found to work exceptionally well with PLA.
The other side of the bed is plain glass, so you can use it to get prints with a smooth bottom surface with practically any filament. For some filaments, like ABS, you’ll need to use a bed adhesive, but others stick well enough to the glass.
Despite it not being a flexible bed, our prints came off well on the PEI side. There was no need for aggressive scraping or anything like that. We did find ourselves running the bed about 5°C hotter than we typically would for those filaments to improve adhesion.
On the glass side, the difficulty of getting the prints off mostly depends on the type and amount of bed adhesive you use.
It’s important to keep the area under the bed clean. At the maximum print height—when the bed is lowered to the bottom of the frame— it’s easy to accidentally create an obstruction when you leave something lying around underneath.
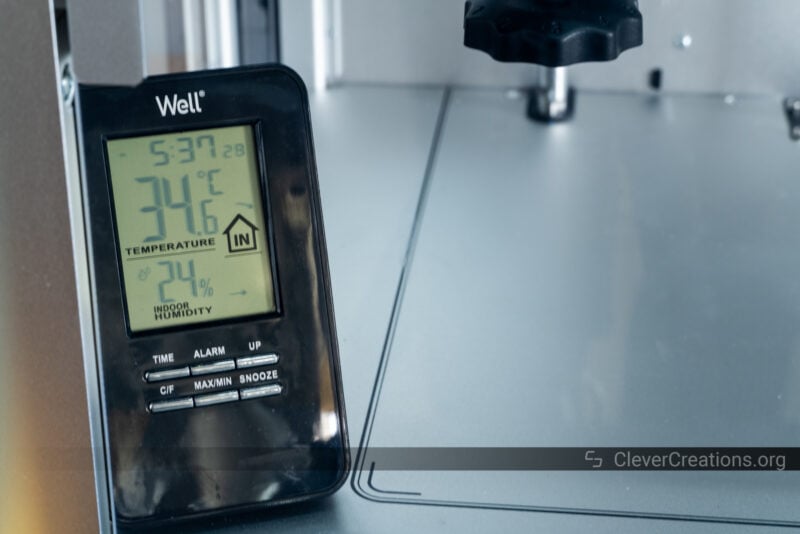
Temperature Uniformity
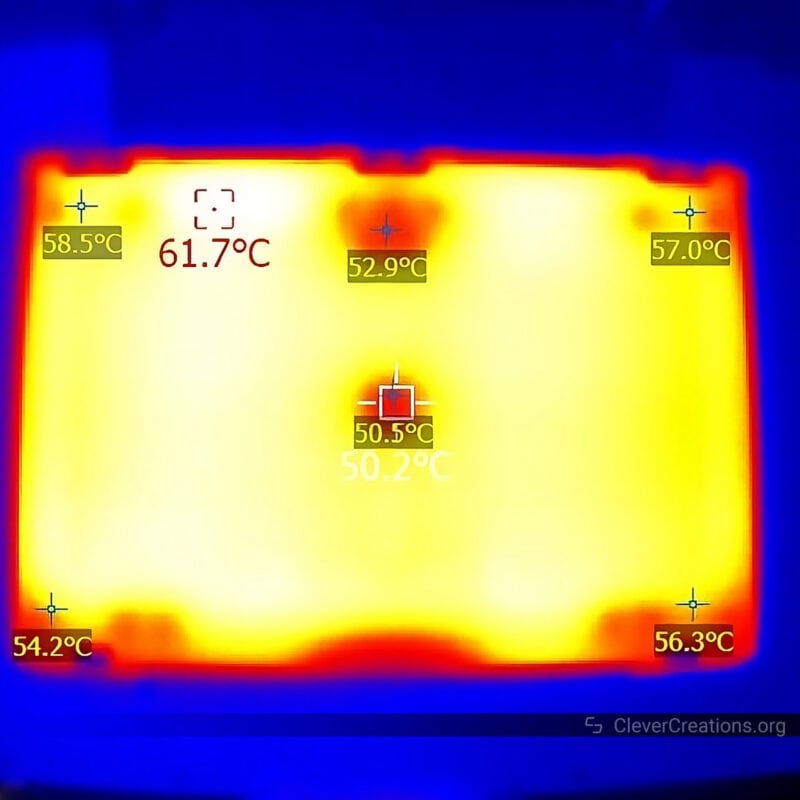
The evenness of the J1s print bed temperature leaves a lot to be desired. As you can see in the image above, there are clear dead spots where the bed temperature is considerably lower than intended.
It’s mainly caused by the leveling pads on the print bed circuit board. Since there are no heating traces in those locations, those areas are much colder than they should be.
Even when we left the bed at 100°C for an hour, the heat in the bed didn’t spread out much.
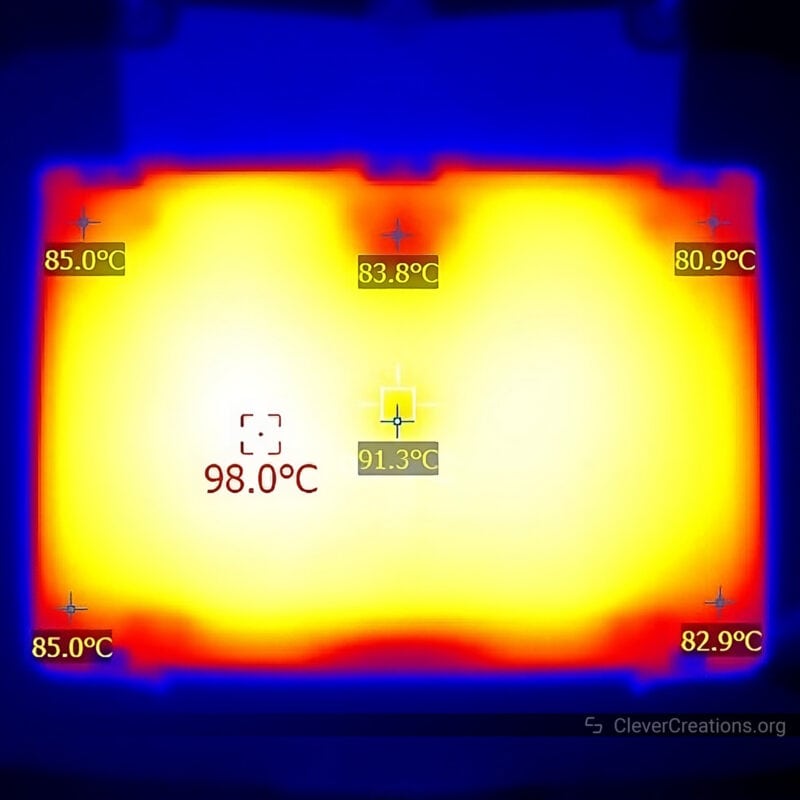
The temperature at some of the edges isn’t great either, because the bed doesn’t have insulation underneath in those spots.
The be-all and end-all of this is that you’ll want to avoid these areas with warpy filaments like ABS. Large temperature differences are likely to cause warping or curling in those areas.
We tested this with the enclosure lid off, so you can expect a slight improvement with the lid on. But it’s still not as good as we’d like to see on a 3D printer at this price level.
Heating Times
It also takes a while for the print bed to heat up. Since the bed only draws 250W of power, it takes about 3 minutes to get up to 60°C and 11 minutes to reach 100°C.
Compared to most other 3D printers with a similar print bed area, that is on the slow side. It’s not horrible by any means, but it can be frustrating if you want to work with high-temperature filaments and have to wait over 10 minutes for the bed to heat up.
Bed Leveling
Even though nearly all modern 3D printers come with an automatic bed leveling sensor, the Snapmaker J1s does not have one. Because of the way the 3D printer deals with leveling, that’s not necessarily a problem. Let us explain.
As you’ve seen in the calibration process, the J1s uses assisted manual leveling to get the bed straight. Once that is done, you can place the glass print surface onto the bed and you are ready to print.
The glass surface has a consistent and known thickness, so the 3D printer knows exactly what print height the surface is at. This means that there’s no need for a bed leveling sensor and the 3D printer can just rely on its memory.
Dealing with an uneven bed on the J1s is more effort than it is on a 3D printer with an automatic bed leveling sensor. The latter can adjust for minor slopes, whereas the J1s needs to be manually re-leveled.
However, because the J1s has a solid build quality, the bed is unlikely to end up slanted during regular use. After setting up the 3D printer and leveling the bed, we haven’t found the need to level it again.
Other Features
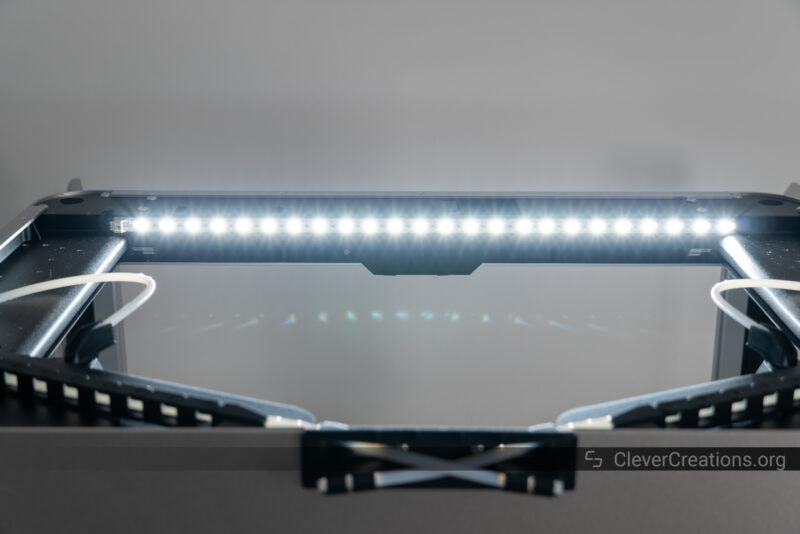
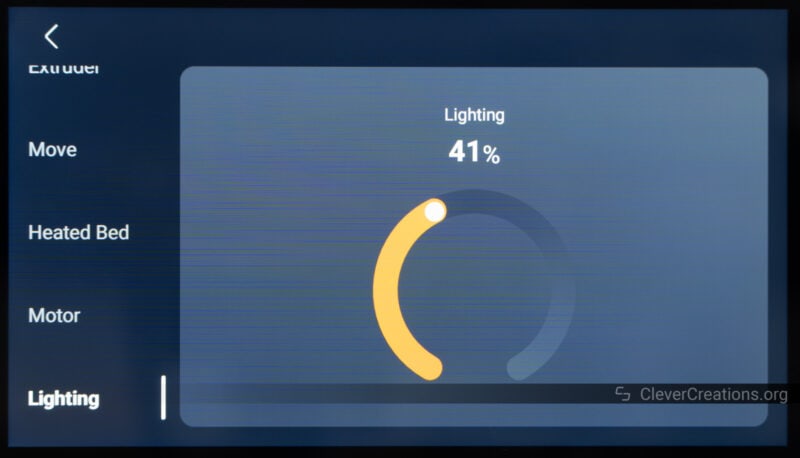
You’ll find plenty of other stuff on the J1s that is designed to improve your 3D printing experience. For example, the bright (and dimmable) LEDs light up the inside of the printer. These make it much easier to inspect a 3D print in progress or do any kind of work inside the machine.
There are also multiple filament runout sensors—one for each extruder—that detect when the filament runs out. However, the print heads themselves also can detect when filament does not extrude as intended. During a nozzle clog, for example.
So even when the filament is still present, the 3D printer can pause a print and let you know that something is up.
With a 3D printer like the J1s, it might be easier for us to list the things that we think are missing.
One thing we can think of is an integrated HEPA filter in the enclosure. This is especially helpful when you’re printing with materials like ABS that produce VOCs (volatile organic compounds).
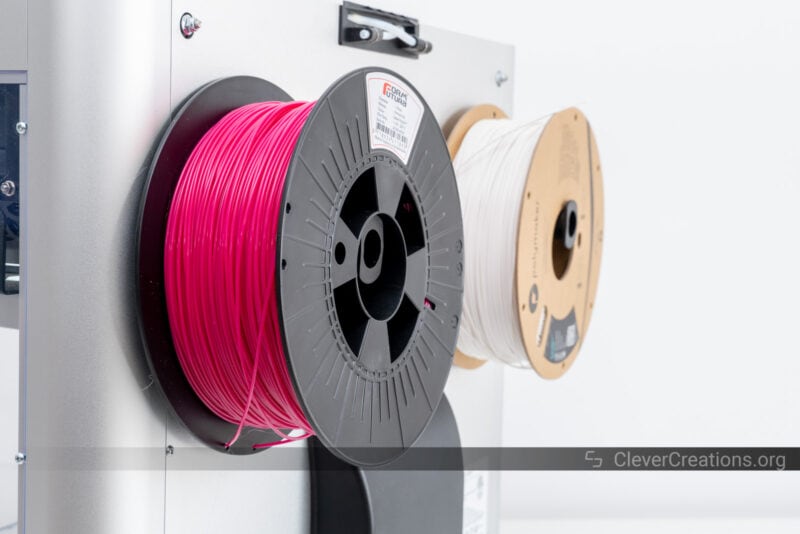
Aside from that, the stock spool holders are on the short side and only fit spools up to ~70mm in width. Wider spools stick over the edge. It still works for feeding filament, but it’s not an elegant solution.
Build Quality and Construction
Snapmaker rarely disappoints with the overall build quality of their 3D printers. Even though the J1s is a little different from their previous 3-in-1 machines, it’s clear that they haven’t held back here either.
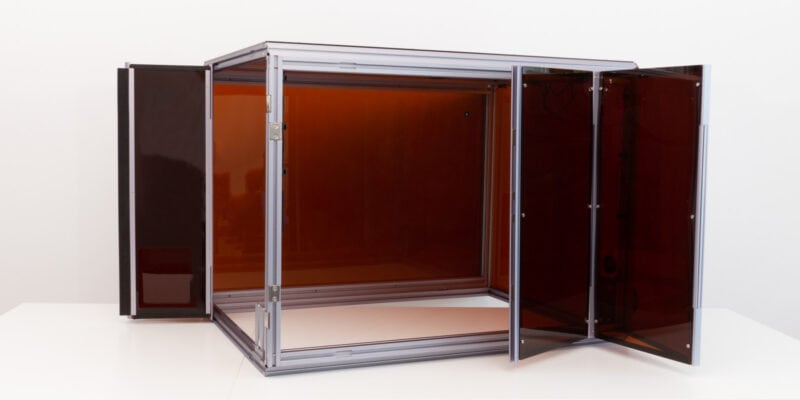
Full Enclosure
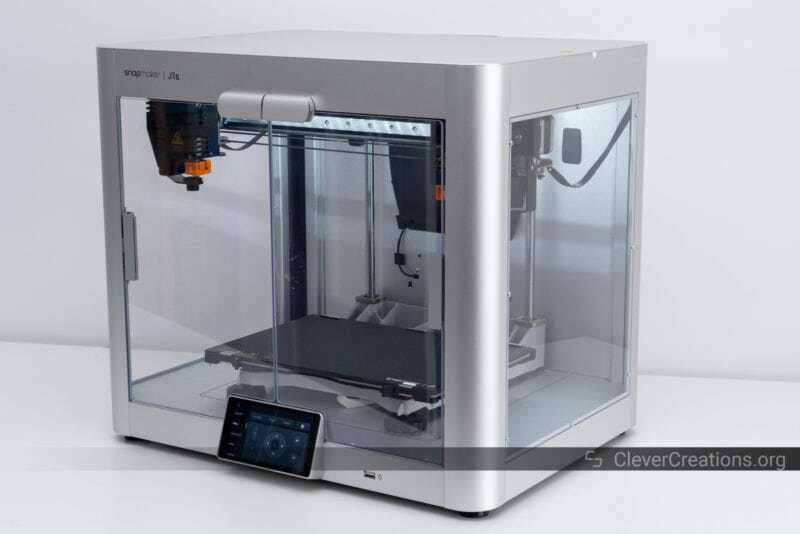
From the outside, the Snapmaker J1s is one of the most compact dual extruder 3D printers we’ve seen. It looks sleek and modern, with a robust full enclosure that’s made from brushed aluminum. You won’t notice any cables sticking out anywhere, which is an impressive feat for a 3D printer that has so much going on.
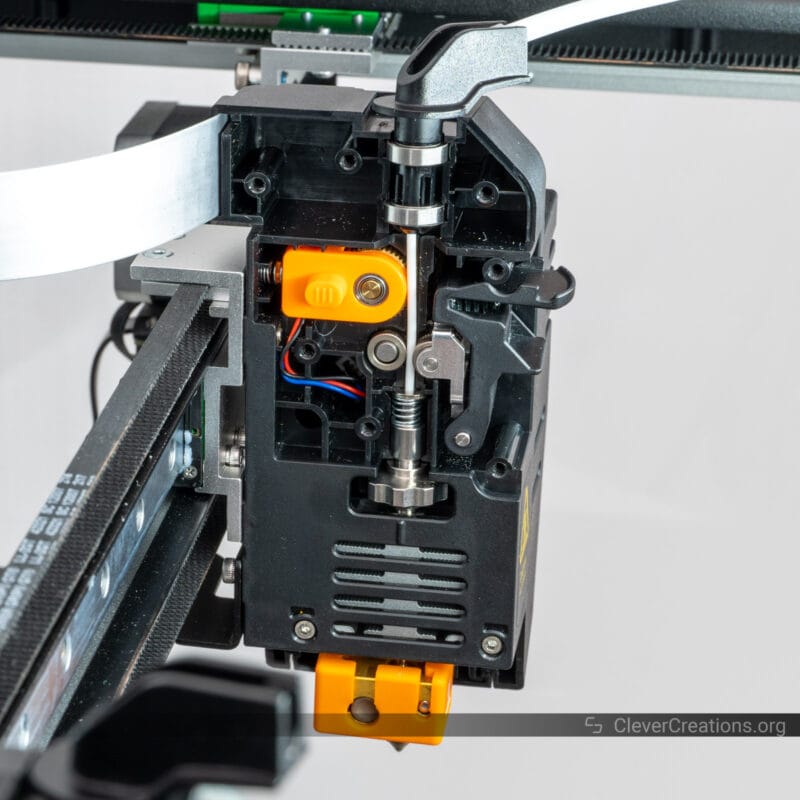
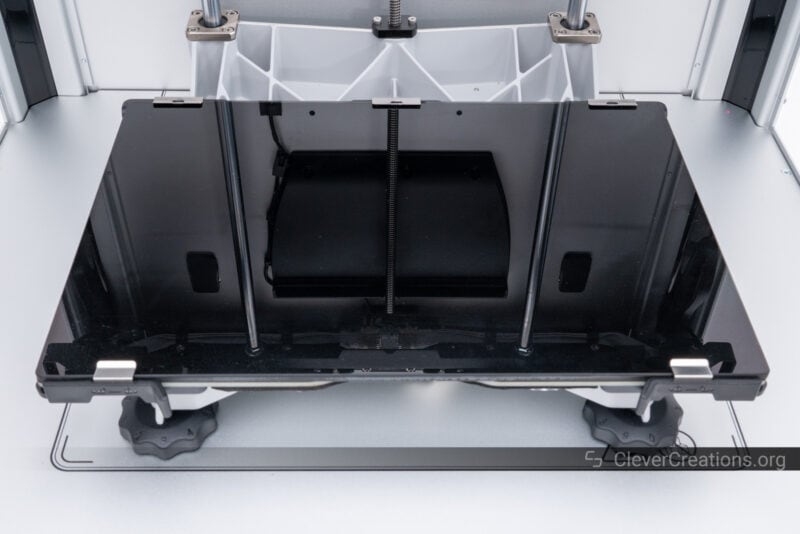
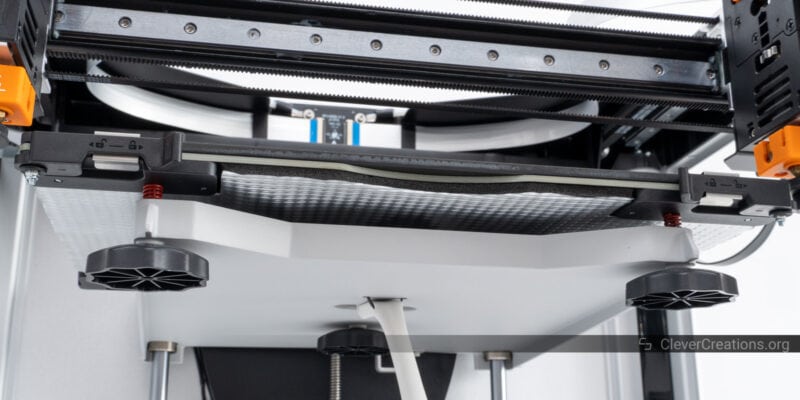
Looking under the lid, you can see a variety of design choices that allow the machine to make optimal use of the available space.
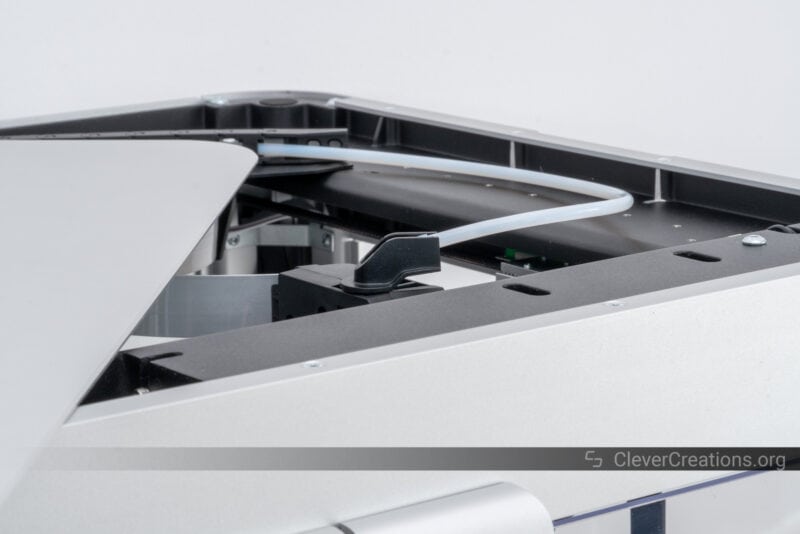
For example, the PTFE tubes that carry filament from the spool holders to the print heads run through a cable chain. Near the print head, there’s a plastic guide with a 90-degree bend that can freely rotate 360 degrees around its Z-axis.
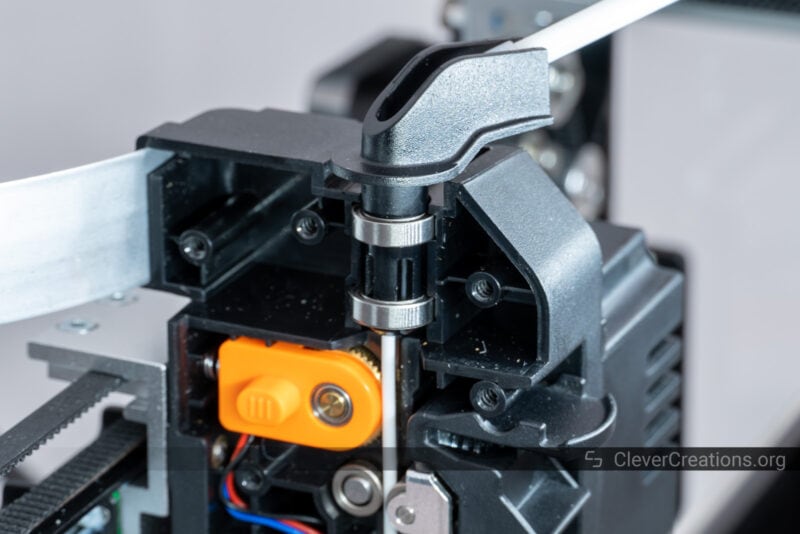
It’s a clever way to guide the filament to where it needs to go while still fitting everything within the enclosure.
Its tight 90-degree bend does add a lot of extra friction in the filament path. If you are working with brittle filament, this is the point it would snap at. We haven’t experienced any issues from the tight bend in practice, however.
Because the machine is fully enclosed—as opposed to partially—you will experience less noise, dust, and warping of your prints. The heated bed also reaches its target temperature faster and more consistently than with other 3D printers.
In fact, because the machine is so well enclosed, you can keep the print bed running at 100°C for a while to create somewhat of a heated chamber.
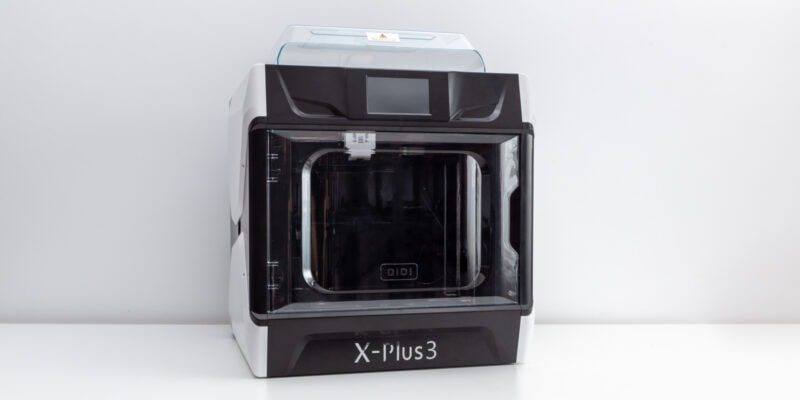
It’s not as effective as a real heated chamber, like the one we saw on the QIDI X-Plus 3, but it does help to keep the temperature more consistent while printing large objects or with materials that warp easily.
Build Volume
One of the downsides of packing two extruders in an enclosed area while keeping the machine’s overall footprint small is that it limits the build area.
The Snapmaker J1s can only print objects up to 300 x 200 x 200 mm in size. Compared to typical open-frame 3D printers, you’re looking at 50 mm less print height.
When compared to open-frame 3D printers at the same price point—which are often large 3D printers— the difference in build volume and height is even bigger.
For an enclosed 3D printer, however, the total build volume of the J1s is fairly decent. Most of the best enclosed 3D printers have similar size limitations.
The main point here is that if you know you need to print tall objects, the J1s won’t be the ideal 3D printer. But considering that 300 x 200 x 200 mm is more than enough to print basic objects, this build volume of the J1s is fine for most users.
Having the longer 300 mm side is nice to have as well. It allows you to print wider items than you could on a typical 220 x 220 mm print bed.
Kinematics

Unlike most other recent 3D printers that focus on speed, the Snapmaker J1s does not use CoreXY kinematics to move the print head around. It would be impossible to implement CoreXY with two IDEX extruders, so this makes sense.
Instead, the 3D printer uses traditional ‘cartesian’ kinematics. It’s a bit slower than CoreXY because of the increased mass that is slung around, but it is easier to maintain over time and does allow for the two IDEX extruders.
We found that the vibration compensation and the rigid all-metal construction do a decent job at compensating for the extra moving mass, but it’s no match for 3D printers like the Creality K1 we reviewed, that are built from the ground up for speed.
It’s not a problem in our eyes. The J1s is still by far the fastest dual extruder 3D printer in its price range. But if speedy prints without dual extrusion are your top priority, you may want to look into a CoreXY 3D printer.
Component Quality
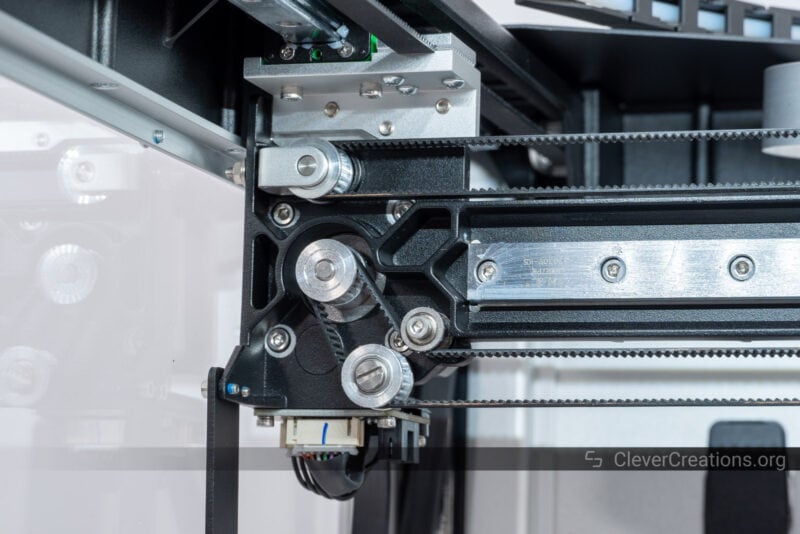
The component quality of the Snapmaker J1s is nothing but exceptional. From the aluminum frame to the all-metal carriages to the Gates timing belts, it’s all top-notch.
It’s a clear step up (if not multiple steps) from the mostly plastic construction of enclosed 3D printers of Flashforge and the like.
You’ll still find some injection molded plastic components on the J1s, like on the print heads. Since these need to be lightweight, plastic is still the way to go here.
The 3D printer also uses wide, durable linear rails on the X- and Y-axes that don’t exhibit any wobble or play. It’s all well thought out and it’s clear that you get what you pay for with this machine.
We didn’t encounter any component quality issues that gave us concern about the durability of the 3D printer, which is a rare thing to happen.
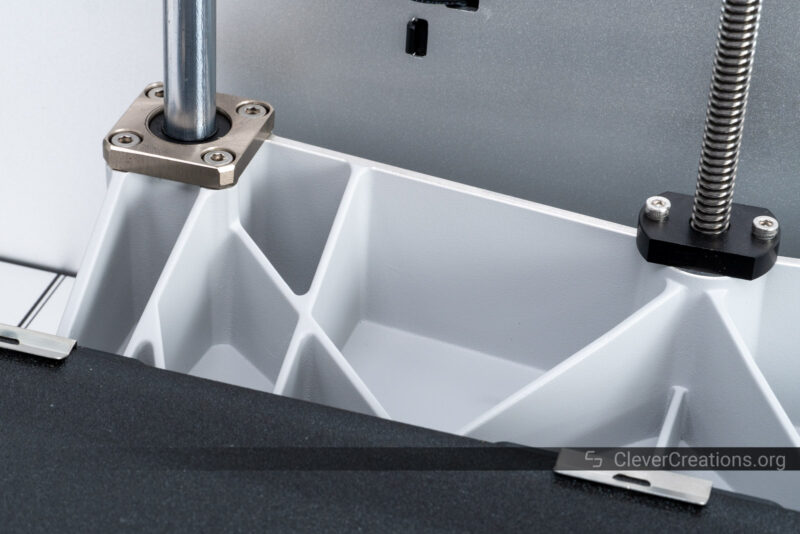
Cantilevered Bed
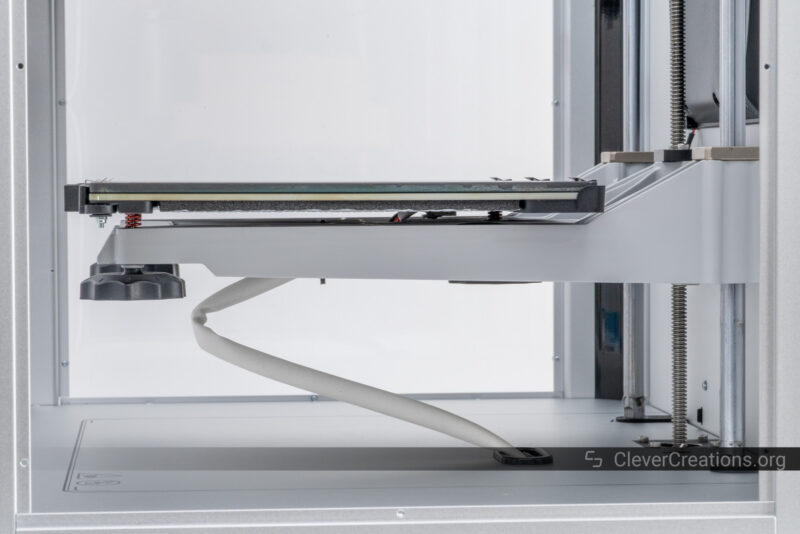
The major point of criticism we do have on the construction of the Snapmaker J1s 3D printer is its cantilevered print bed. It’s a design choice that leads to a decrease in print quality.
Cantilevered print beds always have inherent instability to them. This is because the bed is only supported on one side.
With one side unsupported, the bed can slightly move up and down. For example, when the nozzle touches the print, or when the 3D printer vibrates from rapidly moving parts.
We are talking about a movement in the tens of microns here, but it’s still something that can have a noticeable impact on 3D prints.
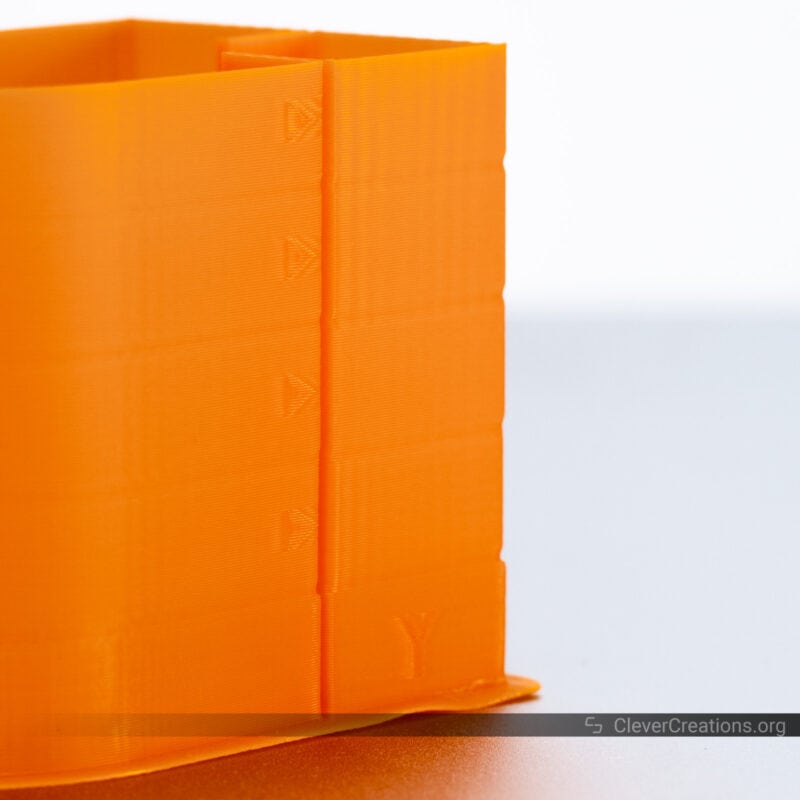
For example, this test 3D print we made on the J1s shows the result of this instability:

You can see the slight Z wobble on the outer surface of the print. It’s most noticeable when holding the 3D print with the layer lines perpendicular to a light source.
The further away from the linear rods (i.e. the supported side of the bed), the more this deflection shows its effect. You can see that the other side of the planter, which was printed closer to the linear rods, has less of this Z wobble.
This is the disadvantage that comes with a cantilevered print bed, and the only realistic way to deal with it is to reduce print speed on the outer sections of the print. On a 3D printer like the Snapmaker J1s that is designed for speed, that’s a bit of a shame.
You won’t notice the issue in all circumstances. It’s only when the light hits the print perpendicular to the layer lines that it becomes most visible.
When light hits the print parallel to the layer lines, it’s not visible at all:
We can also say that for a cantilevered bed, the one on the J1s is well-designed. It is all-metal, with its body cast in aluminum. It’s much better than the lightweight plastic reinforced bed we encountered on the Ender 5 S1, for example.
Still, we’d much rather have seen a triple leadscrew mounted bed design that provides perfect stability. That would allow you to push this 3D printer much further in terms of print speed without affecting print quality.
Sound Levels
We found the sound levels of the Snapmaker J1s to be more than acceptable. Especially compared to the performance of the machine. It’s by no means silent, but the sound levels are lower than other 3D printers with similar capabilities we’ve tested.
Most notably, the externally-mounted large print cooling fan is surprisingly silent given the amount of air it pushes. Snapmaker could have gone with a cheap and loud fan here as we saw on the Sovol SV07, but Snapmaker made the right choice of going with a quality fan that won’t drive you up the wall when it’s running.
The full enclosure also goes a good job of dampening some of the sounds that come from inside the machine, like the print head fans and the carriages rolling over the linear rails.
What we like the most, however, is that while 3D printing you can change the performance mode of the 3D printer. You have the choice between silent, default, and fast modes.
Each mode changes the speed of the 3D printer. The first two modes (silent and default) enable the silent mode of the TMC stepper drivers, whereas the fast mode disables the silent mode and gives the motors more torque.
We found this to be particularly useful during long 3D prints that ran into the night. The last thing you want is for your 3D printer to disturb the people around you. Having the option to continue a print in a more silent mode while sacrificing some performance is a great solution.
Ease of Use
In most aspects, the user experience of the Snapmaker J1s is better than your typical 3D printer. A lot of thought goes into these machines when it comes to usability.
For starters, the machine comes pre-assembled and pre-wired. It’s almost plug-and-play, with only unpacking the 3D printer and calibration left for you to do. During use, the experience feels polished and streamlined as well.
Let’s look at the main aspects when it comes to usability.
Touch Screen
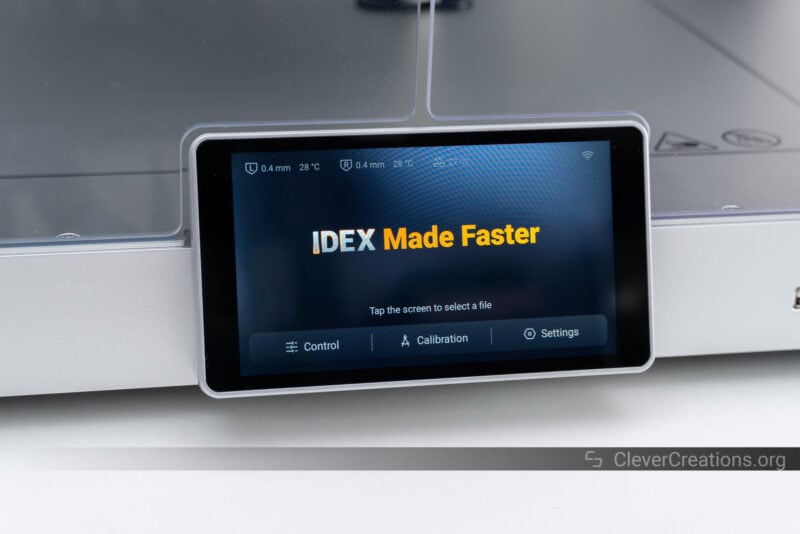
From all 3D printers that pass through our office, the screens of the Snapmaker machines stand out for having the best look and feel. The screen of the J1s is no exception.
The J1s uses a 5″ touch screen for all the interaction you’ll have with the machine. It has a dense 1280 × 720 resolution, so there’s plenty of space to show all the information you need.
We often find ourselves having to turn down our studio lights when taking pictures of 3D printer LCD screens. With the screen of the J1s, we didn’t need to. It’s that clear and bright.
Android-based User Interface
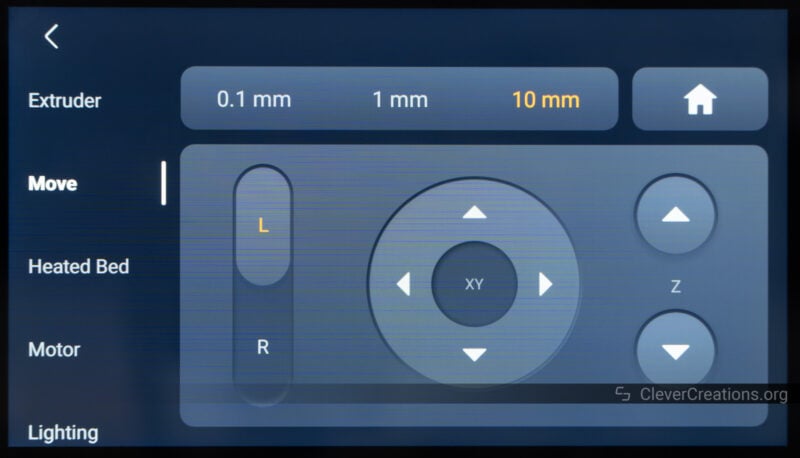
If you use an Android smartphone, you’ll be very familiar with the user interface of the Snapmaker J1s. That’s because it runs on a modified version of Android, with a custom UI designed specifically for the J1s.
It’s very intuitive to use and well organized. It has all the basic menus and functions you need at your fingertips, with helpful explanations that assist you along the way.
The downside of its streamlined experience is that there’s not much depth when it comes to settings. Advanced users may find the lack of control over certain aspects, like the stepper drivers, motor currents, or setting the extruder steps/mm, a bit limiting.
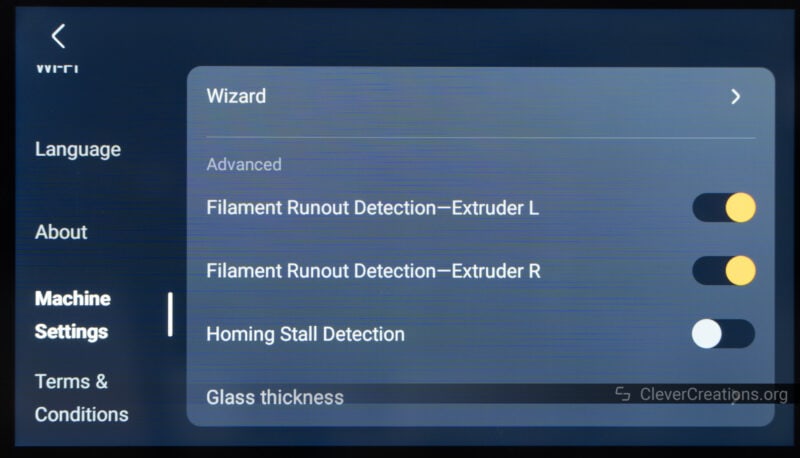
You also aren’t able to directly control things like the max. speeds and acceleration settings through the UI, even though you have more control over this through other methods (firmware, G-code).
On that note, Snapmaker recently made the Marlin-based firmware of the J1, and by extension the J1s, open-sourced. This is something that we are happy to see, as it allows users like yourself to customize the experience with the 3D printer more deeply.
But let’s get back to the UI. There are still some things that we’d like to see improved.
For example, while the round sliders for setting temperature and other variables look nice, they don’t provide much precise control.
We frequently found ourselves having to slightly re-adjust the slider to set the exact temperature we wanted.
We’d much rather have the slider snap to the nearest 5 degrees or something similar, with the option to override this with a number entry box.
On a similar note, you have control over the built-in LEDs from 0 to 100% with 1% increments. While using the 3D printer, we really couldn’t find a use for that. A simple 0% / 50% / 100% toggle would be just as practical.
These are minor nitpicks, however. Overall, we’re satisfied with the performance and look of the Snapmaker J1s UI. It is well-designed for the majority of its target audience.
Snapmaker Luban

Accompanying the Snapmaker J1s (and all other Snapmaker machines) is the Luban software suite. It’s a Windows/macOS/Linux-based application that lets you turn 3D and 2D designs into usable .gcode for 3D printing, laser engraving, or CNC milling jobs.
With the J1s, you’ll only be using Luban for 3D printing, as the machine lacks a laser engraver and spindle.
Compared to the last time we tested the software—when we made a review of the Snapmaker 2.0 A350T—the Luban software has made considerable progress when it comes to 3D printing slicer settings. It’s not yet on par with the industry standard applications like Cura, but it gets close in most areas.
If you want to make use of Cura with the J1s—which we advise you to do for the absolute best print results—then you can use the Snapmaker Cura plugin. Kudos to Snapmaker for offering an officially-supported solution.
Just like with the interface of the 3D printer itself, Luban is best suited for the beginner or intermediate user who just wants to get prints done without a lot of tinkering. It’s not as feature-rich as other software packages, but it gets the job done well enough.
Setting up dual-color or multi-material prints in Luban is easy and intuitive once you know how to do it.
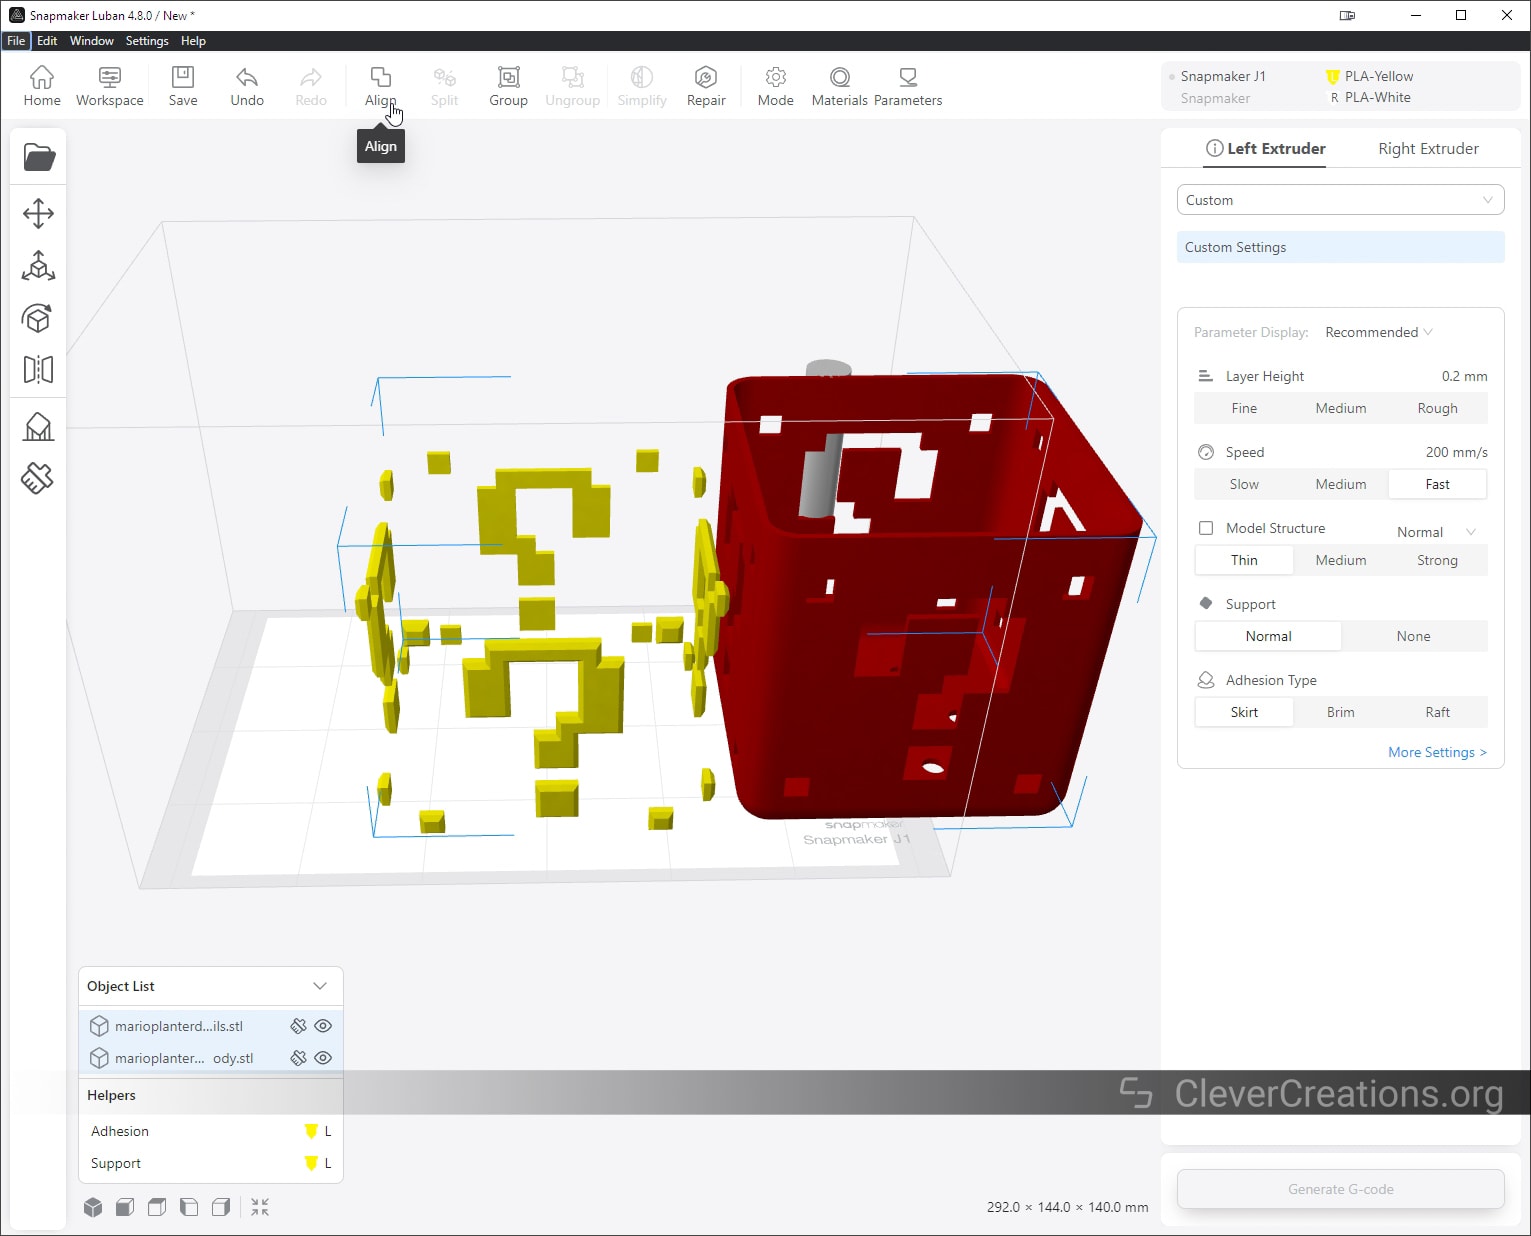
You start by loading two STL files that are designed to work together. It’s important to select them both and align them so that they fit together perfectly in Luban.
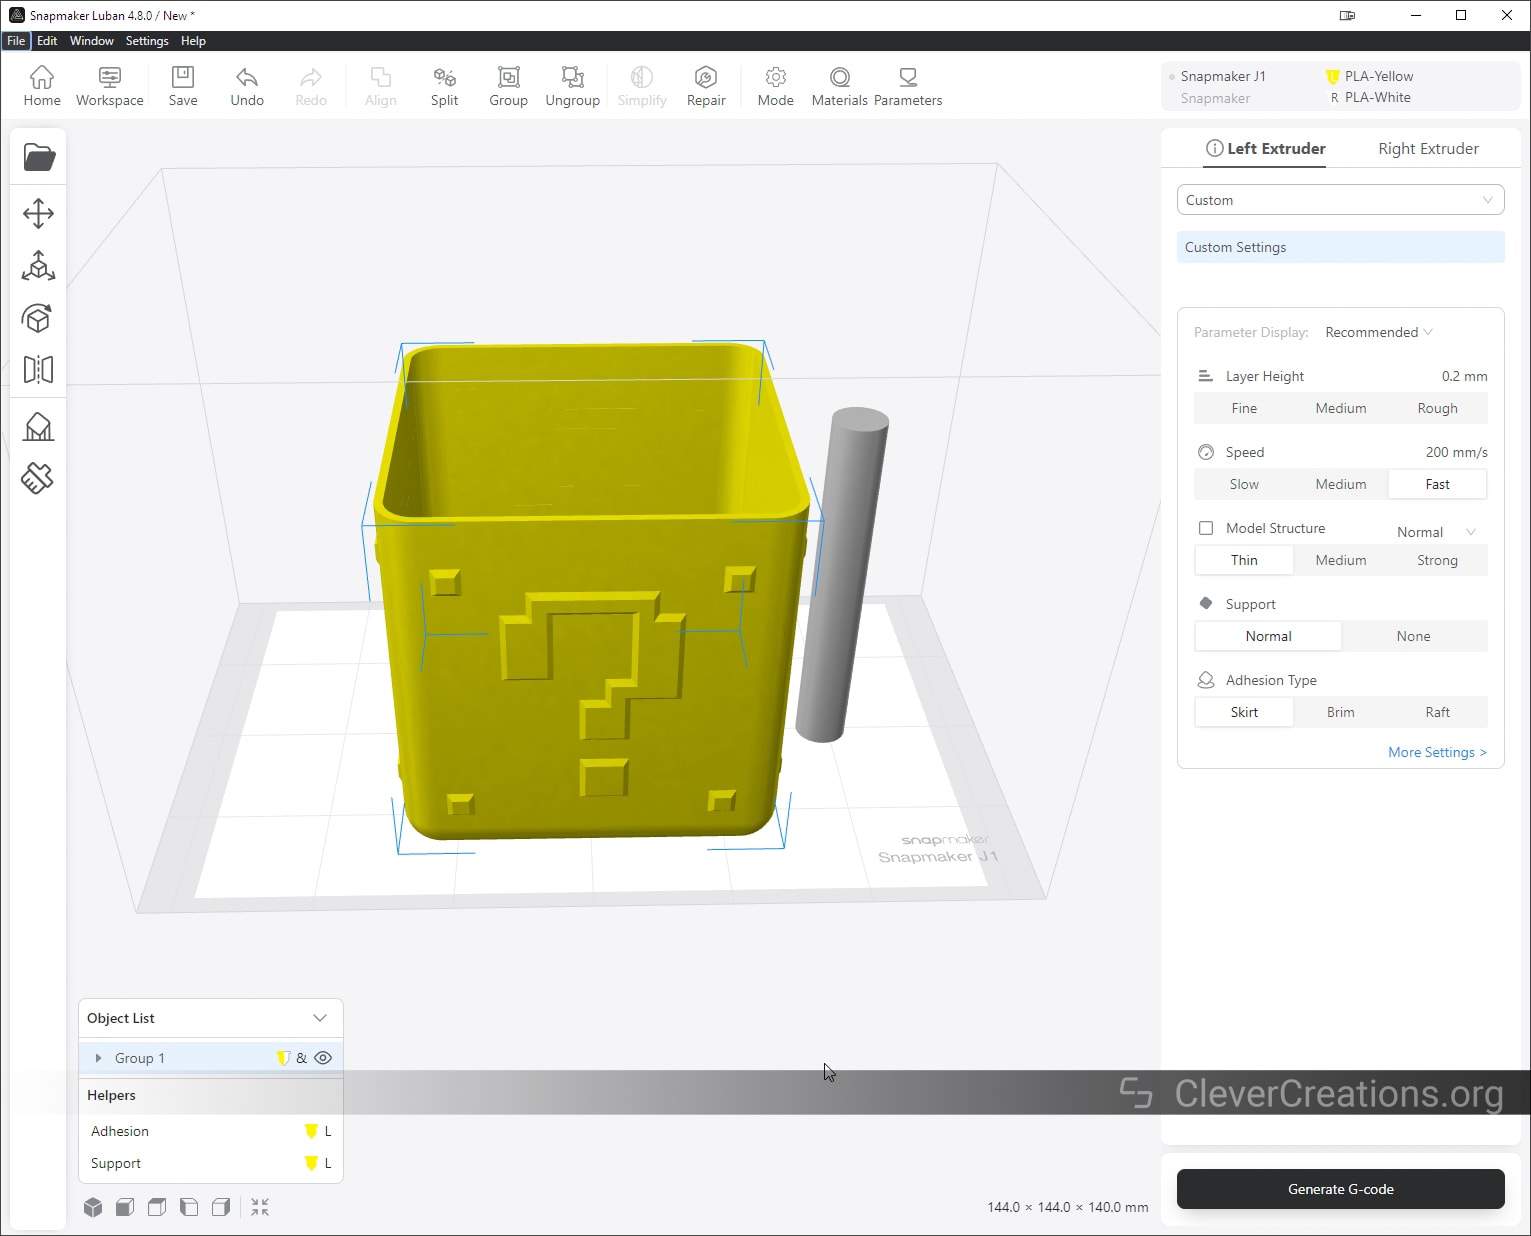
You then assign each part its own extruder and filament and set the parameters for it as you would with a single-extruder print.

Luban will automatically add the necessary commands in the generated .gcode file to switch between the two extruders each time it needs to swap filaments. These commands include purging, wiping, and adjusting the temperature of each extruder when it is either printing or idling.
We really like this and it took minimal time for us to set up a successful dual-color print. It was that easy.
You also have the option to select whether you want the second extruder to print in normal mode (print an additional color/material), copy mode (replicate the left print on the right side), or mirror mode (mirror the left print on the right side).
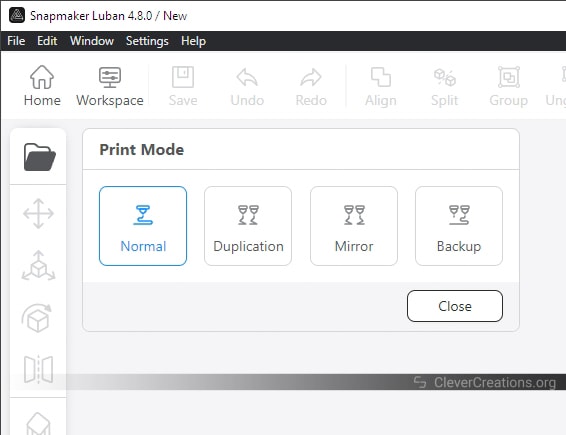
As you can see, there’s also the backup mode. We haven’t tested it, but from the description, the second extruder acts as a backup and kicks in when the first one runs out of filament or has other issues.
All the test prints below were sliced in Snapmaker Luban. We typically use Cura for our testing, but with a complete package such as the J1s, we prefer to use the included software to get the best possible out-of-the-box experience.
Snapmaker J1s Print Quality
Just a heads-up: the print quality on some of the Snapmaker J1s test prints below looks worse on the images than it does in real life. Our overhead studio lights emphasize the main quality issue of prints made with the J1s: Z-wobble. You have seen in the example earlier in this review how light angle plays a big role in how this appears.
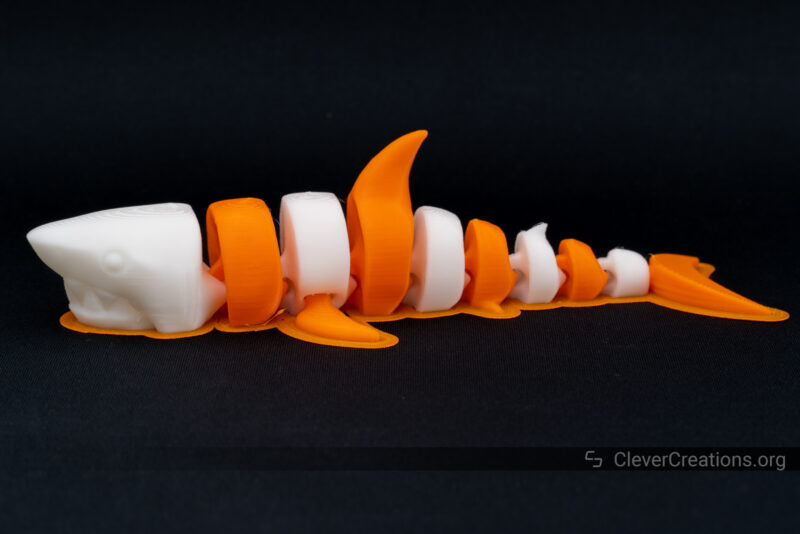
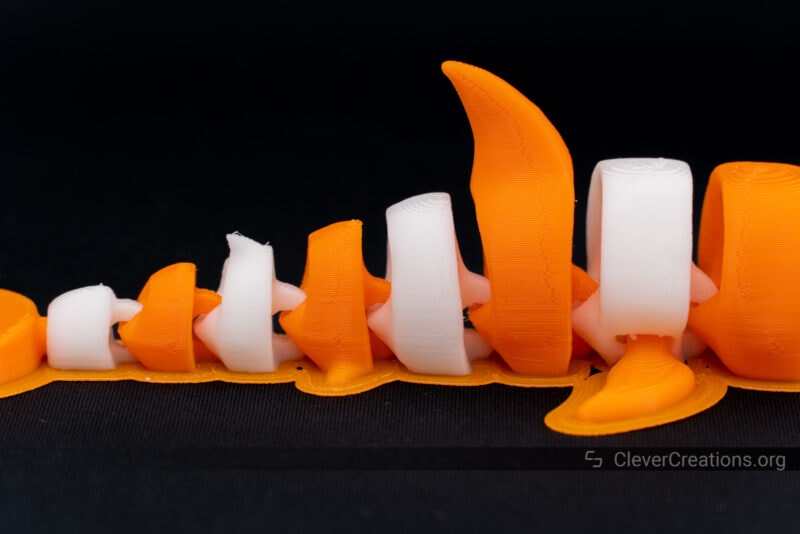
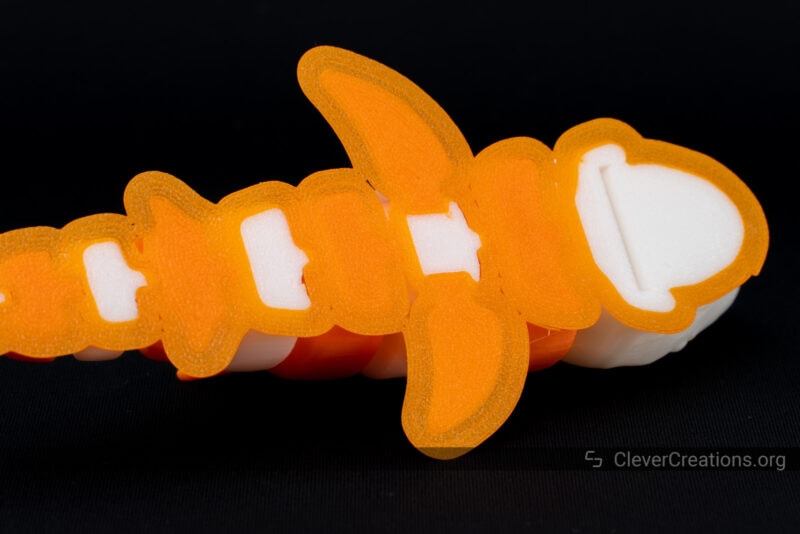
Articulated Shark
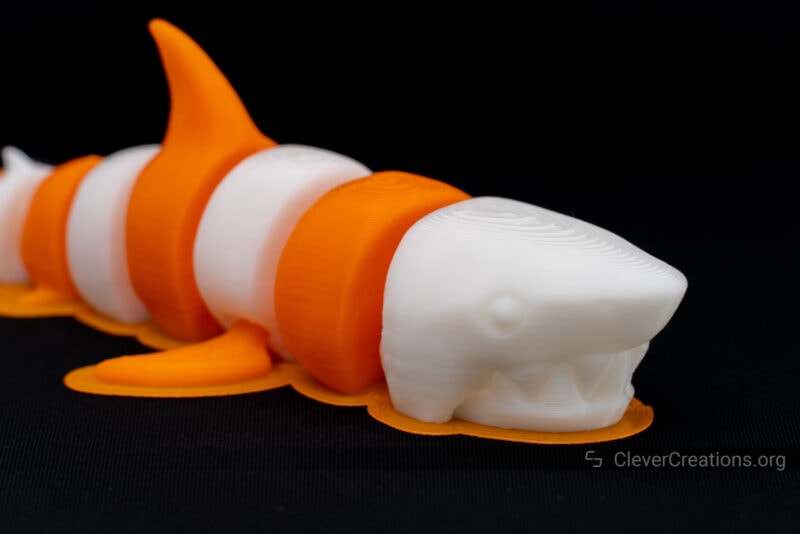
The Gcode of this articulated shark is included on the Snapmaker J1s itself. We always like to test one of the included Gcodes to get an idea of what a manufacturer-optimized print looks like out of the box.
If it doesn’t look good, we know something is up with the hardware of the 3D printer. In this case, the print came out great.
It’s not clear to us why Snapmaker decided to put a brim on this print. The bed adhesion is good enough to not require it. On an articulating print like this, it’s a headache to remove it after printing.
After we removed it, the shark could freely move around. So no issues with dimensional accuracy despite the high print speeds.
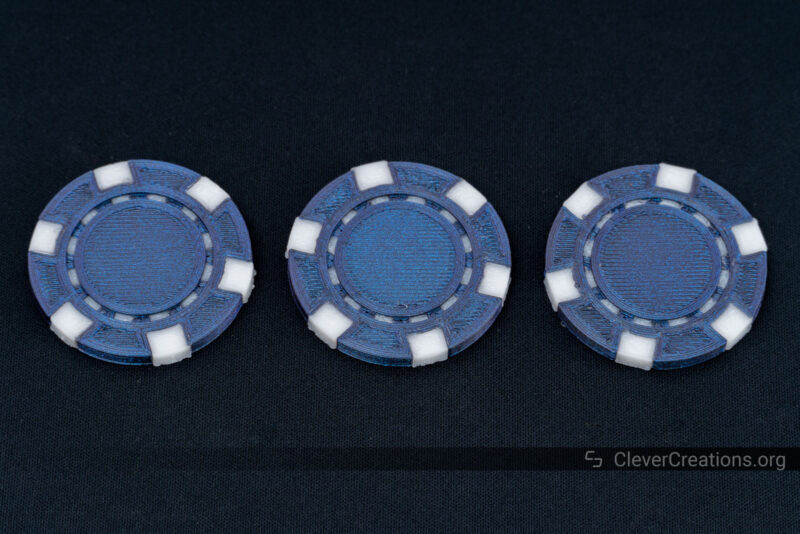
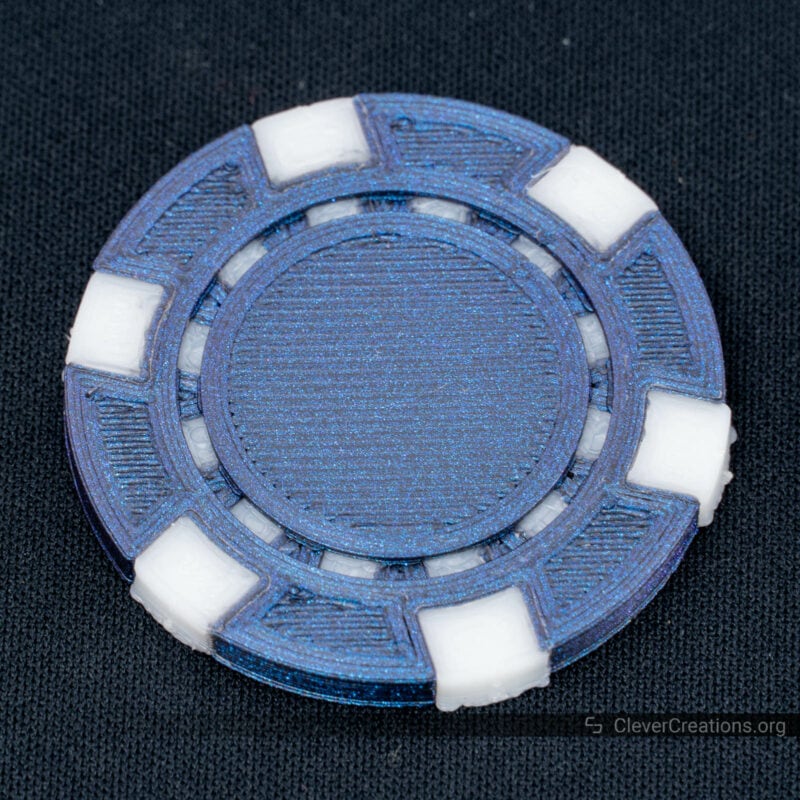
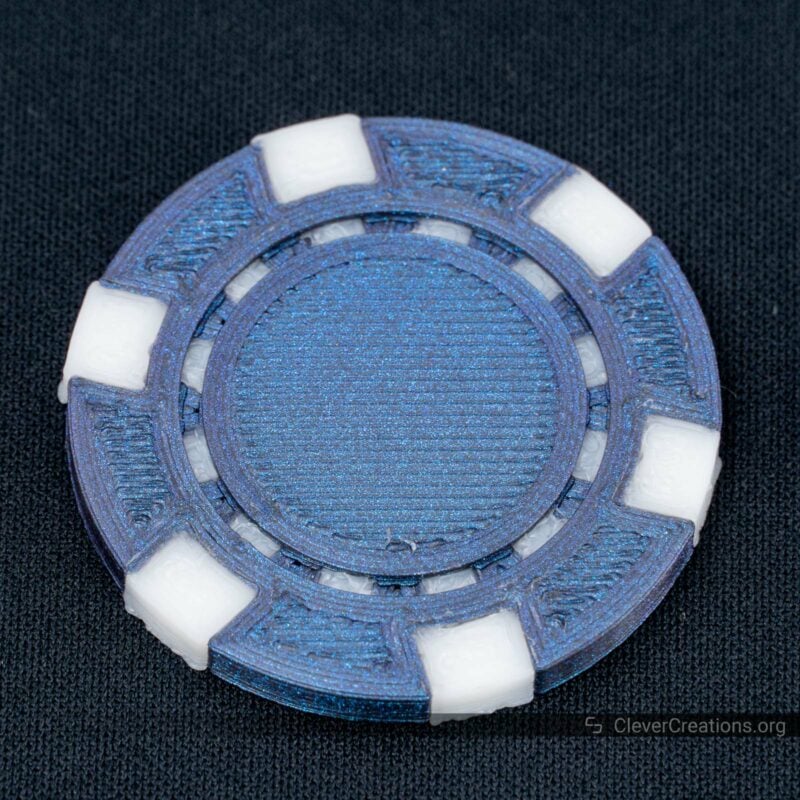
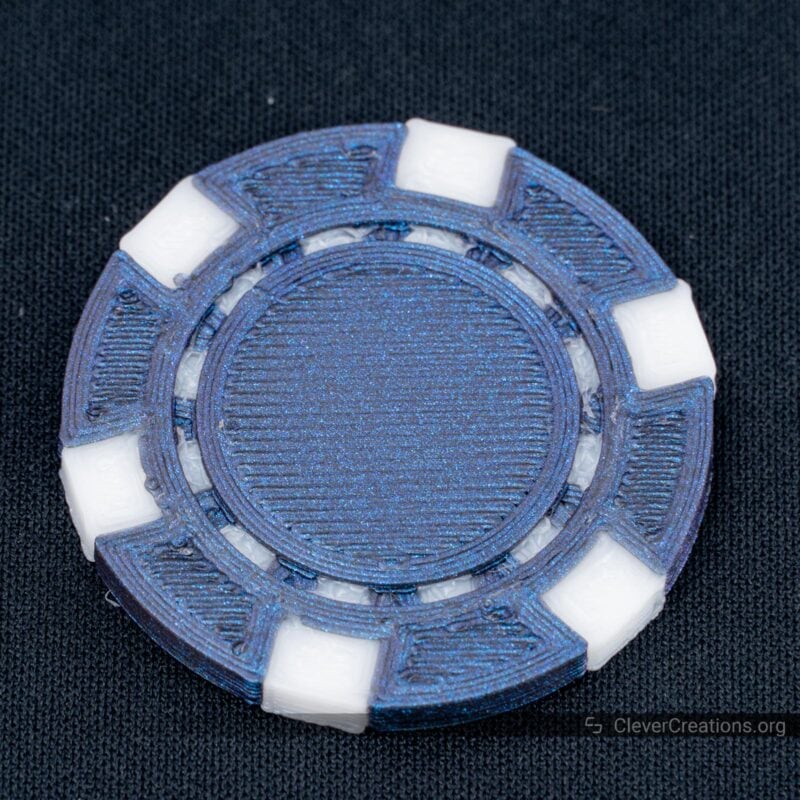
Dual Color Poker Chips
We printed these three poker chips with the three standard Luban presets: slow (60 mm/s), medium (100 mm/s), and fast (200 mm/s) to see how they would perform.
There’s a clear difference between the three, with the slowest result looking the best. The medium and fast results both show increasing inaccuracies and decreases in print quality.
Because the chips are only a couple of centimeters across and we are dealing with zoomed-in images, the print quality issues at the faster speeds aren’t as big of a deal as they might seem. When playing with the chips, you won’t notice the difference.

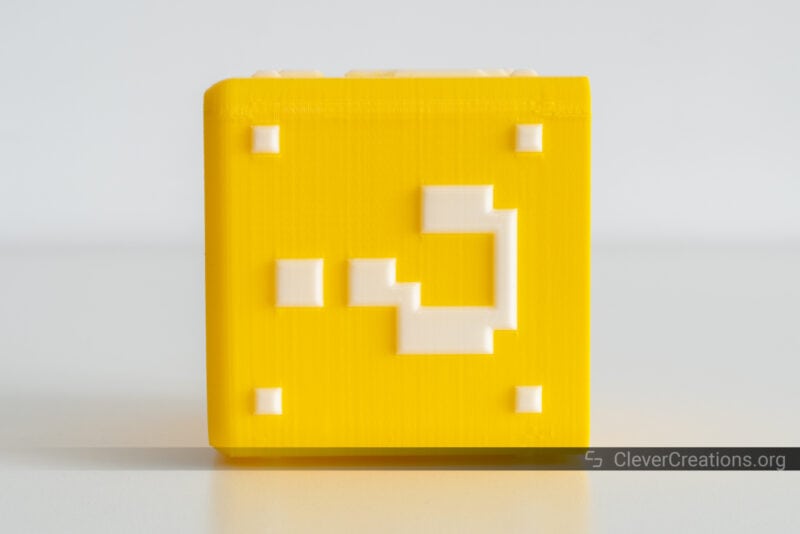
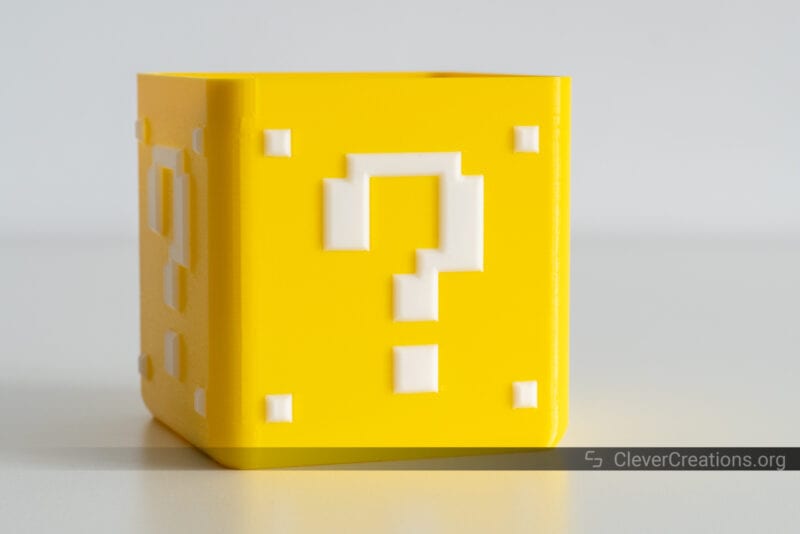
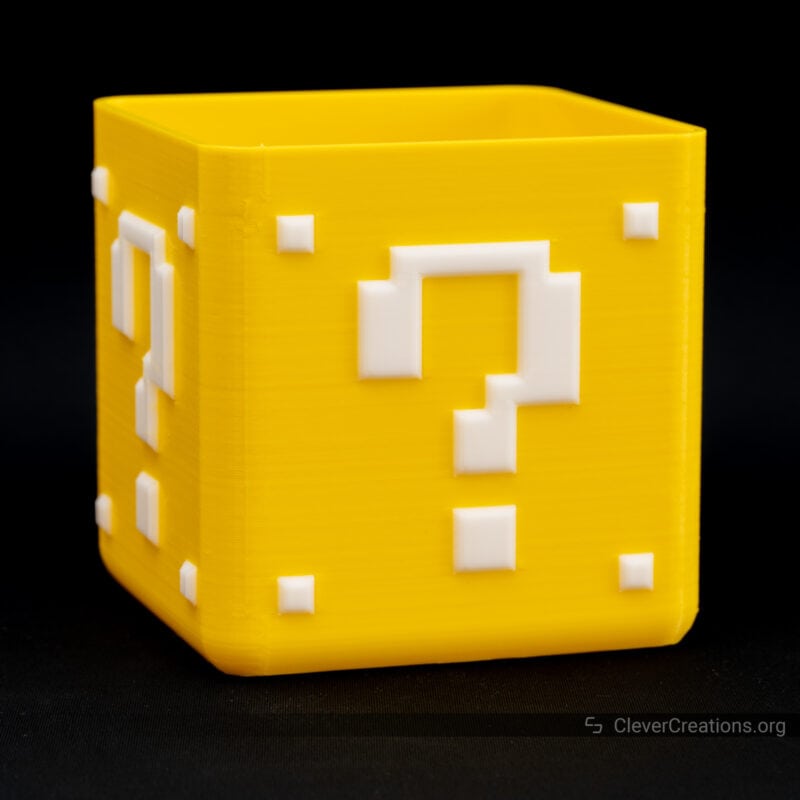
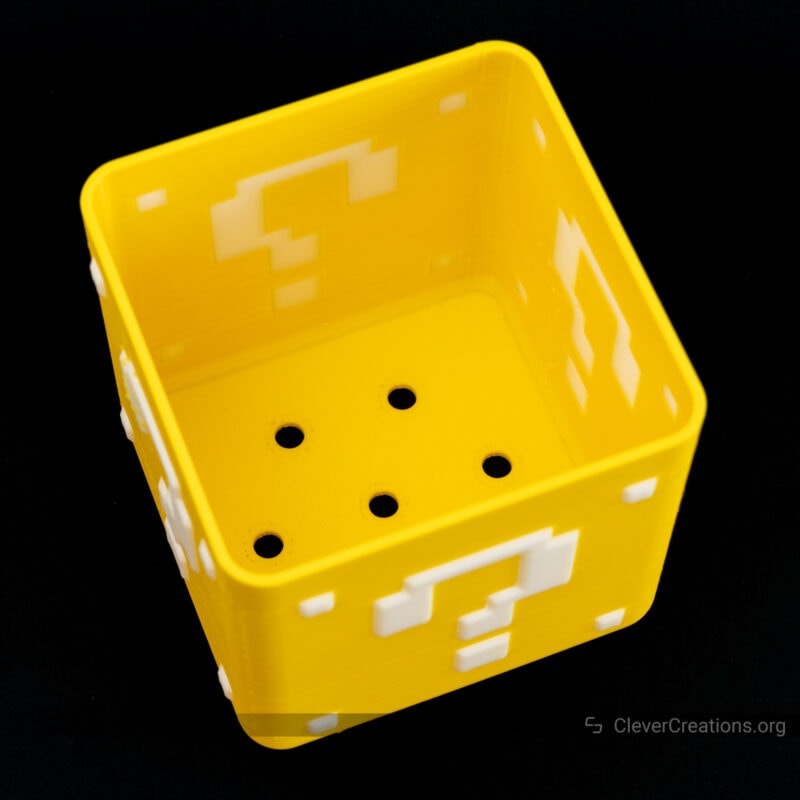
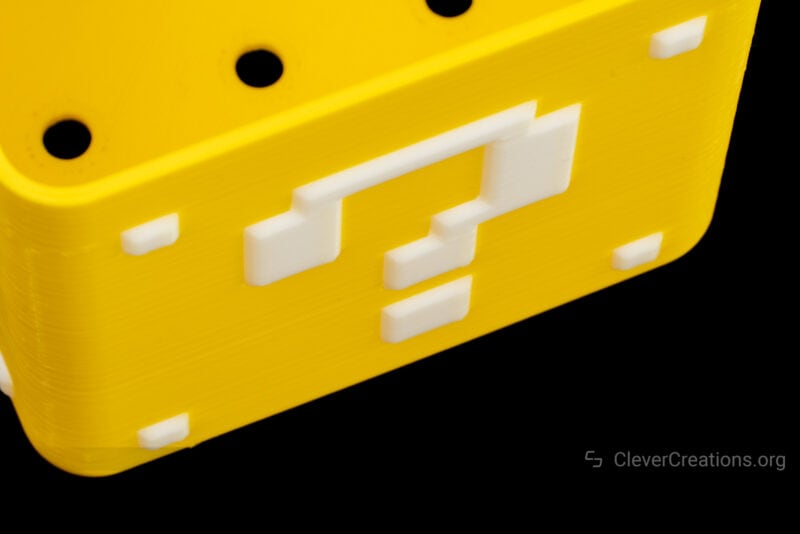
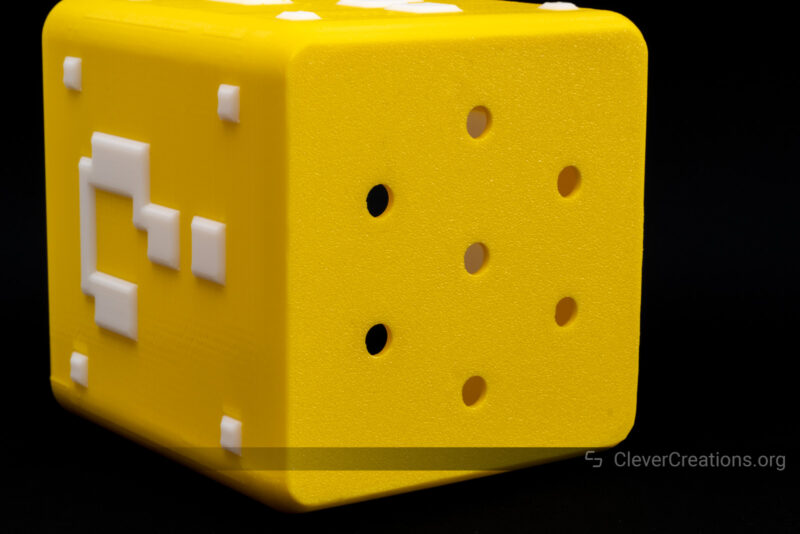
Mario Bros Planter
You already saw this planter above in the context of the Z-wobble issue, but we thought we’d share some more close-up shots to show the details. Aside from the layer lines, the print is flawless. No complaints.
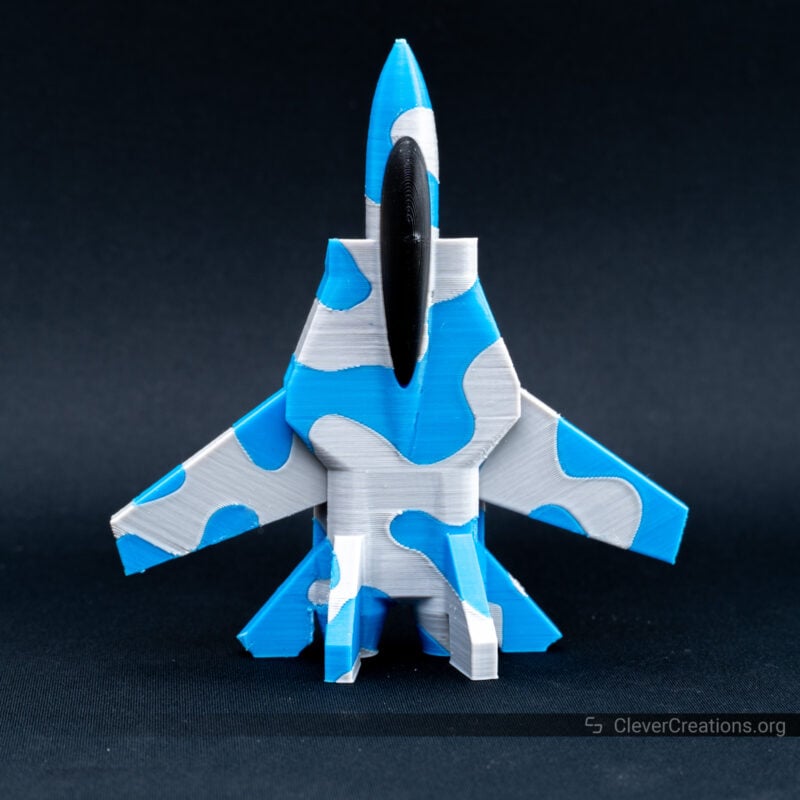
Print-In-Place Articulated F14
This F14 with articulating wings is one of our favorite prints for showing off the capabilities of a dual extruder 3D printer. Everything aligned well and the inner mechanism for the wings is fully usable.


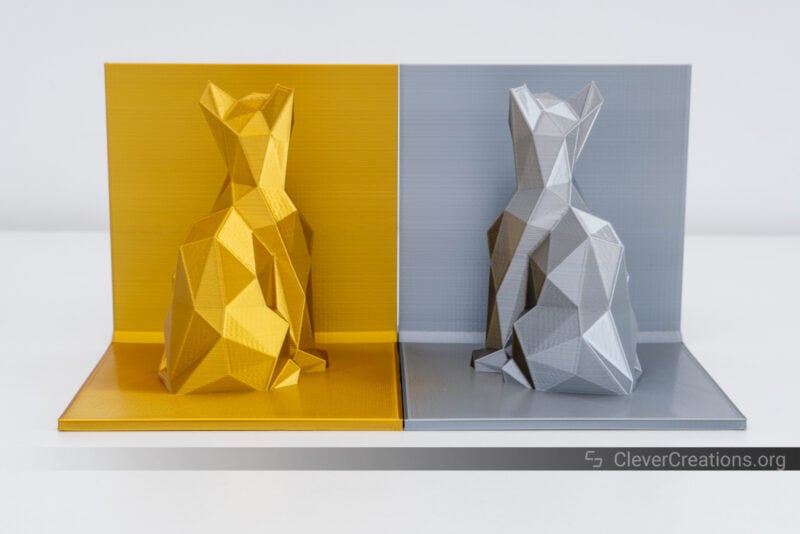
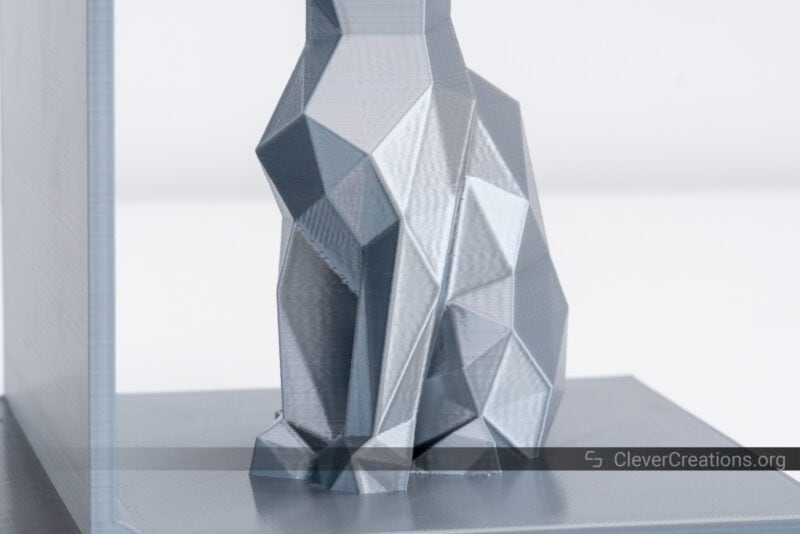
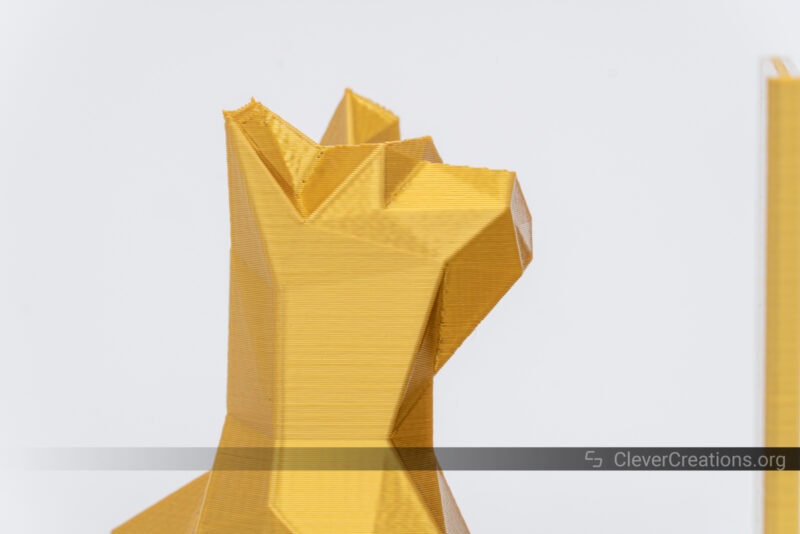
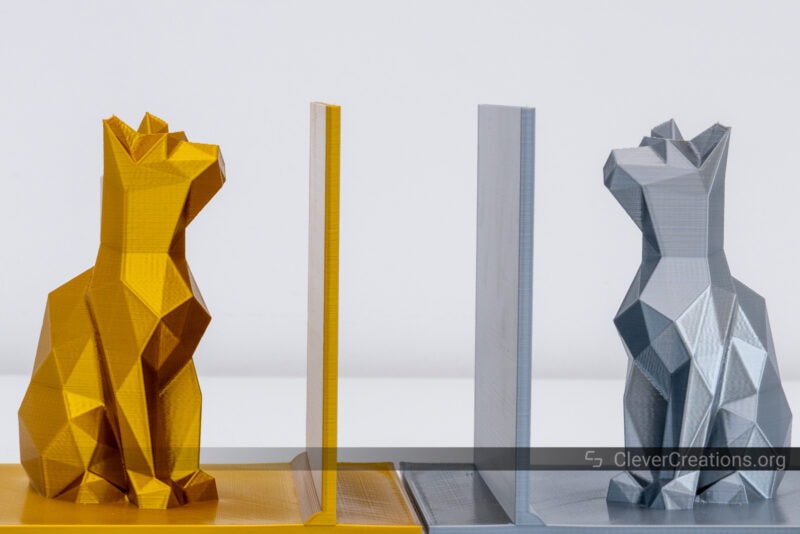
Low Poly Cat Bookends
These bookends were a great print for mirrored dual extruder 3D printing. After all, you need a cat looking left and one looking right if you want to use them as a set.
Overall, we’re happy with how they came out given the speeds we printed them at. Again, our studio lighting emphasizes the layer lines on flat vertical surfaces, but they are much less noticeable when looking at them in normal conditions.
Bottom Line: Is the Snapmaker J1s Worth Buying?
The Snapmaker J1s is a well-engineered dual-extruder 3D printer that offers great features and ease of use. Anyone can get their first multi-color and multi-filament 3D prints going in no time.
As a dual-extruder 3D printer, the J1s stands out for its fast printing speeds. Its print quality is good, even though its cantilevered bed does cause slight Z-axis wobble at higher print speeds.
The temperature evenness of the print bed also leaves some to be desired, with some dead spots and lower temperatures on the edges. With large 3D prints in materials like ABS, this can result in deformation and warping.
Aside from that, however, we can’t find much to complain about the J1s. Right now, there’s no other machine with the same feature set, build quality, filament compatibility, and dual-extruder printing speed.
Price-wise, the Snapmaker J1s 3D printer is demanding on the wallet. But if you need the dual-extruder capabilities that it offers, this machine is the best investment right now.