- Magnetic doors with detection sensor
- Built-in LED lights
- Added protection from laser light
- Integrated exhaust system
- Decent noise reduction
- Integrated touch screen mount
- Solid construction
- High-quality finish
- Takes up a lot of space
- Exhaust system is somewhat underpowered
- Time-consuming assembly
- Demanding price tag
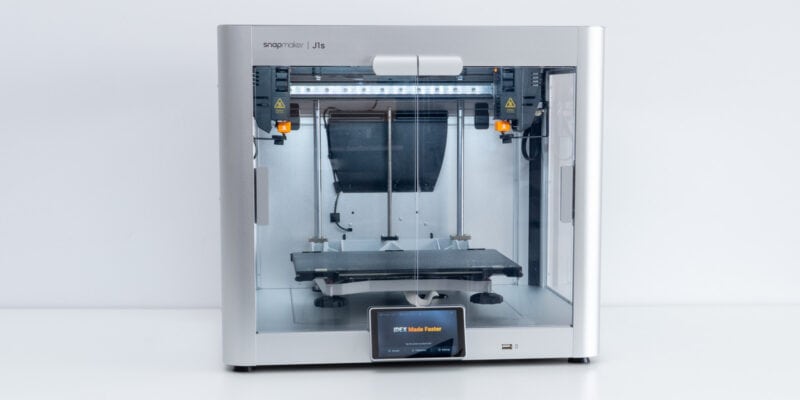
The Snapmaker 2.0 is one of the best 3-in-1 3D printers at the moment. If you are looking at buying it, however, you will notice that a lot of its accessories have to be purchased separately.
One of those accessories is the Snapmaker 2.0 enclosure. It is an optional add-on that many choose to purchase. It improves the 3D printing, laser engraving, and CNC milling experiences by providing additional features and protection for the user.
At $500 (for the A250T) to $600 (for the A350T), the price for the enclosure is a steep ask. You might wonder if it is worth the money or if you can’t build a custom enclosure with the same features. Or just run the machine without one altogether.
Today, we’ll review the Snapmaker 2.0 enclosure and show you what you can expect from it and whether it is worth its price tag.
Snapmaker 2.0 Enclosure Specifications
| A250T/F250/A250 | A350T/F350/A350 | |
|---|---|---|
| Price | Snapmaker | Snapmaker | Amazon | MatterHackers |
| Net Weight | 14.2 kg | 19.3 kg |
| Package Dimensions | 700 x 600 x 260 mm | 900 x 690 x 180 mm |
| Frame Material | Aluminum alloy | Aluminum alloy |
| Panel Material | Acrylic | Acrylic |
| Features | LED Strips, Exhaust Fan, Hose | LED Strips, Exhaust Fan, Hose |
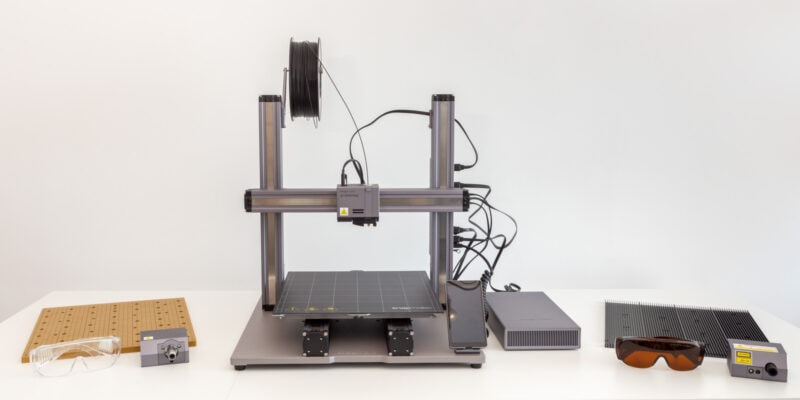
Unboxing
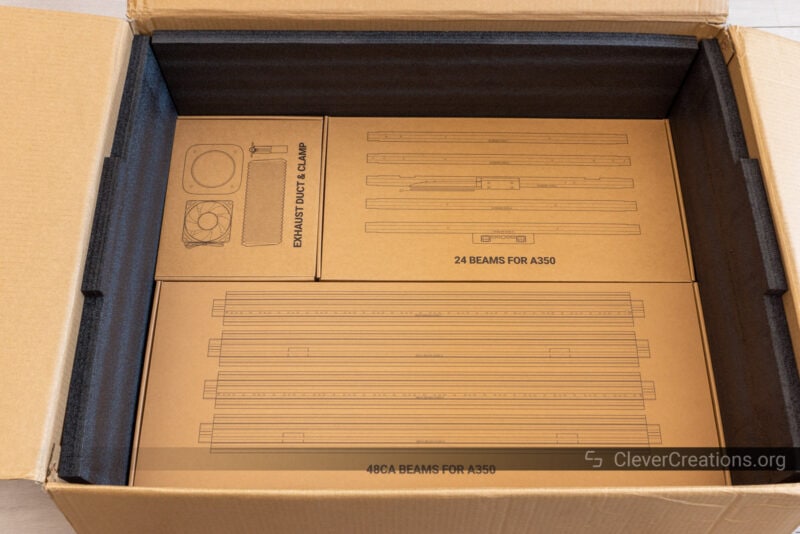
If you ordered the enclosure together with the Snapmaker 2.0, it will come in the same big box that also contains the machine.
With all components sorted in smaller boxes, unpacking is a joy. All boxes are clearly labeled and you can quickly sort the components that belong to the enclosure separately.
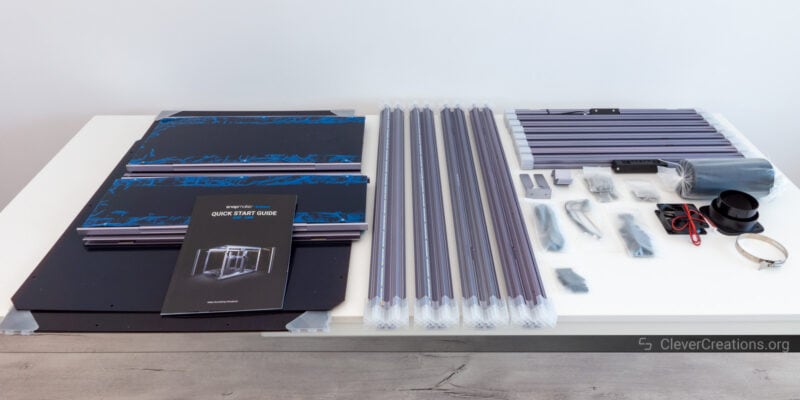
Everything you need for the enclosure is included:
- Aluminum extrusion
- Acrylic panels
- Exhaust hose
- Exhaust fan
- Various exhaust components
- LED strips
- Various hardware for assembly
- Hex keys for assembly
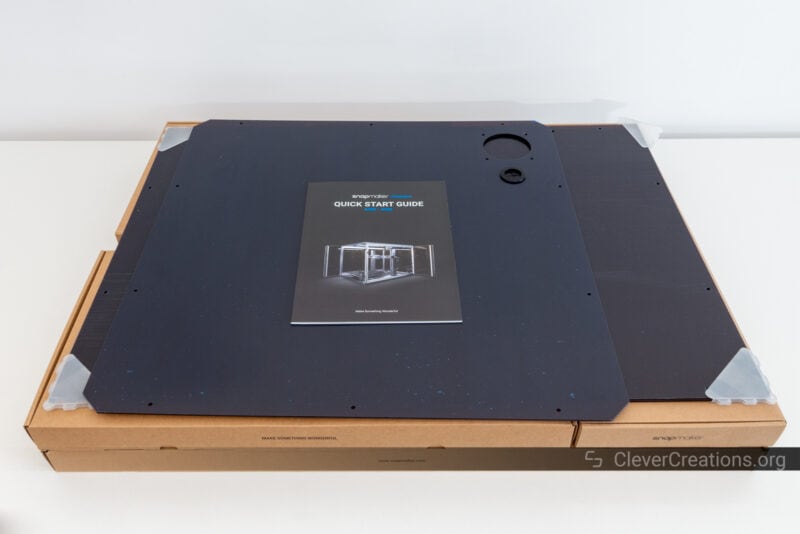
- Quick start guide
You will need to schedule some time for just the unboxing. There are many parts to identify, unpack, and organize.
Snapmaker 2.0 Enclosure Assembly
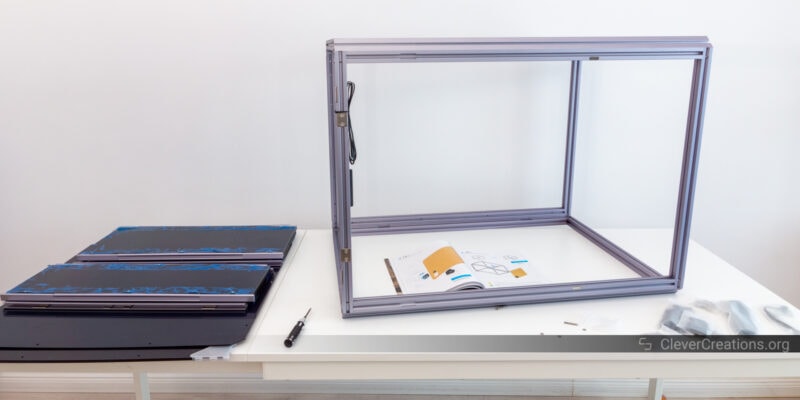
Like with the Snapmaker 2.0 itself, assembling the enclosure requires patience.
It’s difficult to give you an exact time estimate for the assembly. We spent a good amount of time making pictures in the process. You can expect that the process will take at least a couple of hours.
Finding enough room for the enclosure assembly can be a challenge. Not only do you need space for the enclosure on your desk or 3D printer table, but the loose parts, tools, and various unpacked boxes also need to be placed somewhere.
Also, if possible, we recommend you get help from a second person. The final weight of 14 or 19 kg—depending on if you got the A250T or A350T version—makes lifting the assembled enclosure a challenge. Its large size contributes to this as well.
Aside from that, the process is straightforward. Just make sure to follow the assembly instructions to the letter. If you don’t do this, you can run into issues.
For example, if you reverse some of the aluminum extrusions, you will realize later that you have to reverse the last steps and start over. Don’t ask us how we know.
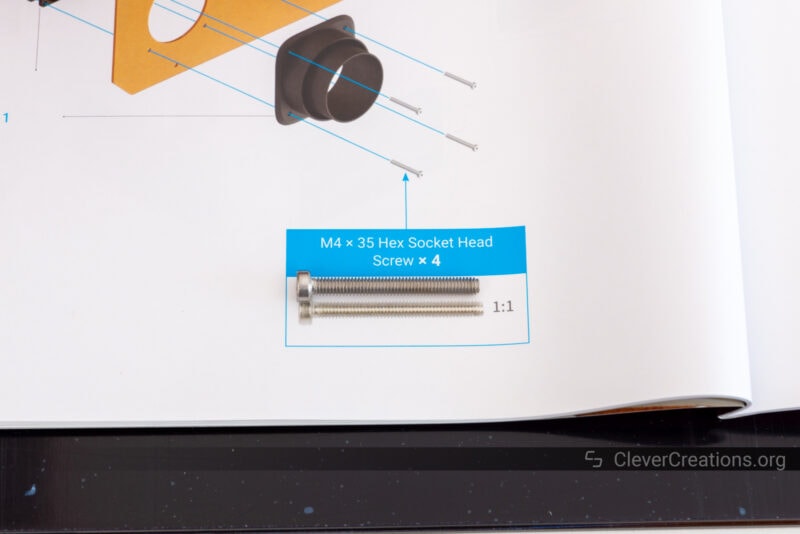
The instructions for the Snapmaker 2.0 enclosure are just as clear as those of the 3-in-1 3D printer itself. They are easy to understand, have clear diagrams, and even the screws you need for each step are displayed in 1:1 size. For us, it is a lot of fun to work with these kinds of instructions.
The only issue we ran into during assembly is that the heads of some of the long flathead bolts snapped off. It’s a common problem that other users have dealt with as well.
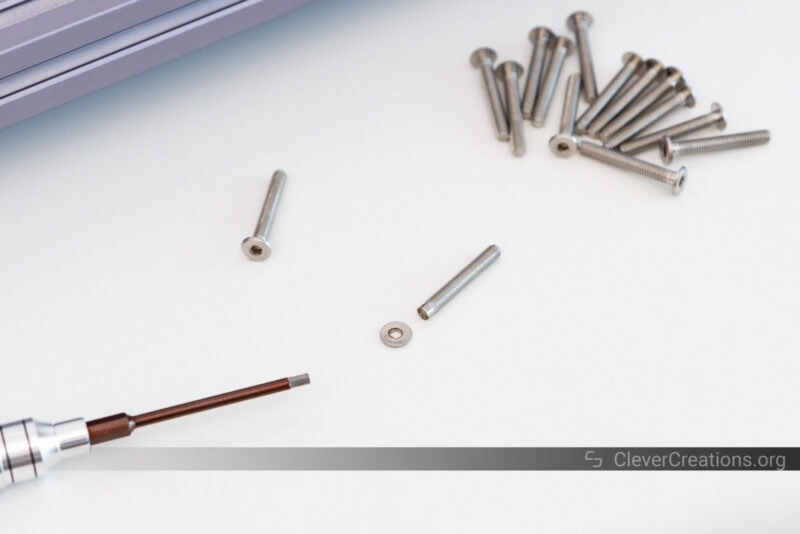
Luckily, Snapmaker ships three extra bolts. This happens to be the exact number that we snapped. The company is also not difficult about sending extras, so you can always contact them and ask for more.
For design reasons, the heads of these bolts need to be very low profile. The associated material reduction weakens them. It would be good if Snapmaker switches to stronger steel for these kinds of bolts in the future.
You can help prevent this issue by not over-tightening the bolts and inserting the hex key all the way. That way, the tightening torque gets distributed more evenly and the heads of the bolts will be less likely to snap off.
Snapmaker 2.0 Enclosure Features
The Snapmaker 2.0 enclosure is almost as versatile as the 3-in-1 3D printer itself. It provides a range of functions that are not only useful for 3D printing, but also for laser engraving and CNC machining.
Noise Reduction
Useful for all manufacturing processes is that the Snapmaker 2.0 enclosure reduces noise.
The official specifications of the enclosure list a 10dB reduction in sound levels. We haven’t done any measuring with calibrated equipment, but we can say that the enclosure makes a clear difference.
When 3D printing and laser cutting, the machine ends up nearly inaudible. The enclosure does a good job of containing the sounds of the stepper motors and other moving parts.
CNC machining is a different matter entirely, as you can imagine. You can still clearly hear the loud spindle and cutting sounds, but the enclosure does reduce some of this higher-frequency noise.
Low-frequency noise will still travel through your desk or table as there is no mechanism (e.g. rubber grommets) that reduces these.
It’s tricky to silence any CNC machine, so we won’t hold this against the Snapmaker 2.0 enclosure.
Tri-Fold Magnetic Doors
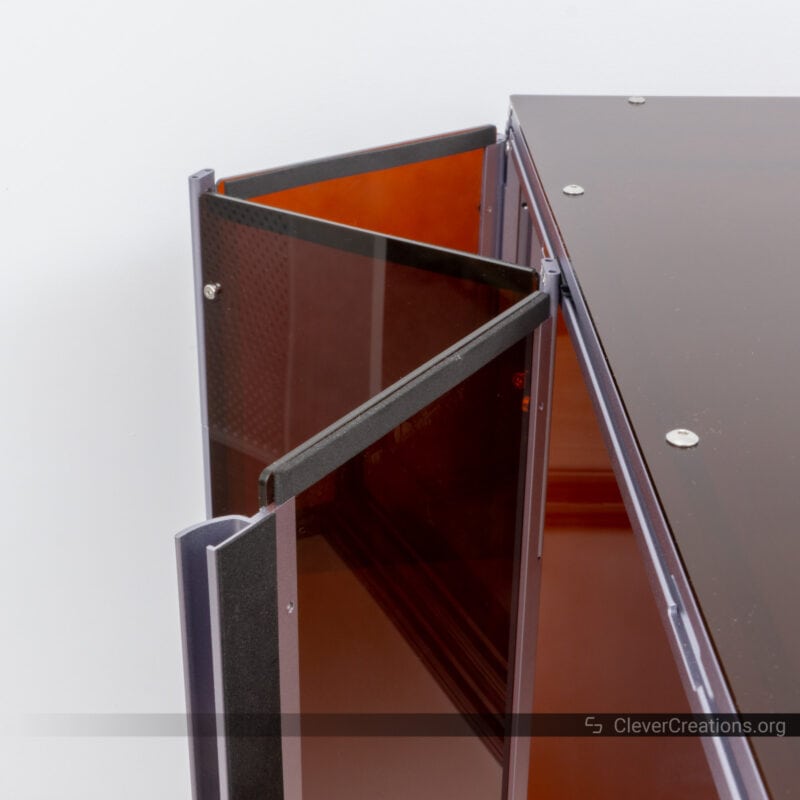
The enclosure of the Snapmaker 2.0 has two doors that fold in three parts. They are ideal for getting access to the machine from most angles, while still providing near-perfect enclosing when the doors are shut.
When closed, the doors are held in place by magnets. There is no need to worry about them flapping open at unwanted times.
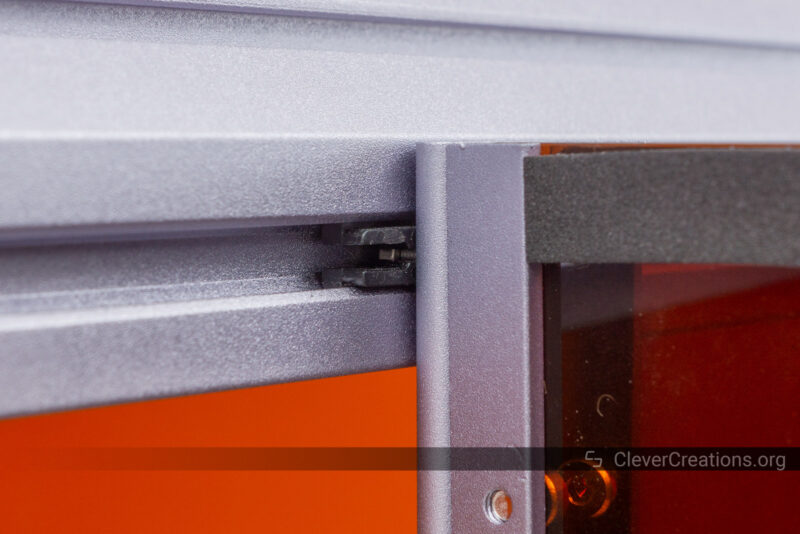
In addition, the enclosure has magnetic sensors that are hooked up to the Snapmaker 2.0. These detect whether the doors are opened or closed.
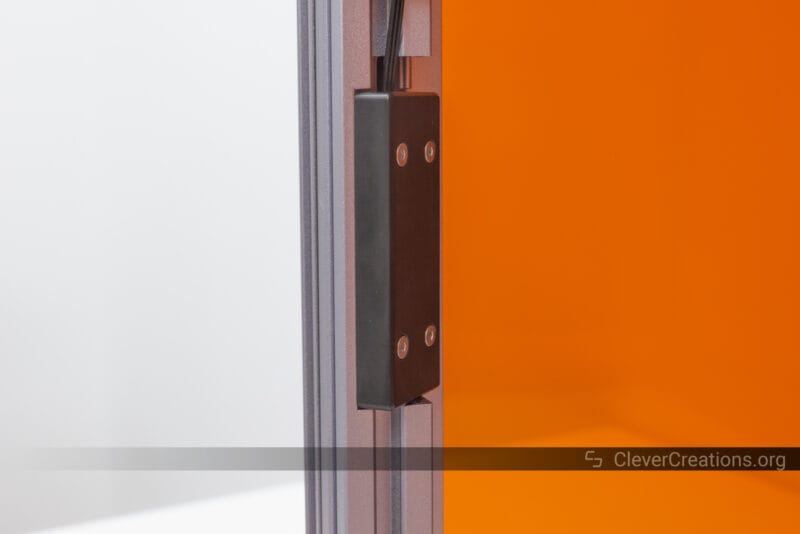
If the sensors detect that one of the doors is open, the Snapmaker 2.0 automatically stops the current process. This helps protect both your machine and yourself from any potential accidents.
This feature can be turned off in the settings, so you can also leave the enclosure open while 3D printing or CNC machining. Technically also while laser engraving and cutting, but that is not something you want to do for safety reasons.
A minor issue we encountered with the doors is that they don’t always slide very well in the aluminum extrusion grooves. You can address this by properly aligning the plastic sliders of the doors after installation and applying a small amount of lithium grease to them.
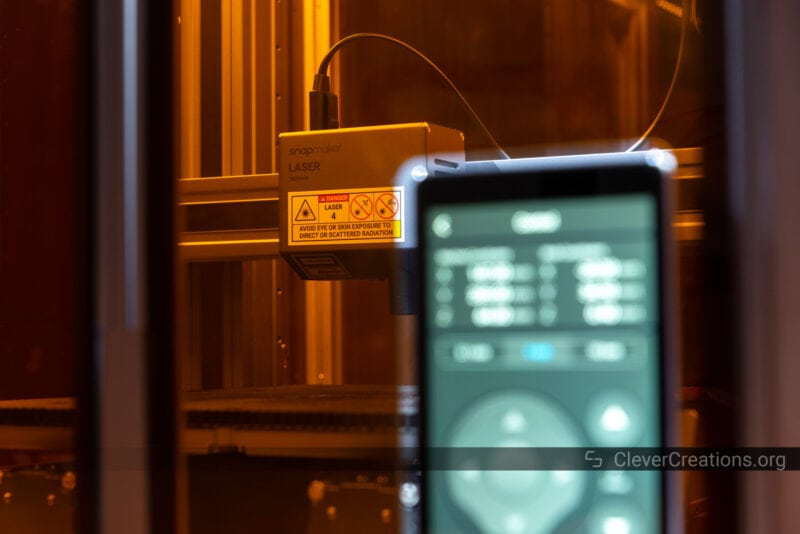
Laser Light Reduction
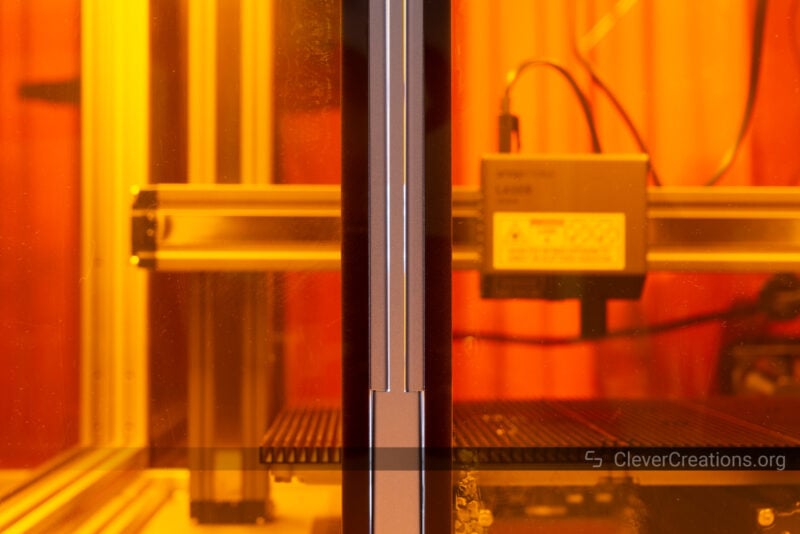
The acrylic panels of the enclosure are made of a material that blocks the 405 nm wavelength of the Snapmaker 2.0 laser modules. This helps protect your eyes from direct exposure to this light.
Unfortunately, because of the folding nature of the doors, you can still accidentally look into the laser light through the door gaps. This is part of the reason why you should still wear the included laser goggles when the laser is operational.
This reduces the usefulness of the acrylic panel protection a bit, but in the end you can’t have enough safety when working with lasers. It’s better to have this extra (albeit incomplete) layer of protection.
Dust, Debris, and Smoke Isolation
If you have your Snapmaker 2.0 placed in a dusty environment, the enclosure will help keep the machine clean and ready to go. It can be annoying to have to clean the machine of dust when you want to use it, but the enclosure removes this problem.
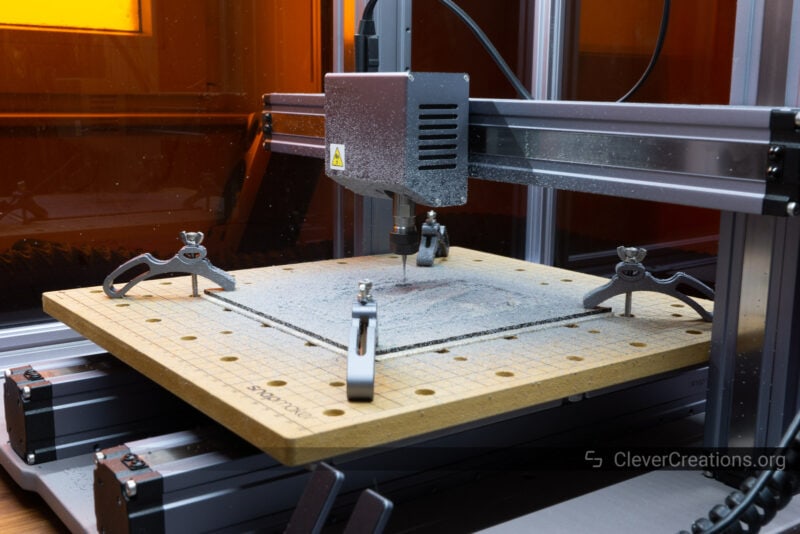
Conversely, the enclosure also prevents CNC debris from escaping and creating a mess in your work area. No more having to sweep up swarf all around the place after a machining job.
Finally, the enclosure helps contain the smoke generated when laser engraving. This is arguably the most important feature of the enclosure, as these fumes can harm your health when breathed in.
Even though the enclosure is not airtight, the negative pressure from the exhaust system fan—more on this further down—prevents the fumes from escaping through any gaps.
For this reason, unless you have a different enclosure or ventilation system, we believe the enclosure is a must-have for laser engraving with the Snapmaker 2.0.
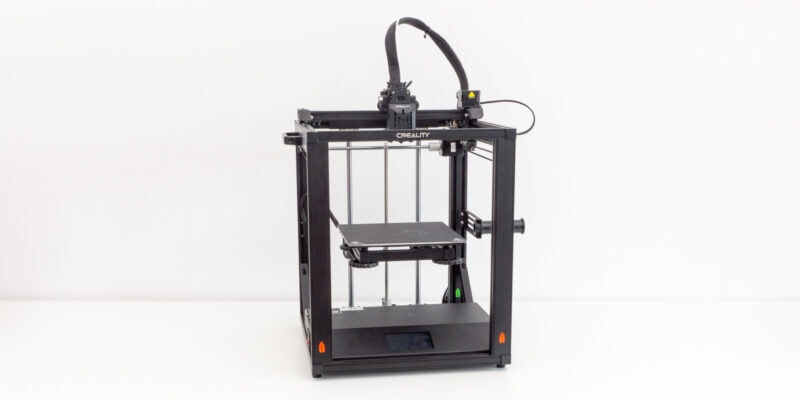
Exhaust System
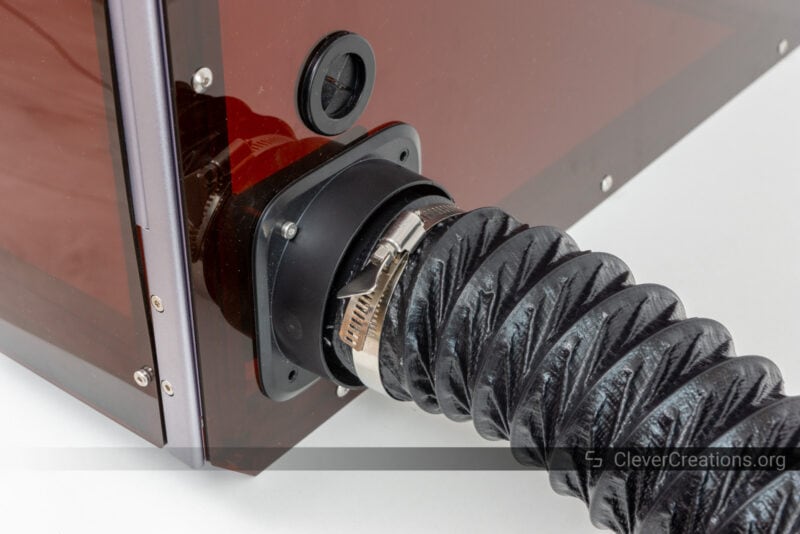
To remove laser engraving fumes, the Snapmaker 2.0 enclosure is equipped with an exhaust system. It consists of an exhaust port, an 80 mm fan, and a hose.
Overall, this system works quite well. It creates a negative air pressure inside the enclosure and directs the fumes through the hose and outside of the room the machine is in. For this reason, you want to place your Snapmaker 2.0 close to a door or window.
For most engraving and cutting jobs, this system is sufficient. However, when we laser cut MDF, the exhaust fan wasn’t able to cope with the large amounts of smoke created. And this was with the 1600mW laser.
The result was lots of smoke built up inside the enclosure, with some of it escaping through the gaps.
If you plan on doing lots of jobs like this, you might want to upgrade to a different 80 mm 24V fan with a higher air flow rate. The stock fan just doesn’t seem powerful enough for demanding jobs.
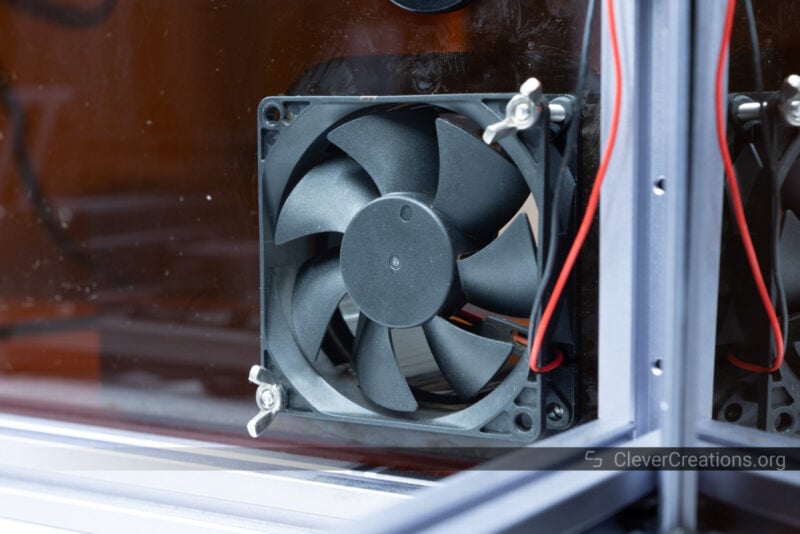
We swapped the stock fan out with a Papst AF80-00137 at some point. The fan in the image above is the original fan that comes with the enclosure.
In the same vein, the exhaust hose is on the short side. At 150 cm (5 ft) in length fully taut, it does not have much reach.
You can’t reposition the exhaust port on the enclosure, so if the hose isn’t long enough to reach a window or door, you will have to get a longer hose.
Its diameter is about 75 mm (3″), which is a size that is relatively easy to find. You can also 3D print an exhaust port adapter to fit a different diameter hose.
If you use a longer hose, you’ll likely need to upgrade the fan too. Its static pressure isn’t sufficient to push meaningful volumes of air over larger distances.
For most jobs, however, the stock fan and hose are sufficient. They also prove useful when 3D printing ABS and other filaments that emit large amounts of 3D printing fumes.
Temperature Control
This brings us to the next feature of the enclosure: temperature control. The enclosure creates a warm environment that helps prevent ABS, Nylon, and other high-temperature filaments from warping.
The heat that builds up inside the enclosure mostly comes from the heated bed of the Snapmaker 2.0. As such, it can be practical to preheat the bed and then close the enclosure for a while. This will warm up the enclosure before you start your 3D print.
In our testing, we got the enclosure temperature up to between 35 and 40°C (95 to 104°F), depending on the ambient temperature and the heated bed setting. It makes a considerable difference in 3D print warping compared to a drafty environment at room temperature.
Touch Screen Access
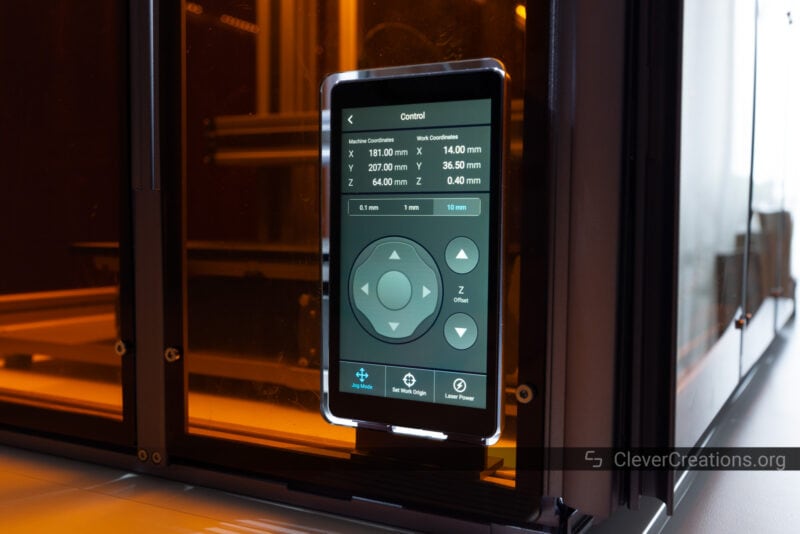
The Snapmaker 2.0 comes with an amazing touch screen and you might wonder how you can access it through the enclosure. The answer is simple: the enclosure is equipped with an opening and a bracket to magnetically mount the display to the enclosure itself.
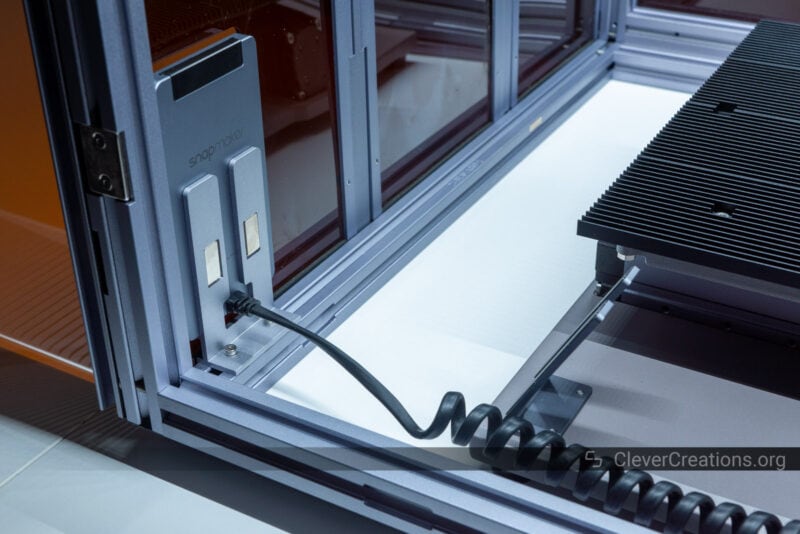
It is an excellent solution that allows you to monitor and control your jobs without having to open the enclosure.
Just like with the doors, there is a gap between the touch screen and its opening and you can be exposed to laser light if you look from the right (or wrong) angle.
On the new Snapmaker Artisan, this issue is addressed with an external touch screen on the electronics unit.
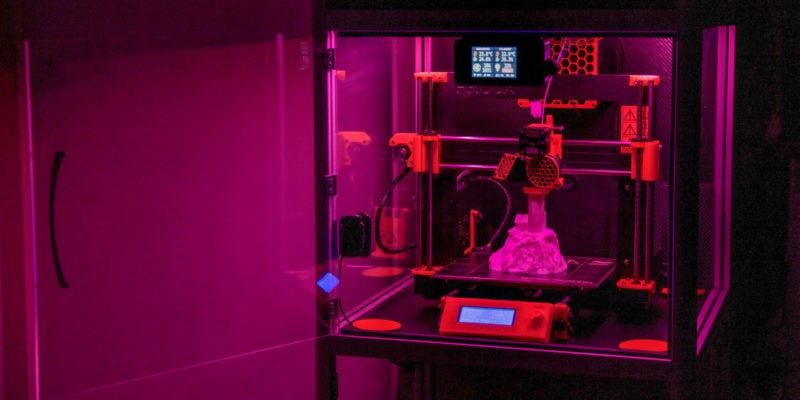
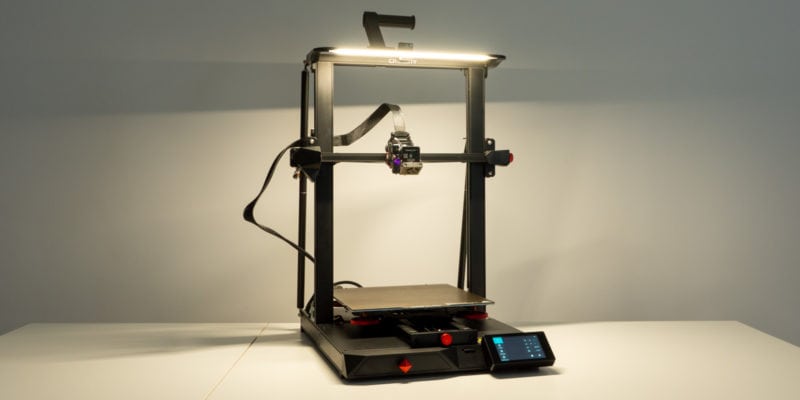
Built-in LED Strips
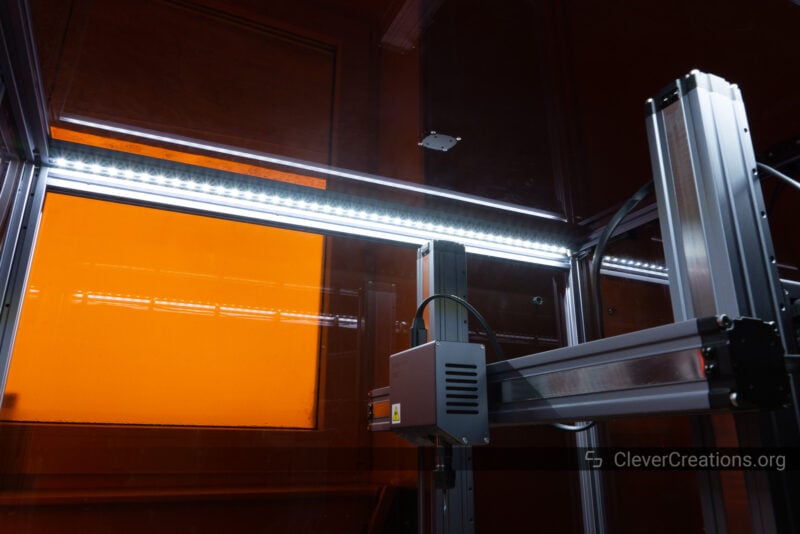
Because the acrylic panels are reflective, it can be difficult to see inside the enclosure. For this reason, the enclosure is equipped with two LED strips that light your Snapmaker 2.0 up from the inside.
Again, this is a great solution that prevents you from having to open the enclosure to see what is going on. You can control the LED lights with the touch screen as well as the Luban software, so you can easily adjust the lighting as desired.
The LED strips themselves are bright and have a cool color temperature. When looking through the orange acrylic panels, the light has a warmer, more natural color quality.
Other Uses
Aside from using the enclosure for the Snapmaker 2.0 itself, we have found that it offers a couple of other practical uses.
For example, practically every 400×400 mm laser engraver/cutter fits inside the enclosure. In our testing of the best laser engravers, the Snapmaker 2.0 enclosure has proven itself to be a great fit for these machines as well.
If you use the Snapmaker 2.0 as your main laser engraver/cutter, this is probably not relevant. The 10 Watt laser module accessory of the Snapmaker 2.0 is sufficiently powerful to do what most standalone diode laser engravers can do.
Another way the Snapmaker 2.0 enclosure is practical is for resin 3D printing. It fits both a resin 3D printer and a UV curing station at the same time. In combination with its exhaust system, it makes for a safe and easy to access resin 3D printing environment.
The enclosure isn’t worth purchasing for resin printing alone. For that, it is too expensive. There are plenty of cheaper enclosure kits with ventilation available.
Alternatives to the Snapmaker 2.0 Enclosure
There are also many other 3D printer enclosures you can choose from, but there is only one that fits the Snapmaker 2.0 perfectly: the original from Snapmaker themselves.
No other option gives you the same convenience of having access to the touch screen, folding doors, LED lights, an integrated exhaust system, and more.
While you could build something yourself, it would take considerable amounts of time and money for a result that is likely not as good as the original Snapmaker enclosure.
Conclusion: Should You Get the Snapmaker 2.0 Enclosure?
If you have a Snapmaker 2.0, there is no good reason not to get the enclosure as well. As long as your budget and workspace allow for it, that is. The convenience it adds far outweighs the cost for most users.
In our experience, the best feature of the enclosure is the ability to exhaust laser engraving/cutting smoke and resin 3D printing fumes. But the LED strips, touchscreen access, folding doors, noise reduction, and other features can’t be ignored either.
While some things can be improved, such as the gaps in the doors and the somewhat underpowered exhaust system, these are relatively minor issues that don’t take away from its primary purpose. And you can choose to upgrade some of these aspects later on if you want to.
One reason to not get the Snapmaker 2.0 enclosure is if you only plan on 3D printing with the machine. The feature that is most useful for 3D printing—temperature control—can also be obtained through much cheaper enclosures.
But given that nearly all users plan to make use of multiple features of the Snapmaker 2.0—that’s why you get a 3-in-1 3D printer after all—we can heartily recommend the enclosure for any Snapmaker 2.0 user.