
- Easy-to-use focusing system
- Excellent build quality
- Wide material compatibility
- Red positioning crosshair
- Awesome material pack included
- Good documentation
- Integrated Wi-Fi
- Lightburn-compatible
- Overly sensitive flame sensor
- Hard-coded machine settings
- Accessories are demanding on the wallet
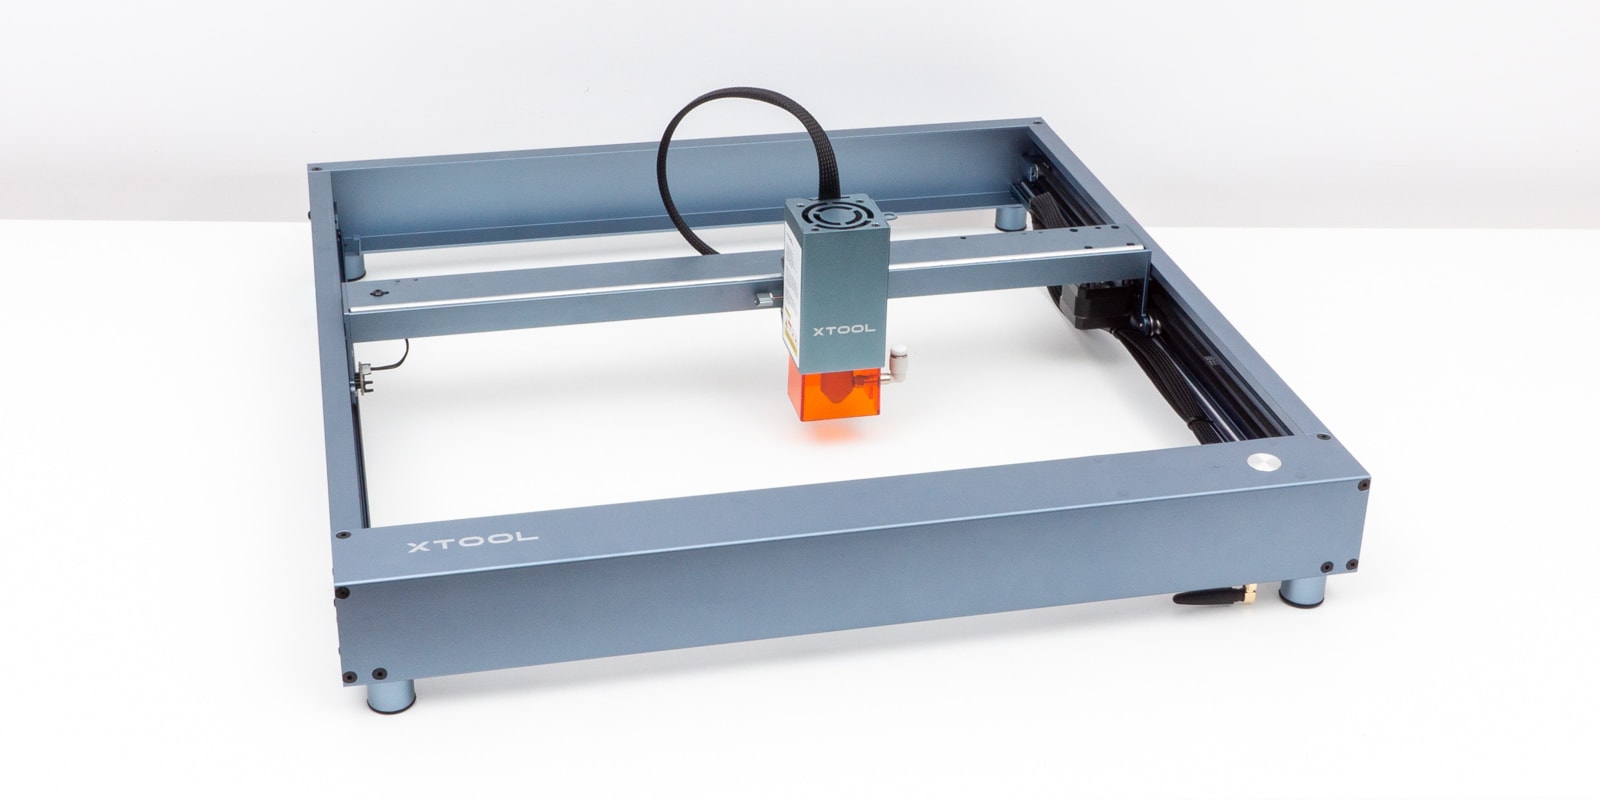
The new xTool D1 Pro laser engraver is an upgrade of xTool’s previous D1 model. From a better laser module to limit switches and an adjustable air nozzle, there are a lot of new features to help improve your laser engraving experience and results.
In this xTool D1 Pro review, we’ll examine the company’s newest flagship machine and show you what makes it stand out. We’ll also test the device and its accessories on a variety of materials. After reading, you’ll know exactly what you can expect from it.
Available Versions
The xTool D1 Pro comes in a couple of different flavors. They differ in both laser module strength and color.
There are two laser power options to choose from: 20 Watt and 10 Watt.
The top-of-the-line 20 Watt model is recommended if you want to laser cut thicker materials in a single pass, up to 10 mm for basswood and 8 mm for acrylic.
The 20W version is the best option if you want to start a laser engraving or cutting business. Its increased laser output power and speed make it ideal for more commercial applications.
We’ll be taking a look at the other offering today, the 10 Watt xTool D1 Pro. This laser module offers a good balance between power and price.
There used to be a 5 Watt version available, but it does not seem to be for sale anymore. It makes sense if XTool removed it from its assortment completely. It has too little laser output power for serious applications and it wastes much of the machine’s potential.
Aside from the difference in laser module power, the xTool D1 Pro is also available in two different colorways—metal gray and gold/red. There’s no functionality difference between the two, so that decision all comes down to aesthetics.
xTool D1 Pro Specifications
| xTool D1 Pro 20W | xTool D1 Pro 10W | |
|---|---|---|
| Price | xTool | Amazon | xTool | Amazon |
| Machine Power | 120W | 60W |
| Laser Electric Power | 84W | 40W |
| Laser Module Output Power | 20W | 10W |
| Laser Spot | 0.08 x 0.10 mm | 0.08 x 0.06 mm |
| Routing Speed | 400 mm/s | 400 mm/s |
| Working Area | 430 x 390 mm (16.93 x 15.35 inch) | 430 x 400 mm (16.93 x 15.75 inch) |
| Max. Workpiece Height | 50 mm (2 inch) | 50 mm (2 inch) |
| Max. Workpiece Height with X risers | 50 mm+X*45 mm(each set riser height column) | 50 mm+X*45 mm(each set riser height column) |
| Connecting Interfaces | USB, Wi-Fi, TF Card | USB, Wi-Fi, TF Card |
| Certification | FCC, FDA ,CE | FCC, FDA, CE |
| Operating Systems | Windows, macOS | Windows, macOS |
| Control Software | xTool Creative Space, LightBurn | xTool Creative Space, LightBurn |
xTool D1 Pro Unboxing
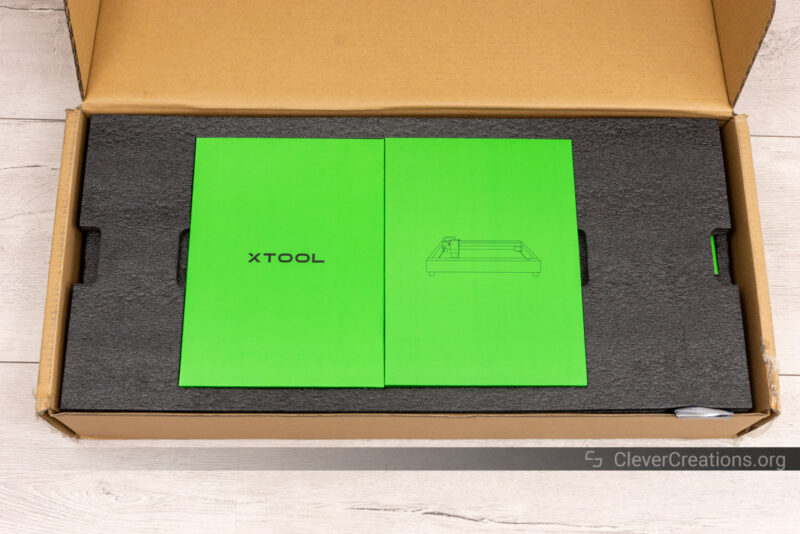
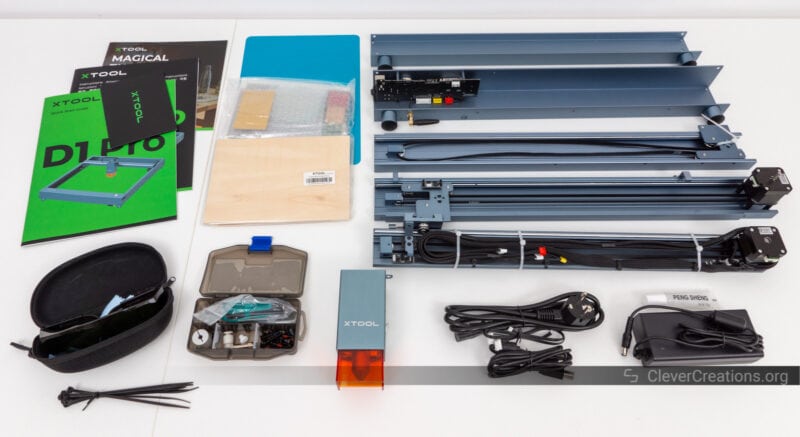
The unboxing of the xTool D1 Pro feels like a premium experience. It is clear that xTool knows how to package and present its products.
For example, no parts are floating around loose in the box. Instead, the medium-sized components are all nearly packaged in bright green boxes—the company’s color.
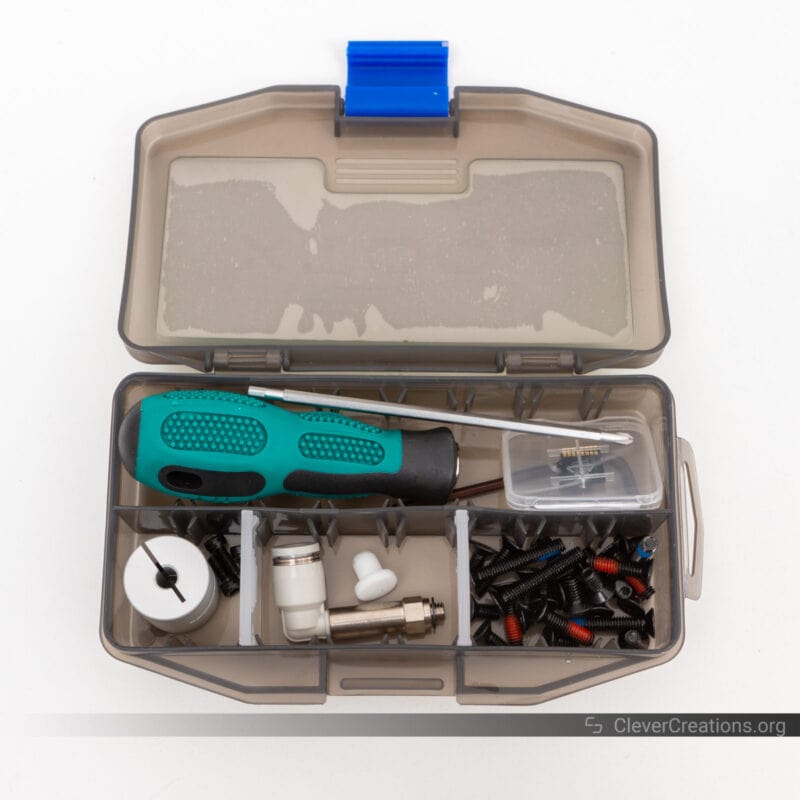
Small parts and the included tools all come pre-organized in a neat toolbox. It helps you keep all things in one place and saves you from having to look for things during the assembly process.
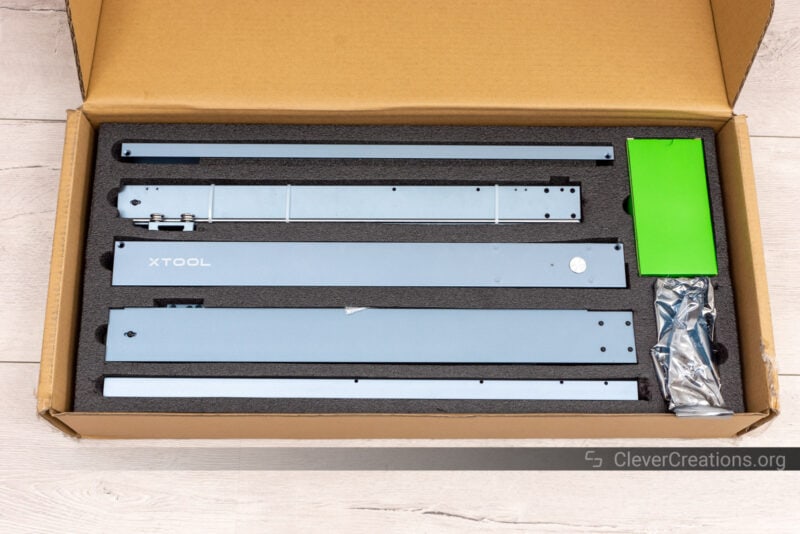
Included in the box are the following:
- Frame components
- Laser module
- Safety goggles
- Material pack
- Documentation
- Power cable and USB cable
- Cable ties
- Accessory box with various tools and components
- TF card
- A4 aluminum sheet (for under the material)
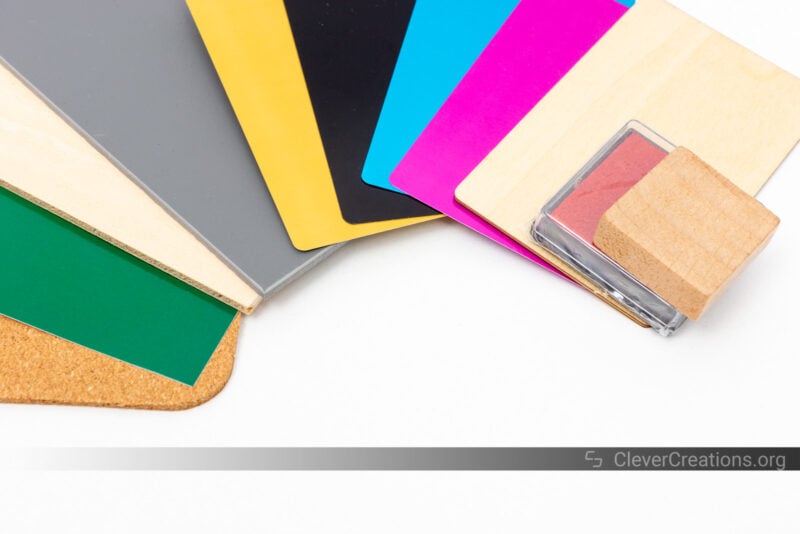
The included material pack is worth pointing out. It is a step above what we usually see included in laser engraver bundles. Plywood, cork, metal business cards, there are all kinds of materials included for you to experiment on.
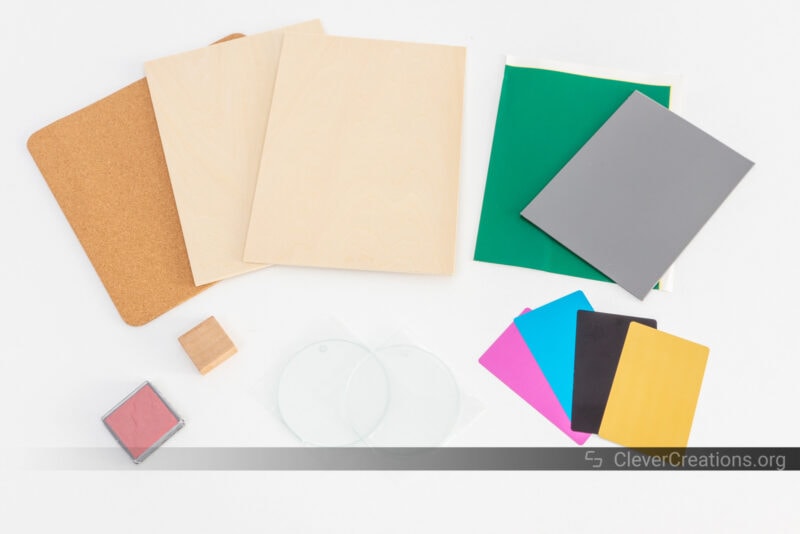
The only downside we could find about the whole unboxing experience is that all material samples are individually packed in plastic. We understand the need to prevent the materials from staining each other, but a paper solution would be better for the environment.
Getting Started
Like with most laser engravers, the xTool D1 Pro comes partially assembled. The most intricate parts, like those of the motion system, are already put together. But the main frame pieces you will need to connect yourself.
This isn’t a difficult task, as xTool provides clear instructions and helpful pictures throughout the assembly process. It’s another way in which xTool’s products stand out.
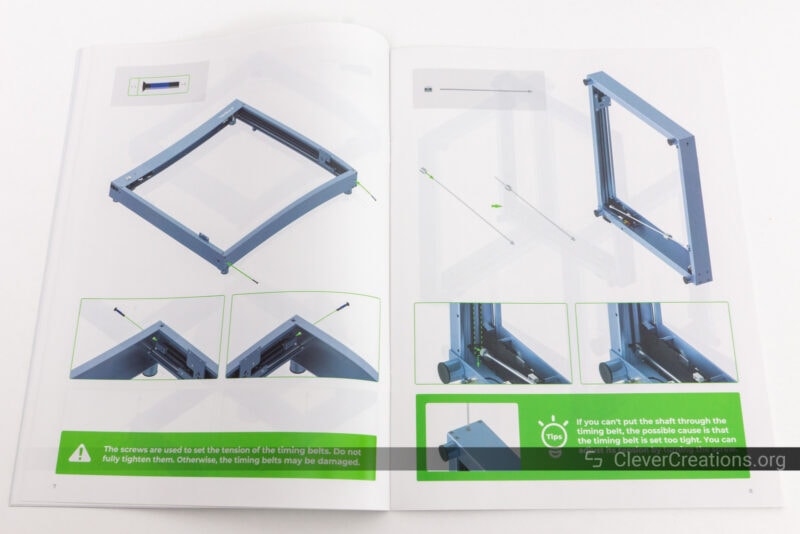
Most other machines we have tested are lacking in this department—with the exception being the Snapmaker 2.0 we reviewed recently—but xTool does a great job at guiding you through the assembly process without any guesswork.
We still have two minor pointers for you that aren’t covered in the included instructions:
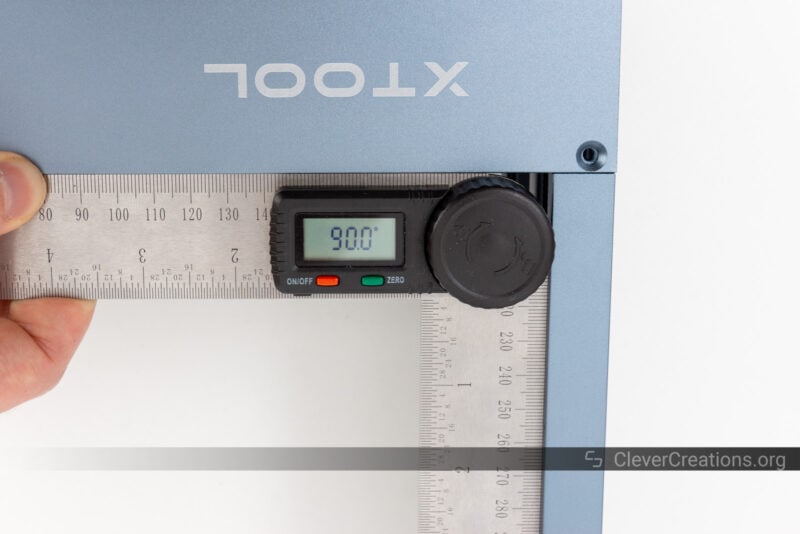
- It can be helpful to use a digital protractor or speed square for squaring the frame. There is a maximum 1° margin of error when assembling the frame. It’s not much, but for the best laser engraving results, you want the frame to be as square as possible.
- The linear rods on the X- and Y-axes come pre-greased. This saves you from having to do this yourself, but you do have to be careful not to touch them during assembly. If you do, you risk getting grease all over the rest of the machine.
Other than that, there is not much to note. You’ll have the xTool D1 Pro running in approximately 15-20 minutes. It’s all pretty straightforward and xTool’s instructions are very helpful.
D1 Pro Features
Laser Head
Aside from housing the laser module, the laser head of the xTool D1 Pro has a number of excellent features that make your laser engraving life easier.
Red Crosshair
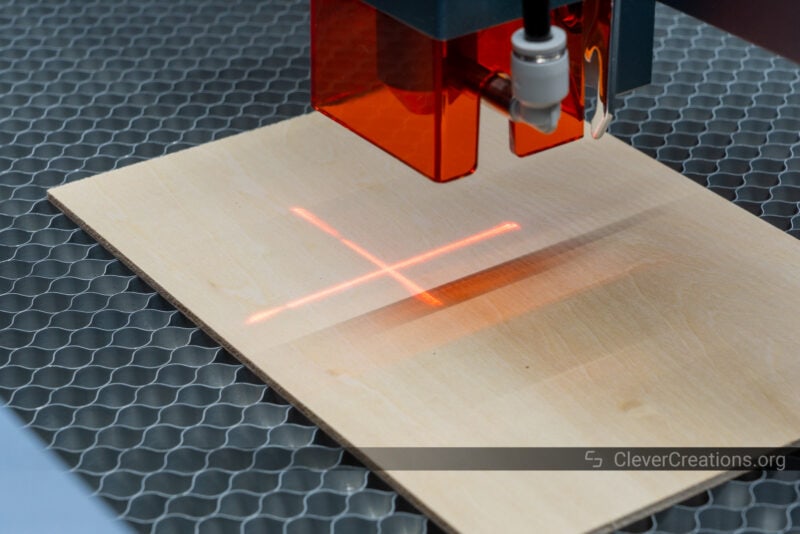
For example, it comes with a red crosshair that helps you accurately frame engraving and cutting jobs. It is offset from the laser spot, but the D1 Pro automatically compensates for that in its firmware.
It’s a practical addition that prevents you from having to use the laser module at low power to preview the outline of your job.
If you don’t want to use the crosshair, you can turn this feature off through the included xTool Creative Space software—more on this later. This setting persists after rebooting, so even if you want to use Lightburn, it won’t switch back on again unless you want it to.

Laser Beam Focusing System
The way you focus the diode laser of the xTool D1 Pro is well thought out. To adjust the height of the laser head, you can unlatch a single lever and then adjust the module. When it’s at the right height, you lock the lever again.
It works exceptionally well and we wonder why other manufacturers don’t use this system too. It’s a brilliant and easy way to focus the laser without having to fiddle around with tools.
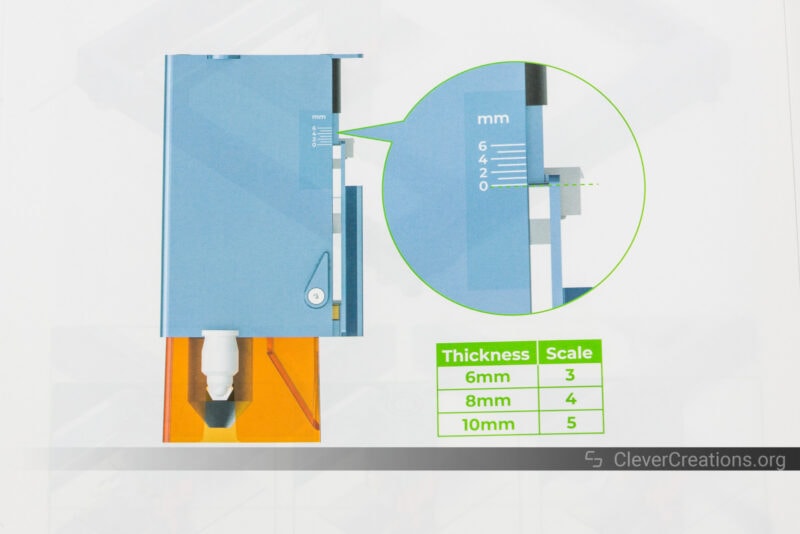
Additionally, to set the correct focus height, the D1 Pro laser head has a focusing bar that lets you lower it to the exact height needed to perfectly focus the diode laser on the material surface.
This bar magnetically locks in place at the top, so whenever you need to change the focusing distance, you can easily extend it and put it back in its place. No tools are needed.
Compared to other machines we have tested, these two things combined make focusing the xTool D1 Pro laser engraver and cutter a breeze.
The 20 Watt laser module version of the D1 Pro also includes an adjustment mechanism with a printed scale on the side of the laser head. It lets you set the focus distance to the exact center of the material you are engraving. This gives you a better cut quality than when focusing on the material surface.
We would have liked to see this adjustment mechanism on the 10 Watt version as well. While there are other ways to set the cut focus distance deeper, like with spacers between the laser head and material, an integrated mechanism is more practical.
Integrated Air Assist
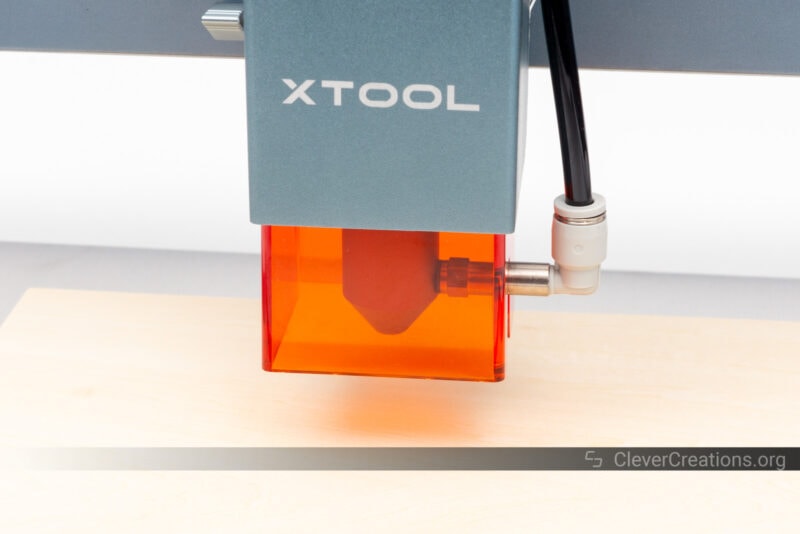
The laser module of the xTool D1 Pro features an integrated air assist nozzle, which is useful for improving engraving and cutting quality. It does this by directing high-pressure air that blows away smoke and debris from the area.
This only works in combination with an air assist pump or compressor. Without one, it doesn’t do much. The D1 Pro does not come with a compressor, but the company sells its own solution that works perfectly with the machine. We have covered it in more detail below.
Aside from improving the quality of your laser engraving and cutting, the integrated air assist of the xTool D1 Pro also helps to keep your laser lens clean. This is important to extend its lifespan and keep its performance at high levels.
You’ll still need to clean the laser module once in a while with a Q-tip and isopropyl alcohol, but less often than you otherwise would have to.
The air assist also helps reduce the chances of fires, as the air force pushes away any loose material around the laser area. This is especially useful if you’re working with materials that can produce combustible debris, such as wood.
In short, the air assist is a welcome feature. If you are buying a laser engraver that is as costly as the xTool D1 Pro, you probably want the best results. Using the air assist functionality lets you do just that.
Work Area
The work area of the xTool D1 Pro depends on the laser power of the machine. The 20 Watt version has 430×390 mm (16.93″ x 15.35″) of space for your projects, while the 10 Watt version offers 430x400 mm (16.93″ x 15.75“).
The difference is caused by the 20W laser module. Internally, it combines more laser modules (4x5W) and needs to dissipate more heat. This means a bigger overall size that reduces the effective space you can use.
This doesn’t mean that you can’t fit large projects in 20 Watt version. All versions provide more space than what we typically see on open-frame laser machines.
For example, the Ortur Laser Master 3 and Jinsoku LC-40 don’t even exceed the 400×400 mm barrier.
And if the additional length of the xTool D1 Pro is not enough, you can always use the official extension kit for a whopping overall size of 936×432 mm. This makes the machine perfect for laser engraving skateboards, surfboards, and other long items.
On the Z-axis, all versions have 50 mm of vertical space to fit your items. It’s a generous amount, but if you want to engrave or cut tall items, you can use the optional risers to increase it further.
These risers are stackable, so the more you add, the taller your workpieces can be.
This can be practical for the aforementioned skateboards or surfboards, but also if you want to use a rotary module for engraving large cylindrical items.
Altogether, there is more than enough space for basic laser projects. For those that need more, the xTool D1 Pro is one of the few laser engravers that you can extend later on both the Y- and Z-axis.
Safety
There are a number of features on the xTool D1 Pro that ensure your safety while using the machine. Not all of them are equally useful, so let’s go over them one by one.
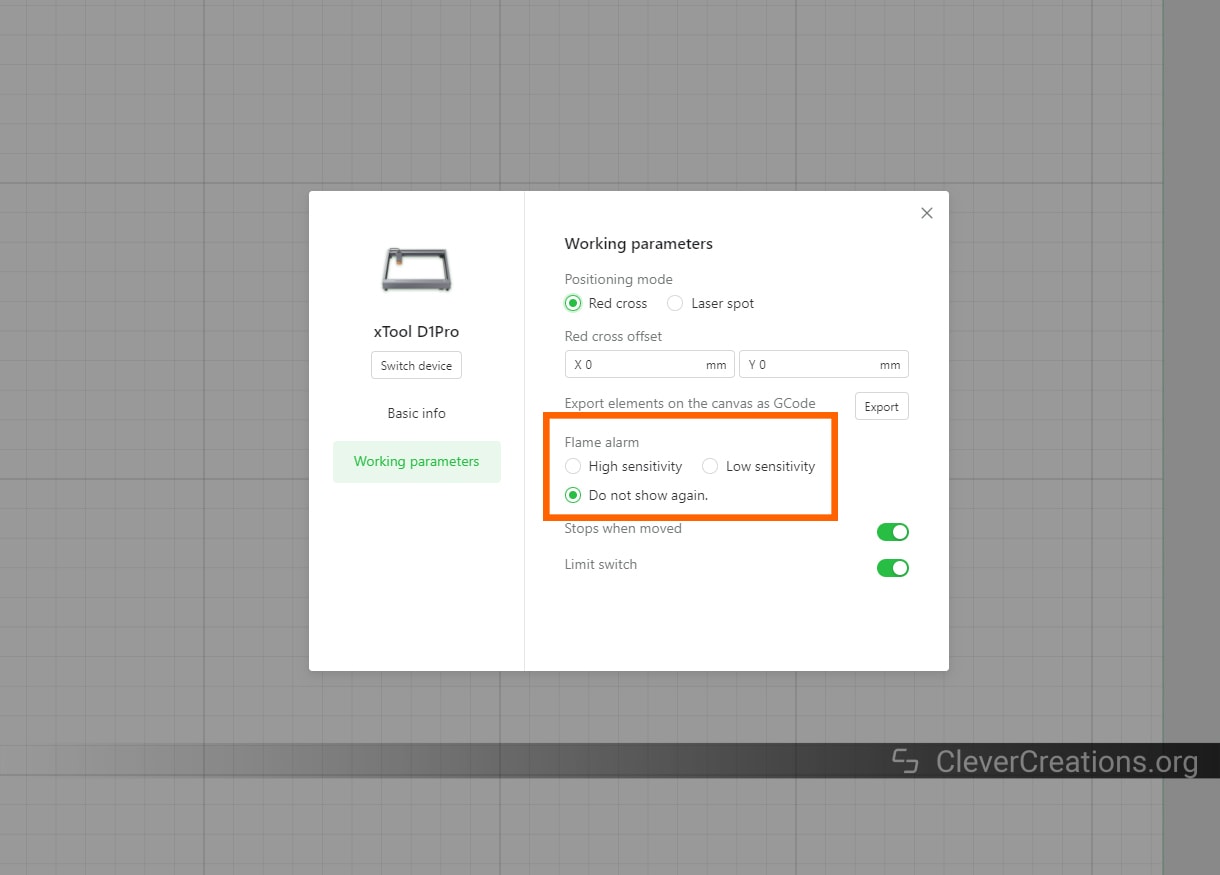
The first is the flame detector feature. By using a flame sensor, the machine detects any fires that may occur while operating the laser cutter. When it does, it sounds a loud alarm and disables the laser immediately.
In theory, this is great. In practice, we found the flame sensor to be too sensitive. It triggered at seemingly random moments, causing us to have to reset the D1 Pro and start the job over.
While the sensor is sensitive to outdoor and infrared light, our machine was sensitive even in low light conditions. So it seemed to be the sensor itself that was the problem and not the environment.
Luckily, there is an option to change the sensitivity of the flame sensor in xTool Creative Space. We ended up disabling it altogether, as we never leave our laser machines unattended anyway.
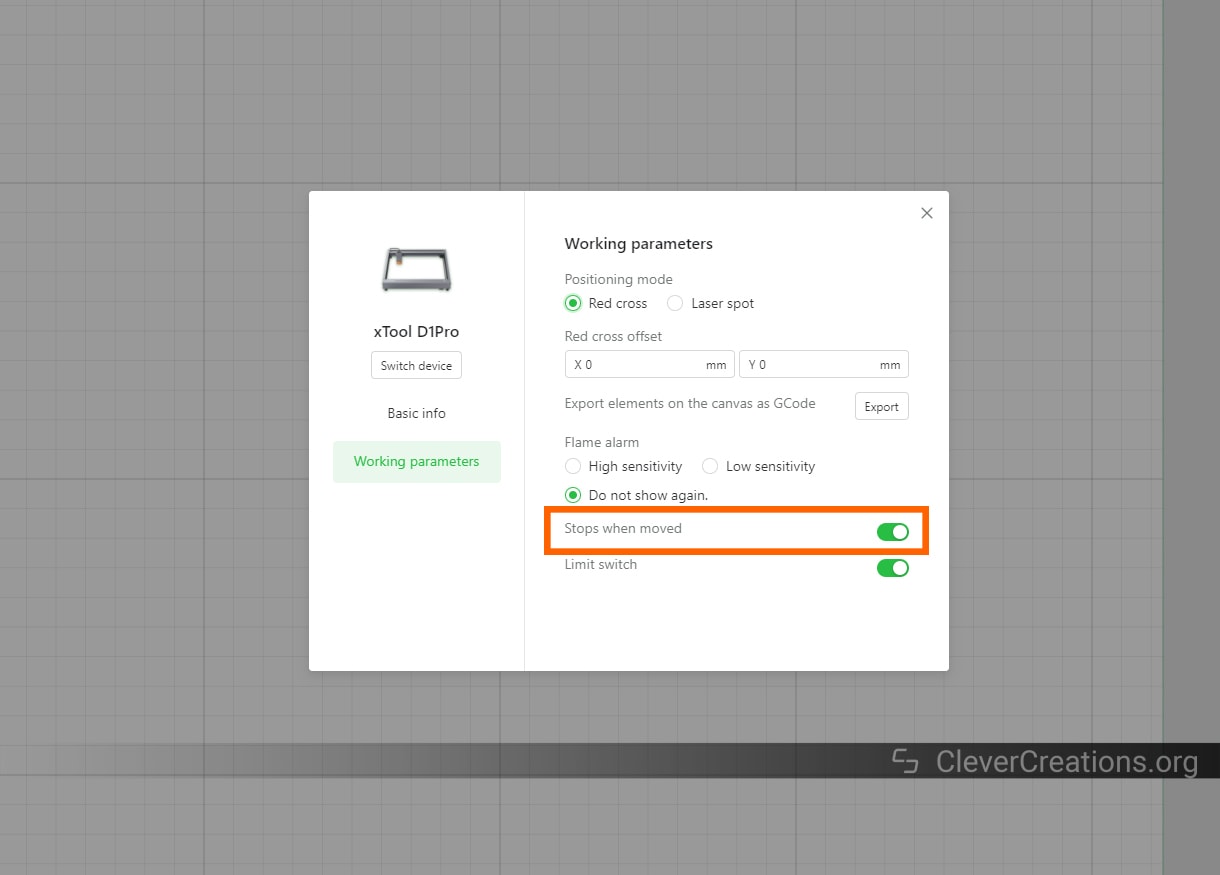
Next is the gyroscope sensor. It is used to detect the movement of the xTool D1 Pro. If the machine detects any unexpected movements, it will sound the alarm and shut down the laser for safety.
This feature worked as expected for us. No false alarms or anything like that.
Just like the flame alarm, you can turn this feature off in the working parameter settings. We don’t see any reason to ever do this unless perhaps the sensor is malfunctioning.
Missing from the xTool D1 Pro is an emergency stop, but this is not a big issue. The power switch is located near the front of the machine and it is fairly easy to flip it in case something goes wrong.
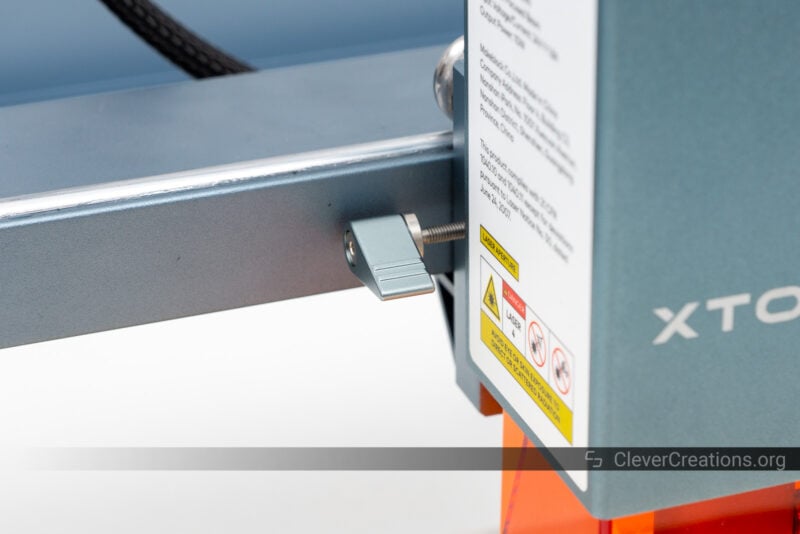
Limit Switches
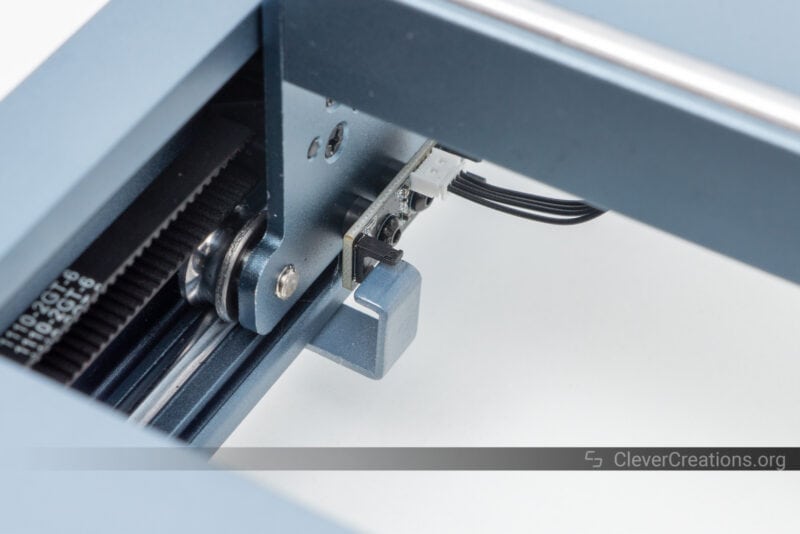
New on the D1 Pro are limit switches. These are used to automatically detect the x and y limits of your laser engraver. With that information, the device can tell exactly where the laser head is located in 2-dimensional space.
It’s a fairly standard feature that was surprisingly missing from the original xTool D1. We’re glad to see them added now. It prevents the laser head from accidentally crashing into the frame, a move that can cause expensive damage.
The limit switches on the device are optical and last longer than mechanical ones.
Material Compatibility
You won’t be short on materials you can work with, especially if you get the 20 Watt version of the xTool D1 Pro. Engraving and cutting paper, cardboard, cork, leather, fabric, wood, acrylic, MDF, and similar materials are all possible.
The 20W version boasts a maximum single-pass cutting depth of 8 mm in acrylic and 10 mm in basswood. While we didn’t have access to the 20W machine to test this, we can say that we haven’t caught xTool overstating any other specs. So the cutting depths are probably accurate.
Engraving is possible on more materials, such as stone, ceramics, glass, and metal. Some of these materials need preparation first, but then you can achieve decent results. The 10W version can do this as well, but slower.
If engraving metal is a big priority, however, you will be better off getting the infrared laser module. It is sold in a 2-in-1 kit with the D1 Pro which is perfect for those who want to do more serious metal engraving.
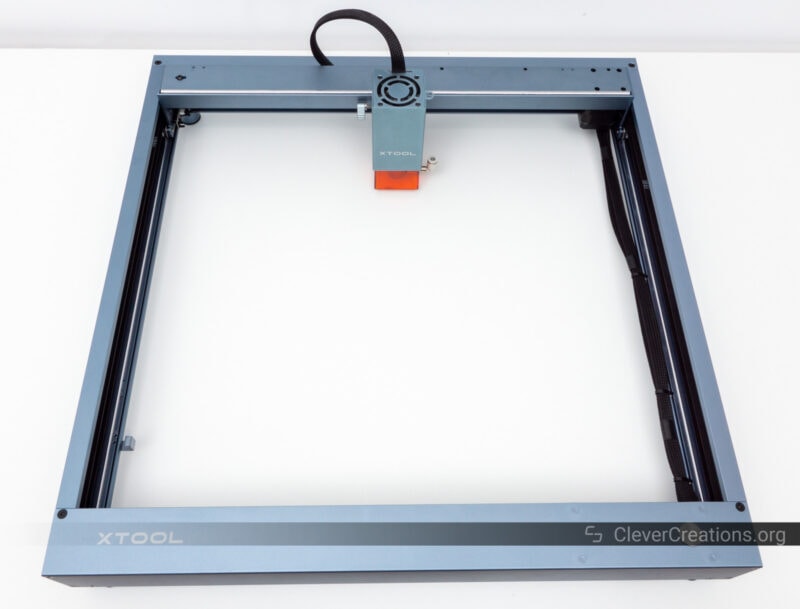
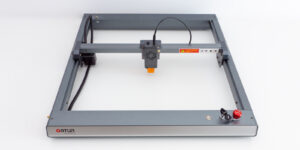
Build Quality and Construction
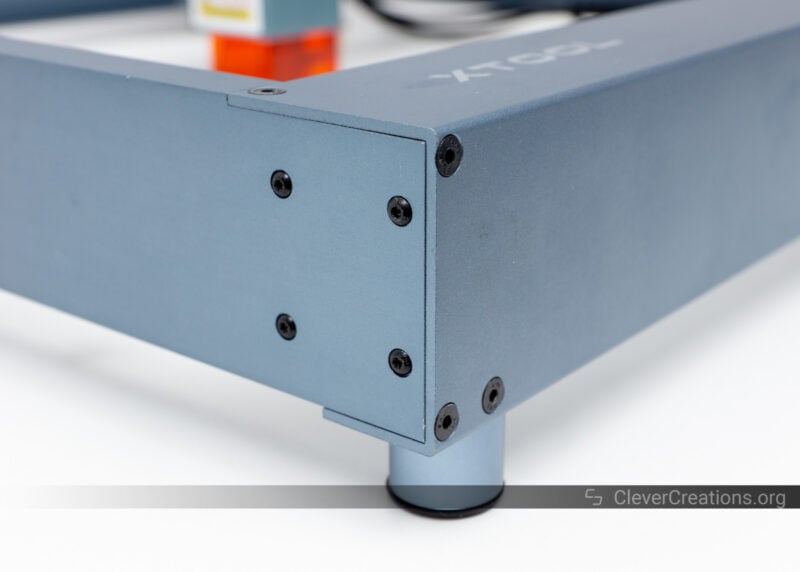
If we had to summarize the build quality and construction of the xTool D1 Pro in one word, it would be: solid. There’s nothing about this laser machine that feels cheap.
Like many laser engravers, the frame is made of extruded aluminum. xTool has chosen rigid C-beams that provide a lot of stability and strength.
The motion mechanism is standard, but with a small twist. Two NEMA17 stepper motors drive the X- and Y-axis through a belt and pulley system. This is exactly what you’d expect from a laser cutter.
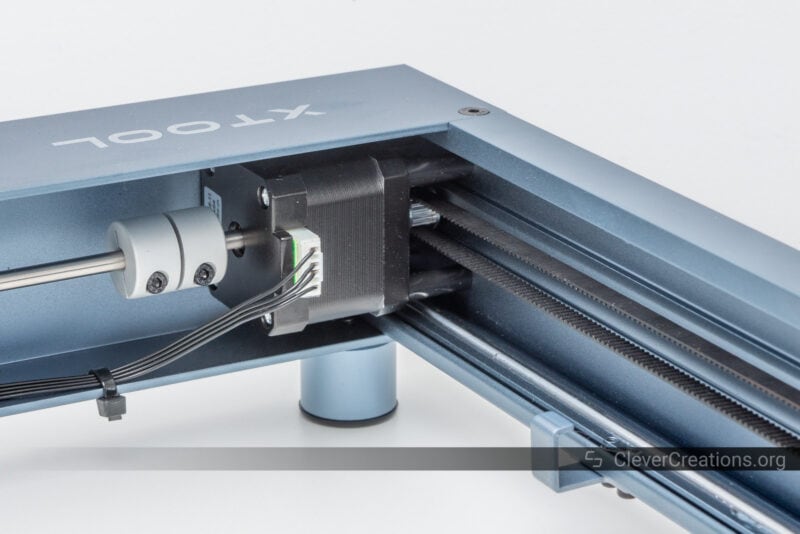
Other mechanisms, such as ball screws, make no sense in a fast machine that does not undergo heavy loads. Those are better for home CNC machines.
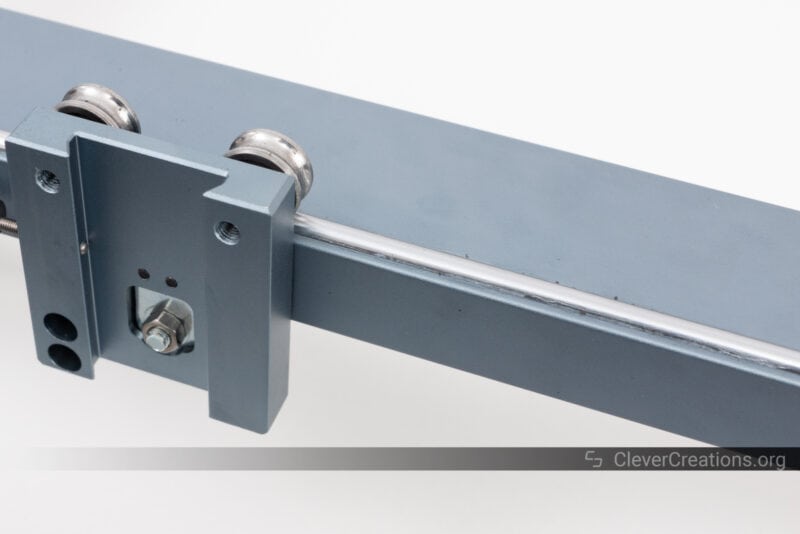
One way in which the xTool D1 Pro is different from its competition is that it uses steel linear rails and grooved roller bearings to guide the axes. We typically see either linear bearings, or plastic V-wheels.
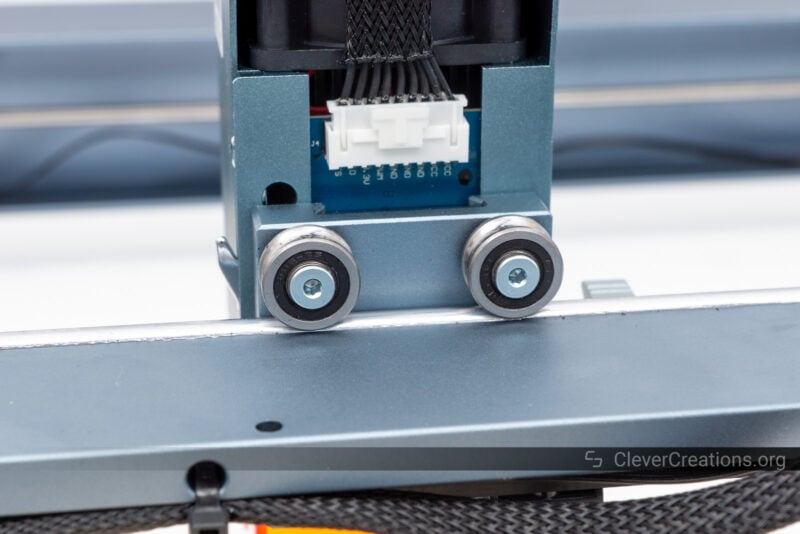
We really like the roller-bearing approach of the D1 Pro. It is extremely smooth and, to xTool’s credit, did not require any calibration out of the box.
The only downside is that you have to keep the roller bearings lubricated. If you don’t, the bearings will start to wear out and become less accurate. That’s just how repeated steel-to-steel contact works over time.
Once again, xTool has thought of this and included a decently-sized tube of grease with the machine. If you relubricate the machine every couple of months under medium use, the tube should last you quite a while.
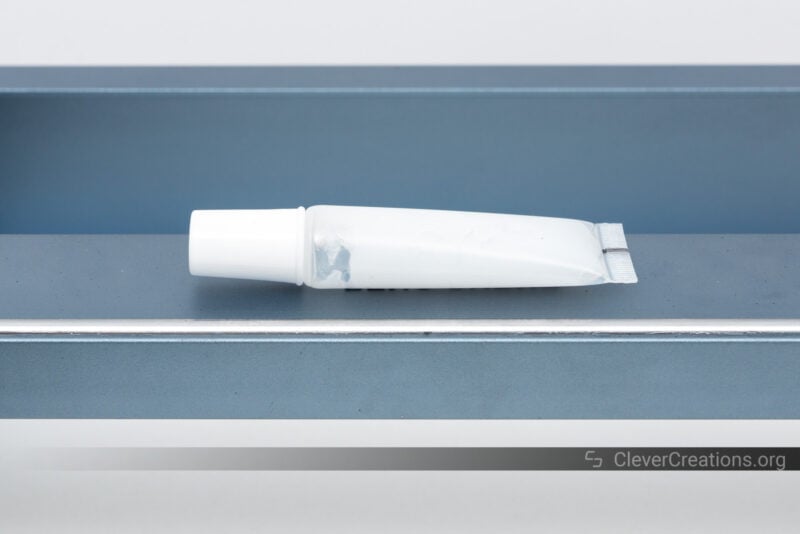
If you run out, some white lithium grease will do the trick. Make sure to avoid oils like 3-in-1 oil. These are way too thin and runny for this purpose. Also never use WD-40, since WD-40 is not a lubricant.
Electronics
The xTool D1 Pro boasts ‘advanced stepper motor drivers’, which we assume refer to the popular Trinamic TMC2208 or TMC2209s. These drive the stepper motors smoothly, but there are plenty of other drivers out there that would do the same.
They won’t make a massive difference in the quality of your laser engravings. Things like laser output power, correct settings, regular machine maintenance, and properly tensioning the timing belts are more impactful.
Ease of Use
Software
xTool Creative Space
There are several software options you can use with the D1 Pro. The most notable is xTool Creative Space. It’s xTool’s own freeware software, and for a manufacturer-supplied solution, it’s pretty good.
As is typical with included software, the options you have are basic. Or at least when compared to LightBurn.
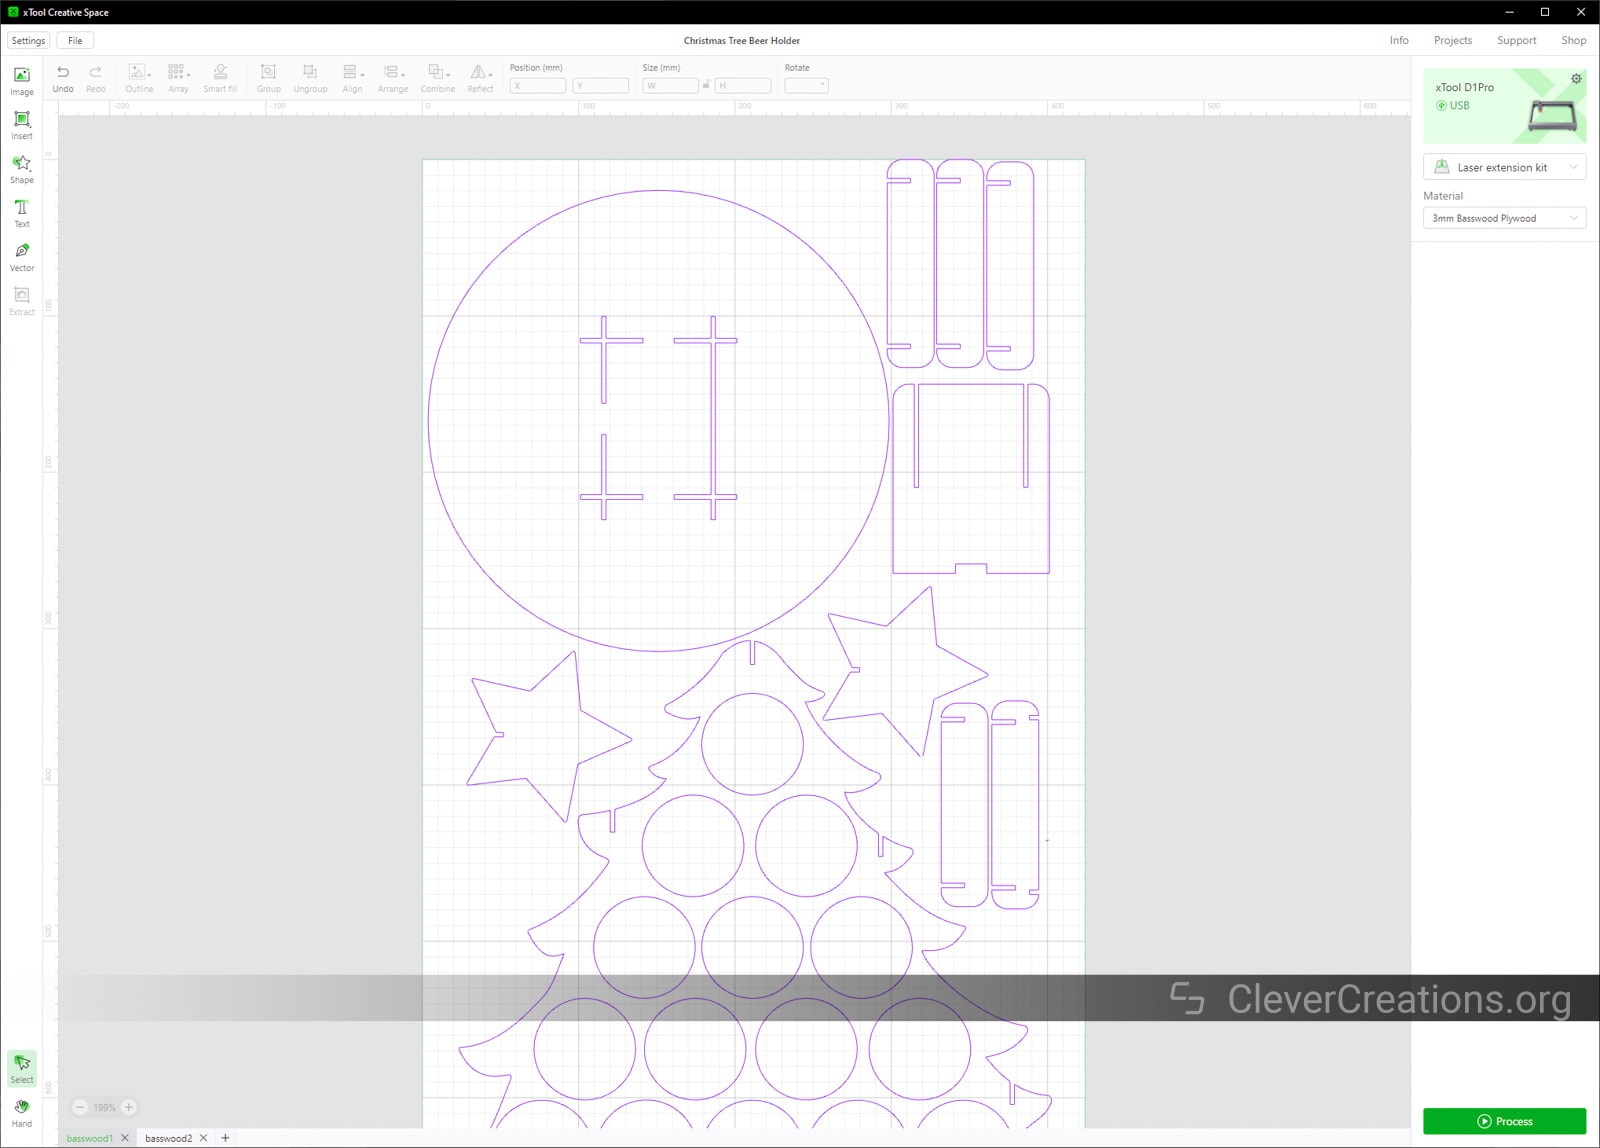
In Creative Space, you can make a job by drawing vector graphics, importing images from PNG/JPEG/SVG formats, and adjusting the laser settings like power and speed.
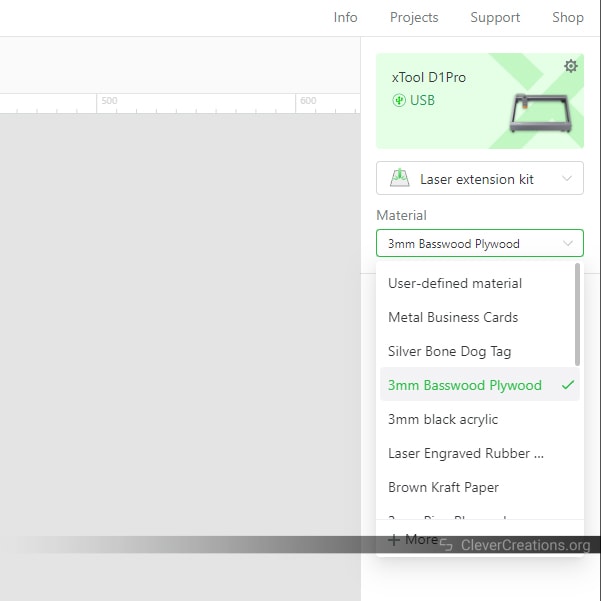
What we really like are the presets for xTool’s official materials. It allows you to quickly and easily select the proper settings without having to waste time and materials. Of course, you can add your own presets for other materials as well.
Another great addition is the option to directly download and set up projects from the project center. It’s a cool way to quickly get your hands dirty with laser cutting and engraving without having to create your own designs from scratch. You can customize the ones that are already there, so it’s super easy.

We counted 90 projects in total. It’s a good amount, but if you are looking for something niche-specific, chances are you won’t find it. The ones that are there are of good quality, however, with clear images and instructions.
What we don’t like about Creative Space is that in order to control your xTool D1 Pro, you must first set up a job. It’s a bit impractical when checking if the machine is operating correctly after assembly or hardware changes.
LightBurn
The second good option is the aforementioned LightBurn. It’s the best option for laser cutting and engraving, period. The software is incredibly powerful but comes at a cost. If you are serious about laser engraving and value your time, however, it is worth the $60 fee.
One thing we noticed is that xTool seems to have hard-coded the settings of the machine. So if you are looking to adjust things in the GRBL configuration through Lightburn, this is not possible. It is also not possible to do this through Creative Space.
You might want to do this to limit the maximum feed rates, acceleration, or other settings. It is unfortunate that xTool does not allow for this level of customization. It seems like the company prefers to keep things as straightforward as possible for its user base.
Other than that, however, LightBurn works fine with the xTool D1 Pro. If you want to use it, you are recommended to follow xTool’s LightBurn setup steps.
User Interface
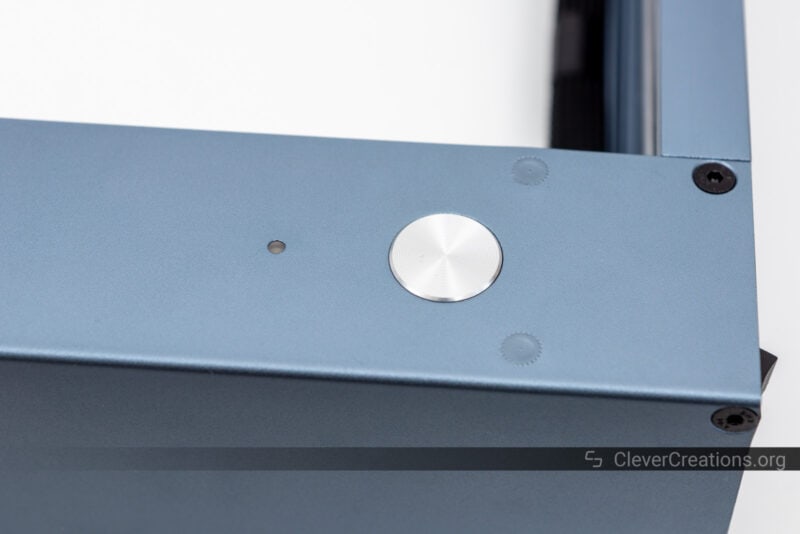
The xTool D1 Pro user interface is rudimentary. A simple momentary switch and an RGB status LED are all you get. If you want a laser engraver that can be used standalone, this is not it.
In that case, you’ll be looking at something like the Longer Ray 5 or an enclosed laser cutter, which typically have a touchscreen interface. It’s the only significant shortcoming we can find on the xTool D1 Pro.
There’s also no emergency stop present on the D1 Pro, but quickly flipping the power button on the side will achieve the same.
Connectivity
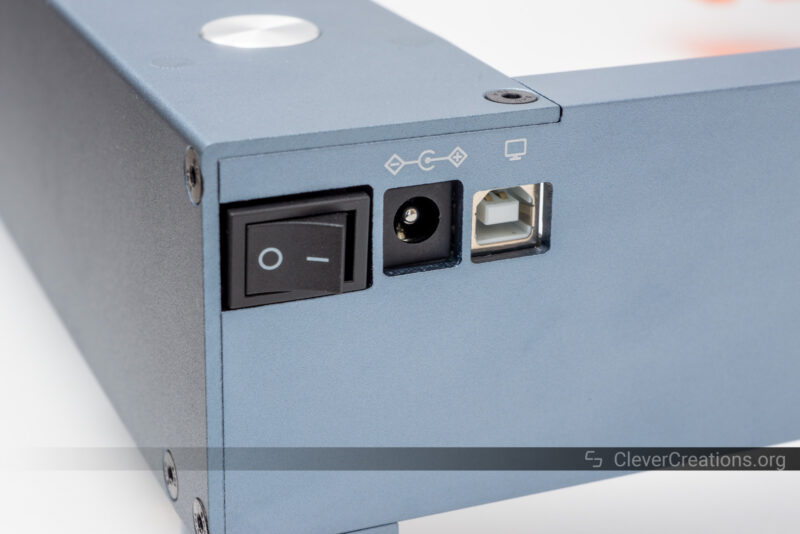
You can, however, use a computer or your phone (through the Laserbox for xTool app) to control the D1 Pro. The laser engraver has a USB port for connecting to a Windows/macOS system.
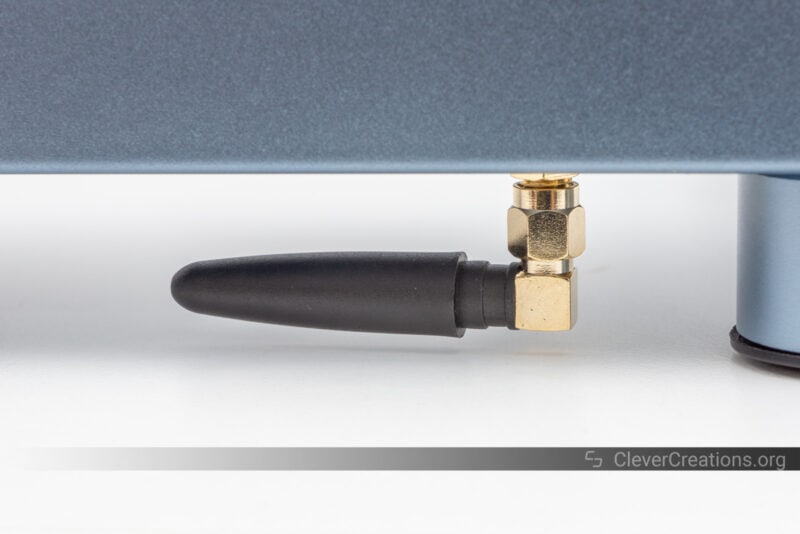
It also has a built-in Wi-Fi module, so you can connect to it remotely from any device if you don’t want to be limited by a cord.
Setting up the Wi-Fi requires you to connect the device over USB cable to a PC first. It’s the only way you can enter the SSID and password information required. After that, you’re free to disconnect the USB cable and enjoy wireless laser cutting and engraving.
Optional Accessories
To customize the laser engraver to your needs, there are a plethora of xTool D1 Pro accessories to choose from. We’ve already covered some above (extension kit, risers), but there are many more if you want to get creative.
We must point out that most of xTool’s accessories are on the pricey side. Their build quality is excellent, however. If you are okay with their price, you won’t regret buying them.
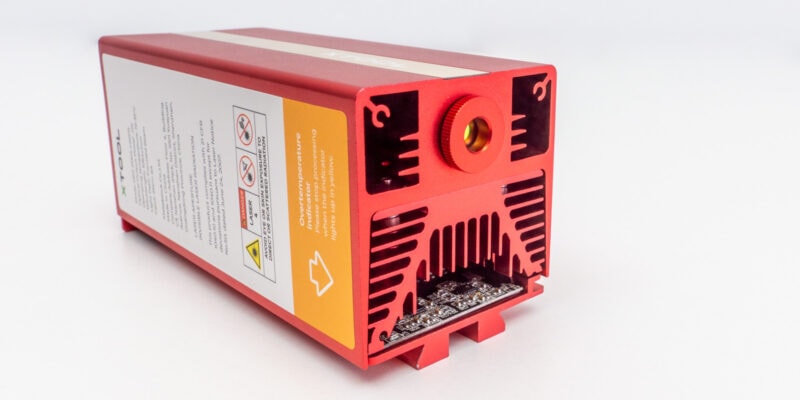
Infrared Laser Module

xTool sells a 1064 nm infrared laser module that is a perfect solution for engraving metals. It has a 2W average power with a 15KW(!) peak power.
It works on any common metal, like gold, silver, copper, aluminum, or stainless steel. Even the 20 Watt blue-light diode laser can’t handle most of those metals, so xTool’s infrared laser module is the way to go if engraving metals is your thing.
While you can use the IR module to cut thin aluminum, copper, and steel sheets of up to 0.5 mm, it is not recommended. It takes a long time and causes the module to get too hot, shortening its lifespan.
You can also use the IR laser beam for engraving things like leather, stone, circuit boards, non-transparent acrylic, and opaque plastics. Even glass and ceramic are an option if you use marking paper.
The spot size of the infrared laser module is a mere 0.03×0.03 mm, so you can achieve much greater detail with it than with the blue light laser beam.
It’s a really cool accessory and we will have a dedicated review up on it soon with test results. If you can’t wait, we recommend checking out xTool’s 2-in-1 kit to get your hands on one.
RA2 Pro 4-in-1 Rotary
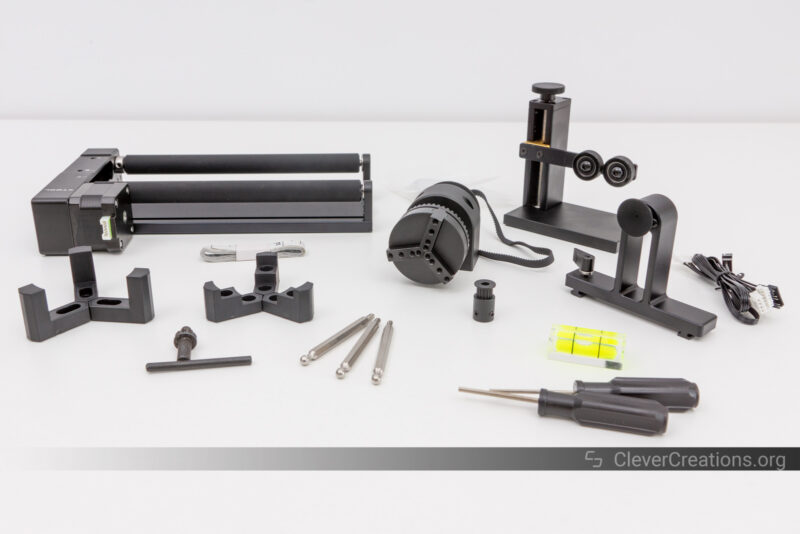
The RA2 Pro is currently the gold standard as far as laser engraver rotary axes go. Not only is it a versatile piece of kit that lets you engrave practically any cylindrical or spherical object that fits, but it is also well-designed and built to last.
Its 4-in-1 capabilities mean it can be used as a roller, chuck, sphere, or ring rotary. With its many attachments and configurations, there really isn’t much xTool’s RA2 Pro can’t work with. Wine glasses, Christmas ornaments, bottles, rings, and other jewelry, it’s all fair game.
An added benefit is that it is compatible with many other laser cutter brands as well. So even if you decide to buy a different machine—now or in the future—you can still use it.
Just like the IR laser module, we’ll have a separate review on it soon. It’s just that cool a product.
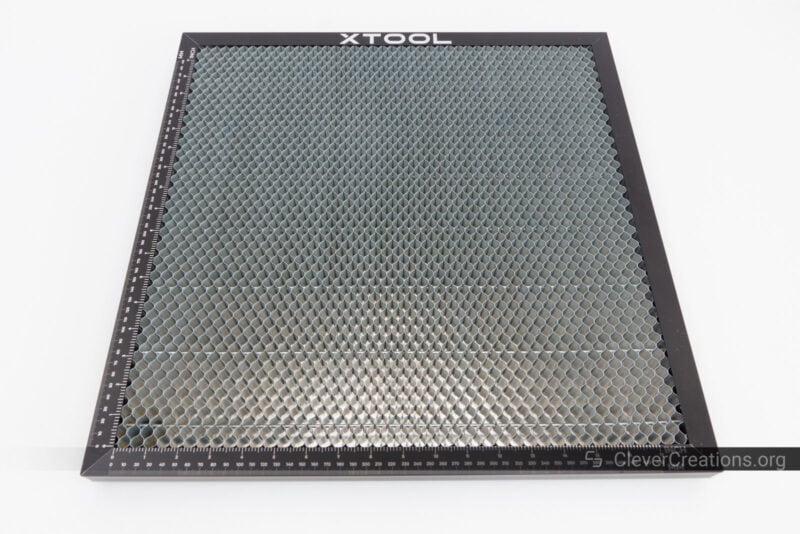
Honeycomb Bed
xTool’s honeycomb bed is an example of an accessory for the D1 Pro that feels a bit overpriced.
Don’t get us wrong though, it is still a well-designed product with good build quality and a number of excellent features.
The honeycomb bed includes a massive steel plate to protect your desk or workbench from the laser beam. Compared to the small steel plate that is included with the xTool D1 Pro, this makes it almost a necessity to actually make use of the entire engraver’s work area.
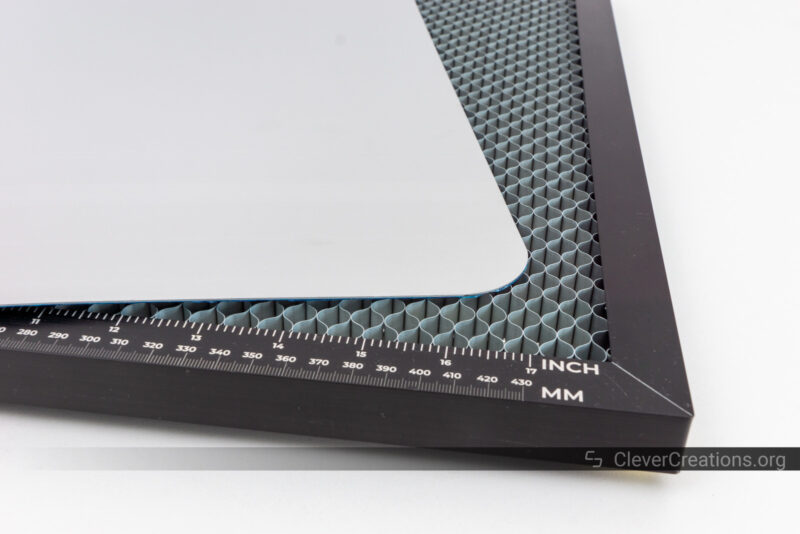
At about 450×450 mm of usable space, the honeycomb bed lets you do exactly that. With the included measuring grid, it is easy to make sure your materials are properly laid out as well.
Also included are magnetic feet that help separate the bed from the steel plate below. This ultimately helps the air circulation around the aluminum honeycomb structure.
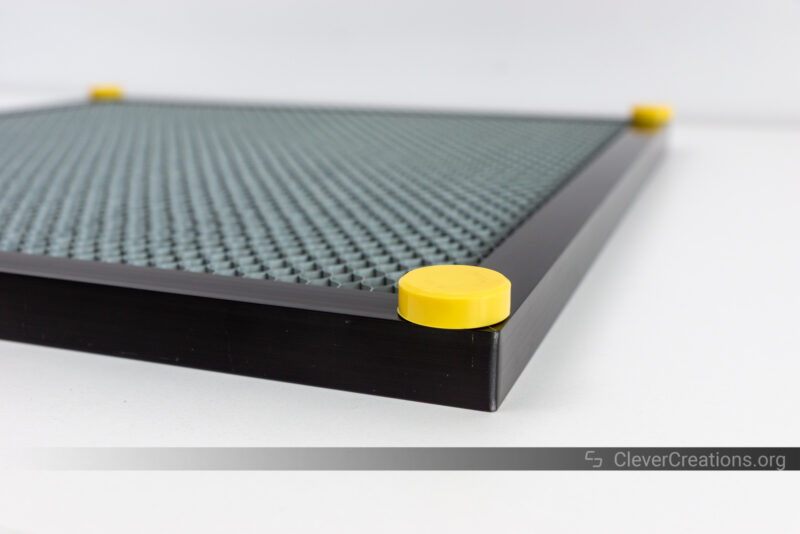
That way, the materials you cut get fewer scorch marks, which is ultimately the goal of this accessory.
There is no assembly required. It comes as-is in a giant box. If you buy it from Amazon, as we did, that box comes in an even bigger box that makes you wonder what you just bought.
Its current price is $129, which is a big ask for a honeycomb bed. We would have preferred to see it at around $89-$99.
Air Assist
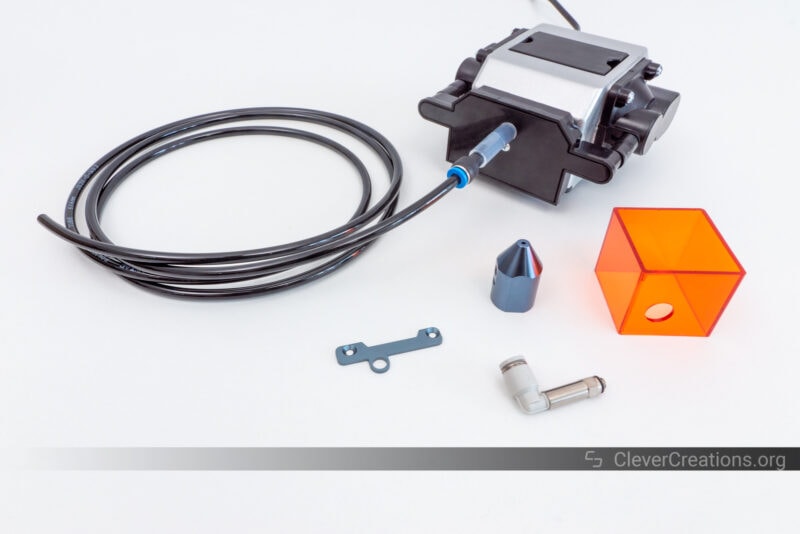
xTool’s air assist set is similar in that regard. It is well-designed and does its job, but it’s pricey.
The air assist set comes with a compressor, hose, nozzle, and everything else you need for use with the D1 Pro, D1, or even the M1 laser/blade cutter.
Like any compressor, it is noisy. However, its rubber dampeners do a good job of containing low-frequency vibrations. We were able to work in the same room with it, no problem.
It has an on/off toggle system, so there is no granular control for you to use. You can always use an in-line valve if you are looking to adjust the air assist pressure more precisely, but that is an extra cost on top of its roughly $150 price.
Regardless of the price, we have achieved excellent results with it. It does its job as advertised.
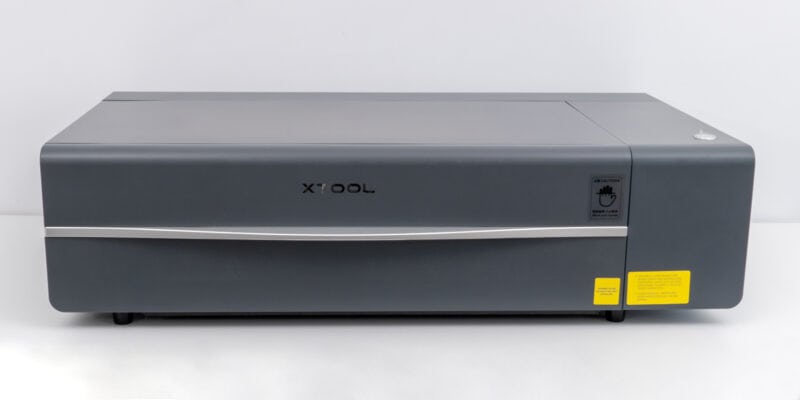
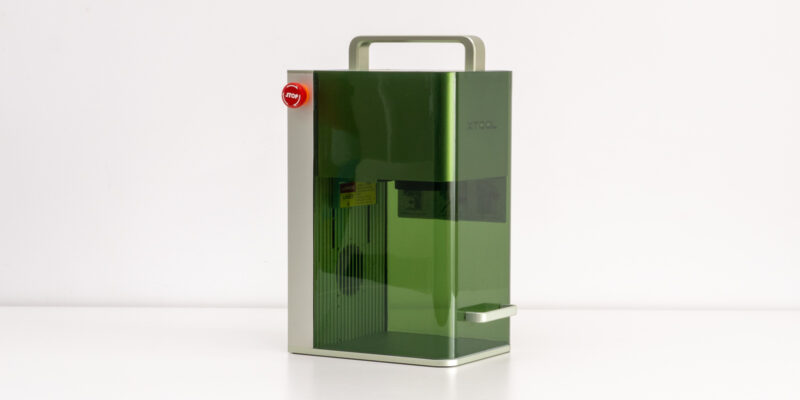
Enclosure
If you are going to use your xTool D1 Pro indoors, you’ll need to use some kind of enclosure or fume extraction solution. Breathing in laser engraving or cutting fumes is not something you want to do for your long-term health.
xTool’s official enclosure is designed to fit the D1 Pro. And if you ever decide to enlarge the machine with the extension kit, you can extend the enclosure as well.
We don’t have any hands-on experience with it, but it looks just as well designed and thought out as the rest of xTool’s accessories.
For example, it uses fireproof polyester fabric to prevent the enclosure from catching fire. The last thing you want is to have the enclosure go up in flames when something goes wrong. No such risk here.
Its built-in exhaust fan and hose make it easy to evacuate the fumes outside or to xTool’s fume extraction system. This means you can use it near a window or door, but also far away from them.
The xTool enclosure has a convenient storage system that lets you store a variety of accessories. This includes tools, spare parts, and any other materials you need to make your engraving/cutting job easier.
If you only use your xTool D1 Pro periodically, you can simply fold the enclosure up when not in use. This way it won’t take up as much space in your workshop or garage.
At $179, it provides good value. Not to mention, because the D1 Pro is on the larger side, you can use the enclosure for nearly every other laser machine as well. Not that you’d want to if you have a D1 Pro already.
xTool D1 Pro Laser Engraving & Cutting Quality
All testing of the XTool D1 Pro has been done in an enclosure. No transfer tape has been used, and the final engravings and cuts have not been sanded either. As such, these results should give you the minimum of what this laser engraver/cutter is capable of.
We have used an air assist for all tests, unless otherwise specified.
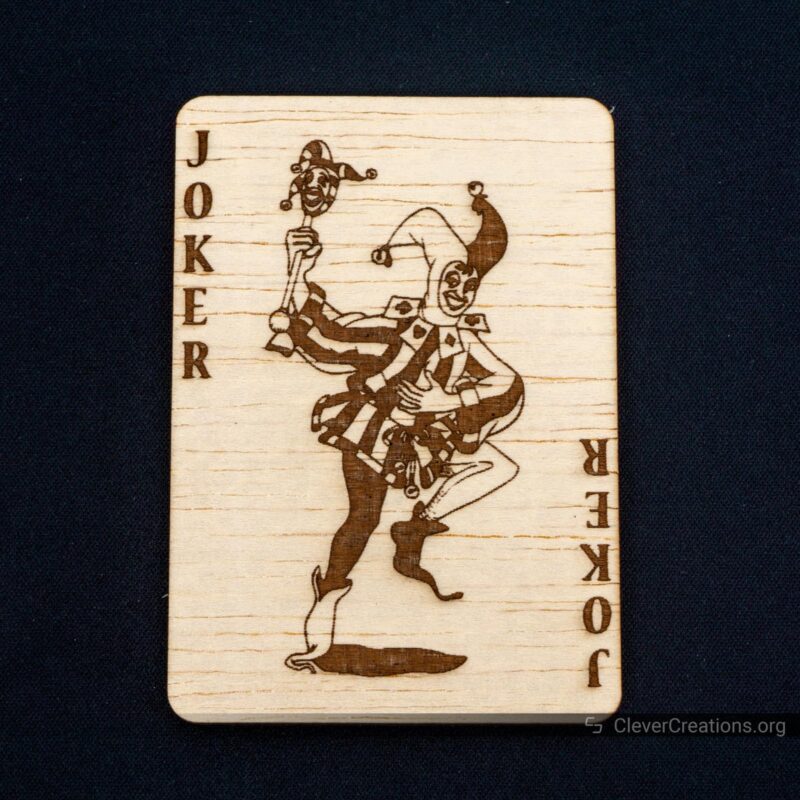
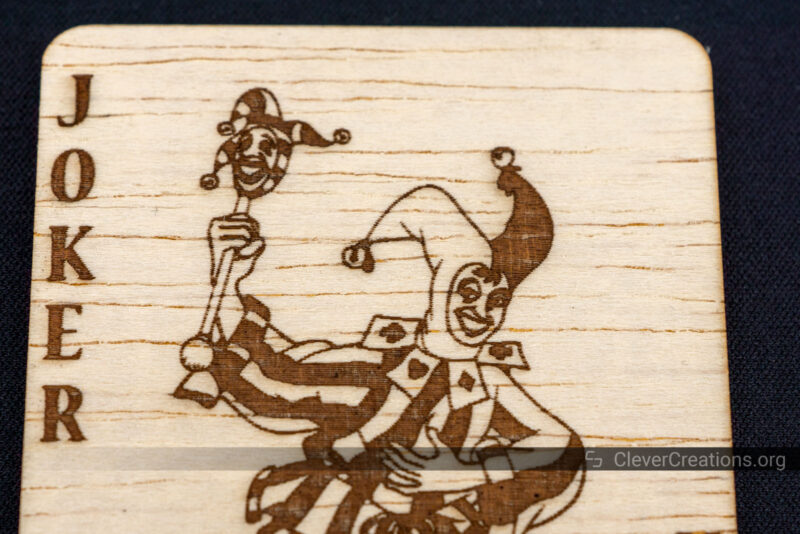
Playing Card
As usual, we start with something simple. We engraved and cut out a playing card from 4 mm Cedar plywood. The xTool D1 Pro was able to do this in one pass and with practically no scorch marks.
The engraving detail is excellent and exactly what you would expect from a machine at this price range. All small details have been retained and the contrast is clear.
There is some vertical waviness present near the edges of the image. We suspect it is caused by the laser spot shape or a too aggressive belt tension. It’s only noticeable when looking very closely at the wood, and it’s not something to be concerned about.
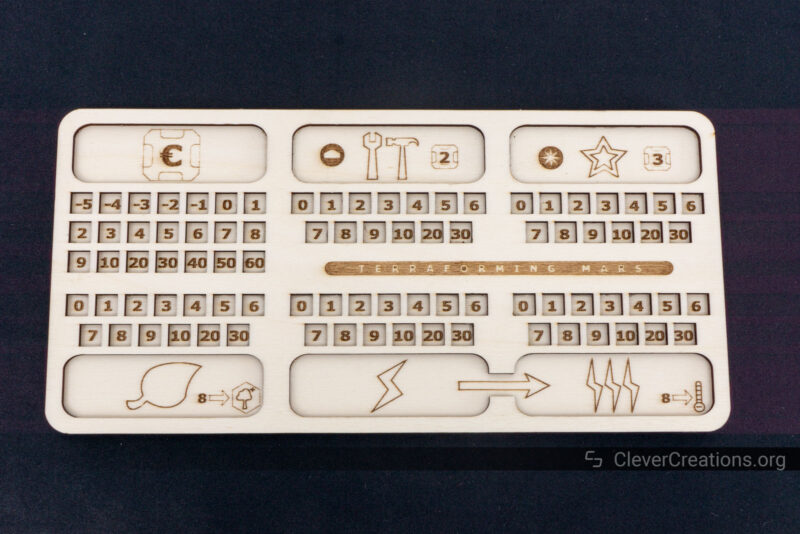
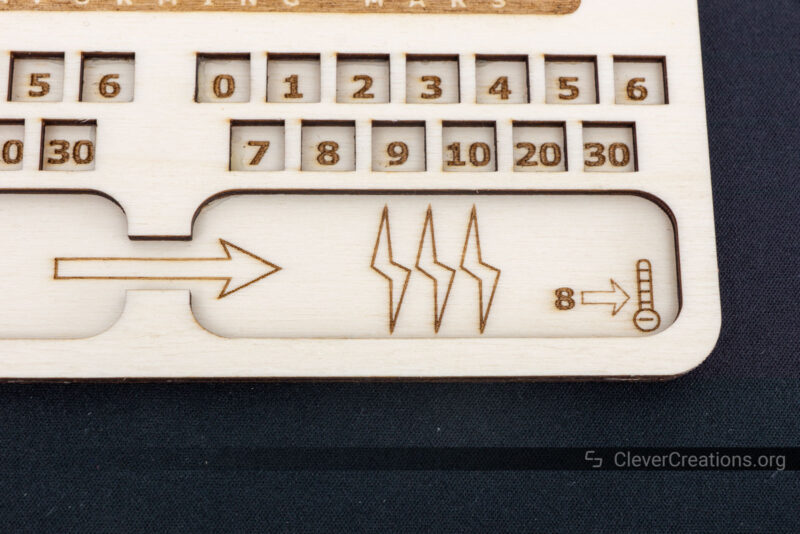
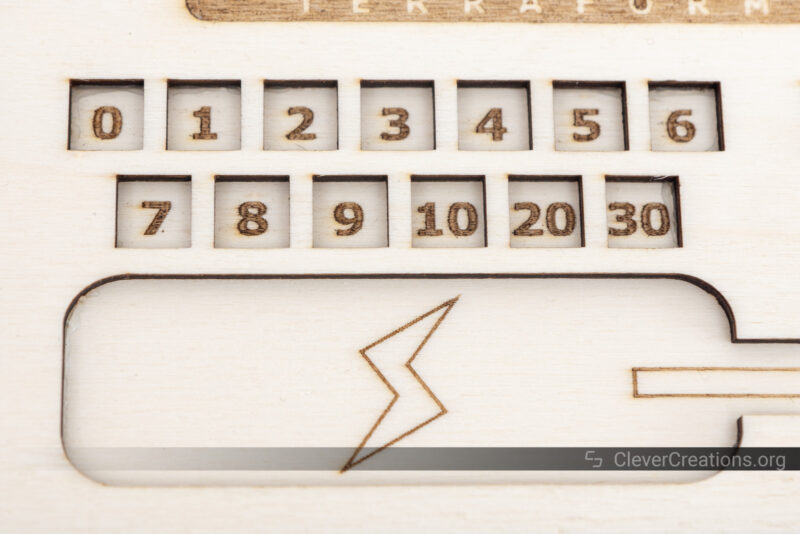
Terraforming Mars Player Board
Making accessories for board games is always a good use for a laser cutter, and the xTool D1 Pro is no different. We took a design for a Terraforming Mars player board and cut it out of 3 mm Poplar plywood.
Once again, the results are great. There are practically no burn marks, aside from at some start/end points of cut shapes.
If you are thinking about making similar accessories, we recommend going with a different wood than Poplar. Poplar is rather soft and can be easily dented or scratched. Its contrast is not great either. Maple, Oak, Walnut, and Cherry are better alternatives.
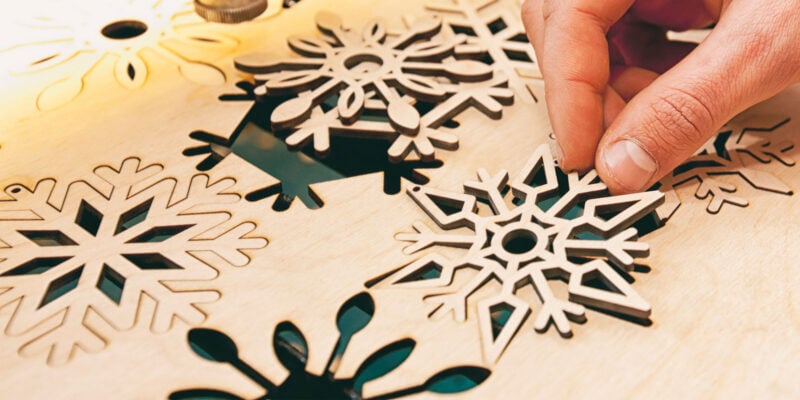
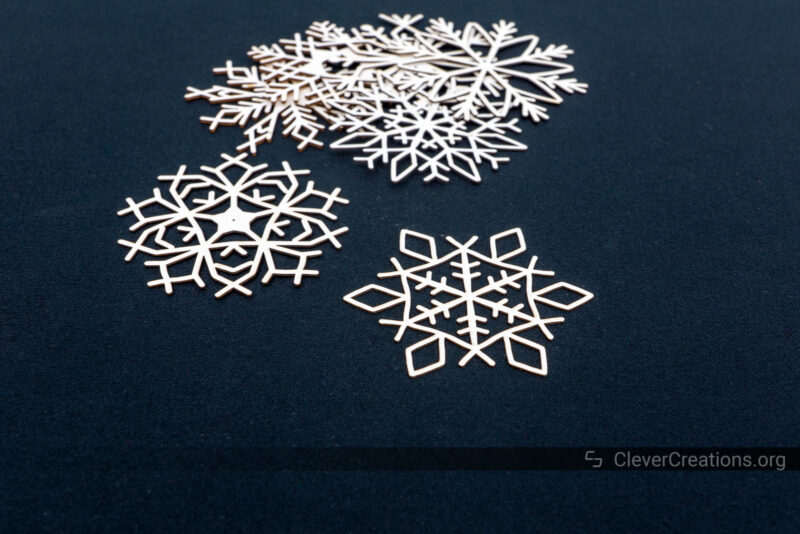
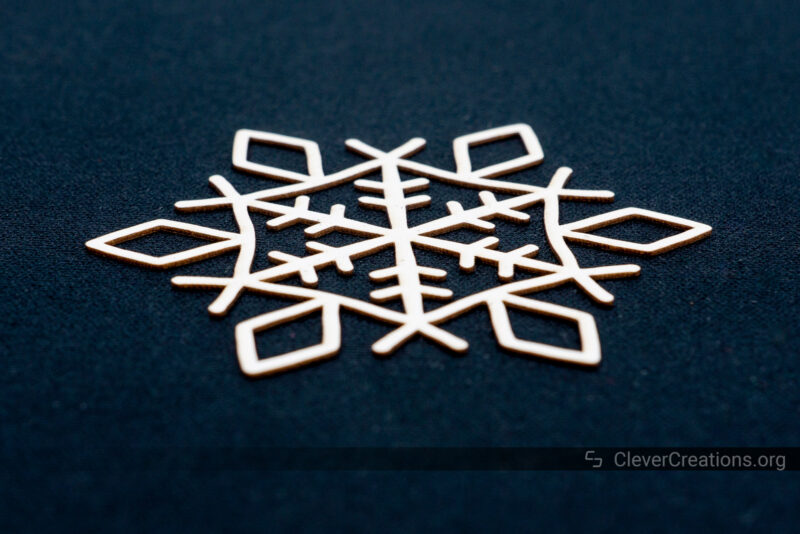
Christmas Decoration
With the holiday season upon us, it is a good opportunity to cut some seasonal decorations to spruce up our office. We took some vector art of snowflakes and cut them out of 1 mm thick white cardboard.
The results could not have been better. The xTool D1 Pro cut all delicate details with great precision and without burn marks. There’s nothing negative to point out here, and we are impressed with how the machine handled this job.

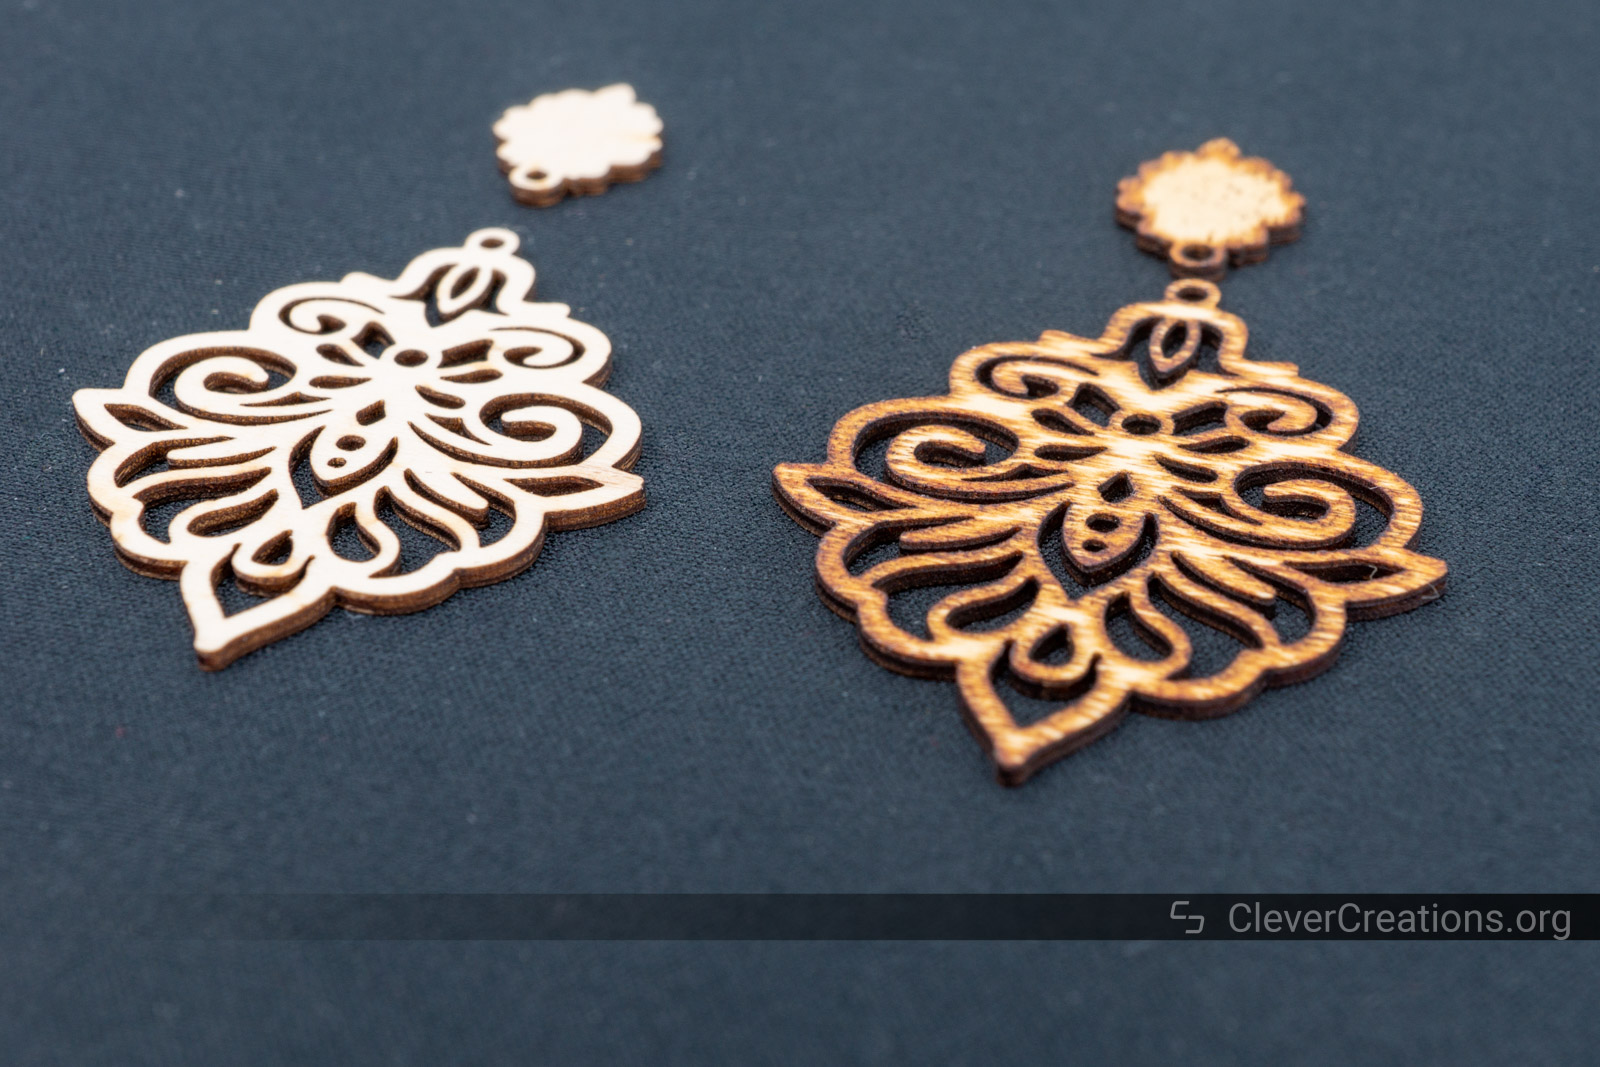
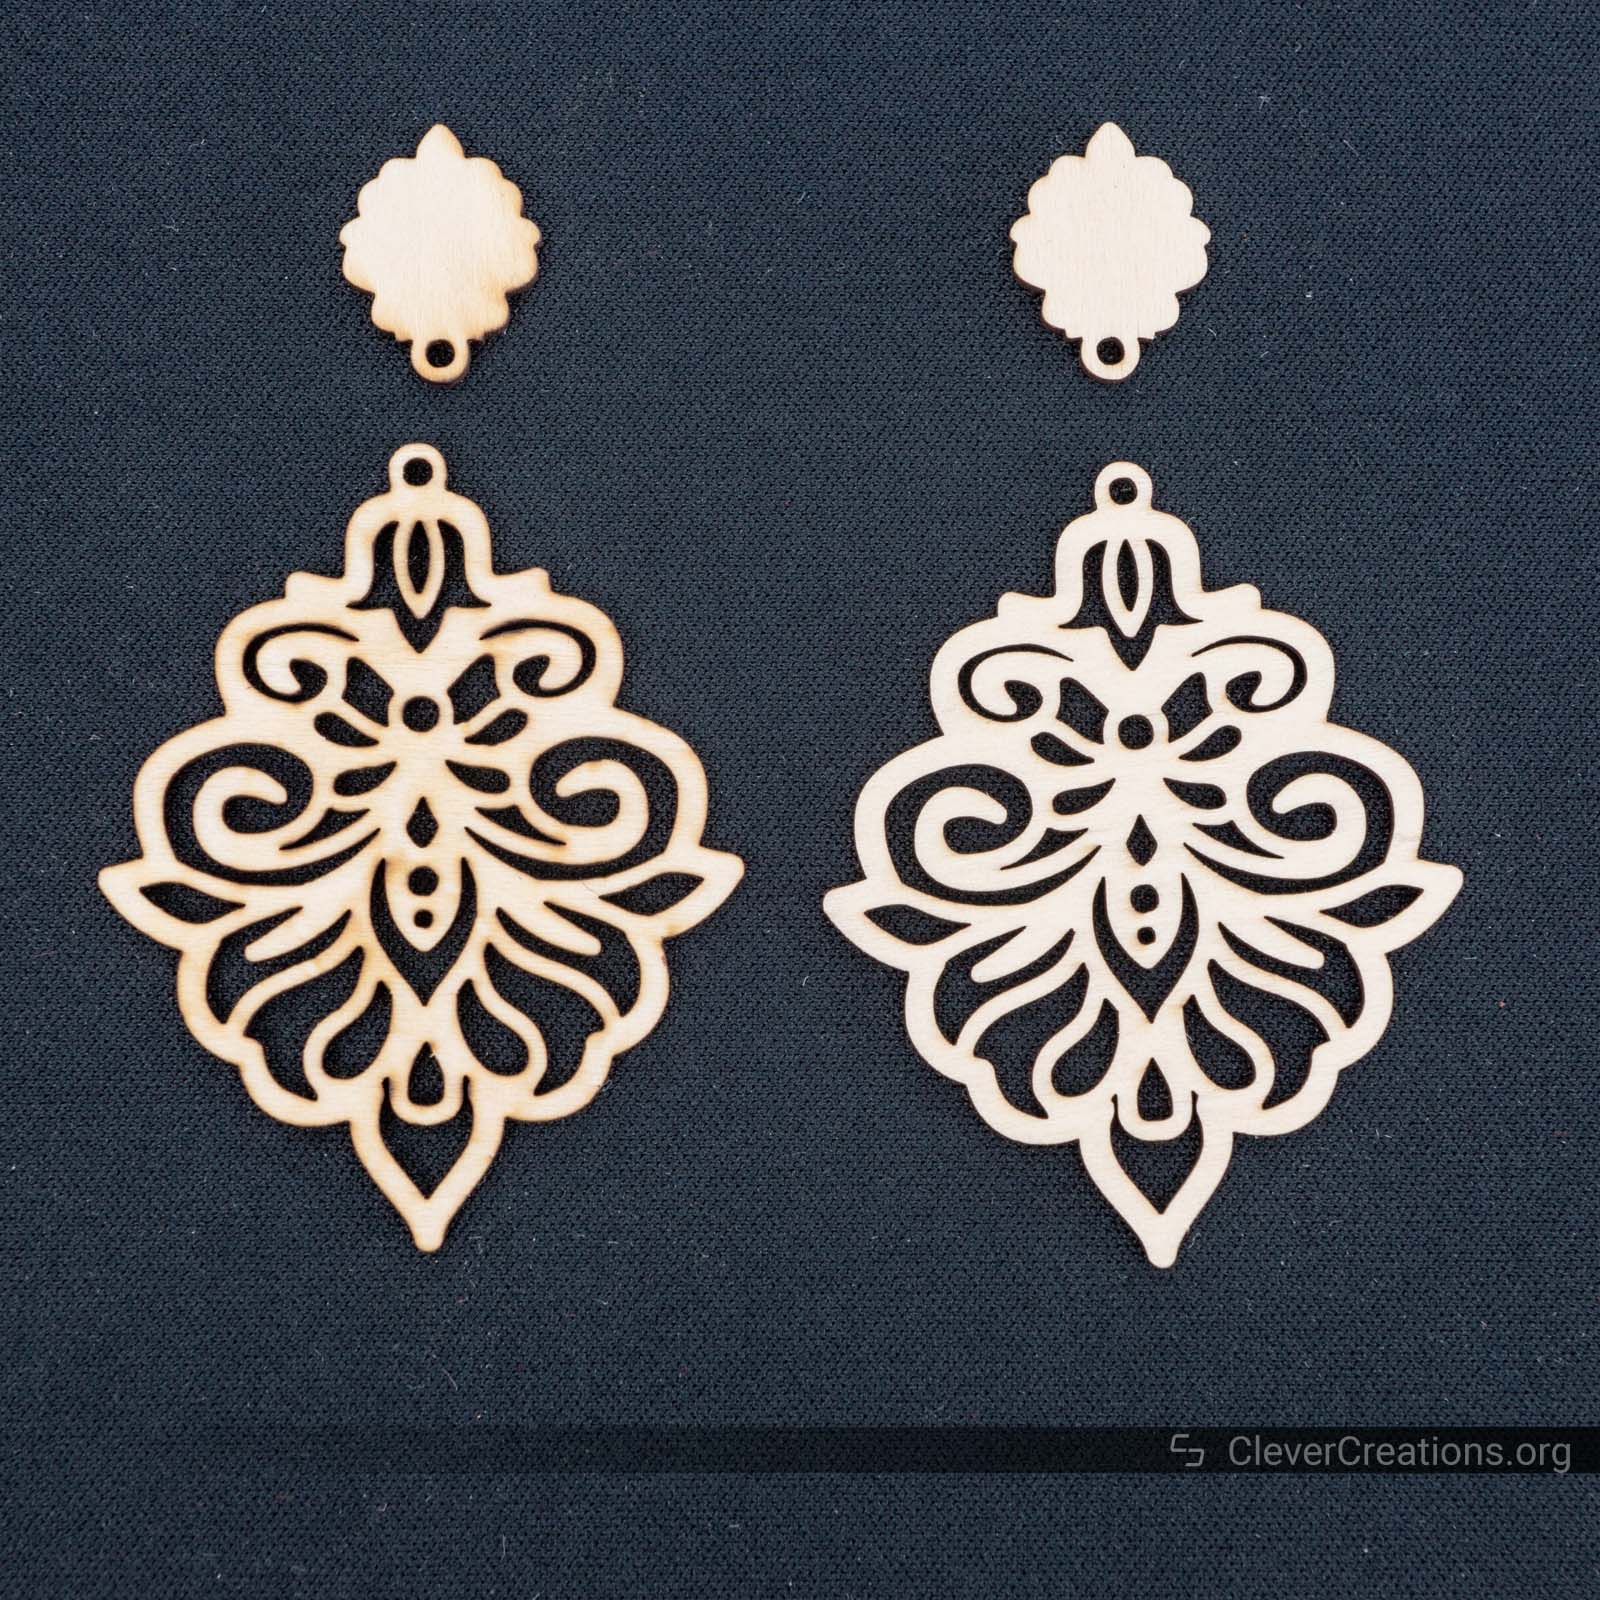
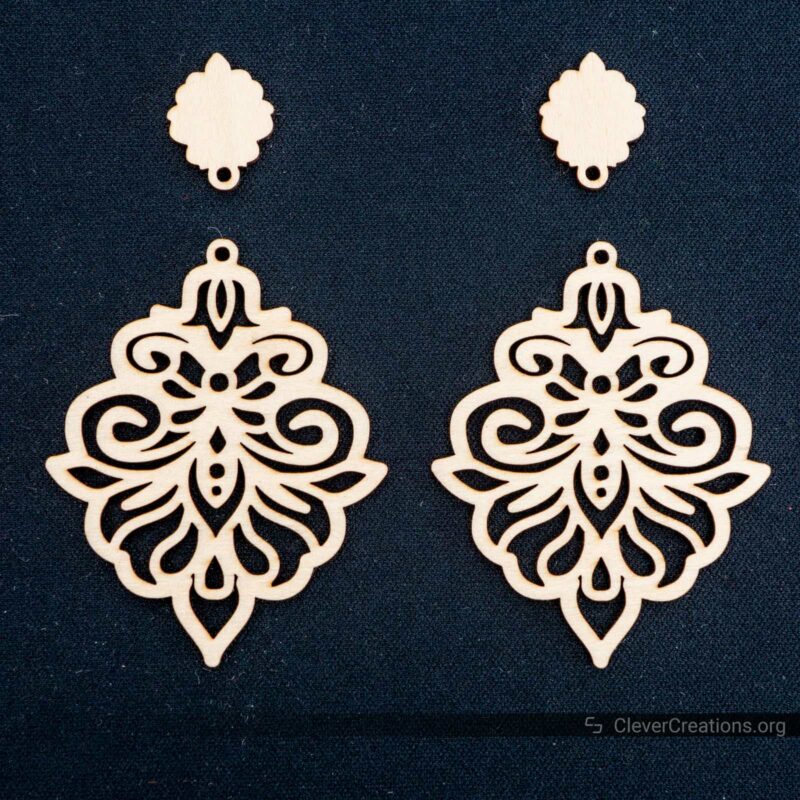
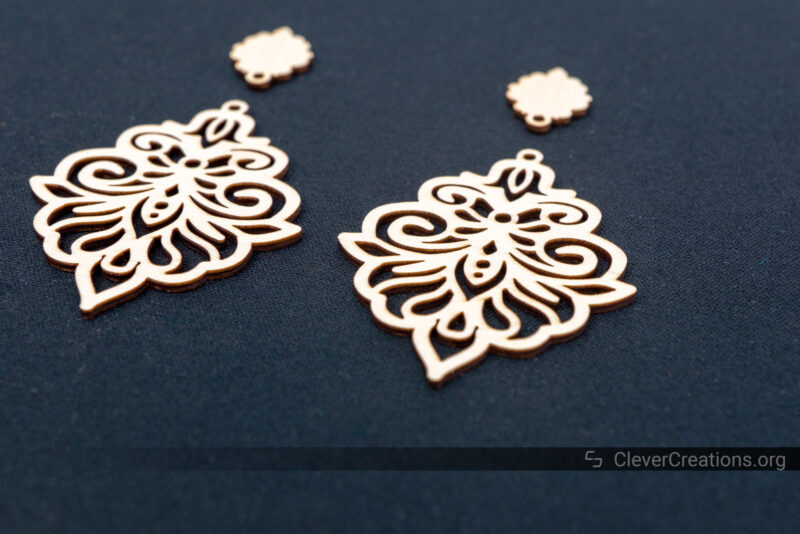
Earrings
The same can be said for these earrings. Even the smallest of details have been cut out with a clean edge. As such, you won’t need to worry about sanding or finishing the earrings in any way, which is a big time-saver when it comes to post-processing fragile parts.
As you have seen in the accessories section, you will need to use an air assist and honeycomb bed for these kinds of results. This is not exclusive to the xTool D1 Pro. Any other laser cutter requires a similar setup for clean results like these.
Without air assist, the D1 Pro also provides acceptable results. In our testing, the amount and strength of the burn marks of the D1 Pro are less than those of its nearest competitor, the OLM3.
Alternative Laser Cutters
xTool D1 vs D1 Pro
From our perspective, there’s not much reason to get the xTool D1 over the xTool D1 Pro, unless you can get a crazy deal on the former.
The new Pro model can engrave over twice as fast (400 mm/s vs 160 mm/s), has a better and more powerful laser module, and has new features like limit switches.
Ortur Laser Master 3
Ortur’s new Laser Master 3 has fewer capabilities than the xTool D1 Pro, but still provides good value.
Compared to the D1 Pro, it is slightly smaller, lighter, and comes with a safety lock and emergency button. There is only a 10 Watt diode laser version available at the moment, so if you need more power, the 20W xTool is a better choice.
The xTool also offers significantly more accessories at the moment and thus better future upgradeability
Other than that, the machines have a lot of similarities. Built-in Wi-Fi, fast engraving, integrated air assist, and a solid build quality.
If you don’t have demanding needs and the OLM3 is on a discount, it can be worth going for.
Bottom Line: Should You Get the xTool D1 Pro?
If you are looking for an open-frame laser engraver and cutter, the xTool D1 Pro is the best option right now. Not only does it perform at the highest level, but it is built like a tank and has a lot of accessories available to make your life easier.
The 20 Watt diode laser version of the D1 Pro is the option to go for if the price is not an issue. Its material compatibility is the best you can get for a diode laser cutter.
The model with the 10 Watt laser module is slower and has less material compatibility, but is about $500 cheaper. You can always upgrade its machine power later, so it might be the better option if you are on a budget.
However, even with its top-notch performance, the xTool D1 Pro might not be the best option for everyone. For example, if you are an absolute beginner, there are simpler and cheaper machines out there, like the ORTUR Laser Master 2 Pro S2.
The few downsides of the D1 Pro that we can find are the simple user interface and hardcoded GRBL settings. In the grand scheme of things, these are negligible and most users won’t find them to be a problem.
All in all, if you are looking for the most versatile laser engraver out there right now, you have found it. The xTool D1 Pro is a machine that can do anything other laser engravers can do, and more. It also allows you to grow and upgrade as your skills and needs improve.
Try it out for yourself and you will see just how powerful it is!