
- Fast engraving capabilities
- Wide material compatibility
- 55W of laser power
- Curved surface engraving
- Great safety features
- Practical dual camera preview system
- Laser focuses automatically
- Excellent value
- Awesome accessories for expanding capabilties
- Only partial Lightburn compatibility
- Impractical emergency button placement
- Cameras don't work well with dark surfaces
- Loud
Makeblock has been making waves with its xTool laser cutters. Their new xTool P2 is no exception. With a powerful 55W CO2 laser tube, curved surface engraving capability, and automatic feeding of material, it sounds like a Glowforge-killer as far as desktop laser cutters are concerned.
In this xTool P2 review, we’ll put the laser machine to the test and show you whether it lives up to the expectations. Is it worth spending thousands of your hard-earned dollars on? Is it the right machine if you want to start a laser engraving business? How does it compare to other laser cutters?
Read on and find out!
xTool P2 Specifications
| xTool P2 Specs | |
|---|---|
| Price | xTool | Amazon |
| Rated Power | 55W (CO₂ Glass Laser Tube) |
| Package Size | 1122x727x346 mm 44.4″x28.6″x13.6″ |
| Product Size | 1000x639x268 mm 39.4″x25.1″x10.6″ |
| Product Weight | 45KG |
| Max. Engraving Speed | 600mm/s |
| Processing Precision | 0.01mm |
| Z-axis Movement | 3″(75mm) |
| Lifespan | 6000~8000h |
| Safety Guard | Class IV (FDA Certified) |
| Laser Spot | 0.15×0.2mm |
| Work Area | |
| Bed Size | 680×360 mm 26.7”x14.1” |
| Processing Area | 600×308 mm 23.6”x12.1” |
| Max. Workpiece Height | With tray 2.5″(64mm) Without tray 2.7″(71mm) With riser base 8.5″(215mm) |
| Max. Passthrough Width | Without riser base 27.6″(700mm) With riser base 25.2″(640mm) |
| Max. Passthrough Height | width 0-599mm: 30mm width 600-700mm: 18mm With riser base 112mm |
| Rotary engraving diameter with tray | Roller:3-42mm Chuck:X |
| Rotary engraving diameter without tray | Roller:3-50mm Chuck:X |
| Rotary engraving diameter with riser base | Roller:3-180mm Chuck:0-100mm |
| AI Camera Information | |
| Camera | Long-range camera + close-range camera |
| Number of Pixels (Effective) | 16MPx2 |
| Vision Precision | 0.3mm |
| Image Resolution | 1000 DPI |
| Focus Mode | Autofocus |
| Positioning | AI Visual Positioning |
| Build-in Accessories | |
| Cooling System | Closed-loop self-contained internal liquid cooling system |
| Water-cooling System Capacity | 1.4L(0.37gal) |
| Air Assist (adjustable) | 15-150 Kpa |
| Exhaust Fan | 145 CFM |
| Software and Connection | |
| Operating Systems | Windows / macOS / iPadOS |
| Control Software | xTool Creative Space / LightBurn |
| Supported File Type | SVG, DXF, JPG, JPEG, PNG, BMP |
| Connection / Transmission | Wi-Fi, USB, Ethernet |
Unboxing
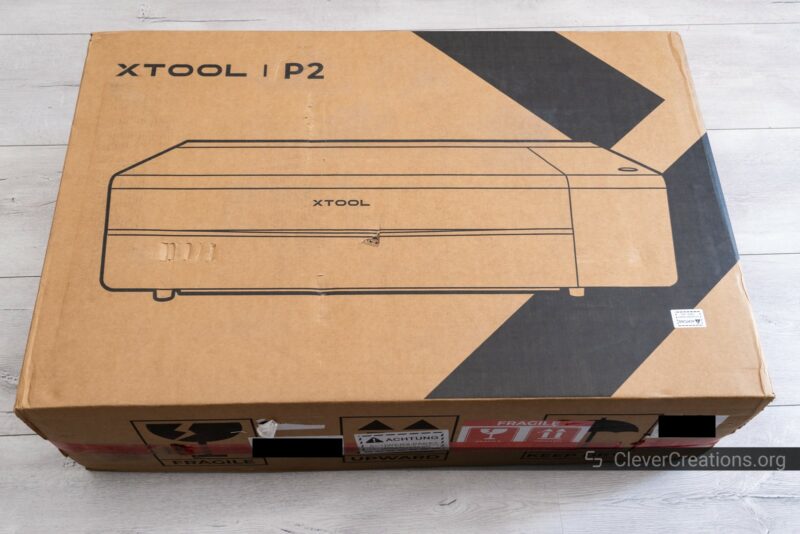
The xTool P2 55W CO2 laser cutter comes in a ridiculously large box. The picture above doesn’t do it justice.
At 45 kg (100 lbs), you won’t be able to carry the box yourself. Even if you are strong enough, the size of the box makes it difficult to handle.
Based on our experience, two or ideally three people are necessary to put the machine in its place. Because of the fragile laser tube, it’s best not to take any risks.
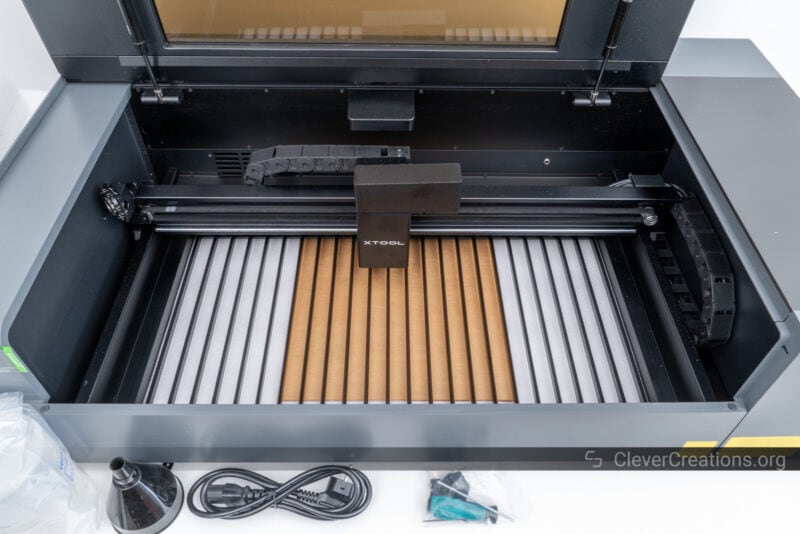
Once you open the carton enclosure, the P2 is right there waiting for you. Just like moving the box, lifting the laser cutter is an arduous task. It’s a good idea to put it in its final place right away to avoid having to carry it again.
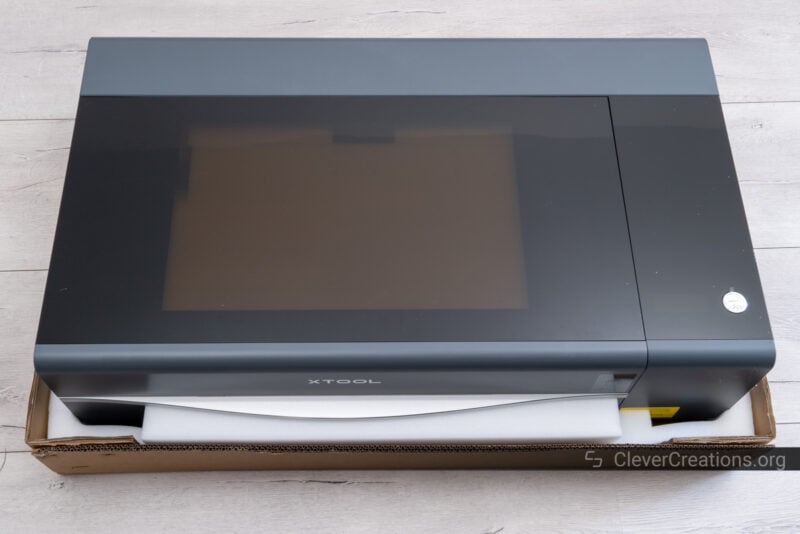
When you open the laser cutter, you are greeted by a bunch of foam. Inside, you’ll find the machine’s accessories, documentation, included materials, and so on.
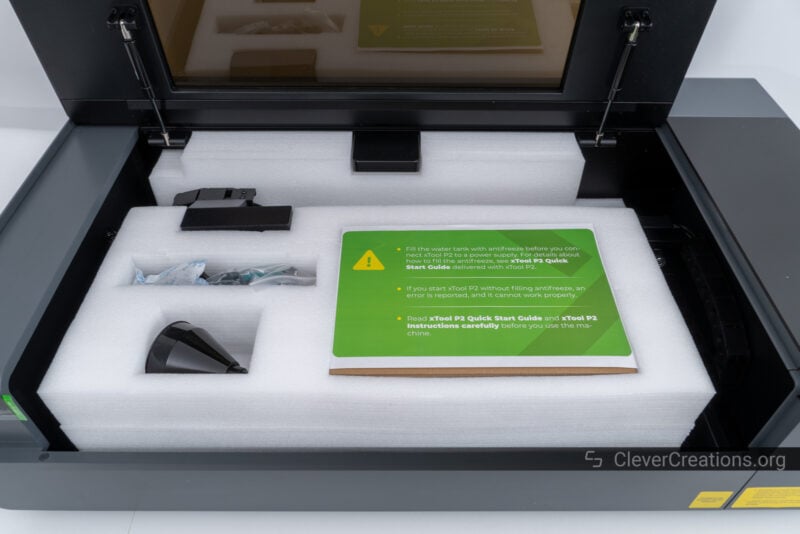
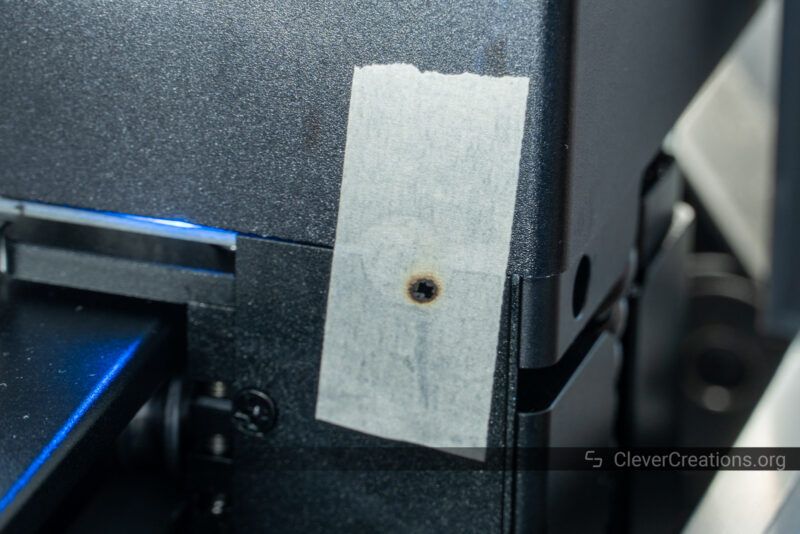
After removing them, you’ll find that there is a second collection of material sheets in the tray under the machine’s slats.
You’ll have to remove a small screw before you can slide the tray out. As you can see, the sticker points in the wrong direction. There’s only one screw to choose from, however, so you can’t go wrong.
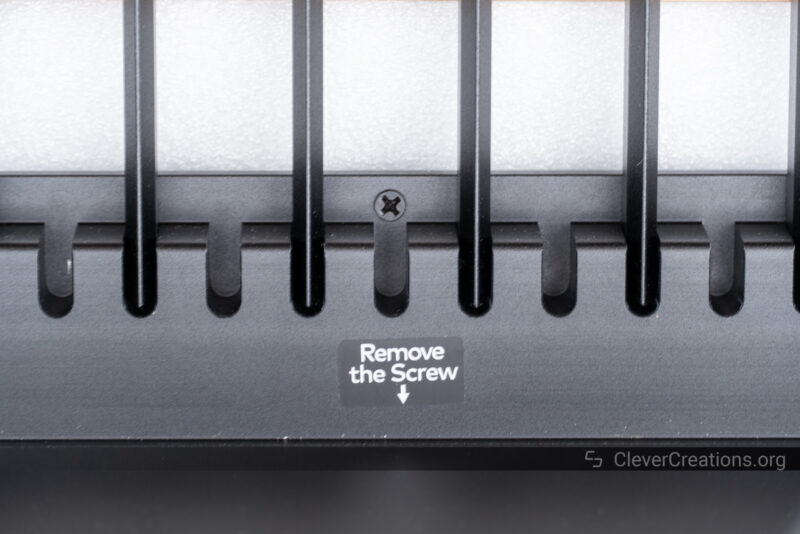
With the screw removed, the tray comes out. Make sure to remove both the laser cutting material and the white foam. You don’t want the foam to be exposed to the laser beam when you start using the machine.

In most of our other laser cutter reviews, we just lay the accessories out on the table for the picture below. With the xTool P2 laser machine on the table, there was hardly any space left, so we could only place the accessories on top of the device.
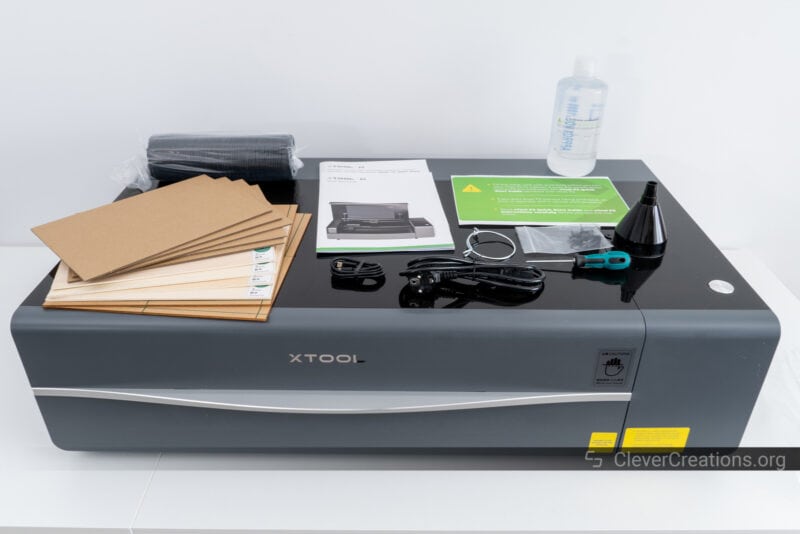
In total, you get the following with the P2:
- xTool P2 laser machine
- Power cable
- USB Type-C cable
- Smoke exhaust hose
- Antifreeze
- Funnel
- Several sheets of 3 mm basswood, 3.5 mm corrugated paper, and acrylic.
- A screwdriver and hex key
- The quick start guide and instructions
It’s almost enough to get started with the machine. You will have to provide your own distilled water for filling the laser tube cooling loop. You can’t use tap water, as it contains too many contaminants. Aside from that, you are all set.
We were a bit disappointed with the included materials, however. Compared to the much cheaper xTool D1 Pro we reviewed, the included sheets of corrugated paper and basswood don’t offer much to experiment with.
Of course, xTool offers plenty of material packs that you can buy along with the machine. But considering the high cost of the P2, we prefer to see more materials included with the machine.
Getting Started With the P2
Compared to a diode laser cutter, the setup of a CO2 laser cutter like the xTool P2 is a bit different.
On the one hand, there’s no assembly work for you to do. The machine comes fully pre-assembled along with its laser tube pre-installed.
On the other hand, the cooling system for the laser tube needs to be set up. This might sound daunting, but on the xTool P2, it’s just a matter of filling up the cooling loop with the appropriate coolant.

Depending on the lowest temperature the laser cutter will be exposed to, you have to fill the loop with either distilled water or a mixture of distilled water and the included antifreeze. The exact ratio for the mixture depends on the minimum temperature and is clarified in the manual.
The xTool P2 comes with a perfectly-fitting funnel that helps you fill the tank. We recommend cleaning it before use, however. Ours was quite dusty and it is best to not introduce unwanted impurities in the cooling system.
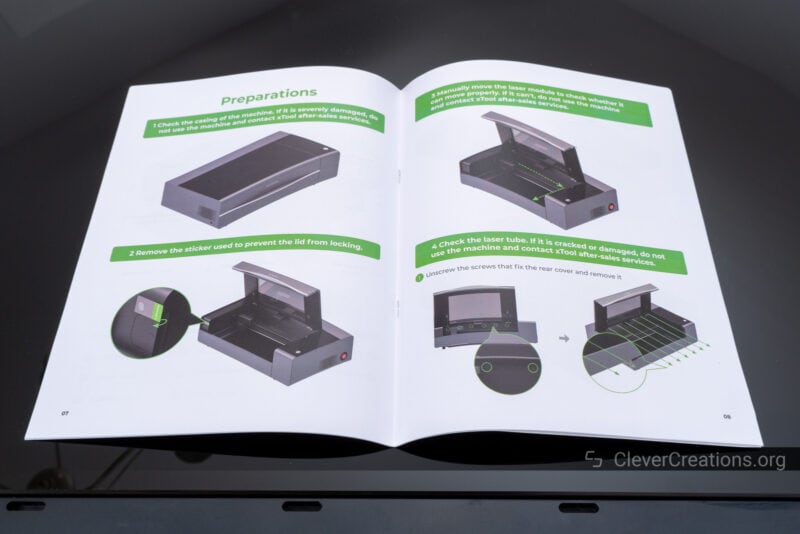
Just like we are used to with xTool’s products, the manual, tutorials, and other documentation is top-notch. Any question you might have is likely already answered in one of the many resources the company provides. It gives you a very smooth start to using the machine.
A less smooth aspect of the setup process was that we had to remove a lot of bolts to get to the laser tube and cooling loop compartment. But because that only has to be done once, it’s not a big deal.
Once you are done filling the loop, you can move on to the remaining steps of the setup. Closing up the laser tube compartment, setting up the software, and connecting the exhaust hose.
After that, it is a good idea to check the laser path alignment before you start cutting anything. This is not mentioned in the quick start guide or manual, but this article by xTool explains the process clearly.
This was helpful for us before we started testing the xTool P2, as we discovered the laser beam was not aligned correctly on our machine.
It’s easy to dismiss this as a build quality issue, but it’s fairly common for the mirrors that guide the laser beam to slip out of alignment during transport. It’s precision equipment, after all, and the smallest changes in the mirror positioning can make a huge difference.
Fortunately, the problem was easily resolved by following the steps in the video above. After that, we were ready to start cutting!
xTool P2 Features
The xTool P2 comes with a bunch of cool hardware and software features. Some of them are similar to those of other laser engraving machines of this caliber, whereas others are new and innovative.
Regardless of whether you are an experienced user or a newcomer to laser cutting, the P2 offers a lot for everyone.
55W CO2 Laser Tube
The main centerpiece of the xTool P2 laser machine is its 55W CO2 laser tube. Its laser beam has a wavelength of 10649 nm, making it compatible with a wide variety of materials. Wood, felt, leather, fabric, plastic, MDF, glass, brick, marble, various uncoated and coated metal, acrylics, you name it.
No matter which materials we threw at the machine during our testing, it managed to deal with it successfully. From cutting clear acrylics to marking uncoated stainless steel, the P2 was able to do it without breaking a sweat.
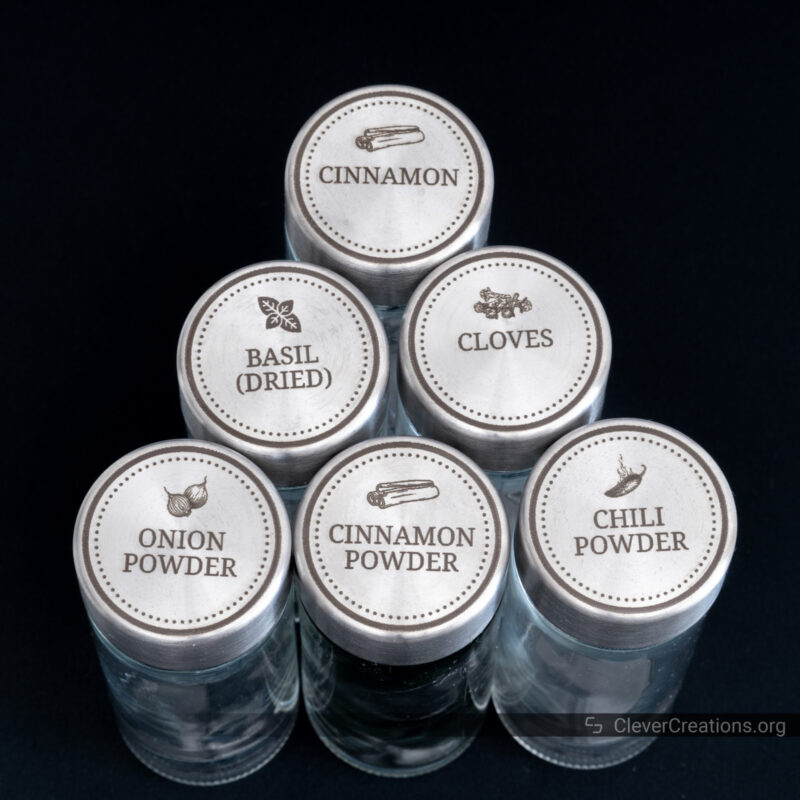
We expected to have to use marking spray for the stainless steel lids, but when we tried without, we got nice enough results.
We can’t overstate how satisfying it feels to have a laser cutter that is capable of dealing with such a wide range of materials. It eliminates the need for having multiple separate machines and/or laser modules. It’s basically like having a miniature factory in your home.
Compared to the 10-20W output power diode lasers found in many entry-level machines, the time it takes for the P2 laser cutter to finish the engraving or cutting process is much shorter as well.
It’s not just a 2.75x (55W divided by 20W) increase compared to a 20W diode module. The different wavelength of the CO2 tube laser also increases the amount of energy that can be transferred to the material. You’re looking at around a 6x increase in engraving speed compared to a 20W diode laser. A big time-saver.
Some laser cutter manufacturers habitually overstate their diode’s or laser tube’s power. This does not seem to be the case with the xTool P2. Based on our testing, the 55W CO2 laser performs more or less exactly as claimed.
For example, xTool claims that the P2 is capable of cutting 18 mm thick black walnut in a single pass. While we didn’t have that exact wood in stock, we tested cutting 20 mm thick solid pine.
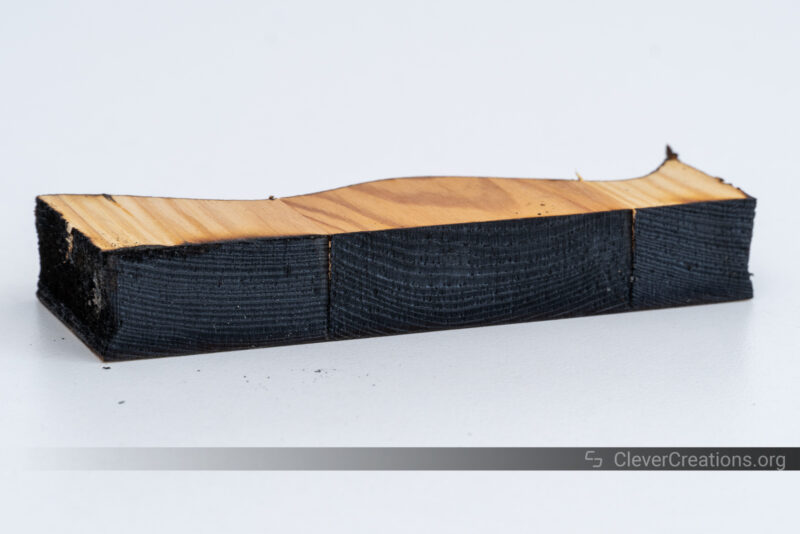
The laser cutter cut through it in one pass at 1 mm/s and full power. The result is, as expected, a bit charred on the edges, but we’d still call it a success.
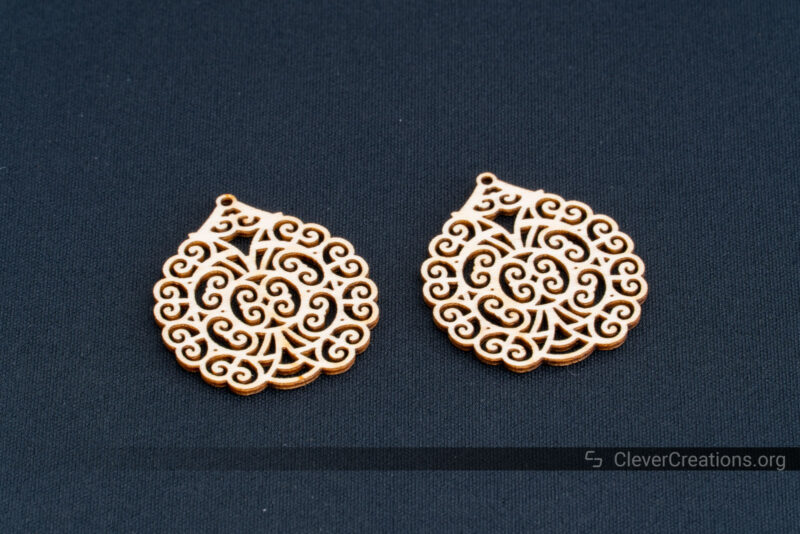
As for the detail, the laser spot size is listed as 0.15×0.2 mm. For what that looks like in practical terms, the images below should give you a decent idea.

We engraved a detailed mandala pattern on 3 mm acrylic and cut it out to use as a coaster. The resulting detail is nothing but impressive.

The fact that we could do it on transparent acrylic without coatings, laser tape, or other preparation is even better. No smoke marks, residue, or mess either. Just a high-quality coaster with an intricate design that took us only a few minutes to complete.
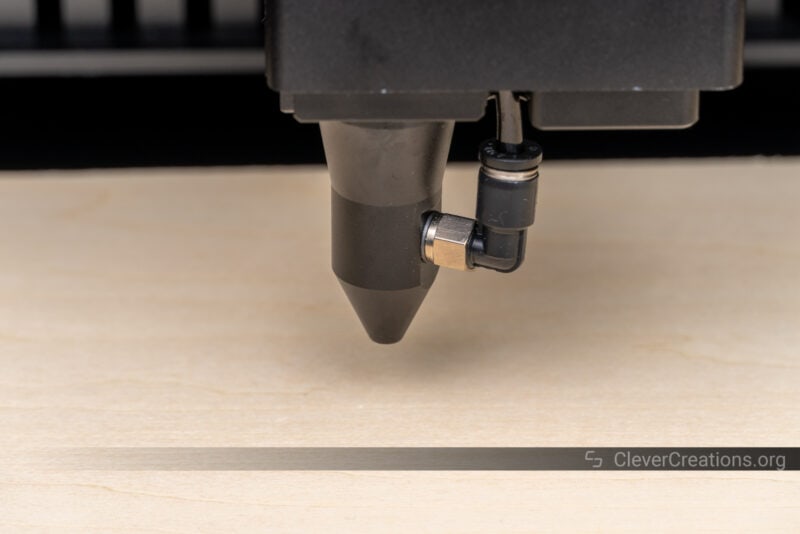
Built-In Air Assist
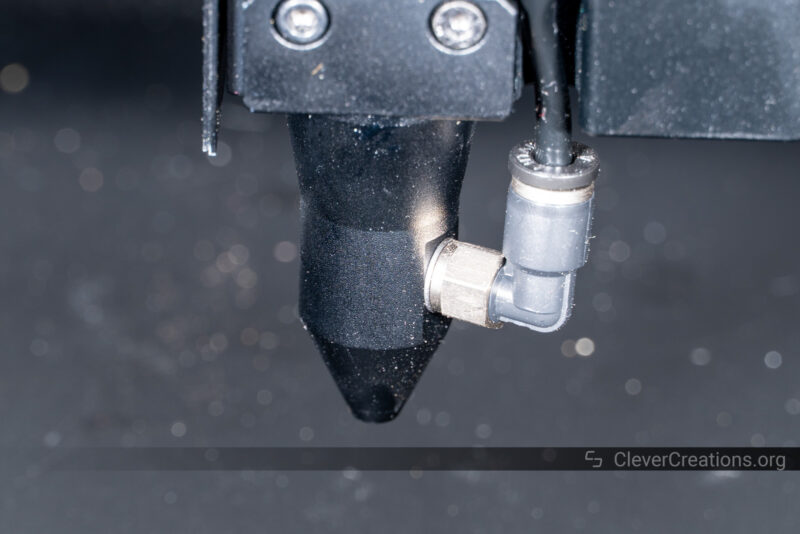
As you would expect from a desktop laser cutter in this price class, the xTool P2 laser cutter comes with an integrated air assist system. It consists of a nozzle on the laser head, an air compressor, and a tube that connects the two.
The air assist helps keep the material free of smoke and debris, preventing it from getting charred during slower cuts and at higher power settings. It’s useful for both engraving and cutting and expands the lifetime of the laser head lens.
We used it with basically every material we tested with, and it gives great results. Because the air assist system is fully automated, there’s not much thought or effort involved when you use it.
With laser cutters with separate air compressors, you’ll have to hook up the air tube and turn the compressor on before you start cutting or engraving. An integrated air assist system removes the need for these steps, making it more convenient to use.
The air pressure is adjustable from 15 to 150 Kpa, so you can dial the airflow in per the needs of your specific project.
The only time we changed the setting of the air assist was when we engraved a bunch of loose cardboard pieces. At full power, the airflow was too strong and blew our pieces out of alignment during the engraving process. Reducing the air pressure to a third of the maximum power solved the problem.
In short, the air assist of the xTool P2 machine keeps your cuts and engraving clean with little burn marks or charring. If necessary, you have the option to turn it off or adjust the air pressure to suit your specific project’s needs.
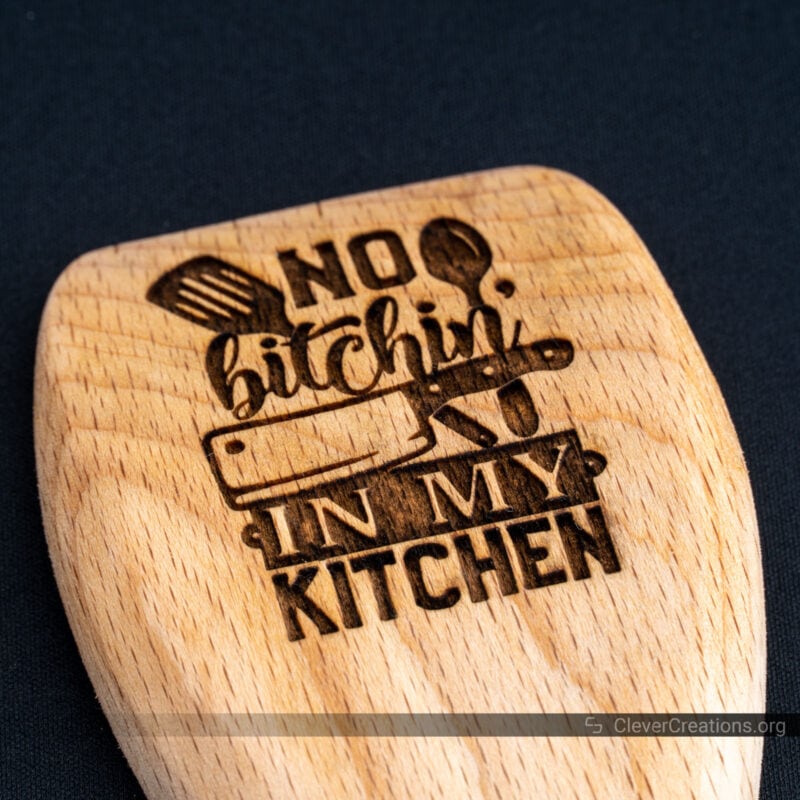
Curved Surface Engraving
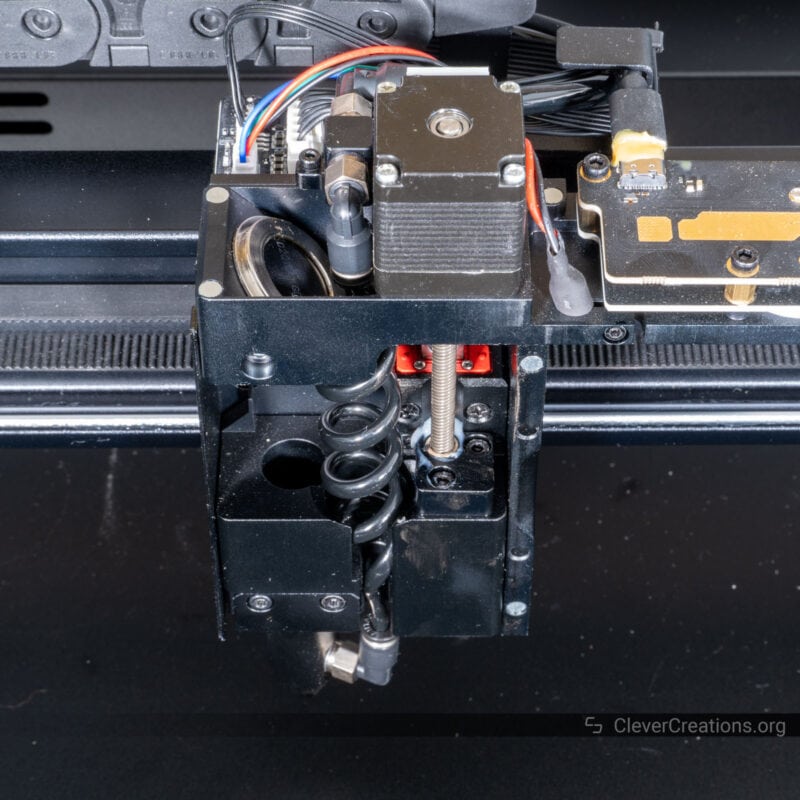
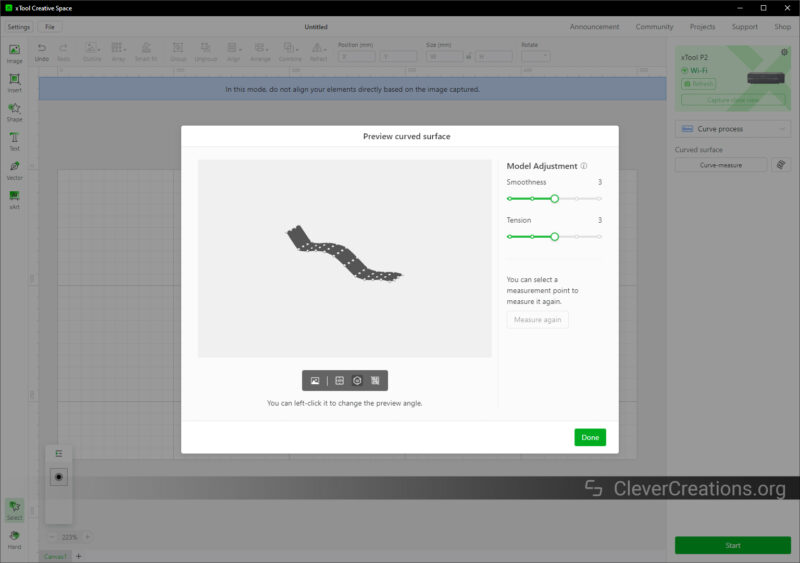
One of the most unique features of the xTool P2 laser cutter, and one that we haven’t seen before on any other laser machine, is its ability to engrave on curved surfaces.
Because the machine can adjust the height of the laser lens with a Z-axis stepper motor, it can follow the curves of a surface to engrave intricate designs on it.
If you are experienced with laser cutting, you might know that most machines can only work with flat surfaces. It’s a big limitation when it comes to customizing existing objects.
The xTool P2, on the other hand, is capable of engraving curved surfaces without any issues. Practical applications for this would be customized phone cases, instruments, USB drives, jewelry, and various industrial components.
How it works is as follows: the machine scans the surface of the object and measures its curvature to adjust the laser head height accordingly. It then follows along with that same curve as it engraves or cuts.
In combination with the material compatibility of the xTool P2 CO2 laser cutter, the possibilities are nearly endless. For large engravings on cylindrical or spherical objects, you still want to use a rotary attachment—the RA2 Pro being the obvious choice—but for most other situations, the curved surface engraving works amazingly.
Dual 16MP Cameras
Inside the xTool P2 machine, you can find two 16-megapixel cameras that help you visualize the workspace from your PC. When you want to set up a job or align the laser, the cameras will provide you with a view of what is happening inside.
This is somewhat similar to xTool’s M1 desktop laser and blade cutter, even though that machine only comes with a single 16MP camera.
One of the cameras of the xTool P2 is mounted above the work area of the laser cutter. It has a fish eye lens and provides you with an overview of the entire workspace at once.

In the accompanying xTool Creative Software, you can capture an image with this camera and overlay your designs. This makes setting up jobs a whole lot easier since you don’t have to continuously open the lid and peek inside.
The other camera is located on the laser head itself. You can use it to take images of specific areas that you want to look at in more detail and resolution.
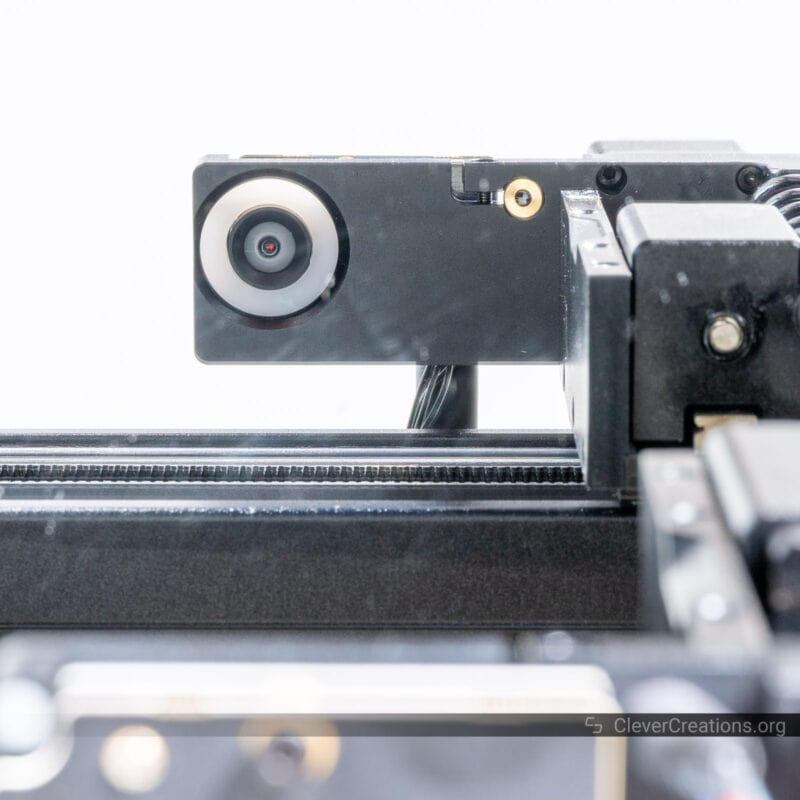
For precise alignment tasks, we found the image from the laser head camera to be the most practical. The view from the wide-angle camera tends to be a bit warped at the edges due to the fisheye lens. It’s not ideal for doing precision alignment.
The laser head camera, on the other hand, provides a straighter view of the workspace, which we found to work better for precisely aligning engraving and cutting jobs.
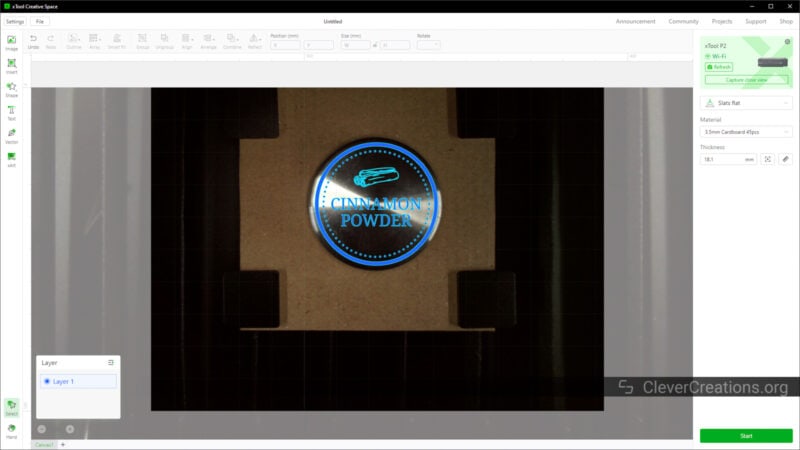
In practice, this alignment method works decently well, but not perfectly. Typically, engravings and cuts were off by a maximum of 0.5 mm from where we intended them to be.
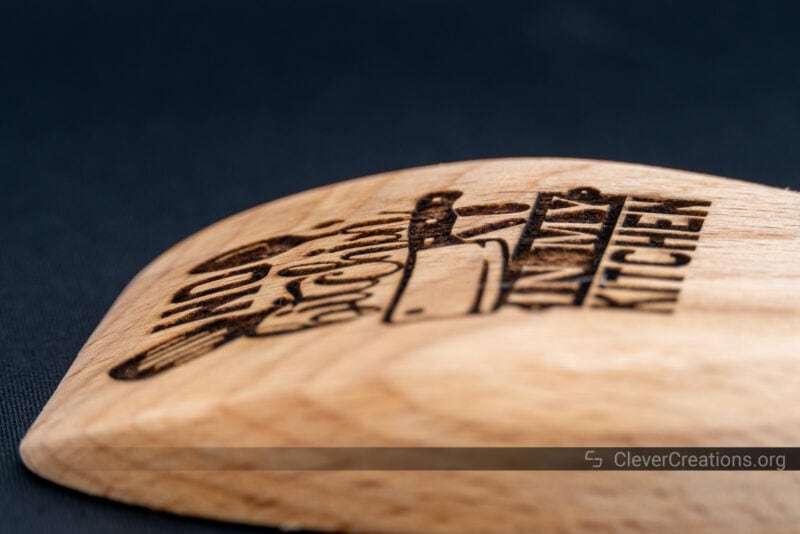
One situation in which this is most notable was when we engraved the lids of the spice jars we showed earlier. Especially in the first couple of attempts, we had some engravings that did not line up perfectly.

By zooming in on the XCS software and paying close attention to where the lids ended and the shadows started, we were able to get the rest of them aligned perfectly.
We believe that a red laser cross or dot would still have been a good addition to the xTool P2 CO2 laser machine for situations where you need as much accuracy as possible.
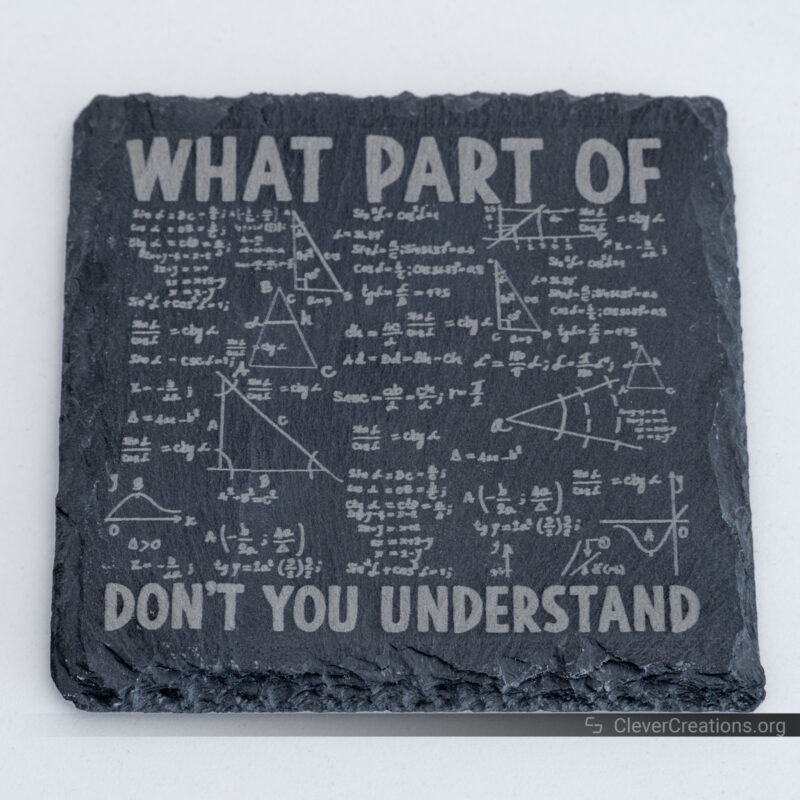
Another limitation of the cameras we encountered was the capturing of dark objects. There simply isn’t enough light inside the machine to capture good images of dark materials like slate coasters or black business cards.
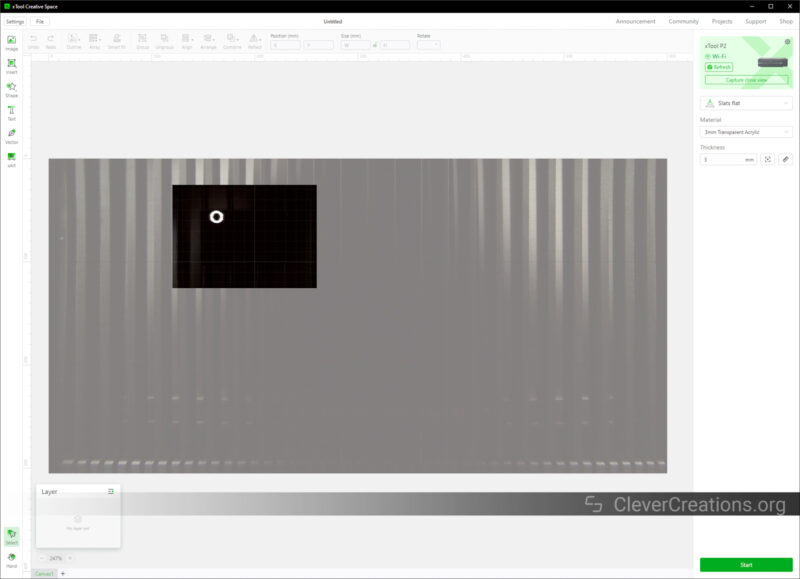
In the case of the slate coaster, we used white masking tape so that we were able to see where our object was located inside the machine.

Only then we were able to align our engraving and get a good result. Again, it did not end up perfectly centered, but close enough.
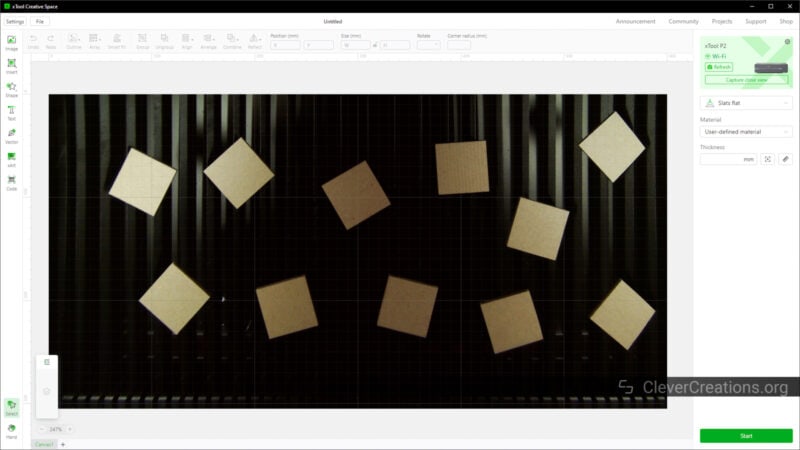
Smart Fill Batch Engraving
Another cool feature of the xTool P2 CO2 laser cutter, or more of the xTool Creative Space software that comes with it, is the ability to engrave multiple identical items in batches.
What this means is that you can place multiple objects inside the machine and let the software take care of the alignment job for you. No matter how the objects are aligned or oriented, the software will place the design exactly in the same spot on each of them.
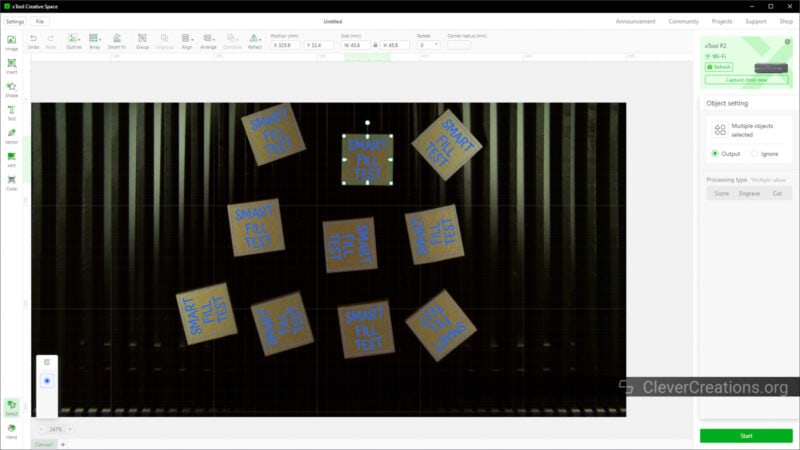
We found this to save a lot of time when engraving many objects at the same time. If you are running a business selling laser-engraved items, this is a massive advantage. It drastically cuts down the amount of manual labor involved.
There’s no need for jigs or fixtures, and you can quickly set up jobs and move on to the next task.
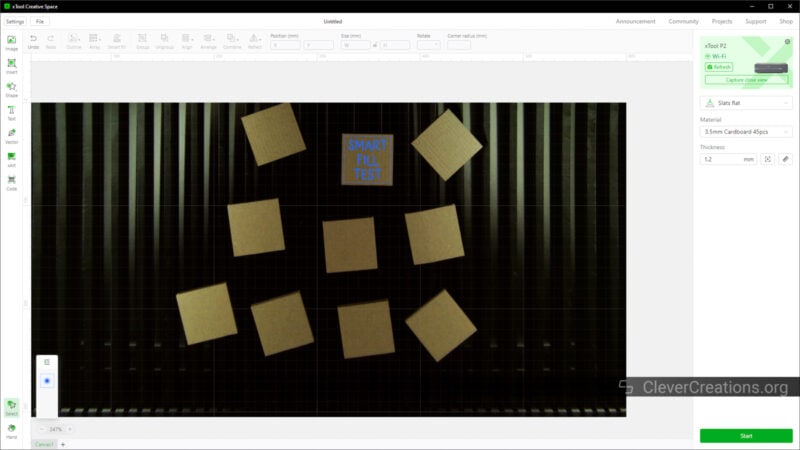
One limitation we found is that you are dependent on high contrast when using the batch engraving feature. In the example above, it only detected cardboard in the dark areas where the machine’s internal light did not reflect on the slats and tray. This is why the top left and top right sections are left unpopulated.
Other than that, however, the batch engraving feature of the xTool P2 CO2 laser machine works well and has already saved us a ton of time.

Large Working Area
You might think that with all those features packed in, the xTool P2 laser cutter has a reduced working area. Nothing is further from the truth, however.
With a 680×360 mm (26.7″x14.1″) bed size and a 600×308 mm (23.6″x12.1″) processing area, it stands out among other laser machines in this category.
For example, an FSL Muse Core offers you a maximum area of 508×305 mm (20″ x 12″), whereas a Glowforge laser cutter can only handle workpieces up to 495×279 mm (19.5″ x 11″).
Of course, the large work area of the xTool P2 does cause the machine to have a larger footprint. The integrated cooling water pump and air assist pump contribute to this as well.
To comfortably fit the machine on your desk or workbench, you’ll need about 1000x639x268 mm (39.4″x25.1″x10.6″). Not a size that is for the faint of heart.
On top of that, you’ll need:
- Space on the left of the machine for any network/USB cables.
- Space on the right of the machine to access the emergency button.
- Space above the machine to open the lid.
- Space in front of the machine to slide out the bottom tray.
All of this goes to show that though the xTool P2 is a fantastic laser cutter, you need to plan for it before you commit to one. It requires a lot of space in your workshop or office if you want to use it comfortably.
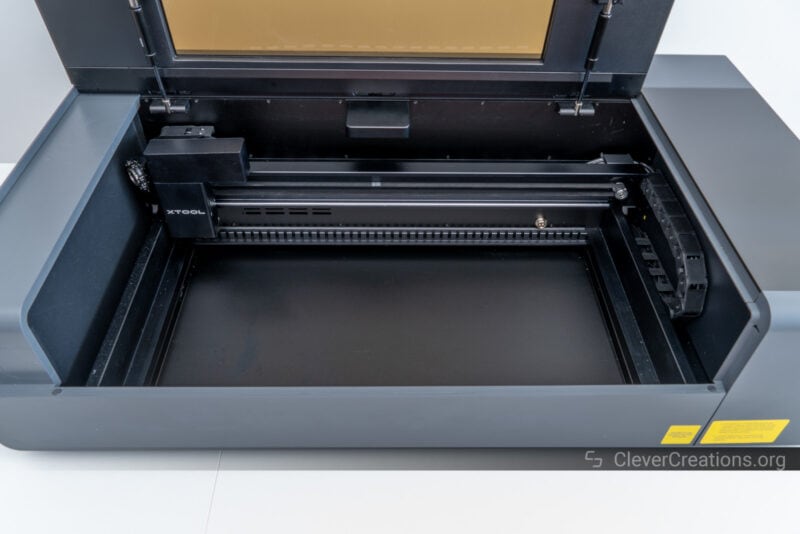
Slats
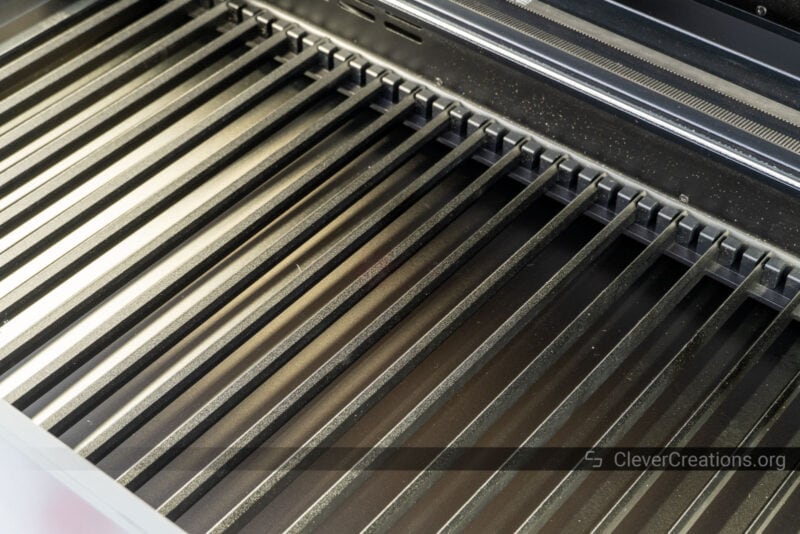
When using the xTool P2 for cutting flat sheets of material, the material will rest on the slats that come with the machine. They consist of multiple parallel bars that run along the depth of the machine.
Compared to a honeycomb bed, the slats allow for smoke to escape better. As a result, you’ll have better results and less flashback on the back of your material. Especially when working with wood, this is a very useful feature.
The slats are spaced 26 mm (1″) apart, so smaller objects will fall through the gaps. In that case, you can place a sheet of cardboard or wood underneath to support the material.
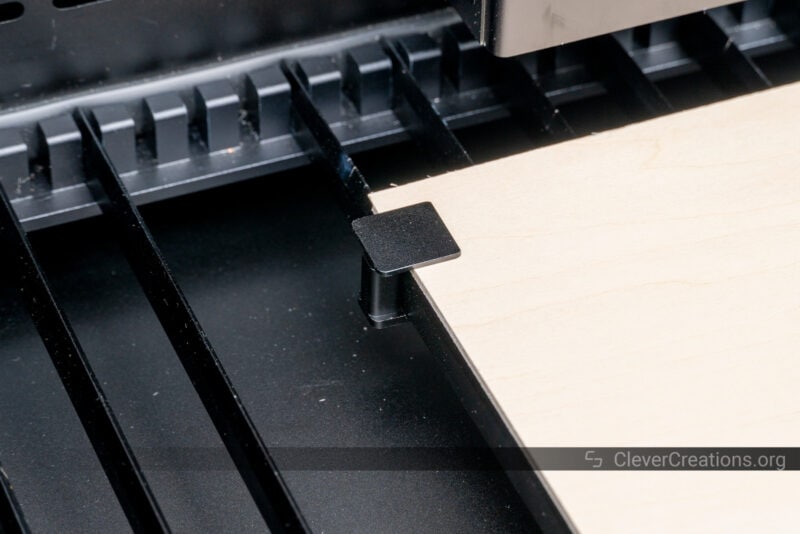
To hold workpieces in place, the P2 laser cutter comes with four spring-loaded clamps. They are surprisingly strong and can hold materials up to 12 mm (~0.5”) in place without any issues.
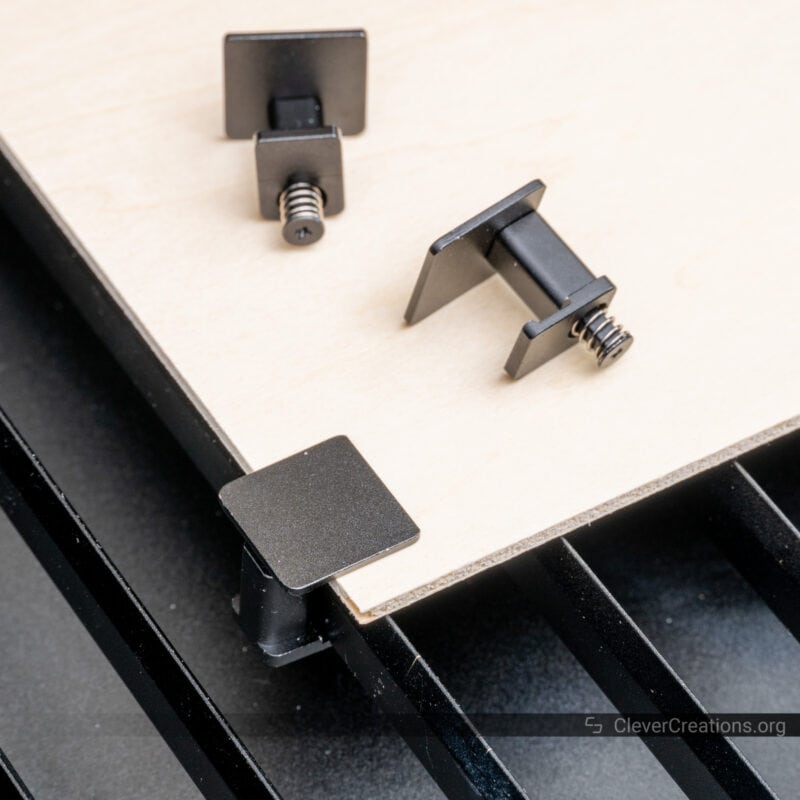
One issue we did run into during our testing is that it is quite fiddly to hook the clamps to the slats. There’s only limited space for your fingers to move when trying to attach them.
Our solution was to simply remove the adjacent slats to create extra space for our fingers. That way, we were able to place the clamps without hassle.
Working Height
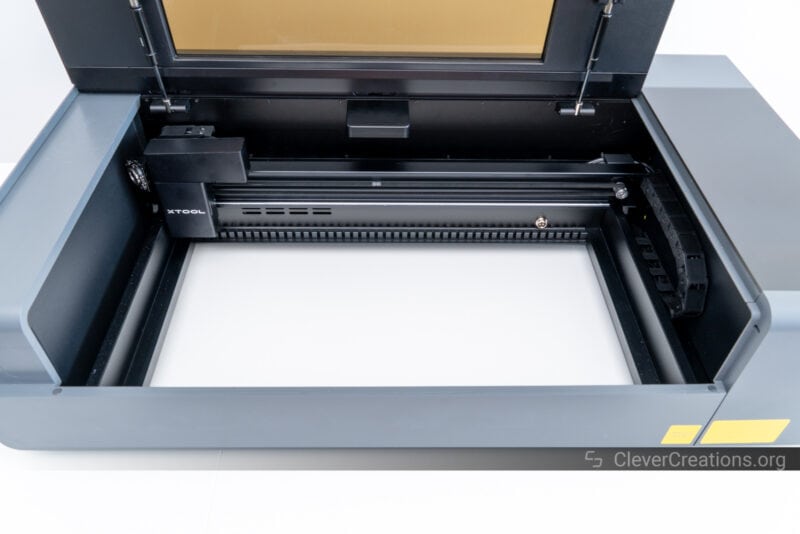
As we mentioned above, it is possible to remove the slats of the xTool P2 laser cutter. This increases the working height of the machine and is another way in which this machine proves its versatility.
When you remove the slats and place your workpieces on the bottom tray of the machine, you have a maximum working height of 64 mm (2.5″).
Remove the tray, however, and you’ll be able to place objects on the surface underneath the machine itself. That will give you a maximum working height of up to 71 mm (2.7″).
Making a similar comparison as before, a Glowforge only gives you 50 mm of height to work with, whereas an FSL Muse Core does a bit better with 64 mm (2.5″) of maximum working height.
That’s not even the best part, however. The xTool P2 has the option for a riser base that increases the total work height to a whopping 215 mm (8.7″).
It is an accessory with an extra cost associated with it, but if you expect to customize a lot of tall items, it might be worth the investment.
Even without it, however, the xTool P2 laser cutter has an excellent maximum working height of 71 mm (2.7″). That makes sure you have plenty of room for engraving or cutting objects and is more than enough for most applications.
Build Quality and Construction
After testing the xTool P2 from the inside out, we can confidently say that it is a well-built machine. There is absolutely nothing that suggests xTool has cut corners anywhere and there is no doubt in our mind that the P2 is durable and built to last.
The excellent build quality can also be seen in the dimensional accuracy of its engravings and cuts. For example, it was remarkably easy for us to make perfectly fitting inlay pieces.

Even when engraving at its maximum engraving speed, we weren’t able to notice any quality loss in the results. You won’t be able to reach the maximum 600 mm/s speeds all the time. It depends on your artwork and the material you are working with. However, you can be assured that the xTool P2 delivers consistent results as a laser engraver.
Let’s look at some of the more technical aspects of the machine’s construction.
Laser Tube Cooling
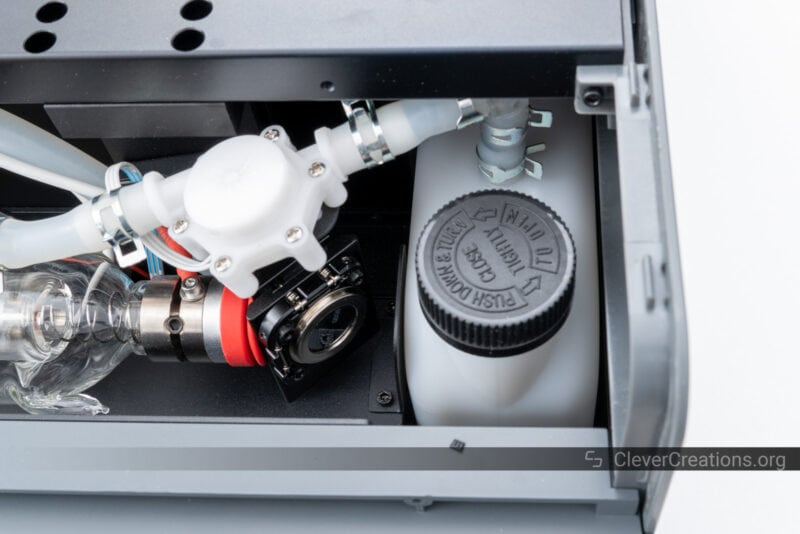
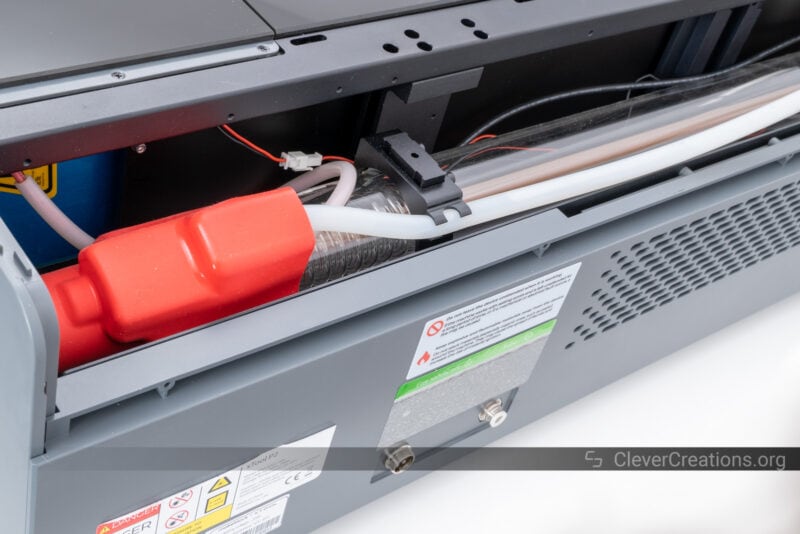
The cooling pump, reservoir, and other cooling loop components of the xTool P2 laser cutter help protect the laser tube from any damage due to overheating. Laser tubes are expensive components and it’s important to keep them in good condition.
By extension, the cooling system is one of the most important components of a laser cutter and xTool has done a great job at integrating the closed-loop system as a whole into the body of the machine itself.
After initially filling the cooling loop, there’s nothing to do other than perhaps periodically check the fluid levels. It really is that simple.
We found it to be a relief not to have to deal with external cooling systems like with some other machines. The cooling system of the xTool P2 just does its thing automatically in the background. You can rely on it without having to spend any time on it.
Machine Lid
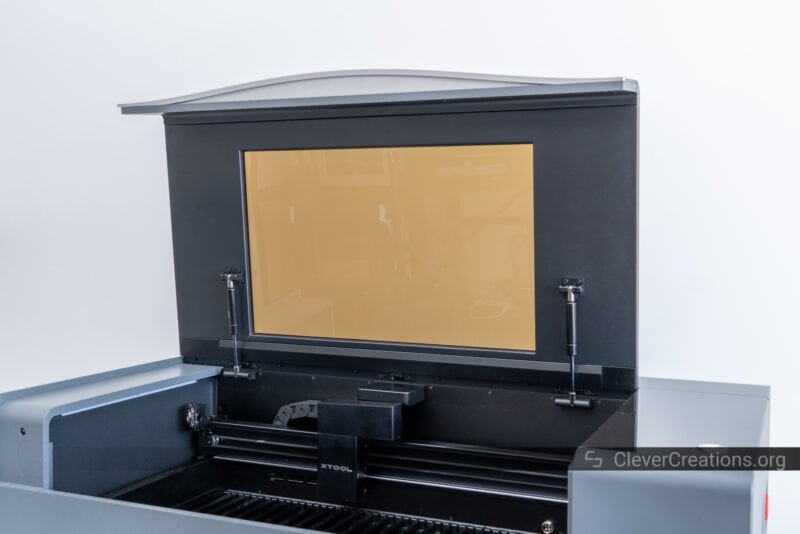
Because the xTool P2 CO2 laser machine is fully enclosed, you’ll have to open its lid before you can place materials inside.
The lid itself is well-built, with a clear viewing window to monitor the progress of your engraving or cutting. It also serves as a safety feature, as the light-filtering lid blocks out the beam of the laser and prevents it from releasing any dangerous radiation.
You’ll find that the lid has two pistons that hold the lid open after you pull it up. We found the whooshing sound they make when opening the lid to be quite satisfying.

One thing that we don’t like is that when closing the lid, the pistons don’t seem to do all that much. The lid lowers quickly and you have to be careful that it doesn’t come crashing down with a loud noise.
It’s a minor issue, but one that we were surprised by given the overall excellent build quality of the xTool P2 CO2 laser cutter.
Integrated Exhaust System

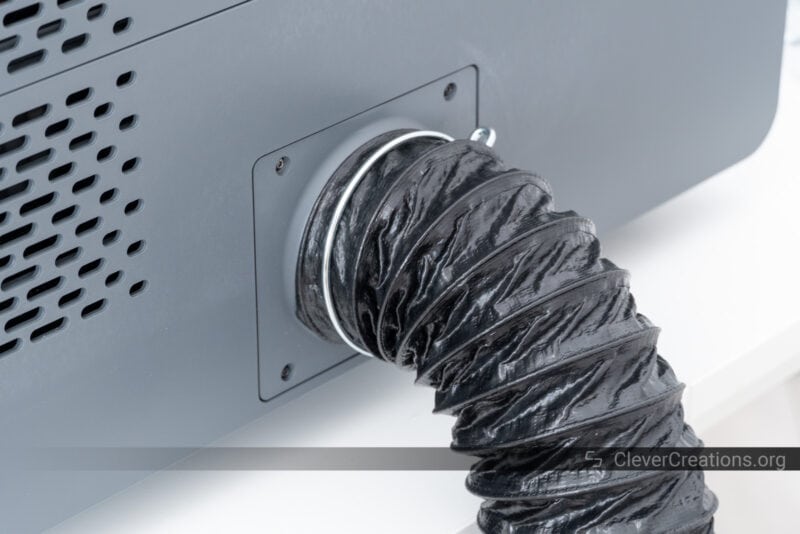
To remove smoke from both the machine and your workspace, the xTool P2 laser engraver and cutter comes with an integrated exhaust system. This consists of a large fan and an exhaust port at the back of the machine.
A fitting exhaust hose and spring hose clamps are included, so there’s no need to purchase any extra accessories. Simply hook it up to your existing ventilation system or hang it out of a window, and you are all set.
We should point out that we only tested the xTool P2 laser cutter in combination with the xTool Smoke Purifier, which has its own fans that produce additional airflow. But just the P2’s extraction fan is still more than enough to keep your workspace smoke-free.
Noise Levels
One of the few complaints about the xTool P2 CO2 laser cutter is that it is quite loud. The extraction fan and cooling system produce a considerable amount of noise that makes it sound like you are working with industrial equipment.
It doesn’t help that they also produce low-frequency vibrations that travel through the machine and into your desk or work surface.
These vibrations don’t have an impact on the quality of the cuts and engravings, however, so it’s something that we can live with. Just don’t expect to be able to use the xTool P2 in peace. Everyone in the vicinity will know you are using it.
Automatic Conveyor Feeder
In combination with its automatic conveyor feeder accessory and riser base, the xTool P2 laser machine offers you the option for automatic passthrough of materials with flat surfaces.
This increases the maximum working area of the machine to a whopping 3 meters by 50 centimeters (118×19.6”), which gives you the ability to make large signage and process large volumes of material in an instant.
The automatic conveyor feeder is compatible with hard thicker materials, like plywood (14 mm), acrylic (12 mm), and fiberboard (12 mm), but also softer materials like felt board (9 mm), cork board (12 mm), and EVA board (10 mm).
Its adjustable pressure anti-slip wheels should provide the ideal grip on any material, but we haven’t tested the automatic conveyor feeder to confirm its performance.
It’s a similar functionality as the Glowforge Pro offers, even though the xTool P2 CO2 laser cutter with automatic conveyor feeder + riser base costs you less.
Safety Features
From top to bottom, the xTool P2 is a safe laser engraver and cutter. As long as you follow its instructions, there’s nothing that can go wrong and it won’t cause any harm to you or your workspace.
There are a couple of included and optional features that ensure you have a hard time messing up, even if you wanted to.
Automatic Lock
For example, the automatic lock on the xTool P2 laser cutter physically prevents you from opening the lid while the laser is active.
It’s an electronically controlled solenoid lock that extends as soon as the laser is activated and retracts 15-20 seconds after your engraving or cutting job has been completed. This is so that the machine can exhaust any fumes inside the machine before you open the lid.
We found the latter to be slightly annoying, as we are always eager to inspect the results as fast as possible. But we understand that safety goes first, and it’s probably a good thing that the xTool P2 laser cutter protects us from ourselves.
The lock appears to be tamper-proof, so it’s difficult—if not impossible—for any kid to find a way to open the machine while it’s running.
Emergency Stop Button
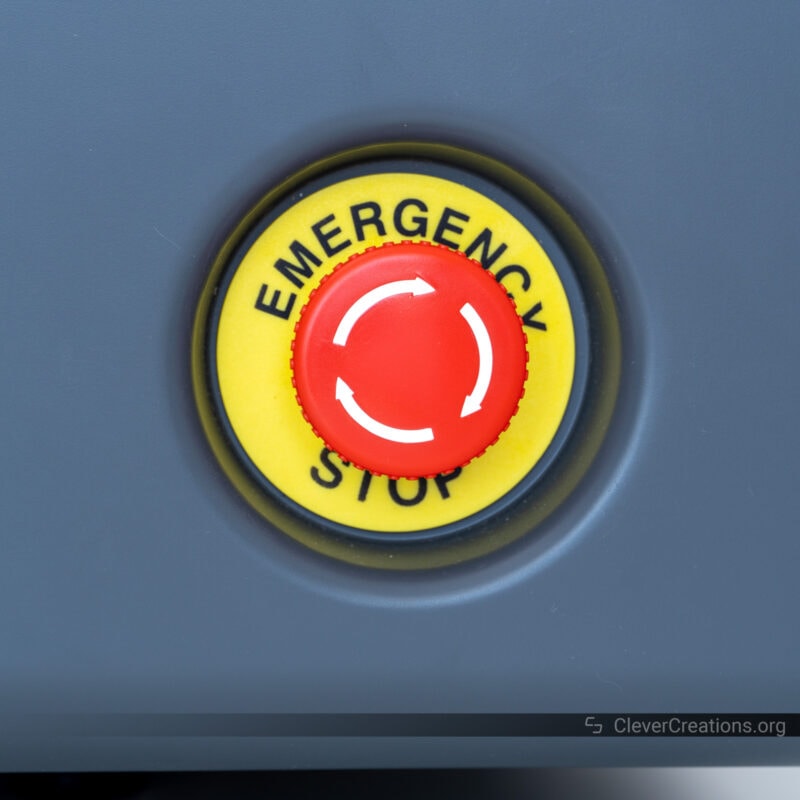
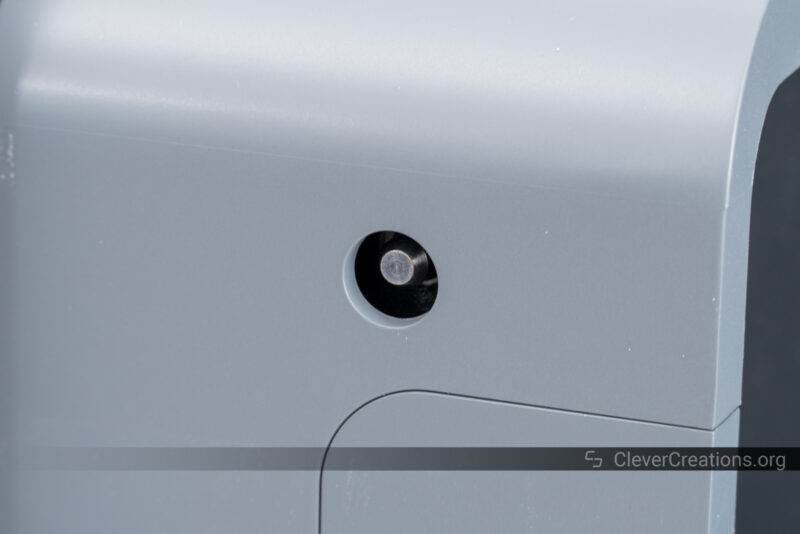
Just in case something goes wrong with the xTool P2 during the laser cutting process, the machine has a dedicated emergency stop button on its right side. It instantly shuts down the machine and unlocks the lid when pressed, so you can access the work area right away in case of a fire or malfunction.
The emergency button is a useful feature, but we feel like its placement could have been better. It’s located at the far end of the bottom of the right side of the machine, where it is difficult to reach.

Because it’s also invisible from most angles, it’s hard to find for people who aren’t familiar with the xTool P2 CO2 laser cutter. Ideally, xTool would palace it at the front or on top of the machine where everyone can quickly see and access it.
As it is, you also have to keep the area to the right of the xTool P2 free from obstructions, like furniture or other objects. Forget about placing the right side of the laser cutter right next to a wall, for example.
Because we did not run into any dangerous situations with the machine, we haven’t found the need to use the emergency button for that purpose.
We did use it as the main button for turning the machine on and off. Despite its placement, it is easier to reach than the power toggle switch at the rear of the laser cutter.
Fire Suppression System
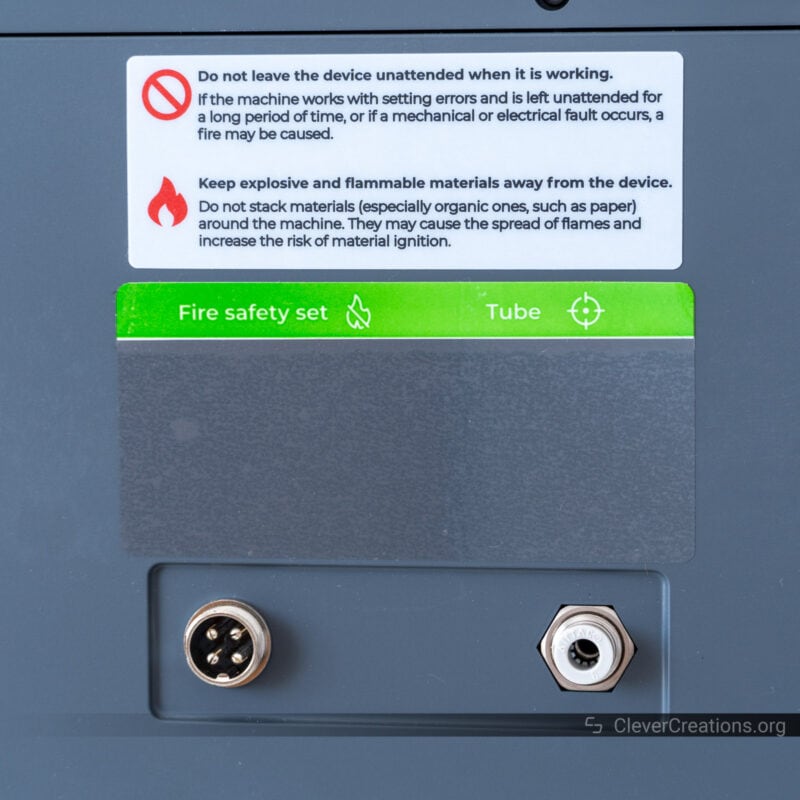
There is an optional fire suppression system accessory that you can opt for. We haven’t tested it, and it’s available in the US only. If it does what it says on the tin, it’s a great addition to the Xtool P2 CO2 laser cutter.
The xTool fire safety set is designed to automatically cut the power to the laser cutter in the event of a fire, as well as release CO2 gas into the work area to extinguish the fire. The CO2 is released from a replaceable canister, so it’s not just a one-time-use thing.
At the back of the P2—pictured above—you can find two ports to hook up the fire suppression system. It’s fairly self-explanatory, even though we are sure that xTool’s documentation for the accessory is thorough and detailed.
We think this is an interesting feature, and it’s rare to find this type of fire safety accessory for laser machines. If you expect to work with flammable materials, run long engraving or cutting jobs, or just want that extra piece of mind, then it’s worth considering.
That said, when we tested xTool’s D1 Pro, one of our main issues was its sensitive flame detection sensor. We ended up disabling it altogether to avoid false positives.
Since we haven’t tested the fire suppression system on the xTool P2 CO2 laser cutter, we can’t tell you whether or not it suffers from similar issues.
Ease of Use
We found the xTool P2 laser cutter to be much easier to use than other laser machines we’ve worked with. From getting the machine up and running to setting up engraving and cutting jobs, or even cleaning, it’s all very streamlined.
There are several aspects of the P2 that are responsible for this. Let’s look at them one by one.
Automatic Focusing
One of the neat functions of the xTool P2 laser cutter is that it can automatically adjust the focal length. No longer do you have to manually adjust the focal length with manual focus bars and thumbscrews, just use the button in the XCS software to measure the material from the camera preview.
This doesn’t only tell the machine the focus distance, but it also calculates the height of the material you are working with and adjusts the scores/engraving/cutting settings accordingly.
Yes, you heard that right. You only have to select the material you are working with from the large database of materials, and the XCS software will adjust its settings based on the thickness measurement of the actual material you are working with.
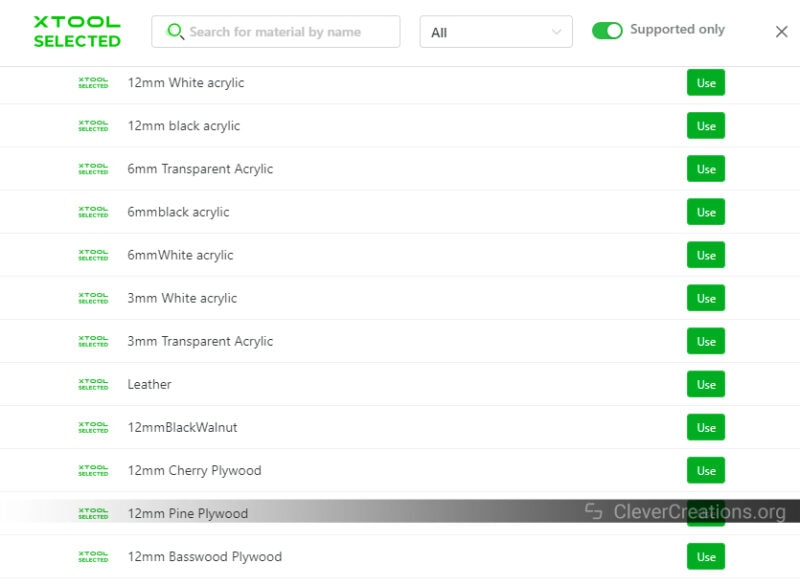
We can’t stress enough how much time and frustration this saves. No more guesswork or testing of how the laser interacts with specific materials. It’s a game-changer, and it works incredibly well.
There are still exceptions. For example, wood varies a lot in composition and moisture levels. But for homogenous materials, like acrylic, the recommended settings are practically guaranteed to work.
During our testing of the xTool P2 laser cutter, we barely found ourselves having to run test cuts or engravings. With the presets and automatic calculation of settings, most jobs just worked on the first try. It’s clear that xTool has spent a good amount of time getting the preset settings just right.
The only exception we ran into with the height measuring function is that we weren’t able to measure the thickness of transparent materials, like glass.
When you think about it, that makes sense. Unlike the 10649 nm wavelength of the xTool P2 CO2 laser beam, the light that is used to measure the height of the material passes straight through transparent materials.
We solved it by just manually measuring the material thickness with calipers. After doing that, the software knew at which height it could expect the material and focused accordingly.
xTool Creative Space Software

Compared to software like Lightburn and LaserGRBL, manufacturer software can often leave something to be desired. Fortunately, the xTool Creative Space software (XCS) is a welcome exception.
We found xTool Creative Space not only user-friendly but also powerful in terms of features and control over settings. We were pleasantly surprised by how well thought out the interface was and how many advanced options were available at your fingertips.
You can xTool Creative Space to create basic designs, like adding text, images, and vector drawings for engraving. But it’s also possible to generate barcodes and QR codes on the fly.
For more advanced designs, you’ll still want to use a vector graphics package like Adobe Illustrator or Inkscape to create the artwork. You can then import it into xTool Creative Space and adjust the settings.
There’s also an AI art generation feature. We haven’t tried it and aren’t a fan of those sorts of things in general. It also costs credits for each use. But if you’re into that kind of thing, it’s there.
If you want to make use of the advanced features of the xTool P2 laser cutter, this is the software you want to use.
While the xTool P2 supports Lightburn software, the features you can use are limited. There’s no support for camera preview, curved engraving, or auto-focus. It was much less useful for us than xTool Creative Space. We recommend sticking to the manufacturer’s software if you want to get the most out of your machine.
xTool does provide full instructions for connecting Lightburn software to the P2, along with a .lbdev file, so it’s not like they don’t support their users. Just make sure to temper your expectations about the features you can use if you decide to go with Lightburn instead of the official xTool Creative Space Software.
Connectivity Options
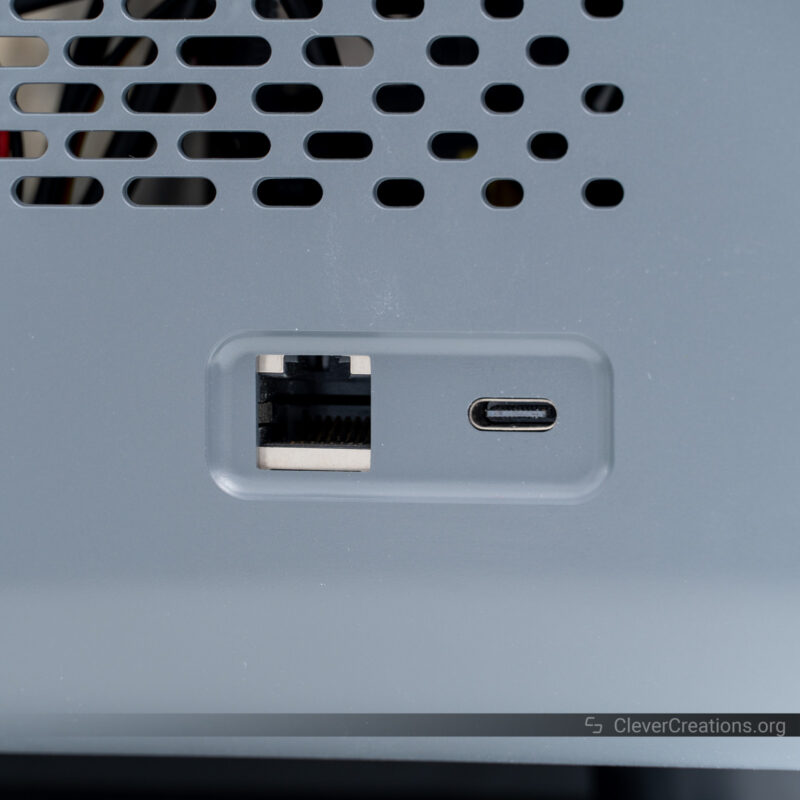
In terms of connectivity, the xTool P2 laser cutter impresses as well. With Ethernet, Wi-Fi, as well as a USB-C port at your disposal, there are plenty of ways to connect the machine from a computer.
There were a couple of quirks we ran into with the connectivity. The first is that we initially grabbed two random USB Type-C cables from our shelf that we couldn’t get to work with the xTool P2. Only when we got the official cable from the box were we able to get a connection.
The second quirk is that we weren’t able to connect from our PC to the xTool P2 over USB while we had VPN software enabled on the PC.
The P2 does not require to be connected to the internet to be used—we made sure to check that because of how Glowforge machines work—so we’re not sure what prompted this behavior.
Fortunately, this was easily solved by just disabling the VPN connection before connecting to the xTool P2.
Altogether, the connectivity options provide you with plenty of flexibility for setting up the P2. If you run into any issues, xTool has clear documentation to solve whatever the connectivity problem is.
User Interface
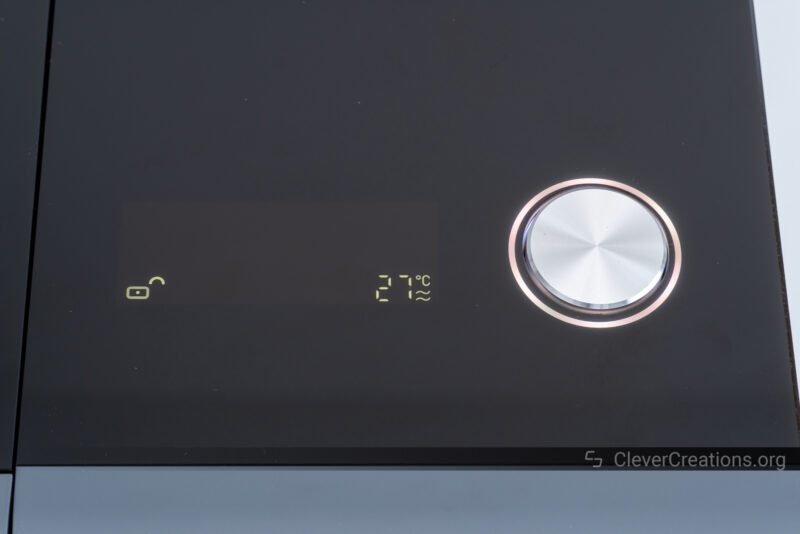
If you want to directly interact with the xTool P2 laser cutter, you can do so using its embedded LCD screen and large button.
The screen displays a variety of information, like the status of the door lock, the process of the job, as well as the current temperature of the coolant.
There’s also an RGB circle around the button that indicates the current status of the machine. It glows or pulses in various colors depending on what it is doing.
It’s all slick and well-designed, but in all honesty, we didn’t find ourselves using it that much. With the P2 connected over Wi-Fi, we were able to do anything we wanted to do from the xTool Creative Space software on our computer.
The only times we used the button was to start a job, and that’s only because the XCS software prompts you to do so as a confirmation.
It’s a nice interface, but there’s also a reason why we listed it as the last item in this xTool P2 review.
What Can the Xtool P2 Cut?
With the powerful laser cutter abilities of the xTool P2, you can cut acrylic, corrugated paper, leather, fabric, wood, plastic, felt, cardboard, kraft paper, bamboo, PVC, and MDF.
What Can the Xtool P2 Engrave?
The material compatibility for the engraving process of the xTool P2 includes the materials above, along with ceramic, marble, glass, shale, jade, brick, cement, coated metal, painted metal, and electroplated metal, like anodized aluminum alloy and anodized titanium steel
How Thick Can Xtool P2 Cut?
We have confirmed that the xTool P2 can cut up to an impressive 20 mm thickness of solid wood in a single pass, and the same can be said for acrylic. We have not tested any materials thicker than that, but you can expect to be able to cut thicker materials with multiple passes.
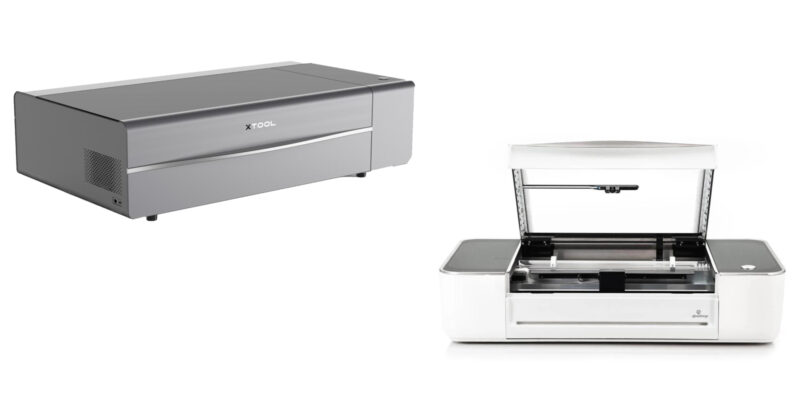
Is the Xtool P2 Better Than a Glowforge?
The simple answer to this question is yes, it is. The Glowforge may be the most well-known laser cutter on the market, but when you compare features and performance, the new xTool P2 easily comes out on top.
With a larger processing area, higher laser power, and faster maximum engraving speed, the P2 is capable of taking on more intensive projects.
Plus, the software support for the xTool P2 is much better than Glowforge’s proprietary Cloud-based software.
The xTool P2 also costs less than a Glowforge Pro and can laser engrave curved surfaces, something the Glowforge Pro—and every other desktop laser cutter available right now—simply can’t do.
Verdict: Who is the Xtool P2 For?
When trying to answer the above question, perhaps we should ask who isn’t the xTool P2 laser cutter for. There’s so much that this laser machine can do, it’s hard to find someone who won’t benefit from it.
Those with basic needs, like cutting and engraving wood and acrylic materials, will be more than satisfied with the xTool P2. For those looking for a bit more of a challenge, the machine can also handle engraving on glass and metal materials.
If you have the money and want the best desktop laser cutter available right now, this is it. If you want to start a laser engraving or cutting business and want the machine that offers you the least setup time on your jobs and the easiest workflow, this is also it.
If you are a hobbyist that wants to make all the cool laser cutting projects from Instagram or Pinterest, you guessed it, the xTool P2 is one of the best laser machines to go for. And if you want to engrave curved objects, there isn’t even a close second option.
Of course, there are simpler laser cutters, even diode laser machines, that don’t have the advanced technology that the xTool P2 has. But if you want something that doesn’t limit you and is future-proof, the P2 is the way to go.
The elephant in the room is, of course, the price. How much can you expect to spend on all this?
As we speak, the xTool P2 costs $4,599. Since most of its advanced features are built-in, it’s unlikely that you need many add-ons—if any—so you can consider that the final price. That already puts it miles ahead of the FSL Muse Core ($3,749 for just the base unit).
The Glowforge Pro, with its $7,000 price tag, pales in comparison to what the xTool P2 offers. Especially when you consider the limitations of the Glowforge Pro, like its subscription model and always-online requirement.
You can find the FLUX BeamBox at roughly the same price as the xTool P2, but without curved surface engraving and a very limited cutting depth, the P2 seems the better option. Even though the touchscreen interface of the BeamBox is a neat feature that the P2 does not have.
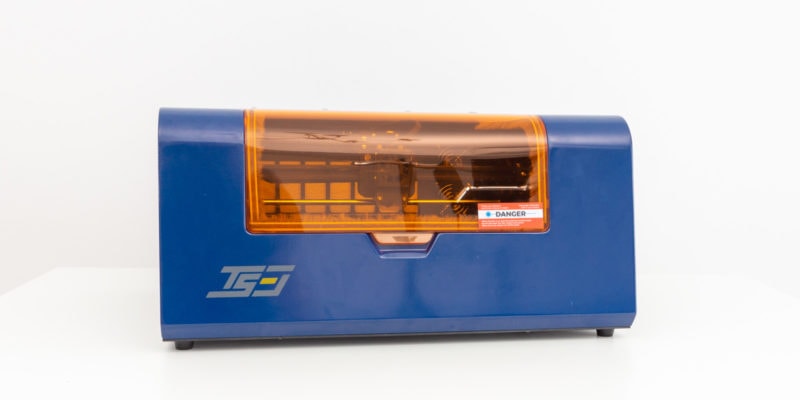
On the cheaper end of the spectrum, there’s the Gweikecloud 50W CO2 laser machine. At $2,800 and similar laser power and engraving speeds as the xTool P2, it looks pretty good on paper.
Still, the xTool has its curved surface engraving capability, an additional camera, optional automatic passthrough, additional fire safety features, and a more trusted company behind it. All of that makes the P2 a much better option, even though it is more expensive.
Altogether, this xTool P2 review shows us that this laser cutter ticks almost all of the boxes. It’s a great machine for those who have the money to spend and want something reliable. It does just about everything you could ask for and you can be sure to get amazing results.
The only real downside is the price, but that might just be a worthwhile investment for many. If you want something more affordable, perhaps consider checking out our list of best budget laser engravers or have a look at more Glowforge alternatives instead.
Regardless of which machine you decide to go with, we hope this xTool P2 review helped you make that decision. If you have any additional questions, don’t hesitate to comment below and we’ll get back to you! Good luck with finding the perfect laser cutter for your needs.
Happy cutting and laser engraving!