
- Great engraving and cutting quality
- Useful passive air assist
- Includes laser goggles
- Easy to square
- Silent operation
- Lightburn- and LaserGRBL-compatible
- Comes with some materials to start cutting right away
- Focus adjustment is rough
- Limited cable management
- Measuring scale is impractical to use
- Bubble level does not add much
Creality is a company mostly known as a 3D printer manufacturer. Recently, however, they’ve expanded their product line to include laser engravers and cutters.
One example of this is the recently released CR-Laser Falcon. It is a budget-friendly laser engraver that comes in two flavors: 5W and 10W laser power.
Today, we will take a look at the 10W version. In this CR-Laser Falcon review, you will see how this machine performs and whether it is good enough to make the list of the best laser engravers available right now.
Creality CR-Laser Falcon Specs
| Creality CR-Laser Falcon Specifications | |
|---|---|
| Price | Creality | Amazon | Creality3DOfficial |
| Spot size | 0.1 mm |
| Engraving depth | 0-3 mm |
| Cutting thickness | 0-5 mm |
| Laser wavelength | 455+-5 nm |
| Optical power | 5 W, 10W |
| Engraving precision | 254 dpi |
| Engraving speed | Max. 10000 mm/min |
| Engraving area | 400×415 mm |
| Laser type | Semiconductor laser |
| Input voltage | 100-220V |
| Output voltage | 24V |
| Slicing file format | Svg, png, jpg, jpeg, bmp, dxf |
| Engraving file format | .gcode (after slicing) |
| Support OS | Windows / macOS |
| Slicing software | CrealityLaser, LaserGRBL, LightBurn |
| Material support | Cardboard, wood, bamboo, rubber, leather, fabric, acrylic, plastic |
Unboxing
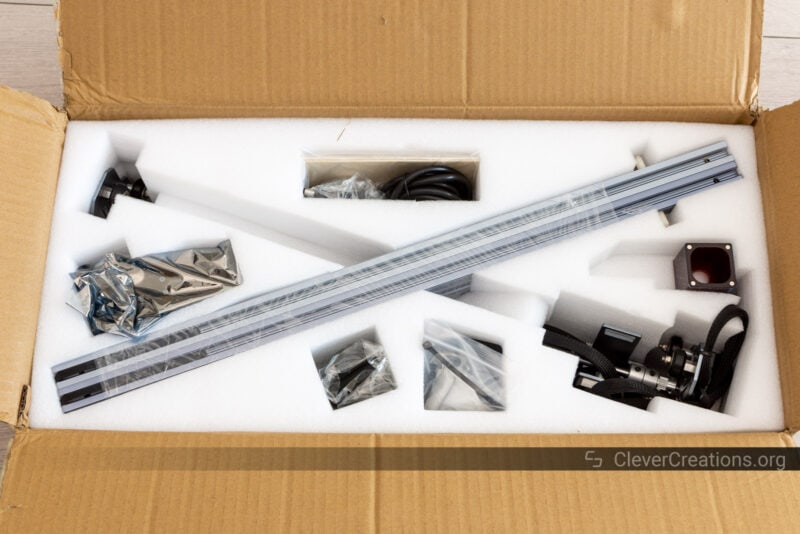
When you receive it, you will notice how small and lightweight the box of the Creality CR-Laser Falcon laser engraver is. Being mostly aluminum, the machine’s components don’t weigh a whole lot. And because the device comes mostly disassembled, Creality is able to pack them densely in the foam padding.
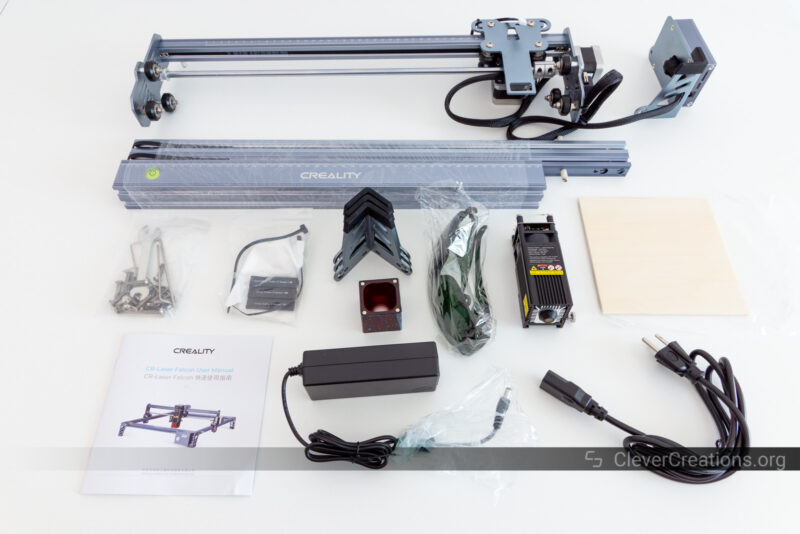
You will find the following in the box:
- X-axis assembly
- A variety of aluminum profiles for the frame
- Frame legs
- Laser module
- Power adapter
- Power cord
- Nuts and bolts for assembly
- Tools for assembly and operation
- Linden plywood
- Laser goggles
- SD card with card reader
- Multi-level focus bar
- Cable ties
- Cloth for cleaning the laser module lens
- Instruction manual
As you can see, there is quite some stuff included. The laser goggles and the cloth for cleaning the lens are welcome additions that we don’t always see.
The included 2 mm Linden plywood is nice too. It’s not a whole lot of material, but you could use it to laser cut quite a few small items, like earrings or pendants.
Getting Started With the CR-Laser Falcon
Because the Creality CR-Laser Falcon comes mostly disassembled, there is a decent assembly process involved. It’s nothing complicated, but it does take up time. You can expect to spend about 20 minutes putting everything together.
Part of the assembly process is figuring out the included instructions. As we are unfortunately used to from Creality, the translation of their manuals leaves a lot to be desired. In this instance, the images are also on the small side, making it more difficult to distinguish details.
With enough patience, you will be able to work things out. Especially if you are familiar with how laser engravers, CNC machines, or 3D printers work, you will be able to put this device together without any issues.
Assembly
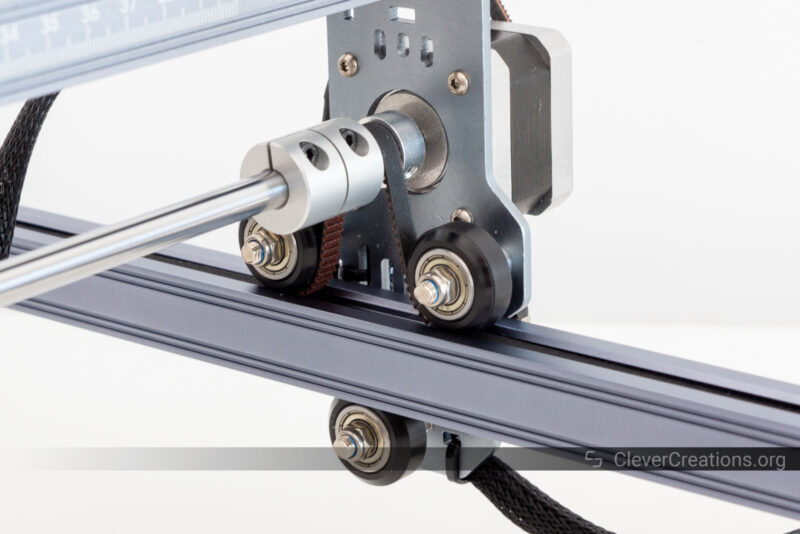
The first step is to connect the X-axis assembly to the Y-axis extrusions. This involves running the timing belt up and down through the V-wheels and pulleys, which can be a bit challenging. We recommend using a pair of tweezers to grab the belt and guide it through the components.
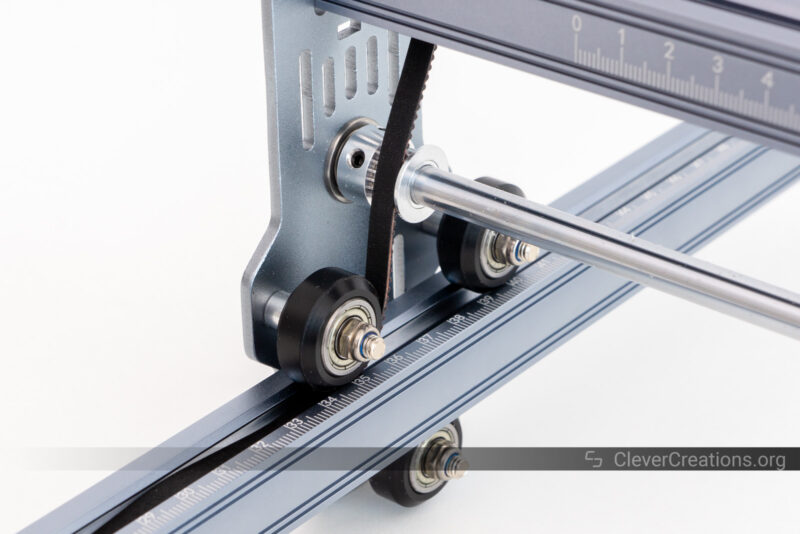
The manual recommends tightening the Y-axis timing belts after this step, but we think it is better to wait until the frame is fully assembled. That way, it is easier to ensure that both sides of the Y-axis have the same tension and that the X-axis gantry ends up square with the frame.
Next is to use the included bolts to assemble the outer frame of the Creality CR-Laser Falcon.

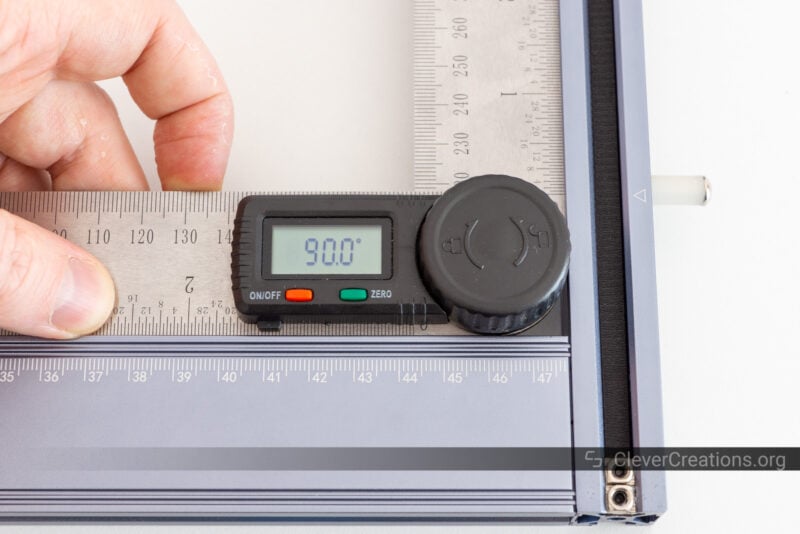
What we like about the construction of the frame is that it is automatically squared by the aluminum extrusions that are used. As a result, you don’t have to put time into measuring and making any adjustments during assembly. This was an issue we ran into when reviewing the Genmitsu Jinsoku LC-40.
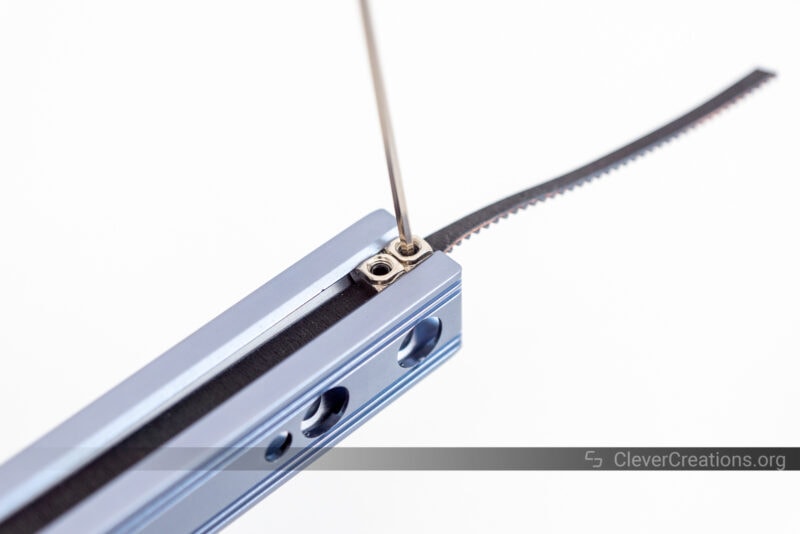
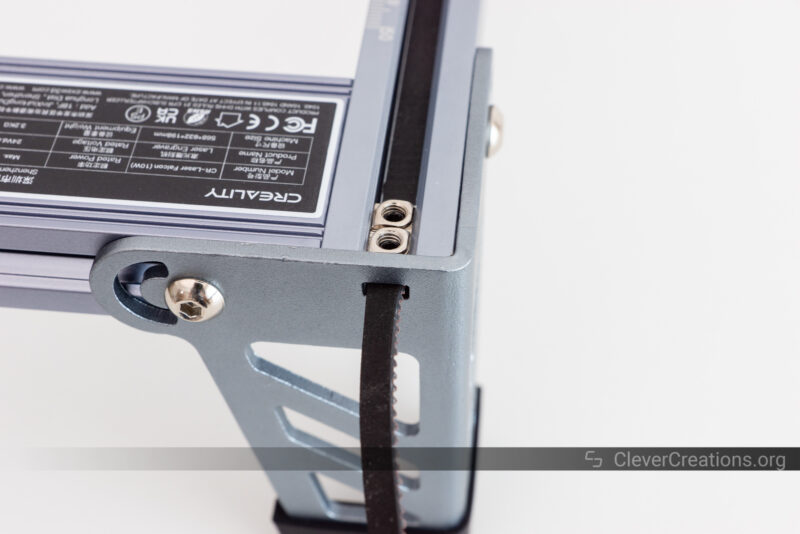
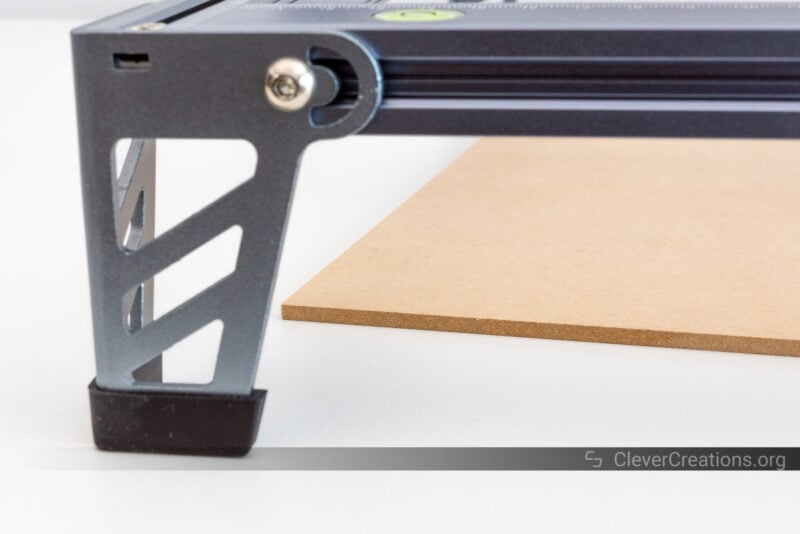
After this, attach the included feet to the frame and make sure to run the Y-axis timing belts through the gaps in the feet. At this point, you’ll want to properly tighten these belts with the same amount of tension on each side, so that the X-axis gantry does not end up crooked.
The only thing that remains now is to install and plug in the laser head. All the wiring from the X-axis carriage to the control box is already pre-connected, so you only have to use the included cable ties to tidy things up a bit.
It’s a pretty straightforward assembly process, but we do wish that the instructions were better translated and more detailed.
Setup
Before you can use the Creality CR-Laser Falcon, it is best to tighten the eccentric nuts on the V-wheels of the X and Y-axis. This will ensure that these axes move smoothly, without any unwanted vibrations.
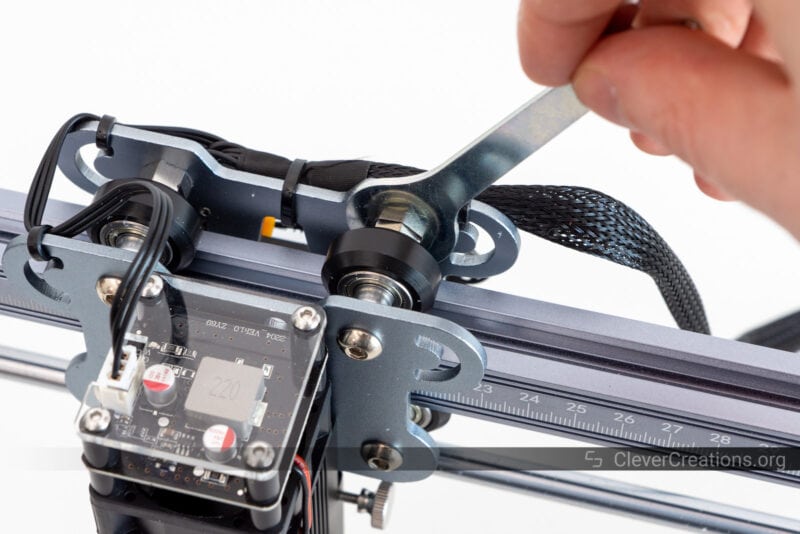
This is another step that is often emitted from Creality’s manuals. It is important not to skip it on a brand-new machine.
You can now install the software you want to use. We prefer Lightburn ($60) for its extensive feature set, but the machine is also compatible with LaserGRBL. The latter has fewer features, but it is free to use.
Creality CR-Laser Falcon Features
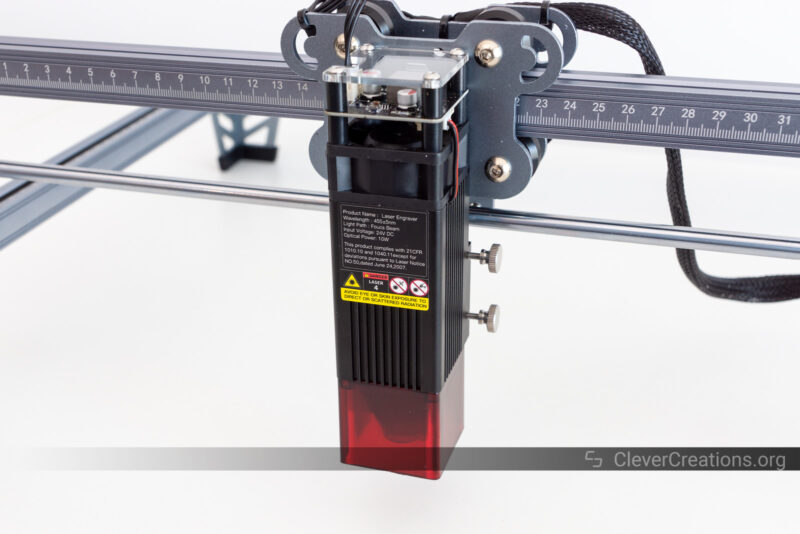
Laser Module
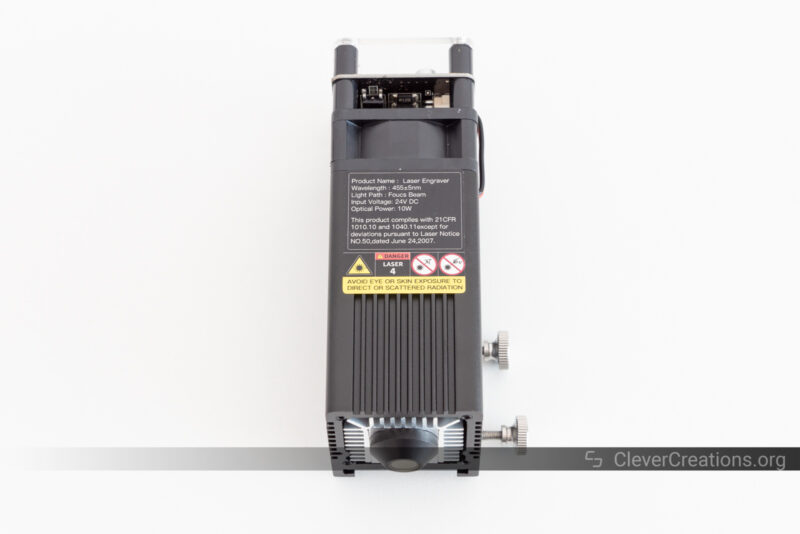
As mentioned above, the Creality CR-Laser Falcon laser engraver comes in a 5W version and a 10W version. Aside from the laser module, there are no differences between these two models.
Aside from their Wattage, the 5W and 10W laser modules have a number of differences. For example, the 5W version has a ‘fixed focus bar’ that is useful for setting the height and focus of the laser head.
An even bigger difference is the fume filtration that the 5W version has. Through the use of a fan and an activated carbon filter, the CR-Laser Falcon 5W will filter some of the smoke that is produced when engraving or cutting.
Since Creality sent us a 10W version to review, we can’t speak for the fume filtration on the 5W model.
We do know that it increases safety and comfort a bit, even though you might still want to use a complete laser engraver enclosure if you plan on using the device indoors.
If you want to mostly engrave woods, leather, or plastics, or cut thin material, such as paper or carton, then the 5W version will suffice. If you want all that and to laser cut through thicker materials, then you are better off with the 10W CR-Laser Falcon engraver.
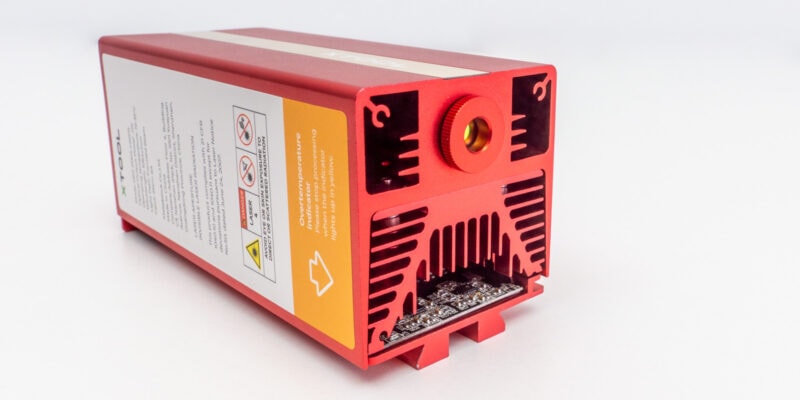
The 10W version does not have the aforementioned features. Instead, it is more powerful and better suited for more demanding laser tasks.
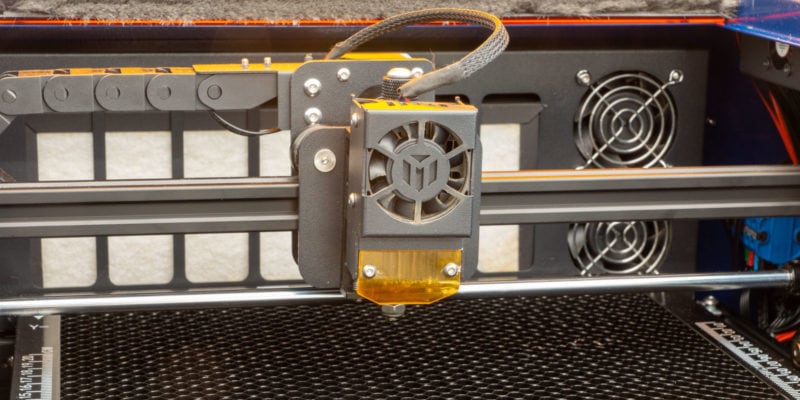
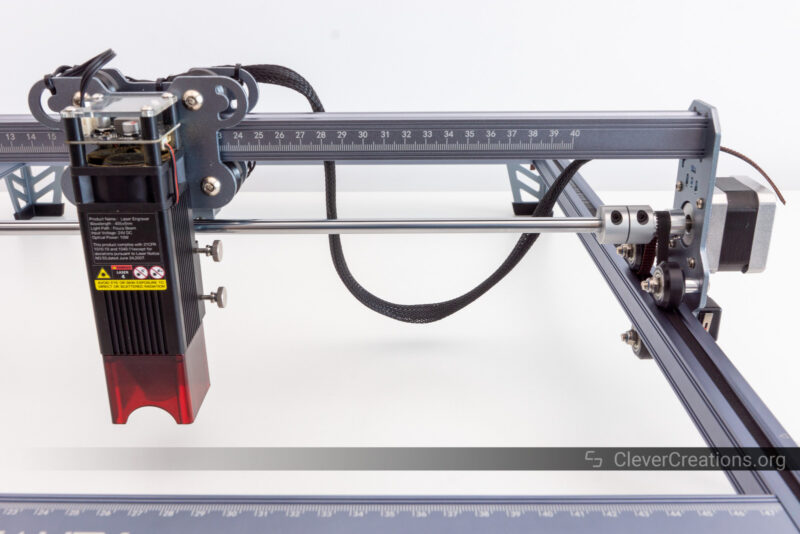
It also comes with a magnetic attachment that has multiple functions. Its shape lets it funnel air from the powerful laser module cooling fan to the object you are engraving.
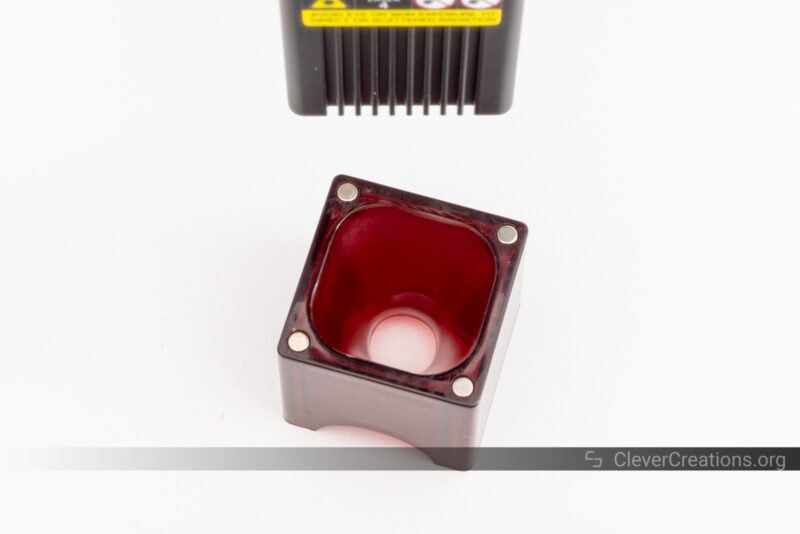
This creates a sort of passive air assist that helps reduce scorch and burn marks on your material. In practice, we found that this works quite well, but it is not as effective as a true air assist.
The magnetic attachment is made from laser light blocking material, so it also helps reduce the amount of stray light that is emitted from the machine. This increases safety but doesn’t remove the need to wear laser safety goggles.
We have found that this attachment resonates sometimes during operation when it is not positioned correctly, creating an annoying buzzing noise.
The good thing is that the attachment is magnetic, so if this happens you can adjust its position to where it stops vibrating.
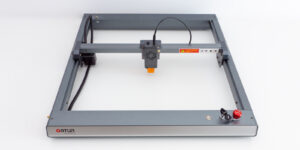
Working Area
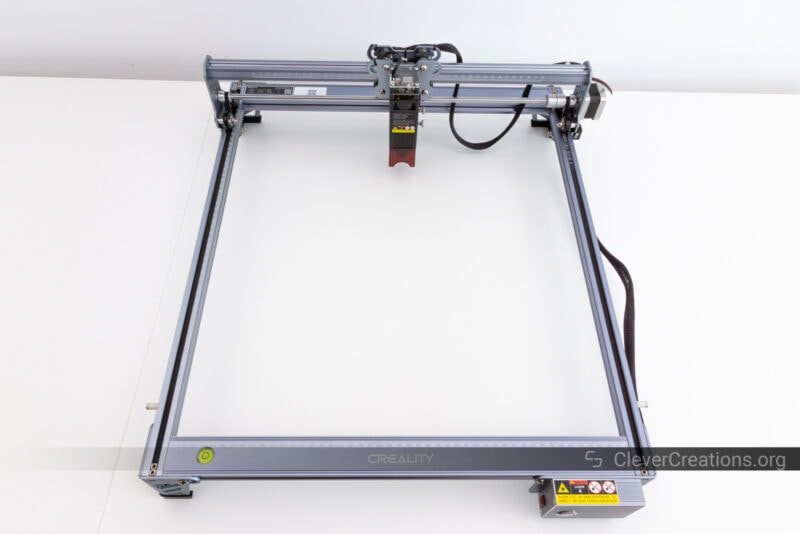
The Creality CR-Laser Falcon engraver has a 400×415 mm work area. Most of these types of laser engravers and cutters have a roughly 400×400 mm work area, so this is super standard. The extra 15 mm on one of the axes probably won’t make a difference for you.
If you think you do need to use that extra space, a larger machine, like the Jinsoku LC-60A (600×600 mm) or Ortur Laser Master 2 with extension kit (800×400 mm), might be better.
That said, the work area of the CR-Laser Falcon is more than enough for most, and we find it hard to imagine needing more space for all basic laser engraving and cutting jobs.
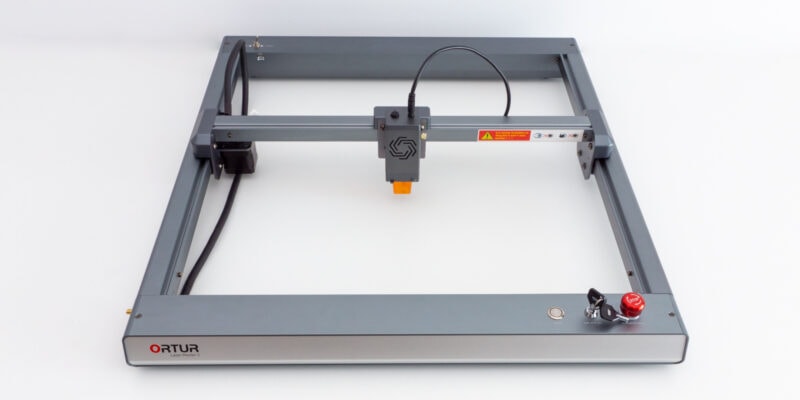
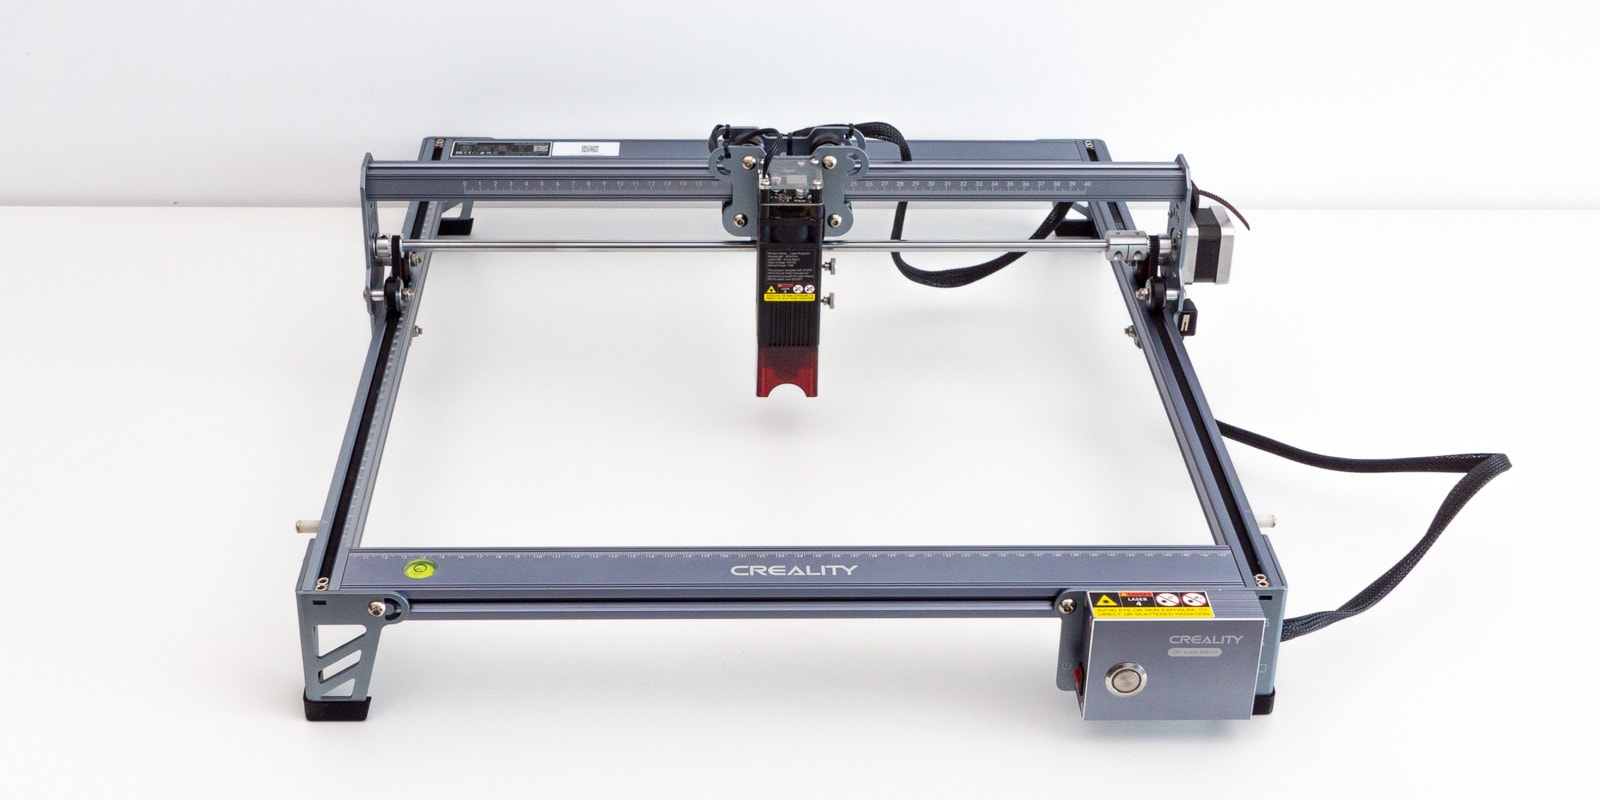
Frame
The frame of the CR-Laser Falcon is made from aluminum and uses V-wheels for movement on the X and Y-axis. This, in combination with the silent stepper drivers, results in a smooth and silent operation of the device.
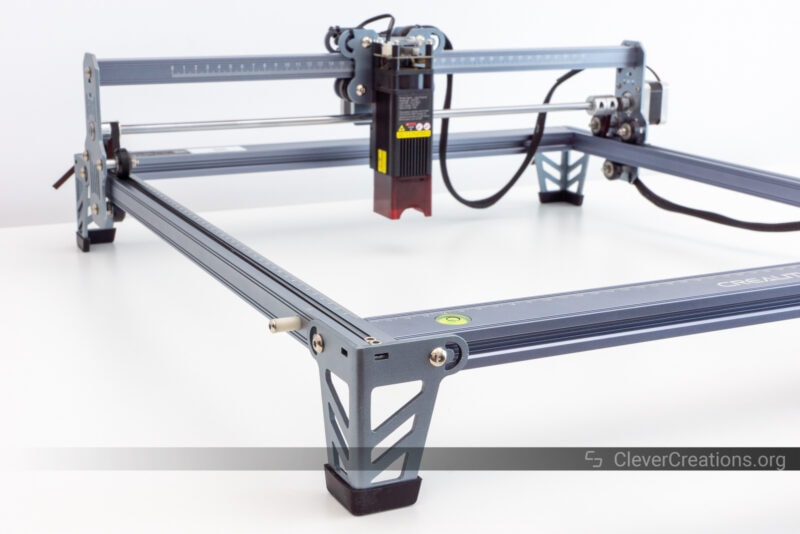
The way the frame is designed and cut makes it easy to square. This will save you some time in the setup process.
Aside from its ease of assembly, the frame is also lightweight. Comparing it to the Genmitsu Jinsoku LC-40, which has all of its motion components covered for safety, the CR-Laser Falcon doesn’t have any additional components that add weight to it.
This does mean that the motion components (stepper motors, pulleys, V-wheels, etc.) are exposed, which increases the safety risk a bit. However, since you probably won’t be sticking your hand into a running laser engraver anyway, this probably isn’t a big worry.
Cable Management
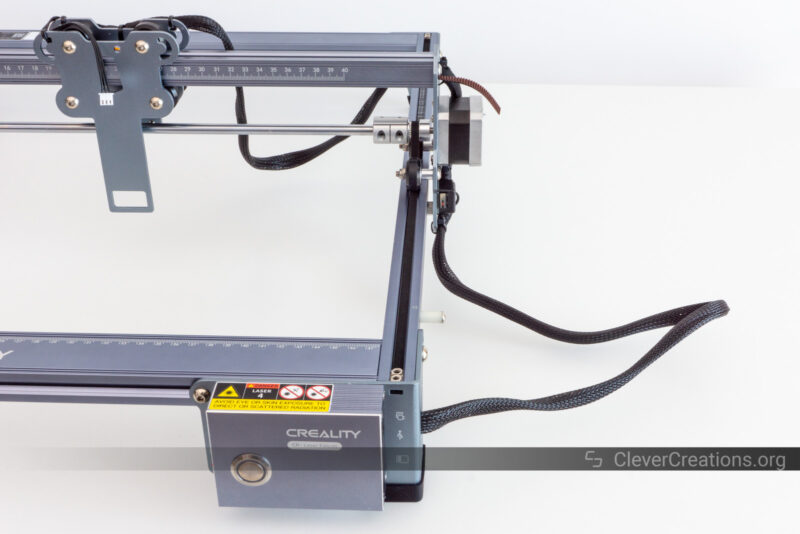
One of the downsides of the Creality CR-Laser Falcon is its lackluster cable management. Aside from some tie wraps that attach the wires to the X- and Y-axis gantries, there is no real way to keep the cables tidy.
This can create a bit of a mess and leads to the potential risk of the cables snagging onto your honeycomb bed or material.
To clarify: we haven’t had this happen, but you need to be aware that it is a possibility.
Bubble Level
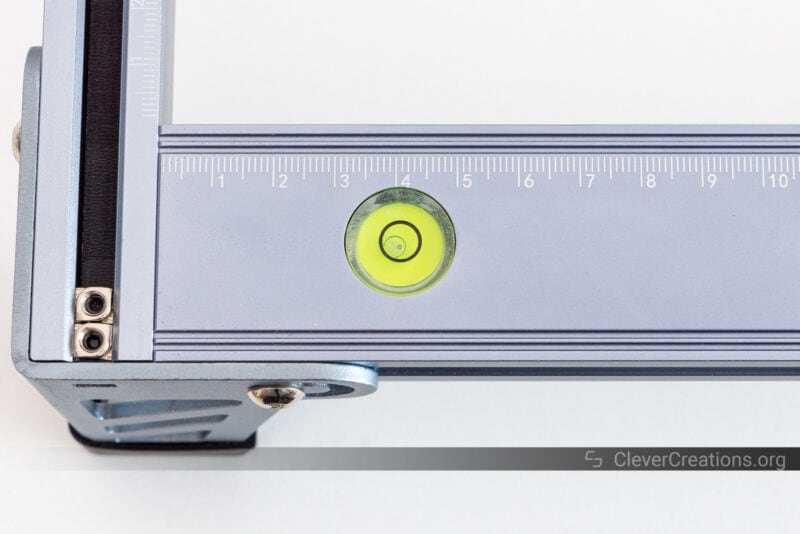
A unique feature of the CR-Laser Falcon engraver is that it comes with a bubble level in the frame. The idea of this is to add a visual aid to level the machine.
In practice, it does not really work like that. The only thing the bubble level does is check whether the laser engraver is horizontally level relative to our planet.
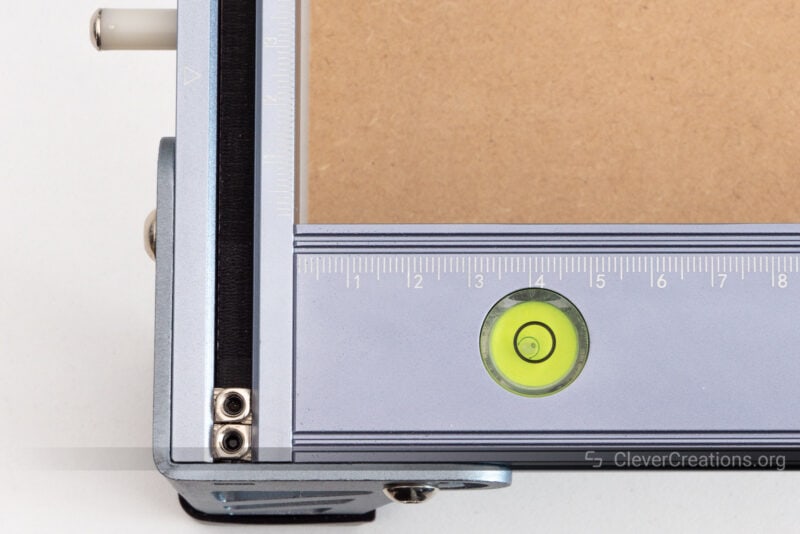
It does not check for levelness relative to the workpiece, which is what you really want when running your engraving or cutting job.
For example, the machine can be perfectly aligned with the workpiece, but both are on a table that is not level with the ground. In that case, the bubble level would still show that the machine is not level, even though it would create good results.
The opposite situation would be that the CR-Laser Falcon is perfectly horizontal relative to the earth, but the workpiece is placed unevenly under the machine. In that case, the bubble level would show that the machine is level, even though your engraving results would be subpar.
So while the idea of a bubble level sounds nice, it does not add much value in practice.
Measuring Scale
The same goes for the measuring scale that is imprinted on the frame of the CR-Laser Falcon engraver. The idea is to align your material with it so that you can easily position the material for engraving.
However, because you can’t view the laser engraver from above in an orthogonal view (i.e. without perspective), you can’t use the measuring scale to accurately position your material.
Another limitation here is that you can’t place your material against the frame. So it is very easy to slide it out of position relative to the measuring scale.
While the measuring scale can be helpful as a general guide, you will have to use other methods for more precise positioning.
We think the best way to do things is to just use the frame option in the software to see the boundaries of where your material will be engraved or cut.
Additionally, you can get a honeycomb bed with a measuring scale, so that you actually have something physical to align your material against.
Ease of Use
Focusing
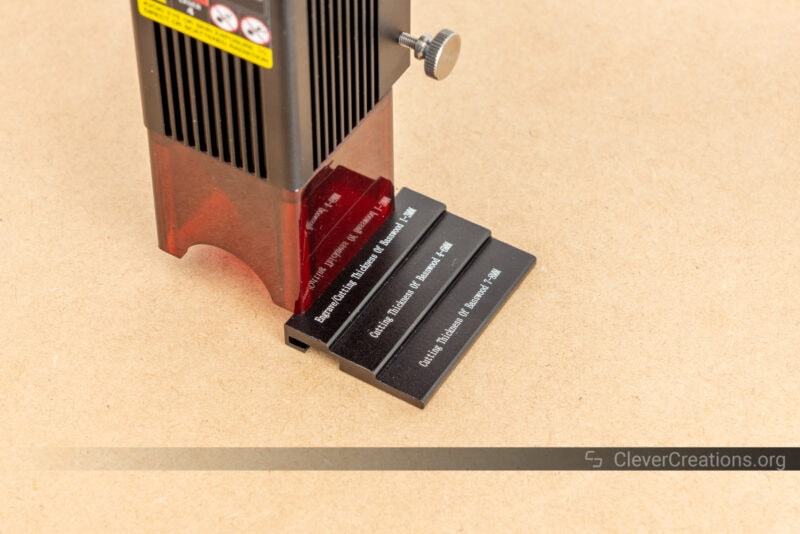
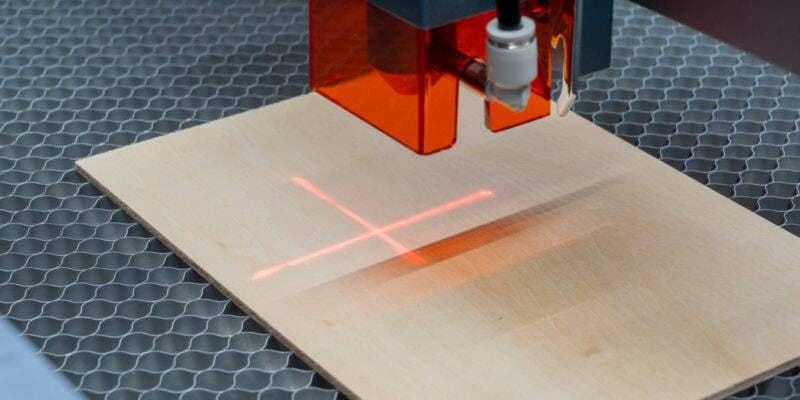
Whereas the 5W version of the CR-Laser Falcon engraver has a built-in focus bar for focusing the laser for engraving, the 10W version comes with a more versatile ‘multi-level fixed focus block’.
This is a metal accessory that lets you set the right focus distance for the material you are working with. Regardless of whether you want to engrave or cut different thickness materials, the attachment gives you the right height setting.
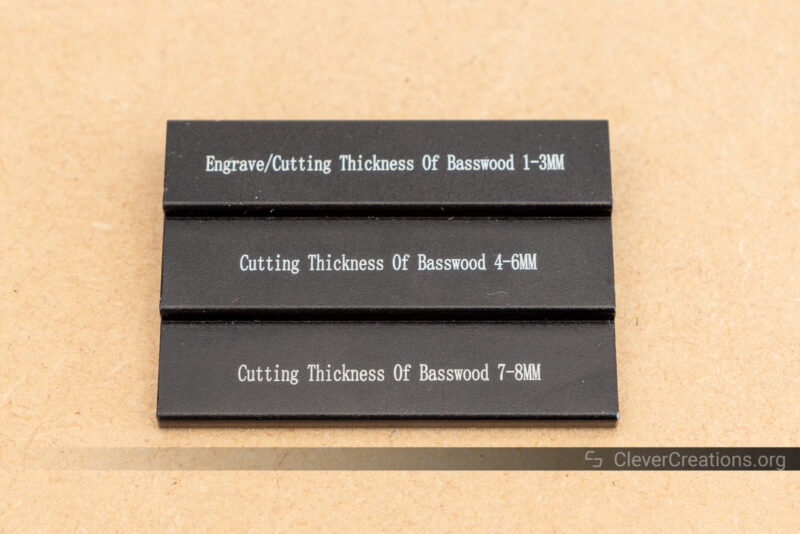
To use it, you just have to place the focus block under the laser head and lower the head on top of the right section. That sets the laser at the correct distance from the surface of the material you’re working with.
Adjusting the height of the laser head is done by unscrewing two thumbscrews and sliding the head up or down. After that, you can tighten the thumbscrews again to lock the head in place.
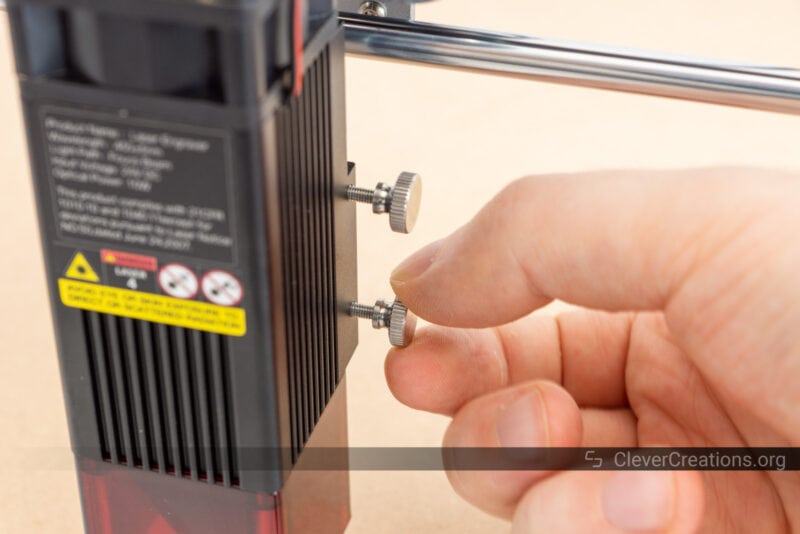
This process of adjusting the height is not as smooth as we expected. On our machine, the laser head sometimes had trouble getting unstuck from its current position.
This isn’t a huge problem, but in the next version, we would love to see some kind of Z-axis guide rods that let the head slide up and down more easily. Right now, the laser head clamps onto a section of rough anodized aluminum, which doesn’t provide a smooth surface to slide against.
User Interface
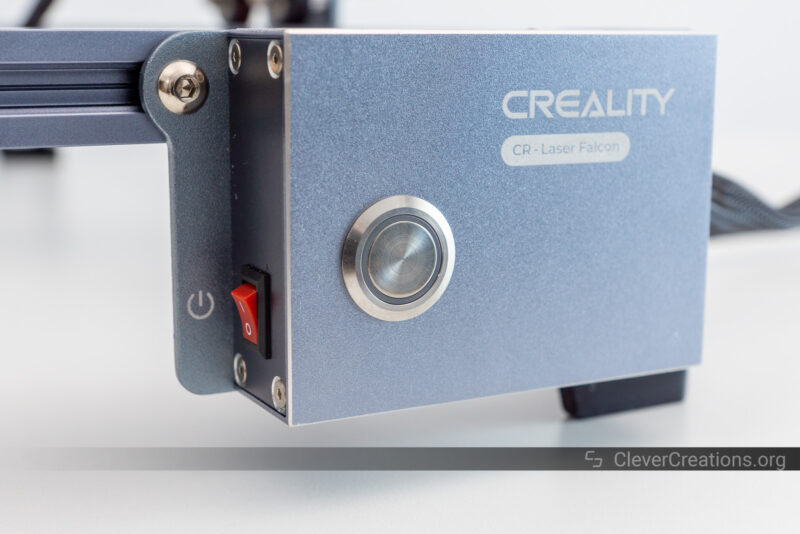
Like nearly all laser engravers and cutters at this price point, the user interface of the Creality CR-Laser Falcon is rudimentary.
To interact with the device, you can use the single push button. Depending on the state of the machine, you can use it to preview, start, pause, or cancel your laser job.
To let you know what is going on, the button has a built-in LED that lights up or pulses, depending on what the device is doing.
This is as simple as it gets and means that the machine is difficult to use as a standalone device. You can only make use of its true potential by connecting it to your computer and using engraving software like LaserGRBL or Lightburn.
For a similar laser engraver that you can use as a standalone device, you could take a look at the Atomstack A10 Pro 10W. It comes with a remote touch screen but does cost a bit more.
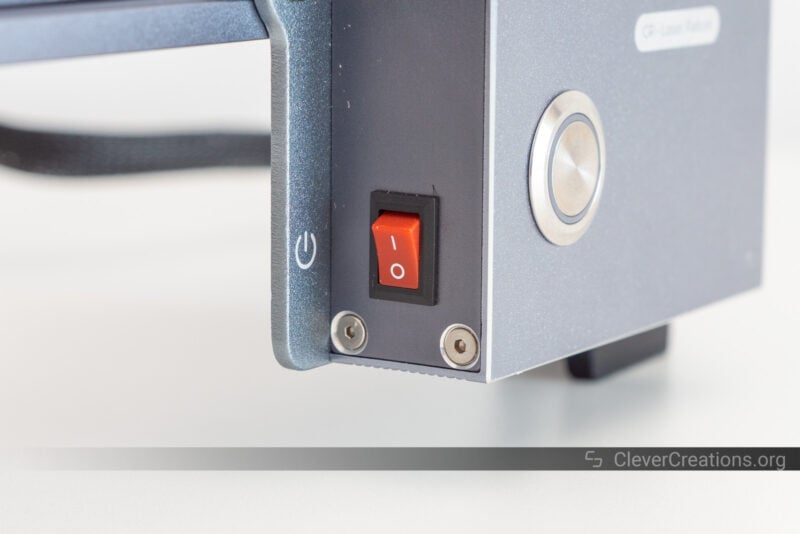
While the Creality CR-Laser Falcon does not have an emergency button, it does come with a power toggle switch on the front. This works just as well, and it is an easy way to turn the machine off if you want to immediately halt its operations.
Connectivity
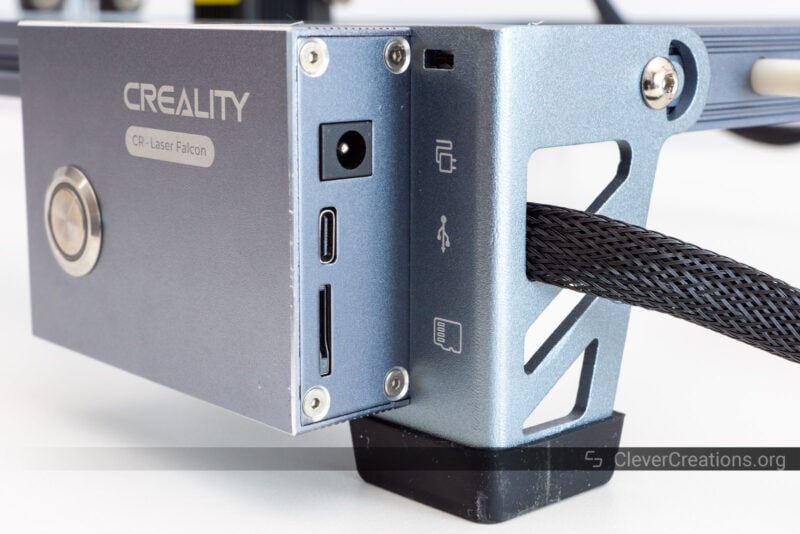
You can connect to the laser engraver over USB-C, or use the built-in SD card slot to load your projects.
We recommend using the USB connection, as it allows you to send jobs directly from your computer. If you want to use the SD card slot, you’ll also have to use the single-button interface of the machine, which can be a bit tedious.
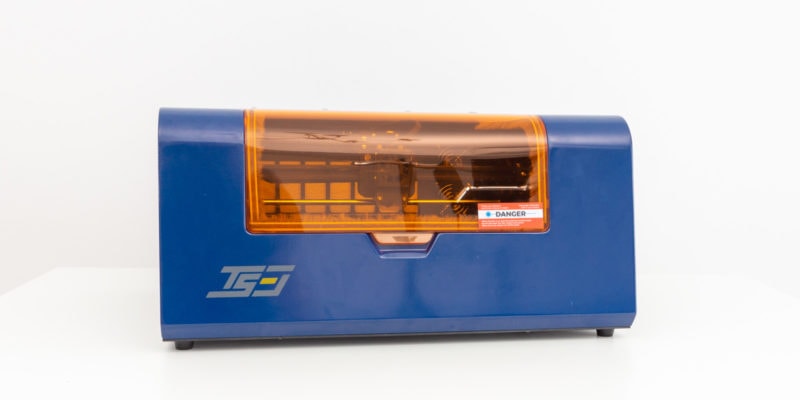
There is no Bluetooth or Wi-Fi connectivity, so in that regard, the Creality CR-Laser Falcon is one step behind laser engravers like the TwoTrees TS3 and Ortur Laser Master 3.
It’s not a big deal for most users, but if you’re looking for a machine that you can control wirelessly from your computer or phone, this is not it.
Accessories
We can’t say much about the accessories of the CR-Laser Falcon engraver because frankly, there aren’t many available. For example, Creality does not sell a fourth-axis rotary roller, an optional air assist pump, or even a honeycomb bed.
This isn’t much of a surprise. Creality is mainly a 3D printing company, and the CR-Laser Falcon is one of their first forays into the world of laser engraving and cutting.
As the company’s laser division matures, we expect to see a wider range of accessories become available. But for now, you’re pretty much on your own when it comes to expanding the capabilities of the machine.
Adding a third-party honeycomb bed or air assist isn’t too difficult, but adding a fourth-axis rotary roller is impossible. It needs to directly interface with the machine and without an available connection port, that’s not going to happen.
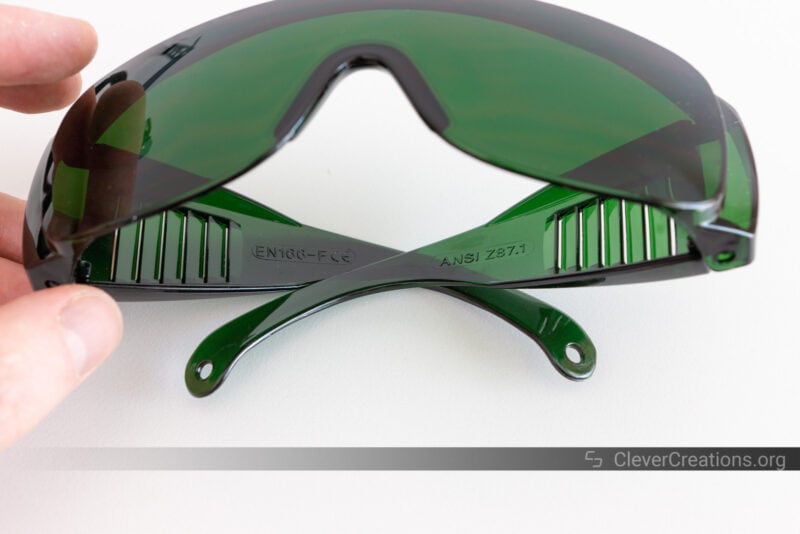
What is included with the device is a pair of laser goggles. If we are to believe its labeling, they are CE and ANSI certified. There is no information on the wavelengths they protect you from or by how much they reduce the harmful laser light, so we can’t say much about how effective they are.
CR-Laser Falcon Laser Cutting and Laser Engraving Results
So far, we have pointed out quite a few limitations of the CR-Laser Falcon engraver. You might have gotten the impression that we don’t think highly of this machine, but that is not the case.
In the most important aspect of a laser engraver, the engraving and cutting quality, the device scores exceptionally well. You can see this below.
As with all our laser engraver and cutter reviews, we haven’t used any painters tape or transfer tape to reduce the amount of burn marks. This way you can see exactly what this machine is capable of, right out of the box.
We also didn’t sand any of the surfaces after engraving or cutting. This is something you might want to do for aesthetic reasons, but it’s not necessary to get a good result. A single pass with 200-grit sandpaper is often sufficient for this.
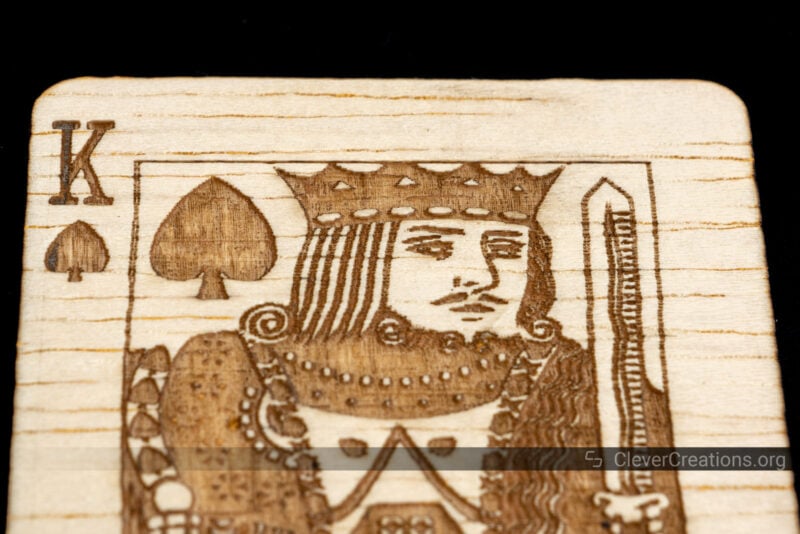
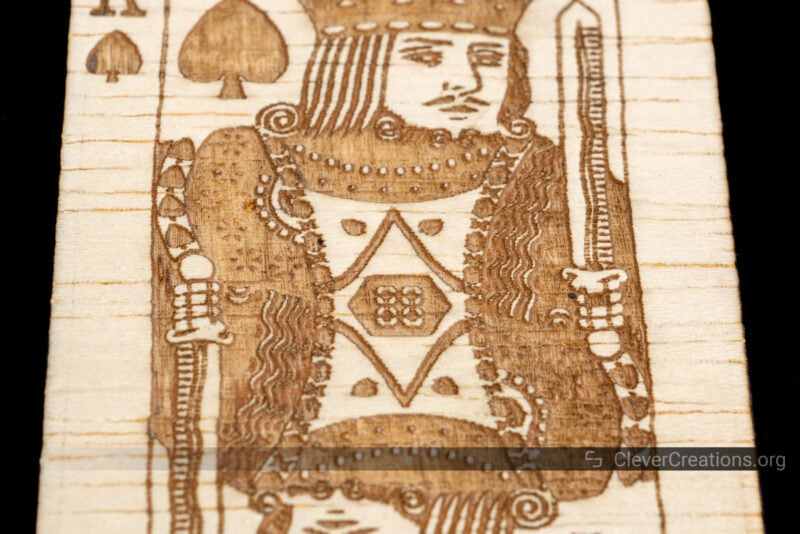
Playing Card
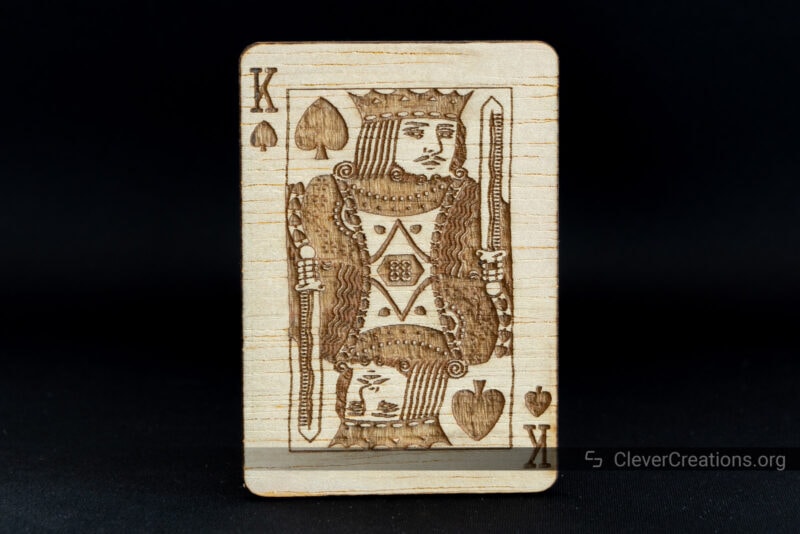
The CR-Laser Falcon handled this engraving of a playing card very well. All small details came out great.
You might notice that the engraving looks a bit wavy on the vertical axis. We think this is because the machine was missing steps on the X-axis or had some slack in the X-axis timing belt.
To fix this, we made sure the X-axis motor pulley was tightened, reduced the acceleration of the machine, and tightened the X-axis timing belt.
After this, the problem was gone and the remaining engravings and cuttings came out straight.
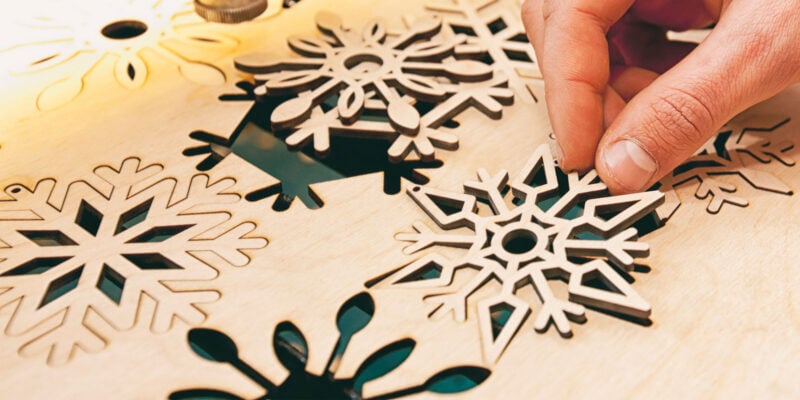
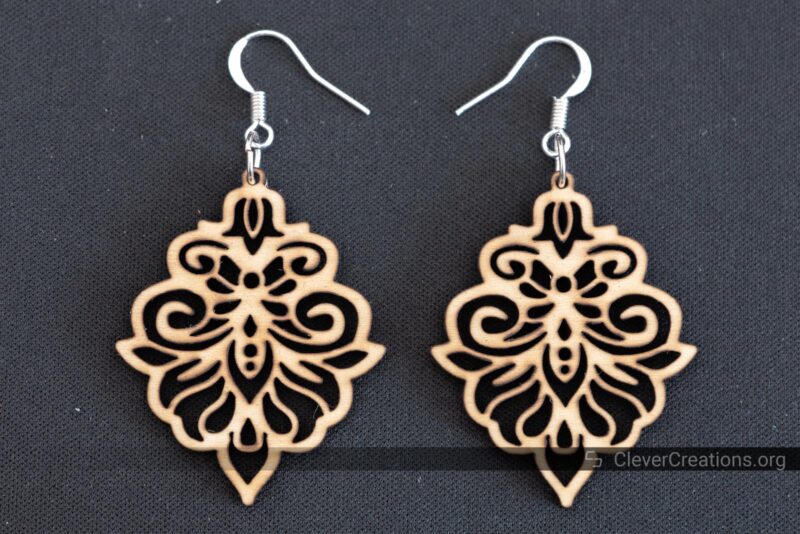
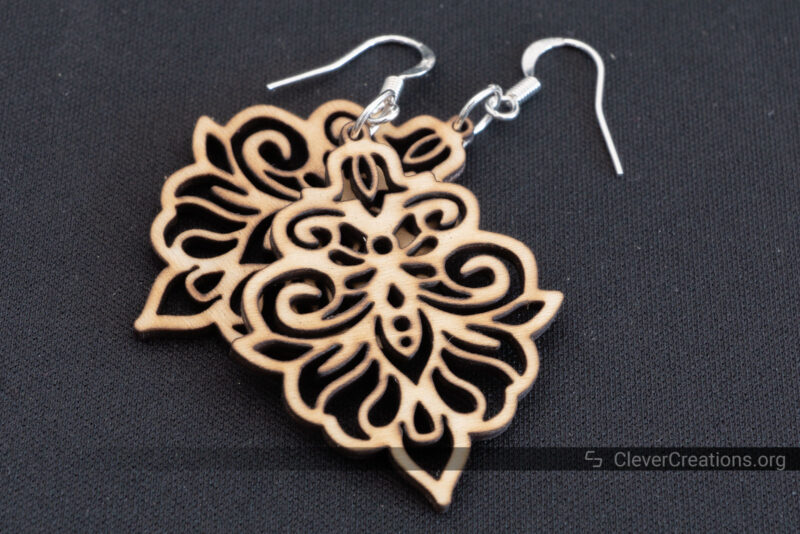
Earrings
The small details on these earrings came out amazingly. For reference, the total height of the earrings (without the hook) is about 40 mm / 1.5″.
There is a small amount of charring visible, but a quick sanding took care of that after taking the pictures.
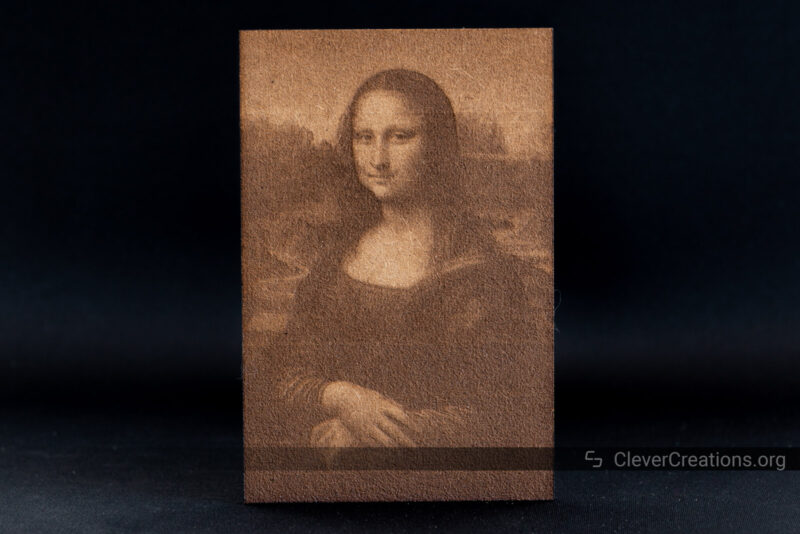
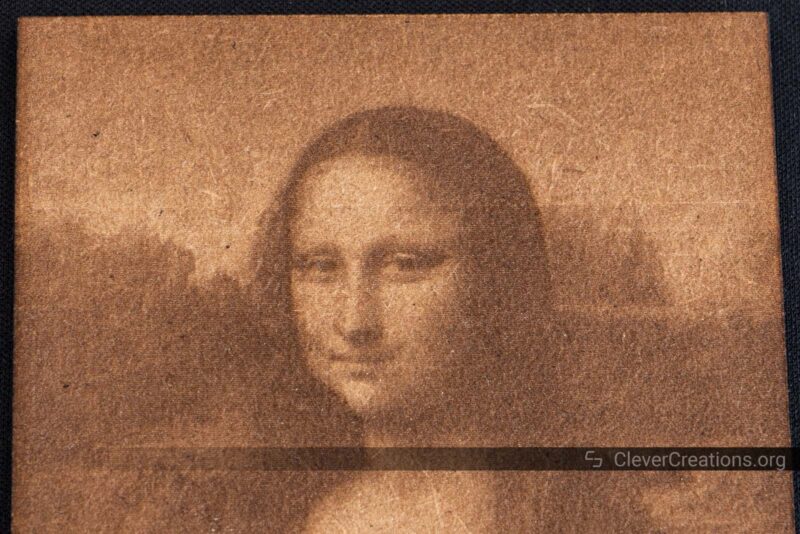
Mona Lisa
This Mona Lisa engraving is our go-to test for testing engraving detail and contrast. Again, the CR-Laser Falcon engraver impressed us.
The engraving shows excellent contrast and we can’t say anything negative about the detail either. The results are significantly better than with the TwoTrees TS3 that we recently tested, despite them both coming with similar 10W laser heads.
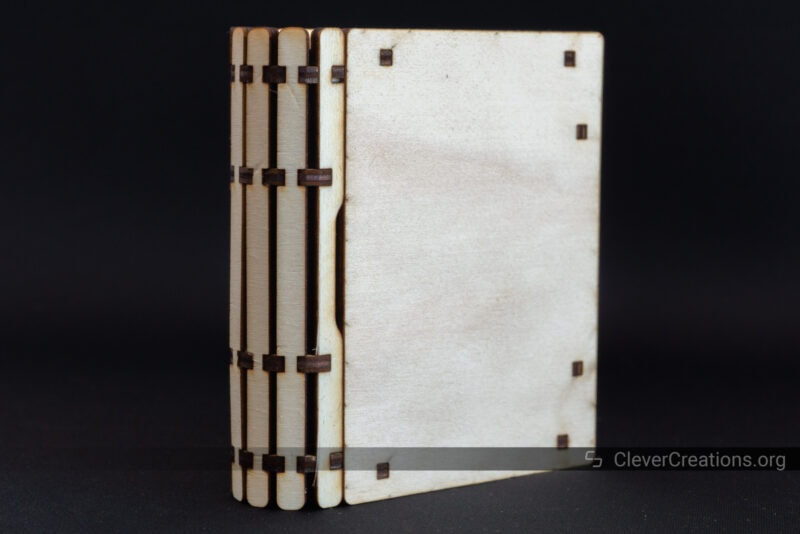
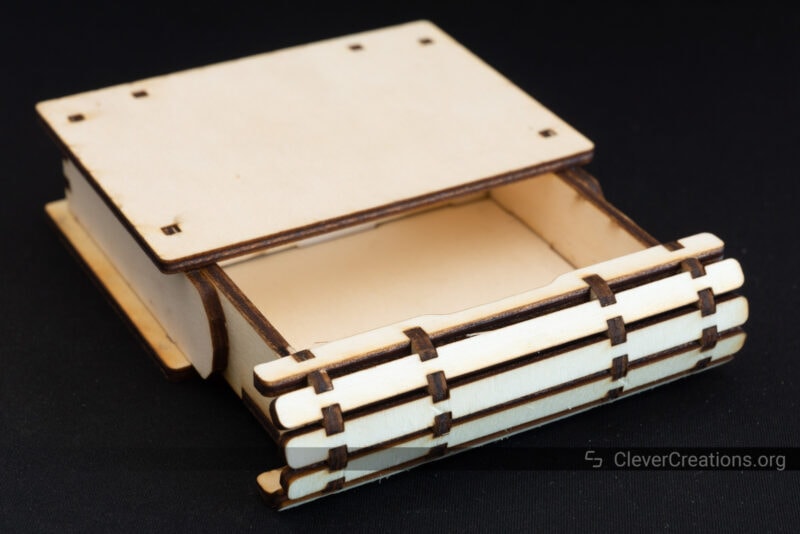
Mini Book
To test the laser cutting accuracy of the machines we review, we always like to assemble something with laser-cut pieces.
This mini book is a good test for this. The final fit of the pieces was good, albeit a tad tight. We think this is probably caused by the laser cut files themselves, and not by the machine itself.
Altogether, we are super pleased with the results of the tests. For a 10W semiconductor laser engraver/cutter without air assist, the Creality CR-Laser Falcon did an excellent job.
Alternatives to the CR-Laser Falcon
Atomstack A10 Pro 10W
The Atomstack A10 Pro 10W is a very similar machine to the Creality CR-Laser Falcon, both in features and in construction. It costs a bit more, however.
For that extra money, you basically get a touch screen display and an emergency button. The former is especially great if you want to use the machine in a standalone environment without a connected computer.
If you have no need for those features, however, there is not much reason to pay the extra cost of the Atomstack A10 Pro.
No products found.
ORTUR Laser Master 3
The ORTUR Laser Master 3 is another machine that has a number of advantages over the Creality CR-Laser Falcon. Not only does it offer better engraving speeds and build quality, but it also comes with an integrated air assist and has many accessories available.
For example, you can expand it with a rotary attachment for engraving cylindrical objects, or a Z-height adjuster for easy focusing.
So if you are looking for a 10W laser engraver that offers more expansion options and is more futureproof, the Ortur Laser Master 3 is the way to go.

Verdict: Is the CR-Laser Falcon Worth Your Money?
The Creality CR-Laser Falcon is not a perfect machine by any means, but it is very good at what it is supposed to do: giving you quality laser engraving and cutting results. If that is all you need, we can recommend the machine without hesitation.
It is a capable device for working with wood, leather, carton, paper, cork, and other easy-to-engrave materials. You shouldn’t expect to get any results with engraving metal, for that you will need a more powerful laser engraver for metal.
There are several things that you need to be aware of with this machine, like ensuring that the X-axis is properly calibrated and that the wiring does not snag on anything.
You also have to keep in mind that the machine has limited connectivity options, and there are no accessories available at the moment.
If these things are no issue for you, then the 10W CR-Laser Falcon engraver provides good value for money. This is also why it has deserved a spot on our list of best laser engravers.
The 5W version of the CR-Laser Falcon is not something we have experience with. Generally, 5W laser engravers can be frustrating to work with because of their lack in power. This limits them in their engraving and cutting capabilities. And even the things they can do take more time to accomplish.
So for those reasons, we would not recommend the Creality CR-Laser Falcon 5W. But that’s more a general stance towards 5W laser engravers than it is a statement about this particular machine.