
- Dual (blue + infrared) lasers
- Wide material compatibility
- High accuracy results
- Fast engravings
- Excellent software support (XCS + Lightburn)
- Reliable material presets
- Solid approach to safety
- Practical and qualitative accessories
- Small work area
- Important to not lose USB keys
- Infrared laser needs warm-up for good results
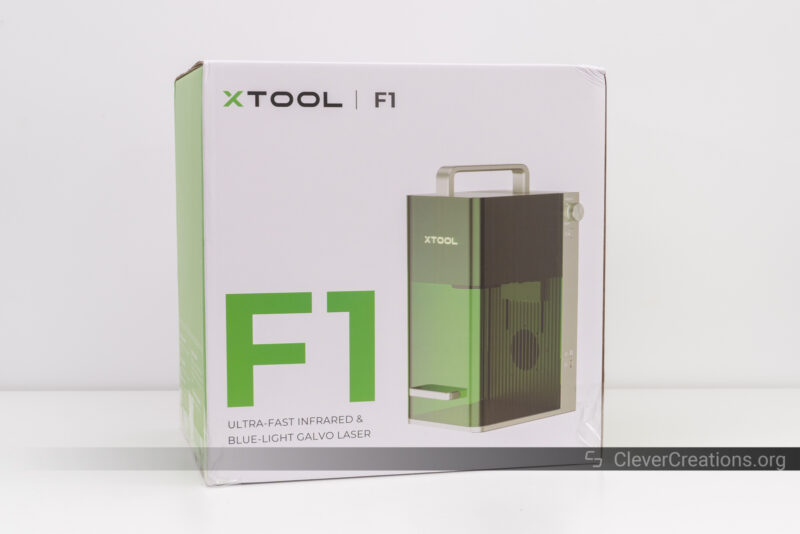
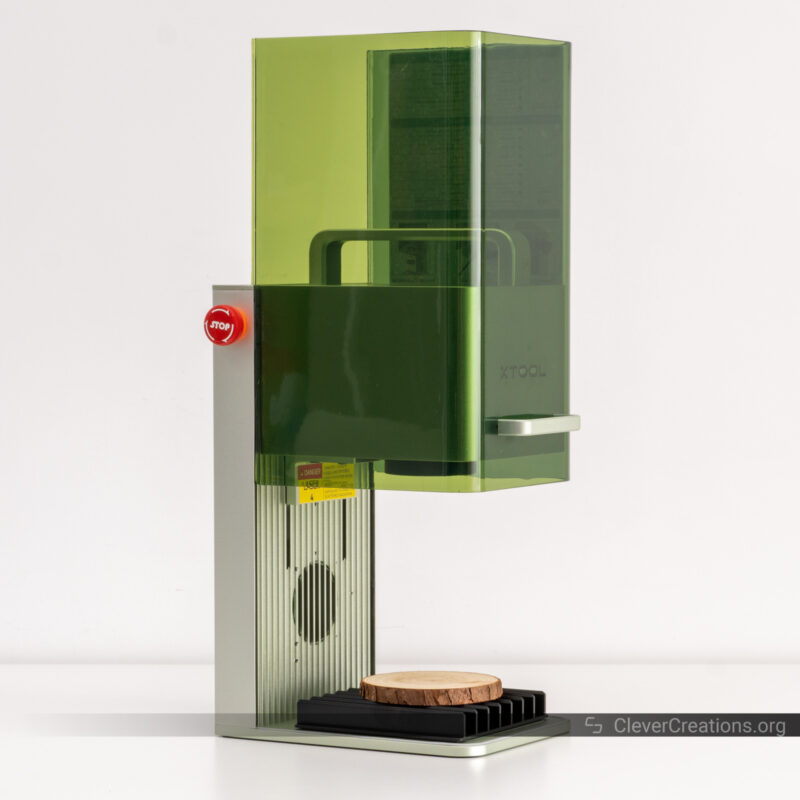
The new xTool F1 is a portable laser engraving machine focused on high-speed engraving. With two different lasers—UV and infrared—it aims to let you engrave a wide range of materials. From paper to leather and metals, it promises to handle it for you.
At around $2000, however, you’ll probably want to know whether the xTool F1 can deliver on its promises. And if it does, is it worth paying this much money for? Perhaps there are better alternatives you can choose.
In this xTool F1 review, we’ll put the laser engraving machine to the test for you to find out. Read on to learn whether this is the laser engraver to get for your high-detail engravings and how to make the best use of it.
xTool F1 Specifications
| xTool F1 Specs | |
|---|---|
| Price | xTool | AliExpress |
| Laser type | 10W diode laser 2W 1064nm infrared laser |
| Product size | 179 x 235 x 334mm |
| Product weight | 4.6kg |
| Accuracy | Movement accuracy: 0.00199mm Repeat positioning accuracy:0.000248mm |
| Working area | 115 x 115mm rounded rectangle Expandable to 400x 115mm with accessories |
| Preview | Rect & Outline |
| Preview speed | Rect: 12000mm/s Outline: 8000mm/s |
| Up to working speed | 4000 mm/s |
| Applications | XCS, Lightburn |
| Connection | WiFi, USB |
| Support file | SVG, DXF, JPG, JPEG, PNG, BMP, etc. |
| Support systems | Android, iOS, iPad, Windows, macOS |
| Input | 24V 5A |
Unboxing
One of our first impressions when handling the box of the xTool F1 laser engraver is that it is deceptively heavy. Galvo laser engravers like these are high-precision devices. Despite their small size, they need a rigid, solid metal construction.
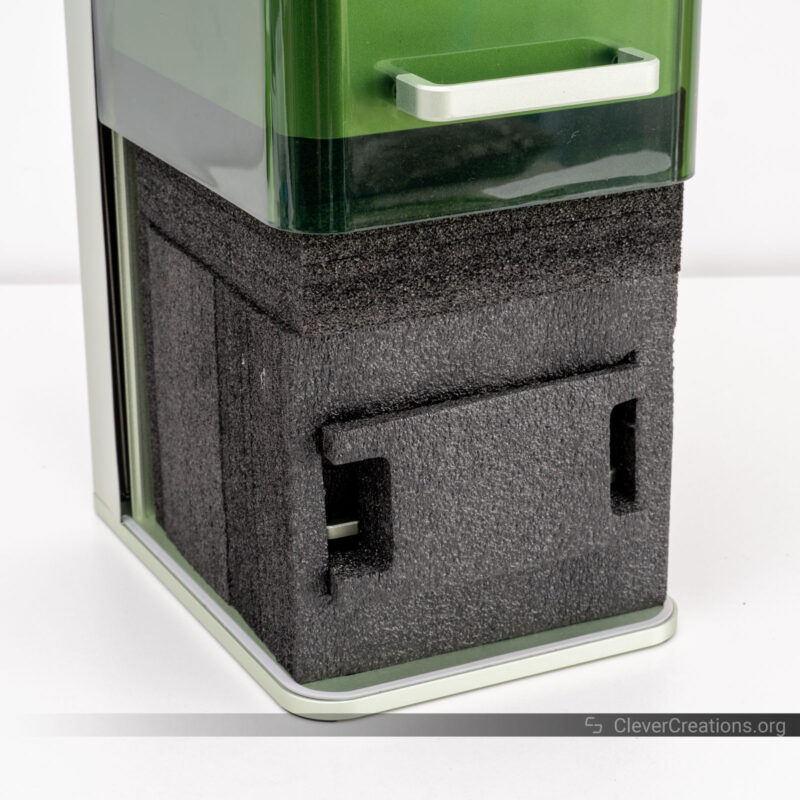
To keep the laser engraver safe during transport, layers of dense foam surround the xTool F1 in the box. It’s important to protect the precision components inside the device in shipping.
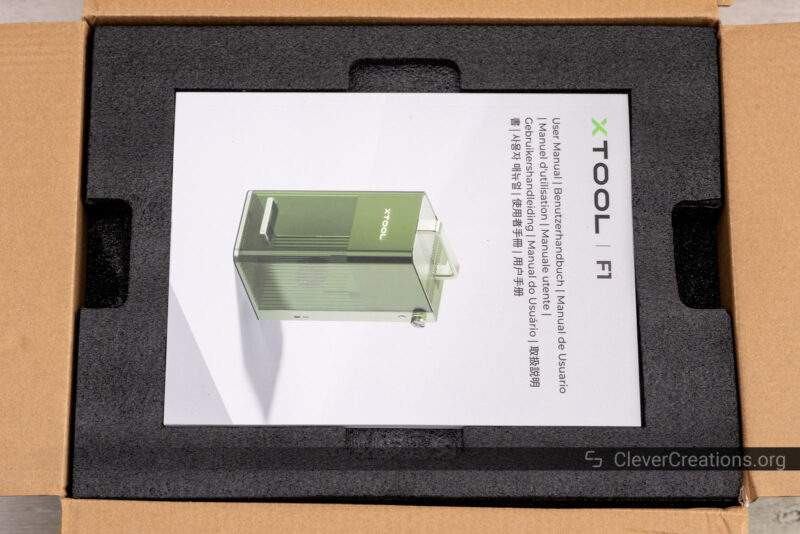
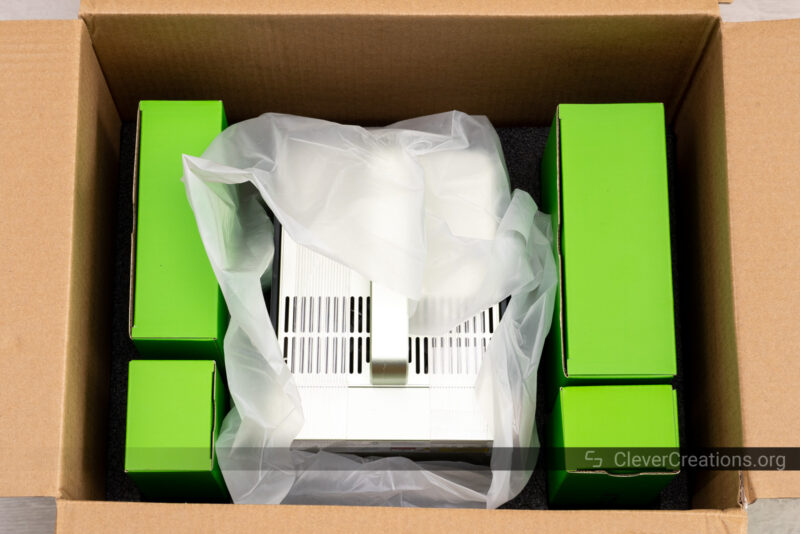
After unpacking the xTool F1 and accessories from the box, you’ll see that the compact box contained quite a lot..
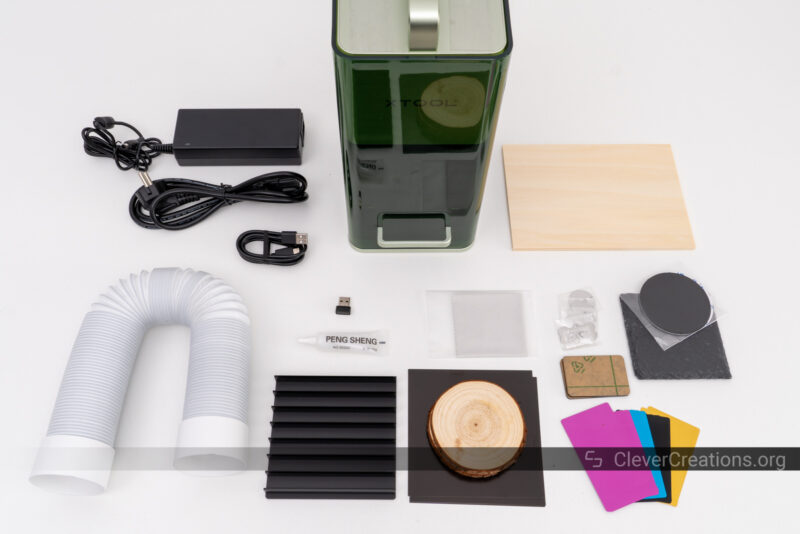
In total, you’ll get the following things:
- xTool F1 laser engraver
- Exhaust pipe
- L-shaped positioning piece
- Working panel
- Spare key
- Grease
- Material Pack
- Manual
- Power and USB cables
The material pack especially stands out to us. When we reviewed the much more expensive xTool P2, we noticed that laser cutter came with very few materials. We are happy to see that the company improved on this with the xTool F1.
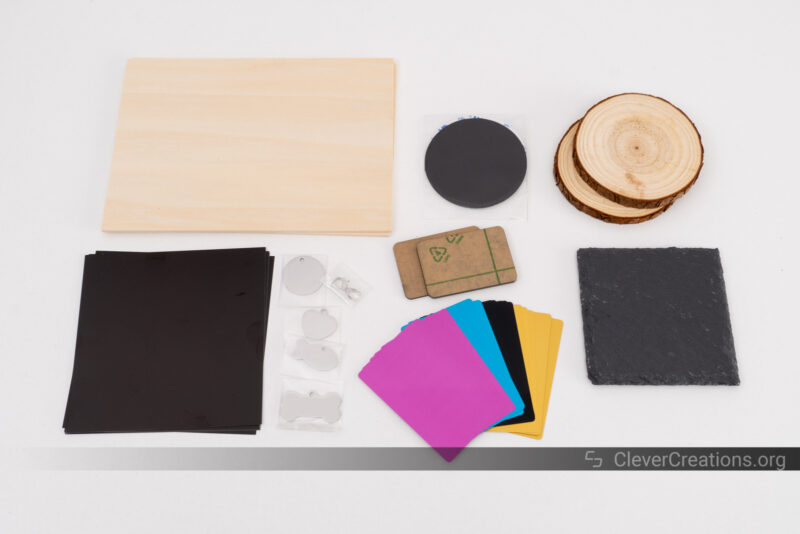
Altogether, xTool provides a complete kit that lets you start creating cool laser engraving projects right away. As soon as the materials run out, there are plenty of additional material packs you can opt to continue with.
Getting Started
We have worked with many laser machines and can confidently say that the xTool F1 portable laser engraver is one of the easiest to set up. For example, the machine arrives at your doorstep 100% assembled.
This gave us a much different experience than we got with its main competitor, the LaserPecker 4. That laser engraver we had to assemble before we could use it.
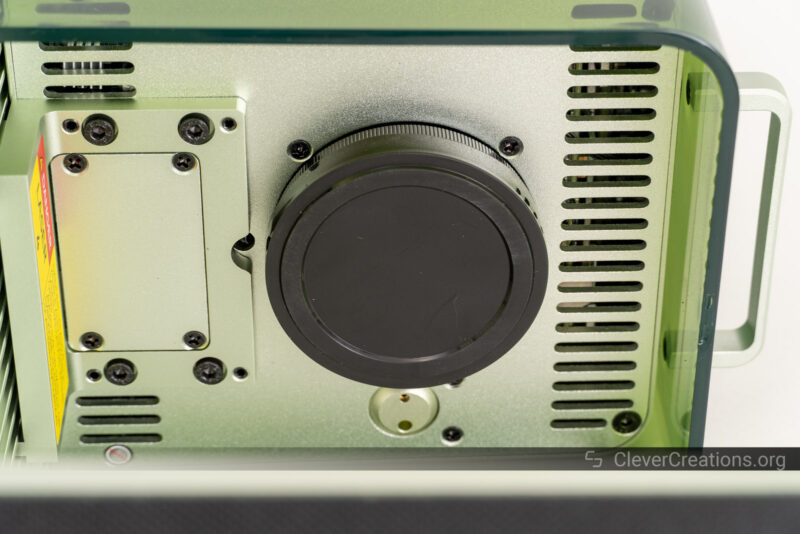
Most of your work getting the xTool F1 ready consists of removing shipping-related things. Namely, several pieces of tape, the protective foam from inside the machine, and the laser lens cover. After that, you’re practically ready to start laser engraving.
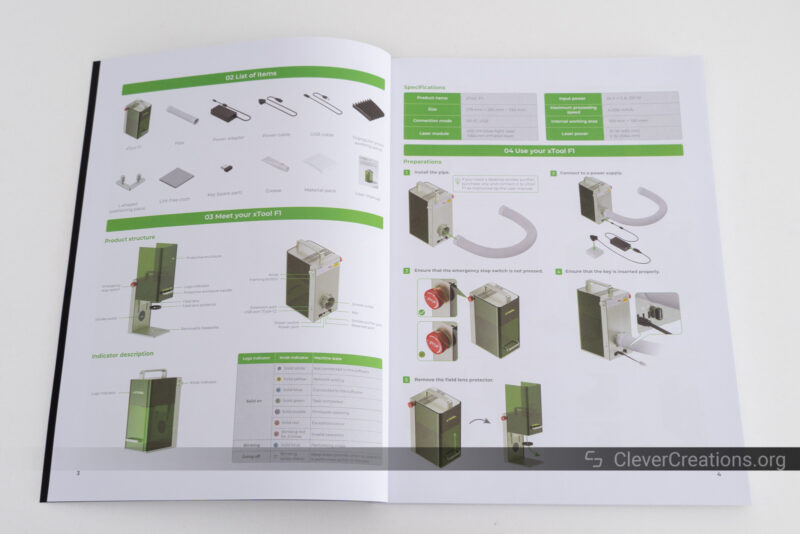
Despite the fact that the set up process is simple, we found it to be well explained in the manual that comes with the laser engraving machine. Aside from clear instructions, it also contains many diagrams that show what all the parts of the xTool F1 are for.
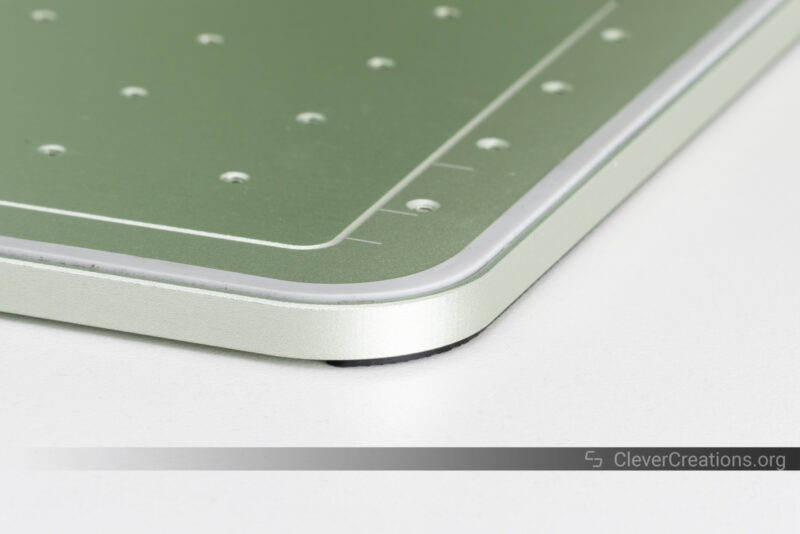
In total, we spent more time admiring the xTool F1’s interesting green hue of brushed aluminum than we spent on getting the laser engraver ready for use. Give it 5 to 10 minutes and you are ready for laser engraving.
xTool F1 Features
Despite its small package, the xTool F1 portable laser engraving machine comes with an impressive amount of technology and features. Let’s take a look at the ones that stand out most.
4000 mm/s Engraving Speeds
The xTool F1 uses two mirrors to point the laser beam on the object you want to cut or engrave. This arrangement is commonly referred to as a galvanometer (or galvo) system, and can reach very high engraving speed and engraving accuracy.
In its official specifications, the engraving speed of the xTool F1 is listed as 4000 mm/s. As such, it is also marketed as the fastest portable laser engraver.
In reality, however, most materials you will be laser engraving or laser cutting require slower working speeds. They need time to absorb enough enough laser energy and, unfortunately, this laser engraver is unable to cheat physics.
When we tested the xTool F1, the fastest speed we reached was 2400 mm/s when engraving art scratch paper. But for most materials, we got the best results with speeds of ‘only’ 300 to 1000 mm/s. Still impressively fast, especially compared to most other laser engravers.
The laser cutting speeds are much lower, as it requires more energy to fully cut through material. Those speeds are similar to a regular laser engraving machine of the same power, and you won’t see much advantage of the galvo system. In short, engraving is where the xTool F1’s maximum speed really shines.
Blue and Infrared Lasers
In some of its marketing materials, the xTool F1 claims to be the first laser engraving machine that combines a 2W 1064 nm infrared laser with a 10W 455 nm diode laser. Interestingly, the aforementioned LaserPecker 4 makes the same claim.
Either way, these dual laser source setups allow you to engrave many more materials than you can with a single laser.
For the more organic materials (leather, wood, paper, rock, ceramic), the 10W blue diode laser works great.

This is the same type of diode laser that you see on most open-frame laser machines.
For metals (aluminum, steel, iron, gold, silver, platinum) and plastic, you’ll see better results with the 2W 1064 nm infrared laser.
IR lasers are not as common as blue lasers, but we are starting to see them more frequently in the hobby space. For example, the xTool D1 Pro we recently reviewed came comes with an optional infrared laser module. We found it useful for certain applications, but it is more practical to have a dual laser source system that doesn’t require you to swap the laser head
We are happy to see innovations like the dual laser. Sure, it doesn’t make the xTool F1 a cheap machine. But when you compare it with having to purchase a regular laser engraver and a laser engraver for metal, the higher cost of the single machine is easier to justify.
As you’ll see throughout this xTool F1 review, the results we achieved with both the 2W infrared and 10W blue laser were excellent. From the laser engraving accuracy to the clean results of laser cutting, we found little to complain about.

Fine Detail Engravings
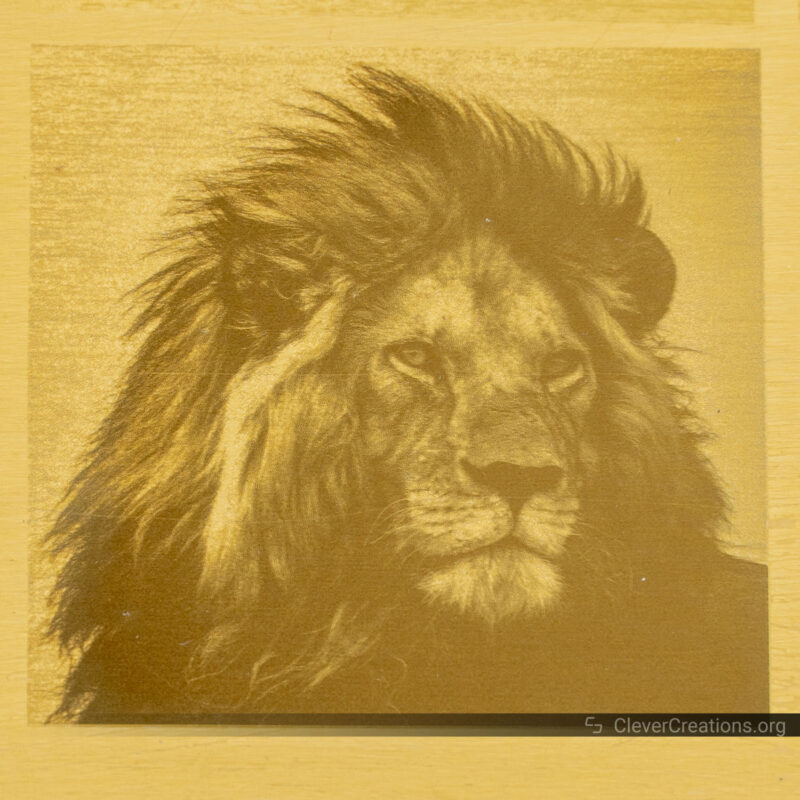
The image above shows you a good example of the engraving accuracy you can achieve with the xTool F1. With its 0.002 mm accuracy, the images you engrave come out with a picture-like appearance.
Of course, the image engraving quality won’t look the same with all materials. For example, when engraving fiber-heavy materials like fiberboard or leather, the detail is decreased. That’s something you will experience with even the best laser engravers, however.
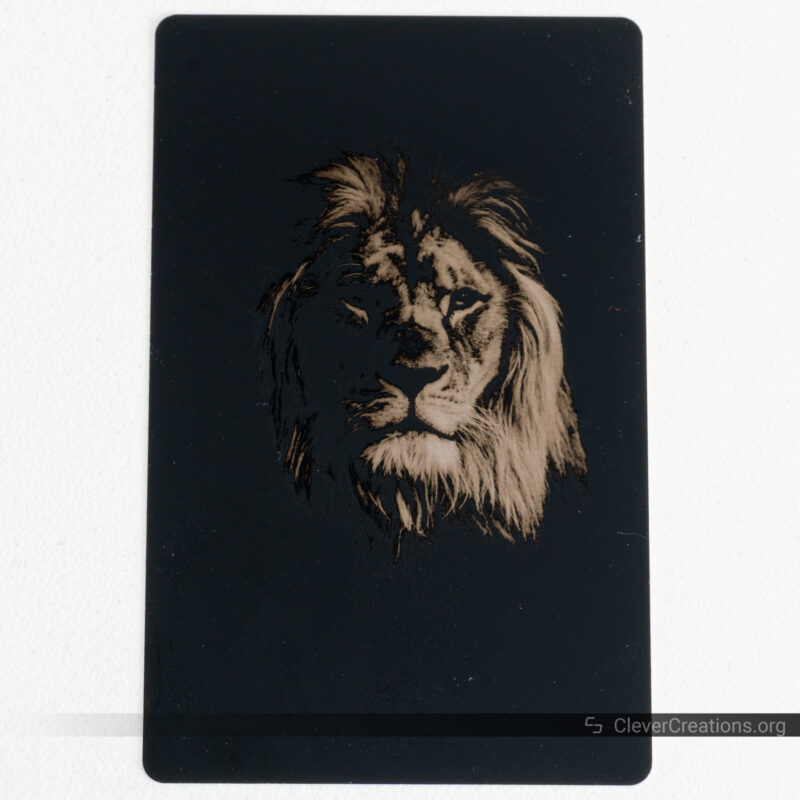
When it comes to laser engraving metal business cards, jewelry, dog tags, key chains, watches, knife blades, and other metals, the results are nothing short of amazing. Both the engraving speed and engraving accuracy impressed us.
When engraving organic materials like leather, we found that the xTool F1 also gives great results.

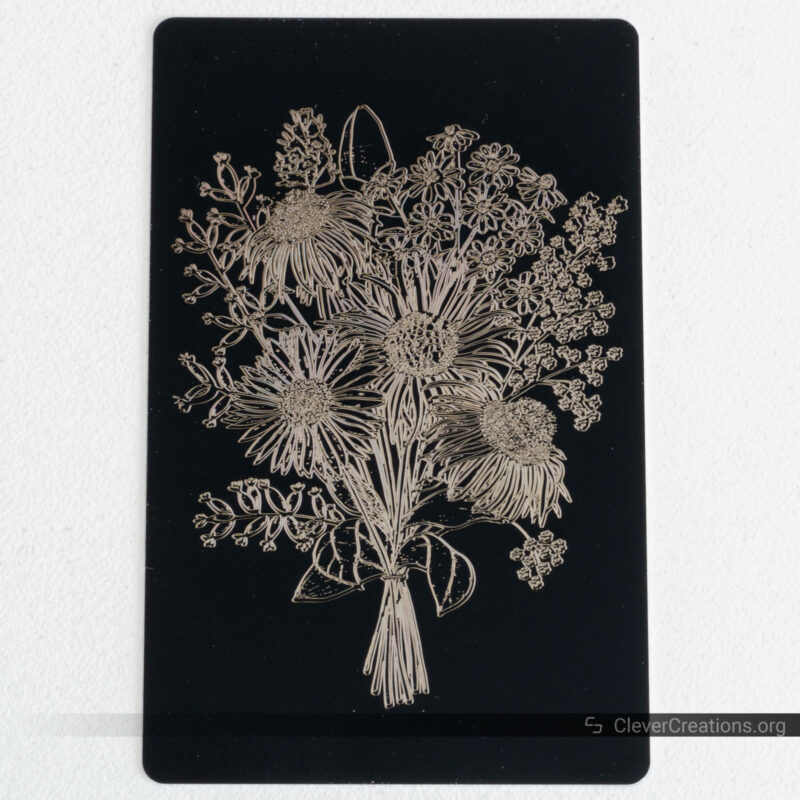
The high engraving accuracy of the xTool F1 extends to simple scoring as well. The flower outline on the metal business card below only took 28 seconds for the laser engraver to make.
One shortcoming we noticed is that the IR laser on the xTool F1 requires warm-up before you can get good results with it. When we started engraving ‘cold’, the first engraving lines came out looking faded.
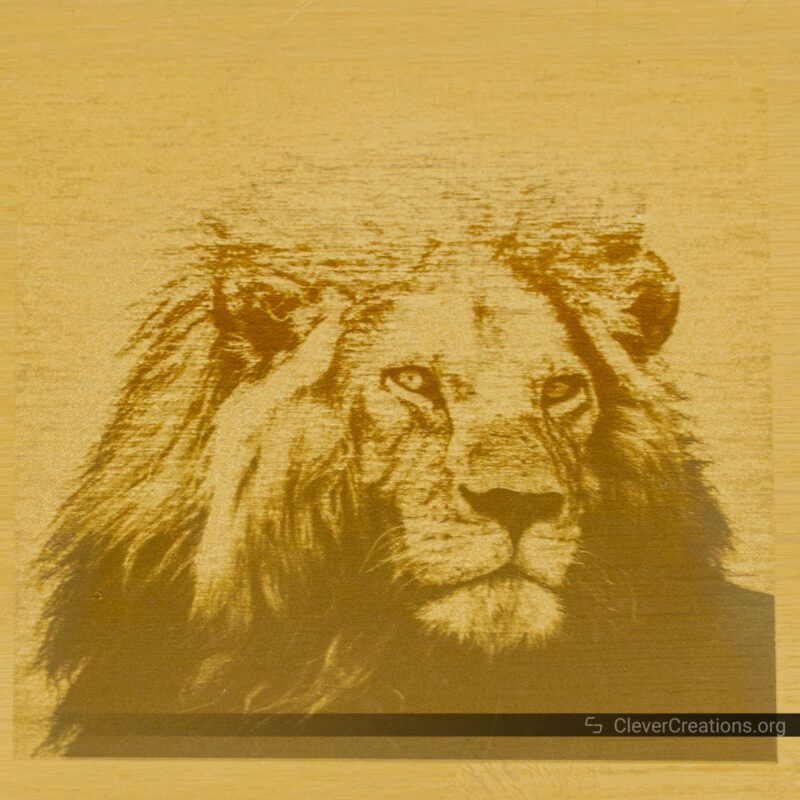
Warming up the laser is not a big issue if you remember it. However, if you only have a single shot at an engraving and you forget the warm-up, you’ll end up with subpar results on your important piece.
Working Area
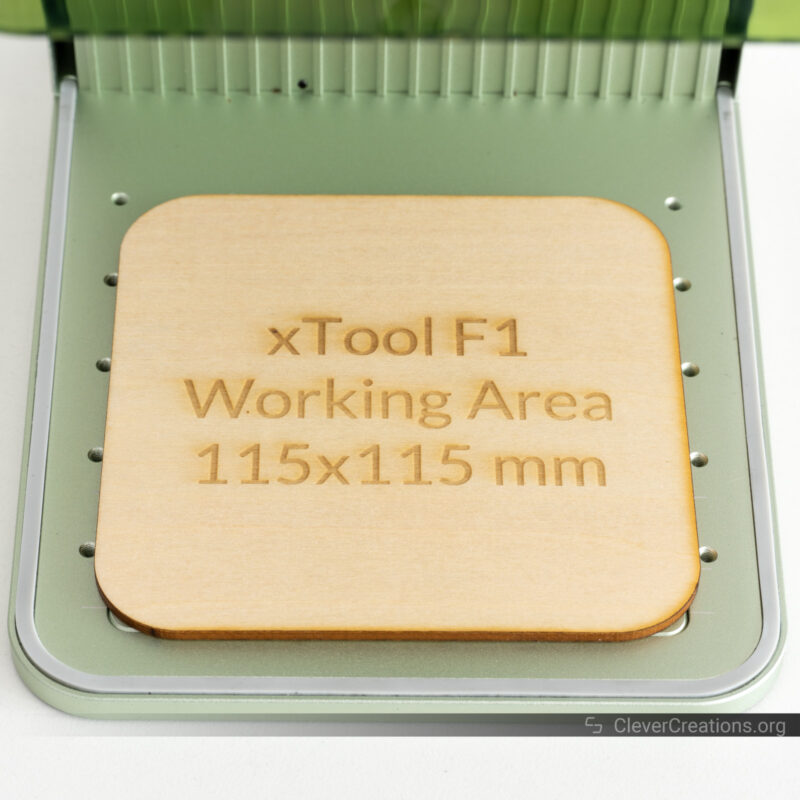
The best we can describe the working area of the xTool F1 is modest. At 115×115 mm, there isn’t a whole lot of space for you to work with. It’s a laser machine focused on creating high-resolution engravings in a small area, rather than a larger area with a decreased resolution.
The 115×115 mm engraving space is enough for things like nameplates, jewelry, keychains, phone cases, engraving barcodes, coasters, and so on.

If you want to engrave or cut larger items, you can use the slide extension accessory. It extends the work area to 115×400 mm. We’ll cover it in more detail further down.
High Portability
Aside from using the xTool F1 in its standard orientation, you can also pick it up and engrave items that are positioned vertically or at an angle. It’s a great feature to have if you want to engrave objects in situ.
Here you can think about various woodworking or carpentry projects, metal shelving, boxes, or really anything else. The two diode lasers of the xTool F1 does not put many limitations on what you can engrave.
You’re still somewhat limited by the distance to a power outlet. But other than that, the laser engraver gives you an incredible amount of freedom.
We found that when using it as a portable laser engraving machine, it is not the easiest device to handle. Mainly because of its weight. But it is still manageable for most, especially if you use two hands.

Ease of Use
User Interface
Compared to similar laser engravers, the xTool F1 does not have much of a user interface. It has no touch screen or LCD, and therefore you won’t be able to use it as a standalone laser engraver. You’ll always need a computer, tablet, or phone to drive it.
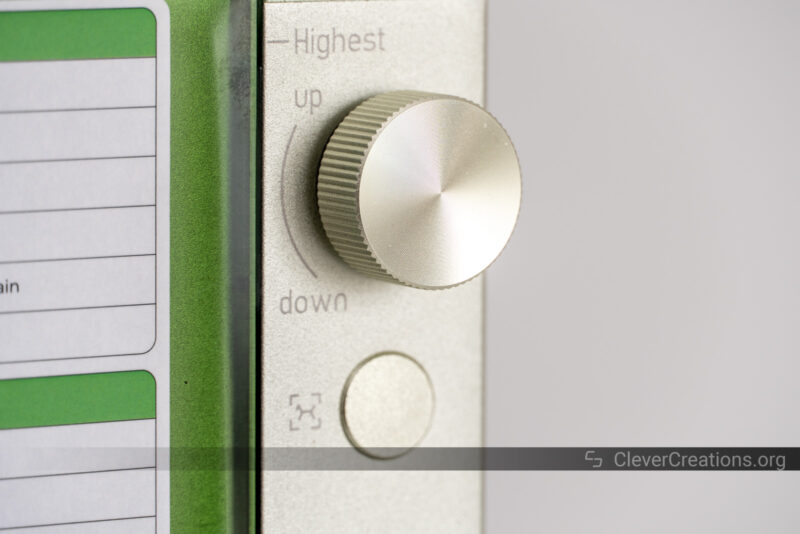
The buttons that you have access to—aside from the emergency button—are the focus adjust and framing buttons that you can see above.
We found ourselves using the focus adjustment knob the most. It’s spring-loaded and has a satisfying feel to it. We’ll delve deeper into its function in the next section.
Despite the lack of a screen, the xTool F1 tells you a lot about its status. For example, the focus knob lights up in various colors depending on the status of the machine.
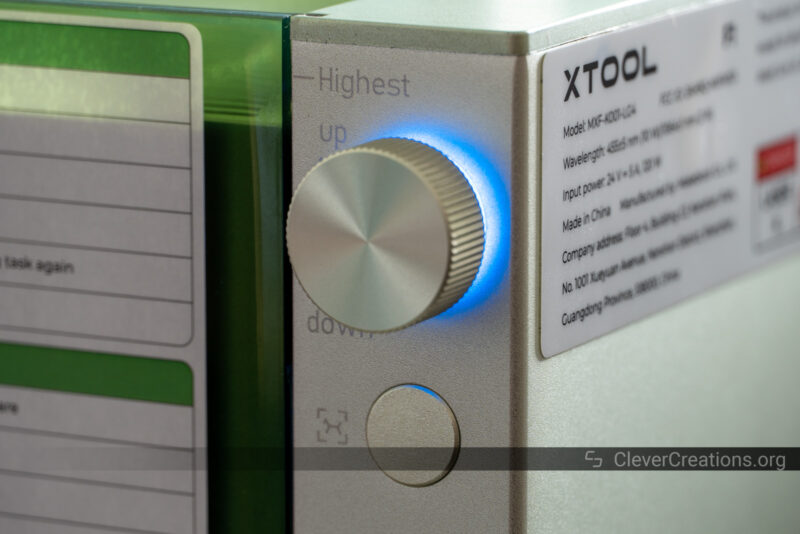
The logo on the front also lights up or blinks for additional information.
Altogether, this can be a bit much to keep track of. To solve this, the xTool F1 comes with a practical guide stuck on its side that explains what all signals mean.
We like this addition. The xTool P2 has a similar status indicator around its main button, but because it’s difficult to memorize its colors mean, we rarely find ourselves using it as a reference. This aspect is much better thought out on the xTool F1.
Focus Adjustment
As you have read above, the knob on the right side of the xTool F1 lets you focus the laser beam on your workpiece. We found the button to be conveniently placed and you typically need only a couple of seconds to get the laser in focus.
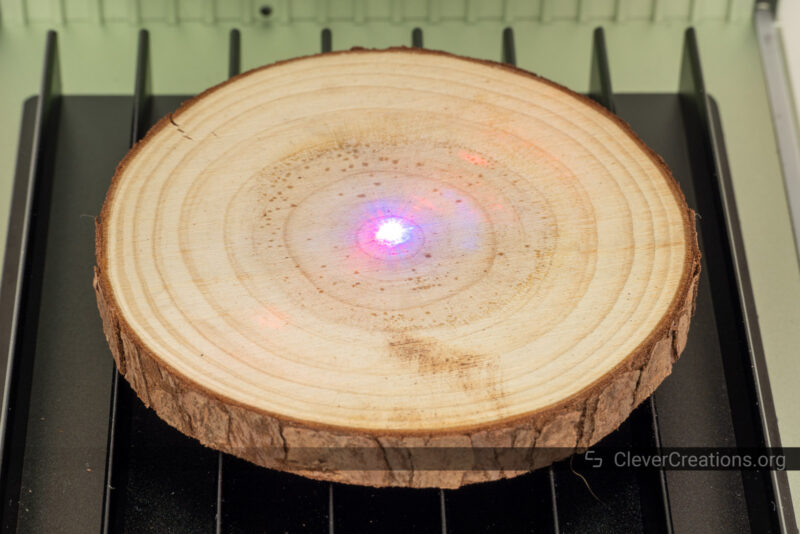
To indicate whether the laser is in focus, the xTool F1 projects two laser beams from its laser head. One laser beam is red, and the other is blue.
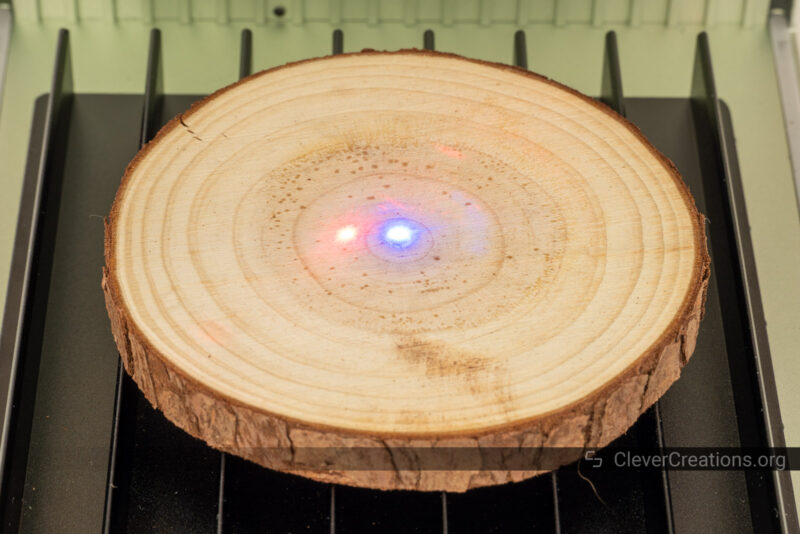
When the two dots are spaced apart on the object you want to engrave, the laser is out of focus. By moving the laser head up or down with the knob, the dots will either move further apart or closer together.
The goal is to get them to overlap. Once you have done that, the laser beams of the blue and infrared laser are correctly focused on the object underneath.
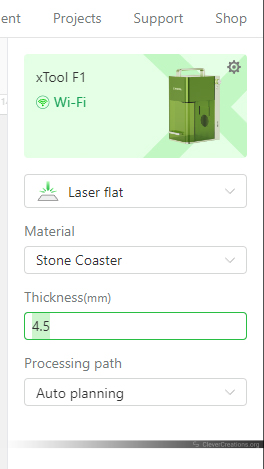
What we like about the xTool F1 is that you can also auto focus through the software. Simply enter the material thickness you are working with in xTool Creative Space, and the laser head automatically moves to the right height.
When you do this, it is important that you place the material on the xTool F1 itself. Not of on the black working panel you can see above, because this increases the height of your material.
Because the manual method is already fast, we did not find the automatic method to save that much time. It does feel cooler to use, however.
Framing Preview
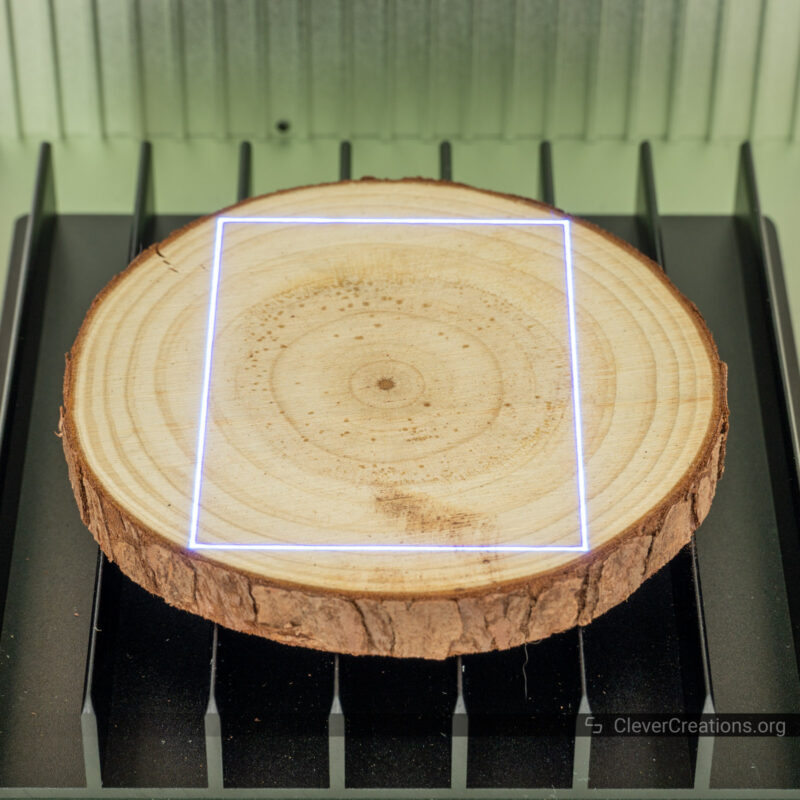
To align your laser engravings and cuts, the engraving preview option of the xTool F1 comes in handy. It’s the best way to see where the work will take place without actually doing it. That way, you can realign things before you make them permanent.
Something new on the xTool F1 that we have not seen elsewhere is the option to project the exact outline of the job. Instead of showing a rectangular box of where the diode lasers will do their job, it shows the exact shape.
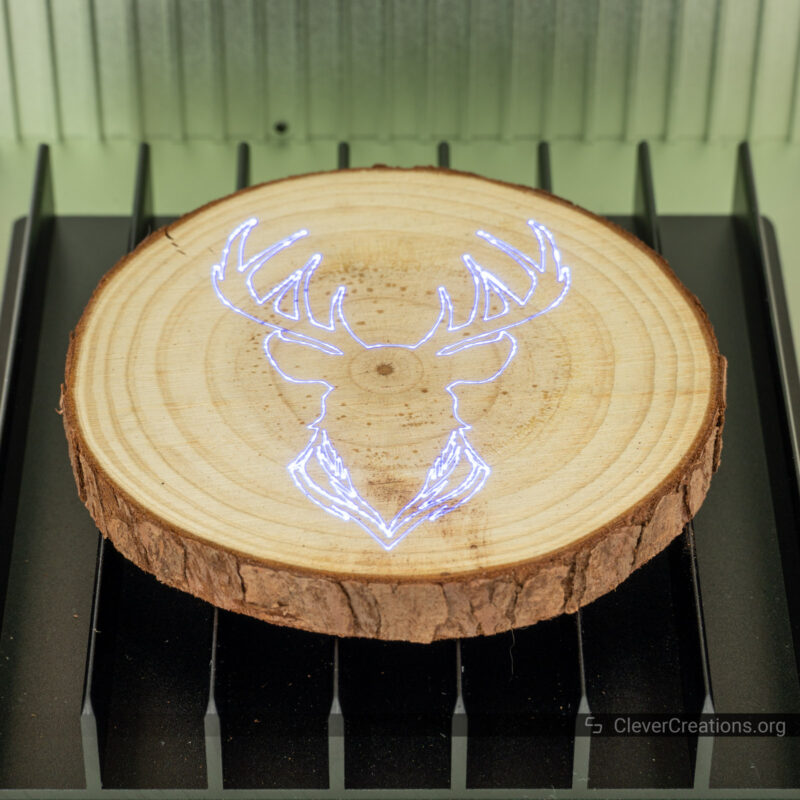
We found this feature to be most useful for oddly shaped engravings. These can end up appearing off-center when engraving them based on their rectangular outline. By previewing the exact outline of those engravings, you get a much better idea of the final result.
Connectivity
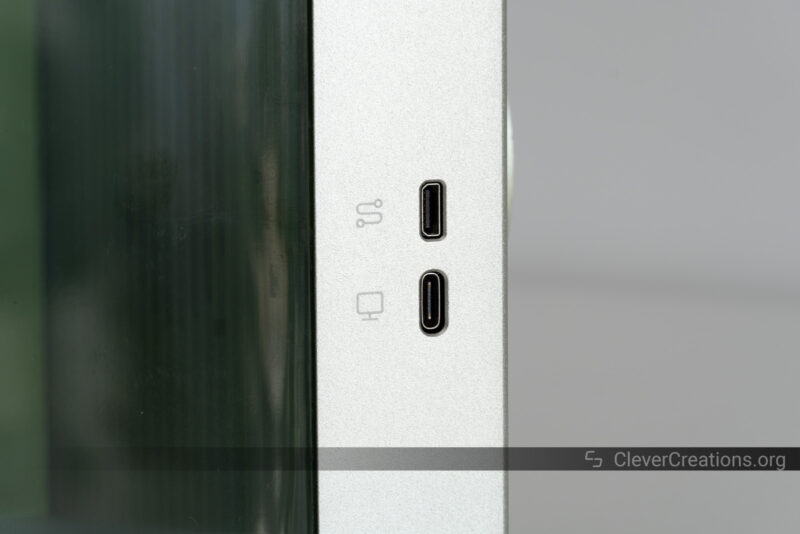
There are two ways you can connect to the xTool F1. Either over Wi-Fi or through a wired USB connection. We tested both methods, and we found that they both provided a fast and stable connection without issues.
In the end, we settled on using the Wi-Fi connection for all our testing. It works just as well as the USB connection, but it didn’t require cables running across our workbench.
The Wi-Fi option is also the most practical if you want to place your xTool F1 next to a window for ventilation purposes.
At the back of the xTool F1, you can find several USB ports for hooking up the accessories. One is dedicated to the air purifier—more on this later—and the other is for either the slide extension or the rotary extension.

All connections worked perfectly while we did the testing for this xTool F1 review. You won’t need to spend time fiddling around with them or their settings to get things to work.
Software
xTool’s software support is typically one of its strong points. With the F1, this is no exception. The two options available are either xTool Creative Space software or Lightburn.
xTool Creative Space
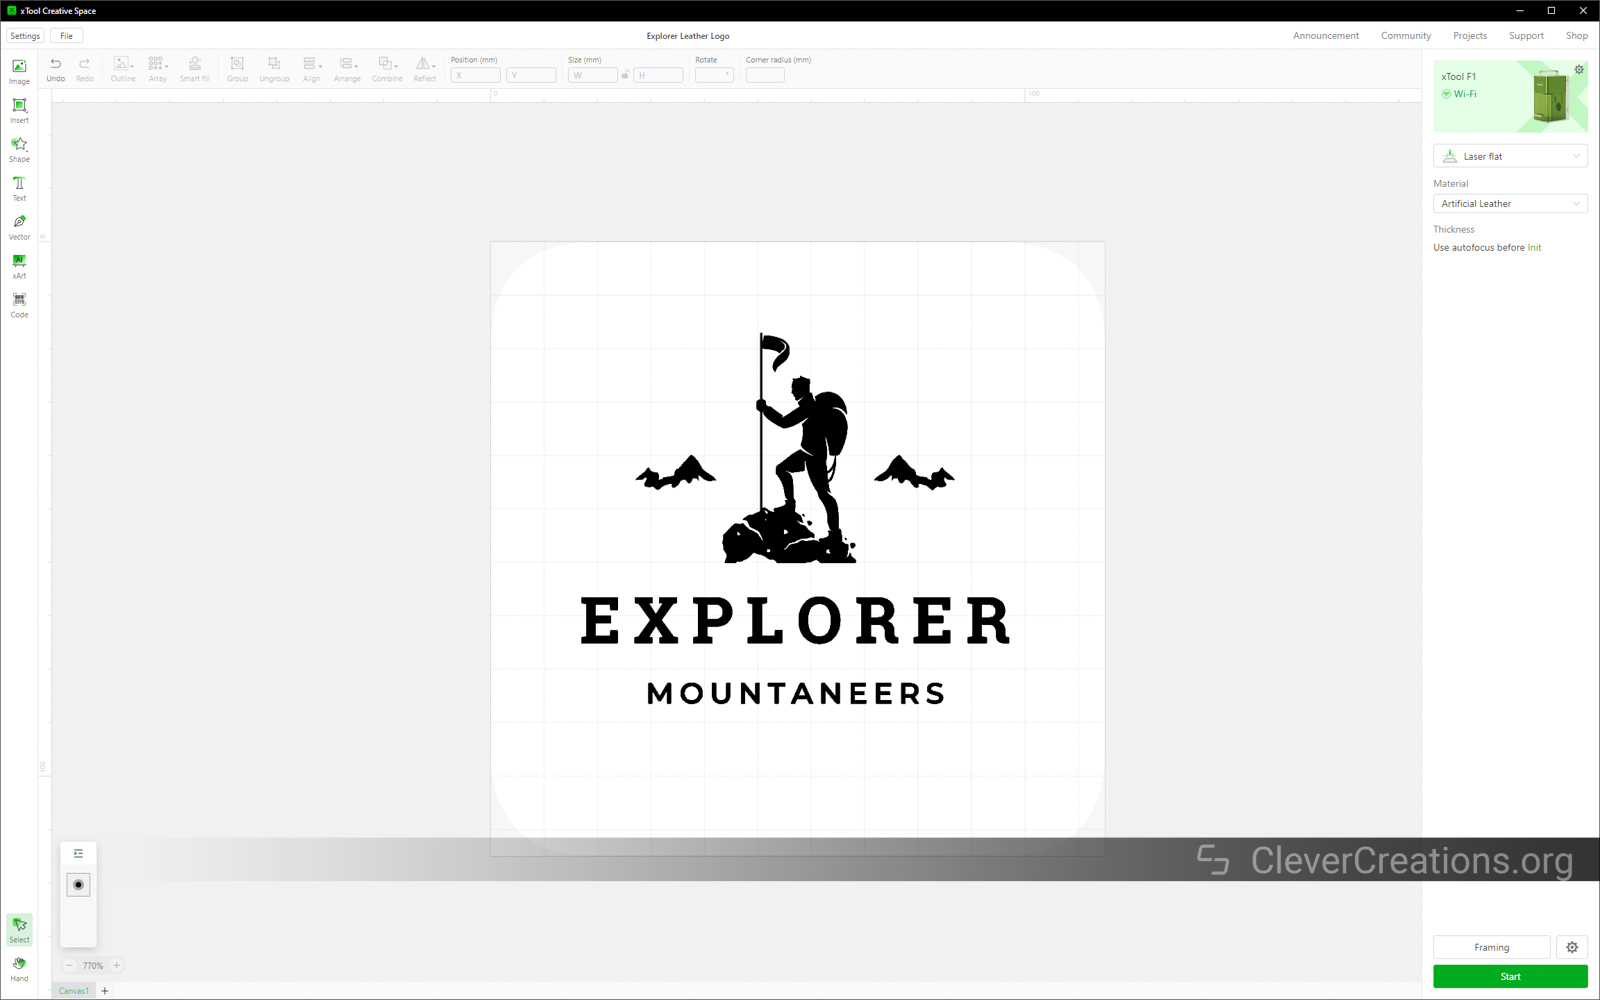
The xTool Creative Space software is the official solution for xTool’s laser machines. It’s capable, powerful, and—from what we have seen during our testing—mostly bug-free.
You can use it for designing engravings and cutting jobs, sending those jobs to the xTool F1, and controlling the laser machine itself. It’s a one-stop solution and most users will be very happy just using this software.
One thing that stood out to us is that the material reference settings—or presets—are excellent. Not only do the presets give good results, but there are also lots of materials with pre-configured settings you can choose from.
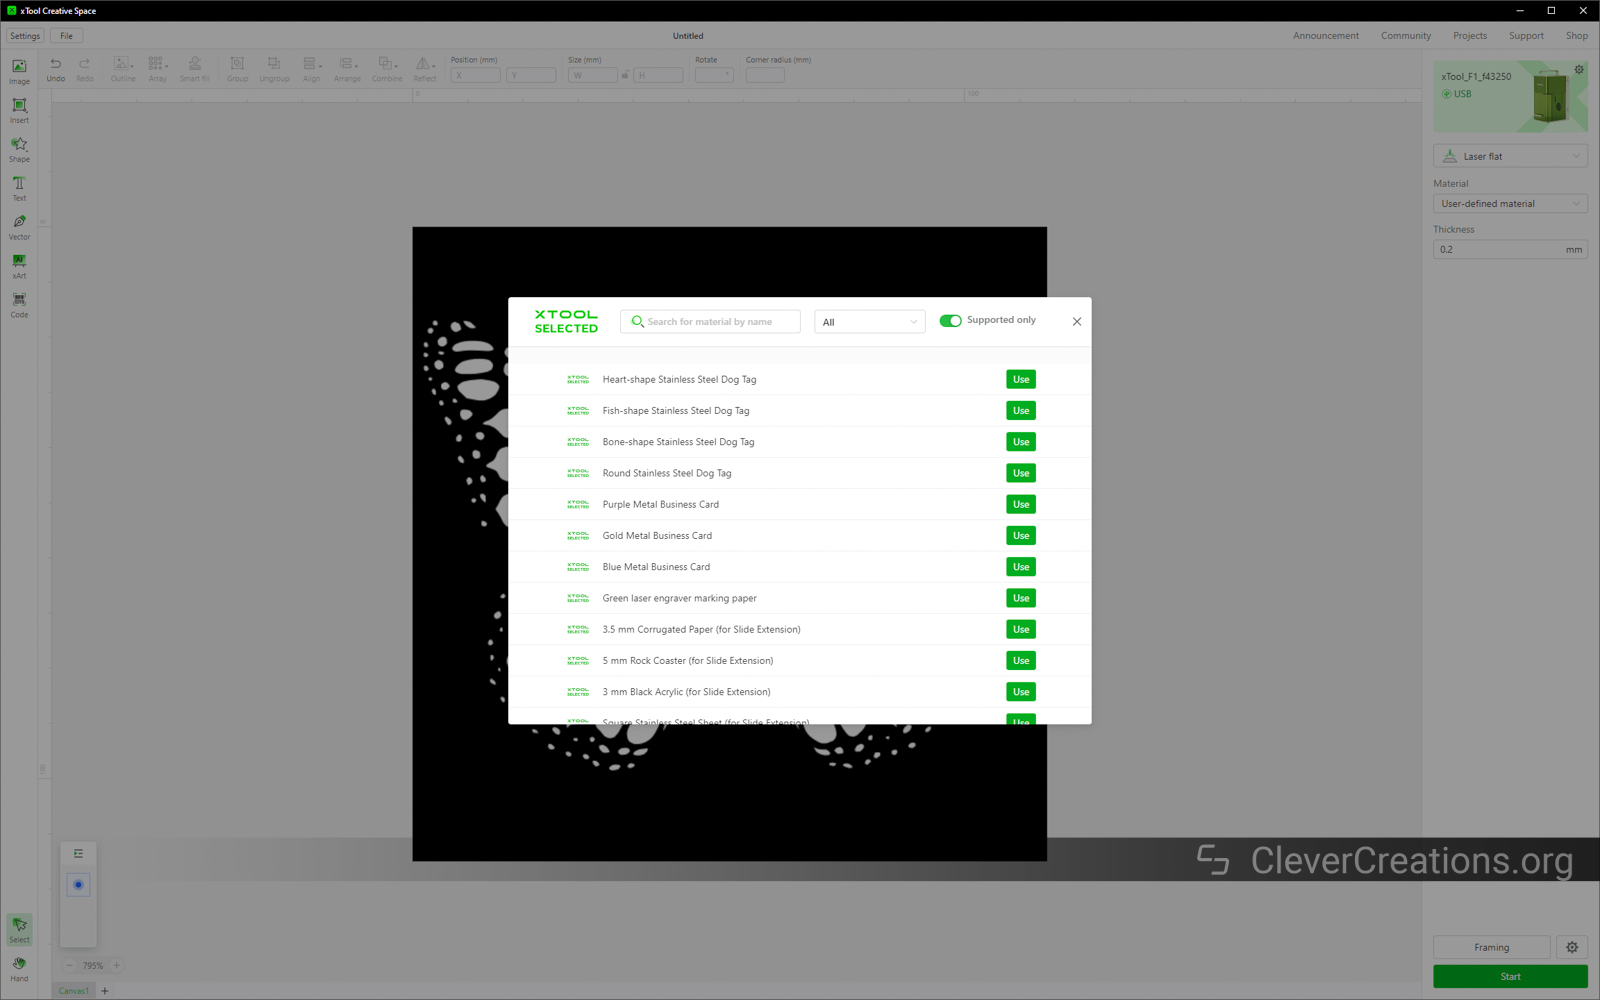
In contrast to other laser machines, there is little need to perform test engravings on scrap material to determine the correct settings first. Not only does this save materials, but it also saves you time.
Lightburn
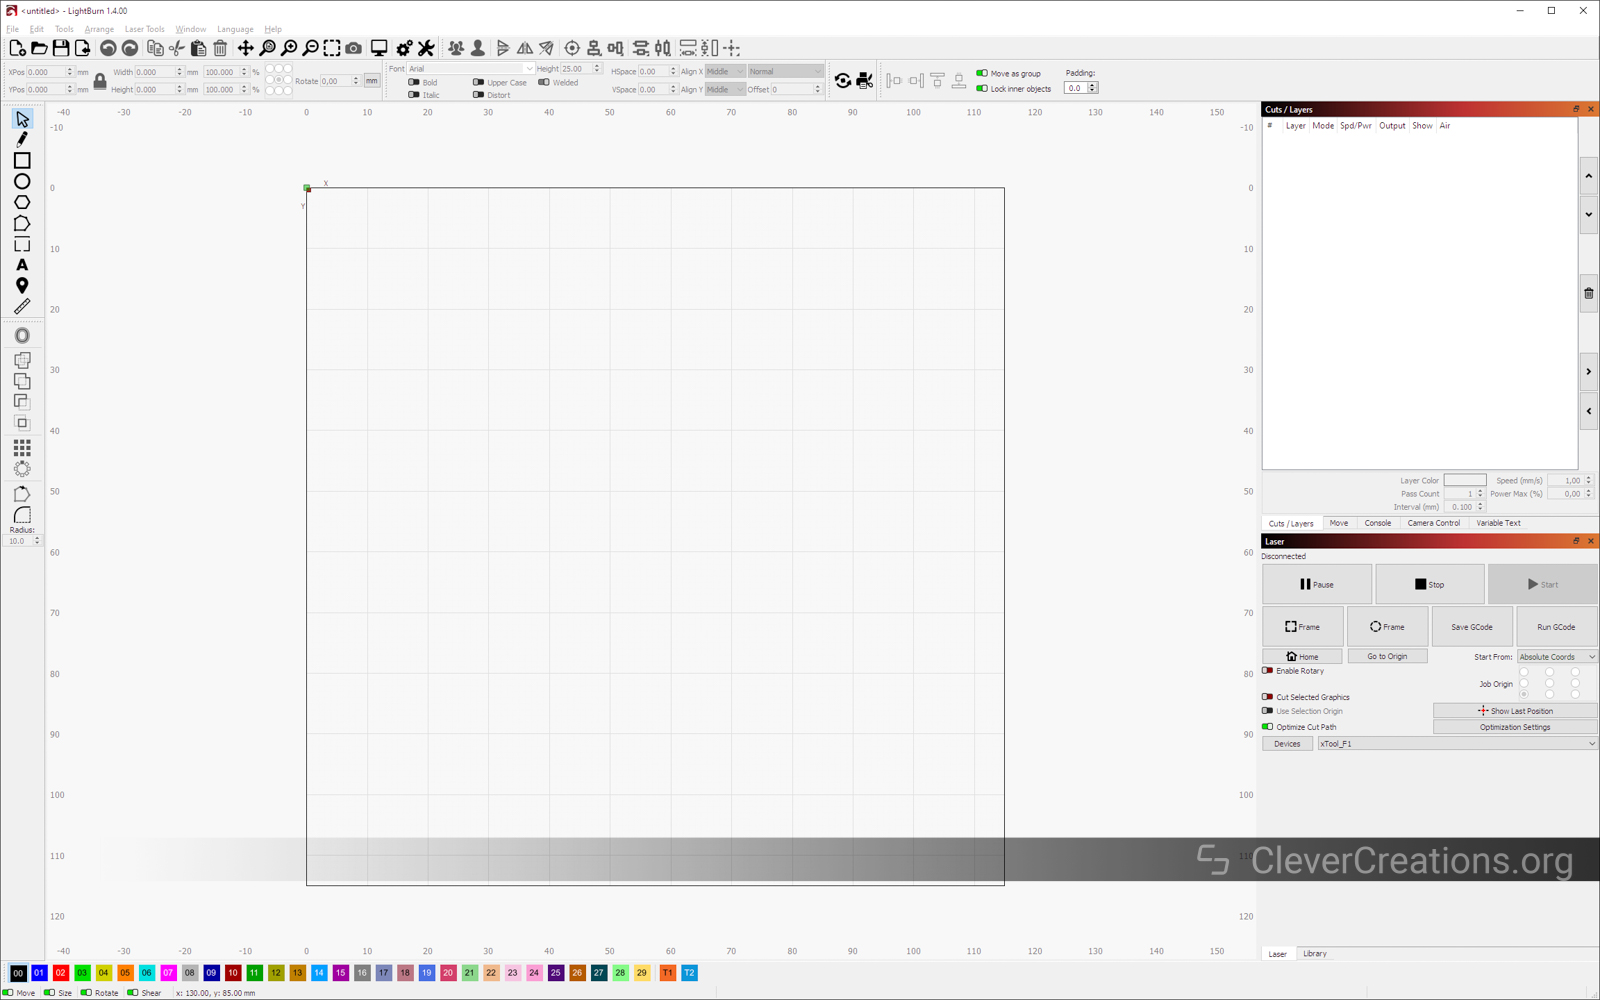
Even though xTool Creative Space is a good enough software for most, Lightburn, the gold standard, is better. Comparing the two, Lightburn gives you control over more settings, has better multi-layer support, and comes with superior design features.
If this is what you are looking for, or if it is the software you are familiar with, we’re glad to let you know that the xTool F1 supports Lightburn as well.
The official instructions from xTool to use the F1 with Lightburn are straightforward and easy to use. Getting Lightburn up and running with the F1 took us minimal time.
From what we could see, the only features of the xTool F1 that you can’t use in Lightburn are the software focusing mode and the Wi-Fi connectivity. Other than that, everything works. You can even use the rotary and slide extensions.
Safety
With several nifty safety features, the xTool F1 has a lot going for it in terms of safety. Not only is it a secure device for you to use, but it also protects kids and other loose projectiles from messing about with it.
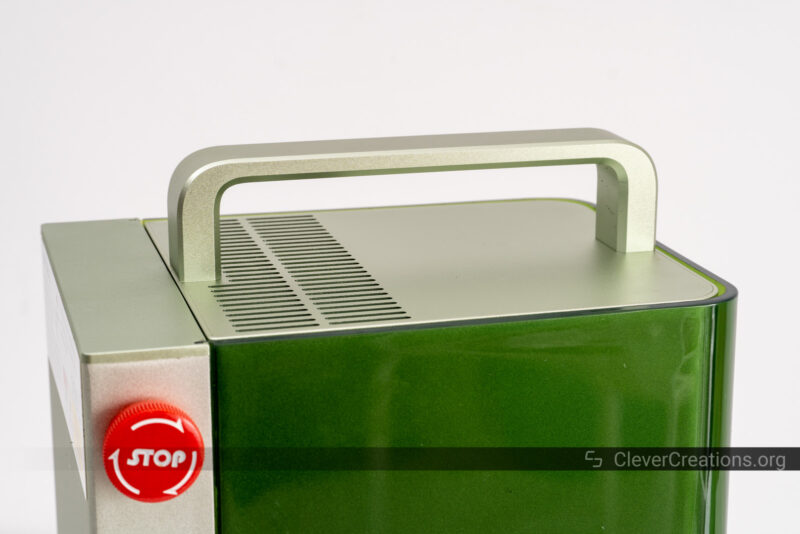
Emergency Stop
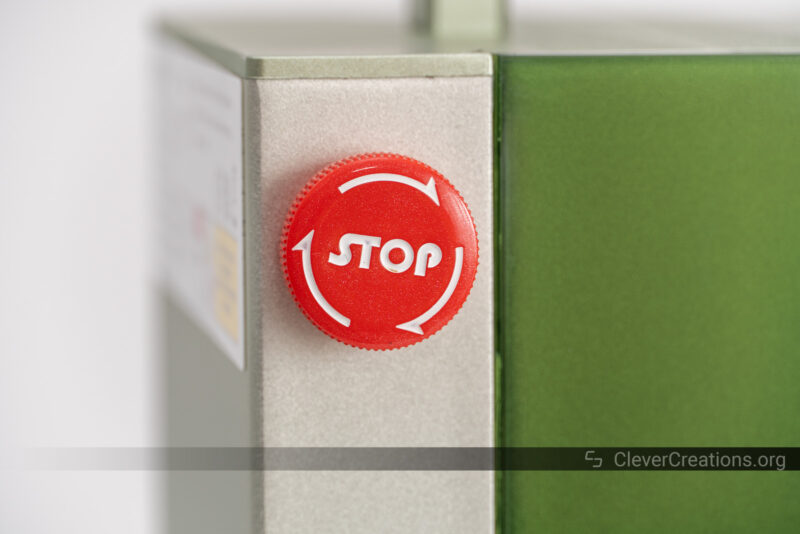
If you want to quickly stop your engraving or cutting job, for example, you can use the emergency stop button on the xTool F1.
The emergency button is a bit hidden at the back of the side of the machine, but since the xTool F1 is so small, it is still easy to reach.
The emergency stop immediately cuts the power to the device. Because of this, we also used it as the main power button for the laser engraver.
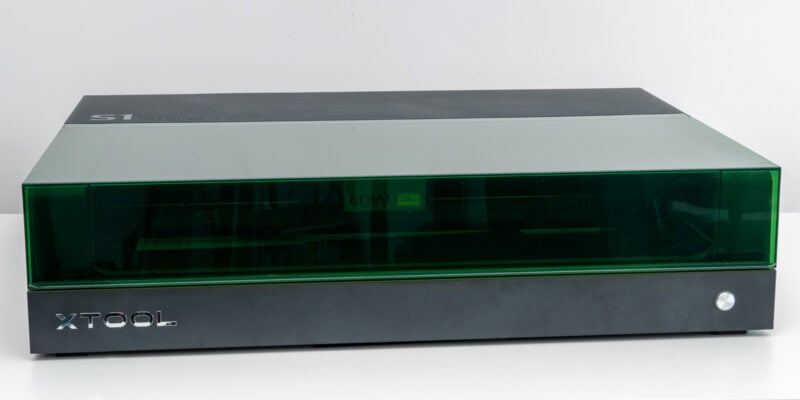
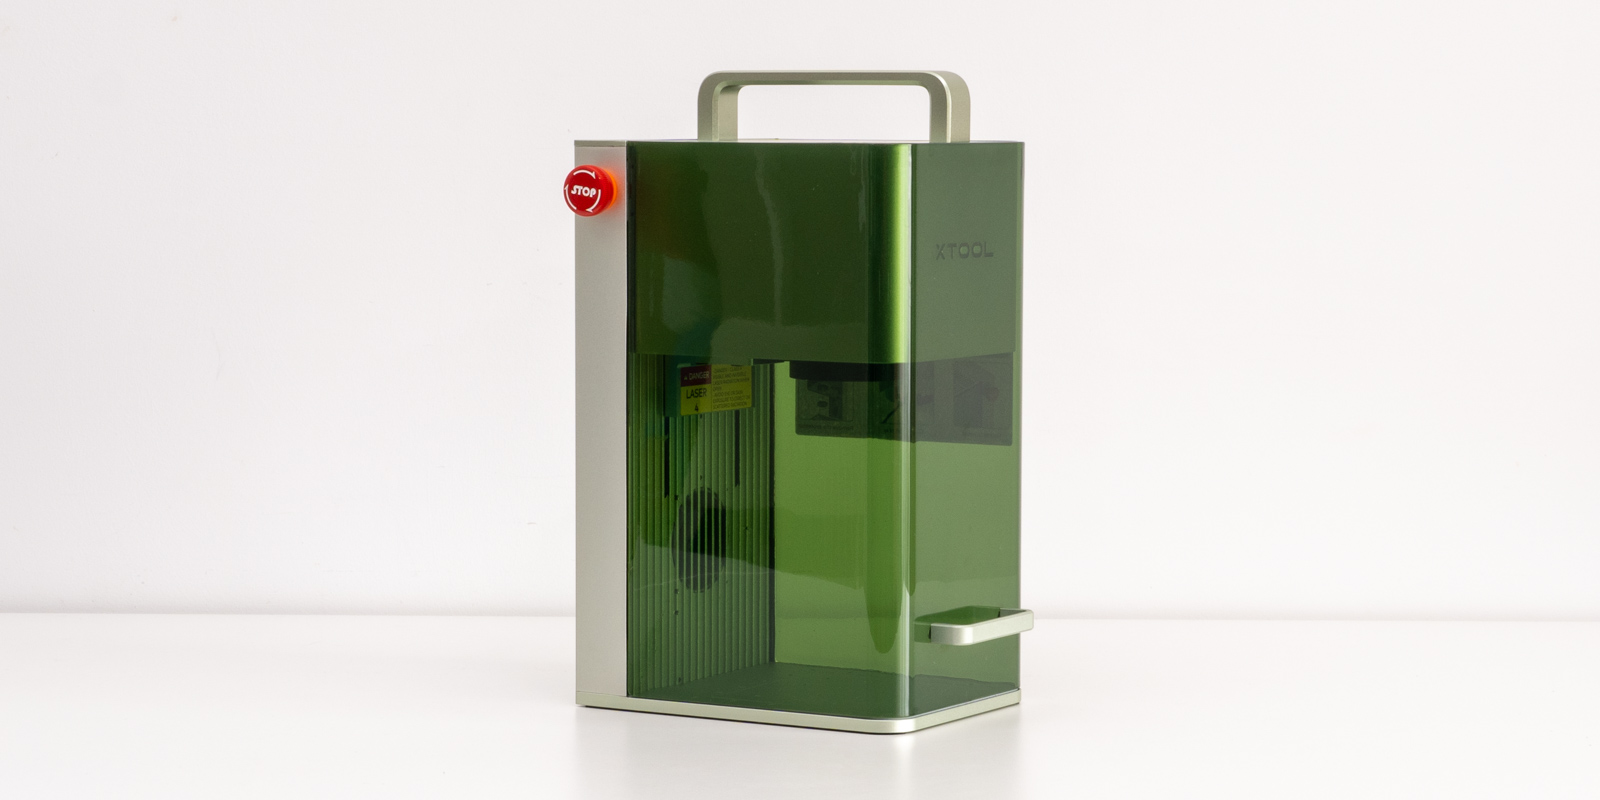
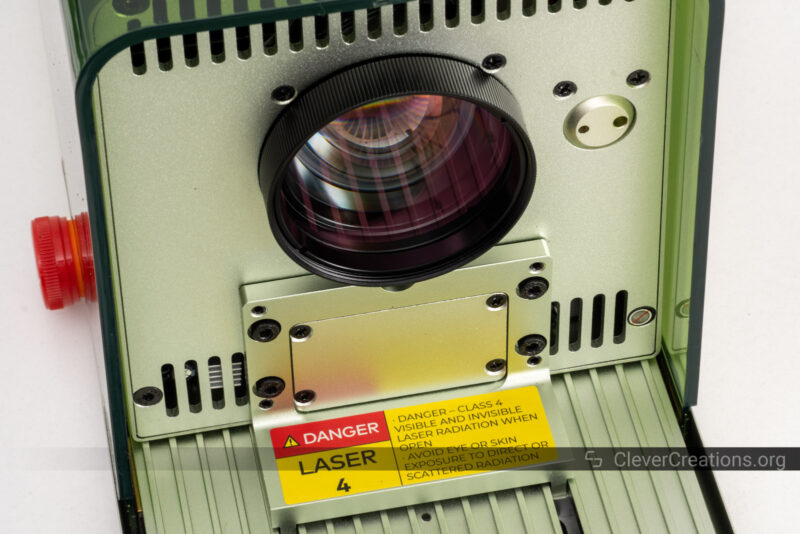
Protective Enclosure
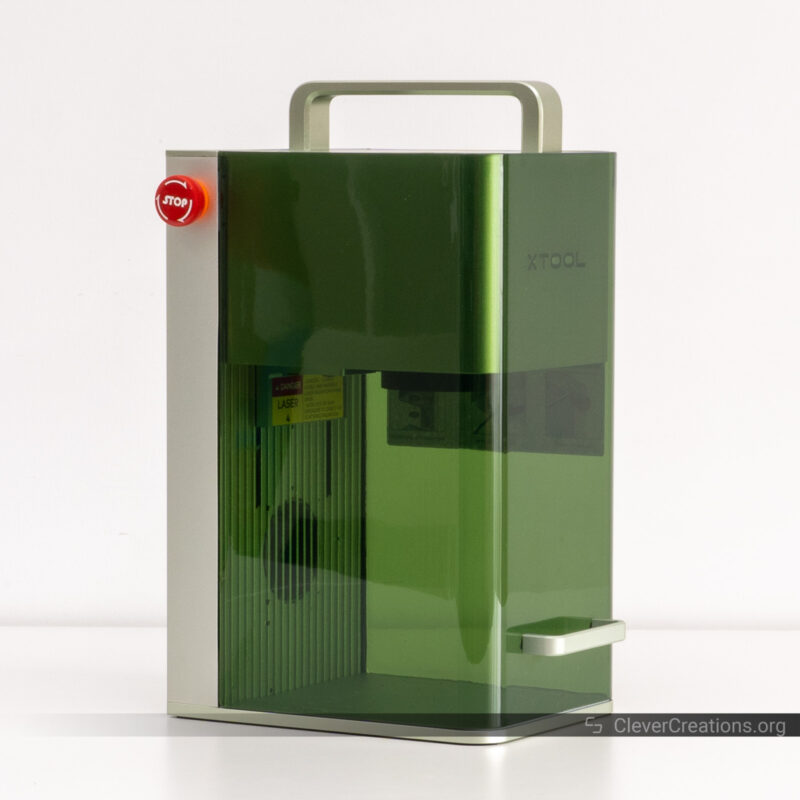
If you are familiar with laser engravers and cutters, you’ll know that it is important to prevent laser light from reaching your eyes. To do that, the F1 comes with a built-in protective enclosure that filters out harmful light wavelengths.
It’s green, partially transparent, and covers both the front and sides of the laser engraver. To access the laser’s work area, you simply use the enclosure’s handle to slide it upwards.
We like this system because it keeps the enclosure attached to the device. Compared to laser engravers where the enclosure separates, there is no chance of losing it.
There’s also no risk of forgetting to put it on before you start an engraving job. There’s a setting in xTool Creative Space that only allows the xTool F1 to operate with the enclosure closed. If you prefer otherwise, for example if you want to use the rotary tool or slide extension, you can disable this setting.
Unlike many other laser machines, the xTool F1 does not come with a pair of laser goggles. This is alright if you use the machine without its extension modules, because the laser engraver has no light leakage from the two powerful lasers.
For example, at the bottom of the enclosure, the F1 has a seal that prevents light from getting through. It also helps prevent smoke from leaking out, so it’s a good feature for multiple purposes.
However, if you want to use the slide extension or rotary tool with the xTool F1, you’ll have to use laser goggles. Because you can’t use those with the enclosure closed, goggles are the only way to protect your eyes from the powerful laser lights.
Locking Keys
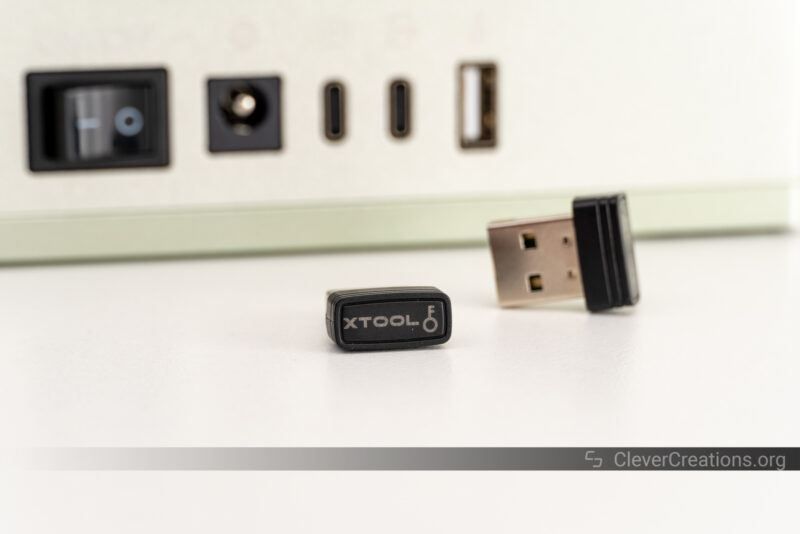
You’ll also find that the xTool F1 comes with two USB ‘keys’ that you can use to unlock the portable laser engraver. One you plug into the back of the machine, and the other is a spare.
It’s another feature that we haven’t seen on other laser machines. In this case, we don’t fully see the use of it. We assume it’s to avoid unwanted use of the machine, but we can’t find many situations in which it is practical.
For example, if your kid knows how to power and start the laser engraver, it is probably smart enough to find and plug the safety key in as well.
Ordinarily, we are indifferent towards extra features that we don’t see the use of. But in this case, we have a concern.
If you happen to lose both keys, there’s no way for you to ever use the machine again. We’ve checked with xTool to verify this, and there is no setting or firmware modification to bypass the key check.
So it’s extremely important that you keep track of at least one of the keys. The way we do this is, is by keeping one key in the xTool F1 at all times. As you can see, that already defeats its main purpose—locking down unwanted use of the laser engraver.
Fume Exhaust
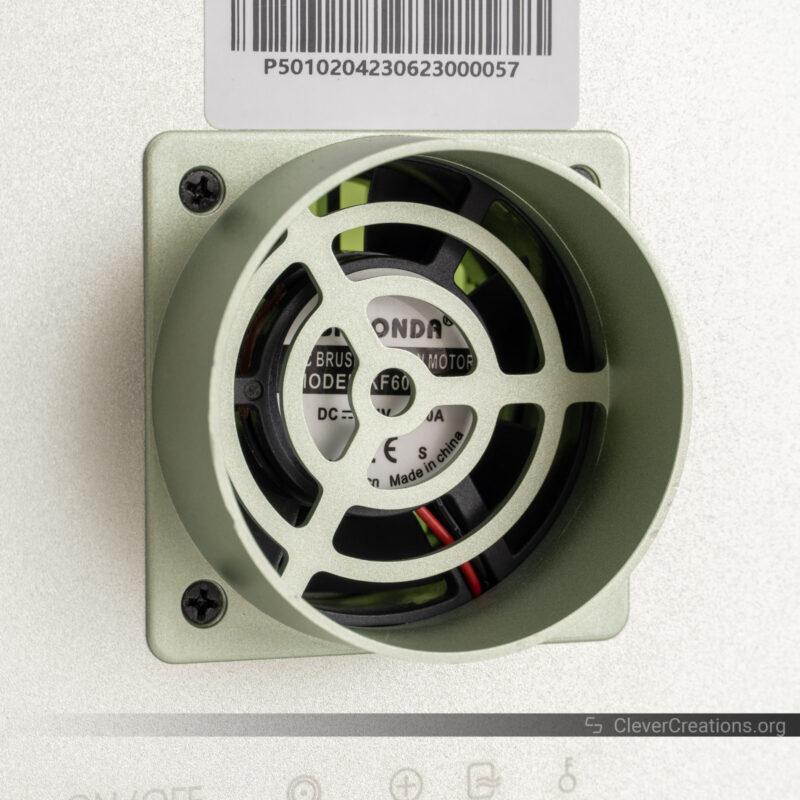
The back of the xTool F1 has an exhaust port that the laser engraver uses to vent laser-cutting fumes. It’s 63 mm in diameter and comes with a hose that you can use to direct fumes further away.
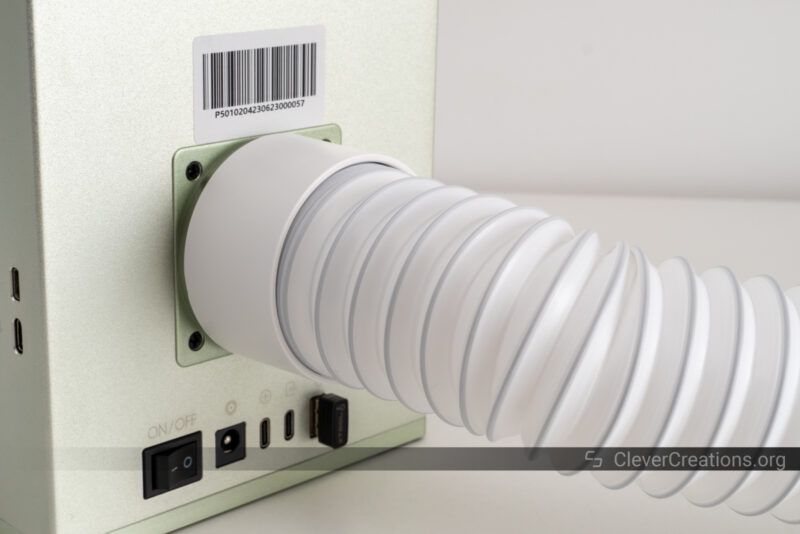
The exhaust hose is made of rigid plastic and can be fully or partially extended or retracted. Its total length ranges from 50 cm to 150 cm. We like its overall quality and that its retracted sections stay in place. You won’t have a hose flopping all over your workbench.
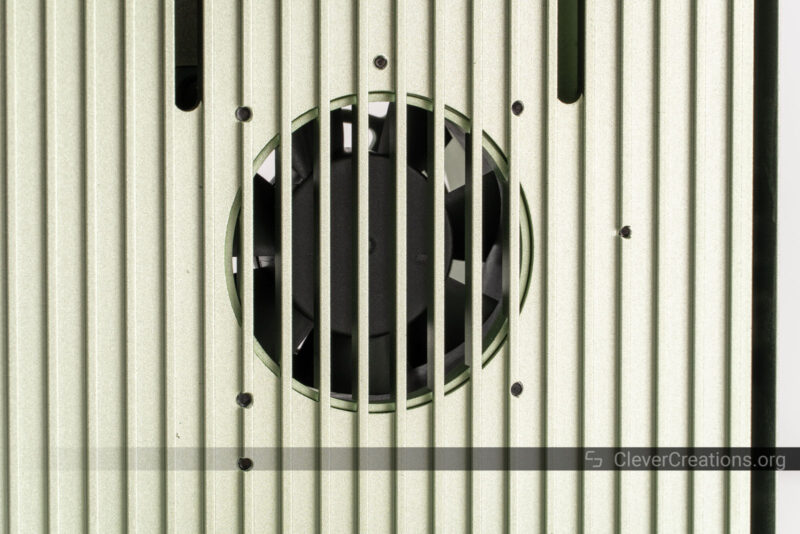
Inside the xTool F1 you’ll find the built-in fan that pulls smoke out of the work area. In our testing, it proved powerful enough to avoid excess smoke build-up inside the laser engraver.
In most of our tests, however, we also hooked the exhaust up to the official desktop air purifier. We’ll show you how that works in the next section.
xTool F1 Accessories
Like any laser engraver, the xTool F1 comes with accessories to improve the functionality and user experience. Overall, we find xTool’s accessories to be of high quality. It’s worth pointing out that they have a price that matches the quality.
Desktop Air Purifier
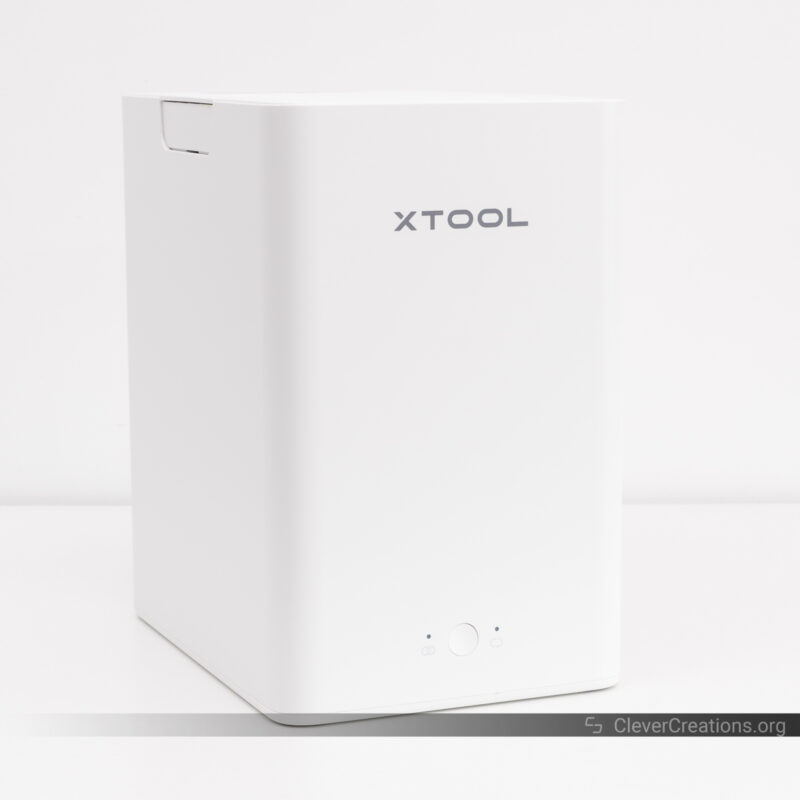
With the xTool F1 laser engraver, you can use its compatible desktop air purifier accessory. It’s basically a box with a fan and a series of air filters that filter unpleasant smoke and toxic fumes. It keeps your indoor air clean so that you can use the engraving machine inside.
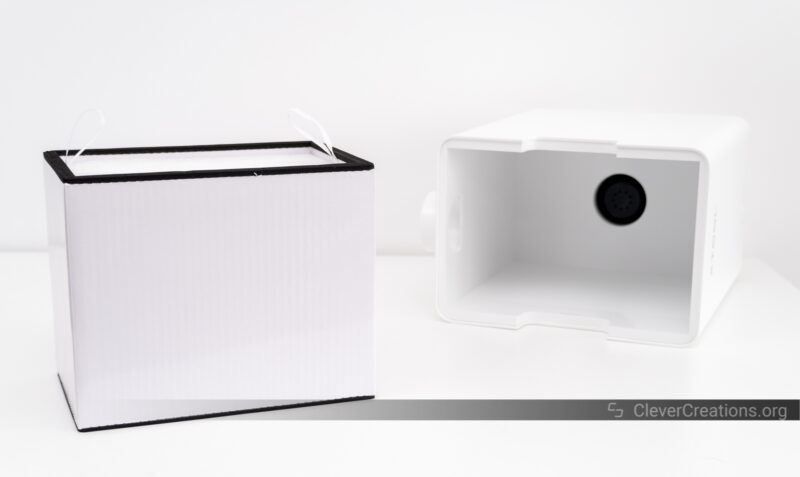
What we particularly like about the air purifier is that it connects to the xTool F1 over USB. When the laser engraver starts a job, it automatically turns the purifier on. This might sound trivial, but we found it quite nice to not have to remember to start the purifier before using the laser engraver.
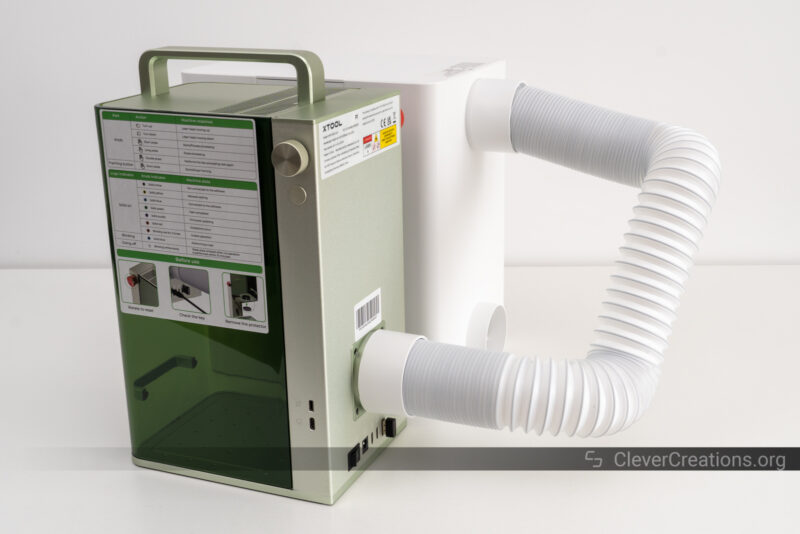
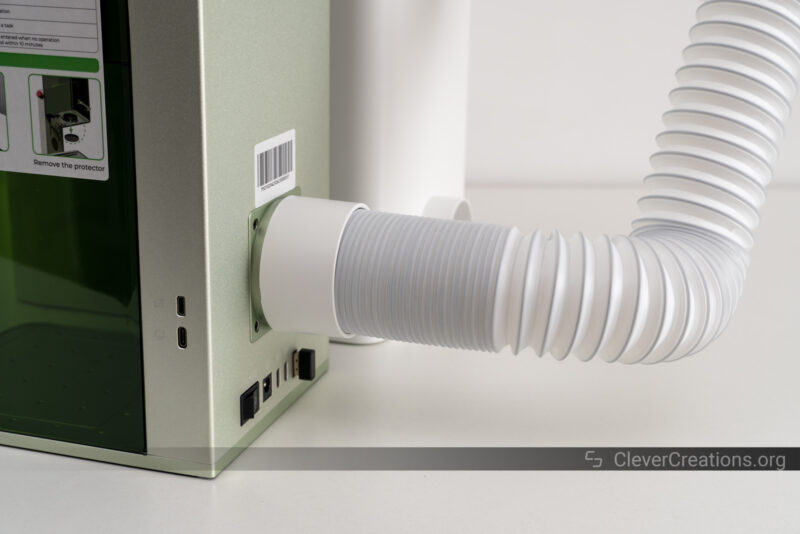
The input of the smoke purifier simply connects to the exhaust port of the xTool F1. Because of the collapsible hose, your workspace won’t end up cluttered. In our experience, the whole setup has a professional feel to it.
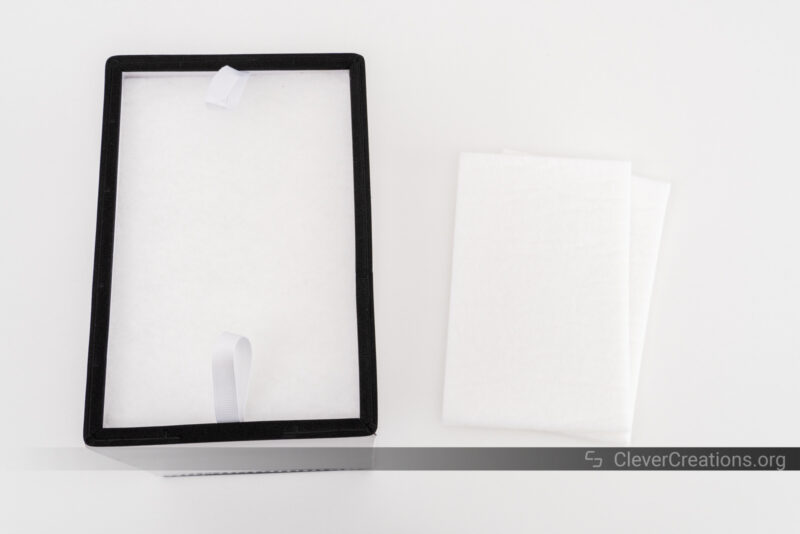
According to xTool, it takes 8 hours of processing high smoke until you need to replace the filters with a new filter pack. This does not sound like a lot of time, but unless you cut a lot of wood, it will take a lot of use time to get to that point.
When using the xTool laser machine for its main application—engraving—it only generates small amounts of fumes. Because the laser engraver is fast and has a small work area, most jobs take up little time as well.
As far as its purification abilities, anecdotally we can say that the air purifier does a decent job. We did not experience any smoke build-up in our testing area.
We did still smell the material that we were cutting or engraving. Leather especially created a strong smell that the air filters could not deal with, but laser cutting wood was still noticeable as well.
That said, we found the xTool desktop air purifier to be more than enough for using the xTool F1 non-stop indoors.
The construction quality of the air purifier is excellent. Its injection-molded plastic appears durable and there is no rattling or resonance from loose parts when the fan is running.
We found the filter fibers to be a bit itchy when touching them with our bare hands. It’s normal for these types of filters, but if you have sensitivities, you’ll want to wear gloves when handling them.
At $499, it’s a pricey accessory. At a discount—which xTool often has—we think it’s worth it. Unfortunately, this air purifier is only compatible with the xTool F1. For all other laser engravers in xTool’s line-up, you can use the regular smoke purifier, but that one is probably too powerful for this small portable laser engraver.
Rotary Extension
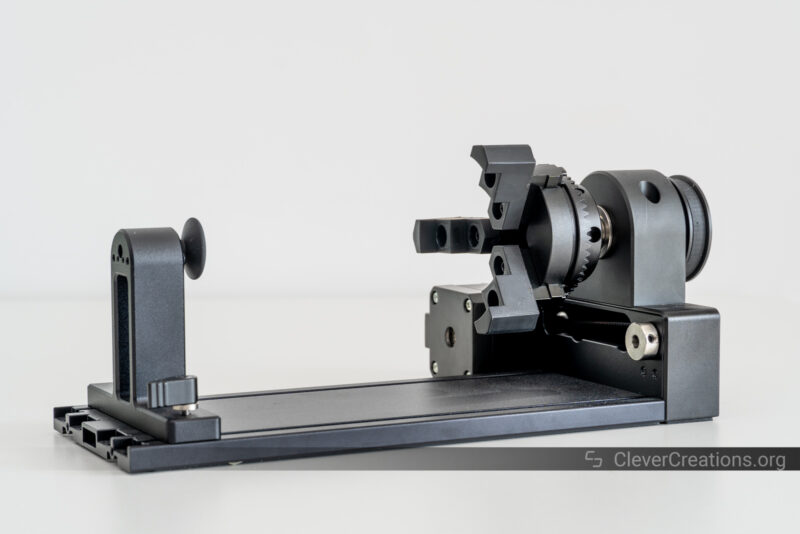
xTool’s RA2 Pro rotary tool is another useful accessory available for use with the xTool F1. We’ve tested it previously with the company’s other laser machines and we can confidently say that it is a nice piece of kit.
It gave us consistent results in engraving cylindrical and spherical objects, and like the other accessories, its build quality is excellent. Directly comparing it with the rotary extension of the LaserPecker 4, we expect this one to hold up better over time.
The RA2 Pro does not have an option to adjust the chuck angle, however. This is something that LaserPecker’s rotary extension does have.
So if you want to engrave the inside of rings with the xTool F1, for example, you’ll have to get a bit creative. Placing the entire rotary at an incline is enough to do the trick.
Keep in mind that if you want to use the xTool F1 with the RA2 Pro, you’ll need to use a special cable to connect the two. It’s only five bucks, but—as we encountered—if you don’t have it at hand when you need it, you are unable to use the rotary extension with the F1 until you get one.
Slide Extension
While we were working on this xTool F1 review, the company released a slide extension for the laser engraver. We haven’t tested it, but if it is built as well as the other accessories, it is a useful addition to the machine.
You can see the slide extension as an extra axis for the F1 that extends the working area. It gives you the option to mount a bigger workpiece that slides back and forth while the diode laser or infrared laser does its thing.
In total, the slide extension expands the usable area from 115×115 mm to 115×400 mm. xTool markets it as a 4x increase in area, but if you do the math, it’s a bit less than 3.5x. Regardless, it’s a practical accessory for a laser engraver with such a small work area.
One of the downsides of using the slide extension is that it exposes you to laser light. This is because the housing can’t be closed anymore.
As such, you’ll be wise to invest in a pair of certified laser goggles as well. The same goes for if you decide to use the rotary tool with the F1.
Verdict: Is the xTool F1 Worth It?
There’s no denying that the xTool F1 portable laser engraver is a capable machine that allows you to engrave practically any common object to your liking. Its dual laser setup is a versatile solution that lets you work with many different materials. From metals to wood and acrylic to leather, the F1 can handle nearly anything.
Based on what we saw in our testing, the xTool F1 has many strong points. Its engraving results for one, but also its engraving speed. Whether its the absolute fastest portable laser engraver is hard to say, but it is certainly up there.
In the ease of use department, the F1 performs strongly as well. The easy focus adjustment, outline engraving preview, and Wi-Fi connection all make using the xTool F1 that much easier compared to other laser machines.
On the software side, there’s nothing to complain about either. The xTool Creative Space software provides enough for most to make use of the machine. For anyone else, its Lightburn support is enough to do the trick.
The optional accessories of the xTool F1, albeit pricey, accompany the machine well and add practical solutions to common problems.
As for the shortcomings, the small work area was the most notable to us. Engravings up to 115×115 mm in space are not an issue. Coasters, wallets, phone cases, and various small items are easy to do in one go.
For larger jobs, however, the xTool F1 is not a practical device. The slide extension helps address this somewhat, but it is still restrictive with a short side of 115 mm.
Due to its lack of an LCD (touch)screen, the xTool is also not usable as a standalone device. You’ll always need a computer, phone, or tablet. We don’t think this is a big issue for most users, but if it is for you, the LaserPecker 4 will be a better option.
Other than that, the xTool F1 is a solid laser machine. It’s easy to use and doesn’t pretend to be anything that it is not. Its high-detail engravings are nothing but impressive and it feels great to have such versatility with a single machine.
Its official price is listed as $1999, but we recommend waiting for a discount if you can. Not because the machine isn’t worth it at the full price, but mainly because xTool runs regular promotions that offer hundreds of dollars off.