
- High quality engravings
- Blisteringly fast
- Dual (infrared & UV) lasers
- Generous work area for a galvo
- Decent cutting capabilities
- Durable build quality
- Easy focusing of lasers
- Solid safety features
- Practical accessories
- Inaccurate material presets
- Desktop software can be buggy
- No option for smoke extraction/filtering
- While the LP4 build quality is great, its accessory quality could be better
With its previous LP1 through LP3 models, LaserPecker established itself as a manufacturer of affordable high-speed galvanometer laser engravers. Their new LaserPecker 4 aims to improve on their previous machines by adding even more features to the mix.
For example, the new LaserPecker 4 combines both a 1064nm infrared laser and a 450nm blue laser to let you engrave on almost every material you can get your hands on. And with the addition of several practical accessories, it looks to be a very versatile machine.
A single machine that can do everything is what we all want, but is the LP4 as good as advertised? In this LaserPecker 4 review, we’ll put the laser engraver to the test to see if it is worth its demanding price tag.
Let’s put our laser goggles on and safely take a look!
LaserPecker 4 Specifications
| LaserPecker 4 Specs | |
|---|---|
| Price | LaserPecker | AliExpress |
| Laser Type | 10W 450 nm Blue Diode Laser 2W 1064 nm Infrared Laser |
| Working Area | 160 mm x 120 mm (Basic) 160 mm x 300 mm (with the Slide Extension) |
| Working Speed | 2000 mm/s |
| Preview Speed | 16000 mm/s |
| Engraving Precision | 0.003 mm |
| Resolution | 1K, 2K, 4K, 8K |
| Applicable Materials | 10w 450 nm Blue Diode Laser: Lacquered metal, Anodized aluminum, 304 stainless steel, Bamboo, Wood, Leather, Food, Paper, Fabric, Photosensitive printing, Plastic, Acrylic, Tinted glass, Color glaze ceramics, etc. 2w1064 nm Infrared Laser: Metal, Plastic, Leather and any material with paint coating |
| Cutting Depth | 8 mm Balsa Wood, 5 mm Dark Opaque Acrylic |
| Preview Mode | Center Point, Outline Frame, and Contour Preview Modes |
| Software | LaserPecker Design Space & LaserPecker PC Software & LightBurn |
| Support Format | PC: G-Code, JPG, PNG, BMP, SVG, DWG, DXF, etc. APP: JPG, PNG, G-Code, SVG |
| Connection | Mobile – Wireless Bluetooth 5.0 PC – USB Connection, Wireless Bluetooth 5.0 (Dongle Required) |
| Operating System | Mobile – iOS 9.0 & Android 7.0 PC – macOS 10 & Windows 10 |
| System Languages | Simplified Chinese, Traditional Chinese, English, Japanese, Korean, German, Spanish, French |
| Safety Certification | CE, ROHS, FCC, FDA, CDRH, NCC, KC, UKCA, TELEC |
| Input Power | DC (24V 5A) AC (100-240V, 50-60HZ) |
| Size | Laser Head: 241 x 82.1 x 139.7 mm Stand: 260.5 x 218 x 283.5 mm Protective Shield: 176 x 145 x 155.7 mm |
Unboxing
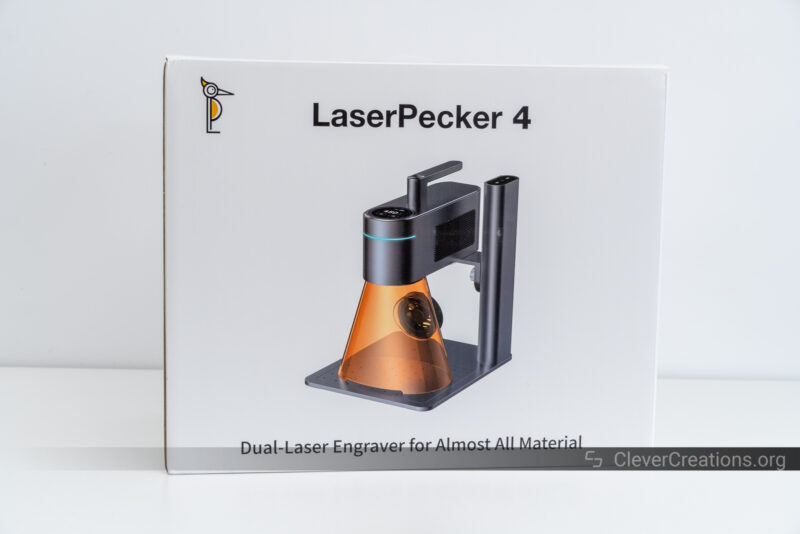
Our first impression of the LaserPecker 4 laser engraver, even before opening the box, is that it is a solid machine. The box itself isn’t that big, but it has a surprisingly hefty feel to it.
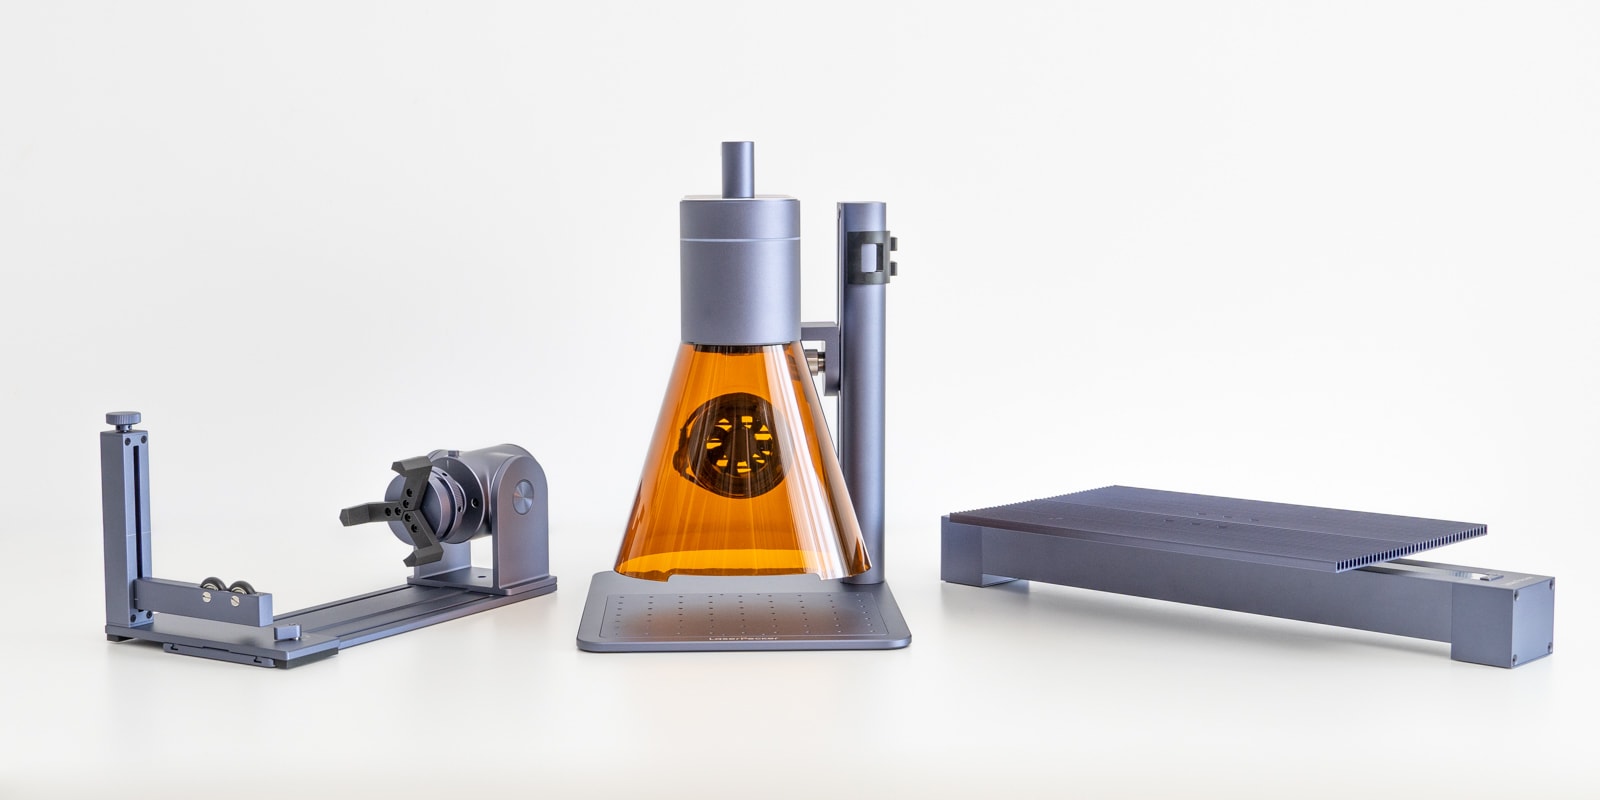
LaserPecker sent us the premium bundle of the LP4, which includes both the slide and rotary extensions. They’re partly responsible for the weight, but even without them, the LaserPecker 4 itself is a solid unit.
Inside the box, you’ll find everything neatly stacked in multiple layers of foam padding. After taking them out layer by layer, you are left with a neat arrangement of components.
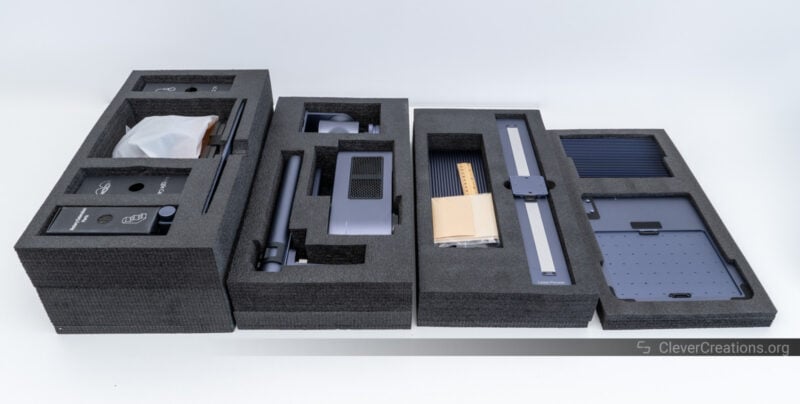
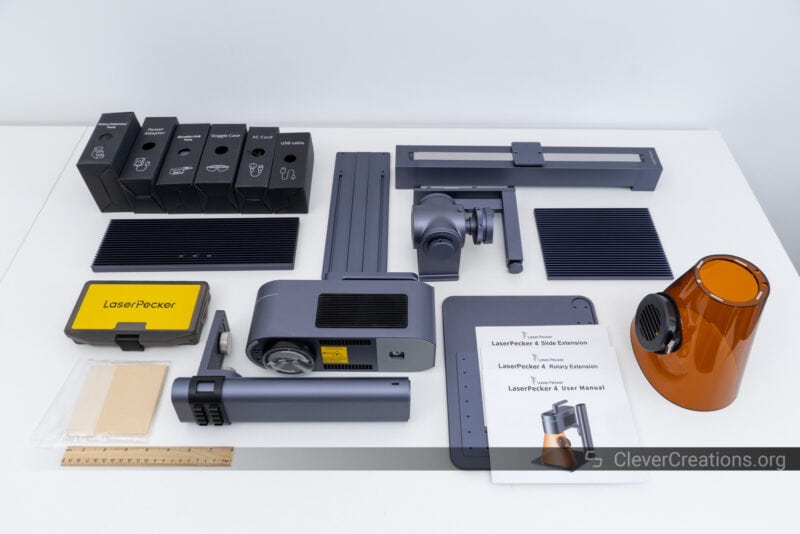
Remove all parts from the foam and you’ll find that you have received the following:
- Laser unit
- Electric stand
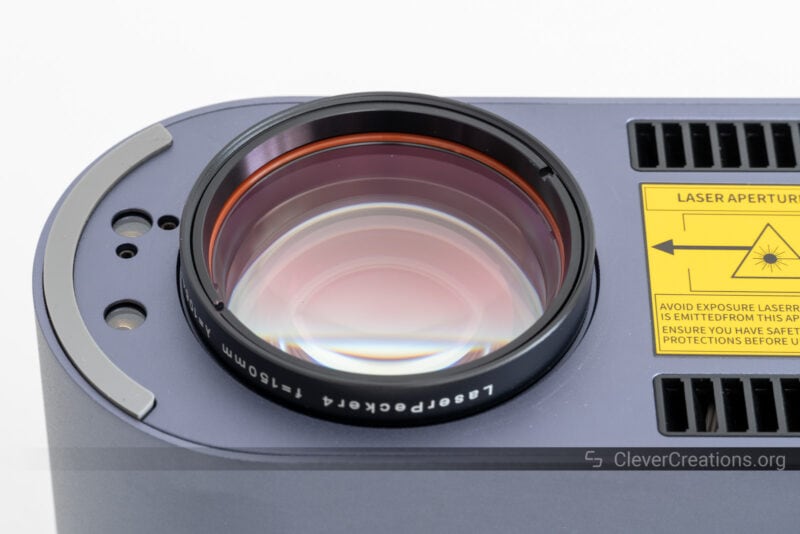
- Field lens & cover
- Safety cover
- Safety goggles
- AC cord & power adapter
- Various cables
- Various bolts & hex keys
- Ruler
- Several material samples
The premium bundle also contains a variety of components for the rotary extension and slide extension. We did not include these in the list above.
We found all components much to keep track of at first, but sorting the components by their type —LaserPecker 4, slide extension, and rotary extension—helped us figure out what is what.
Immediately clear to us was the high build quality of the kit. You are expected to pay quite a bit for the LP4, but you’ll also feel like you are getting good value for what you are paying for. Both the component quality and the presentation match the price.
Getting Started With the LaserPecker 4
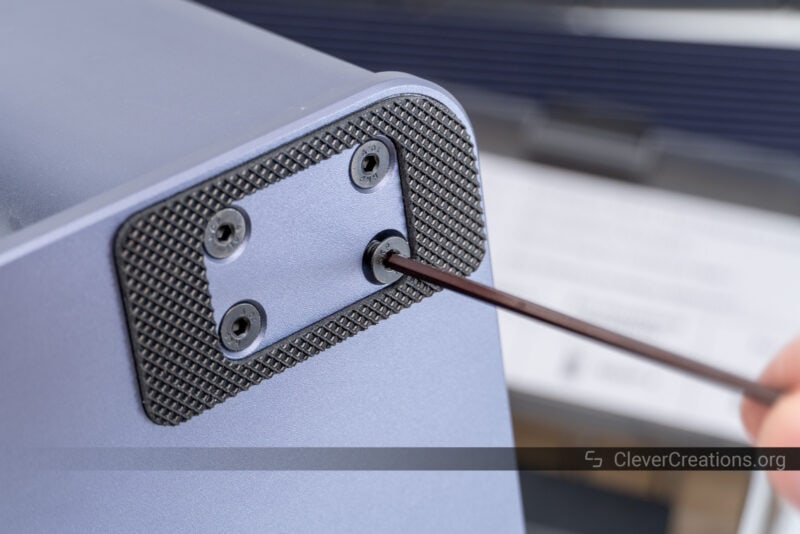
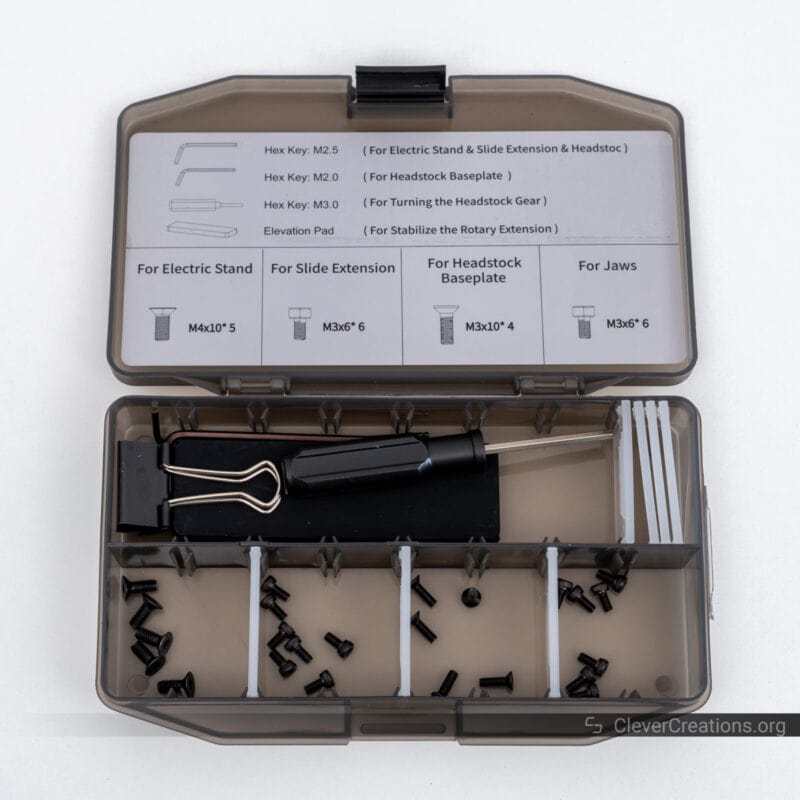
That qualitative feel extends to the setup process of the LaserPecker 4 laser engraver. From the documentation to the provided parts for assembly, it all feels well thought out.
For example, the tools and bolts you’ll need to assemble the laser engraver are sorted and clearly labeled in an organizer box. It’s a box with customizable dividers, so after assembly, you can use it to organize other stuff as well.
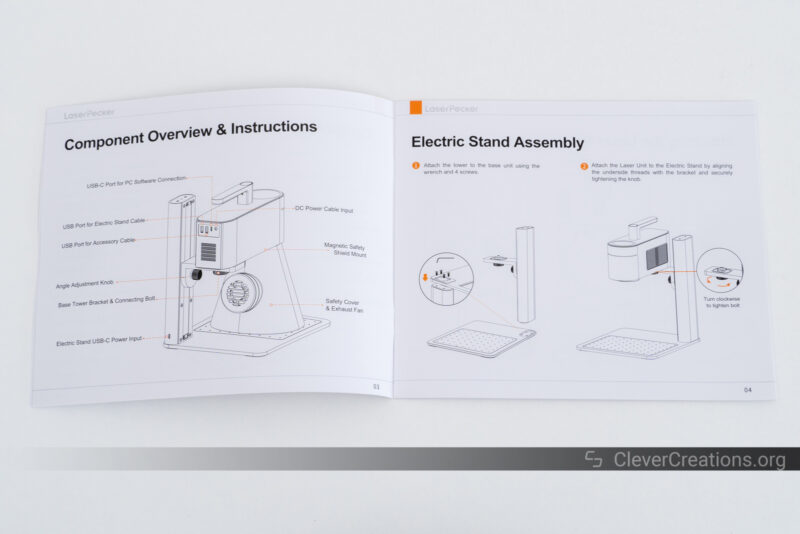
Similarly, the manual is reasonably well-translated and has many clearly-labeled diagrams to show you what goes where.
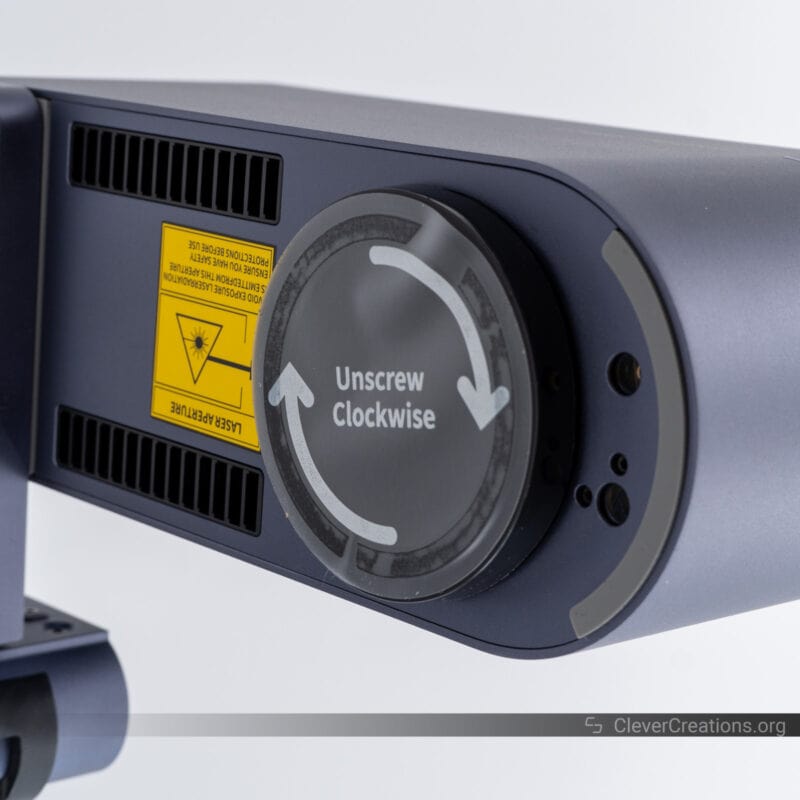
One step that we did not see mentioned in the manual is the removal of the protective laser lens cover. If you are familiar with laser engravers, you will quickly realize that you need to remove it. But if it’s your first time with such a machine, it’s easy to miss. Make sure to take it off.
In total, you only need about 10 minutes to assemble the LaserPecker 4. It’s just a matter of bolting several components together and hooking up the cables. There’s not much to it.
You can expect to spend more time if you also have the slide and/or rotary extension. They are equally easy to put together, but also take about 10 minutes each.
LaserPecker 4 Features
Dual Laser Sources
The LaserPecker 4 is a somewhat unique laser engraver in that it combines both an infrared laser and a UV laser. You can switch between them depending on the material you want to engrave or cut.
The UV laser has 10W of power and a wavelength of 450 nm. It’s your typical blue light laser that works with wood, paper, fabric, plastics, leather, ceramics, and so on.
At 10 Watts, it’s reasonably powered. It’s advertised as being able to cut 8 mm balsa wood in a single pass, and we found that to be reasonably accurate. It performs close to most other 10W lasers we have tested.
The 1064nm infrared laser is better for engraving metals, plastics, and leather. With 2W of power, you might think it is not as powerful as the diode laser. However, because it is a pulsed laser with a 2W average power, it’s not an apples-to-apples comparison.
Interestingly, the infrared laser is advertised as being a fiber laser. We suspect this is not the case; instead, it simply is an infrared diode arrangement. It also wouldn’t surprise us if the LaserPecker 4 uses the exact same IR diodes that we encountered on the xTool D1 Pro 2W Infrared Module.
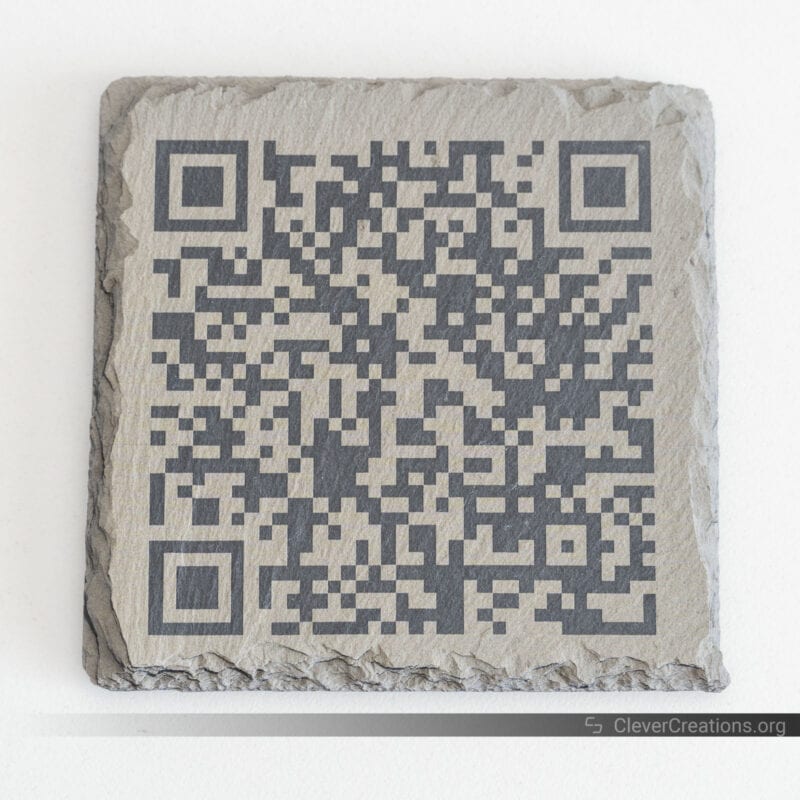
A fiber laser or not, the 1064nm infrared laser (and blue laser for that matter) worked well in our testing. As you will see in this LaserPecker 4 review, it gives great results on all kinds of materials. From metals to slate (stone) coasters.
Fast Engraving Speeds
The LaserPecker 4 engraver uses a galvanometer (galvo) arrangement to direct the laser beam. Simply put, it uses small, lightweight mirrors that can quickly point the laser light to the right spot on your workpiece.
It’s similar to what the previous LP1, LP2, and LP3 models used, and it’s one of the ways in which LaserPecker’s machines stand out.
The advantage of such an arrangement is that it gives you a very high laser engraving speed; the LaserPecker 4 is listed as having engraving speeds up to 2000 mm/s.
Of course, you are dependent on the power of the laser and the material you are working with. But suffice it to say, the LP4 is fast.
Large Work Area
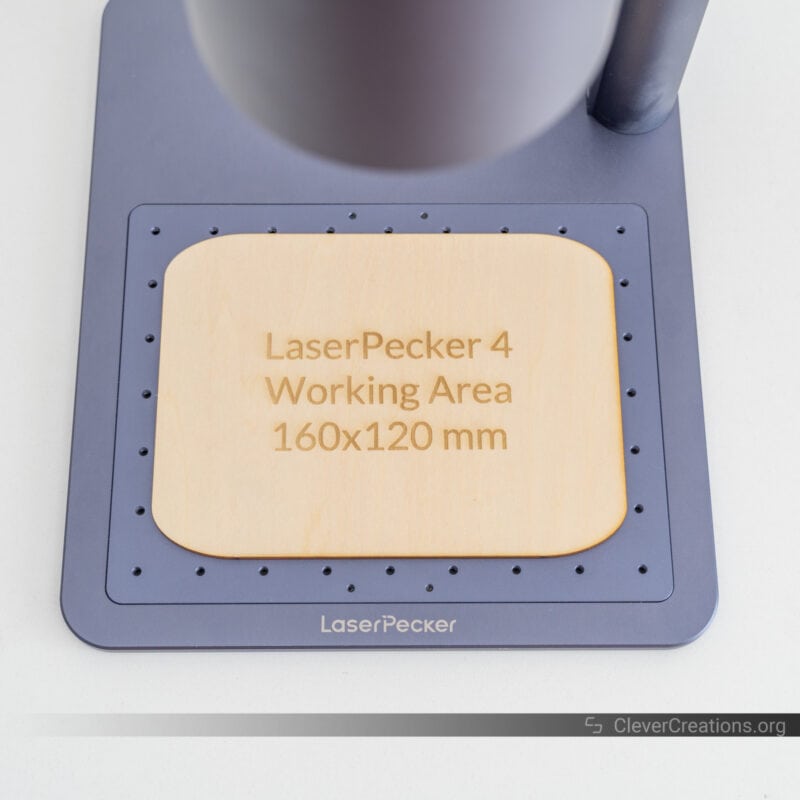
The disadvantage of a galvo setup is that the work area only extends to where the mirrors and lens can direct the laser beam to. In the case of the LP4, this is an area of 160×120 mm.
In the context of the best laser engravers, this is a small area. There are plenty of cheaper machines with a larger engraving area out there. But these don’t have the small form factor, portability, engraving speed, or dual laser system that the LaserPecker 4 has.
Compared to similar galvo laser machines, however, the 160×120 mm work area of the LaserPecker 4 is generous. For example, the recently released xTool F1 only gives you a 115×115 mm area to work with.
Compared to the LaserPecker 3, the work area has been significantly improved as well. Whereas the previous model had 115×80 mm of engraving space, the LaserPecker 4’s 160×120 mm more than doubles that.
To extend the engraving area even further, LaserPecker offers an optional slide extension accessory for the LaserPecker 4 that increases it to 160×300 mm.
It’s a welcome addition that takes away one of the big downsides of a high engraving speed galvo setup. We’ll cover this accessory in more detail below.
High-Detail Engraving
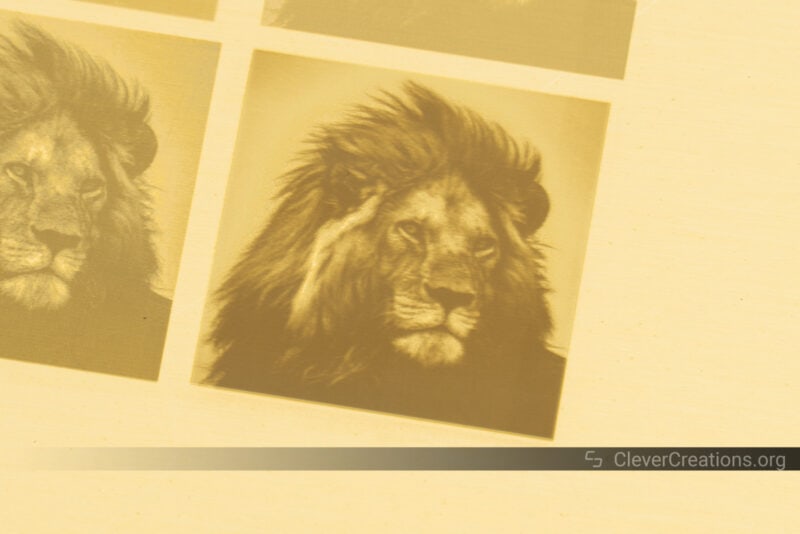
As we have come to expect from LaserPecker, the LP4 improves on the previous model with higher accuracy and engraving detail. It boasts a 0.01 mm laser spot with a 0.003 mm engraving accuracy.
This allows you to engrave in much more detail than you can with most other laser engravers. It’s especially useful for things like pictures and other grayscale engravings with gradients.
When using the LaserPecker 4 with the LaserPecker Design Space app, you can select either a 1K, 2K, 4K, or 8K resolution for your engraving job. The higher the resolution, the more detail, but the longer it takes for the engraving to be done.
For most jobs, you’ll want to pick one of the lower resolutions (1K or 2K). We found that while the 4K and 8K (1289 DPI) resolutions provide exquisite detail, they are overkill for most situations. It’s often better to save time and make use of the high engraving speed.
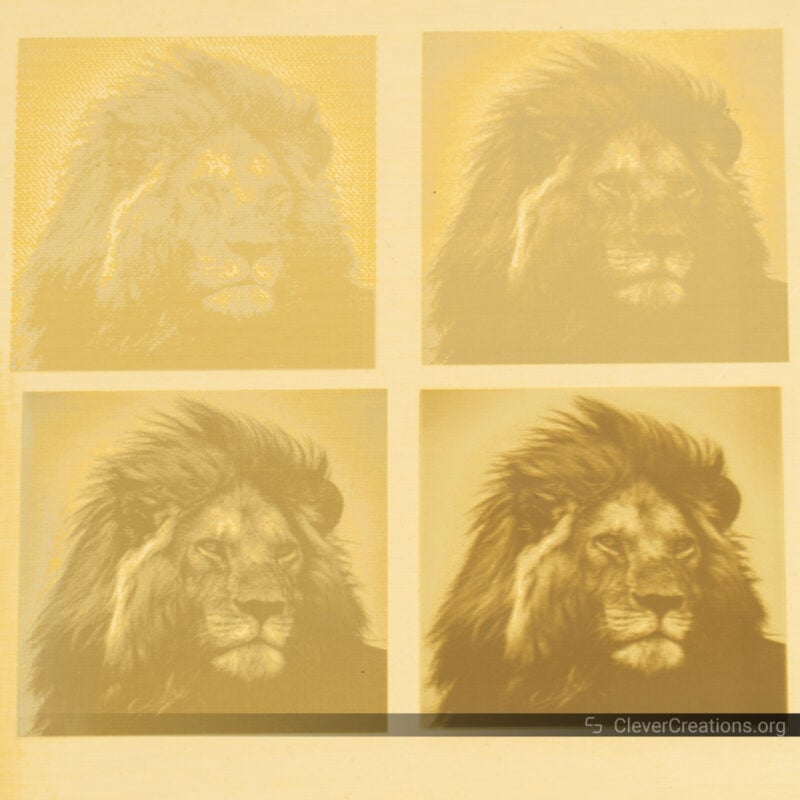
Each of the brass engravings is very small in size. Only 30×30 mm each. Their differing contrasts are caused by the way the LaserPecker quality settings (1K to 8K) adjust the engraving speed as well.
It would have been possible to increase the contrast of the top engravings by reducing their speed, but it still would not have increased their detail.
Regardless, it should be clear that the bottom right (8K) engraving has the richest detail. At 30 minutes, it also took the most time to complete.
Portable Laser Head
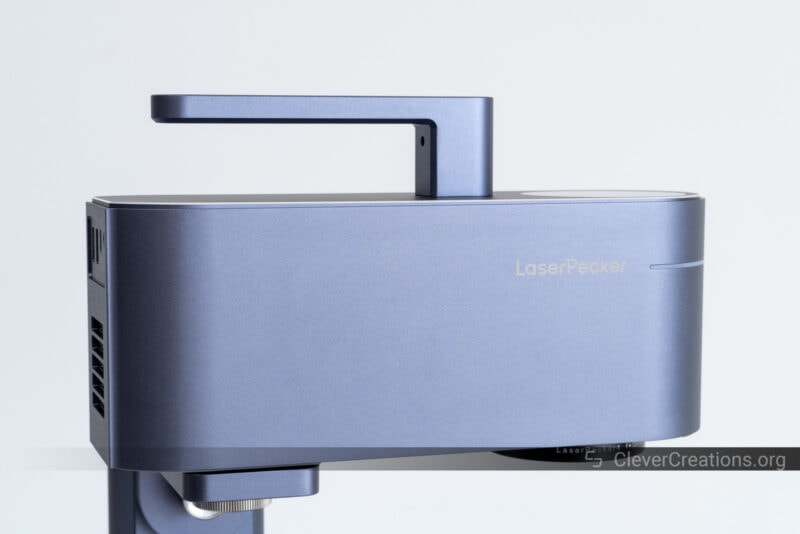
One of the big upsides of compact galvo laser engravers like the LaserPecker 4 is that they take up little space. It can be tempting to purchase a cheaper open-frame 400×400 mm laser engraver, but if you only run small engraving jobs, you’re better off with a smaller one.
The smaller size of the LaserPecker 4 also means that it is portable. Not only can you take it with you on a journey, but you can also use it to engrave many of the objects you come across.
It’s one of the features that is carried over from the LaserPecker 2 and 3, and one that we like the most. Being able to quickly add barcodes to boxes, serial numbers to metal objects, or engrave your logo on your woodwork, it’s all within reach.
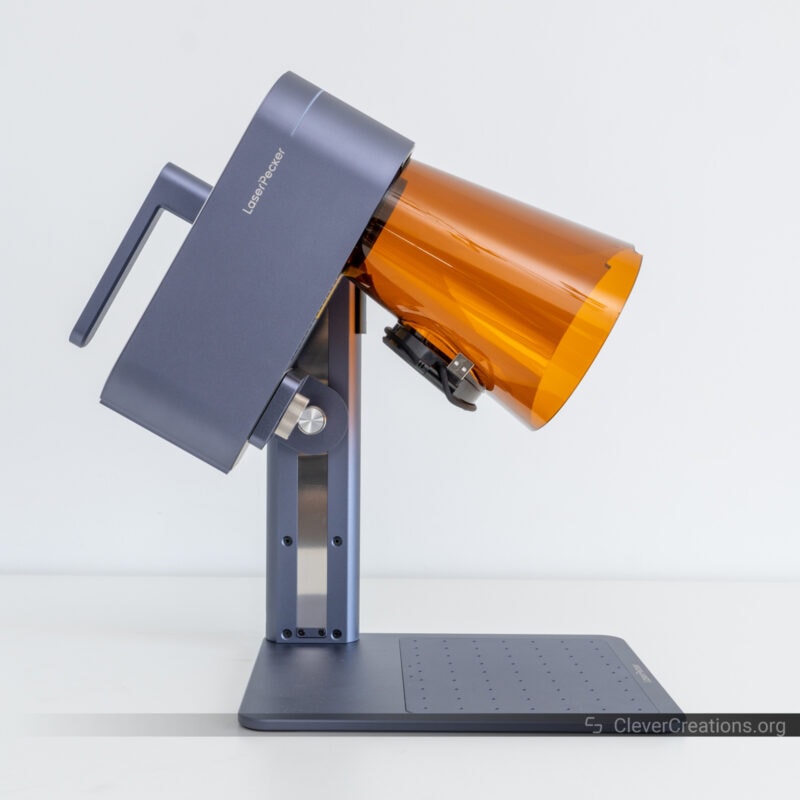
Aside from using the laser head as a portable laser engraver, the LaserPecker 4 is versatile when attached to its base as well.
With two turns of the knob, you can adjust the angle of the laser head to engrave oddly-shaped objects that don’t fit directly under the laser head itself. It’s a versatile piece of equipment.
Ease of Use
Setting Focus
On ‘regular’ laser machines, setting the focus can be a hassle. You’ll have to undo one or more thumbscrews, measure the distance between the laser lens and your workpiece, slide the laser head up or down, and lock the thumbscrew(s) again.
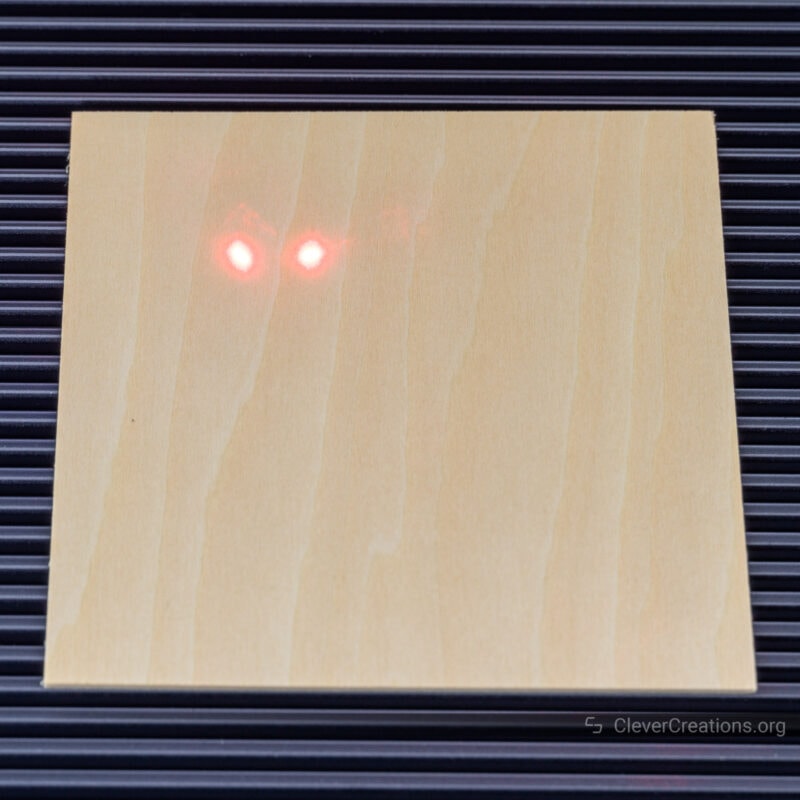
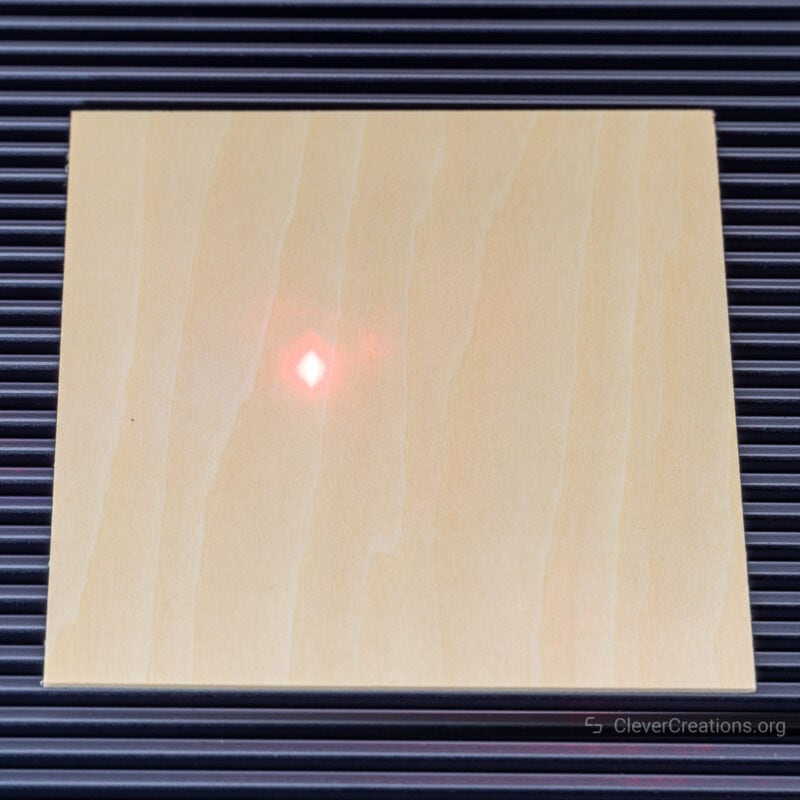
With the LaserPecker 4 laser engraver, you won’t have to worry about any of that. The laser head contains two red dot laser pointers that intersect at a certain height. This intersection height is the focal distance of the blue and infrared lasers.
You can adjust the height of the laser head so that the laser dots overlap on your workpiece. When that happens, you’ll know that the lasers are also in focus. It’s an intuitive system that we found easy to use.
The best part about it is that you can do the height adjustment through the buttons on the electrical stand. A single press up or down moves the head a bit, whereas keeping one of the buttons pressed longer moves the head for an extended period of time.
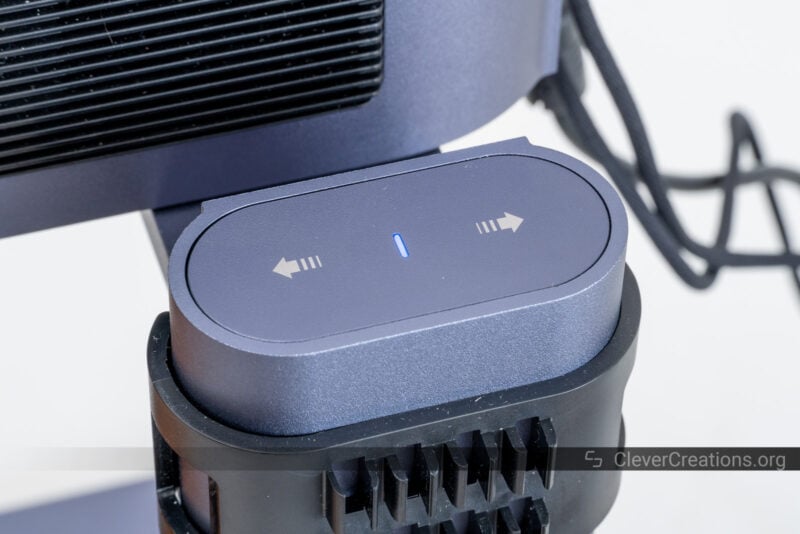
While the buttons might appear capacitive, they are actually tactile. It’s what we like on devices like this. Tactile feedback always works that much better for adjusting things in small increments.
You can also control the height through the LaserPecker Design Space software, but we found it to be more practical to use the buttons. It saved us from having to continuously look back and forth from the laser dots to our computer screen.
One thing we don’t like is that the electric stand does not have a system that detects when the safety hood hits something underneath. You’ll have to keep a close eye on it to make sure that it does not keep moving into your workpiece.
User Interface
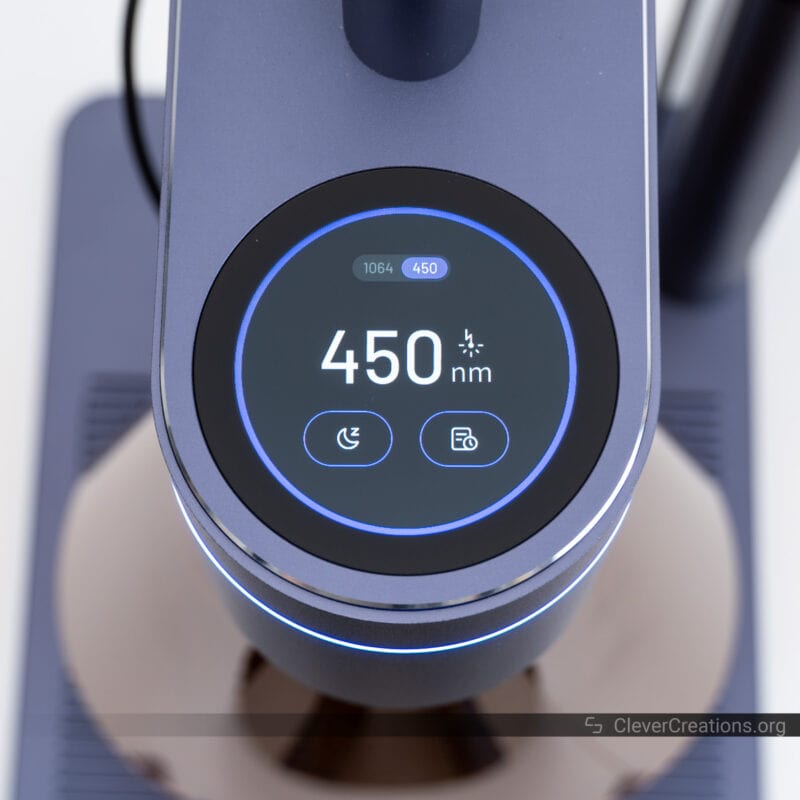
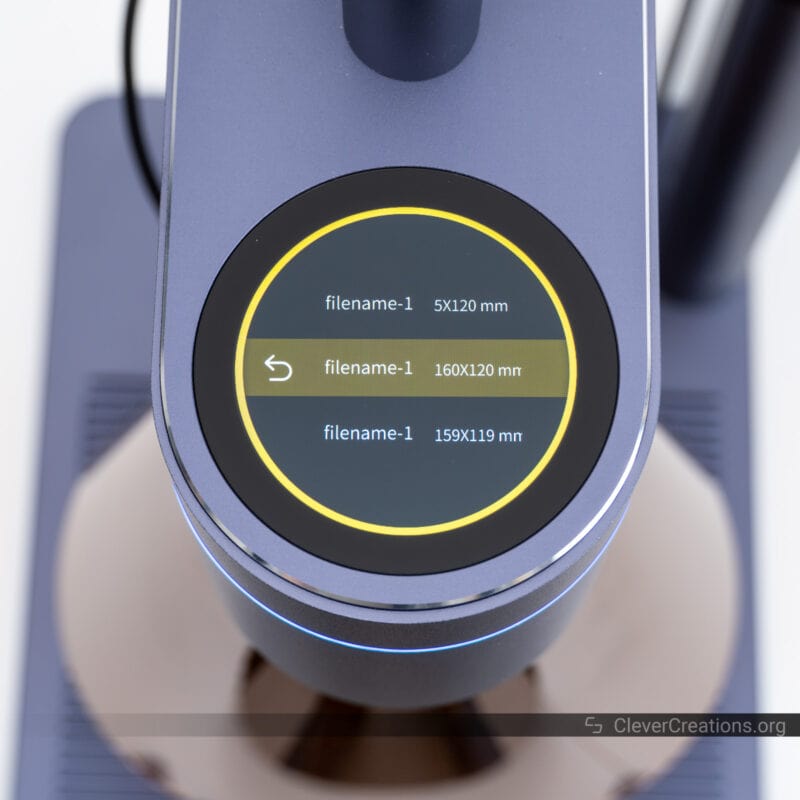
New on the LaserPecker 4 laser engraver is its large, circular touch screen. It’s an improvement over the smaller screen from the previous versions. Size, clarity, and brightness have all been improved.
While the screen looks fancy, it offers just basic functionality. You can use it to switch between the two laser sources (UV or infrared), to move the laser engraver in and out of sleep mode, and to select a laser engraving or cutting job to execute.
It’s not much functionality, but we found it to be sufficient. It’s enough to use the LaserPecker 4 as a standalone, portable device without the need for a computer, tablet, or phone. Just make sure to upload your engraving job(s) to the device beforehand and name them clearly.
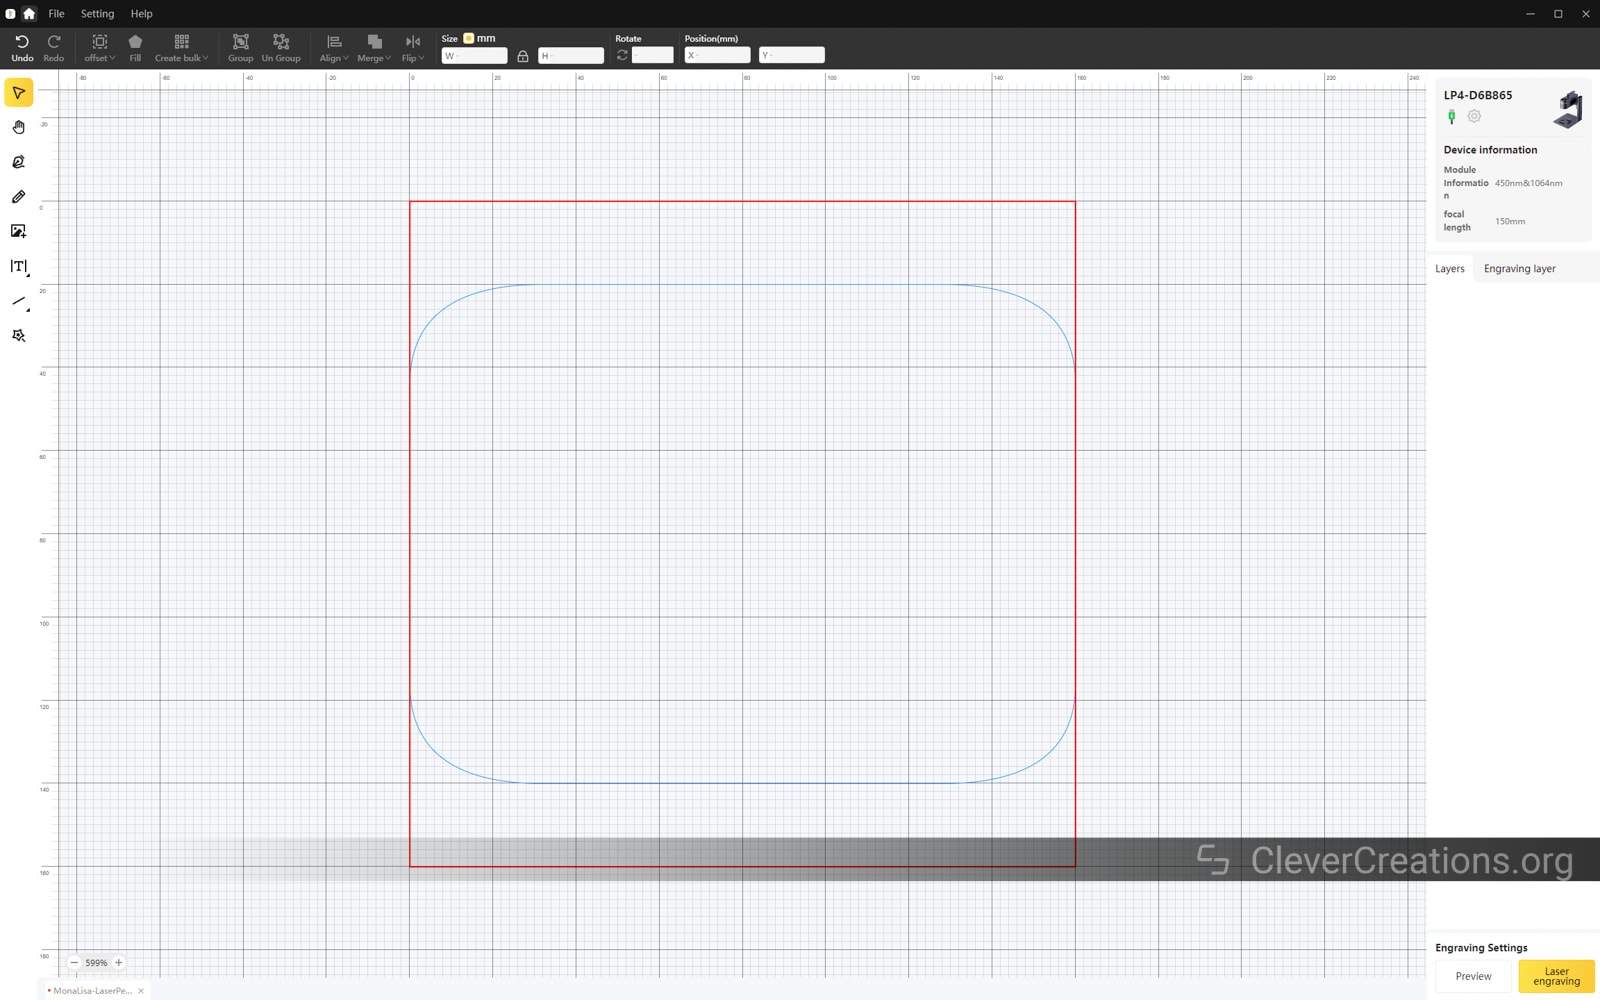
Outline Frame
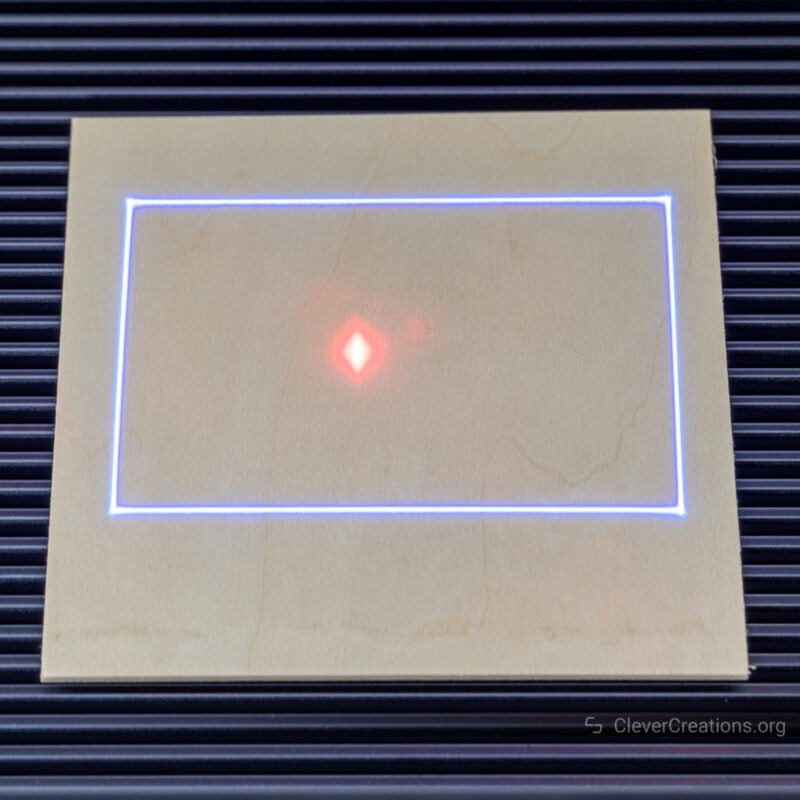
Another neat option of the LaserPecker 4 is its frame feature. It lets you preview the outline of your engraving or cutting job on the workpiece. Adjusting the position of the job in LaserPecker Design Space software updates the preview in real-time on the workpiece, which makes alignment a breeze.
You can also switch the preview from the outline to the center of the job. In that mode, the machine projects a single dot. We found this most useful when we wanted to precisely center engravings.
Connectivity
You can use the LaserPecker 4 both over USB and Bluetooth. Both connections worked reliably in while we tested, no matter which software we used.
Because of reasons that we will get into shortly (the mobile app is not that great), we recommend sticking to the USB connection and controlling the LaserPecker 4 from a PC.
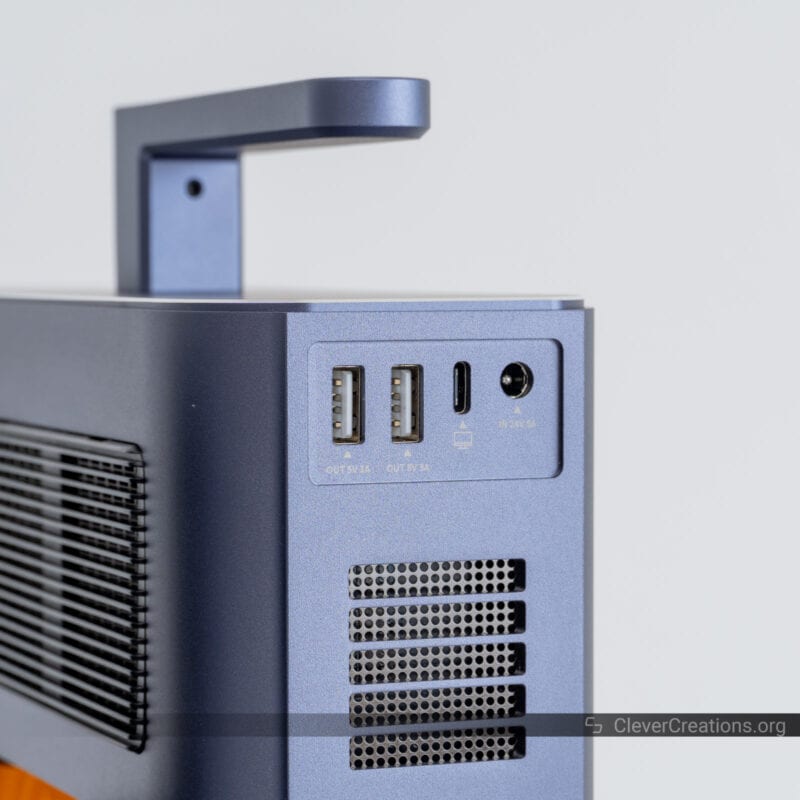
Two of the I/O ports on the back of the LaserPecker 4 are for connecting extensions and accessories. For example, the electric stand, safety hood fan, rotary extension, and slide extension.
As you can see, there are four things you can connect to the laser engraver, but only two ports. The machine solves this problem by letting you daisy chain certain accessories to each other (connect them in series). It worked flawlessly in our testing without any hiccups.
Software
The biggest complaint we have about the LaserPecker 4 laser engraver, however, is its software integration. You can use several options for creating engraving jobs and controlling the machine, but they all have shortcomings.
Let’s go over them one by one.
LaserPecker App (Mobile)
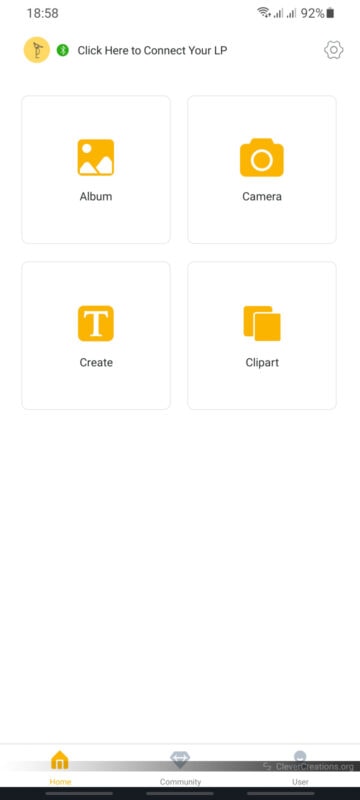
The LaserPecker 4 comes with an official mobile app (Android & iOS) that lets you use the basic features of the machine. It’s enough to set up very simple engravings and cuts, but don’t expect anything more than that.
Because of its simplicity and impractical UI, we don’t recommend it for any serious use of the laser engraver.
If you do choose to go that route, it’s important to download the correct version of the mobile app. The version we downloaded from the Google Play store turned out to be for the LaserPecker 3 and lower. The one you’ll want is called ‘LaserPecker Design Space’. It is for the LP4 and LX1.
LaserPecker Design Space (Desktop)
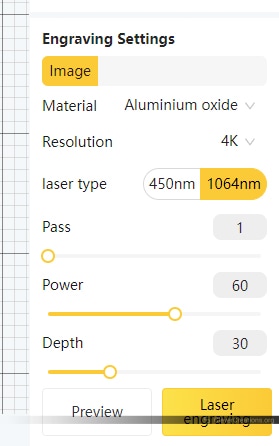
You can also download the LaserPecker Design Space software for Windows and MacOS. In contrast to the mobile app, the desktop version offers much more functionality. You can set up multilayer jobs with variable engraving settings, access all presets, and use a clearer and more streamlined UI.
Its design is very similar to that of the xTool Creative Space we used in our xTool P2 review, but it’s clear that LaserPecker’s version is less developed and rougher around the edges.
For example, when we tested the desktop LaserPecker Design Space app, it could not detect transparent backgrounds of PNG files. The engraving speeds are also confusingly labeled, it is not possible to set up a job without connecting to the LaserPecker 4 first, and preset material settings are not accurate.
The latter is probably the biggest issue, as it means you’ll have to spend time and materials figuring out the right settings for the material you are planning to engrave and cut. In contrast, the settings from xTool Creative Space always work straight away for us.
Still, the desktop LaserPecker Design Space software is a big improvement over the mobile LaserPecker app. It is more than enough for all your basic use of the LaserPecker 4 laser machine.
You can use it to create designs, use image editing features, configure the settings for your engravings and cuts, as well as control the laser machine. It’s enough for what most users need.
Lightburn
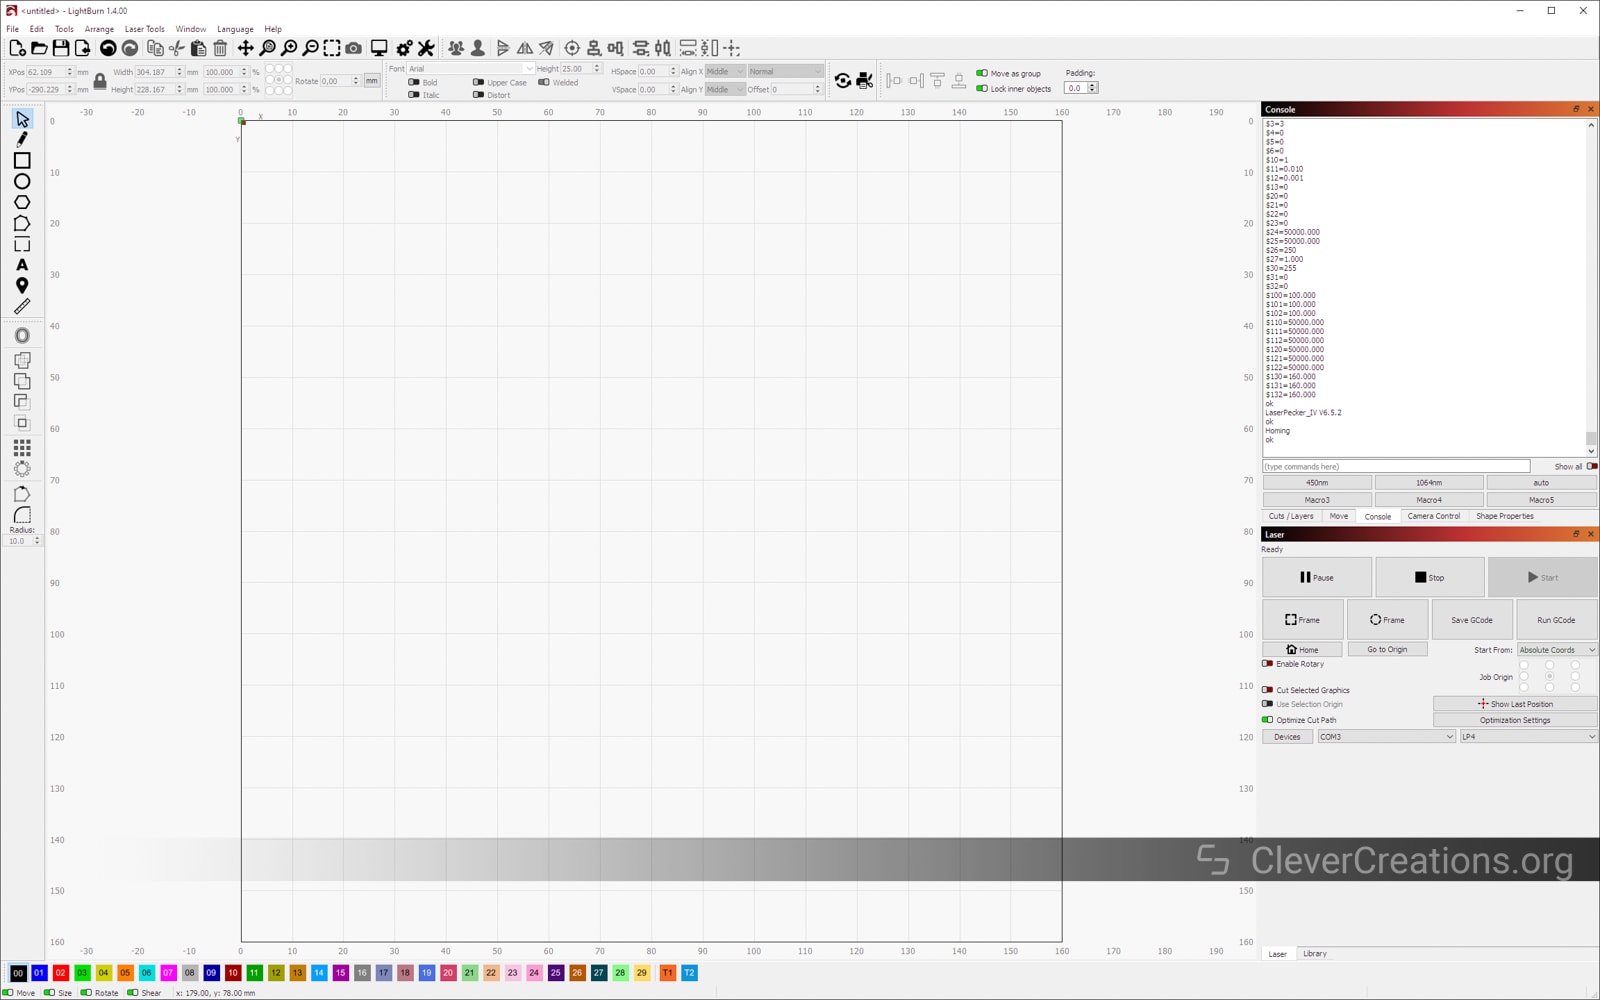
If you want more control and design features, you can also use the LaserPecker 4 with Lightburn. It’s the software that we use in our workshop for all our engraving and cutting, and frankly, we wouldn’t buy a laser machine that doesn’t support it.
Luckily, the LP4 does, even though it takes some effort to set it up. We found the official instructions for configuring Lightburn for the LaserPecker 4 to work well. The only thing missing from the instructions is that you need to set Lightburn to start from ‘Absolute Coords’, so make sure to do that as well.
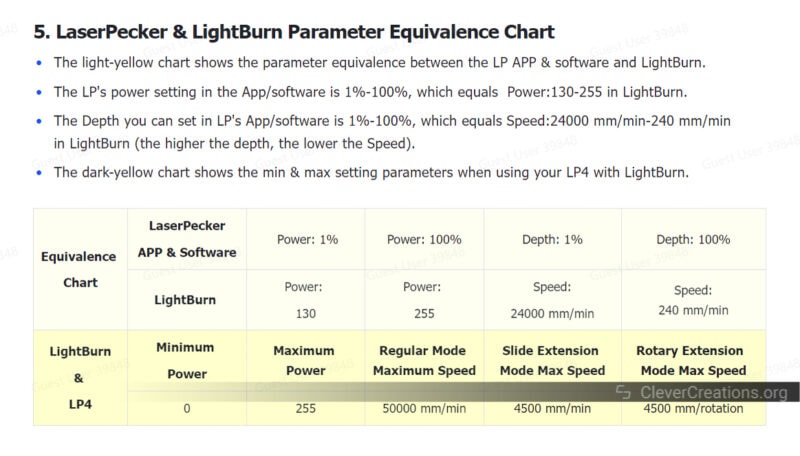
Because of the confusing way that the Design Space software lists laser engraving speeds, you’ll need to use the Parameter Equivalence Chart at the bottom of the instructions to convert them to Lightburn’s parameters. We found this to be a bit of a hassle.
Another shortcoming of the LaserPecker 4’s integration with Lightburn is that the red dot focus functionality is not supported at the moment. It is announced to be added in the future, but it’s not clear to us how long that will take.
While it’s common for laser engravers to have limited functionality in Lightburn—we encountered the same with the xTool P2—using them with the official software is always smooth sailing.
Because of the shortcomings of the LaserPecker Design Space software, we can’t say that is the case here. While the company can address this with updates, that’s always more of a hope than a guarantee. At the price point of the LaserPecker 4, we expect better.
Safety Features
When covering laser machines, we believe it’s important to discuss the safety features. Lasers are inherently dangerous. Not only can they create fires when handled incorrectly, but the light from lasers (both blue and infrared) can pose a hazard to your eyesight.
When we tested the laser engraver in this LaserPecker 4 review, we found that the safety of the laser engraver is more than acceptable. There are several factors that contribute to this.
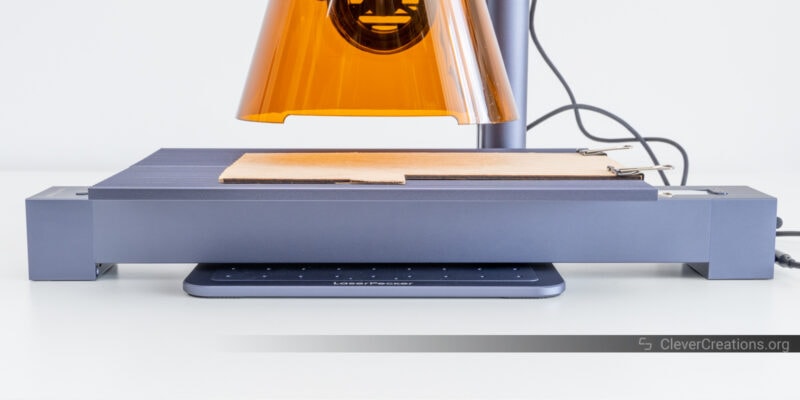
Laser Light Shield
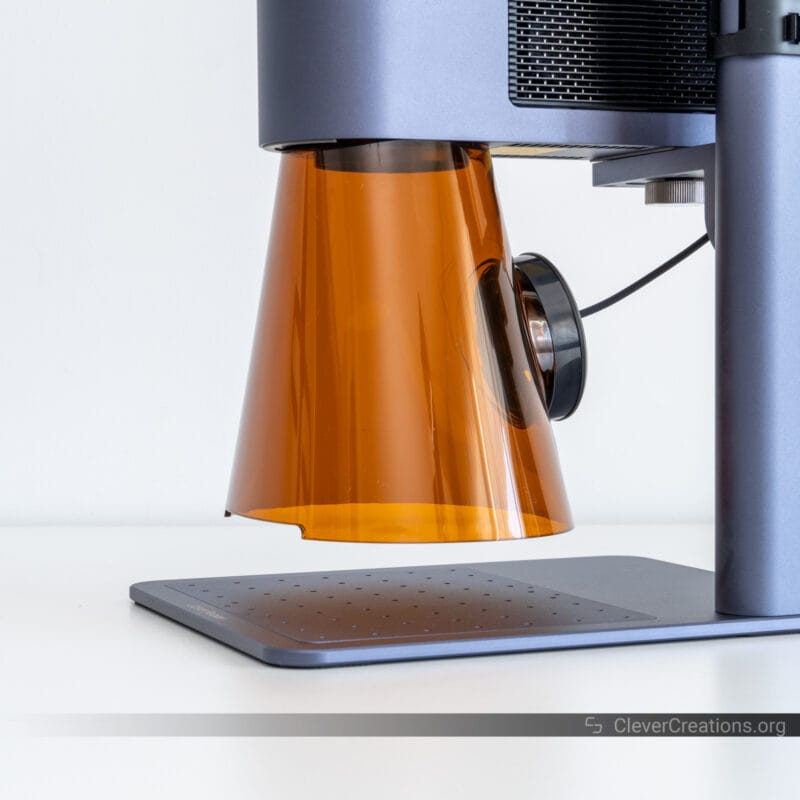
The LaserPecker 4 comes with a safety shield that blocks a big part of the laser light that reflects off the workpiece and device itself. The hood is made of partially transparent orange acrylic that absorbs the harmful light wavelengths that emit from the diode lasers.
What we like about it is that it is magnetic. It’s easy to remove when you want to access your workpiece, and equally easy to stick back on.

Integrated into the shield is a fan for extracting smoke. By pulling clean air into the hood, it increases the quality of the engravings and cuts and helps extend the lifespan of the laser lens.
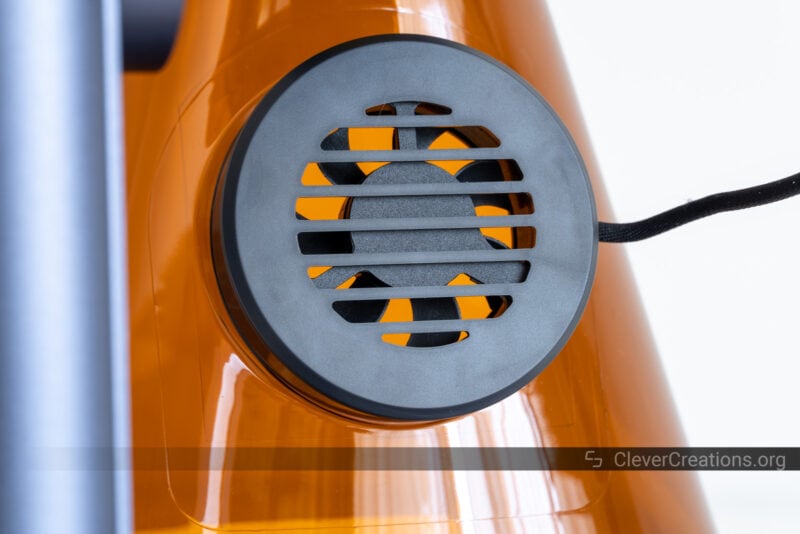
It doesn’t perform as well as a true air assist, but it’s much better than having no fume extraction at all. We were able to get relatively clean cuts with it.

The hood doesn’t help in any way with extracting fumes from your workspace, however. It simply blows the smoke away from the laser engraving and cutting area.
Because the LaserPecker 4 is so small, however, we found it easy to place the laser machine outside. Even placing it on a window sill next to an open window is enough to deal with most of the smoke. As long as you don’t have any wind blowing from outside to inside, that is.
It’s important to point out that the hood doesn’t block all laser light, which is why it is important to also wear laser goggles.

Laser Goggles
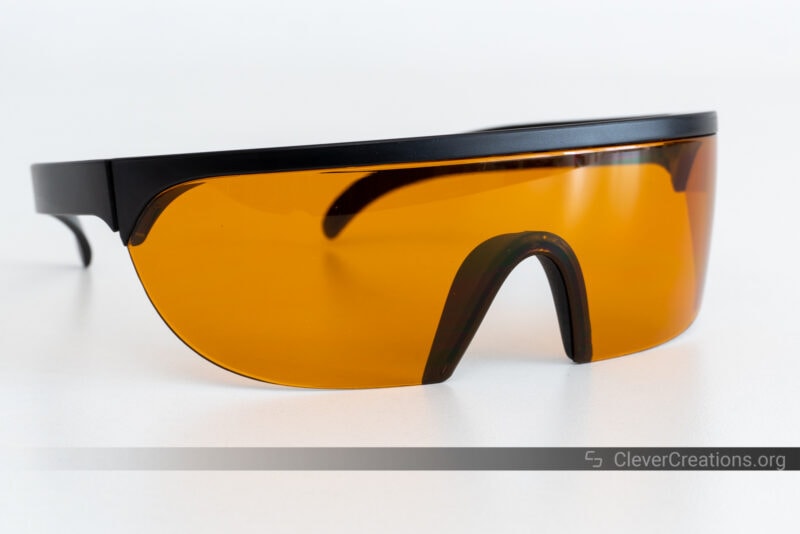
Luckily, the LaserPecker 4 comes with a pair of laser goggles. Straight out of the box, we couldn’t find any type of marking or certification with their specifications.
After reaching out to the company, we learned that they filter out light in the 190-550 nm & 800-1100 nm ranges with an optical density of OD4+. Assuming these specifications are not overstated, these are good goggles to have for a laser engraver like this.
Emergency Stop Button
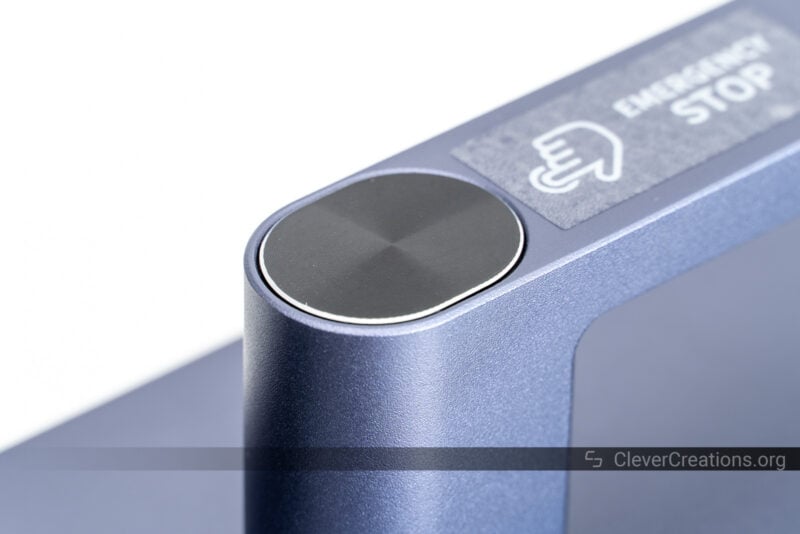
In case something goes wrong with the laser engraver during operation, you’ll want to have an emergency button that immediately shuts it down. The LaserPecker 4 has one that does just that.
The button is placed on top of the device, near the handle. It’s clearly visible and easily accessible no matter where you are positioned relative to the laser engraver.
We tested the emergency button and can confirm that the does exactly what it says on the tin. When pressed, it cancels the current engraving job and turns off the laser.
Accessories
As you understand by now, the LaserPecker 4 has various optional accessories that aim to extend the capabilities of the laser engraver and improve your overall experience.
When making this LaserPecker 4 review, we had access to several of them. We’ll cover our experience with them below.
Slide Extension
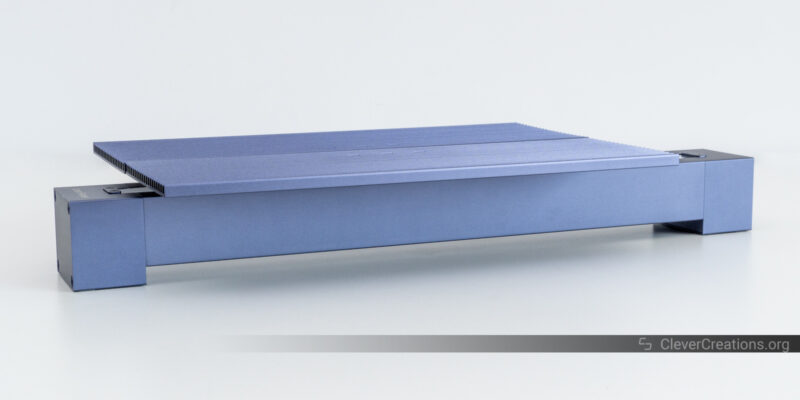
The slide extension is an accessory that extends the total work area of the LaserPecker 4 from 120×160 mm to 300×160 mm. It’s a useful add-on if you will be working on things that extend beyond the default work area.
Installing the slide extension is straightforward. Place it under the laser head, plug its cables in, and toggle the setting in the software. There is nothing to configure in terms of steps/mm or disabling other axes, the LaserPecker 4 understands which extension it is dealing with.
The design of the slide extension is very similar to that of Snapmaker 2.0 linear modules. It’s a fully enclosed linear drive module with a thin metal cover that dust and debris from the drive mechanism.

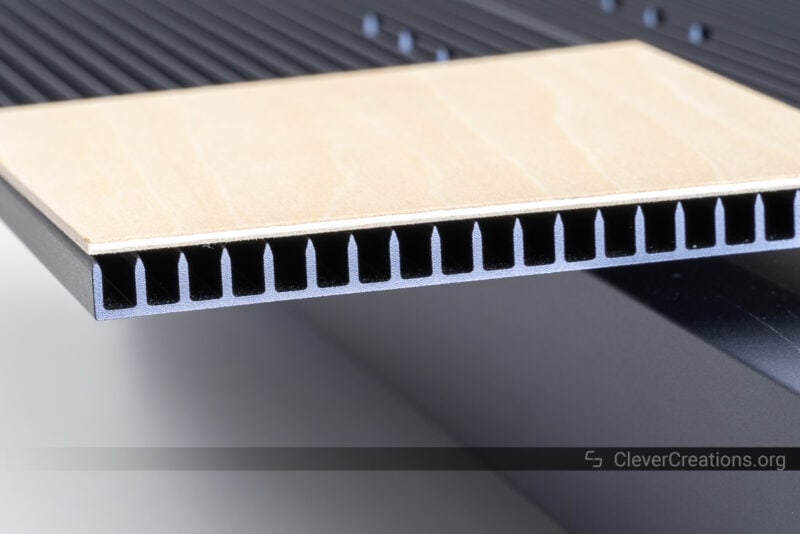
Mounted on top of the slide extension is a slatted bed that helps with smoke ventilation. This part is similar to the cutting plate accessory that comes by default with the LaserPecker 4. We found it to work quite well in preventing flashback and scorching on the bottom of laser-cut pieces.
Rotary Extension
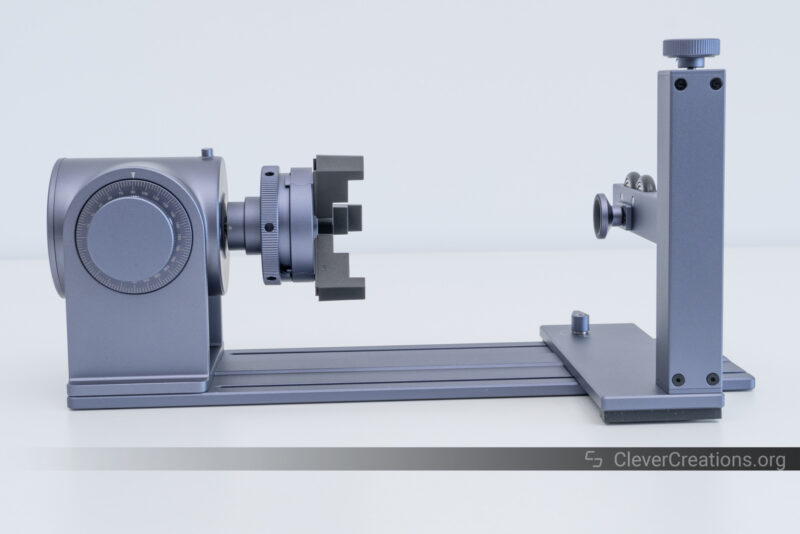
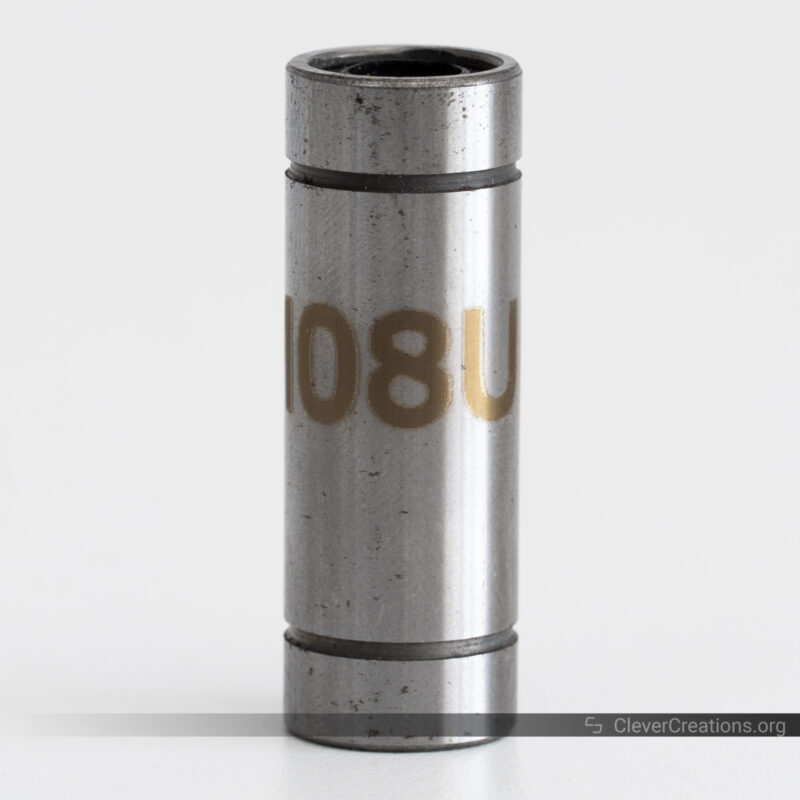
Practically every laser engraver has a rotary extension nowadays, and the LaserPecker 4 is no exception. It’s a great accessory for engraving tumblers, jewelry, Christmas ornaments, and other circular or spherical objects.
We found the rotary extension of the LaserPecker 4 to work well. It’s just as easy to set up as the slid extension. Plug it in, toggle the rotary extension module setting, and make sure to enter the correct diameter of the object you want to engrave.
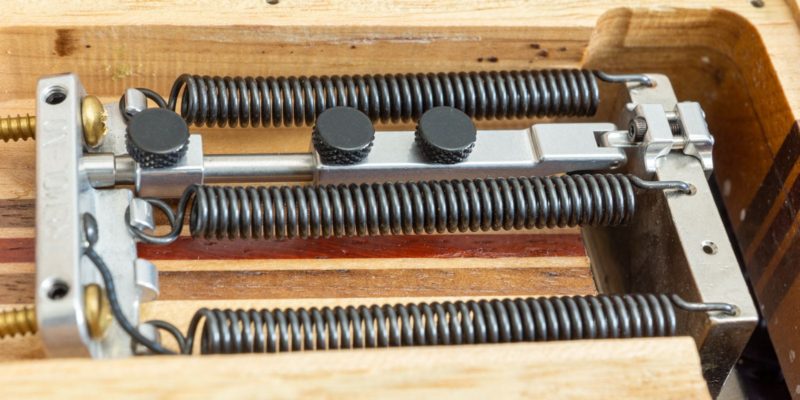
One thing worth pointing out is that the design and build quality of the rotary extension falls short of that of the LaserPecker 4 itself.
For example, we found that the tailstock deflects when it encounters too much pressure. This makes centering spherical workpieces that require its support more difficult.

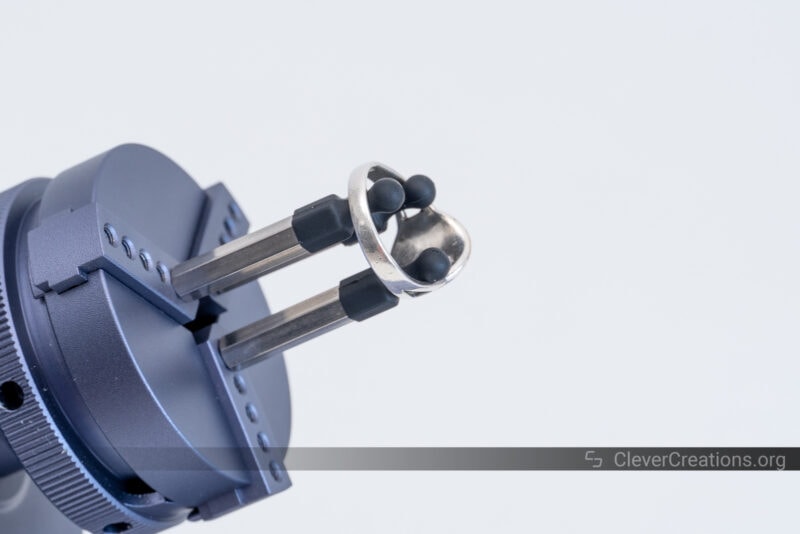
Another thing is the adjustable angle of the rotary head. While it is a useful feature—like for engraving the inside of a ring—it took us a lot of physical effort to lock it in place.
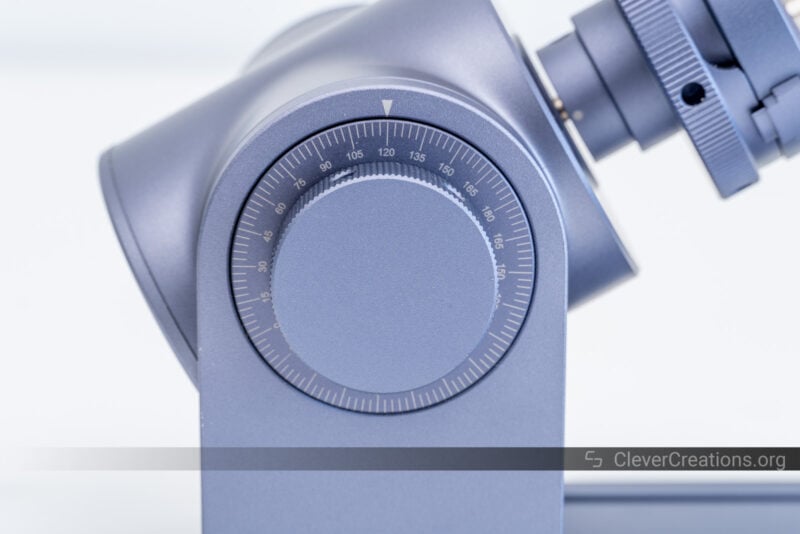
But even when tightening the locking knob with maximum force, it does not take much effort to accidentally push the head out of alignment when adjusting the chuck jaws. This made setting up rotary jobs more time-consuming for us.
When finally set up, however, the rotary extension performed great. With its three different sets of jaws and adjustable head, it gives a lot of laser engraving options.
We do feel like its price—$319 discounted from $399 at the moment—is a big ask. Having hands-on experience with both the LaserPecker rotary extension and xTool’s RA2 Pro, we can say that the latter is superior. Not only does the RA2 Pro offer a better build quality, but it does so at a lower price.
LaserPecker’s rotary extension is not bad, however, and it has the unique option to adjust the chuck angle upwards. But just like with the software, we expect better for the price.
Because the LaserPecker 4 is only compatible with the official rotary add-on, you won’t be able to choose between the two.
Bottom Line: Is the LaserPecker 4 Worth Buying?
After testing the LaserPecker 4 laser engraver, we can confidently say that it is a powerful machine. With its dual laser configuration, you can use it for a wide range of materials. Engraving metal, stone, wood, leather, the list goes on.
Its engraving accuracy and engraving speed are impressive as well. If you want high-quality engravings, a galvo laser machine like this is the right choice. Other laser engravers with a Cartesian arrangement don’t come close in the engraving detail they offer.
The cutting quality of the LaserPecker 4 is less impressive, mainly because it has no real air assist feature. Because no one buys a laser engraver like this for its cutting abilities, it’s not a deal in our opinion. Having the option to cut wood and acrylics is still great.
As for the main shortcoming, that would have to be the software. The LaserPecker app for mobile isn’t useful for serious use, whereas the LaserPecker Design Space for desktop comes with various bugs and inaccurate presets. Lightburn support is good, however, even though we are still missing the red dot focusing feature for now.
All in all, we found that the LaserPecker 4 still gives good results with either the official software or with Lightburn, but it takes more time to get there than with other laser engravers.
We found the accessories of the laser engraver to be very practical. Both the rotary and slide extension offer great functionality. But it must be said that the quality of the rotary extension did not feel that great for its price.
As for the price of the LaserPecker 4 itself, we’d say that its current $1699 offers good value. It’s $100 less than the xTool F1 and offers similar functionality with a larger work area.
If you want a portable dual laser engraver, you can’t go wrong with either. If you prefer a nearly 50% larger work area with the option to extend it even further, the LaserPecker 4 is the option to go for.
Great in-depth review!
As an owner of the very delayed Lp4 may i add add that because the preview is with the 450nm laser and you want to laser in 1064nm then the placement is slightly off making correct positioning a big challenge with 1064nm. This is due to both lasers sharing the same path.
It is also a slow laser compared to others in its class like the F1