
- Creates clean cuts and detailed engravings
- Powerful exhaust system
- Full enclosure increases safety
- Lightburn-compatible
- Plenty of connectivity options
- Includes rotary roller fourth axis
- Includes honeycomb bed
- Mediocre build quality
- Small work area
- No air assist
Just like we have seen in the 3D printing space, desktop laser engravers and cutters also continue to get more and more affordable. Whereas 3D printers are great for additive manufacturing, laser engravers and cutters excel at subtractive manufacturing. You can use them to create detailed and precise patterns, designs, and images on a variety of materials.
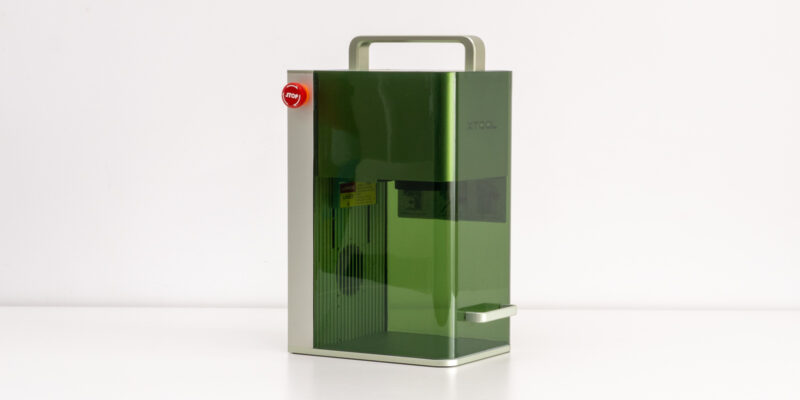
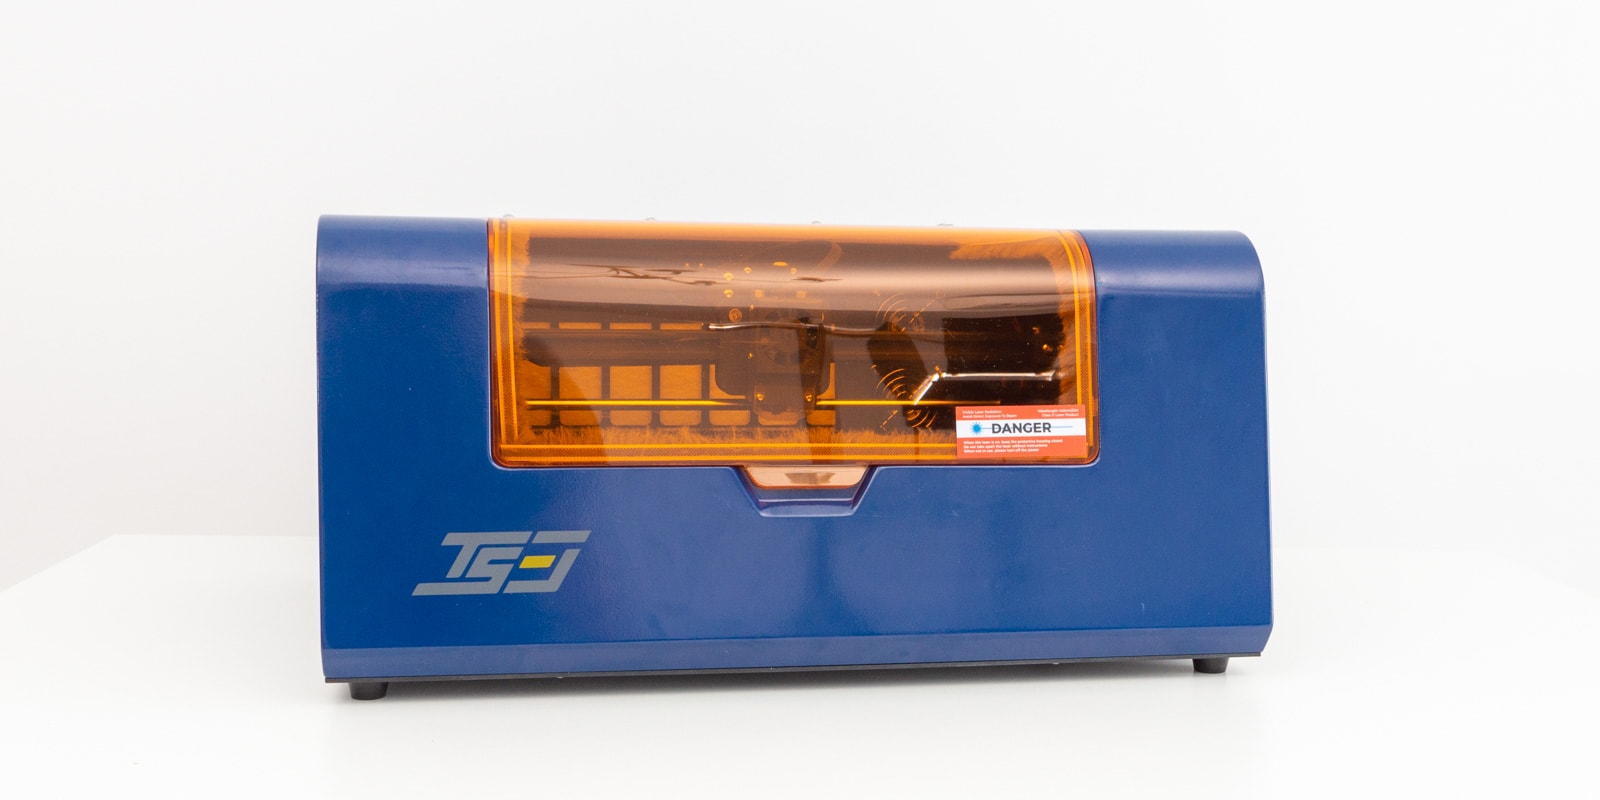
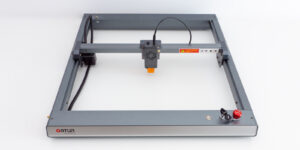
One example of such a device is the Two Trees TS3 laser engraver and cutter. It is an enclosed machine that promises to deliver safe operation in a compact package.
Whether the Two Trees TS3 lives up to its promises is something that we will look at today. We’ll show you how it performs, what you can cut with it, its strengths, and also its weaknesses.
Read on to see if the TwoTrees TS3 is the best laser engraver for you.
TwoTrees TS3 Laser Technology
The TwoTrees TS3 is a laser engraver and cutter that uses a semiconductor diode laser. There are two laser power strengths to choose from, 5W and 10W. Two Trees sent us the 10W version of the TS3 to review, so keep that in mind when reading this article.
Semiconductor lasers are best for engraving and cutting thin materials like wood, carton paper, leather, and some plastics. In our testing, we found that with the 10W version of the TwoTrees TS3, you can quickly make work of cutting non-dense woods with thicknesses of up to 8 mm.
If you need to work with thicker materials or dense woods, then a CO2 gas laser will be a better option for you. Popular choices are a K40 machine like the OMTech 40W.
On the other hand, if you want to engrave metals, a fiber laser engraver will be a better fit. These are more expensive, but a popular option that provides good value is the Triumph Raycus 30W.
If you are still sure that the TwoTrees TS3 meets your needs, keep on reading!
Technical Specifications
| Two Trees TS3 Specs | |
|---|---|
| Price | Two Trees | Geekbuying | AliExpress |
| Laser power | 10W Compressed spot laser |
| Laser wavelength | 445±5nm |
| Material | Aluminum profile + steel |
| XY axis positioning accuracy | 0.1 mm |
| Engraving size | 300×200 mm |
| Engraving accuracy | 0.08 mm |
| Engraving speed | 10000 mm / min |
| Engraving method | USB / APP / Online / Screen Operation |
| Engraving materials | Stainless steel |
| Document format | NC, DXF, BMP, JPG, PNG, GCODE |
| Engraving mode | Image carving, Test carving, Scanning carving, Contour carving, Pixel carving |
| Support system | Windows |
| Support software | LaserGRBL / Lightburn |
| Machine size | 570*430*270 mm |
| Package size | 630*500*330 mm |
| Machine weight | 14.4kg |
| Package weight | 16kg |
TwoTrees TS3 Unboxing

When unboxing the TwoTrees TS3 laser engraver you’ll notice that it is well-packed. The machine is double-boxed, with the inner box containing thick foam padding that is reinforced at the corners with plastic inserts.
The box and laser cutter itself are heavy, so it can be useful to have someone to help you carry and set it up in your house or office.
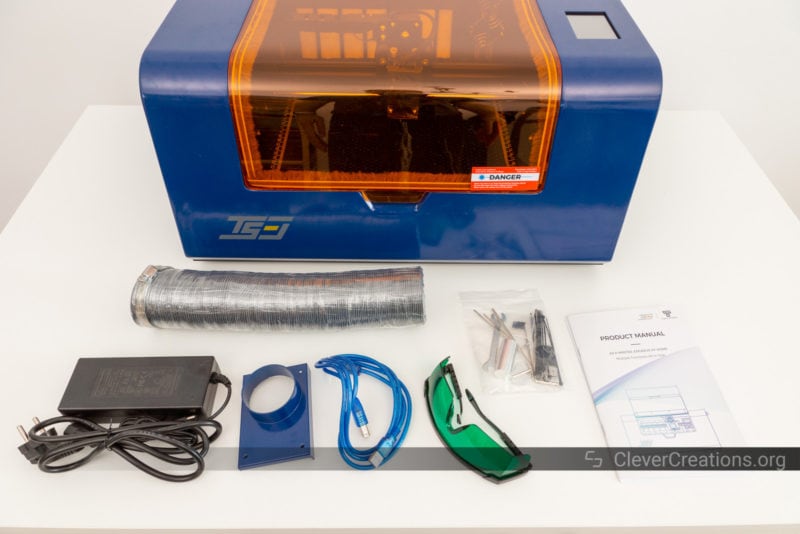
In the box, you will find the following:
- TwoTrees TS3 Laser Engraver
- Exhaust hose
- Power supply
- USB cable
- Laser goggles
- Focusing discs
- SD card and USB adapter
- Various hex keys and wrenches
- User manual and other documentation
All accessories are conveniently packed inside of the TwoTrees TS3, so there is no need to dig around for them in the box. In theory, you have everything to get started with laser engraving. However, not included are any materials to work with right away, so you’ll need to source those separately.
Getting Started
While the TwoTrees TS3 is sold as a fully assembled ready-to-use laser engraver, in our experience there was still quite some setup and configuration to do. We’ll show you the steps we went through to get the machine ready for its first use, so you can judge for yourself.
The first step is to remove the tape and protective foil from the lid. This is a straightforward process that you are probably familiar with from other devices.

Next is to cut the inner tie wraps. This lets you remove the accessory pack and get access to the work area of the TwoTrees TS3 laser engraver. All tie wraps are yellow, they are easy to spot.

Once you have done that, you’ll need to remove the white plastic foam pieces from the inside of the laser engraver. There are quite a few and it will take some time to get them all.

Ordinarily, this is where you would be ready to use the TwoTrees TS3. However, at this point, things got a bit tricky for us. When looking at the laser engraver up close, we noticed that the frame of the machine was significantly out of alignment.
Engraving or cutting like this would cause the work to come out inaccurately, so we contacted Two Trees to find a solution. To their credit, they promptly sent us a video with instructions on how to correct the problem.
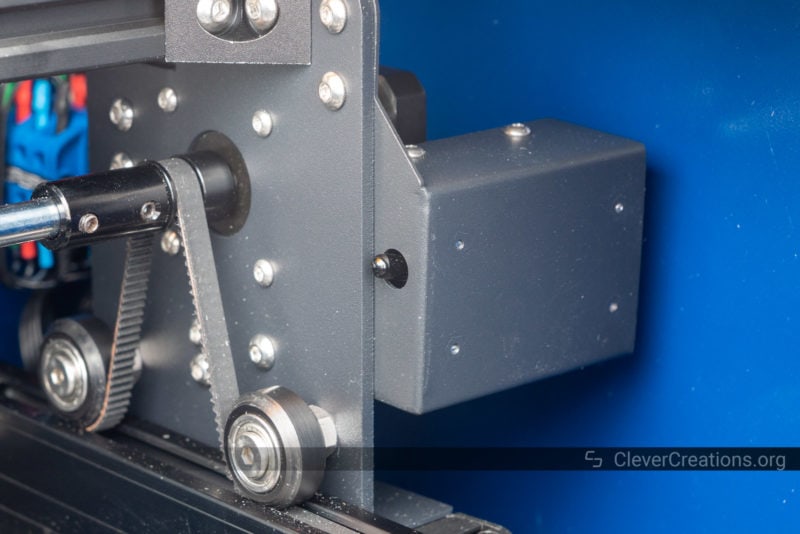
The process of squaring the laser engraver frame is fairly similar to squaring that of a CoreXY 3D printer. Here, it is basically a matter of loosening the clamps on the left and right Y belts, adjusting their tension until everything squares up, and tightening the clamps again.
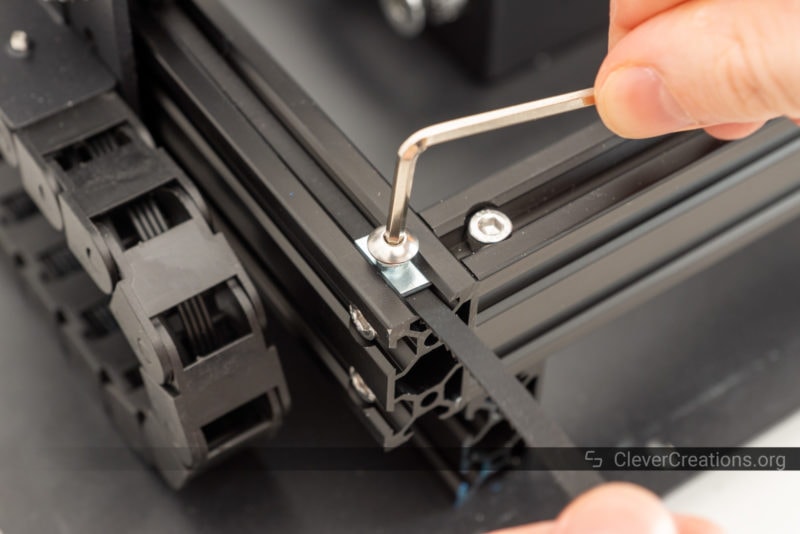
You can do this with the steel enclosure on, but we chose to take it off so that we could take pictures of the process for you.
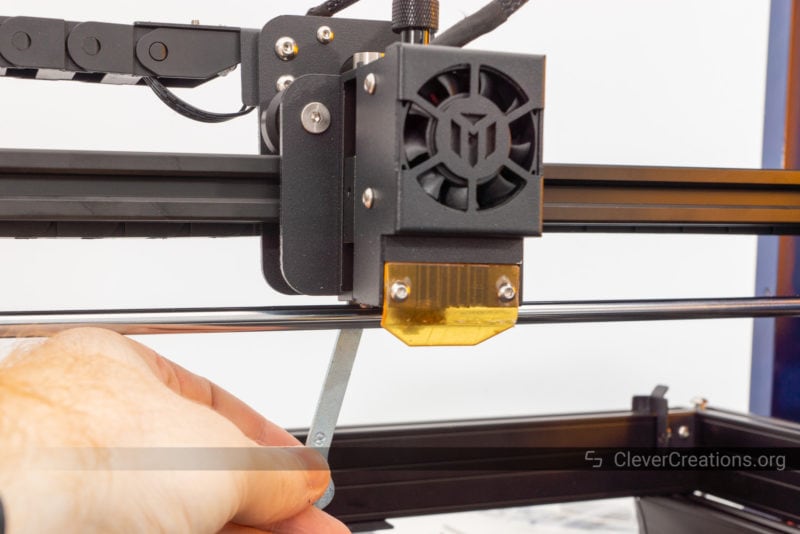
The next issue we ran into is that the laser head carriage on the X-axis was very loose. Luckily, fixing this is also simple. If you run into this, you need to adjust the eccentric nut on the carriage with the included wrench, until the V-wheels make proper contact with the aluminum extrusion of the X-axis. The process is similar to what we did in our Ender 3 S1 review.
After this, our Two Trees TS3 was finally ready for laser engraving and cutting.
We should mention that Two Trees put the blame for the misaligned frame on the shipping process. Regardless of whether that is the case, it is still their responsibility to adequately pack the TS3, so we feel like they have some improvements to make in this area.
Having to go through these troubleshooting steps out-of-the-box is not ideal. Not only because it takes time, but also because it also requires some knowledge of laser engravers or 3D printers to recognize and fix the problems.
TwoTrees TS3 Features
Enclosure
One of the most standout features of the Two Trees TS3 is its fully enclosed engraving and cutting area. This is not something that is common on semiconductor laser engravers, and it is one of its main selling points.
The main advantage of the enclosure has to do with the fumes that laser cutting generates. An enclosed space helps properly ventilate those fumes and makes sure that they don’t build up inside of your room or workspace.
Given that some of the materials that can be cut with a laser engraver can be harmful to health (MDF, for example), this is definitely a feature that is worth having.
The enclosure itself is made of steel, resulting in both a rigid and heavy laser engraver. It isn’t as easy to move around as other, open laser engravers, so keep that in mind if you plan on changing your workspace often.
Engraving/Cutting Area

An obvious downside of the enclosed work area is that any workpiece you engrave or cut has to fit inside of it. With open laser engravers, you can move a large workpiece around underneath to engrave or cut it in sections. With an enclosed machine, this is not possible.
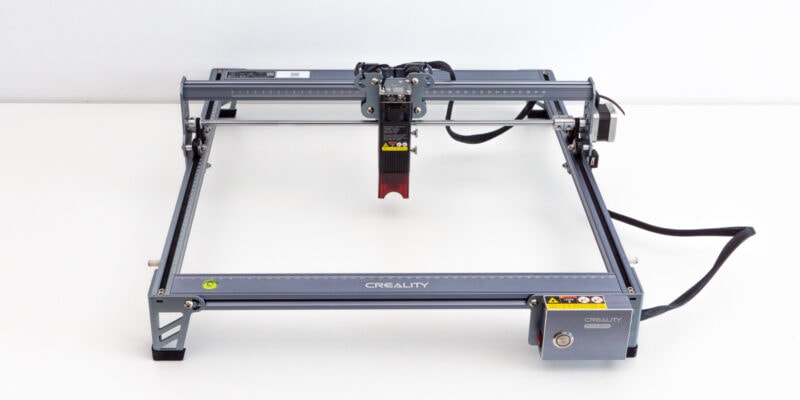
With the Two Trees TS3, you are limited to an engraving/cutting area of 300×200 mm. This is significantly smaller than the engraving area of typical 4040 (~400×400 mm) machines, like the Jinsoku LC-40 and Creality CR-Laser Falcon.
Needless to say, this is a logical consequence of the fully enclosed work area and compact desktop format. Two Trees could have made the machine bigger to begin with, but that would have resulted in a heavier and more impractical machine.
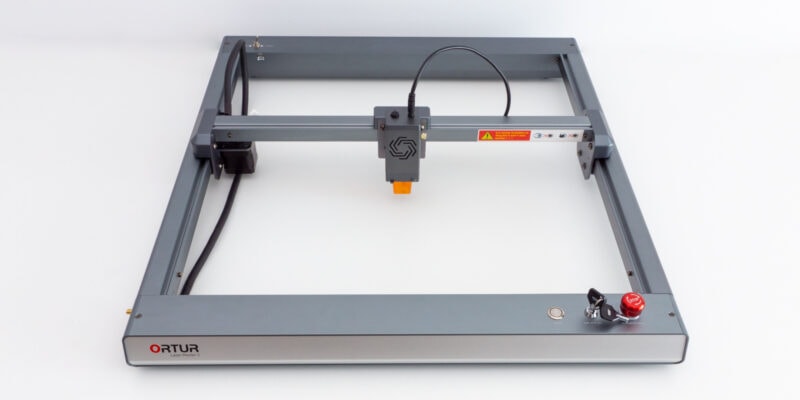
If you are looking for an enclosed 4040 machine that gives you a larger engraving area, the ORTUR Laser Master 2 Pro S2 with enclosure add-on will be your best option. With its accessories (rotary roller, enclosure) it costs about the same price as the TwoTrees TS3. However, the LM2 Pro comes with its own shortcomings and requires an extensive assembly process.
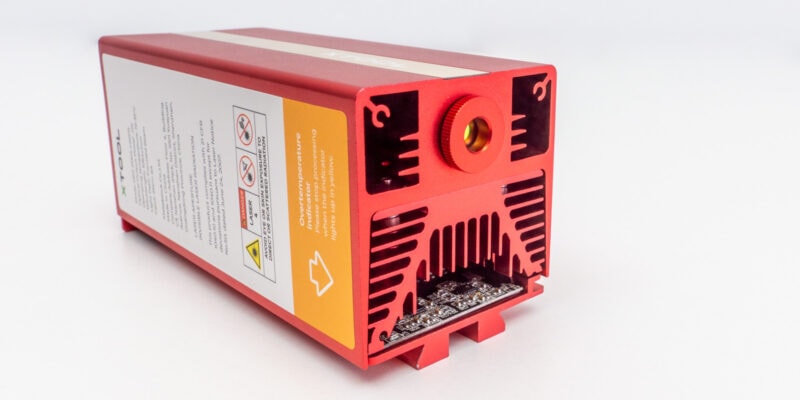
Laser

As mentioned above, the TwoTrees TS3 uses either a 5W or 10W semiconductor laser. In the case of the 10W version, it is actually two 5W lasers that are stacked together through a series of mirrors and lenses.
The TS3 uses an LD+FAC+C lens setup, which promises a more narrow and precise focus than a regular FAC lens. This is Two Trees’ way of saying that the machine has a smaller spot size, which results in more detailed and higher-quality engravings.
We have not been able to find any independent testing on LD+FAC+C lens setups that corroborates these claims. However, as you will see later, in our tests the Two Trees TS3 does deliver quality engravings.
If you want to be able to cut quickly through a variety of materials, like plywood and MDF, then the 10W laser version would be the best option. On the other hand, if you are mainly interested in engraving and you don’t need to cut materials, then the 5W laser will suffice.
Fume and Smoke Mitigation
One of the main annoyances of running laser engravers and cutters indoors is the amount of smoke and fumes they produce. Unfortunately, there isn’t much you can do about that.
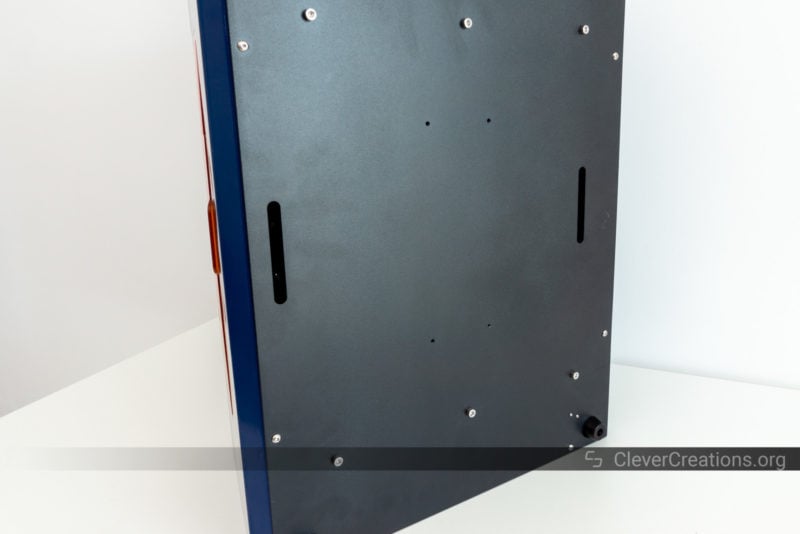
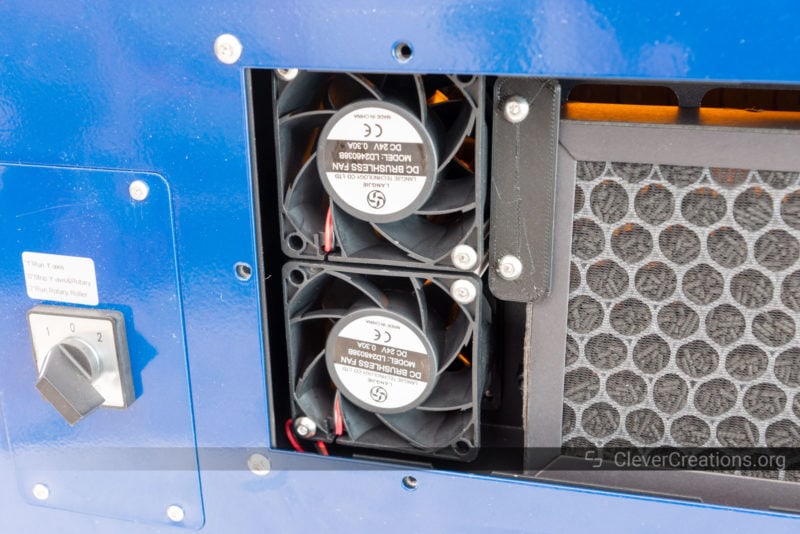
Aside from having an enclosure that contains laser engraving and cutting fumes, the TwoTrees TS3 also gives you two methods of dealing with this smoke. The first is a filter built into the back of the machine. The second is an exhaust port that you can attach an exhaust hose to and vent the fumes outdoors.
Fume Filter

When you receive the Two Trees TS3, it is configured to use the built-in filter to deal with the laser fumes. The fans on the back are set as intakes, blowing air into the machine and creating positive pressure in the process. In theory, this should blow the smoke through the filter and filter it.
In practice, it doesn’t quite work like that. The filter has a steel plate behind it, so there is no path for the air to travel through. Instead, most air follows the path of least resistance and exits through the ventilation slots in the bottom. The result is a lot of fumes that bypass the filter and end up in your workspace.
While the filters do capture some fumes, they aren’t nearly effective enough to make using the filters a pleasant experience. Another thing to consider is that the filters are considered consumables, so you will need to replace them once in a while.
Exhaust Port
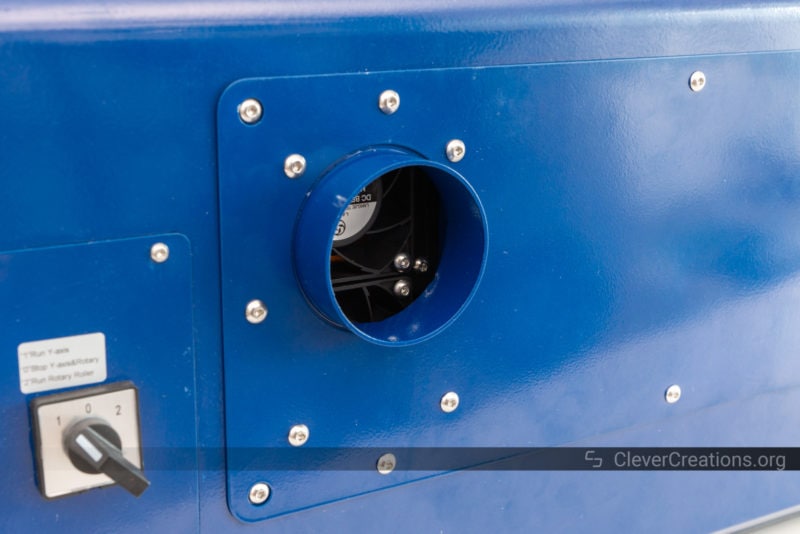
The other, significantly better way to deal with the fumes produced by the TwoTrees TS3 is to use the exhaust port. This lets you use the fans to create negative pressure in the machine and suck the fumes out.
As the fans need to be directed the other way for this to work, there are some steps for you to do in order to reverse their orientation. This involves taking off the rear panel, reversing the fans, and installing the exhaust port attachment. This takes about 5-10 minutes and you will likely only do it once.
After that, you can attach the included exhaust hose to the port and hang it out of a window or door.
This method is a lot more effective than the air filter and makes having the enclosure worthwhile. With the TwoTrees TS3 configured like this, there are barely any noticeable smells during operation and the air in the room stays clean.
For that reason, we highly recommend setting up the TwoTrees TS3 to get rid of all the fumes through the exhaust hose instead of using the filter. In our testing, this is how we set up the machine to deal with fumes.

Triple Work Surfaces
To place a workpiece under the laser head, the Two Trees TS3 provides three options. You can place it on the honeycomb bed, on the aluminum platform, or on the rotary roller. All three options are included by default, so you can always choose whichever one is more convenient for your project.
Honeycomb Bed
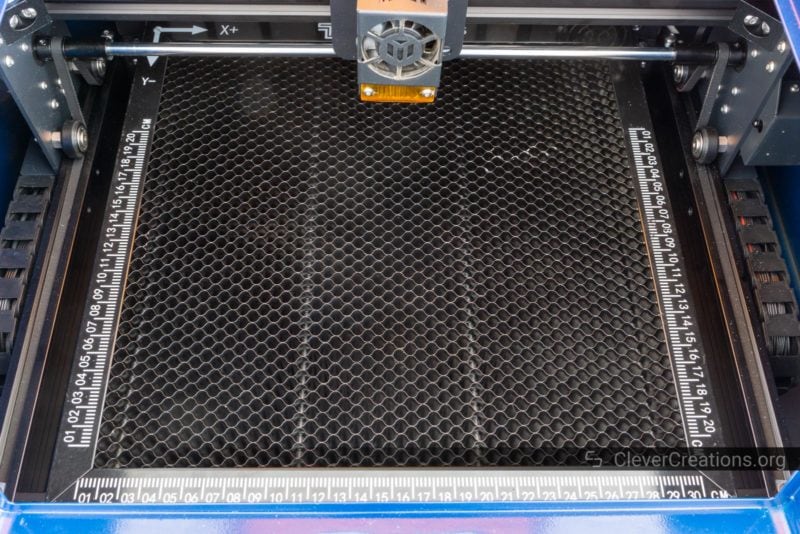
Out of the three, the honeycomb bed of the TwoTrees TS3 is the most useful platform and probably the one you’ll be using most. You can use it to place materials up to about 12 mm in thickness.
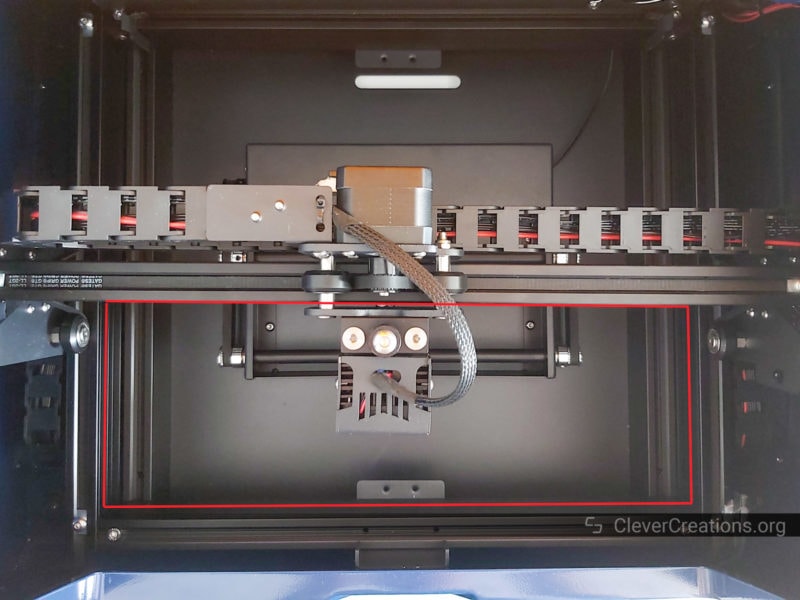
While the honeycomb bed technically offers 300×300 mm in the work area, the laser head can only move 300×200 mm in the X- and Y-axes before hitting the edges of the machine.
Honeycomb beds are great for laser cutting because they allow for more airflow. Compared to a plain surface, they give you fewer burn marks on your material and cleaner cuts.
In practice, we found the bed to work very well, and we had no issues with it during our testing.
If you place a workpiece taller than 12 mm on the honeycomb plate, the laser can’t move up high enough to still focus on the material. In that case, you’ll need to remove the honeycomb bed and use the aluminum platform instead.
Aluminum Platform
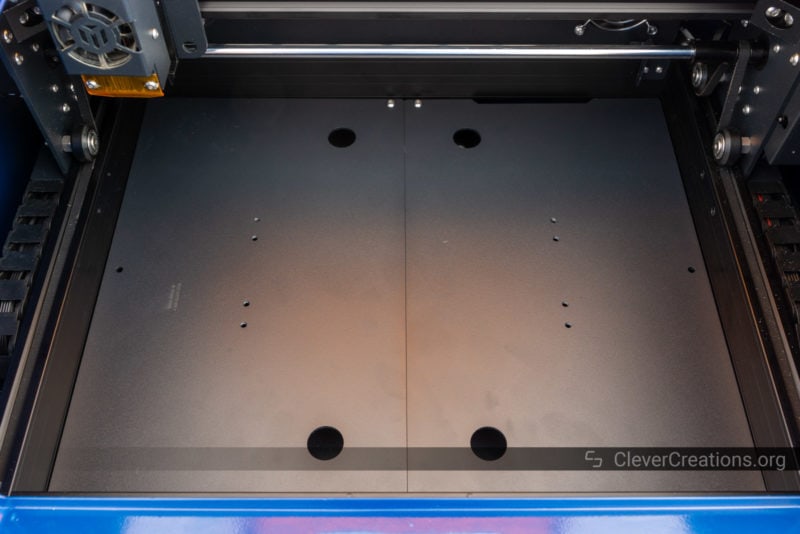
The aluminum platform is mounted about 60 mm lower than the honeycomb bed, and you can use it to engrave objects that are too tall for the honeycomb bed.
We can’t say too much about it, since we did nearly all of our testing with either flat sheets of material (that fit on the honeycomb bed), or with round objects (on the rotary roller).
However, since it is literally just two sections of aluminum plate, it will do the job of keeping your workpiece in place just fine. There isn’t much else to say about it.
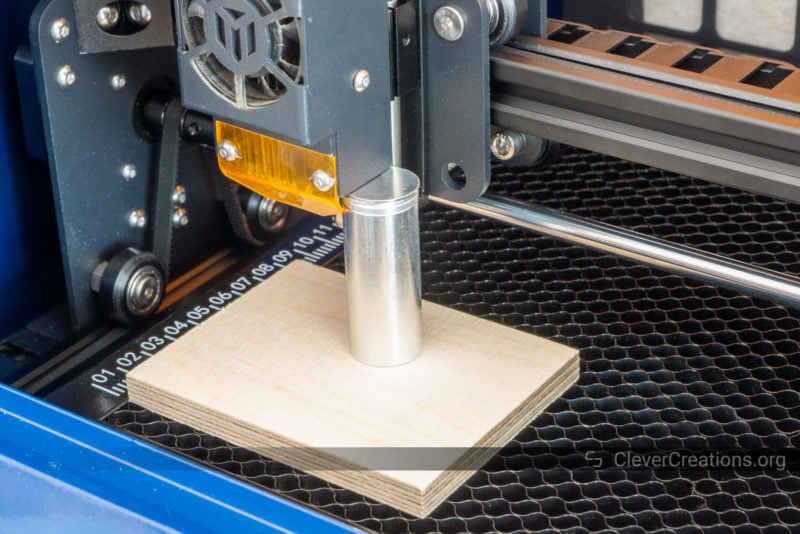
Rotary Roller Fourth Axis
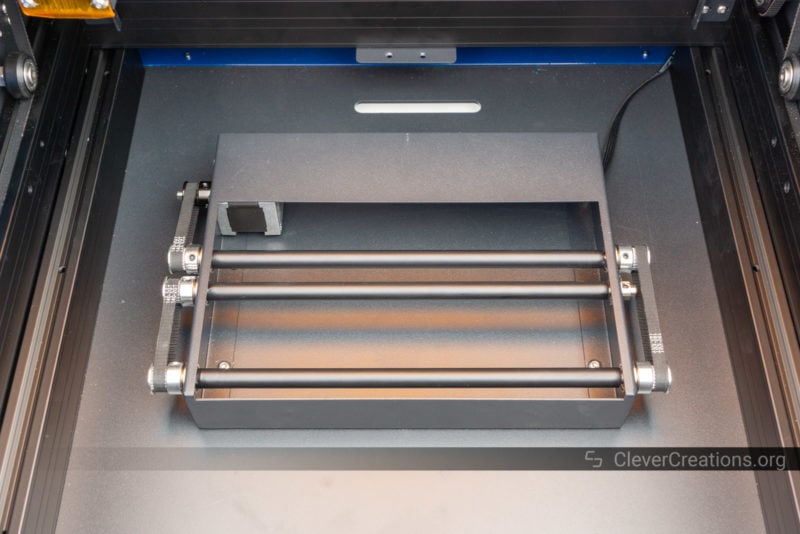
If you remove the four bolts that hold the aluminum platform in place, and then remove the platform itself, you have access to the included rotary roller of the TwoTrees TS3.
This cylindrical engraving adapter is one of its most useful features and lets you engrave or cut cylindrical objects. A great accessory for creating customized glasses, mugs, bottles, and so on.
Unlike with most engravers, on the TwoTrees TS3, the rotary roller comes included by default. This means you won’t have to buy another additional accessory. The downside, however, is that if you never use it, you still end up paying for it.
It took us a while to figure out the right settings for the rotary roller in Lightburn, so you can find a screenshot of the optimal settings (on our machine at least) below. The relevant numbers are the 32.20 mm per rotation and the 10.00 mm roller diameter.

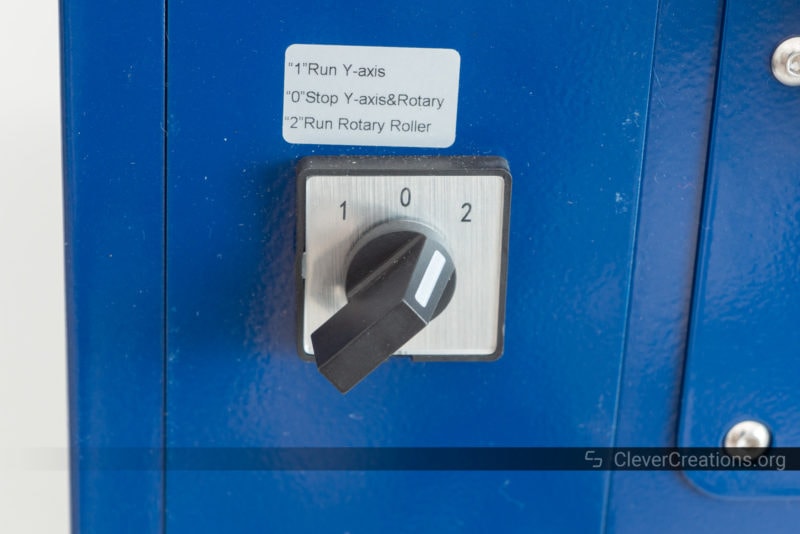
The process of using the rotary roller is not very straightforward. Before you can use it, you need to change the position of the switch on the back of the TwoTrees TS3 to ‘2’. Then load the ‘use rotating.nc’ file through the interface. What this essentially does is tell the machine that it is using a rotary roller on the Y-axis now.
You’ll see in the testing section further down that the rotary roller on the TwoTrees TS3 works exactly as advertised. One thing we did notice is that the surface of the rollers does not provide a lot of traction. This means that you might want to add some weight inside lightweight cylindrical objects to prevent them from slipping.
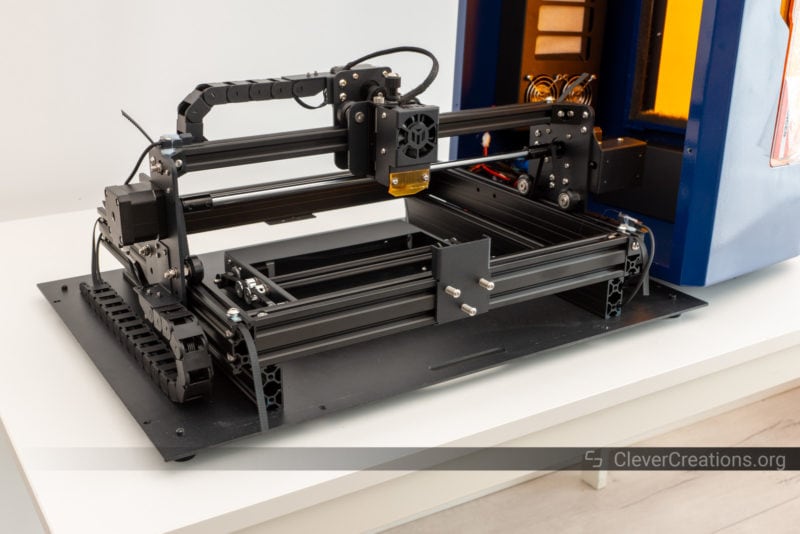
Laser Engraver Frame

The frame of the Two Trees TS3 laser engraver components is nothing special. It is a standard cartesian gantry constructed from aluminum extrusion. It uses V-wheels for motion instead of more expensive linear rails, but this setup is good enough.
Because the frame is bolted to the floor of the enclosure, it is a lot stiffer than it would be otherwise. This helps a bit with engraving and cutting accuracy.
Two Trees chose to go with two stepper motors on the Y-axis (one on each side) to drive it, which seems a bit overkill given the small work area of the machine. For example, the 400×400 mm Creality CR-Laser Falcon only uses one Y stepper motor. However, this is more of a luxury problem than anything else.
Safety
The TwoTrees TS3 has a couple of safety features that make it stand out from the competition.
Laser Light Blocking
Most notable, something that we already covered, is its enclosure and fume management system. These make it a lot safer to use than most other desktop laser engravers on the market, which often don’t have an enclosure at all.
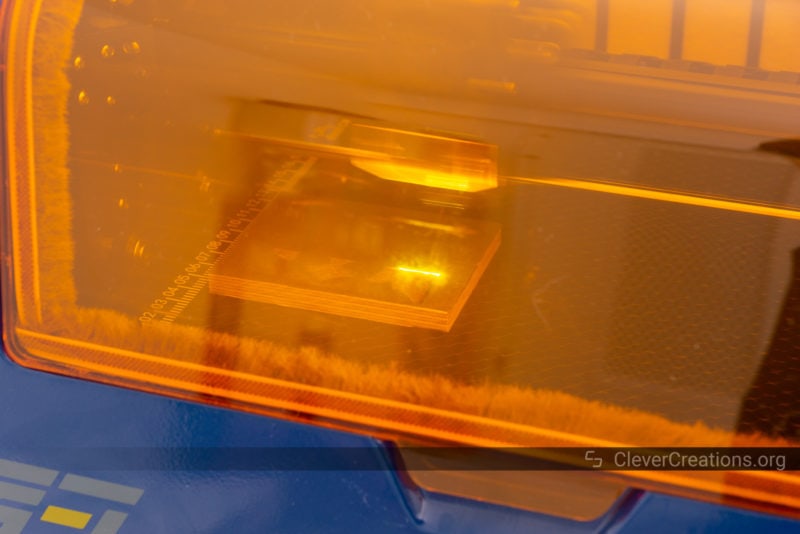
The enclosure comes with an orange acrylic lid that is supposed to filter the laser light. This makes it safer for you to look at the work area while the machine is in operation. We don’t have the equipment to test whether this is actually the case, but it is always a good idea to wear a pair of laser goggles to be sure.
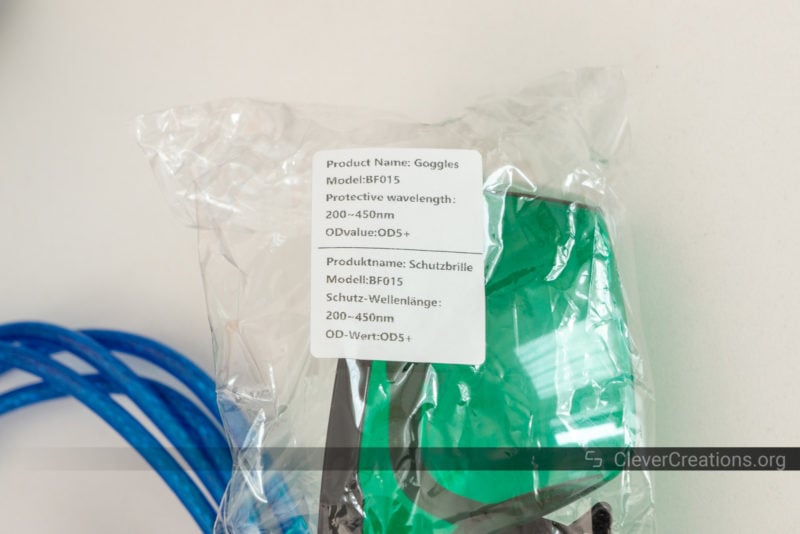
You do get a pair of goggles included with the TwoTrees TS3, but again, whether these are as good as advertised is anyone’s guess. Based on the specifications on the packaging, they are okay for the wavelengths used in the machine.
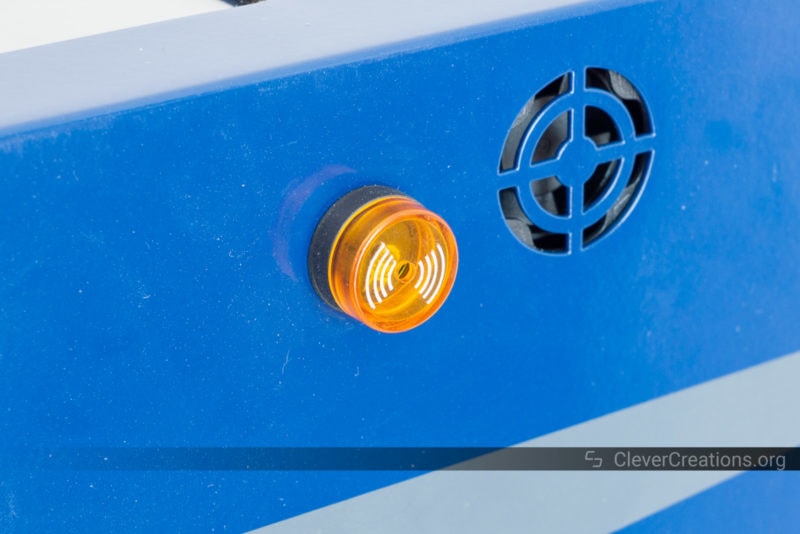
Flame Detector
The TwoTrees TS3 also comes with a flame detector. When this sensor detects a flame for longer than four seconds, it sounds an alarm and turns off the laser. This is one of the best safety features to have, given that it is easy to start a fire in a laser engraver with the wrong settings.
While the flame detector works well, it is one of the cheaper types that also gets triggered by the infrared light in sunlight. More expensive flame detectors can filter this light out, but cheaper ones cannot. As a result, if you use the machine in the sun, the alarm will go off continuously. To bypass this, you could put tape over the sensor, but that is obviously not ideal.
Limitations
No laser engraver is perfect, and aside from the poor build quality, there are definitely a couple of additional features that we would have liked to see in the TwoTrees TS3.
Open Lid Sensor
A simple way for Two Trees to add additional safety features to the device would have been to add an ‘open lid’ sensor. Once the machine detects that the lid is opened, the laser gets turned off. This can prevent some accidents with users not paying attention.
A sensor like this consists of a simple magnet and a Hall Effect or Reed sensor. You can see a good example of this in the review we did of the Sermoon V1 Pro.
Air assist
The second limitation we encountered in the TwoTrees TS3 is the lack of an air assist. Air assists in laser engravers help with both the engraving and cutting process by blowing away debris and smoke.
Not only does a steady stream of air remove the buildup of soot from the material you are working on, but it also removes smoke from around the laser. This increases the laser energy that reaches the material but also helps limit deposits on the laser lens itself, which increases its lifespan.
While there is a fan on the laser module itself that creates a bit of airflow, it isn’t comparable with a proper air assist.
You could modify the TwoTrees TS3 yourself and install an air pump and hoses to the laser head yourself. However, because you are dealing with an enclosed laser engraver, there is limited space to do so.
Auto-focusing
Another thing that would have been useful to have, but that would have significantly increased the cost of the machine, is an autofocus option for the laser. This would save you the effort of having to dial in the focus manually each time you want to engrave or cut something.
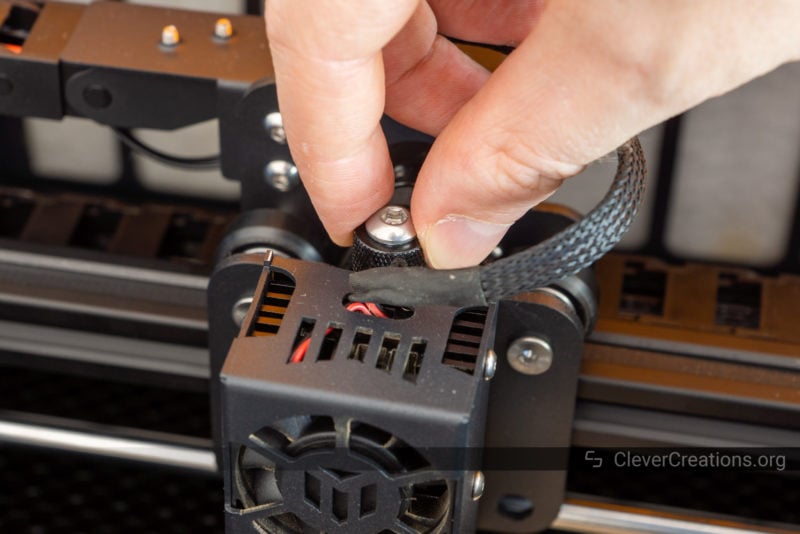
It’s not a huge miss, since manual focusing on the TwoTrees TS3 is an easy process. You can use the thumbscrew on the top of the laser head to dial in the distance with a few turns back or forth.
Compare this with some other laser engravers that require you to unscrew bolts and mount the laser head in a different position, and you can see why the TwoTrees TS3 is still pretty easy to work with.
Build Quality
If you have made it this far in our TwoTrees TS3 review, then you know that the build quality of this laser engraver is lacking. TwoTrees has cut some corners to keep the cost of the machine down, and it shows in the overall result.
Our machine came with a misaligned frame and a loose laser head carriage, and we haven’t been the only ones with these (or different) quality control issues.
While these problems were easy for us to fix and TwoTrees has been responsive in helping with them, it is still not something that you want to deal with when you just want to get started using your new laser engraver.
Another thing we noticed was the use of 3D-printed parts in the machine. Specifically, the machine uses a couple of 3D printed brackets to hold the fume filter in place.
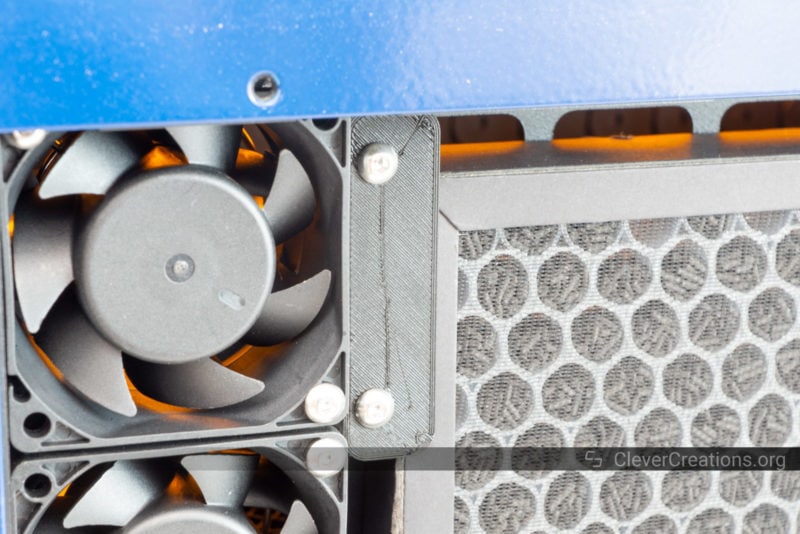
While these brackets work just fine for their purpose, they are still not something that you expect to see on an $869 machine.
On a more positive note, the wiring of the machine seems to be done well. For example, all connectors and end stops are hot glued in place so that they don’t vibrate loose. Similarly, all wires are bundled and heat shrinked where necessary.

Overall, however, the build quality of the TwoTrees TS3 is something that needs improving by the company. If you are uncomfortable tinkering with your laser cutter to improve its setup, this is not the machine to get.
Ease of Use
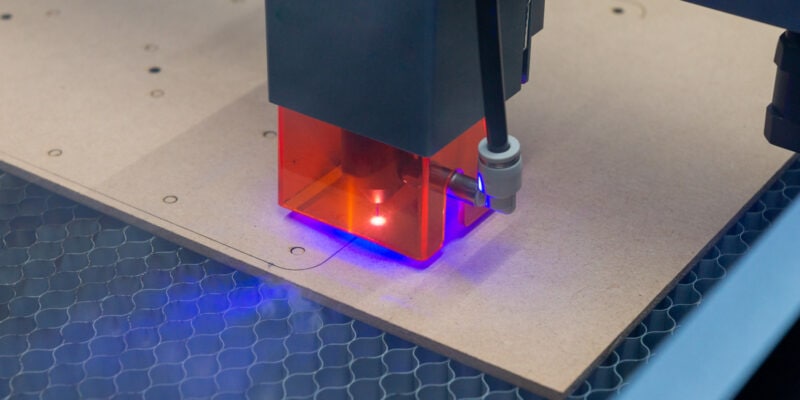
Focusing the Laser
As you have read above, focusing the laser of the TwoTrees TS3 is easier than on some other laser engravers and laser cutters, but not as easy as when it would have autofocus.
For laser engraving, the laser head needs to be exactly 50 mm from the work surface. This might sound difficult to do, but with the included focusing cylinders it is easy to set the right distance.
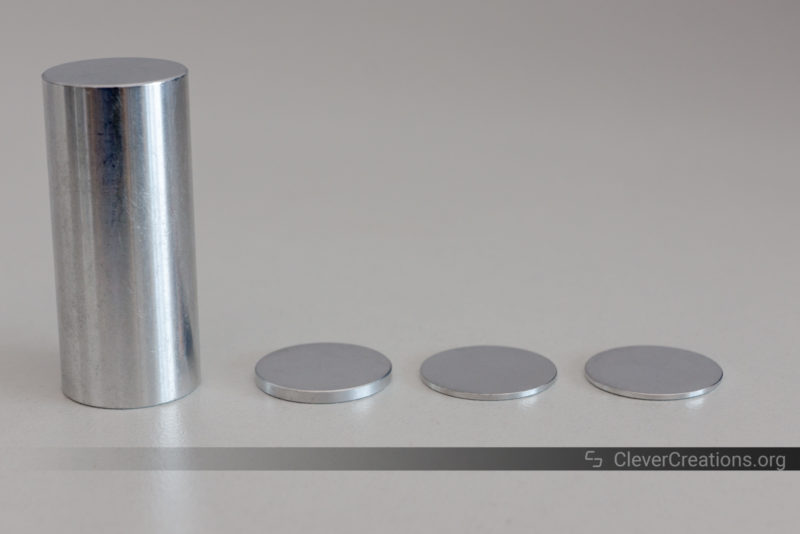
The included cylinders are 46 mm, 2 mm, and 1 mm (2x) in thickness. Stacking them all on top of each other gives you the 50 mm you need for setting the optimal focus distance for laser engraving.
When laser cutting, you need to focus the laser on the middle (vertically) of the material you want to cut. So if your material is 4 mm thick, you’ll want to set the focus 2 mm into the material. This means that the distance from the material surface to the laser head needs to be 48 mm.
You can probably see how the different cylinders come in handy now. For a 48 mm distance, you can stack the 46 + 2 mm cylinders together. For other material thicknesses, you can stack different combinations. Sometimes you need to add a manual half-turn of the thumbscrew for a 0.5 mm adjustment, but this is all explained in the manual (page 04).
This system works very well, even though it would have been nice if the cylinders were labeled with their thickness. It would make the focusing process just a bit quicker. However, if you have access to a 3D printer, you can always 3D print some alternative spacers instead.
Firmware
The firmware of the TwoTrees TS3 provides all the features you’d expect from it. It supports raster and vector engraving, has power control, speed control, and supports homing.
On top of that, you can use Dynamic Laser Power Mode (M4), which adjusts laser power for better engraving and reduces burnt corners.
Earlier versions of the TwoTrees TS3 were shipped with firmware that had its Y-coordinates inverted. This led to a lot of issues with people accidentally engraving their material in the wrong direction.
On our machine, we did not have this problem, so we assume that TwoTrees has since released an updated firmware that fixes this.
Connectivity
There are a couple of ways you can control the TwoTrees TS3 laser engraver. You can either control it through the touch screen, from a computer over USB, or use its built-in Wi-Fi in combination with the MKS Laser app (iOS / Android).
Touch Screen Interface

The touch screen interface of the TwoTrees TS3 is fairly intuitive, even though its translation is rather poor.
You can use the interface to position and home the laser, frame your work, adjust engraving power, and engraving speed. It also allows you to select, start, pause, and stop a job from the SD card in the micro SD slot.
A limitation we ran into is that when setting the laser power through the touch screen (for positioning the laser relative to the workpiece), the only options are 5%, 50%, and 100% power. On some materials, even the 5% setting caused the powerful laser to leave faint marks on the surface.

We would have preferred to have a bit more control over the laser power to avoid this. However, when controlling the TwoTrees TS3 through Lightburn (our preferred method), you can reduce the laser power to 1% or even less and avoid accidental burning of your material.
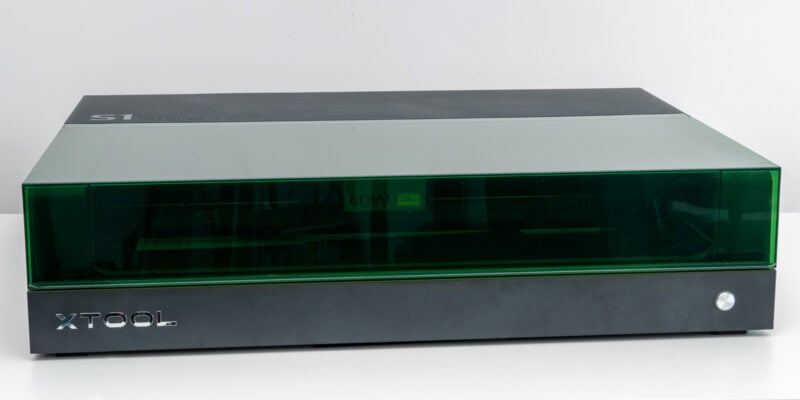
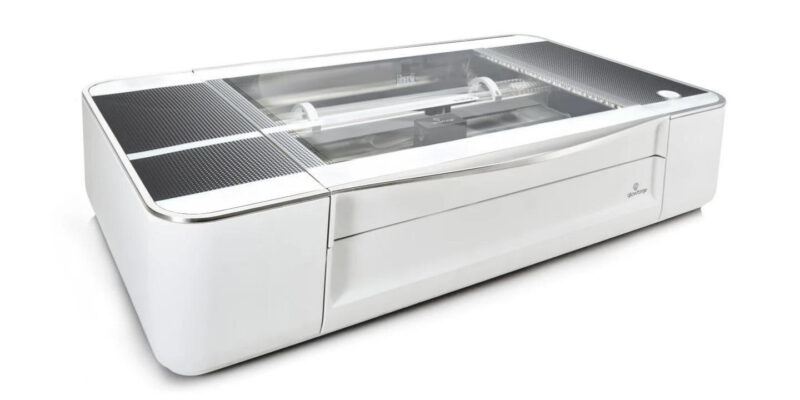
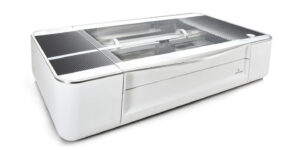
A nice thing about the touch screen interface is that you can use it to run the machine completely offline. This is not possible on some other (higher-end) enclosed laser engravers. For example, the Glowforge machines always need to be connected to the internet.
Computer USB

The best way to control the TwoTrees TS3 is through your computer. By using the included USB cable you can use the free GRBL software or Lightburn ($60, but vastly superior) to do anything your heart desires.
You can use these pieces of software to create or import engravings, set laser engraving and laser cutting parameters, homing and positioning the device, generate and send GCode for the TwoTrees TS3 to run, and so on. There isn’t much you can’t do with them, and they’re both very well supported and actively developed.
Lightburn compatibility is a great feature of the TwoTrees TS3 and is one of the reasons we decided to review this machine. It just makes it that much easier to work with.
Wi-Fi + MKSLaser

We haven’t done any extensive testing of the Wi-Fi on the TwoTrees TS3, but in our experience, it worked fine. However, some users have complained about a flaky connection, so keep that in mind.
The TwoTrees TS3 works well in combination with the MKSLaser app, even though its features are limited when you compare it to LaserGRBL and Lightburn. We did one quick laser engraving of an image of our home office cat, which was surprisingly easy to set up and execute.

One annoying quirk that we encountered with the Wi-Fi configuration in the software is that we had to retype the Wi-Fi password after each power-up of the machine. It seems a bit of an oversight if this is the intended behavior of the firmware, so maybe we did something wrong here.
Aside from the MKSLaser app, you can also use a web browser to visit the IP address of the TwoTrees TS3 on your network and control the device from there. It is not a feature we have used but it’s a nice option to have.
Repairability
Despite the enclosure, the TwoTrees TS3 is relatively easy to repair and modify. Unscrewing several bolts on the bottom of the device lets you remove the top half of the enclosure, giving you access to the entire laser engraver frame.
Once you have removed the top, you can see all of the important components of the TwoTrees TS3. This stands in contrast to the Jinsoku LC-40, for example, which has its movement components (gears, belts, pulleys, etc.) covered for protection.
Two Trees TS3 Engraving and Cutting Results
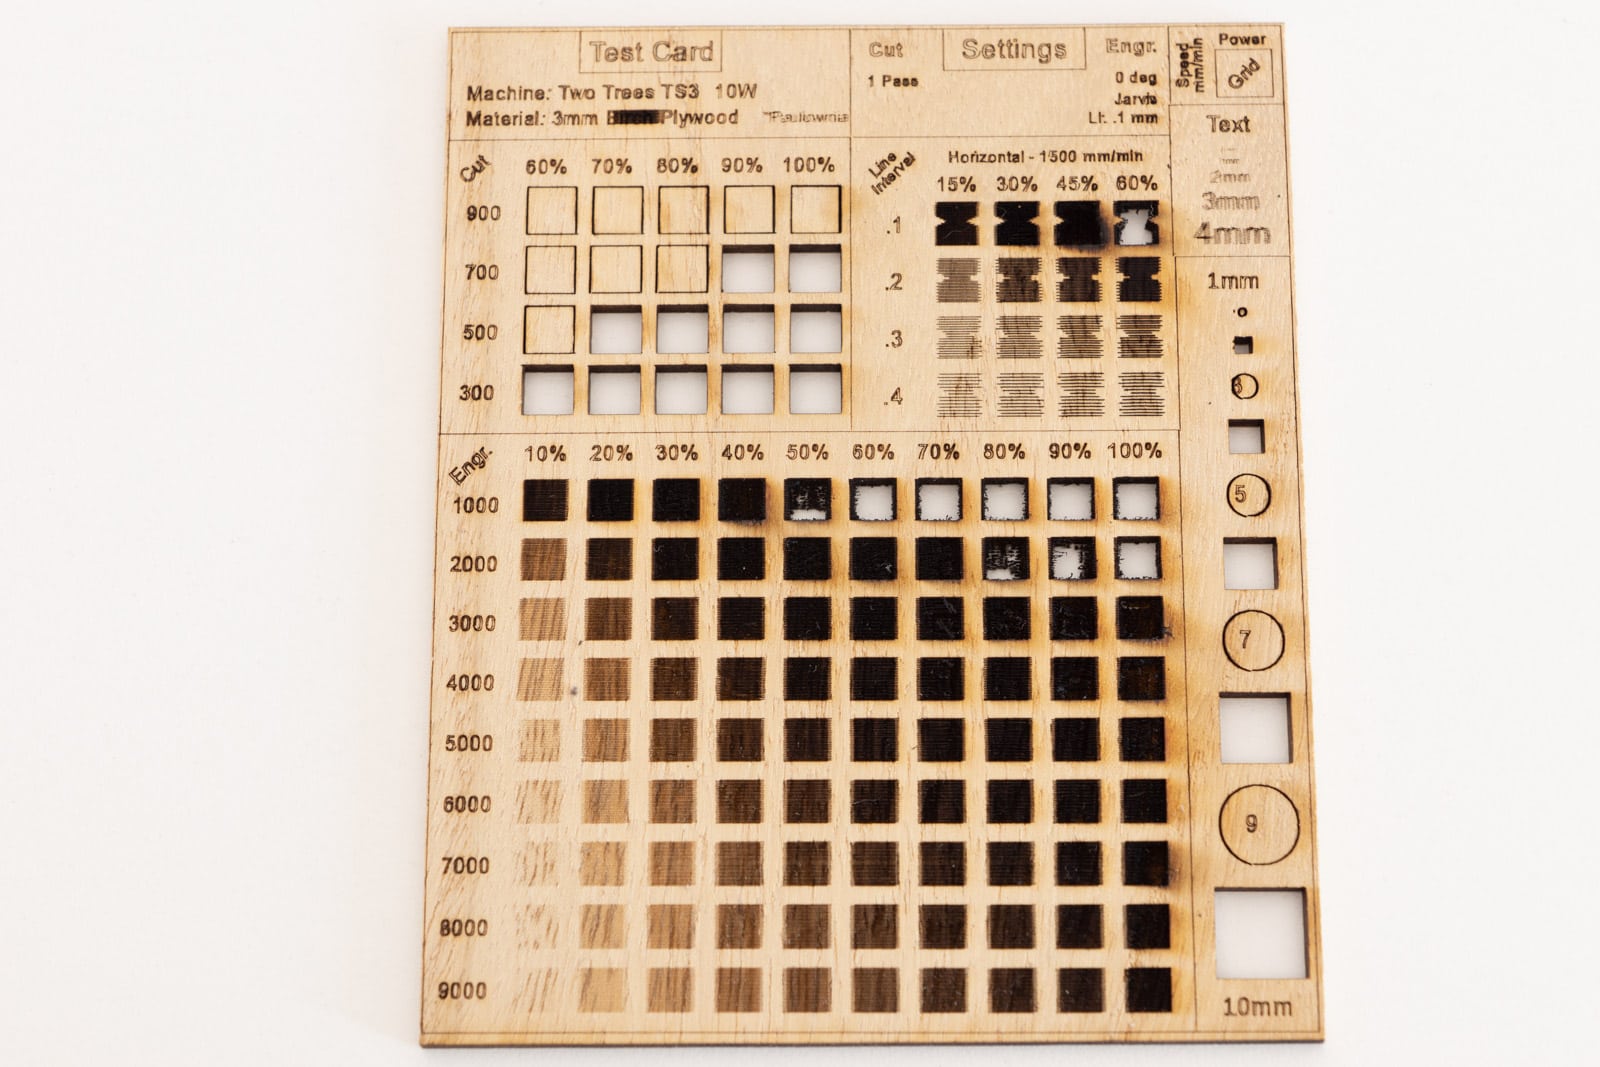
Material Test Cards
A quick material test card on 3 mm Paulownia plywood shows us that the 10W laser is indeed very powerful. On non-dense woods, the laser burns right through on low speeds. Make sure to either speed your work up, or turn down the laser power when working with woods like Balsa, Paulownia, and Poplar.
On the darkest sections you can see clear scorch/burn marks to the right of the cut. Not really a surprise, given that the Two Trees TS3 does not have an air assist. It’s expected and not a big issue. You can prevent this by applying transfer tape before cutting, or by doing a light sanding with 220-grit sandpaper after cutting.
Overall, this test gave nice results and good data on which cutting speeds (700 mm/min @ 100% power) and which engraving settings (9000 mm/min @ 10-90% power) to use for this wood.
On denser woods, like MDF, the TS3 can use the full potential of its 10W laser without burning through.

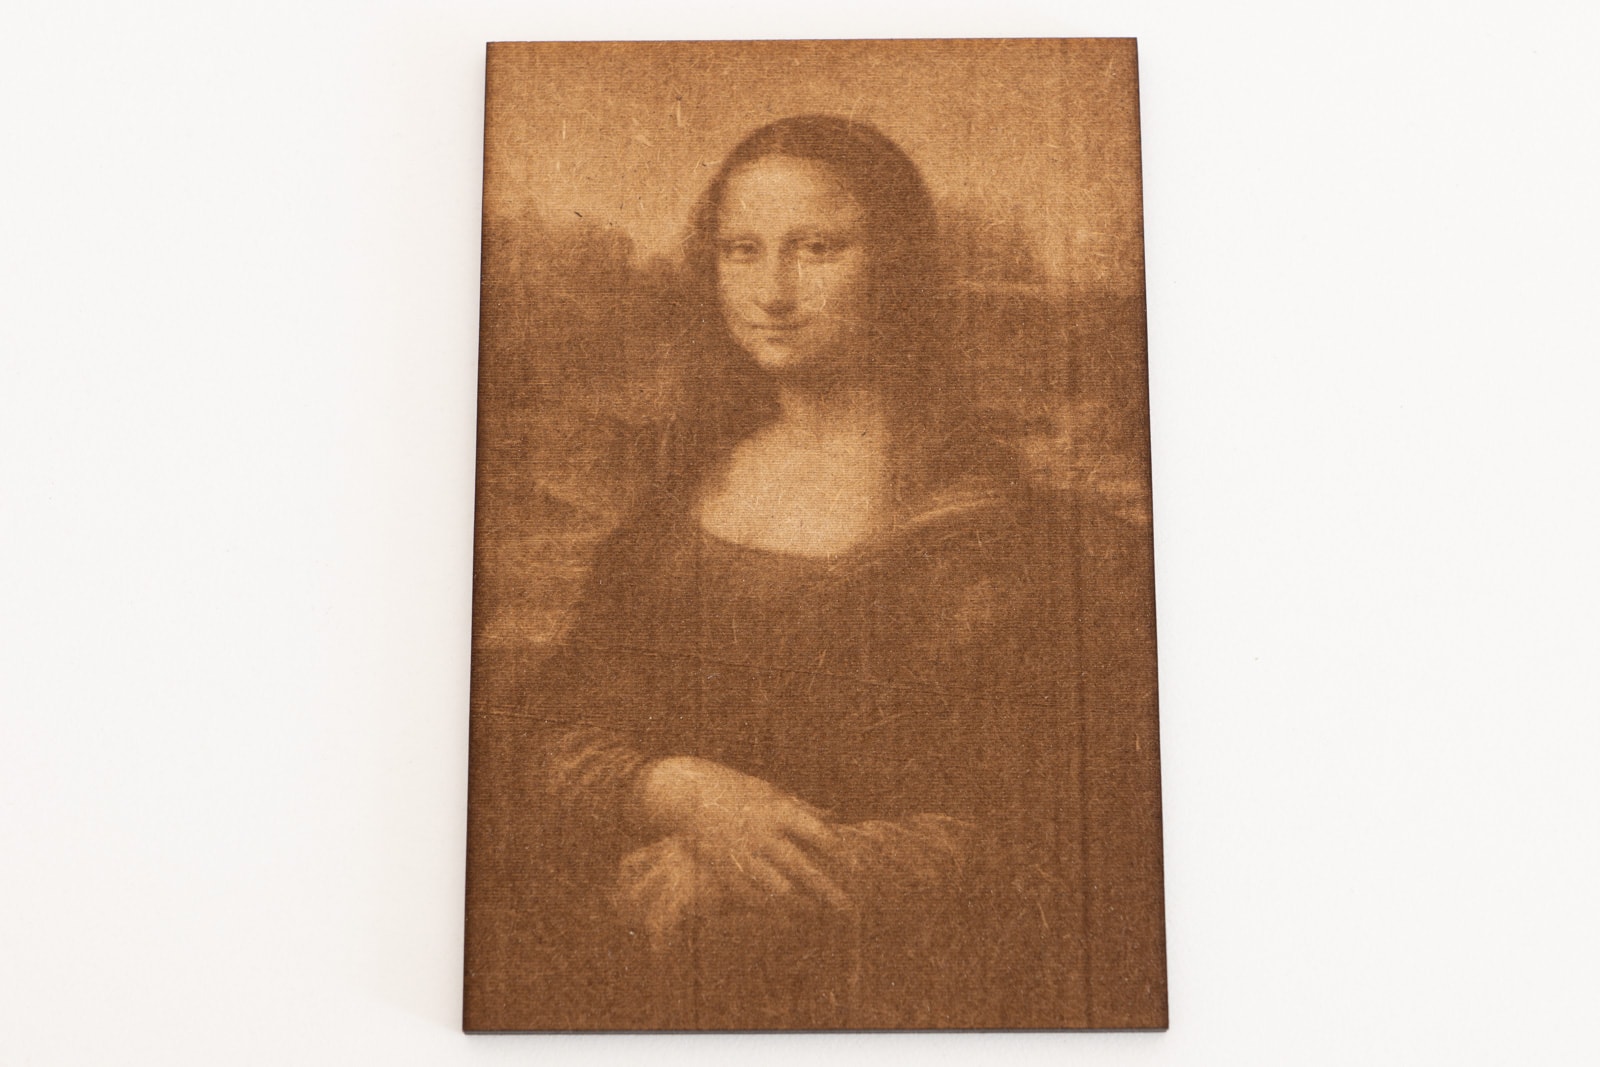
Image Engraving Test
On to the image engraving test. And what better image to pick than the most famous painting in the world? The results speak for themselves here, the TS3 gave us very impressive detail and contrast.
The only negative observation we have is the vertical lines running through the engraving. It is unclear to us where these came from. It could be differences in the density of the MDF, or perhaps debris on the V-wheels of the laser engraver X-axis. It is the only test in which this showed up, so we are not sure.
- Material: 4 mm MDF
- Speed: 9000 mm/min
- Power: 10-90%
- Image mode: Grayscale
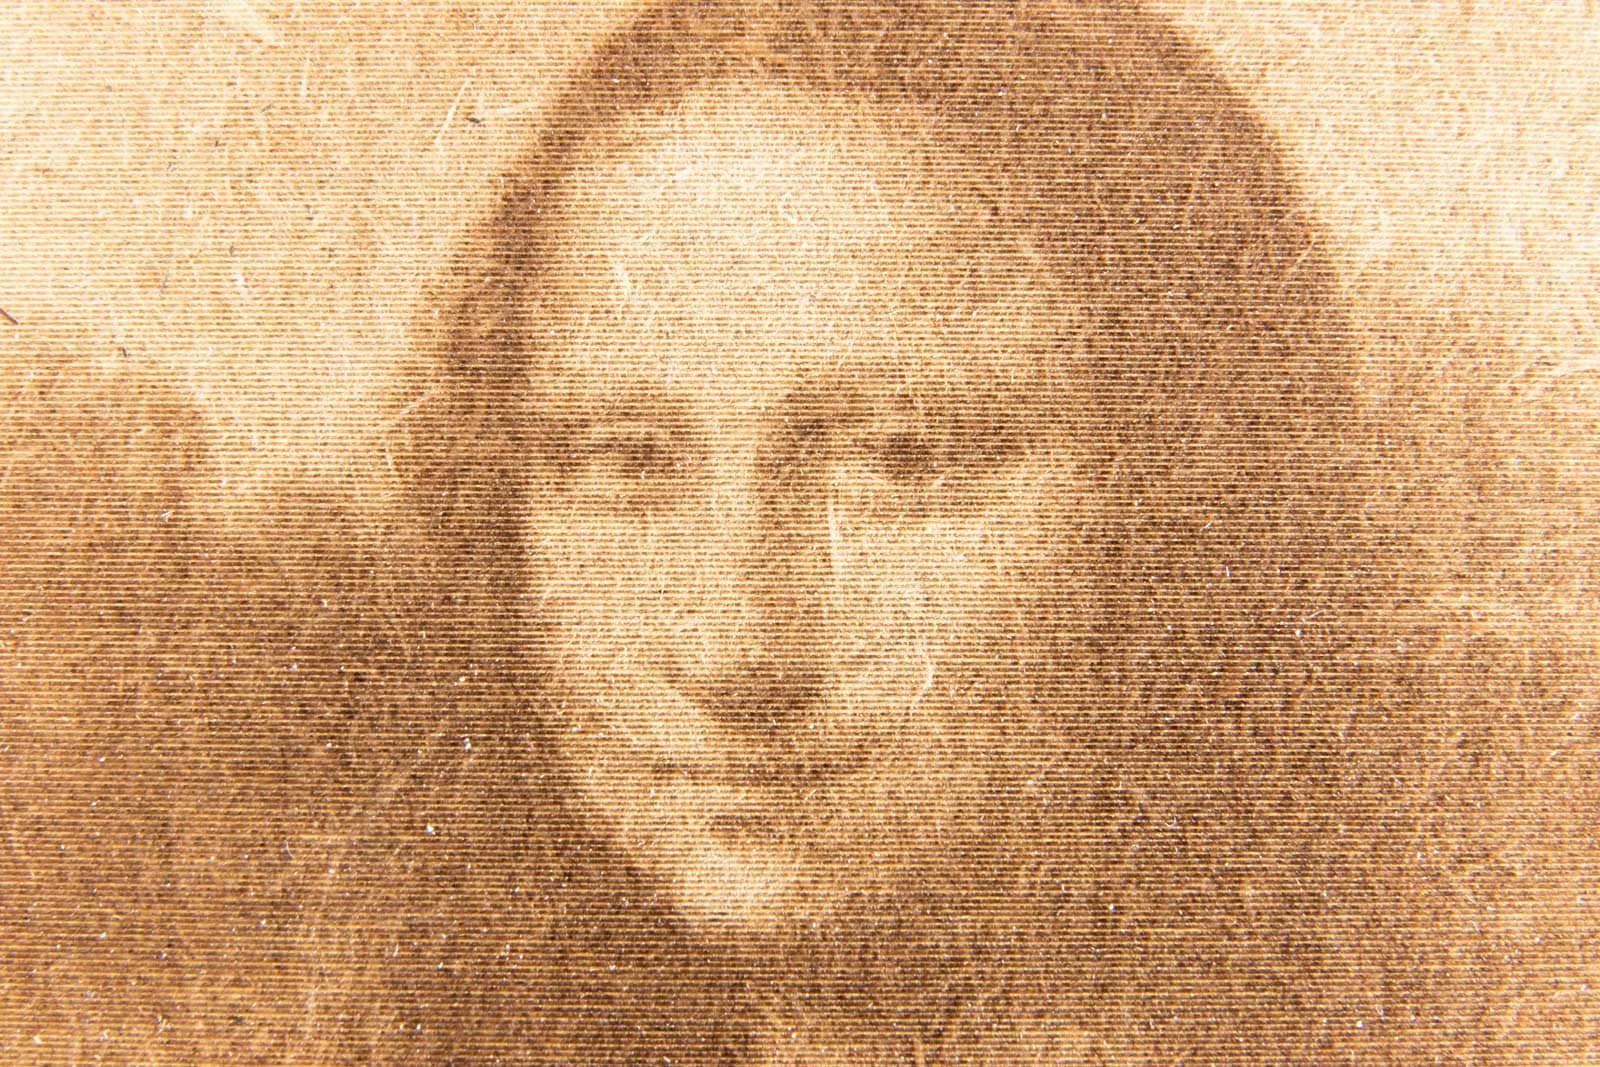
A close-up of the face shows the high detail of the engraving. For context, the total dimensions of the wood are only 120×80 mm
Lattice Test
This test is a good method to see how the TS3 deals with cutting small areas. About 90% of the pieces fell out right after laser cutting. The rest we had to remove by hand. Some of them were a bit stuck, which led to damage to the fragile lattices during removal.
To solve this in the future, we will run the laser at a slightly slower speed to make sure that it cuts through everywhere. This would lead to a bit more burn marks, especially without air assist. On this piece we already did some light sanding, before we stopped and realized that it would be better to show the current burn marks. You can still see some in the bottom third.
Burn marks and incompleted sanding aside, the piece still came out really nicely.
- Material: 3 mm Paulownia
- Speed: 600 mm/min
- Power: 100%

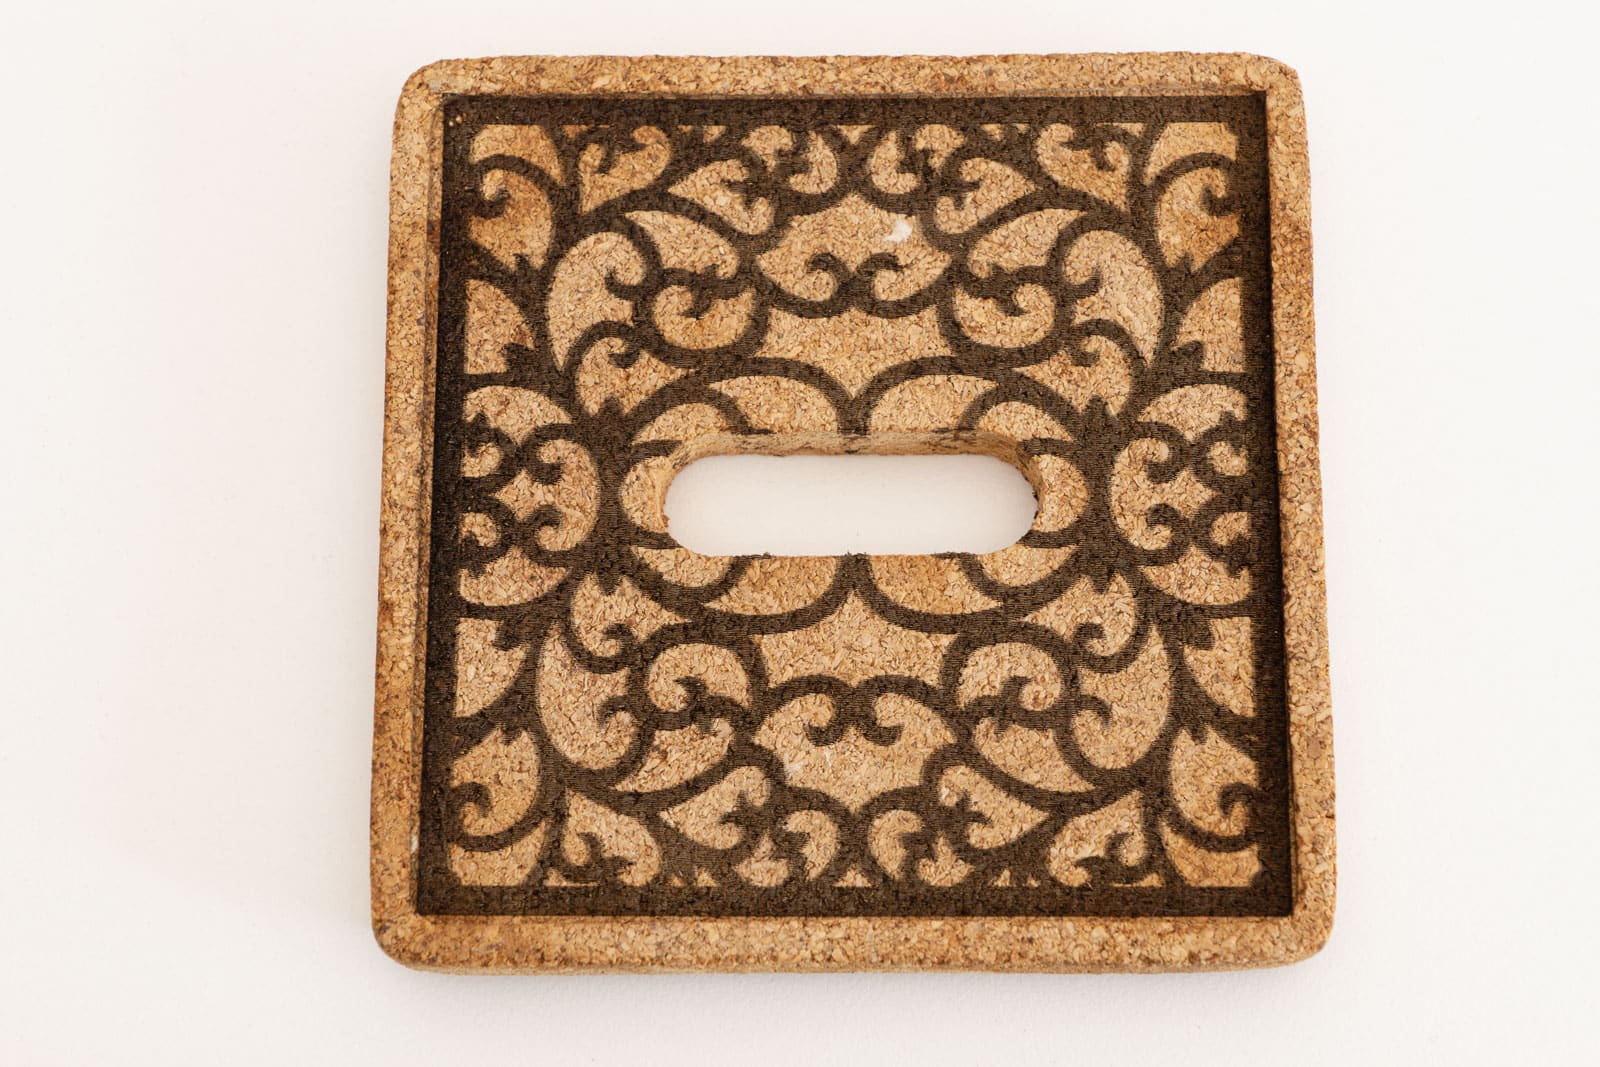
Cork Test
Here we did a quick engraving of an old cork coaster to see how the Two Trees TS3 would cope. Again, the piece came out very well. Make sure to engrave fast and with low power when it comes to cork, because it catches fire easily.
- Material: Cork
- Speed: 6000 mm/min
- Power: 25%
Dimensional Accuracy Test
A simple pen holder constructed from multiple pieces to see how accurate the cuts on the Two Trees TS3 are. We used the MakerCase Box Generator with default settings.
Straight out of the laser cutter all the pieces fit together. There were no sanding or other adjustments necessary. A light application of wood glue and that’s all there is to it. 🙂
- Material: 4 mm MDF
- Speed: 200 mm/min
- Power: 100%

Bonus
Bottom Line: Should You Buy the TwoTrees TS3?
The Two Trees TS3 is an interesting device. As far as we know, there aren’t any other laser engravers and cutters with the same feature set at this price point.
If you are looking for a machine that can engrave and cut fast on a variety of thin (≤8 mm thickness) materials, like wood, carton, plastic, leather, and paper, the 10W version of the TwoTrees TS3 will do a great job.
Just keep in mind that if there is a decent chance you have to do some work on the machine after receiving it in order to get good results. In that regard, the TS3 is not that different from Two Trees’ 3D printers: poor quality control.
If you are okay with that and want an enclosed laser engraver with a powerful fume exhaust, rotary roller, included honeycomb plate, and a variety of other accessories you typically have to buy separately, this is the machine to get.
Our feedback for Two Trees would be to spend an extra ~$50-$100 per product on improving build quality and quality control. If they would do that, they would have a great product at their hand. As it stands now, the TwoTrees TS3 is not guaranteed to be a plug-and-play laser engraver that works out of the box. As such, it can be difficult for some beginner users to get good results.
At the same time, there are some size limitations with the 300×200 mm work area. If you want a bigger enclosed laser engraver, we highly recommend you take a look at the ORTUR Laser Master 2 Pro S2 with its enclosure add-on.
Alternatively, if you are okay with a 300×200 mm engraving area but want more power, the OMTech 40W is a great choice.