
- Blisteringly fast print speeds
- Rigid frame
- Innovative bed leveling system
- Triple lead screw bed
- Powerful print cooling
- Small footprint
- Print chamber thermistor
- Constrained filament path
- Suboptimal CoreXY implementation
- Underdeveloped UI + web UI
- Closed-source firmware
- No air filter
The new Creality K1 3D printer aims to deliver high-quality prints in a fraction of the time. With true CoreXY kinematics, powerful print cooling, and an innovative bed leveling system, the machine appears to be capable of delivering just that.
But with Creality having had several non-stellar product launches, you might be wondering whether it’s worth investing in the K1 right now, or whether it is better to go with an alternative from Bambu Lab or QIDI.
In this Creality K1 review, we’ll be putting the 3D printer to the test and answering all questions you might have. Have the shortcomings of the initial batches been worked out? Does it actually print as fast as advertised?
Let’s quickly dive in!
Creality K1 Specs
| Creality K1 Specifications | |
|---|---|
| Price | Creality | Amazon | AliExpress |
| Dimensions | 355x366x480 mm |
| Max. Build Dimensions | 220x220x250mm |
| Extruder | Direct Drive |
| Max. Nozzle Temperature | 300 °C |
| Max. Heated Bed Temperature | 100 °C |
| Supported Filament | PLA, TPU, PETG, ABS, PET, Carbon |
| User Interface | 4.3” Touch screen |
| Print Interface | USB Flash Disk, Wi-Fi, Creality Cloud Printing |
| Power Loss Recovery | Yes |
| Filament Detection | Yes |
| Auto leveling | Yes |
| Rated Power | 350W |
Unboxing the Creality K1 3D Printer

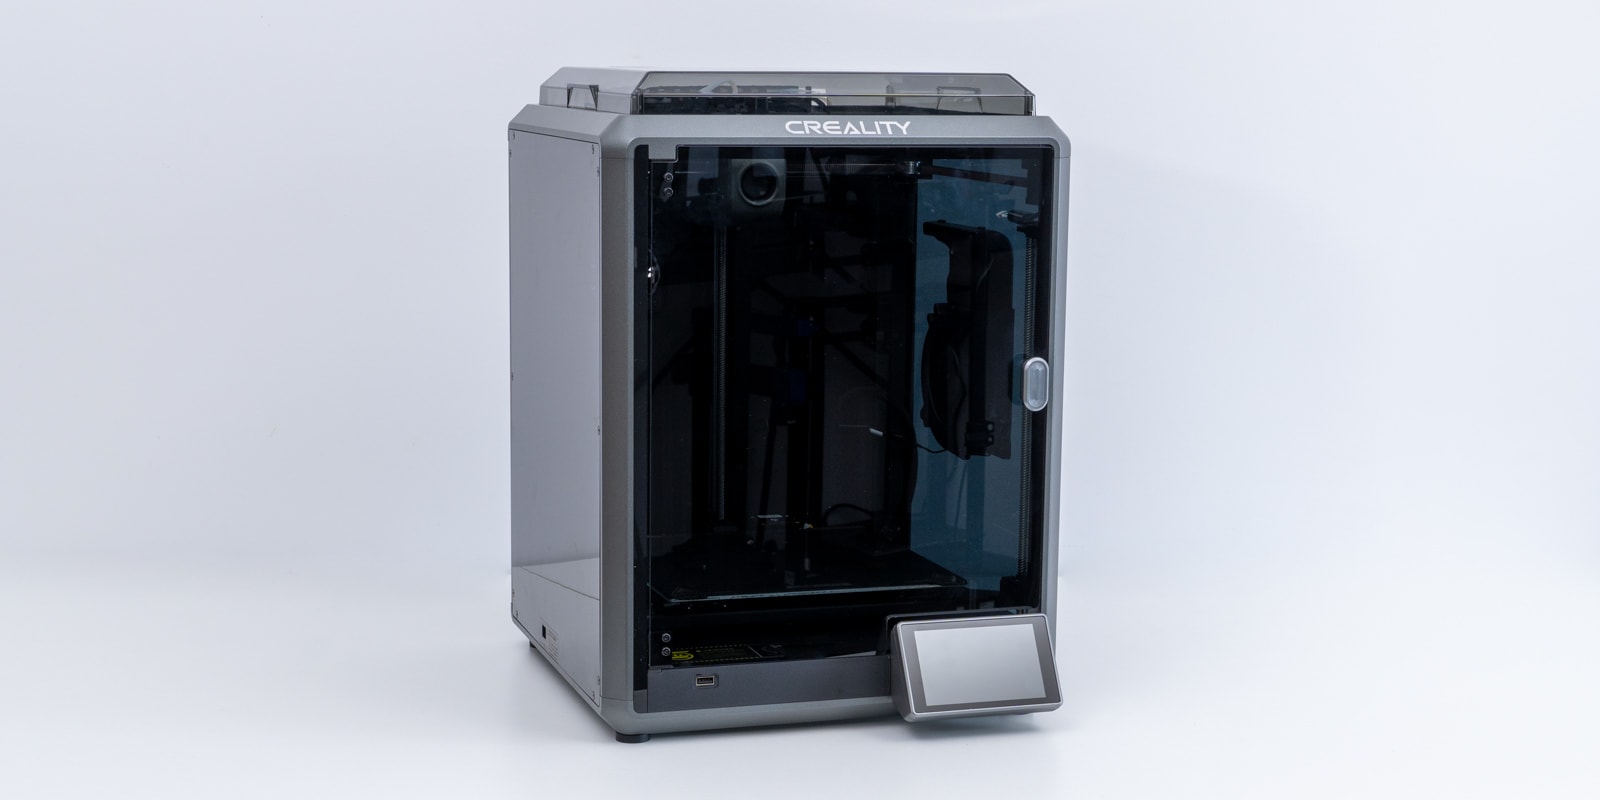
After opening the box of the Creality K1, you are presented with the top lid of the enclosure and a bunch of documentation. When you remove these from the box, the machine itself becomes visible.

Because the K1 arrives at your door mostly pre-assembled, there is little for you to do. Basically, just lift the printer out of the box. It’s one of the easiest Creality 3D printer unboxings we’ve done.

Our first impression was that the K1 is very compact. Even though it has the same print area as machines like the Ender 3, it takes up less desk space due to its compact CoreXY kinematics and stationary bed.
All accessories are located in the 3D printer itself. To access them, you’ll first need to remove several pieces of protective foam.

Once you have done so, you’ll see the following items:
- Creality K1 3D Printer
- Touch screen
- Spool holder
- Documentation
- Power cable
- Various basic printing tools
- Various maintenance tools
- Rubber feet
- 500g of hyper PLA filament
These are all fairly standard 3D printer accessories, with the exception of the included filament.
Usually, this is a small spool of PLA filament. With the K1, you receive a spool of hyper PLA instead. It’s the type of filament we recommend you use for pushing the 3D printer to its printing speed limits.
There’s no glue stick or other print adhesive included. Creality recommends that you use it, and we found that it is indeed a good idea to get some, especially for printing ABS. With materials like PLA and PETG, we found the print surface works great without a bed adhesive.
In the picture below, you’ll see a spare extruder gear kit and a spare hot end. These were included on the 3D printer that Creality shipped us, but they won’t come with the retail version.

Getting Started
There are still a couple of things to do before you can start printing with the Creality K1. For example, you’ll need to unscrew several bolts that held the components in place during shipping.

In addition, there’s the touch screen for you to attach, as well as the spool holder. Those steps don’t require any tools and took us minimal time.
The setup process is well-documented in the manual. We’ve had some complaints in the past about Creality’s lack of clarity in its instructions, but the K1 manual is much better in that regard.

On top of that, the user interface of the 3D printer guides you through the entire process as well. It’s not something we’ve seen before on Creality’s machines, but it’s a great addition for new users who don’t have much experience with 3D printers.

When you work your way through the prompts on the screen, you’ll quickly get to the self-test process. It tests various components of the 3D printer from nozzle to automatic leveling.

This self-test process is remarkably similar to what we encountered in our Snapmaker J1s review. One big difference is that the calibration process on the K1 is done fully automatically. The process of the J1s required several manual interventions.
For us, it took about 15-20 minutes before the K1 was finished testing. It’s tempting to make a cup of tea or coffee and let the machine do its thing, but it’s a good idea to keep an eye on it in case the 3D printer encounters any issues.
If all goes well, you can start with a test print right away. However, we highly recommend attaching the included rubber dampening feet first.

They were included with our K1 3D printer but weren’t mentioned in the documentation anywhere. In our testing, they made a big difference in the amount of vibrations that the K1 transfers to a workbench or desk. We’ll cover this aspect in more detail below.
Creality K1 Features
We cover many different machines in our 3D printer reviews and there are periods where we see relatively little innovation. With the industry currently focusing on increasing print speed, however, we see manufacturers make advancements in their 3D printers in various ways.
The Creality K1 printer is no exception, with clearly visible hardware improvements and under-the-hood software upgrades. Let’s look at the main features that make this 3D printer worth considering.
Blisteringly Fast 3D Printing (600 mm/s Maximum Print Speed)
The standout feature of the Creality K1 is that it has a higher printing speed than most other 3D printers currently on the market. With a maximum print speed of 600 mm/s and accelerations of 20.000 mm/s², it’s one of the fastest 3D printers around and around 10x faster than typical budget 3D printers offer.
Its high-speed printing is made possible by fast CoreXY kinematics, embracement of Klipper firmware, triple-leadscrew bed mounting, and its lightweight print head.
The listed maximum print speed of 600 mm/s is fine if you don’t mind print quality issues, but for cosmetic parts and detailed models, you’re better off dialing the printing speeds a bit lower.
Based on our testing, we find the printer to have the best balance with print speeds of up to 300 mm/s and accelerations of up to 12500 mm/s². Still more than impressive!
The fast printing speed of the K1 3D printer lets you get out more prints in the same amount of time, but also gives some ‘hidden’ benefits that might not be immediately clear.
For example, you waste less time on print failures and have fewer electricity costs because the 3D printer isn’t operating for as long.
New Dual-Gear Direct Extruder

Creality seems to have done away with its previous Sprite Extruder design and moved on to one that is more suited for the demanding printing speed of the Creality K1 and K1 Max.
It’s still a dual-gear direct extruder but with a custom circular pancake stepper motor and a locking mechanism that clamps the gears onto the filament.

The locking mechanism particularly stood out to us. It works very well at preventing the extruder gears from slipping when the filament is fed into it at high speeds. Your typical spring-loaded extruder arm simply doesn’t apply enough pressure for that.
One downside we found of the metal locking mechanism is that it gets hot when you are using the Creality K1 3D printer fully enclosed. If you are not careful, it’s easy to burn your finger during the filament unloading or loading process after 3D printing.

We found the extruder to work best for most filaments with a 0.5 mm retraction distance. It’s nice and snappy, with barely any oozing or stringing.
You might think that there’s little time for oozing anyway because of the higher print speeds. While that is true, you also run the hot end at higher temperatures to melt filament faster. These two things cancel each other out somewhat.
While the gear system displayed in this Creality K1 review is mostly plastic, the company has told us that future versions of the K1 extruder will have more durable machined parts.

High-Power Hot End

To meet the demands of the high print speeds, the Creality K1 printer uses a hot end with a 60W circular heating element. It heats up scary fast, with 35 seconds to reach 200°C and 68 seconds to reach the maximum 300°C.

The stock 0.4 mm diameter nozzle has a 15 mm long M6 thread, standard Volcano size. You’ll have access to a large array of Volcano-compatible nozzles that you can swap it out with.

During testing, we didn’t run into any issues with the hot end itself. No clogging, uneven extrusion, or similar problems. PLA, ABS, ASA, PETG, PA-CF, and wood filament, the hot end all handled it perfectly fine.
We did have problems with some filaments at 400 mm/s print speed and above, but that was due to the high viscosity of those materials. Hyper PLA filament and other materials optimized for high-speed printing are what you need to achieve the listed maximum printing speed and acceleration.
Print Cooling

Also upgraded on the K1 3D printer is the print cooling. There are two (or three, depending on how you count) different fans responsible for hardening your freshly printed layers.
The first is the print head fan. It’s a 40×20 mm blower that directs air through a shroud to the nozzle area. It’s a big upgrade over the 40×10 mm fan that came with the previous Sprite extruder and does a good job cooling the nozzle area on its own.

Even better, however, is the large fan on the side of the enclosure. We haven’t measured it, but suffice it to say it is massive in 3D printing terms.

It pushes tons of air across the print, cooling down your layers quickly and making sure that the Creality K1 prints new layers on top of already hardened ones.
It’s a similar fan to the one we came across in our QIDI X-Plus 3 review, even though the one on the K1 seems a bit more powerful.
In fact, it’s so powerful that we recommend you turn it down to 50% or so. Its vibrations and printing noise are unpleasant to be in the same room with. We also believe its airflow is overkill for a 3D printer this size. Even for the larger Creality K1 Max it is probably a bit much.
The third fan is more of an enclosure fan than a print cooling fan, but we’ll include it here anyway. It’s a small 60 mm axial fan that is most practical for exhausting VOCs and fumes.

The 3D printer does not come with a HEPA filter or an exhaust hose, but you can upgrade the Creality K1 printer with these with little effort.
Print Bed

The Creality K1 3D printer has a standard Ender-size print bed surface of 220×220 mm. As we often say, it’s enough for your basic 3D prints but not more than that. If you want more, the K1 Max offers you a larger 300×300 mm bed to print on.
For the print bed surface material, Creality has gone with a new-ish option. No PEI-coated bed or a coarse PC-coated surface, but a nearly smooth surface with a light bumped texture.

We’ve found it to provide excellent bed adhesion for most filaments. Even though Creality recommends applying glue before 3D printing, we only found the need for this with high-temperature filaments.
It’s possible that a bed adhesive will be necessary with other filaments once the surface starts to wear, however. Print bed surface adhesion strength often decreases over time.
Just like on Creality’s other 3D printers, the surface is still magnetic and flexible. We found it easy to pop most 3D prints off without help from the included spatula.
It’s a single-sided print bed, however, so you won’t be able to print on the opposite side if you happen to damage the top or when it has undergone too much wear.
That said, you can change it with any other magnetic print bed with a 220×220 mm area. You’ll likely have to cut out notches to fit the K1’s heated bed bolts, but aside from that it’s easy to swap out.
Temperature Uniformity

The print bed of the Creality K1 has excellent temperature uniformity. It’s a small bed in an enclosed machine, so it’s no surprise that we barely measured any temperature variance across the entire temperature range.

As a result, there’s little need to worry about warping from temperature variations in the bed.
This assumes that you keep the chamber fan turned off. If you turn it on, you are likely to end up with the far end of the bed cooler than the rest. It causes uneven temperatures in the print and leads to delamination and warping.
Heating Times
Because of its small size, the Creality K1 print bed also heats up quickly. It takes only 2 minutes to get up to 60°C and 5:10 minutes to get to 100°C.
This is made possible by the relatively high power usage of the bed. At full load, it draws a whopping 310W. It’s way more than we typically see from beds this size.
All testing was done with the enclosure lid off, so if you keep the machine fully enclosed, heating times are likely to decrease a bit.
Strain Gauge Bed Leveling

The Creality K1 also innovates with its bed leveling method. Where most other 3D printers— including Creality’s previous generation models—use a print head-mounted ABL probe, the K1 uses a quartet of strain gauges.
The way it works is as follows: each corner of the print bed is mounted on a strain gauge. When the print head nozzle lightly touches the print surface, it compresses the gauges slightly, causing a change in resistance. This is detected by the electronics, which then know that the nozzle is touching the bed.
With that setup, the printer can probe the bed at each corner and everywhere in between. With knowledge of the bed height across the entire surface, it can adjust its print height accordingly to adjust for unevenness.
It’s a system with great potential and one that worked flawlessly on our Creality K1 3D printer tests. Practically every first layer came out perfectly, and we mean perfectly.

The best part is that it requires zero input from the user. No Z-offsets, no manual leveling, it just works.
That does bring us to one of our concerns, however. The bed is hard-mounted to the strain gauges, so there is no option to manually level the bed if you wanted to.

That means you are dependent on Creality’s quality control to deliver you a K1 3D printer with a relatively straight print bed.
Automatic bed leveling can only adjust for so much. If the bed height is off by more than a couple of millimeters from side to side, it’s unlikely that the ABL adjustments can make up for it.
In that case, you’ll have to resort to fixing the offset bed by shimming it or perhaps adjusting the individual Z lead nut heights to level the bed plane.
It’s not something we’ve had to deal with, however. The whole setup worked great and also eliminated a great deal of squished first layers and elephant foot.
A small detail that we noticed is that you can’t quickly wipe or clean the bed while the 3D printer is homing the Z-axis or probing the bed. The strain gauges are sensitive enough to pick up your touch. Make sure to do any cleaning before homing or leveling.

Other Features

Aside from the features listed above, you’ll notice that the Creality K1 3D printer comes with integrated lighting and an option for connecting an ‘AI’ camera accessory.
Lighting the build area is done by a small LED strip mounted at the front of the machine. We had some concerns about its small size, but it still produces plenty of light. Enough to light up the build area while you look through the tinted panels of the K1.
As we write this, the camera accessory is already available on Creality’s site. It’s useful for monitoring the 3D printer remotely, time-lapses, and AI print failure detection. We are curious to check out the print failure feature, but unfortunately, we didn’t have access to a sample of the camera during testing.

Build Quality and Construction
CoreXY Kinematics

The Creality K1 uses CoreXY kinematics to move the print head. It’s a well-known system for its fast printing speeds, contrasted by the slower Cartesian setup seen more often in other popular 3D printers.
Because CoreXY kinematics have little moving mass—the X and Y steppers are mounted on the frame—the print head can move quickly across the print area with relatively little ringing and other print quality problems.
We’re glad that Creality designed the K1 as a CoreXY 3D printer, but one thing we noticed is that its implementation isn’t ideal. Despite things that have been done well, like its lightweight print head, there are also several ways in which the design could be considerably improved.
For starters, the timing belts don’t run parallel to the axes of the machine. They run slightly off-axis, resulting in varying belt tension at different locations inside the print area.

It’s not a major problem, but it can lead to small print quality issues as well as a slight reduction in the dimensional accuracy of the prints. It’s a problem that is present on both the X- and Y-axes and is caused by improper placement and size of the belt idlers.

That brings us to the next issue, the belt idlers. The Creality K1 3D printer uses smooth instead of toothed idlers on the tooth-facing side of the belt runs.

Belt teeth rubbing over smooth idlers wear the teeth out faster. It could have been easily avoided by using toothed idlers instead.
Despite these two things, we found the CoreXY setup to work well during our testing period. But the idler issue will surely affect durability.
Ending on a positive note, the beefy NEMA17 steppers that the Creality K1 uses were a good choice. It’s still all open-loop control, but we can’t expect it differently at this price.

Enclosure

The Creality K1 3D printer comes with a sleek, all-aluminum frame that provides plenty of rigidity. Attached to the frame are partially opaque panels that keep heat and sound in, and dust out.
Its top panel is removable, so you can decide whether to run the machine fully enclosed or partially enclosed.

A full enclosure is most useful when working with materials like ABS and Nylon that give better results in a heated chamber without air drafts. You can simply preheat the chamber for ~15 minutes by running the heated bed and your prints will experience much less warping and delamination—if any.
For PLA and other low-temperature materials, it’s better to leave the lid off. They don’t have much risk of warping and you’ll want to cool your printed part as much as possible to maximize printing speeds.
One thing we like about the K1 is that it has a dedicated temperature sensor for the print chamber, so you can see exactly when the chamber is up to temperature and you can start your print.
In our testing, we got the chamber to reach 49°C maximum. About 25°C over the ambient temperature at the time.
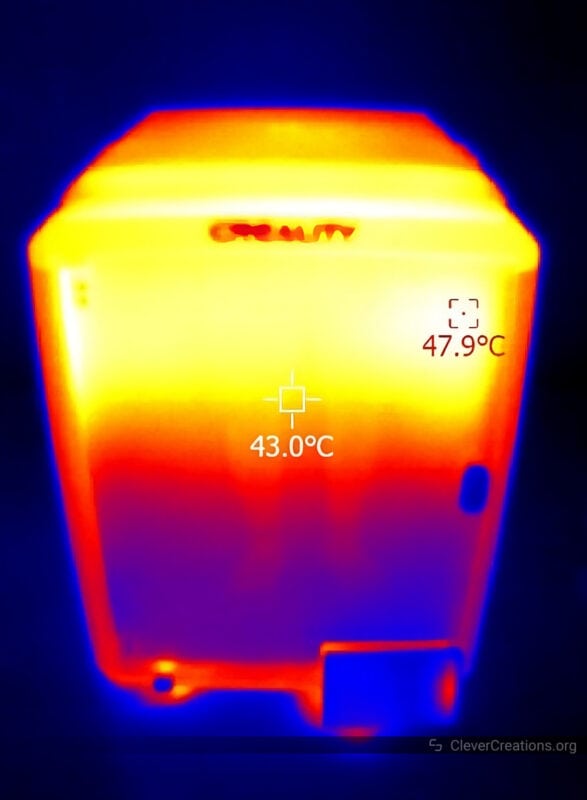
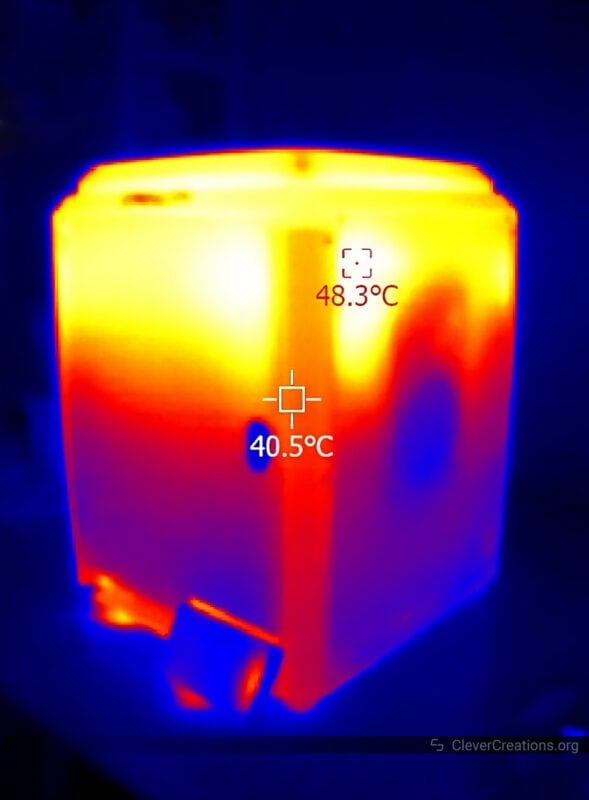
That’s not as good of a temperature as you get with a dedicated print chamber heater, like the one we saw on the QIDI X-Plus 3. Those tend to reach 60-65°C. You also have to wait longer for the print chamber in the K1 to get up to temperature.
What we don’t like about the enclosure lid of the Creality K1 is that it interferes with the PTFE tube that leads to the extruder. It’s bothersome enough that we’ll cover it in a dedicated section below.
Filament Path

The filament path is not something we usually dedicate a whole section to when reviewing a 3D printer, but with the Creality K1, there are a couple of flaws we need to point out.
To start, the filament passes through a PTFE tube that runs through a horizontal cable chain. At the end of the cable chain, there’s a sharp bend that the filament has to pass through.
It’s a similar arrangement to what we saw on the Snapmaker J1s and it is something that creates extra stress on the filament. This stress can cause the filament to break and get stuck in the PTFE tube.
It won’t be an issue with most filaments, but if you are dealing with brittle PLA, for example, it is going to be a problem.
On the Snapmaker J1s, the PTFE tube is mounted to a 360-degree swivel (when viewed from above). On the Creality K1, the PTFE tube and the cable chain can rotate 90 degrees at most. That leads us to the second problem with the filament path.
We found that when the print head is located in the back left section of the 3D printer, the PTFE tube coils up in an unnatural way that creates a very sharp bend in the filament.

It’s bad enough that we recommend not printing at all in this area of the print bed unless you run the PTFE tube outside of the cable chain. It creates so much extra friction that you are going to run into extrusion problems at the high print speeds the Creality K1 3D printer is intended for.
Of course, you can only run the PTFE tube in a larger radius outside of the cable chain if you don’t have the enclosure lid on.

With the machine fully enclosed, the PTFE tube needs to run inside the chain. However, when you do this and the print head travels in the back left area, the bend in the PTFE tube pushes against the lid.

As you can see in the picture above, this puts enough force on the lid to slightly lift it. When the print head moves away, it lowers the lid again. This creates an annoying sound during the printing process and doesn’t promote print quality either.
The easiest way to address this is to not print in the back left area of the print bed when your Creality K1 is fully enclosed. If you do want to use this area, creating an improvised riser for the lid would solve the issue too.
Print Volume
The build area of the Creality K1 3D printer is neither big nor small. Measuring in at 220x220x250 mm, it’s the exact same print volume as you get with an Ender 3 V2.
We’re happy with this choice. Along with the other design choices—like the CoreXY system—it keeps the machine’s footprint small.
For a bigger print volume, you are better off looking at its bigger sibling, the Creality K1 Max. It offers over twice the print volume with its 300x300x300 mm area and is more suited for large-scale projects.
Of the two, the K1 has the most rigidity and can reach higher print speeds without quality loss.
Component Quality

The Creality K1 3D printer uses a good mix of metal and plastic components. We found that the moving components are mostly plastic to keep moving mass to a minimum.
Components that should be rigid, like the print bed, are constructed of metal to maximize stiffness.
The machine also uses genuine Gates timing belts, even though we expect them to wear out faster than intended due to the smooth idlers mentioned earlier.
Pictured above is one of the brackets that hold the XY steppers. Ideally, we’d see it made of aluminum. However, because its design is difficult (and costly) to machine, we understand Creality’s choice to injection-mold it.
Triple Lead Screws

We were very happy to see that Creality went with a triple lead screw setup on the K1. In the somewhat disappointing Ender 5-S1, they used a cantilevered bed that significantly hampered performance at higher print speeds. On the K1, the print bed does not experience any unwanted movement whatsoever.
The three lead screws are tied together in the bottom of the machine through a single belt and a set of pulleys. There’s only a single stepper motor driving them, which is the best way to prevent missing steps between the individual lead screws.

Electronics
Klipper-Integrated Controller Board

Lo and behold, Creality’s new 3D printer controller for (what we assume is) the forseeable future. With two processors—one for driving the 3D printer hardware and one for handling the Klipper firmware—it’s a significant upgrade over Creality’s previous 32-bit boards.
The Klipper-side of things is handled by a new Ingenic X2000E, whereas the 3D printer side is driven by a standard Arm Cortex-M4 GD32F303.
You’ll also find that it has integrated Wi-Fi, so Creality has really gone all-out with making sure it is not dependent on additional circuit boards anymore like we have seen on other Creality 3D printers.
For the stepper drivers, it’s still the silent TMC2209s that we know all so well by now. They work great, and for once Creality has integrated its sensorless homing feature.
The board also has unpopulated Ethernet port pads as well as an unpopulated section for an RS485 serial interface, so we are very excited to see what Creality is planning to do with this board in the future.
Power Supply

The Creality K1 uses a Creality-branded 24V 350W power supply. It’s actively cooled, but it doesn’t make much noise compared to the rest of the 3D printer’s fans.
We don’t think 350W is enough for this machine and we would have liked to see a 400W or even a 450W power supply. This is because the bed itself already draws 310W at maximum load.
Add to that the 60W of the hot end heater, the electronics, and the fans, and it’s easy to see that the 350W maximum output of the PSU is quickly met.
In practice, the bed and heaters will draw less than their rated maximum because the power supply can only provide 350W.
With the power supply near its maximum rated output power for a good amount of time, the durability of the PSU becomes a concern. Only time will tell whether it will hold up.
Safety

We weren’t able to find any noticeable safety concerns on the Creality K1. The metal frame is grounded at multiple points, the high-current cables are crimped, inputs are fused, and all moving wires have proper strain relief.
One potential point of concern is the 60W hot-end heater. With so much power and no thermal fuse on the hot end, it presents a risk in the case of a thermal runaway situation. The same can be said for a 50W heater, however.
Sound Levels
If you enjoy silence, we have bad news for you. The Creality K1, with fans at full blast, is unbearably loud during its 3D printing process. Especially the large side-mounted cooling fan gives the impression of a jet taking off right next to you.
This fan also creates annoying low-frequency vibrations that travel through the frame, your table, and walls. We assume this is the reason why Creality included the additional rubber insulating feet.
The good news is that the fan still provides more than enough cooling when turned down to 50%. At that level, the sound is not bothersome at all.
All other components have negligible sound levels compared to the side-mounted cooling fan, so this is the one to keep in check.
Because the Creality K1 prints so fast, at least you won’t have to listen to its sound as long as with other 3D printers.
Ease of Use
User Interface
One of the gripes we have with the Creality K1 is its extremely simple user interface. There’s hardly anything configurable for the average 3D printer user, let alone advanced settings for the more experienced of you out there.
For example, you can’t adjust print speed or flow rate on the fly, nor can you adjust the Z-offset during the first layer. Forget about adjusting steps/mm or maximum speed/acceleration settings through the UI as well.
The same goes for the web UI that you can connect to over Wi-Fi. It’s as barebones as it gets and pales in comparison to a complete fluidd interface. There’s not even a console window present that you can use.

It’s possible that Creality will update this through firmware updates at some point, as we’ve seen the company do with the Creality Sonic Pad. But as it stands, the user interface is nowhere near as feature-rich as we’d like it to be.
For reference, we’ve tested with the Creality K1 firmware up to version 1.2.9.21.
Screen

The touch screen of the Creality K1 3D printer, on the other hand, is great. It’s as responsive as it gets and has a dense resolution that is suitable for displaying lots of information and settings—provided that the UI will be updated to match.
Compared to Creality’s previous screens, it’s a massive improvement.
You’ll also find that the screen is more than bright enough to work in any lighting condition. There’s an option in the settings to adjust the brightness if you need to.
Connectivity

There’s only one USB port for you to use on the Creality K1. There’s no Ethernet or SD card slot, so if you want to use a USB stick to transfer files and control the device over USB, you can’t do so at the same time.
In practice, we did not find it that big of a problem. Because the 3D printer comes with built-in Wi-Fi, it’s easy to connect to it wirelessly and both upload files and control the machine remotely.
If you don’t have that option, for example, if your shed or garage has spotty Wi-Fi, then the single USB port can pose a problem.
Maintenance and Repairability
For a CoreXY 3D printer, the Creality K1 is relatively easy to work on. Despite the compact area in which the motion components are packed, they are not difficult to access.
Similarly, the extruder and hot end are easy to work on. Compared to the previous Sprite extruder, the gear assembly of the K1 is much easier to access.
To reach the area in the machine’s underbelly, you only have to remove two screws and the four feet. Once you do that, you have access to both the electronics and lead screw belt system. It’s as easy as it gets.
Creality K1 Print Quality Tests
Most of the prints below were at or slightly above the recommended printing speed of 300 mm/s. At full speed (600 mm/s), we ran into print quality problems with regular filaments. We recommend switching to hyper PLA filament if you really want to hit the maximum printing speeds.
We used Cura as slicer software for these test prints, but you can use Creality Print and Creality Cloud with the Creality K1 as well. Our preference goes to Cura, as it has the newest features and we are more familiar with it.
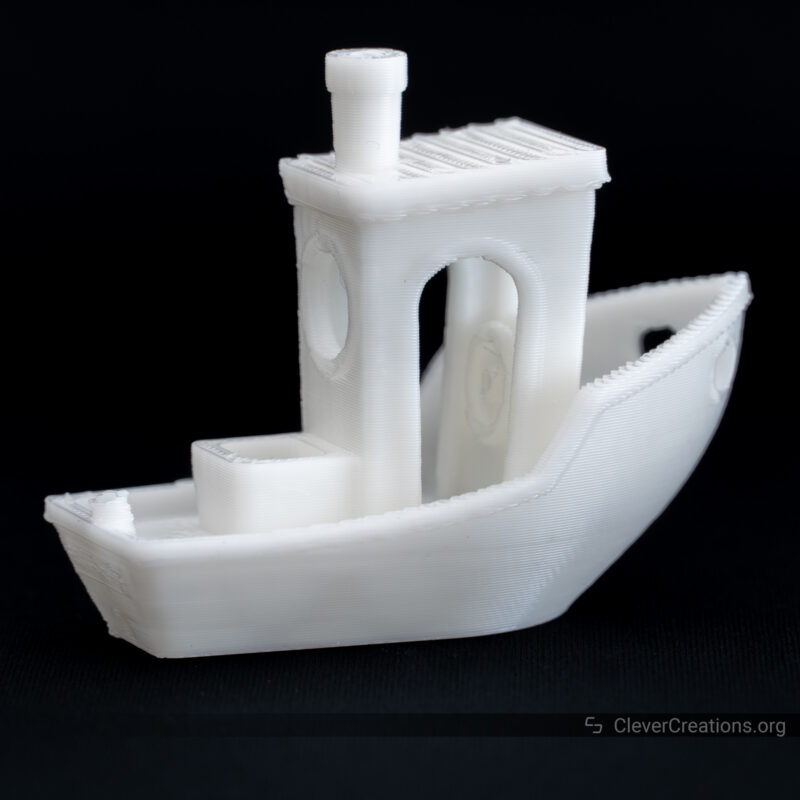
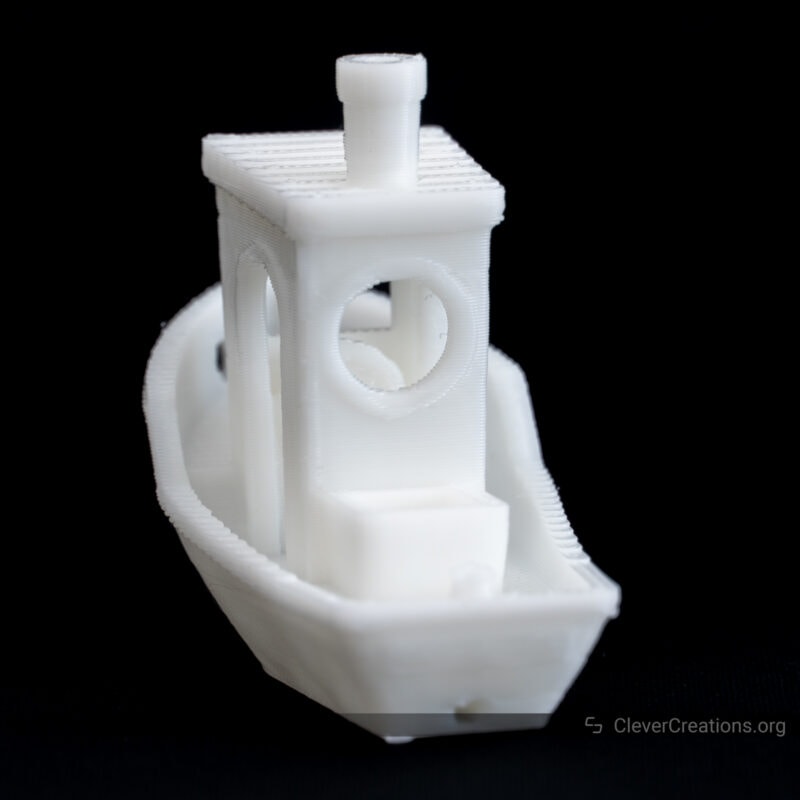
3DBenchies
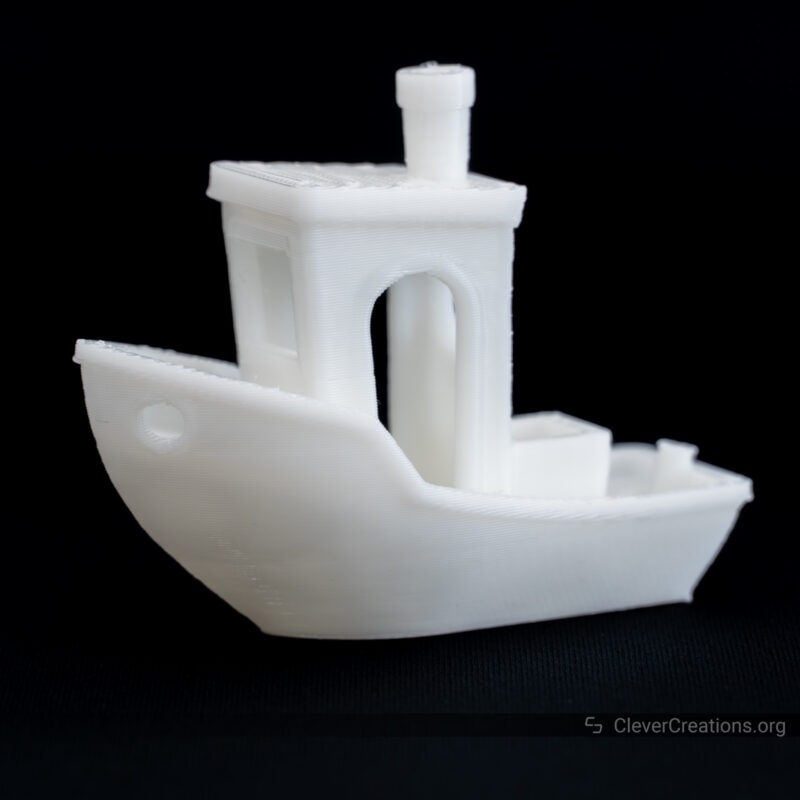
After calibrating the K1, we ran the included GCode for the 3DBenchy test piece and were quite satisfied with the result. As promised, it came out after around 15-17 minutes of printing. Despite that, the quality is as good as with any other printer.
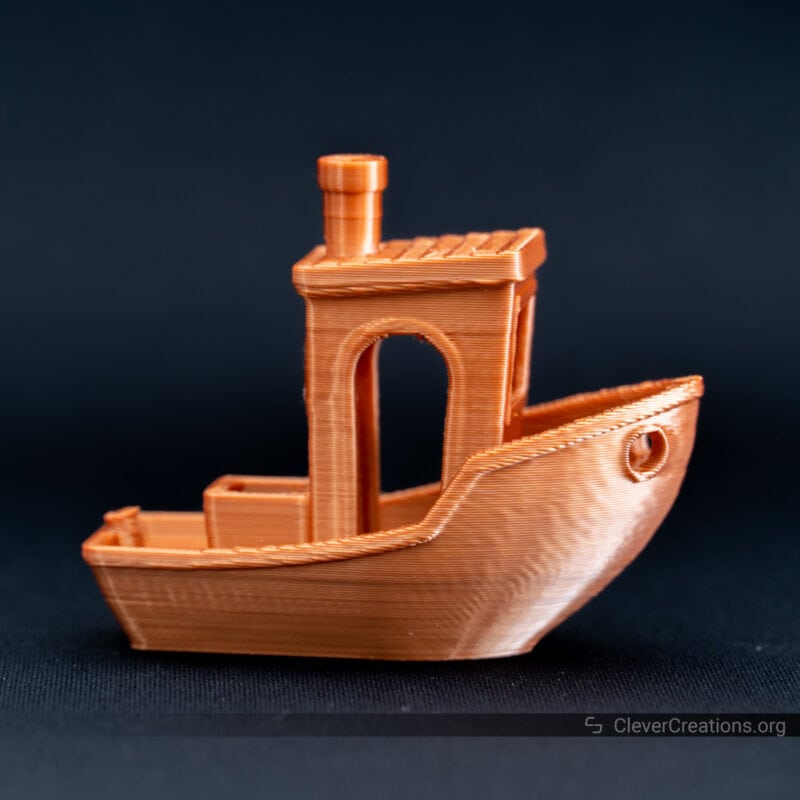
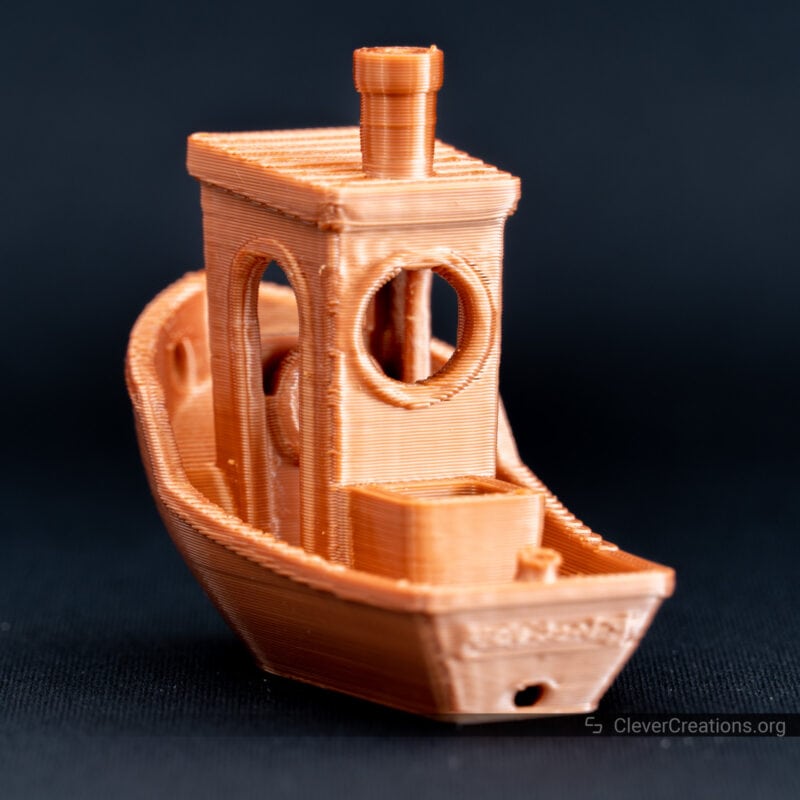
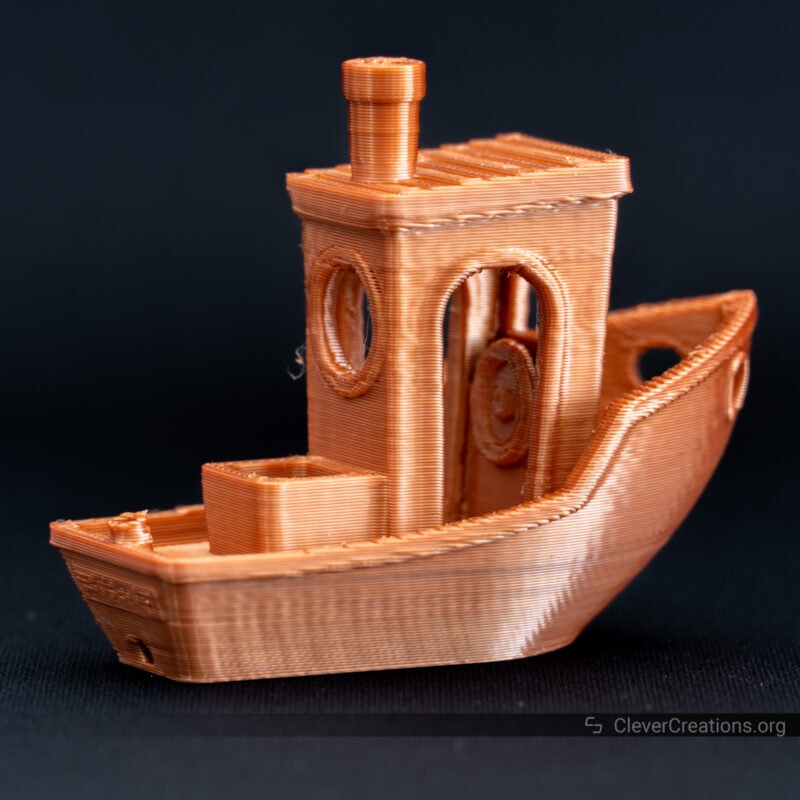
We printed two versions. One with the included white Hyper PLA filament, and the other with Creality’s copper silk filament.
The copper version has notably more corner bulging and ringing. We’re not entirely sure if that is due to the different types of filament or whether these issues are just less visible on the white version. Even looking up close, we could not detect them.
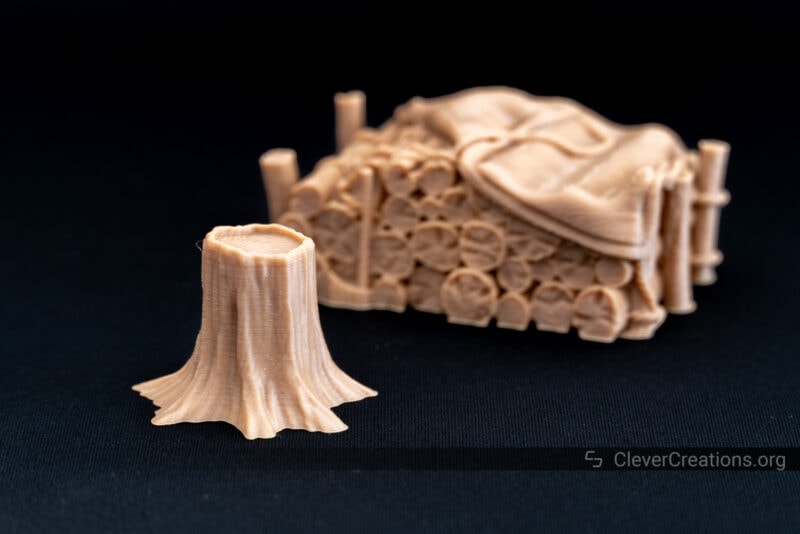
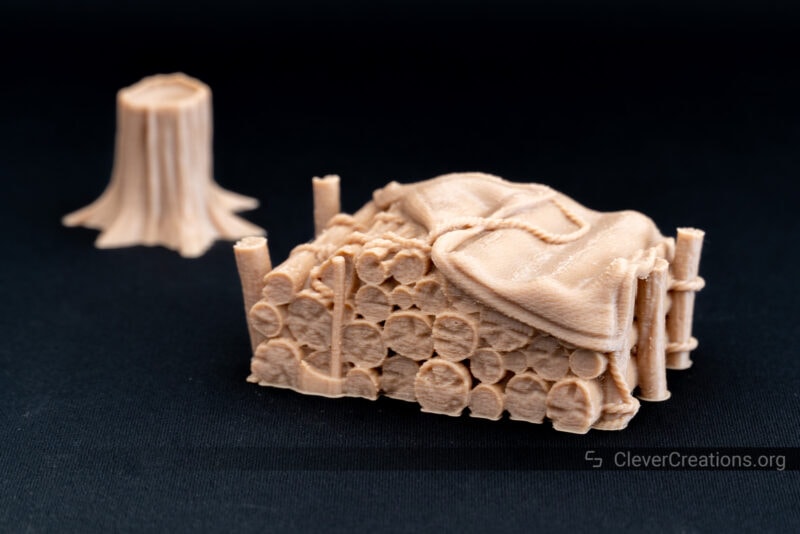
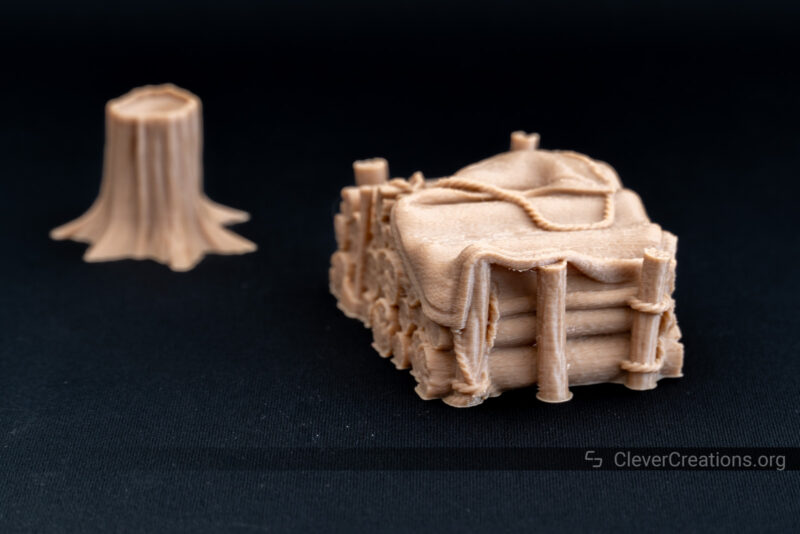
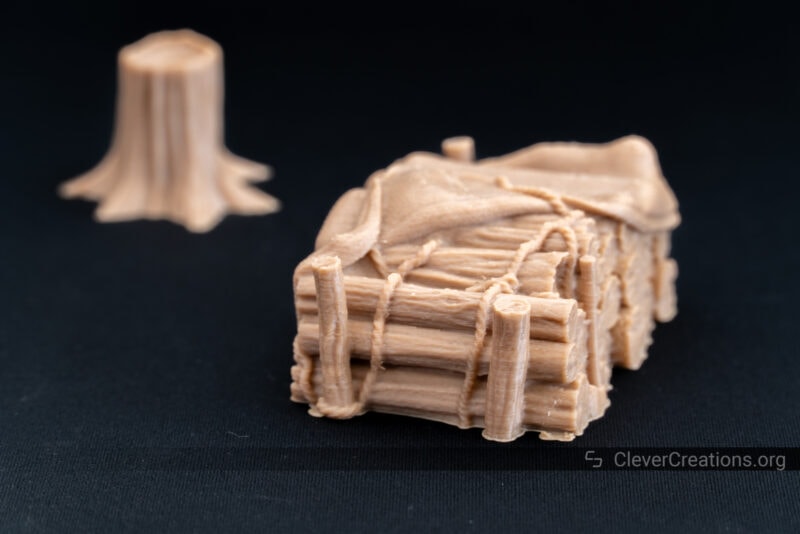
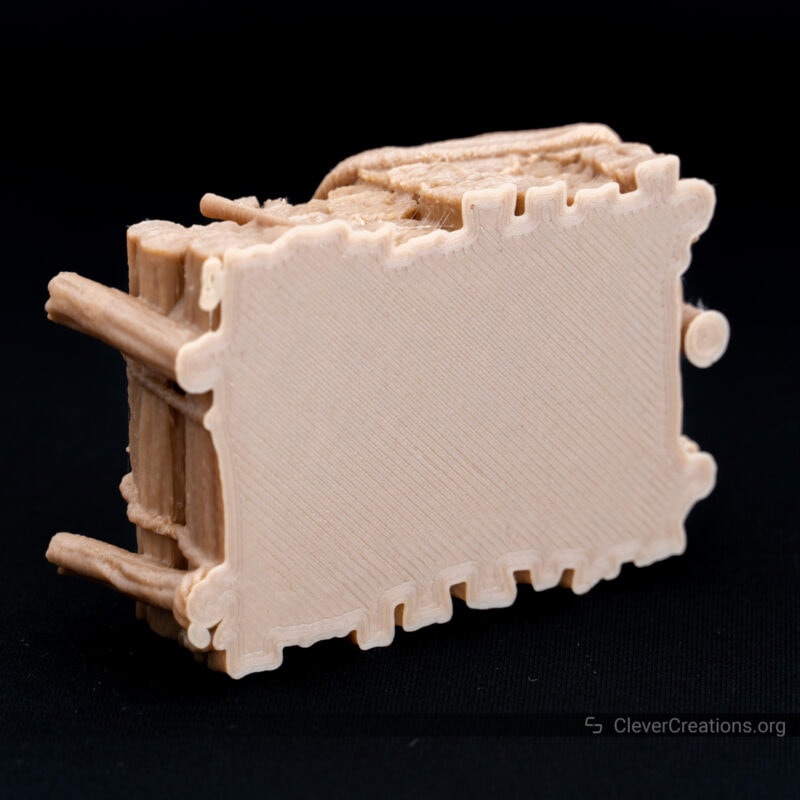
Stack of Wood
To test the Creality K1 with wood filament, we 3D printed this stack of wood along with a 3D model of a tree trunk. Both models were printed at a 100 micron layer height to get as much detail as possible.
Ordinarily, printing at 100 microns or below increases printing time significantly, but with the K1, you can 3D print highly-detailed models without having to worry as much about print time.
There’s a small brim around the wood stack due to an oversight with our print settings. Don’t confuse it for elephant’s foot, the first layer came out non-squished as intended.
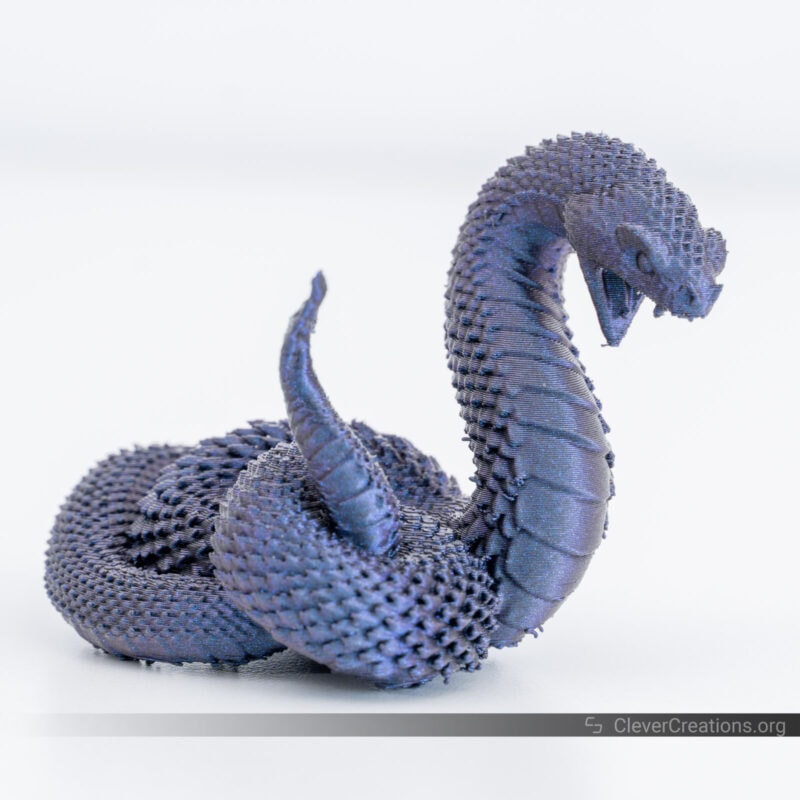
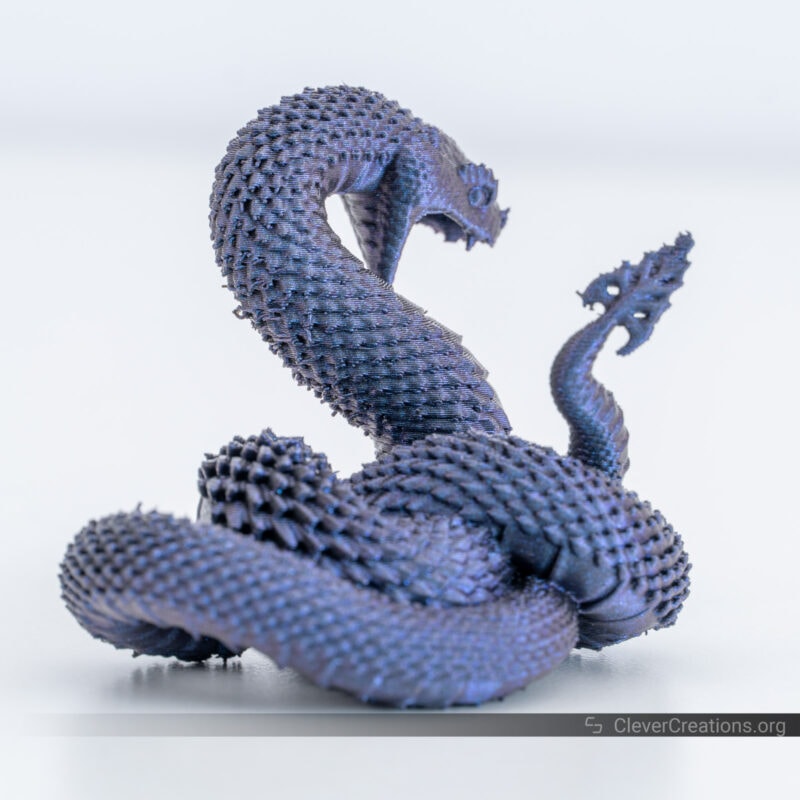
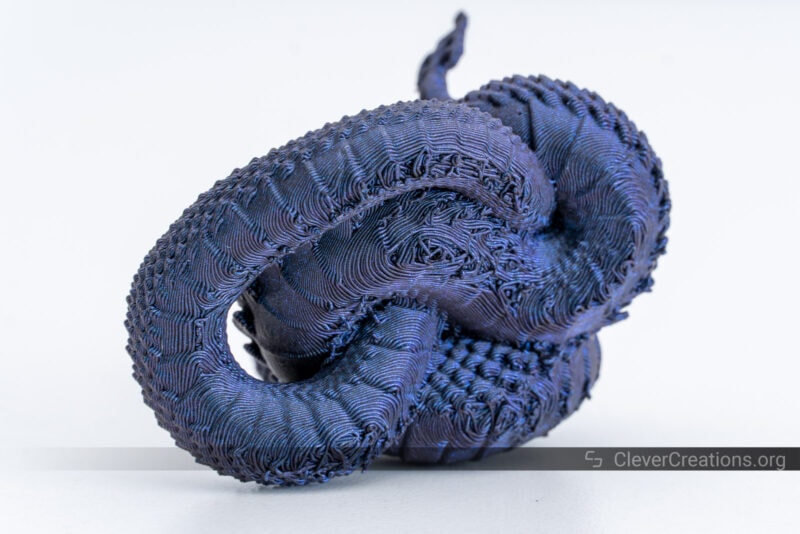
Coiled Viper
Unfortunately, we lost the link to this amazing 3D model. Nevertheless, the Creality K1 printed it with excellent quality and detail. We used tree supports to support all overhangs and they were removed easily without leaving any marks. Very impressive results!

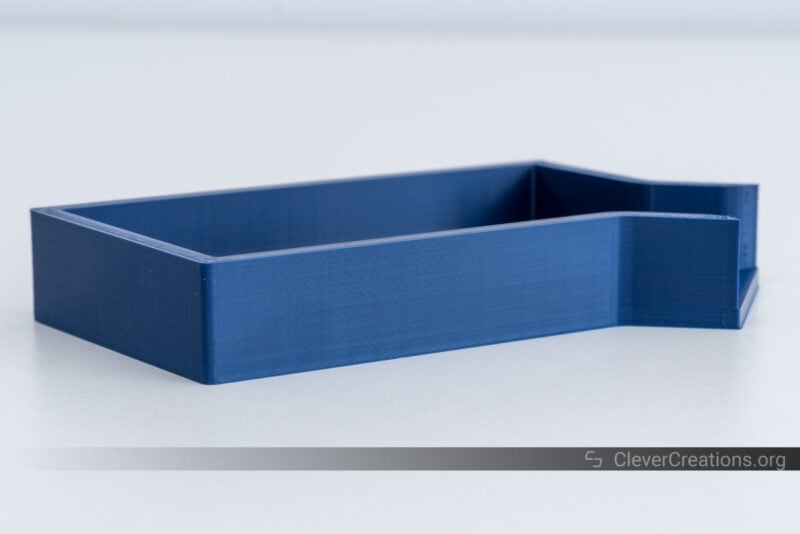
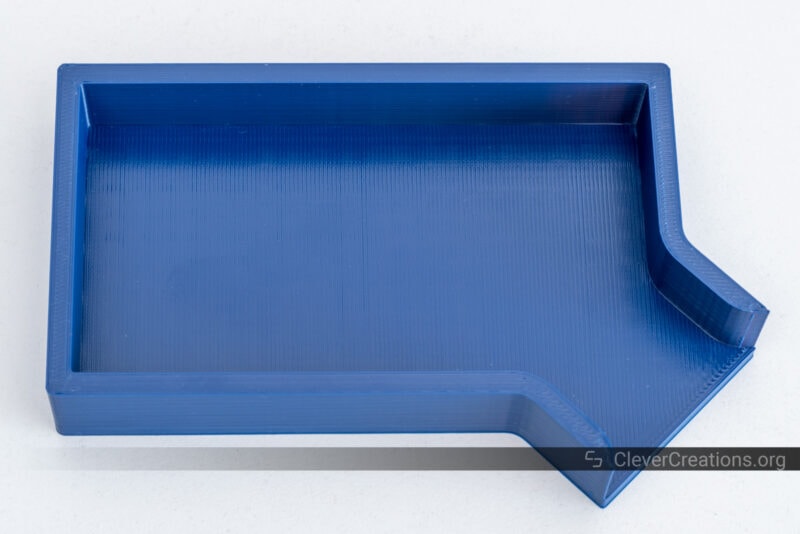
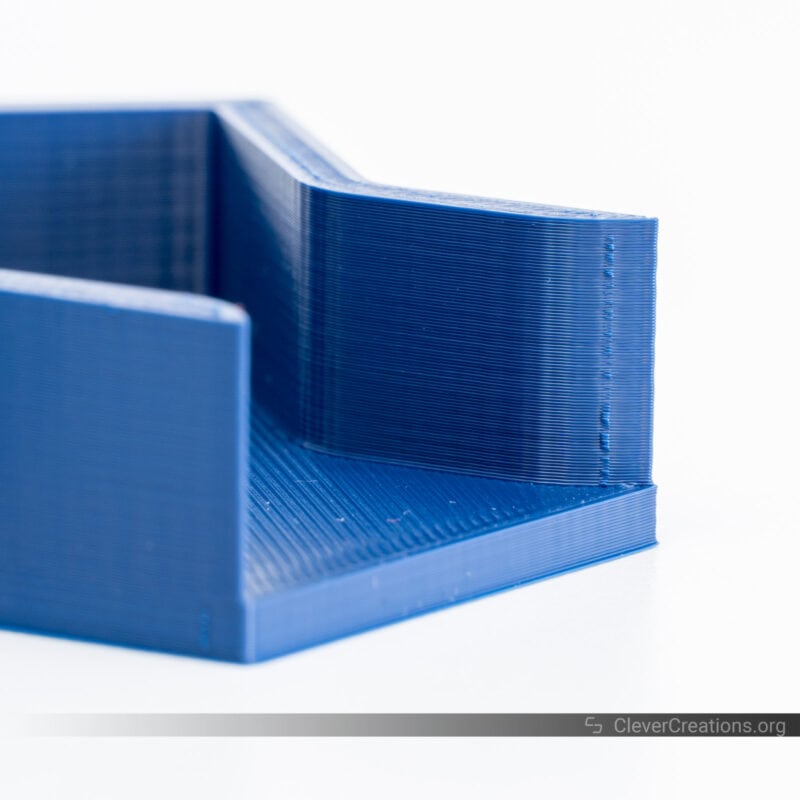
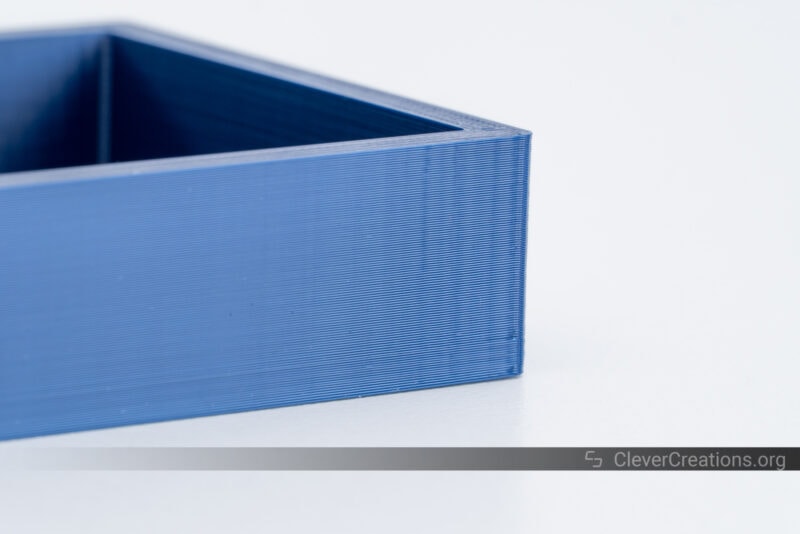
Small Parts Tray
Not a very interesting print, but a good one to test how the Creality K1 handles ABS filament. As it turns out, very well. The bed adhesion (with PVA glue this time) was great and there was no warping whatsoever. We heated the print chamber up to around 40 °C before starting the print.
There’s a bit of ringing on some of the corners, which is why we recommend dialing down the default acceleration and jerk settings. The stock ones are too aggressive if you want the smoothest surface finish on your 3D prints.
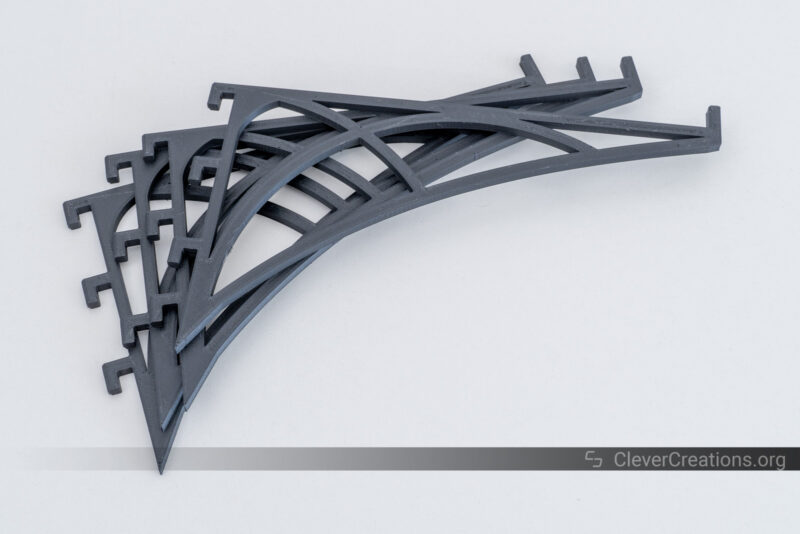
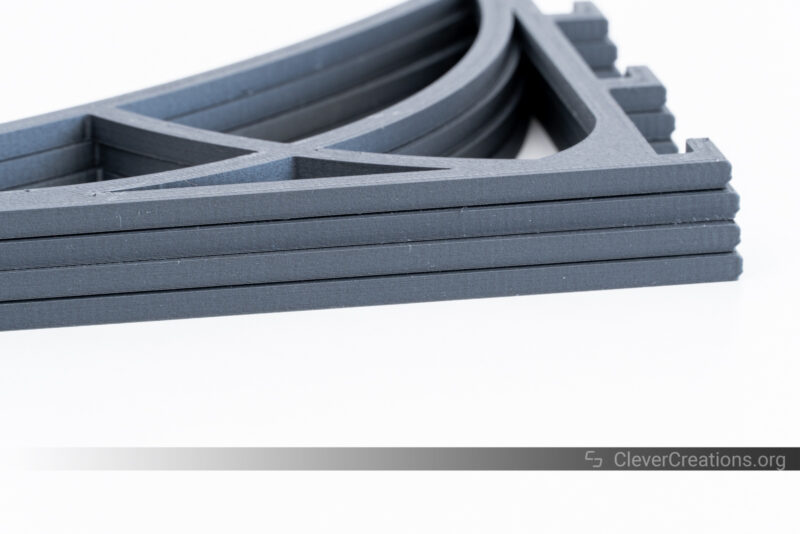
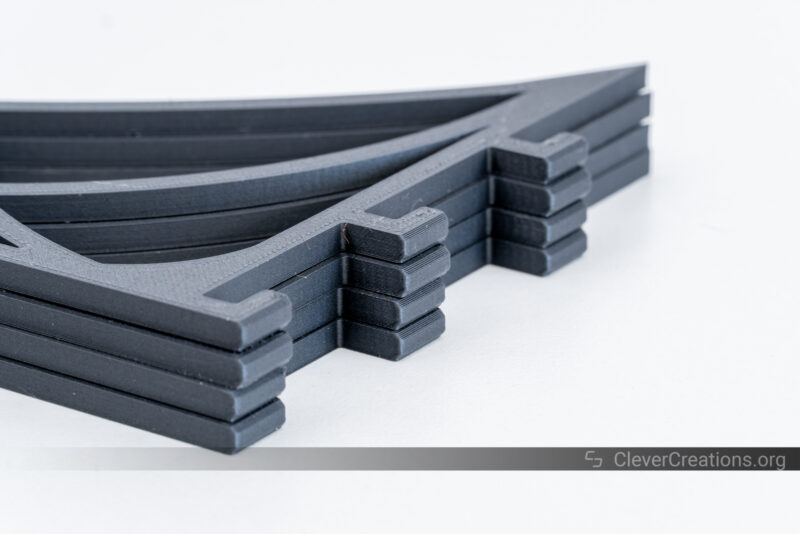
IKEA SKADIS Shelf Supports
Curious to see how the Creality K1 prints a carbon-filled material like PLA-CF, we decided to use this filament to 3D print some IKEA SKADIS shelf supports.
The results were great once again. Smooth layers, no warping, and an overall good finish. It turned out that this is also a very easy CF filament to print, but the K1 certainly helped.
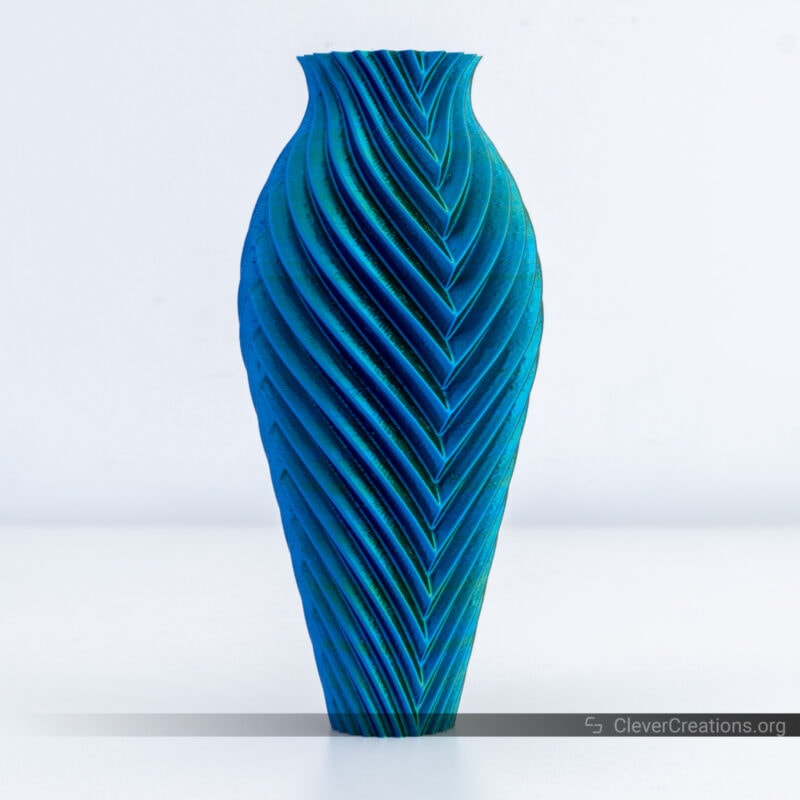
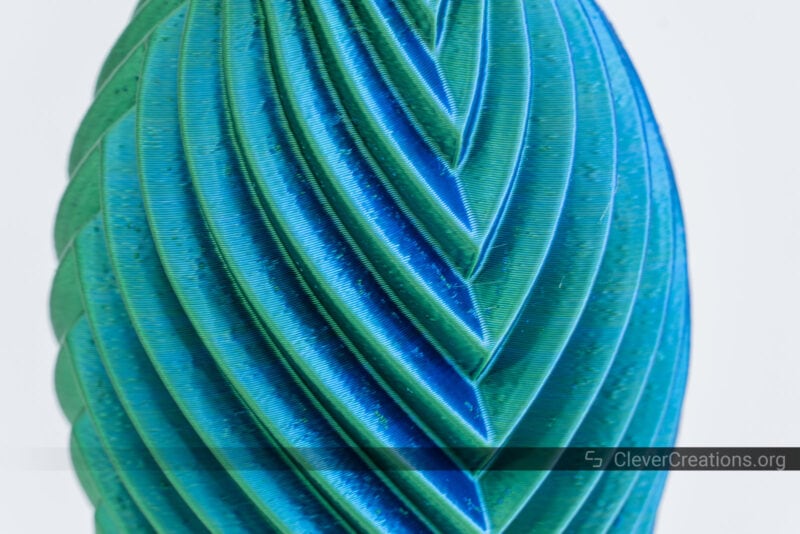
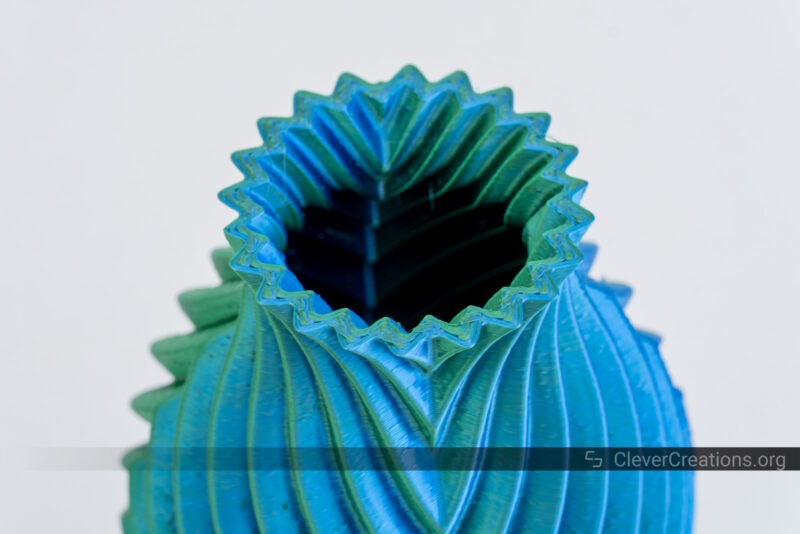
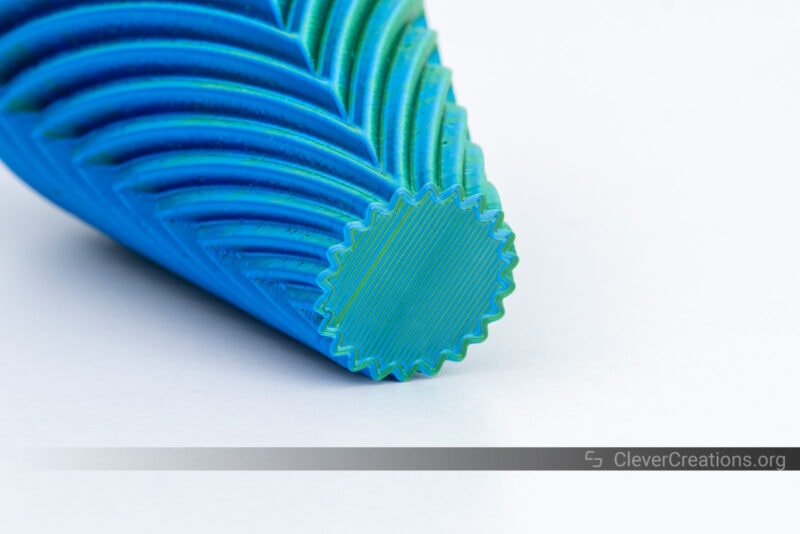
Cross Cut Vase
This was the 3D print we were most disappointed with. This spool of filament just didn’t want to print quickly. You can see the poor surface finish compared to the other 3D prints.
Ordinarily, we’d replace this with a better-looking print, but we kept it in this Creality K1 review to show that it’s not all roses with every filament.

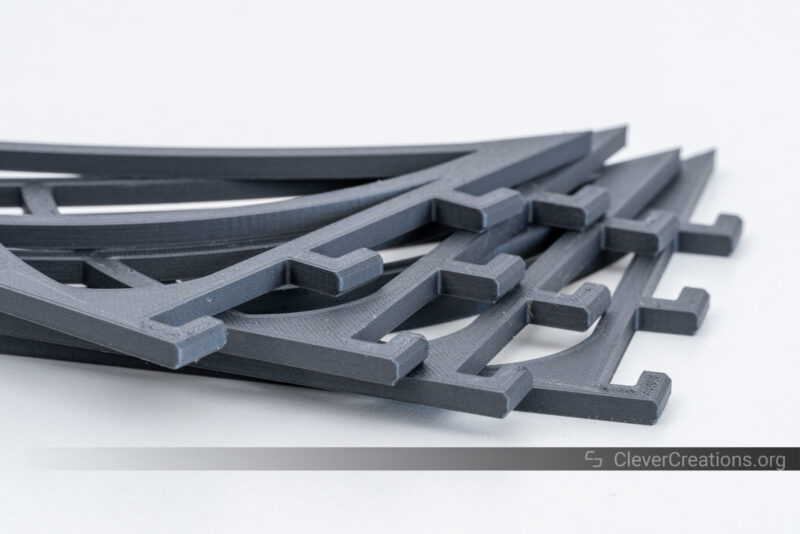
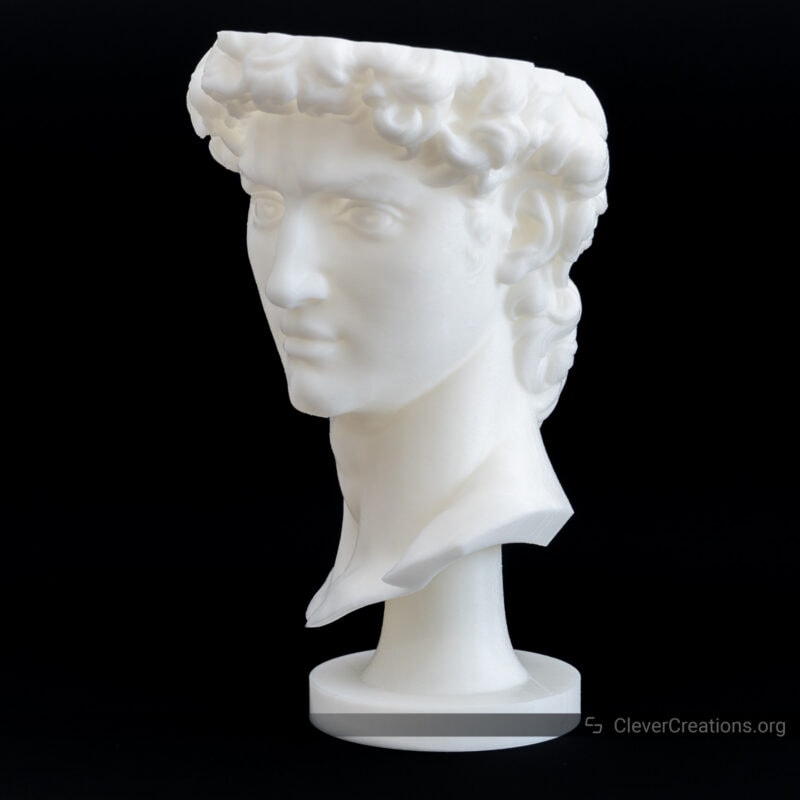
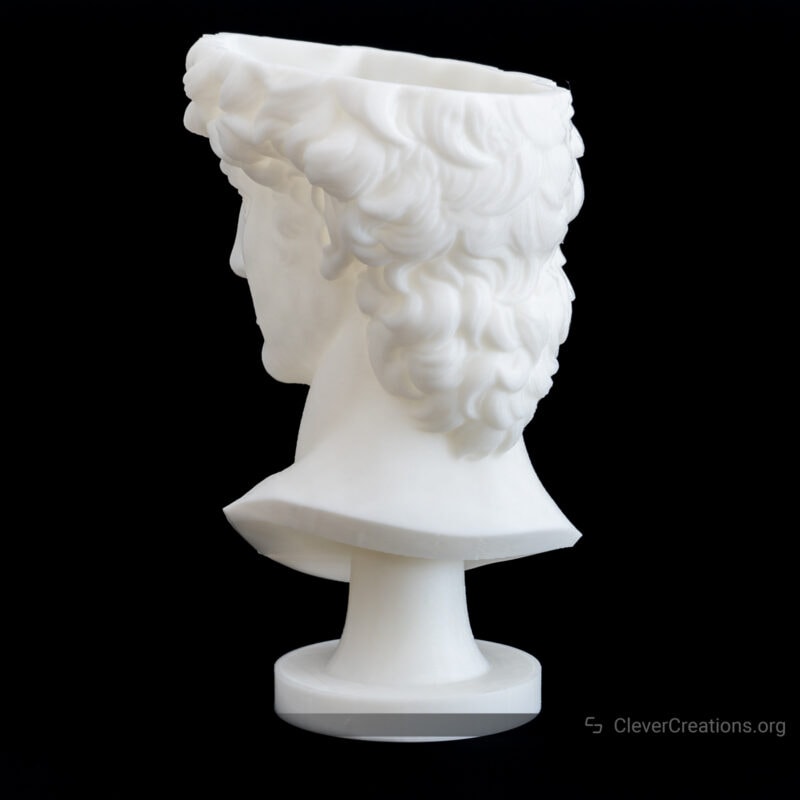
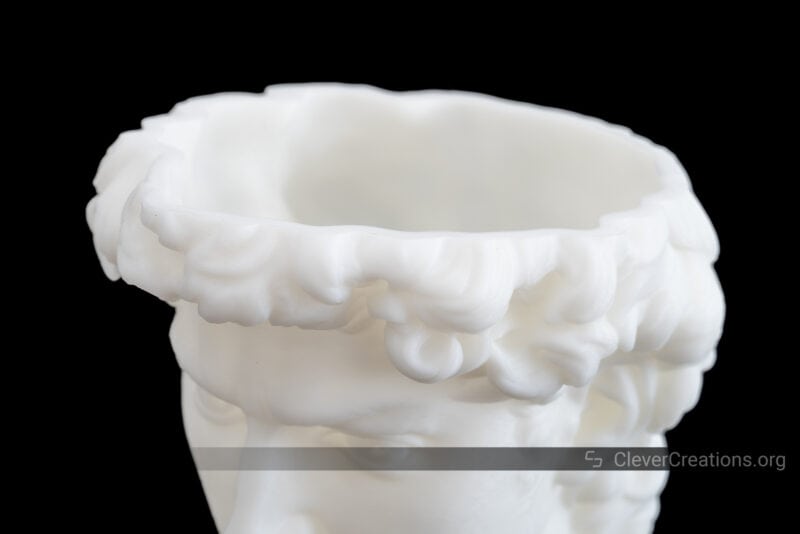
David Flowerpot
We’re also happy with the result Creality’s K1 achieved on this print. The overhangs came out great, the details are well-defined and best of all, it took a fraction of the time to print compared to a standard FDM 3D printer.
Ordinarily, we’d need a whole day to print something like this, but with the K1 it was done in around four hours.

Alternatives to the Creality K1
Creality K1 vs K1 Max
As siblings in the Creality lineup, the K1 and K1 Max have many similar features. Both use the same extruder, hot end, touch screen, electronics, and offer identical print speeds.
Their main difference is in their build volume, with the K1 Max having more than double the build volume of 300×300×300 mm versus the K1’s 220x220x250 mm.
The K1 Max also has a more powerful power supply, a hardened nozzle, an air purifier, as well as a higher maximum print bed temperature. All of these make it a more suitable machine for both larger prints and high-speed 3D prints with more exotic materials.
In addition, the K1 Max also comes with the AI camera system pre-installed, which allows you to monitor your prints from anywhere. On the K1, it’s merely an optional accessory.
If you can make use of its increased build volume and superior material handling capabilities, the K1 Max is a great upgrade from the K1. At around $300 more than the K1, it still provides excellent value.
Qidi X-Plus 3
The QIDI X-Plus 3 is QIDI’s newest release focusing on high-speed printing. It has a much larger 280x280x270 mm print area, a higher 350 °C temperature hot end, as well as an independently heated print chamber that reaches up to 65°C.
We have tested it in our QIDI X-Plus 3 review and were pleasantly surprised with its performance and filament compatibility.
It shares many similar features to the Creality K1, like its print speed, Klipper firmware, and print cooling. However, for its extra benefits, you do have to spend about $300 more than on the K1.
The Qidi X-Plus 3 is probably more of a K1 Max competitor than a replacement for the K1, but it is still worth considering for its excellent value.
Bambu Lab P1P
There’s no denying that the Creality K1 and Bambu Lab P1P have a lot in common. They are both recent CoreXY 3D printers with similar maximum print speeds and accelerations, all-metal hot end, and print volume. Technically, the P1P has a slightly bigger print volume, but the difference is negligible.
Both also offer firmware features like input shaping and pressure advance, even though Bambu Lab’s closed-source non-Klipper approach does not rub everyone the right way. The same goes for the accessories, which you can only get from Bambu Lab themselves (i.e. more expensive).
You’ll also need to fashion an enclosure for the P1P if you want to print high-temperature filaments, whereas the Creality K1 comes fully enclosed. It’s an extra cost that is often overlooked.
The P1P’s hardened nozzle can be an argument for people who print a lot of carbon-filled, wood-filled, or other abrasive materials. However, it’s not that hard to swap the K1’s Volcano-style nozzle out with a hardened version.
In terms of costs, you can expect to spend around $100-$200 more for the P1P depending on offers and where you are located.
Bottom Line: Is the Creality K1 3D Printer Worth Buying?
After having thoroughly tested the Creality K1, we can say that the 3D printer has a lot of potential and speed advantages, but it certainly isn’t for everyone.
To start with the positives, the K1 offers unique advantages in 3D printing speed. It’s a great 3D printer for anyone who needs to print parts fast in various filaments and with good quality.
Its innovative bed leveling system worked great in our testing, and it’s a big time-saver. Without even having to set Z-offsets anymore, you can spend less time trying to get your first layers right and more time 3D printing.
Its triple leadscrew design is also a great asset and helps keep the print bed in place even during very fast 3D printing speeds. It’s not something we often see, aside from on some CoreXY kits, which gives the K1 a clear advantage in print quality.
That said, there’s still a lot that can be improved. For example, its CoreXY system could have been better. The non-aligned belt paths and smooth idlers are not something we expect from a company of Creality’s size. The constrained filament path limits the use of the machine as well.
The UI and web UI also still need work. Its stripped-down fluid interface is not enough for enthusiasts or even intermediate 3D printer users to work with. We’ve seen that Creality updates their firmware relatively often and we hope they will update the K1’s firmware soon to address these things.
Despite that, the K1 is a good 3D printer for its roughly $600 price. Compared to the rest of the fast 3D printer market, it provides good value. Just make sure you don’t mind implementing upgrades and mods where necessary.


have been waiting for this one, thanks
I found printing PLA LW a pain, the slicer that did it the best for me was S3D, but I still got blockages when the print slowed down toward the end on some prints and always within the PTFE tubing between the extruder and heatsink.
Extensive and valuable review, but the tests we’ve done here with a k1 do not match at all with this review. Simply put, it sucks when printing any filament other than creality filaments when using creality software default settings. Even at slower speeds like 60mm/s does not print well . Tweaking settings is required for each filament. 3dbenchy goes easy on testing printers, and that’s why they provide it, and you can test the 3d flying piggy bank model to check if it fails to print well even with creality hyper PLA. It did here and we can share photos on the results.
Using Cura might be a good idea.
Hey Joe,
Some people have had issues with the extruder/hot end of the first batches of the Creality K1. The new K1 version comes with an updated extruder and hot end to address those issues.
Is it possible that your tests were done with a faulty extruder or hot end?
For the record, our review was made with the earlier version of the K1. But our unit was free of extrusion problems.
Tim