- Rapid print speeds
- Excellent print results across various materials and settings
- Powerful print cooling
- Automatic bed leveling and Z-offset
- Hardened nozzle for abrasive materials
- Easy to use touchscreen
- Various minor improvements over K1
- Proprietary nozzle design limits replacement options
- Plastic-geared extruder
- Nozzle is not easy to swap
- Ineffective air filter
- Noisy
- No dedicated chamber heater
- Max. 38°C chamber temperature
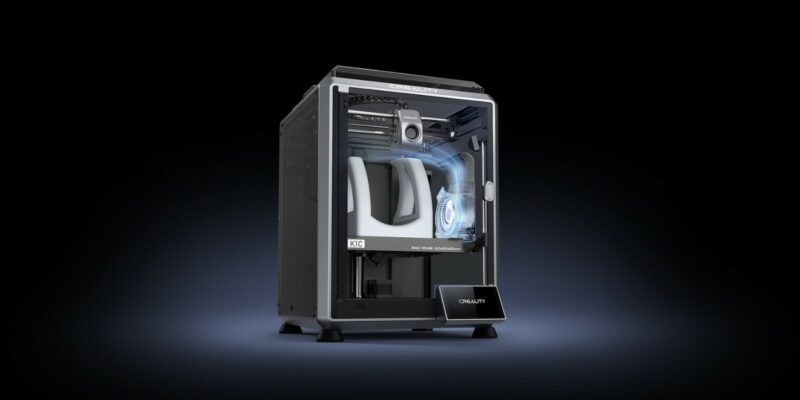
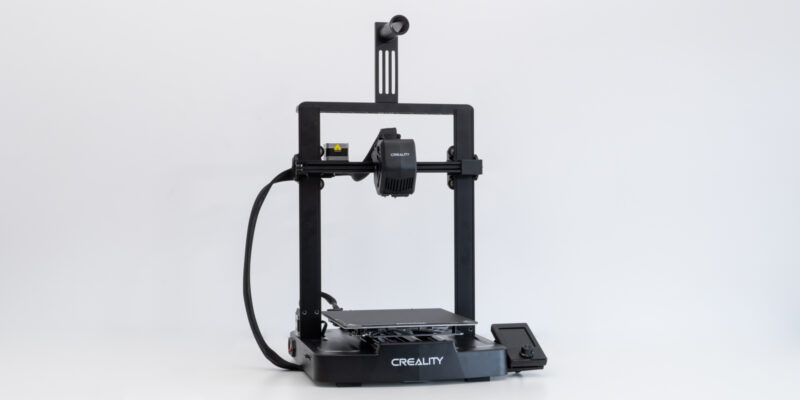
The 3D printing landscape has seen a flurry of activity recently, with Creality releasing its new K1C 3D printer. It’s focused on both fast and carbon fiber infused 3D printing—hence the “C” in its name—and it aims to deliver you a wide range of capabilities.
Following the mixed initial reception of the K1, we’re excited to show you how the Creality K1C will fare in today’s competitive 3D printing market. Not only we’ll be testing whether the machine delivers on its promises, but we’ll also show you if it is worth the extra money over the K1.
Because the K1 and K1C are very similar and we don’t want to waste your time by unnecessarily repeating ourselves, we’ll focus mostly on the new features and recommend you check out our Creality K1 review if you need additional context.
Now, let’s dive into this Creality K1C review!
Creality K1C Specifications
| Feature | Specification |
|---|---|
| Printing Technology | FDM |
| Leveling Mode | Hands-free auto leveling |
| Build Volume | 220x220x250 mm |
| File Transfer | USB drive, WiFi |
| Product Dimensions | 355x355x482 mm |
| Display Screen | 4.3″ color touch screen |
| Printing Speed | ≤600 mm/s |
| Acceleration | ≤20000 mm/s² |
| Air Purifier | Yes |
| Input Shaping | Yes |
| Lighting kit | Yes |
| AI Camera | Yes |
| Power Loss Recovery | Yes |
| Filament Runout Sensor | Yes |
| Layer Height | 0.1-0.35 mm |
| Extruder | Clog-free direct drive extruder |
| Filament Diameter | 1.75 mm |
| Nozzle Diameter | 0.4 mm |
| Supported Filaments | ABS, PLA, PETG, PET, TPU, PA, ABS, ASA, PC, PLA-CF, PA-CF, PET-CF |
| Nozzle Temperature | ≤300℃ |
| Heatbed Temperature | ≤100℃ |
| Build Surface | PEI flexible build plate |
| Printable File Format | G-Code |
| Slicing Software | Creality Print, Cura 5.0 and later version |
| File Formats for Slicing | STL, OBJ, 3MF |
| Rated Power | 350W |
| UI Languages | English, Spanish, German, French, Russian, Portuguese, Italian, Turkish, Japanese, Chinese |
What’s New on the Creality K1C?
Having the Creality K1 and K1C side-by-side in our testing lab, it is fairly easy to identify the differences between the two machines. While there are a good number of differences, we don’t consider any of them to be real game-changers. Let’s go over them one-by-one.
Hardened Nozzle

The most noticeable upgrade in the Creality K1C is the hardened nozzle. It has more durability and longevity compared to your standard brass variant.
If you want to 3D print with abrasive materials like carbon fiber, metal-filled, or glow-in-the-dark filaments, this is the feature you want. It’ll save you both money and time on buying and installing replacement nozzles.
In our testing, the nozzle performed as expected. It dealt with carbon fiber-filled filaments well (PLA-CF, PA-CF, and NylonX). Despite its non-brass structure, it still showed sufficient thermal conductivity to print flawlessly with all filaments and speeds.
That said, it’s not like we put kilos of abrasive filaments through. The true test of the hardened nozzle’s durability is its long-term use, which we’ll continue to monitor and update you on.
Negatives

There are also several things that bother us about the nozzle, however. The first is that changing the nozzle is not as easy as the marketing materials suggest. The second is that the nozzle uses a proprietary design.
The marketing materials suggest a simple twist-and-go method, but in reality, it requires a bit more elbow grease. To access the nozzle for a change, you’ll need to partially disassemble the print head assembly and remove the hot end’s silicone sock, which can be time-consuming and somewhat daunting, especially for beginners.
Additionally, the proprietary design of the nozzle means that sourcing a spare or replacement needs to come from Creality. It’s a more difficult and costly solution than being able to buy a standardized nozzle as replacement.

AI Camera

Whereas the Creality K1 had the ‘AI’ camera as an optional accessory, the K1C comes with it as a stock feature. It’s ideal for monitoring your 3D prints remotely. It allows you to keep an eye on what’s going on when you’re not right next to your printer.
You can also use the camera for creating time-lapses to showcase your 3D printing projects from start to finish on social media or to friends and family. For example:
In addition, the camera can detect print failures and pause the print job, reducing the risk of wasted filament and time. This is not something we’ve tested. It requires connecting the machine to Creality Cloud and we avoid connecting devices on our network to external networks whenever possible for security reasons.
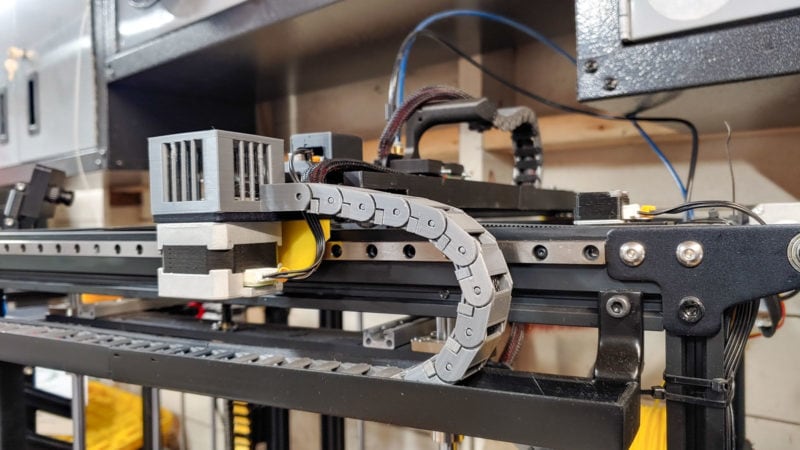
Cable Chain

Something else we noticed is that the design of the K1C cable chain has been improved. It’s raised by about a centimeter compared to the K1 and it doesn’t interfere with the machine’s frame anymore.
The increased height also creates a less constrained arc where the PTFE tube enters the extruder, reducing the amount of friction on your filament. It’s a good improvement, but in our opinion one that should have been made on the K1 in the first place.
In our K1 review, we noted that when the print head moves to the top left corner of the 3D printer (when viewed from above), the PTFE tube coils up in an unnatural way. This issue is still present in the K1C, but a bit less severe.
As a result, we still recommend you avoid 3D printing with brittle or stiff (e.g. carbon-filled) filaments in that corner. The extra tension on them can cause them to snap more easily.

Extruder Design

The extruder woes that plagued the initial versions of the K1 aren’t present on the Creality K1C. While 3D printing with different materials at a wide range of speeds, we didn’t encounter any extrusion inconsistencies, filament grinding, or clogs.

Putting the K1C and revised K1 extruders side-by-side, the most notable difference is the beefier pneumatic tube coupling. We found that it holds the PTFE tube much better. It also doesn’t need a small blue clip to secure the tube in place.
The initial marketing materials of the Creality K1C mentioned an all-metal extruder. We did not find one on our sample of the K1C. The gears were still plastic and you can expect these to wear out much quicker than metal ones would.
 gears in the Creality K1C extruder.")
Air Filter

Also new on the Creality K1C is the air filter. In theory, it should reduce the amount of potentially harmful particles and fumes that are released during 3D printing. Especially when working with materials that release a lot of 3D printer fumes, like ABS filament, a good filter is worth its cost.
We emphasize a good filter, because the filter of the K1C is poorly designed. It consists of a bunch of carbon granules in a mesh with massive empty gaps in between.

When we first saw the filter, we were surprised and had to double-check that we didn’t miss anything. This is the actual filter, however, and it’s safe to say that it does practically nothing in terms of filtering out particles and fumes.
For context, proper air filters use multiple layers of fine, dense mesh. In between, you find gaps large enough to let air molecules pass through, but small enough to capture fumes and other small particulates. This is also the design you typically see in HEPA filters.
It’s a shame that Creality decided to go this route, because a well-designed air filter could have made a big difference on an enclosed 3D printer like the K1C. As it stands, if you’re planning to print with materials that release a lot of fumes, you’re best off running a hose from the air outlet to a window.
To us, it feels like the filter is only there to check the box that says the K1C has an air filter. In terms of performance, we didn’t notice any difference in smells when 3D printing with the filter on or off. Given its design, that did not come as a surprise.
Small Stuff
The Creality K1C has a bunch of smaller improvements as well. We don’t think we can classify these as features, but more as things that stood out to us after handling both the K1 and K1C.
Door Design

The door of the Creality K1C feels less loose than that of the K1 and we believe that the hinge design has improved. Where the door of the K1 freely floated, K1C’s door has friction to it that causes it to stay in place. The door still has an awkward max. 95 degree opening angle, so it’s always pointing in your direction when fully opened.

Another change is the addition of rubber padding on the corners of the doors. On our product sample, these weren’t secured properly and they fell off quickly. We ended up taking them off permanently and hope Creality will add adhesive to them on the production runs.

Rubber Feet

The K1C 3D printer’s rubber feet come pre-installed and are permanently attached to the machine itself. This is a big improvement over the loose rubber feet that came with our K1. Those feet we had to place onto our 3D printer desk before placing the 3D printer on top.
Nozzle Wipe Strip

The print bed of the K1C comes with a rubber strip that the machine uses to wipe its nozzle on before each print. It’s a nice addition that prevents residual filament from sticking to the nozzle and interfering with the first few layers of your print. It also reduces the need for regular 3D printer nozzle cleaning.
We haven’t done any testing on the durability of the strip, but it’s likely that it will start showing signs of wear and tear at some point.
Overall Experience & Thoughts
Aside from the Creality K1C’s new features listed above, there are plenty of other things worth pointing out based on our experience with the K1C.
Standout Features
Automatic Bed Leveling and Z-Offset

Just like on the K1, the print bed of the K1C 3D printer is mounted on four pressure-sensitive load cells. The machine uses these for automatic bed leveling, capturing data that lets it compensate for unevenness in the print surface.
No matter if you are a beginner or advanced user, this saves you a lot of time on poorly sticking prints or manually adjusting bed leveling screws.

The K1C also uses these load cells to set the Z-offset automatically. When the load cells detect the nozzle touching the print surface, the machine sets its Z-position to 0. This eliminates the need for the paper test or a different manual method for setting the Z-offset.
This is particularly useful when you regularly remove and put back the print surface, because the pre-print calibration automatically corrects the Z-offset before starting the actual printing.
In practice, we found this system to work flawlessly. All materials we tested stuck well to the print surface, and for filaments like PLA we didn’t even need a bed adhesive.
Klipper Firmware
One of the standout features of the Creality K1C is its use of Klipper firmware. If you’re not familiar with Klipper, it’s an open-source firmware that combines the power of your 3D printer’s microcontroller with the processing power of a Raspberry Pi or similar single-board computer. The result is faster and more accurate 3D printing.
On the K1C (as well as on Creality’s other 3D printers with Klipper), the machine uses an additional integrated board for sending commands to the Klipper firmware. This means you don’t need to worry about setting up a separate external Raspberry Pi or Klipper Pad.
One downside of Creality’s Klipper 3D printer line-up, however, is that they use their own CrealityOS interface for Klipper. While it’s user-friendly and easy to navigate, we find that it lacks some of the advanced features (e.g. UI customization, third-party Klipper plugins) that interfaces like Mainsail and Fluidd have.
However, if you’re new to 3D printing or simply prefer a more streamlined, intuitive interface, you’ll likely appreciate CrealityOS. You’ll still be able to make use of Klipper’s main features, like fast print speeds and accelerometer input shaping), without having to go through complicated Klipper installation or calibration steps.
Overall, we find the interface to be a smooth, hassle-free experience that makes operating the K1C straightforward. For the more advanced users, however, we can see (the current version of) CrealityOS falling short.
Rapid Print Speeds
The logical consequence of using Klipper firmware is the ability to achieve high print speeds without significant quality loss in your 3D prints. On the Creality K1C 3D printer, that’s no different.
On paper, the K1C is listed as a fast 3D printer with print speeds of up to 600 mm/s. In practice, we found ourselves sticking to speeds around 300 mm/s to limit print quality issues.
At speeds of 400 mm/s and above, parts start to look less appealing. This is mostly a cosmetic issue, so for structural parts there is no problem increasing the print speeds further.
Most materials don’t handle these higher speeds well because of their high viscosity (thickness) when melted, however. So for the best results, it’s a good idea to use filaments specifically designed for high-speed 3D printing.
In our testing, we used Creality’s Hyper-PLA (including the carbon-filled variant), but there’s no reason why you can’t use other high-speed filament brands. For example, PolySonic PLA or SUNLU’s High Speed PLA.
All-in-all, we found the K1C to be a very capable 3D printer at high print speeds. However, it doesn’t offer any print speed performance that the K1 doesn’t also have. So, if you’re considering the K1C purely for its high-speed capabilities, you might also want to look at the K1 as a more cost-effective option.
Build Quality and Construction
The build quality of the Creality K1C is an important factor to consider when evaluating its overall performance. As we explored the ins and outs of this 3D printer, we’ve found things that we liked, as well as things that we think could be improved. There’s lots of overlap with the K1 again, so here’s a very brief summary of our findings.
Positives

On the positive side, the frame of the Creality K1C is rigid enough for fast 3D printing speeds, the electronics of the machine are designed with safety in mind, and getting the 3D printer up and running is a breeze, making it a great option if you’re new to 3D printing.
In addition, the enclosed nature of the machine works well for keeping the temperature more stable during printing. This is particularly beneficial when you 3D print with materials that are more prone to warping or cracking due to temperature fluctuations. So if you’re planning to print with materials like ABS or nylon, you’ll appreciate the controlled environment that the K1C provides.

The triple lead screw arrangement that the print bed rests on is excellent for stability. It’s significantly more stable than what we saw on the Ender-5 S1, for example, and even at the highest print speeds we didn’t notice any deflection.

We found the print bed temperature to be even, with little fluctuation throughout its surface. This is ideal if you want a well-sticking first layer (who doesn’t?). An even print surface temperature is something we expect in an enclosed 3D printer, but it’s still good to verify.

The aforementioned smaller changes in the door hinges, rubber feet, extruder design, and cable chain are solid improvements in build quality too. However, in our opinion, these are things that should have been included in the K1 itself.
Negatives
As for the negatives, there are still plenty of things we’d like to see improved in the K1C. For example, the K1C doesn’t have a dedicated heater for the build chamber. Not only does this limit the effectiveness of the enclosure when printing with high-temperature materials, but you also have to preheat the print bed for a long time to heat the build chamber up.
For reference, when testing it took us 30 minutes for the chamber to heat up from 25°C to its maximum 38°C (more on this below). This was with the lid on and all fans off.

Other issues we encountered were that the belts on the K1C still don’t run parallel to the axis (an issue for CoreXY 3D printers) and the 3D printer uses non-toothed pulleys on the toothed side of the timing belts. The former leads to small print accuracies, and the latter causes belts to wear down faster than intended.

We also noticed that the external fan turns on automatically—and can’t be shut off—when the build chamber reaches 38°C. Presumably this is to prevent overheating of the stepper motors and other electronics. However, it also creates airflow that can warp temperature-sensitive 3D prints.
Aside from the airflow, the 38°C hard limit is relatively low compared to the maximum 60°C you can get on the QIDI X-Plus 3. This Klipper 3D printer does have a dedicated heater and heats up much more quickly.
For a machine targeted towards 3D printing with carbon filament, the lack of a dedicated heater feels like a big shortcoming to us. Sure, you can use the Creality K1C to print large models in PLA-CF, but when you want to do the same in PA12-CF, NylonX, or PC-CF, you will face a bigger challenge.
Lastly, the plastic-geared extruder and the sharp bend in the PTFE tube when the print head moves to the top left corner of the machine are also issues that would make for a better machine if addressed.
Ease of Use

In terms of its ease of use, we find the Creality K1C to have more positives than negatives. The touchscreen interface on the 3D printer is both responsive and clear, making it a breeze to navigate through the various settings and options. We also find the user interface to be intuitive, especially for those who are new to 3D printing.
The on-screen prompts are straightforward and easy to follow, which can be a real time-saver for the initial setup. Later too, whether you’re leveling the bed, loading filament, or initiating a print job, the K1C makes it simple.


That said, the CrealityOS interface on the K1C does not provide anything new, and for a second-generation machine, it is surprisingly unpolished.
For example, whenever we manually move the heated bed down through the UI, the 3D printer shows the message “moving back to homing position, please wait”. To emphasize, it didn’t move to the homing position at all, it only moved down by 30 mm.

This is not something that significantly impacted our use of the machine, but it’s confusing to encounter on an interface that has existed since the release of the K1. We expect these sorts of inaccuracies to be addressed by now.
There are examples of this outside of the UI as well. For example, our K1C 3D printer came with a single (one-sided) print surface labeled “A Plate – For PLA”. There is a mention of a “B Plate” in the included documentation, but it wasn’t included with the machine.

So where the “B Plate” is, what it does (presumably a rougher print surface), and whether it will be included in the retail version is anyone’s guess.
To end this section on a positive note, we really like the heating times of the Creality K1C. We measured it to take 44 seconds for the hot end to reach 200°C, and 82 seconds for it to reach the maximum 300°C. So there’s very little wait time before you can swap out filament.
Similarly, it only takes 2:10 minutes for the heated bed to reach 60°C, and 5:31 for it to reach 100°C. All measurements were taken with the enclosure lid off, so there’s room to speed the heating process up further.
Simply put, just like the printing process is quick, there’s also little waiting to do before 3D printing starts. The only caveat is that if you want to run the pre-print calibration, it will take up a couple extra minutes. We didn’t find running the calibration to be necessary before every 3D print, however.
Creality K1C Print Tests
Putting all the technical stuff aside, we were more than satisfied with the test results of the Creality K1C. The 3D printer produces high-quality parts at a blistering pace that few other 3D printers can match. We ran a series of print tests using a variety of materials and settings and the K1C consistently delivered excellent results.
Here’s a selection of the 3D prints we’ve made with the K1C:
Skull Bride
For this print test, we pushed the Creality K1C to its maximum speed. Despite the high-speed settings, the model came out surprisingly well. It’s definitely not as detailed as it would have been with lower print speeds, but the result is great for the little time it took to print.


Low Poly Lamborghini Countach
Here we put the Creality K1C to the task of printing a low-poly Lamborghini Countach. The 3D printer showcased its excellent dimensional accuracy as all the separate parts fit together seamlessly.
However, despite going through the input shaping calibration at the start of the print, we still noticed ringing around the sharp corners of the model. Overall, we are still happy with the quality of the print.


Articulated Glorious Baby Dragon
Here we decided to challenge the Creality K1C with a print consisting of many small segments. The 3D printer handled them and their overhangs impressively well, undoubtedly due to its powerful print cooling. All small segments adhered perfectly to the print surface.
Right off the bed, the separate elements moved smoothly, once again showcasing the K1C’s precision. Similarly, the dragon’s eyes had a perfect fit without the need for sanding or other modifications.


Custom Structural Component
For this test, we chose to print a custom structural component that we will use in our workshop in PA12-CF filament.
The rough surface of the print was due to the filament itself, not a fault of the K1C. We noticed sagging on the top surfaces, which was a result of us setting the nozzle temperature too high.
The 3D print has excellent inter-layer adhesion and good dimensional accuracy, making it ready for use right away. It’s surface finish isn’t the prettiest, but that wasn’t our goal here.


Fully Printable G-Clamp
We decided to 3D print more in carbon-fiber and print a set of G-clamps using the PLA-CF filament that Creality provided. The results were impressive. The clamps came out strong with an excellent fit. We didn’t need to do any post-processing.
We were also pleased with the level of detail on the knurled knobs. Printing with PLA-CF proves to be much easier than with PA12-CF. For most situations that demand strong 3D prints, we believe PLA-CF is a great option.


The T-Rex Skull
For our final 3D print test, we chose to print the T-Rex Skull. What’s impressive about this 3D print is the overhangs, which the Creality K1C handled impressively well. It also felt nice to be able to 3D print the entire model in under a day thanks to the K1C’s high-speed capabilities.
If we had to nitpick, we noticed some anomalies around the teeth. However, these are minor issues that can easily be fixed with a bit of post-processing. The skull you see now is exactly how it came out of the printer, without any additional touch-ups.


Extra: Creality Space Pi Filament Dryer Testing

Creality also sent over their “Space Pi” Filament Dryer. As part of this Creality K1C review, we decided to test it as well.
The filament dryer dries your 3D printing filament before and during use. It’s particularly useful for materials that are highly sensitive to moisture, even though you can use it to dry absorbed moisture from any type of filament.
At first glance, the Space Pi impressed us with its clear display and intuitive navigation. It comes with preset settings for drying various types of filament (PLA, ABS, TPU, PETG, PP, PA, PC, ASA, PET, PLA-CF, PETG-CF, PA-CF). So it’s fairly easy to set the right temperature for your specific material.

However, we did encounter a few issues with the interface. Sometimes, it required a firm press to register our input, and there were instances where it registered a double click when doing so.
Additionally, we noticed a strange residual effect where the interface would ‘remember’ where we clicked (see below). This effect disappeared after a couple of seconds and did not have any effect on the performance of the Space Pi.

Another limitation we found is the lack of preset times. While you can set the drying temperatures with the presets, the durations still need to be set manually. This makes the setup a bit more complicated than on other dryers we’ve used, like the SUNLU Filadryer S4.
When it comes to drying performance, however, the Space Pi did well. It dried our filament effectively and in a reasonable amount of time. It also did this without producing any unpleasant odors, unlike other filament dryers we’ve used in the past.

The dryer itself is designed well. The air circulation within the device is excellent and the inserted spool rolls smoothly without unnecessary friction.


The Space Pi comes with a single, short-ish PTFE tube. This means you can’t place the machine too far from your 3D printer. However, given its compact size, we found it easy to find a spot for it nearby.
That said, we would love to see a variant with double the capacity. The Space Pi can only accommodate a single roll of filament at a time. If you’re passionate about 3D printing, you’ll likely have multiple types of filament that you’d want to dry simultaneously.
Priced at $69, we believe the Space Pi offers reasonable value for its performance, especially when compared to other filament dryers on the market. It’s worth checking out if you don’t have a single-spool filament dryer yet.
Conclusion: Should You Buy the Creality K1C?
After spending considerable time with the Creality K1C, we can say that it’s a solid 3D printer with several upgrades over its predecessor, the K1. However, it’s not a significant leap forward. The main features and functionality of the K1C are practically identical to the K1.
We think that the few additional features that the K1C offers (the hardened nozzle, AI camera, and improved extruder) are worth considering at its current price difference with the K1—$50. At a larger price delta, we wouldn’t consider the K1C over its non-carbon sibling.
Other things worth noting are that the air filter on the K1C is practically useless, and some of the touted features in its marketing, like the metal geared extruder and easily swappable nozzle, do not exist in practice. Or at least not in the sample we tested in this review.
We also believe that many of the improvements in the K1C should just have been incorporated into a new revision of the K1. Our impression is that Creality needed to release a new product and ended up creating the K1C instead of a new K1 revision. From an outsider perspective, we don’t see enough changes to justify the -C as a brand new product.
From a practical 3D printing point of view, the K1C is a great machine. However, it doesn’t do much that the K1 can’t do as well. Unless you have a specific need for carbon filament printing (with the hardened nozzle) or remote print monitoring (with the ‘AI’ camera), you are better off sticking with the K1 or a different Klipper 3D printer.
In conclusion, if you’re considering the Creality K1C, weigh up the extra features against the current price difference and your specific needs and budget. If the upgrades align with your requirements, it could be a worthwhile investment. But if not, you might find better value sticking with the K1 or exploring other options in the market.