Klipper firmware has gained popularity amongst 3D printing enthusiasts owing to its fast print speeds and feature-rich design. You can print faster, in higher quality, and iterate your designs quicker than ever before. With the release of off-the-shelf Klipper-supported 3D printers, it is starting to become a mainstream firmware solution.
Installing Klipper yourself, however, can be daunting. It involves navigating through technical steps and many of the installation guides contain too much information, making it overwhelming for beginners to get started.
But don’t worry! We’ve tested the Klipper installation process and created this guide to cover everything you need to know. We’ll walk you through all the small details, commands, and steps, ensuring that the installation becomes a breezy and successful process.
Let’s get ready to Klippify your 3D printer!
What is Klipper?

Klipper is a 3D printing firmware that redefines the way your printer operates. Unlike traditional firmware that runs directly on the 8-bit or 32-bit microcontroller embedded in your 3D printer, Klipper takes a different approach. It offloads complex computational tasks to a more powerful single-board computer—often a Raspberry Pi—and leaves the printer hardware control to the less powerful 3D printer controller.
In technical terms, this creates a master-slave configuration. The Raspberry Pi processes the G-codes, handles the firmware’s advanced features, and sends the final instructions to the 3D printer’s controller. The onboard controller then executes these instructions to the stepper motors, heaters, and other ‘dumb’ electronics, and oversees the 3D printer’s movements.
Klipper’s flagship features, such as high precision stepper movement, multiple micro-controller support, high-stepping rates, and more, are all possible due to the use of the more powerful single-board computer. It would be too much for typical printer controllers to handle.
Why Use Klipper?
While there are several other 3D printing firmware, like Marlin and Repetier-Firmware, that let you 3D print high-quality models as well. So what’s so special about Klipper?

Let’s delve into why Klipper firmware has emerged as a favorite among 3D printing aficionados.
Speed and Precision

Klipper stands out the most for its ability to deliver fast print speeds without significantly affecting print quality. Its unique master-slave architecture allows the firmware to calculate complex printer movements with higher precision. Not to mention, it can compensate for limitations in our 3D printer hardware.
For example, the firmware can process up to 175K steps per second and schedule each stepper event 25 seconds before it takes place. As a result, Klipper can produce much faster prints than less powerful firmware & hardware combinations can.
Plethora of Advanced Features

Klipper doesn’t just stop at speed; it introduces several advanced features that boost your 3D printing experience and quality. Multiple controller support, custom Klipper G-code macros, pressure advance, input shaping, plugins & addons, simple configuration process, and the list goes on.
These advanced features allow you to get the most out of your 3D printer. They’re excellent for anyone who wants precise 3D prints, high print speeds, customizability and doesn’t mind getting their hands dirty.
Customization and Community Support

Klipper’s open-source philosophy guarantees constant improvement and allows users to customize and tailor the firmware to their specific needs. It can virtually run with any 3D printer and has a ton of pre-configured printer profiles that you can tweak to your needs.
Add to the mix Klipper’s community support, which serves as an invaluable resource for everything Klipper-related. You can ask questions, share your experiences, troubleshoot issues, and explore new ways of using Klipper.
Now that you know the why, let’s move on to the how. Here’s a step-by-step guide on installing Klipper firmware on your 3D printer.
Prerequisites to Installing Klipper
Before installing Klipper, there are a few things you need to know. The installation process is quite hands-on, so you should be familiar with your printer’s hardware and a few other technical aspects. Here are some prerequisites that are important to keep in mind:
1. Know Your Hardware

The Klipper configuration process depends on your 3D printer’s hardware specifications. Before you start the installation process, make sure you are aware of the following:
- The motherboard your 3D printer uses
- Its movement style (CoreXY, Delta, Gantry, etc.)
- The bed leveling sensors, LCD screen, heaters, and other components it uses.
You can find all this information on the manufacturer’s website or in your 3D printer manuals. Make sure to check the motherboard specifications by looking at the version number printed on it. This will come in handy during the initial installation steps.
Once you have all of this, go to the official Klipper Documentation and cross-reference your 3D printer with the available Klipper configs. When you find one that best matches your 3D printer, its initial few lines will inform you of important details on the installation steps. We’ll cover most of them in detail below.
2. Sourcing Additional Components
Before installing Klipper on an existing 3D printer, you need a few extra components. Most notably, the single-board computer you’ll install Klipper on, and a couple of accessories. The list is as follows.
- Raspberry Pi or Orange Pi
- USB cable for connecting the SBC to the 3D printer. The connector types depend on the specific ports on your SBC and 3D printer.
- A reliable MicroSD card (8GB or larger) for installing MainsailOS. We recommend skipping the off-brand ones, as they regularly come with quality and/or compatibility issues.
Once you have noted down the hardware specs and gathered the necessary components, you are ready to start installing Klipper!
How to Install Klipper Firmware
There are many ways you can go about installing Klipper. For example, you can use the KIAUH Klipper installer, FluiddPi, Mainsail OS, or a Klipper host software such as Octoprint.
The first three are Klipper-specific software designed to help you install, configure, and manage Klipper firmware on your 3D printer. They are all good solutions, and in this guide, we’ll go with Mainsail OS to install Klipper on an Ender 3.
Mainsail itself is a web interface designed for Klipper that lets you control your 3D printer from a browser environment. Using it to install Klipper firmware only requires you to go through four easy steps.
Below, we will guide you through each step in detail and provide you with the necessary information to configure and customize your Klipper settings. Let’s begin!
Installing Mainsail OS
- Go to the Raspberry Pi website and download the Raspberry Pi Imager tool. We’ll use this software to install Mainsail on the Pi.

- Insert the SD card into your computer and open the RPi imager tool.
- Select your Raspberry Pi device and choose the operating system by navigating to Other specific purpose OS > Mainsail OS > Mainsail OS 32-bit.

- In the storage tab, select your SD card and click on Next.
- A popup will open for additional OS settings. Click on the Edit settings option. This will let you configure the wireless settings and enable SSH to connect to the Raspberry Pi.
- Set the hostname, user ID, password, WiFi settings, and your timezone settings. You will need them later, so make sure to write them down somewhere.

- Click Save and hit the Yes option in the popups that follow.
- The Imager tool will begin the installation process. It can take a while to install and verify everything. Don’t worry, just let it do its thing.

- Once completed, you’ll get a successful installation message and the SD card will automatically eject itself.
- Insert this flashed SD card into the Raspberry Pi and power it on. Again, this flashing process can also take a while, so remain patient.
- Once the green LED starts on the Pi starts blinking consistently, open your browser and type in raspberrypi.local. It should open up the Mainsail web interface. Congratulations! Mainsail is now installed on your SD card.


Configuring Klipper Firmware
In this step, we’ll configure the Klipper firmware to match your printer’s board specifications. You can open the Klipper configs and search for your printer/motherboard. It’ll have some specific instructions for configuration that you can use. After that, go through the steps below.
- Download the PuTTY tool. It lets you wirelessly connect to your Raspberry Pi account, access its root folder, and configure the Klipper firmware.
- Open PuTTY and use the host name as raspberrypi.local. The connection type should be SSH. Leave the rest of the settings to default. It’ll open a command terminal window.

- Login to your Raspberry Pi using the previous Username and password settings.
- Execute the following commands. These will open the Klipper firmware configuration window.
cd ~/klipper/
make menuconfig
- Set the microcontroller architecture and processor model using the Klipper config docs. In our case, we are using a 2018 Ender 3. As per Klipper docs, the configuration is AVR atmega1284p.
- You can use the enter/Spacebar keys to select the options and arrow keys for navigation.
- After setting the configuration, press Q and save your configuration using the key.

- Execute the make command in the PuTTY window to configure the firmware for your 3D printer.
- Depending on your printer and motherboard, you’ll either get a .hex or .bin file at the end of the flashing process. In our case, we got the .hex file as an output. We’ll use these files to flash the firmware onto the printer.

- You can close the PuTTY window for now to connect the Raspberry Pi to the 3D printer.


Flashing Klipper to the 3D Printer
Your 3D printer will have a motherboard with one of two configurations—either a locked bootloader or an unlocked bootloader. You can tell which one your printer has by checking the manufacturer’s specifications or by looking for information online.
If your printer has a locked bootloader, you’ll need to go through a few extra steps before you can flash the Klipper firmware. This is often required for Creality and BigTreeTech boards.
However, if your printer has an unlocked bootloader, the installation process becomes quite straightforward, and you can install Klipper over USB straight away.
Regardless of the configuration you are dealing with—a locked or unlocked bootloader—you can find the steps for installing Klipper below.
Unlocked Bootloader
- Connect the Raspberry Pi to the 3D printer using a compatible USB cable.
- Open PuTTY and log in to your RPi using the previous procedure. Go to the Klipper folder by inputting
cd ~/klipper/ - Type in the following command in the PuTTY command entry box. This command checks the connection between your printer and the Raspberry Pi.
ls /dev/serial/by-id/*. - If the Raspberry Pi is able to successfully communicate with your printer, you should get an output something similar like –
/dev/serial/by-id/usb-1a86_USB2.0-serial-if00-port0 - Next, execute the following commands one at a time.
sudo service klipper stop make flash FLASH_DEVICE=/dev/serial/by-id/<your printer's serial ID from the previous step> sudo service klipper start - After the make flash command, the RPi will initiate the Klipper flashing process onto your printer’s controller. If no error pops up, it indicates a successful Klipper installation.
- You can verify it by typing in the ls /dev/serial/by-id/* command. It should report the printer’s unique serial port ID. Note it down, as we’ll need it in the next step.
- That’s it! Klipper is now successfully flashed on your 3D printer.


Locked Bootloader
When dealing with a locked bootloader, we’ll need to flash the firmware using an SD card instead of the USB. For this, we’ll transfer the .bin or .hex file onto a separate SD card and insert it into the printer. The steps are as follows:
- Insert a new SD card into your 3D printer.
- Download SCP software like WindowsSCP for transferring files from the Raspberry Pi to your computer over a wireless network.
- The login procedure is similar to PuTTY. Input your hostname, username, and password to access the Pi.

- Locate the klipper.bin file by navigating to klipper > out
- Right-click on this file and copy-paste it onto the new SD card.
- Rename the file as firmware.bin and eject the SD card afterward.
- Insert this SD card with the firmware.bin file into your 3D printer and power on the machine.
- It’ll flash the firmware as the printer boots up. Wait for a few minutes for the process to complete.
- Connect your printer to the RPi and open the PuTTY terminal.
- Input the ls /dev/serial/by-id/* command.

- If everything is done right, you should get an output that indicates the printer’s serial port ID. Congratulations, Klipper is now successfully flashed onto your 3D printer.


Adding Printer Configuration
You’ve now successfully installed Klipper on your 3D printer. Type the raspberrypi.local address in your browser to open the Mainsail web interface. You can notice there are no control buttons and a big red ERROR sign. It’s because we haven’t configured the 3D printer yet in Mainsail.
To do this, follow these steps:
- Open the Mainsail machine settings and add a printer.cfg file in the configuration files section.
- Go to the Klipper configs website and search for your 3D printer/motherboard. Copy the raw code and paste it into the printer.cfg file.
- Type [include mainsail.cfg] at the top.
- Type in the serial port ID of your 3D printer in the [mcu] section. The final result should look similar to the image below.
- Save the config file and Restart the firmware.
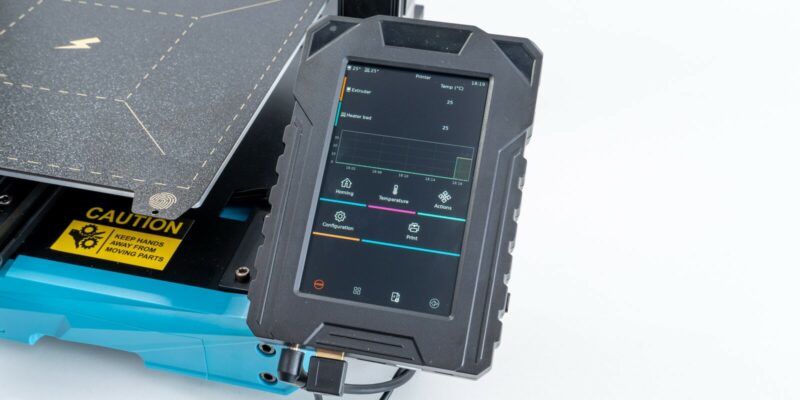
- Klipper should now boot up, and you should be able to see all the printer controls, temperature graphs, and macros in the Mainsail Dashboard.


![Screenshot of MainsailOS showing the [mcu] section and 3D printer serial port in a printer.cfg file.](https://clevercreations.org/wp-content/uploads/2024/03/klipper-installation-ender-3-install-15-1-800x450.jpg "Screenshot of MainsailOS showing the [mcu] section and 3D printer serial port in a printer.cfg file.")
Voila! You’ve just finished installing Klipper on your 3D printer and are ready to begin printing. Before you actually begin printing your models, however, it’s a good idea to look at the next steps in Klipper’s setup.
Next Steps
Klipper has a suite of useful features that you can use to get excellent prints. Some of these features are particularly beneficial if you use them from the get-go. Let’s look at a few notable ones in this section.
PID Tuning

Klipper PID tuning optimizes the temperature control of the heating elements in your 3D printer. It fine-tunes the heating times and precision to ensure the hot end and print bed heat up fast and maintain their set temperature consistently. A well-tuned PID will help you improve the heating performance of your printer, create more stable temperatures, and contribute to an overall better print quality.
Input Shaping

When you print at fast speeds, the resonance from your 3D printer’s components can show up on your 3D prints. These vibrations affect print quality and can ruin your print’s appearance.
Klipper Input shaping is a feature that tunes the motion of your 3D printer such that it cancels out the vibrations. This allows you to print fast but with fewer negative effects. In an ideal setup, you would use an ADXL345 accelerometer with Klipper for the calibration.
Smooth Pressure Advance

Pressure advance in Klipper helps to reduce most print quality issues that occur when printing at fast speeds. It helps you get precise corners and improved dimensional accuracy and also reduces stringing in your 3D prints. It’s a good idea to tune your pressure advance settings before you begin printing any assemblies that require multiple parts to fit together.
There’s much more you can do to set up Klipper, so we recommend checking out our detailed Klipper calibration guide, our guide to configuring the default Klipper startup script, as well as making sure you are using the best slicer for Klipper.
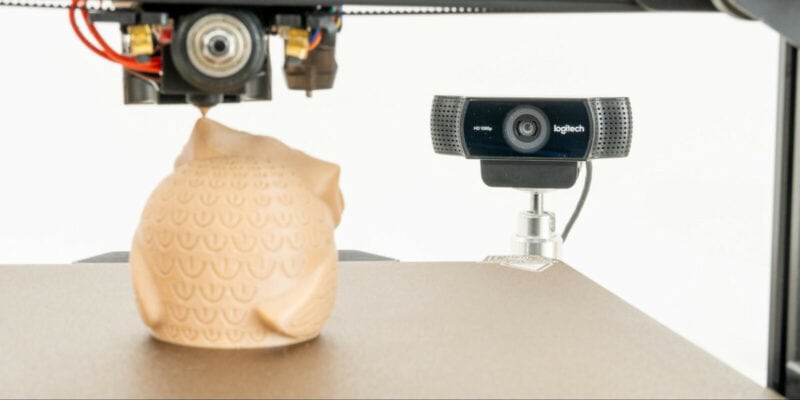
If you are an advanced user, you can also set up a webcam with Klipper and even use Klipper on Android. Now that you’ve successfully installed Klipper on your 3D printer, a world of opportunities awaits you.
Is a Raspberry Pi Strictly Needed for Klipper?
A Raspberry Pi is recommended to run Klipper. However, there are other alternatives for using Klipper on your 3D printer as well.
For instance, the Creality Sonic Pad and BigTreeTech Pad are plug-and-play Klipper Pads that make using this firmware a breeze.
There are also cheaper Orange Pi boards that you can use to run Klipper, even though they are cheaper and you get what you pay for. These boards have less community support and are not as reliable as Raspberry Pi, but they can be a good budget option if you’re willing to troubleshoot potential issues.
Which Raspberry Pi Models are Compatible?
All the Raspberry Pi models can technically run Klipper, but the Raspberry Pi 3B+ and Raspberry 4 are recommended for the best Klipper experience. These boards have the hardware capabilities required to support Klipper’s advanced features.
Can You Run Klipper and OctoPrint Together?
Yes, Klipper and OctoPrint can coexist. You can actually install Klipper on your existing Octoprint setup and get the best of both worlds. Klipper handles the motion control, while the OctoPrint web server manages the user interface and print scheduling.
Conclusion: Is the Klipper Installation a Big Hassle?
Installing Klipper doesn’t have to be as difficult as it’s often made out to be. Even for beginners with zero knowledge of Klipper, we’ve outlined the process in as simple terms as possible, and the benefits are well worth it!
The first step is to flash the Mainsail OS on your Raspberry Pi. Next, you need to configure Klipper based on your printer’s specifications. In the third step, you flash Klipper onto your printer’s motherboard. Lastly, you add the printer configuration file to the Mainsail interface.
We believe this guide will serve as a useful reference material for users of all levels to install Klipper. If you hit any bumps during the installation process or need more detailed explanations of certain steps, feel free to comment below; we’d be glad to help you out.
Happy Klipping!