Klipper is an excellent 3D printing firmware well known for its fast print speeds, high print quality, and a myriad of other valuable features. However, it’s often intimidating for beginners to set up and install Klipper as the process is considered too complex and effort-intensive.
While this may be true to some extent, there are now tools available that make the Klipper installation and maintenance process much simpler.
KIAUH is one of these tools. It lets you go through the installation process with fewer manual commands, more automation, and fewer chances of errors. We can’t imagine installing Klipper without KIAUH anymore, and we think it’s time to show you how to use this Klipper install script yourself!
In this article, we’ll do exactly that. We will show you what KIAUH is, why you need it, and most importantly, the steps involved in getting it up and running.
So, let’s dive in and discover how KIAUH can transform your Klipper experience!
What Is KIAUH and Why Do You Need It?
Klipper Installation and Update Helper (KIAUH) is a tool designed to simplify the installation and updating of Klipper. It automates the setup process to a great extent and saves you from the frustrations of configuring the firmware.
With KIAUH, you can quickly install web interfaces for Klipper 3D printer firmware, Klipper themes, Octoprint, KlipperScreen, and much more. After installation, you use KIAUH to manage these add-ons, quickly back them up, and even remove them in a single click—all from a single place!
If you were not to use KIAUH, you would have to install each element individually. This process can be intimidating if you are a beginner and take up a good chunk of your time. Additionally, there’s always a chance that things could go wrong because you overlooked a small but critical step somewhere.
Long story short, using KIAUH makes installing Klipper a breeze!
Reasons to Use KIAUH During the Klipper Installation
While ease of use and simplicity are at the core of the whole KIAUH experience, its benefits extend beyond these things. Let’s dive into some of the top advantages that make it a must-have tool for both installing and managing Klipper firmware.
Easy Klipper Setup and Installation
KIAUH makes it extremely straightforward to install Klipper. You don’t need to manually type in extensive commands or look for configuration instructions for Klipper. For instance, to manually install KlipperScreen you’d have to type in the command below and then further add the update manager in the Moonraker configuration as well.
cd ~/
git clone https://github.com/KlipperScreen/KlipperScreen.git
cd ~/KlipperScreen
./scripts/KlipperScreen-install.sh
Instead, KIAUH gives you a simple flow to install Klipper and all of its dependencies in a few clicks. You can install various Klipper-related software such as KlipperScreen, PrettyGcode, Mainsail themes, Moonraker Telegram bot, and many more.
In addition, if you want to run multiple Klipper 3D printers using a single Pi board, KIAUH lets you install Klipper on all of them with ease. Not only does it let you install multiple Klipper instances at once, but it also lets you manage them from a single interface.
This easy setup process improves the Klipper experience quite a lot and removes the intimidation factor of it. KIAUH allows complete beginners and new 3D printer users to get a good hold of Klipper without having to deal with its complexities.
Multiple Interfaces
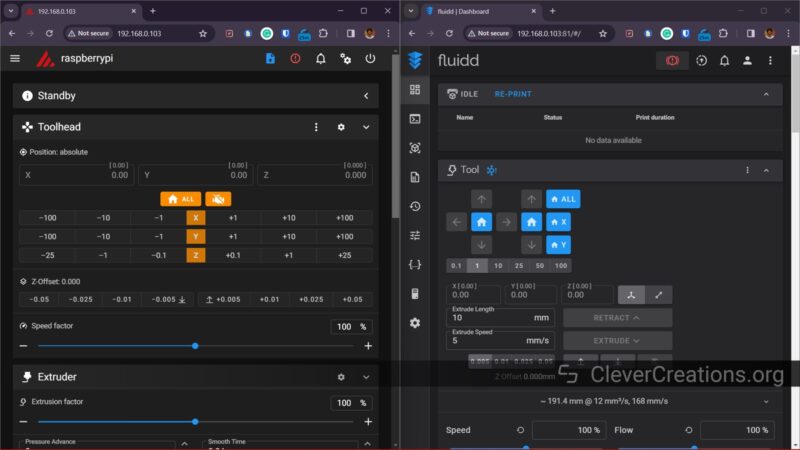
Klipper primarily uses a web interface to give you access to its functionalities. Mainsail and Fluidd are two of the most popular options that you can use to control and manage your Klipper printer from any device.
Typically, while setting up Klipper, you have to choose between either of these two interface options. You have to install either Mainsail or Fluidd while configuring Klipper itself, as it can be time-consuming to do it later on.
However, some users prefer the aesthetics of Fluidd, while others prefer the features of Mainsail. In such situations, KIAUH gives you the flexibility and ease to install both interface options on a single Klipper 3D printer.
The KIAUH script creates two separate instances of Mainsail and Fluidd and lets you use both of them at once. The installation process is simple and you get to enjoy the best of both worlds!
Easy Updates
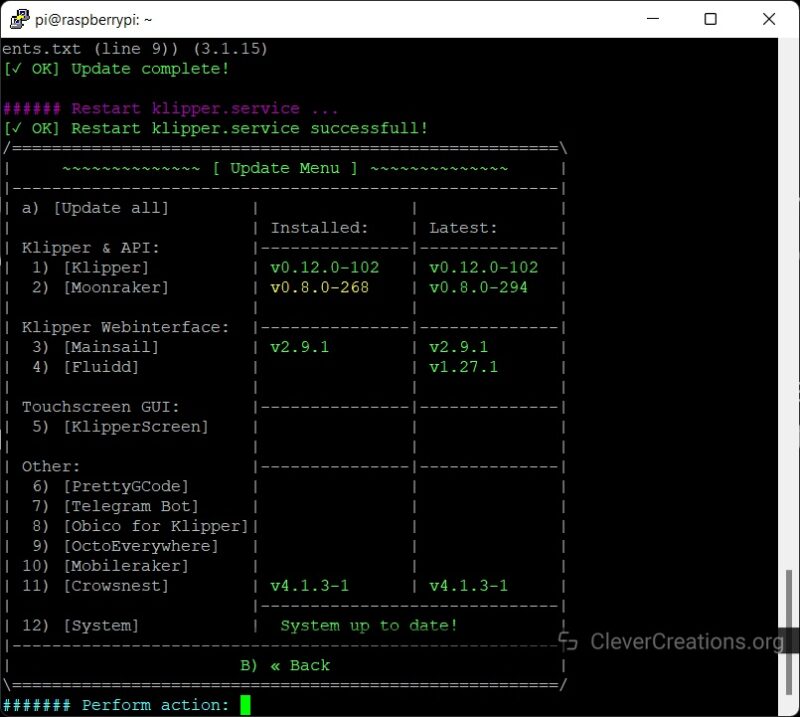
KIAUH also allows you to update your Klipper software easily from a single screen. Its update window displays the current version and the most recent version of the installed software.
If you notice any outdated software version, you can quickly update it using KIAUH. This ensures that your Klipper instance is always up-to-date with the latest releases of your favorite Klipper plugins.
Customization
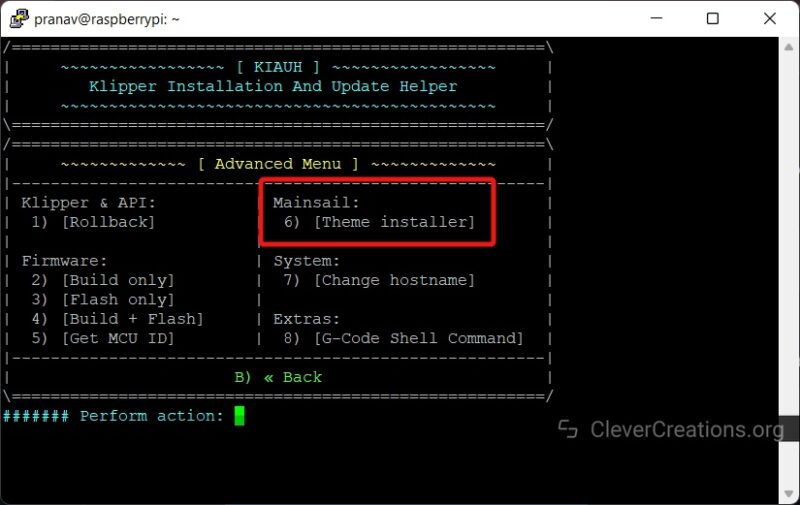
KIAUH also allows you to customize some aspects of your Klipper setup. The Mainsail Theme Installer is a significant feature in the customization area. It lets you quickly apply and update new Mainsail themes without any configuration files.
You’ll also find other advanced options in KIAUH, such as the ability to roll back to a previous version of Moonraker or Klipper. This can come in handy in case you’re facing any difficulties with the current Klipper installation and would like to go back to a stable release.
Additionally, you can change the hostname of your Klipper printer using KIAUH. Instead of typing in raspberrypi.local for your Klipper interface, you can directly input the name of your printer. For instance, ender3.local or prusa.local.
While the latter may seem like a small thing, it can be convenient if you have multiple printers you want to quickly tell apart and access.
Convenient Backups
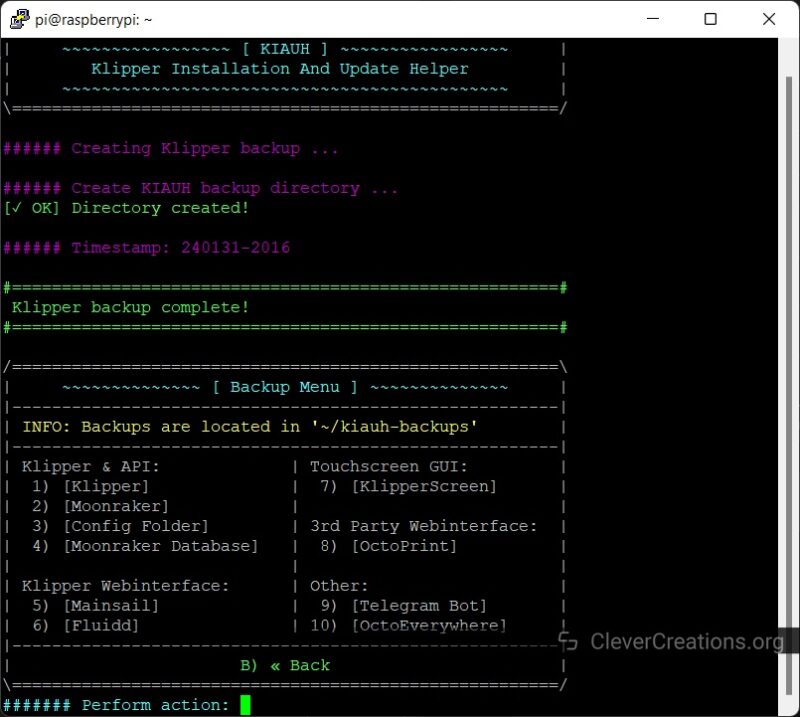
If you wish to re-install Klipper on your 3D printer, it can be quite a task to configure the firmware as it was before. Therefore, it’s handy to have backups of your Klipper firmware and configuration settings to ensure you can start using your printer as soon as possible.
Using KIAUH, you can easily back up your Klipper configuration files along with the other software. You can choose which elements you want to back up and save them in a few clicks.
These backups can save you a lot of time in case you lose any data or experience issues due to a random update. There have been times when this feature saved us hours of work, so we highly recommend making use of it. Even if you think you won’t need it!
How to Install KIAUH for Klipper
Now that you’ve understood the potential of KIAUH for Klipper, it’s time to put it into action. In this section, we’ll guide you through the step-by-step process of utilizing KIAUH to manage your Klipper firmware. Let’s begin with its installation first.
Installing Mainsail OS
KIAUH is a handy installation script that needs some sort of system to run on. For example, you can use a Linux operating system like the Raspberry Pi OS lite or similar to install it.
However, as we’re focusing on Klipper, we’ll be using the Mainsail OS Linux distribution to configure KIAUH for this guide. You can follow along with the steps below:
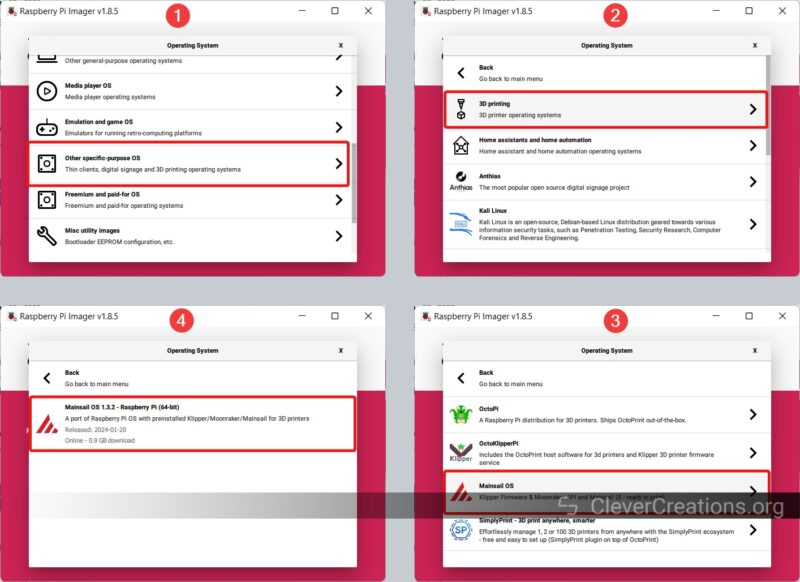
- Insert the microSD card into your computer.
- Download and Run the Raspberry Pi Imager.
- Select your device, and choose the storage as your SD card.
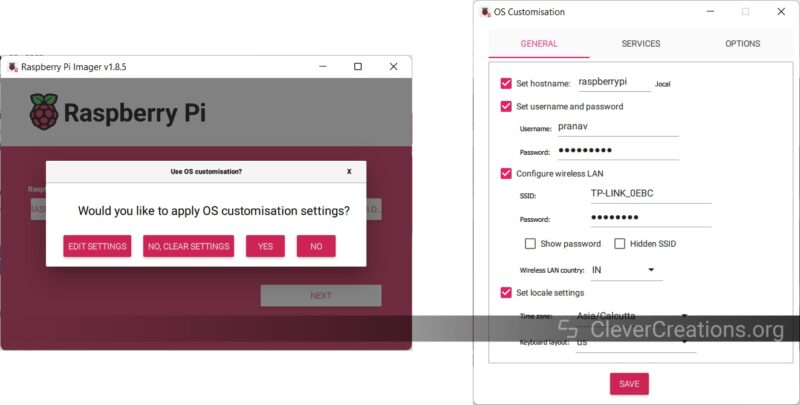
- Select the OS by going to Other Specific Purposes OS>>3D Printing>> Mainsail OS. Click Next.

- Choose the Edit Settings option to configure your wireless settings. Enable SSH, type in the Raspberry Pi password, and configure your WiFi settings. Save and close the installation menu.

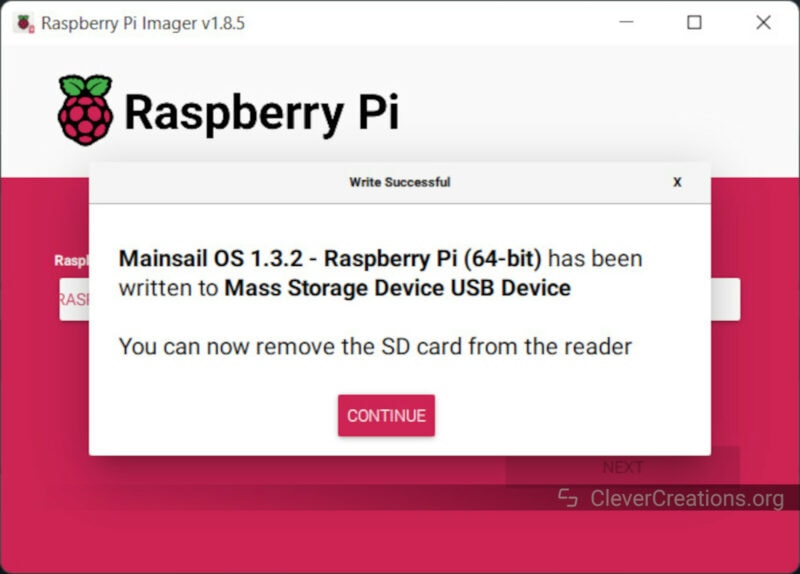
- Continue the installation process. This step will take some time to complete.
- Once the Raspberry Pi imager finishes writing the Mainsail OS on your Pi, eject the SD card and insert it into the Raspberry Pi.

Installing KIAUH (From Scratch and on Pre-Existing Setups)
Next, we’ll install KIAUH itself. We’ll connect wirelessly (over SSH) to the Raspberry using PuTTY first. Then, we’ll install Git before downloading and installing KIAUH onto the Pi board.
-
- Find the IP address of your Raspberry Pi. There are a couple of ways you can do this:
- Type in mainsail.local in your browser to get the IP address.
- By using a tool like Angry IP scanner.
- By going into your router settings. Your router IP will usually be 192.168.0.1 or 192.168.1.1. After logging in with your router credentials, open the DHCP client list and look for the IP address of your Raspberry Pi.
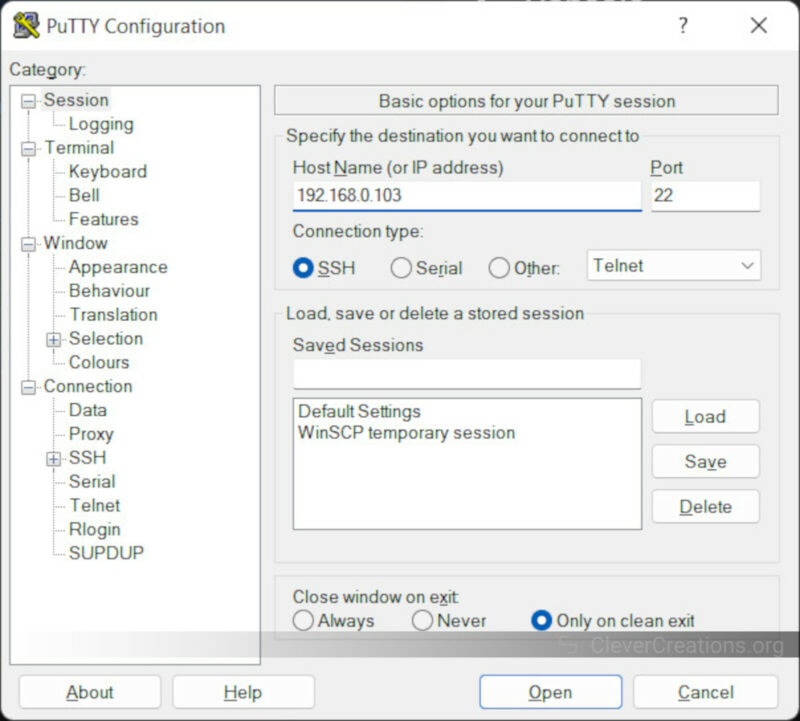
- Download and Install PuTTY software.
- Open PuTTY and log in using the Raspberry Pi IP address.

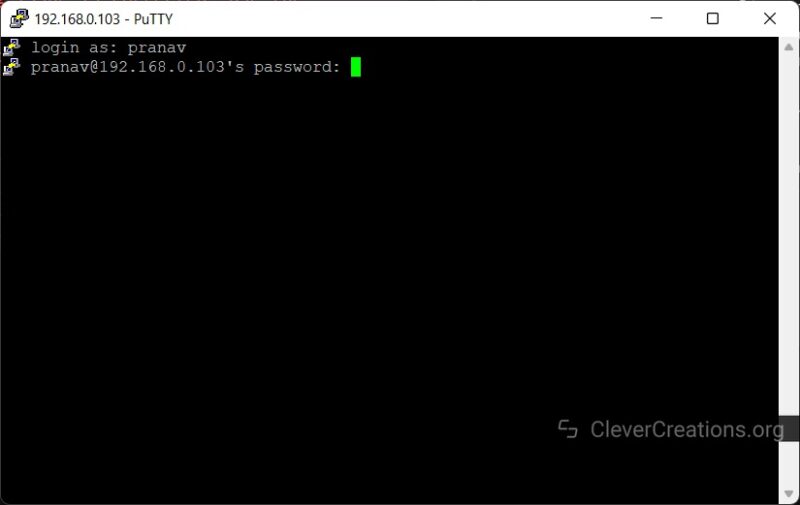
- Log in to your Pi using the username and password you set earlier.

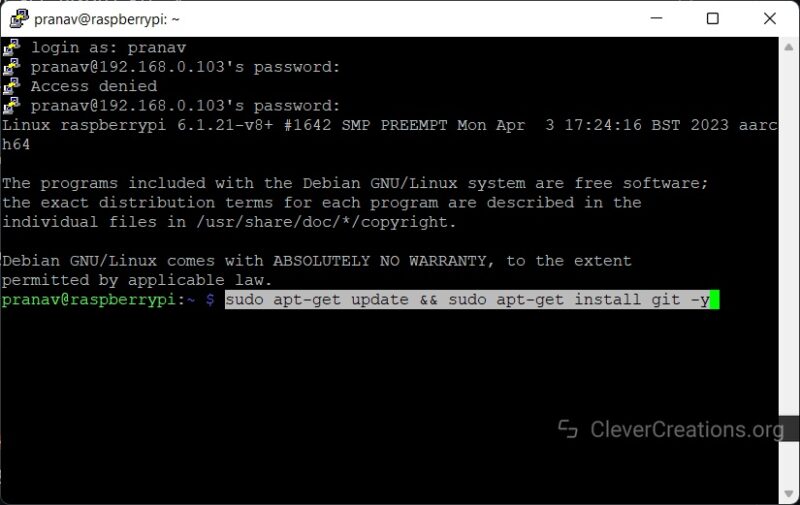
- Install git using the following command –
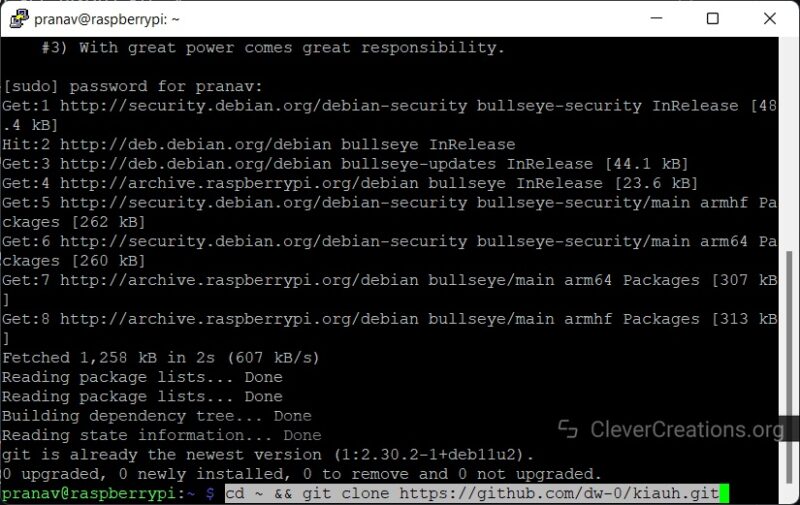
sudo apt-get update && sudo apt-get install git -y - Once installed, download the KIAUH software to your Raspberry Pi –
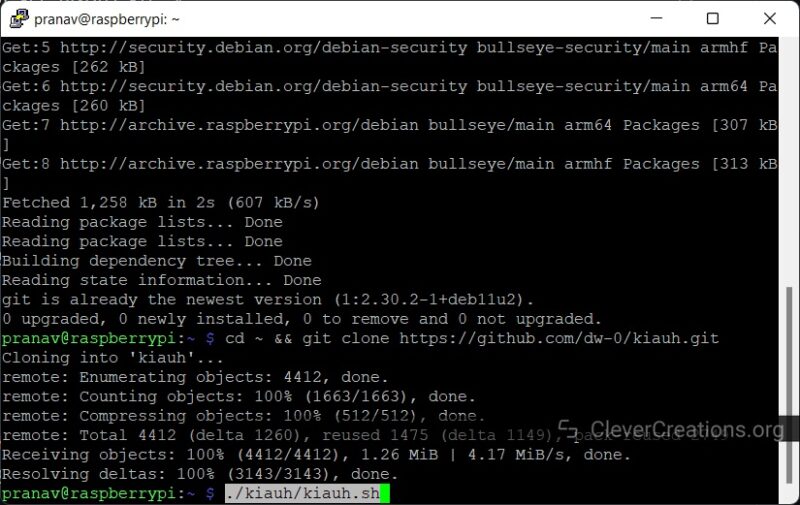
cd ~ && git clone https://github.com/dw-0/kiauh.git - To run KIAUH, use the following command:
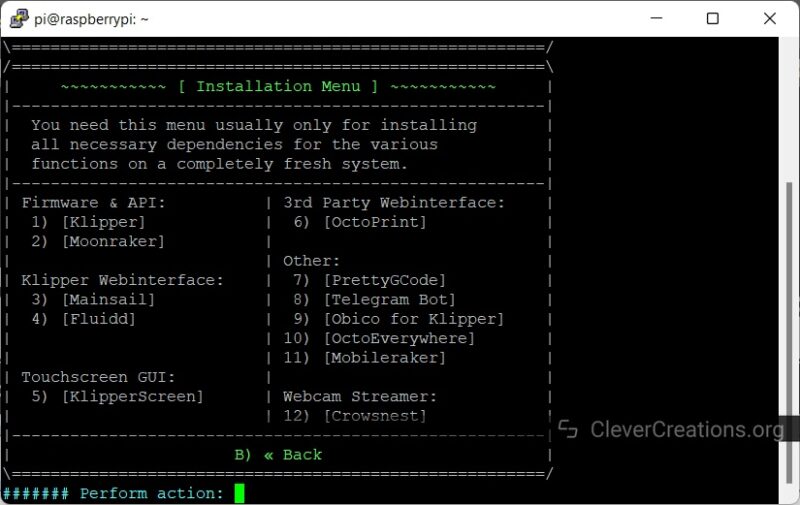
./kiauh/kiauh.sh 
- Find the IP address of your Raspberry Pi. There are a couple of ways you can do this:
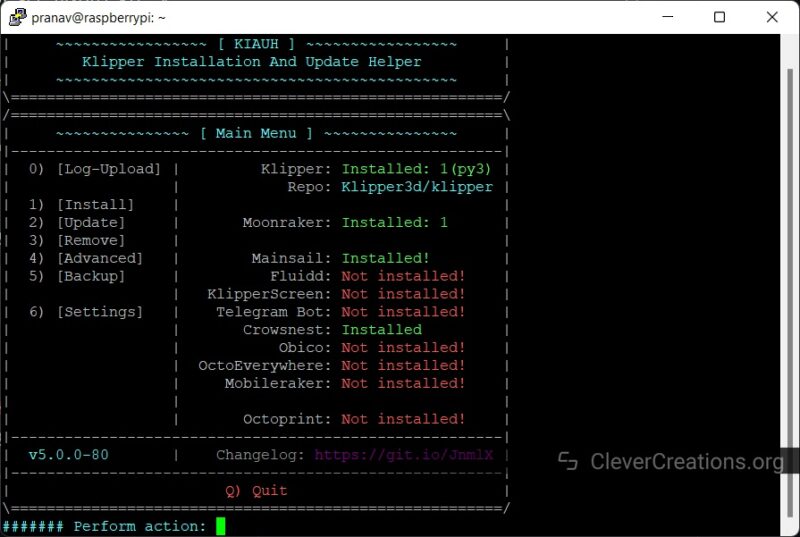
That’s it. You should now see a new window with the KIAUH interface. In the main menu itself, you can see a quick view of the software installed on your Raspberry Pi. Because we’ve used the Mainsail OS in these steps, we can see the Mainsail interface, Klipper, and a few other companion software pre-installed on our system.
Are There Any Alternatives to KIAUH?
At present, there are no true alternatives to KIAUH. It’s the only all-in-one tool for Klipper that is also designed for easy Klipper management.
Remember, KIAUH does not replace any function or software for Klipper. It simply gives you an easy way to manage everything. You can always configure Klipper and install any plugins or addons manually without it.
General Usage Tips
KIAUH is a straightforward solution and there are few bells or whistles to deal with. However, we still have a few tips for a smooth experience:
Always Backup
There’s always a chance that things can go wrong while updating or installing something new. You can also run into edge cases like your SD card corrupting (don’t rely on those cheap SD/TF cards that come with your 3D printers!) or the Raspberry Pi breaking down (more likely if you use a Chinese clone).
In such instances, it’s good to have a backup of all your Klipper things. It allows you to restore the backup and pick up right where you left off.
Update Klipper
Software updates bring new features and fix bugs. Sometimes, a few software elements only work together when all the other versions are up-to-date. Therefore, always make sure to use the latest version of Klipper. Check frequently for software updates using KIAUH and update them to their latest release.
Ask Questions
Klipper is a relatively new 3D printing firmware, but it has developed good community support in a short time. There’s also plenty of documentation and guides around Klipper which can help you with things. If you encounter any issues related to using KIAUH with Klipper, search on subreddits and support forums; someone might have already faced the same problem before.
Review Error Messages
Pay attention to any error messages that pop up during KIAUH installation or updates. These messages often provide valuable clues to the root cause of issues. You can use these prompts to search for troubleshooting online or find solutions through Klipper’s documentation.
Troubleshooting
Updating via SSH
It’s not possible to update KIAUH using Fluidd, Mainsail, or Octoprint for Klipper. So if you need to update KIAUH, use an SSH tool like PuTTY.
Failed Updates
One of the issues you can encounter while using KIAUH is a failed update. This can happen while you’re trying to update Klipper, its plugins, or even KIAUH itself.
The main cause for this is a lack of internet. KIAUH relies on your Raspberry Pi’s internet connection to fetch the latest versions of the software and install them. If your internet or WiFi is down, so are the tool’s update capabilities.
To check if your internet connection is the issue, follow these steps:
- Open PuTTY and connect to your Raspberry Pi just like you did during the KIAUH installation process.
- Once you’re logged in, type ping google.com. This command will send a small packet of data to Google’s servers and measure how long it takes to get a response.
- If you see a response with a time in milliseconds, your internet connection is working fine. However, If you see a message saying “ping: google.com: Temporary failure in name resolution” or “ping: google.com: Name or service not known”, that means your Raspberry Pi is not connected to the internet.
In such cases, you need to troubleshoot your WiFi or internet connection to restore KIAUH’s ability to download updates.
Mainsail Interface Not Showing Up
If the Mainsail interface doesn’t show up, make sure you’ve inserted the SD card correctly in the Raspberry Pi. The green light on the Pi should be blinking steadily. If it’s blinking rapidly, there’s some issue with the configuration.
The best way to solve this is to remove the SD card and flash the Mainsail OS image again.
Errors While Installing Klipper Software
There are situations where you can face errors while installing any of the Klipper-related software using KIAUH. In such cases, it’s worth checking for configuration errors or connection issues with your 3D printer.
If this doesn’t resolve the error, it’s best to search online for a solution to your specific problem. We’d love to cover it here, but there are too many potential scenarios to cover comprehensively. Drop us a comment below and we’ll do our best to help you troubleshoot your issue.
Conclusion: Should You Use KIAUH for Klipper?
KIAUH is a powerful tool that simplifies the installation, updating, and management of Klipper firmware for 3D printers. You can use it to install Klipper on one or multiple printers, update firmware and addons, run Mainsail and Fluidd together, and more from a single place.
No matter if you’re a beginner or a long-time Klipper user, KIAUH is a must-have tool in your Klipper arsenal.
While there are no direct alternatives to KIAUH at present, you can always opt for manual configuration and installation if you prefer.
However, given the numerous benefits of KIAUH, we highly recommend giving it a try. It’s not just about ease of use; it also offers a wealth of features that can help you get the most out of your Klipper firmware.
We believe this guide has helped you understand the KIAUH tool better and given you the confidence to use it. If you need any help with its use, let us know in the comments below!