

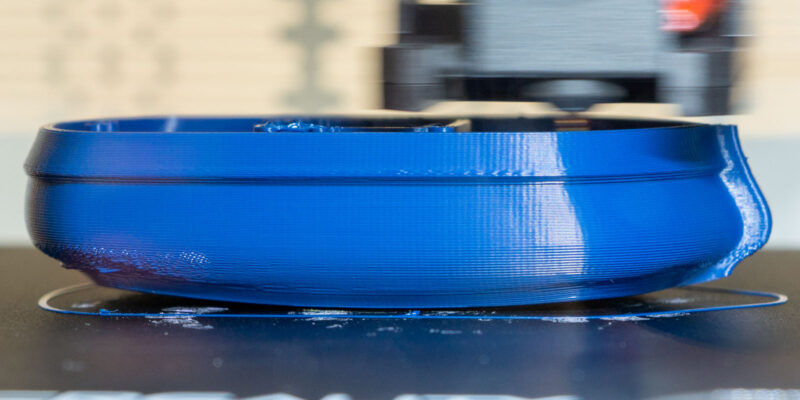
Improper nozzle temperatures on your 3D printer can lead to a variety of problems. Oozing and stringing filament on your 3D printed models are some of the most noticeable. Similarly, you might run into your extruder skipping steps randomly when trying out a new filament.
So, how do you figure out the optimal temperature for your 3D printing filaments? The answer is a temperature tower. It is an easy 3D print that can help you accurately figure out the perfect printing temperature for each of your filaments.
Let’s see how you can use a temperature tower to optimize your print settings and get perfect-looking 3D prints.
What is a Temperature Tower?
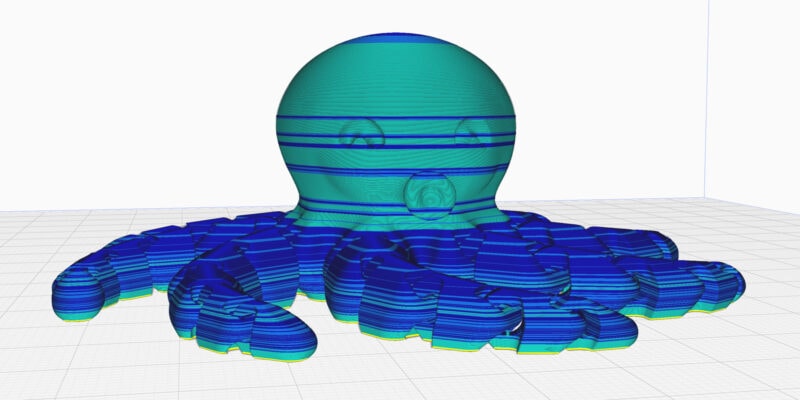
A temperature tower is a vertical structure that consists of multiple horizontal slabs. Each slab is 3D printed with a different temperature. This way, you can quickly pinpoint the temperature that gives you the best result with a specific filament. You can even use these towers to fine-tune your bridging and retraction settings.
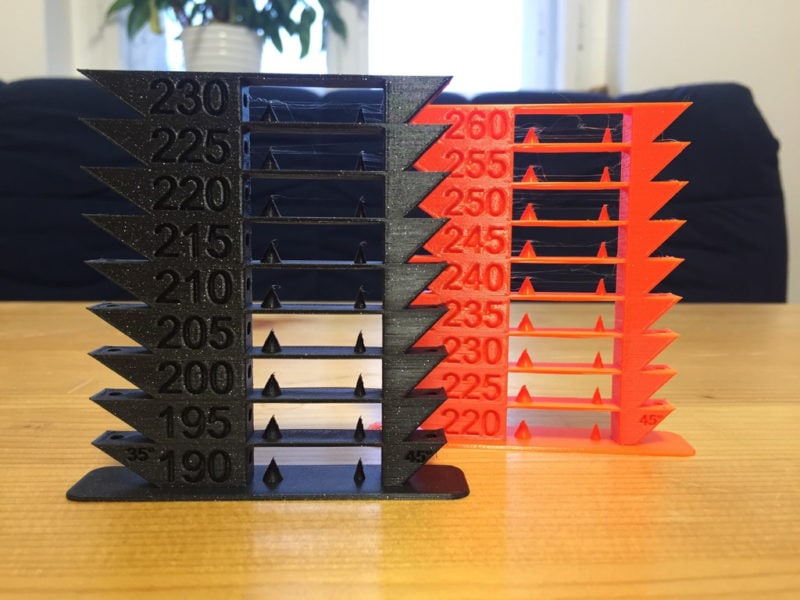
Typically, the temperature decreases from the bottom to the top. For example, if the bottom slab has a temperature of 240°C, the second slab will have a reading of 235°C, the third will have 230°C, and so on.
That way, if your nozzle stops extruding due to low temperatures, this happens at the top of the temperature tower instead of at the bottom and does not ruin your temp tower.
Why Use a Temperature Tower in 3D Printing?
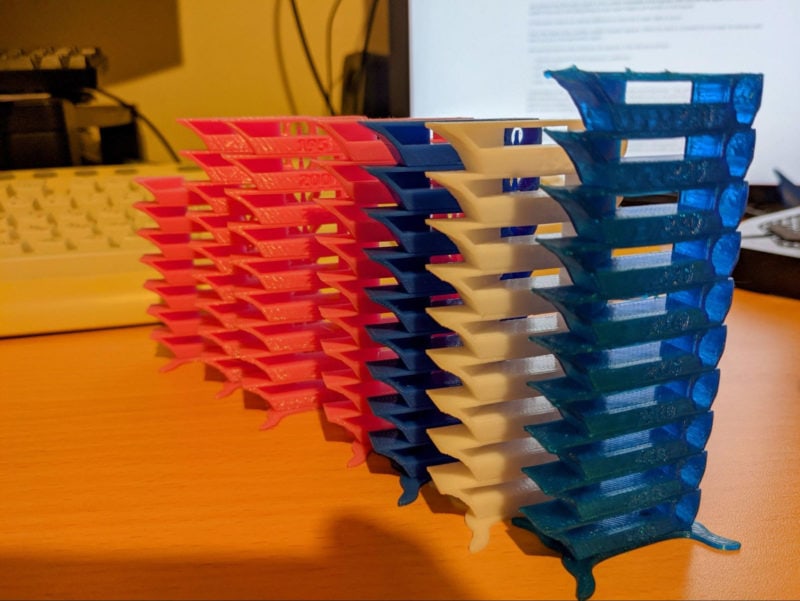
A temp tower lets you evaluate the performance of a particular filament at different printing temperatures. By looking at the final 3D printed temperature tower, it is easy to figure out at which temperature you get optimal results.
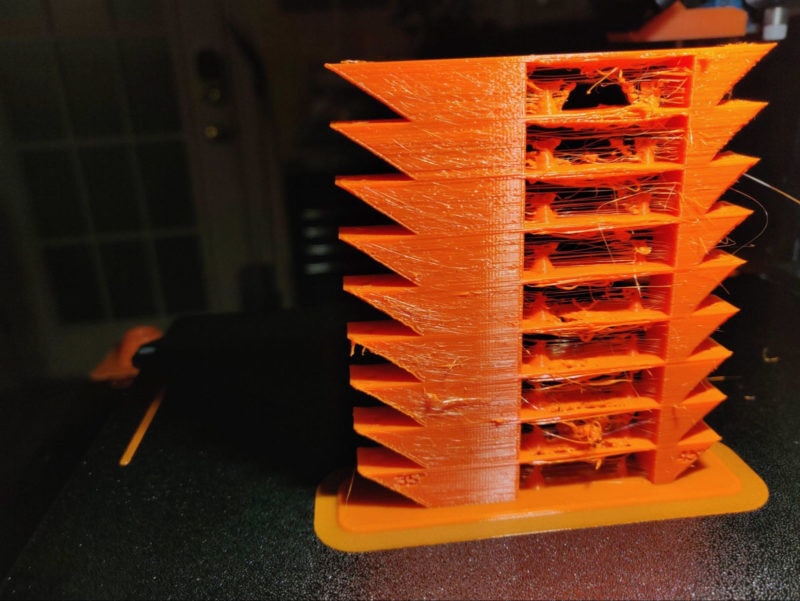
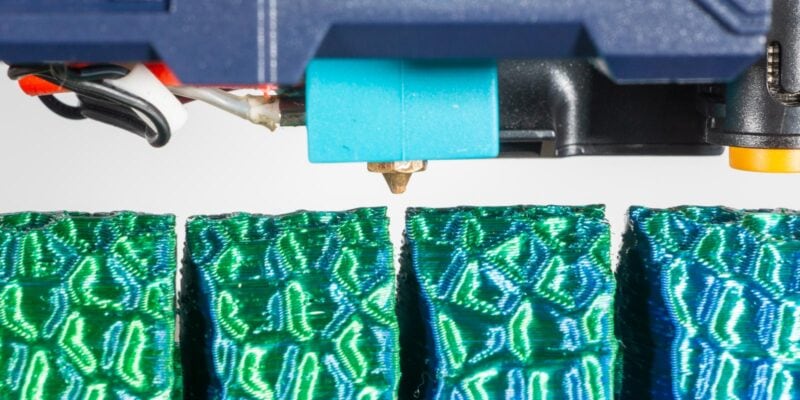
Temp towers help eliminate any defects that might be caused by sub-optimal printing temperatures. For example, low printing temperatures are the most common issue behind under extrusion on fused deposition modeling (FDM) 3D printers. On the other hand, if the printing temperature for a specific filament is too high, you will notice a lot of oozing of filament and stringing during the 3D printing process.
Stringing can be a particularly stubborn problem with PETG, which is why we have an entire article on dealing with PETG stringing.
If you plan on selling your 3D prints and making money with your 3D printer, producing high-quality prints without visual defects is a big key to your success.
When Should You Print a Temp Tower?
The best time to print a temperature tower is when you change filaments and when you’re altering any crucial components of your 3D printer.
Each filament manufacturer uses a slightly different blend of materials to produce the filaments. PLA filament from manufacturer A may give you optimal results at 190°C, and PLA from manufacturer B might print beautifully at 215°C, despite being the same material.
Even if you have perfectly dialed in your PLA filament print settings and made sure to only use the best PLA filament brands, you can get a completely different result when swapping to a different brand of filament.
At the same time, changing any component of your 3D printer, such as the hot end, cooling fan, cooling fan shroud, or even the heater cartridge directly affects the results with the extruded filament. Printing a temp tower helps you evaluate the effects of these changes on the extruded material and allows you to dial in your temperature and print settings for your filaments.
How to Print a Temperature Tower?
Temp towers are quick and easy to 3D print. Let’s find out how you can print one for yourself.
1. Get a Temperature Tower Model
There are many free temp towers available for download on Thingiverse and other Thingiverse alternatives. Some are filament-specific temp towers, some are extra quick and easy to 3D print, whereas others have bridging and retractions tests built-in.
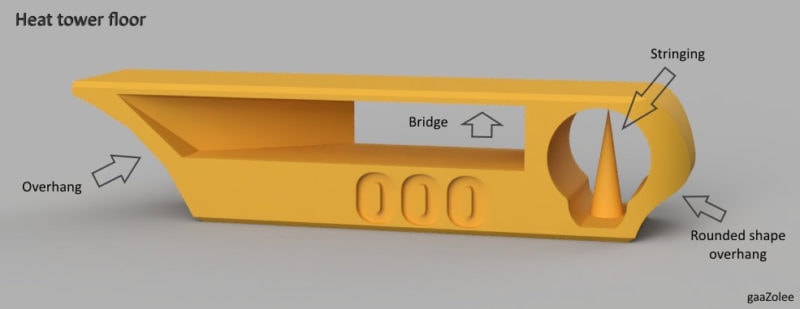
There’s no single best temperature towel model, but if we were to choose one for you to start with, it would be the smart compact temperature calibration tower by gaaZolee. There are temp towers with temperature ranges for PLA, PETG, and ABS. Along with finding optimal temperatures, you can test bridging, stringing overhangs, and even curvy shapes with these.
2. Set up Slicer Settings and Generate GCode
Printing the temperature tower without preparing it in the slicer will cause it to 3D print at a constant temperature. Therefore, the basic procedure for preparing the temp tower for 3D printing involves post-processing the GCode file. Let’s take a look at how to set up the gaaZolee’s temperature tower for printing in three different slicers.
Cura
In Cura, once you slice the temp tower, you’ll have to modify the G-code in post-processing.
In the menu bar, select Extensions→Post Processing→Modify the Gcode. Then select the “Change at Z” option. This will let you set different temperatures for different heights of the temp tower.
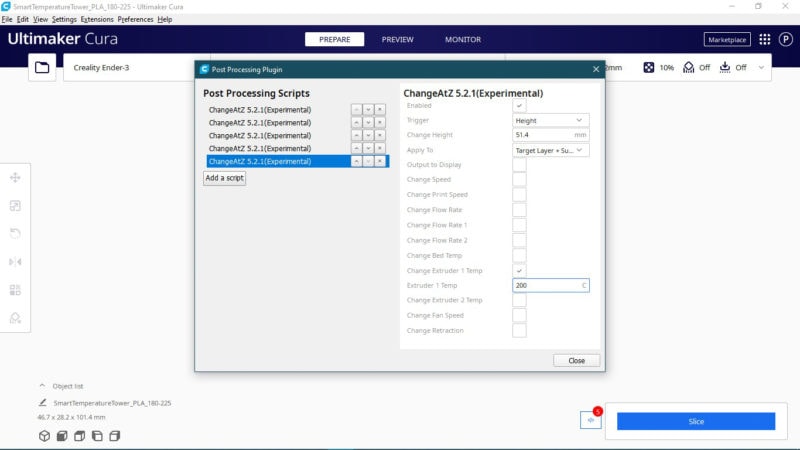
Depending upon the temp tower, you set the trigger height and the temperature for that particular height. For gaaZolee’s PLA temp tower, you’ll have to slice the model at a 0.2 mm layer height with 225°C as the initial temperature (This will be the same in all the slicers mentioned).
Then accounting for the 1.4 mm base and a 10 mm floor height, you’ll set the first trigger at 11.4 mm and the extruder temperature to 220°C. Like this, set the rest of the triggers at 10 mm height intervals and decrease the nozzle temperature by 5°C for each trigger. Slice the model and export the file for 3D printing.
PrusaSlicer
Modifying GCode in PrusaSlicer is slightly easier than Cura. Before slicing the tower in PrusaSlicer, in the Gcode preview, you’ll see a layer height ruler at the right side of the preview window. We’ll use this ruler to navigate and select the various layer heights of the temp tower.
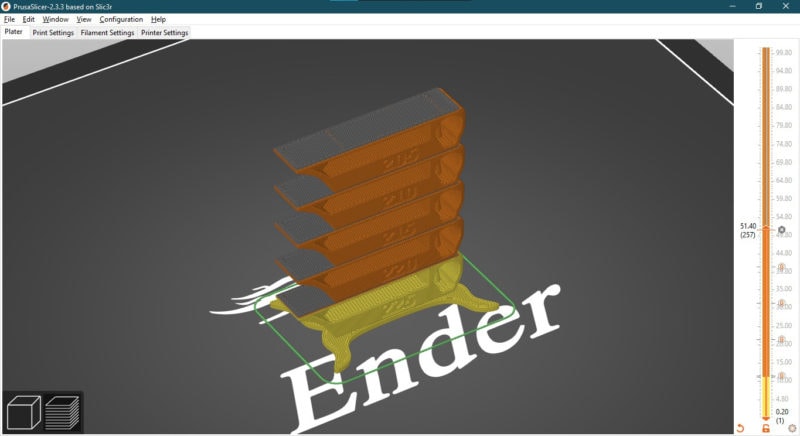
For the first temp change, slide the ruler to 11.4 mm height. Right-click on the ‘+’ symbol and select the ‘Add custom GCode” option. In the pop-up window, type the G-code M104 S220. The ‘M104’ will trigger the temperature change command at the set layer height, and the ‘S220’ part of the G-code will set the temperature to 220°C.
Do this at every height interval of 10 mm. Each time set the temp 5°C less than the previous trigger and reslice the model, and you’re ready to 3D print it.
Simplify3D
Simplify3D makes it slightly easier to set the temperature change. Under the Temperature section, select ‘Primary Extruder Temperature.’ Add setpoints denoting the various layer numbers.
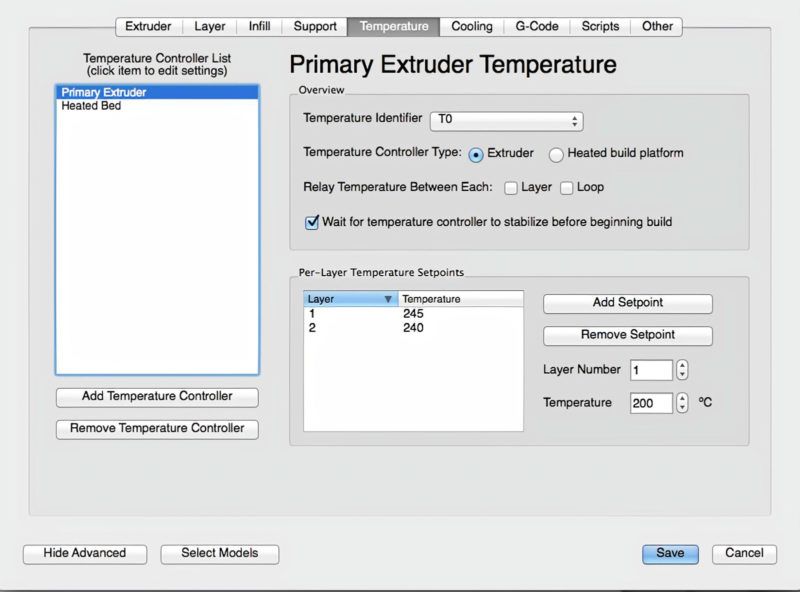
In this case, the first set point for the 1st layer and the temp will be 225°C. The second point will be at layer number 57 (0.2 mm layer height and total 11.4 mm height of the first floor), and the temp will be 220°C.
After that, every other set point will be at successive intervals of 50 layers, i.e., the next setpoints will be at 107, 157, 207, and so on. And each time, the temperature will decrease by 5°C. Once you’ve done this, slice the tower and 3D print it.
How to Read the Results?
After 3D printing the temp tower, it is crucial to interpret the results. The most basic method is to visually inspect the tower and evaluate which temperature setting gives the best-looking results. Check for defects, retraction issues, bridging results, blobs, stringing, and other visual cues.
Then, to check the layer adhesion, try to separate the layers by hand. This lets you know the temperature at which the layers bond to each other strongly. You’ll notice that layers at lower temperatures do not stick to each other well, as the heat is not enough to melt and bind these layers together.
Filaments from brands such as Overture, Hatchbox, Esun, and especially Prusaments are some of the best materials you can use if you’re struggling to get good quality results due to poor material.

Once you’ve evaluated the results, make sure to document them for future purposes. This allows you to look up the optimal temperature settings the next time you print with the same spool.
Conclusion
Temperature towers are a great way to save yourself time and figure out the best 3D printing temperatures for a particular filament. They take out any guesswork, and you can be confident of the results and expect the best printing quality each time from your favorite material.
Let us know your results and experiences with these temp towers. If you have any additional questions or would like to add something, feel free to comment below.


I’m trying to modify the gcode but there is no z-axis option, only before/after a layer change. This is the latest Cura, should I try the older version or is there another method to edit the gcode?
Very good video…
hi there what speed do you have to use to do this test ?
“Typically, the temperature decreases in descending order from the bottom to the top.”
Updated, thanks!