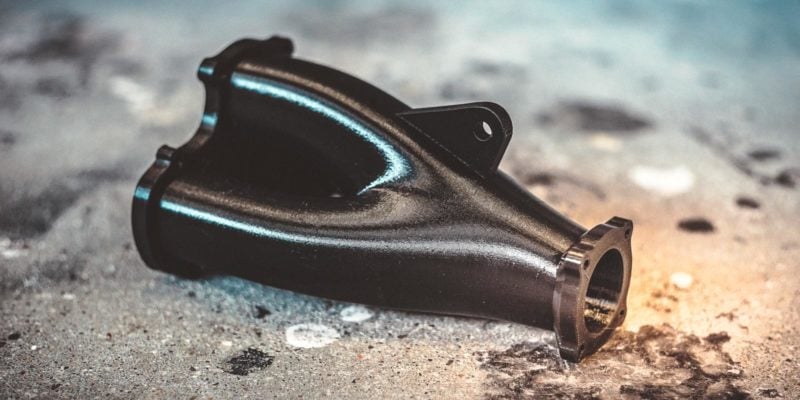
Even if you have your print settings down to a science, your 3D prints might still have holes and gaps. Most of the time, it’s easy to ignore these gaps because they’re small and don’t affect the strength of the print. But sometimes, they can be really noticeable and ruin the look of the print.
Especially when surface finish and overall look are of the utmost importance, like when you are selling 3D prints, holes and gaps can be a major issue.
This article will fill in the gaps and cracks related to this topic, and give you some handy tips and tricks to quickly fix them. By the end, you’ll have a better understanding of how to prevent them in the first place, and how to fix them when they do happen.
Why Do 3D Prints Have Holes and Gaps?
Under-extrusion is one of the most common reasons for holes and gaps in 3D prints. Under-extrusion is when the hot end puts out less filament than it is supposed to. This leads to specific areas in your prints not having the proper material amount, causing a gap in that area.
Another potential cause is a too low print temperature. A low print temperature affects the bonding between the layers of the print. If the layers are not stuck together very well, they can come apart, leading to gaps in your printed parts. This is called “delamination” in 3D printing. We will be looking at this issue in more detail below.
You can encounter more causes for holes in 3D prints as well. For example, too fast printing speeds, improper print settings (infill percentage, top layer count), incorrect Z-offset, and high moisture in the filament. In some ways, these things also cause surface gaps in your prints and lower the quality of the prints.
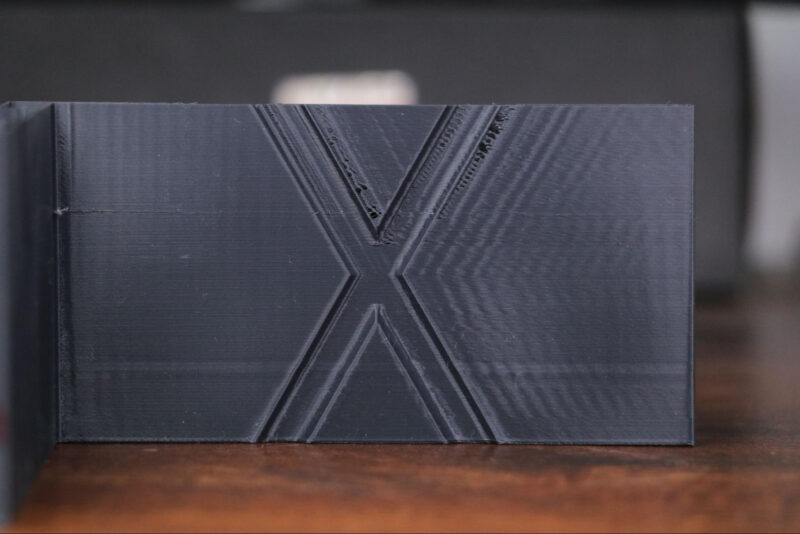
There are also some things that can be seen as a problem with holes in your 3D prints, where in fact it is something standard. One good example of this is the vertical Z-seam.
The Z-seam is caused by the slicer software and is where a 3D print starts and ends. In most cases, it’s positioned in one corner of your model and is visible as a thin line or gap. It’s completely normal in FDM 3D prints, and there are ways to reduce its visibility. For example, you can reduce its appearance by dialing the retraction settings.
It’s a good practice to properly check your printed parts and differentiate whether the gaps are caused by a printing or settings issue, or whether they are a standard part of the 3D printing process.
Which Types of Gaps and Holes Can You Find in Your 3D Prints?
The types of gaps and holes you can find in your 3D prints can be categorized in several ways. Here, we’ve grouped them based on their location in your 3D prints—gaps in the first layer, in the print walls, and in the top layer.
Gaps in the Initial Layer
Gaps in the first layer are common occurrences and are good indicators of under-extrusion and bed leveling issues in your 3D prints. At first, these holes might not seem important. After all, the bottom layer of your prints isn’t that visible, right?
However, if there are too many gaps between the extrusion lines of your first layer, the 3D print won’t have sufficient bed adhesion. In that case, you can end up with a warped print or even have it detach completely from the build plate.
The extruded material won’t spread properly if the distance between your nozzle and the bed is not correct. For example, if the nozzle is too far away from the print bed, the extruded filament won’t get squished together as it should, leading to gaps.
On the other hand, if the nozzle is too close to the print bed, the extruder will have trouble pushing the filament out. This is because the print bed is too close to the nozzle and effectively forms a blockage. This can also result in gaps between the extrusion lines of your first layer.
Print Walls with Holes
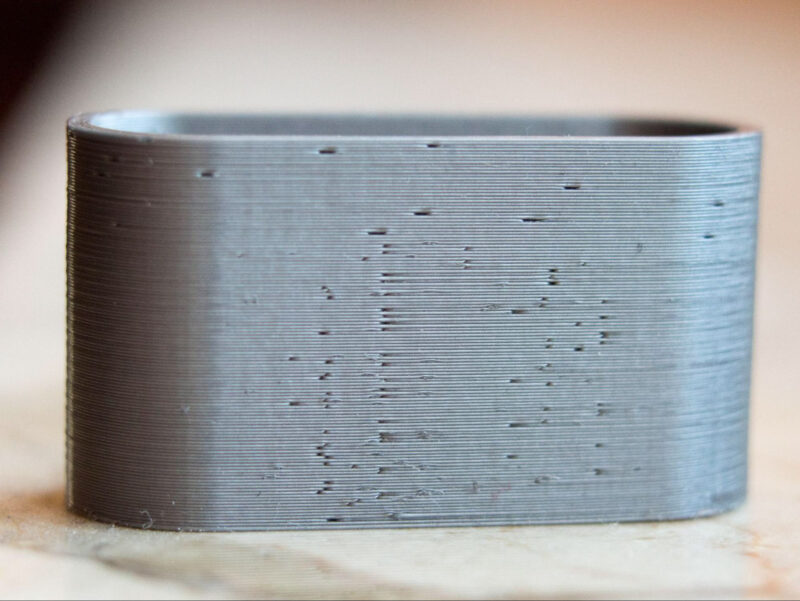
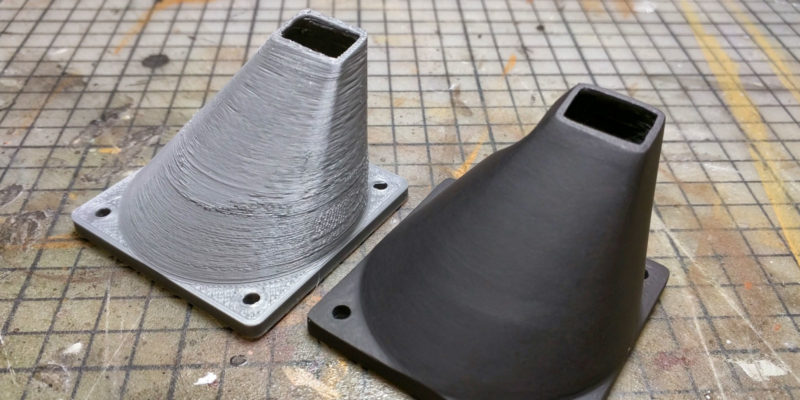
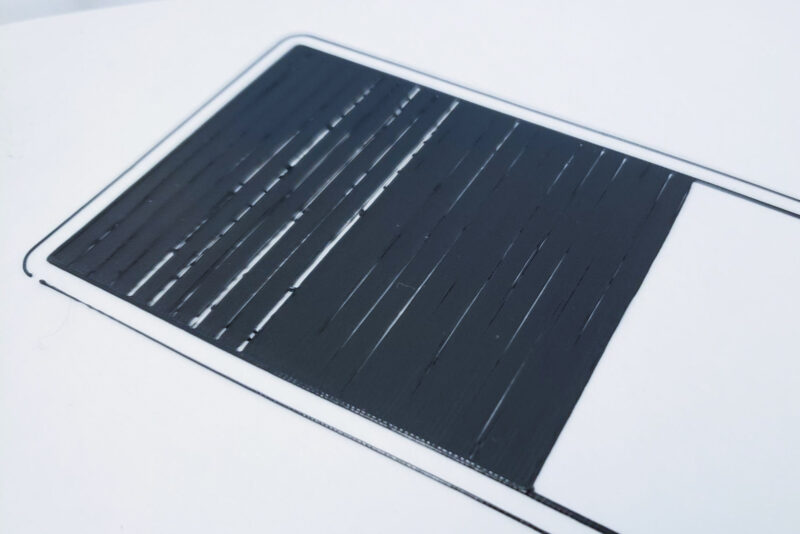
The gaps in 3D prints you’ll notice most quickly are the ones on the outside of your 3D prints. You’ll notice wall gaps showing up during the printing process, and they have the most effect on how your part looks.
Again, one of the most common reasons why wall gaps occur is under-extrusion. For example, if the flow rate is not set correctly or your 3D printer nozzle is clogged, this can lead to too little material being extruded. This causes the print walls to become too thin and leads to gaps in your 3D prints.
Another possible cause can be that the printing speed is so fast that the nozzle doesn’t have enough time to extrude enough material. An underpowered hot end heater cartridge can play a part in this as well. If the nozzle temperature stays too low, it can lead to a poor flow rate and gaps as well.
Remember when we talked about delamination? If the filament is extruded at too low a temperature, the previous layers printed will not stick to the next layers well enough. This can lead to two or more layers separating at their edges or corners. In fact, layer separation is a very common problem with temperature-sensitive materials like ABS and Nylon.
One last kind of gap you might notice in your print’s outer surfaces is when the retraction distance is set too high. If the extruder motor draws back the filament too far, it can leave gaps in the walls of your 3D prints.
Top Layer Gaps
The gaps on the top layer are the last category we will touch on in this post. These gaps are easy to see and affect the aesthetics of your 3D prints. The lack of an appropriate number of top layers is the most likely reason for holes in top layers.
Nearly all 3D printed parts have a partially hollow interior. The top and bottom layers and the outer perimeters close off the partially filled inner space. When the solid flat surface at the top is being printed, its thin layers can droop down into that hollow inner cavity of your parts.
If you have set a low number of top layers in your print settings, these top layers can’t fill out the roof of your parts. The result is that the top layers become too thin and the filament might even disappear into the hollow space. Increasing the number of top layers or increasing the infill percentage are quick ways to solve this problem.
Another type of gap that is easy to notice in top layers is small gaps between layers and their edges. It’s called “wall separation,” and it’s usually linked to under-extrusion and fast printing speeds.
How to Avoid Holes in 3D Prints
Now that we’ve covered the problems with gaps in 3D printing, let’s take a look at how to fix them.
How To Fix First Layer Gaps

There are a couple of things you can do to address first layer gaps in your 3D prints. The most notable ones are leveling your print bed, slowing down your print speed, and adjusting your first layer extrusion settings.
The easiest way to check whether you have a problem with first layer gaps is to use a bed leveling test. Before you print it, make sure to manually level the bed first. If you have a 3D printer with an automatic bed leveling sensor, correctly set your Z-offset settings beforehand.
If your print bed is leveled correctly, but you still have first layer gaps, then it could be a problem with the extrusion temperature or flow rate. Try increasing the temperature of your nozzle for the first layers to make sure that the extruded material is runny enough to adhere to the print bed well.
Slower print speeds also help you avoid gaps between lines and make sure that your prints stick well to the print bed. Keep the speed at which you print the first layer at 20–30% of your normal speed or about 15–20 mm/s. You can also use proper bed adhesion techniques like Magigoo or hairspray on the build plate to further help reduce printing defects.
Avoiding Wall Gaps
Tuning the extrusion settings is your best bet to prevent gaps between layers in the outer parameters of your printed model. Since under-extrusion is one of the most common reasons for this problem, you can try increasing your 3D printer’s flow rate in the slicer settings.
In addition to increasing the flow rate, try reducing your printing speed. Slower print speeds give the hot end time to properly melt the filament and extrude a better quality part.
Second, you need to figure out the ideal printing temperature for the material you are 3D printing in. This will help the material flow smoothly and minimize under-extrusion issues. Also, it will help reduce problems with layer separation, which can cause a print to fail when it starts to warp.
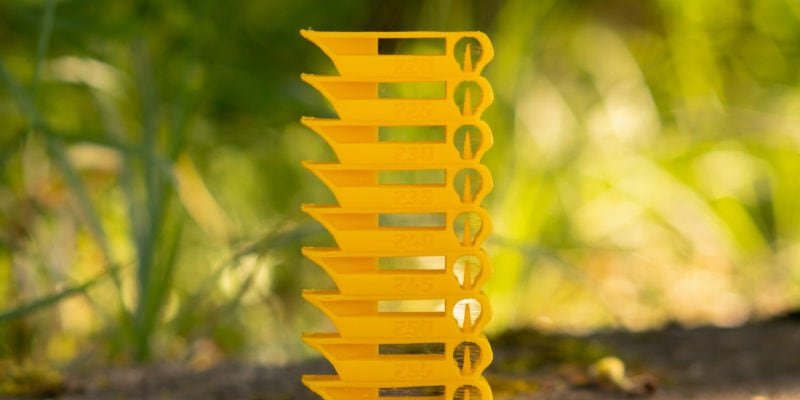
A temperature tower is an excellent way to identify the correct printing temperature for each specific filament. It’s a single 3D model that prints layers at various temperatures. By inspecting the print afterward, you can quickly see which layers have the best results and pick the best temperature.
Printing with materials like ABS and Nylon will also be easier with a 3D printer enclosure. An enclosed 3D printer helps prevent sudden air drafts and maintains a warm ambient printing temperature. This helps the layers stick together and reduces peeling and warping in your 3D prints.
Fixing Gaps in Top Layers
As we saw earlier, the top layer thickness is crucial in covering the partially hollow interior in the 3D-printed parts. Adding more top layers helps keep your 3D prints from having gaps or holes that can be seen from the top. However, using the ironing setting in your slicer will also help you get a smooth top layer and get rid of any gaps.
To cover the gap between the outer edges and the top layer extrusion lines, you can also increase the infill overlap or outline overlap setting in your slicer software. The infill overlap setting makes the distance between those two elements smaller and helps fill in gaps in the edges of your top layer.
Last but not least, you can keep your top layers from having gaps by slowing down the print speed and adjusting the extrusion. Both will help your 3D printer extrude the material more precisely and reduce under-extrusion issues in the top layers.
How to Fix 3D Print Gaps After 3D Printing
Just because your final 3D prints have gaps, it doesn’t mean you have to throw them away. You can fill in these gaps and salvage your models by using some simple techniques and methods.
For example, you can use a primer to cover up any holes or small gaps between layers on the surface of your print. A primer will help you fill in these imperfections and serve as a base layer, for painting your parts.Painting your 3D printed parts is a great way to make them look better and fill in the gaps between the layer surfaces.
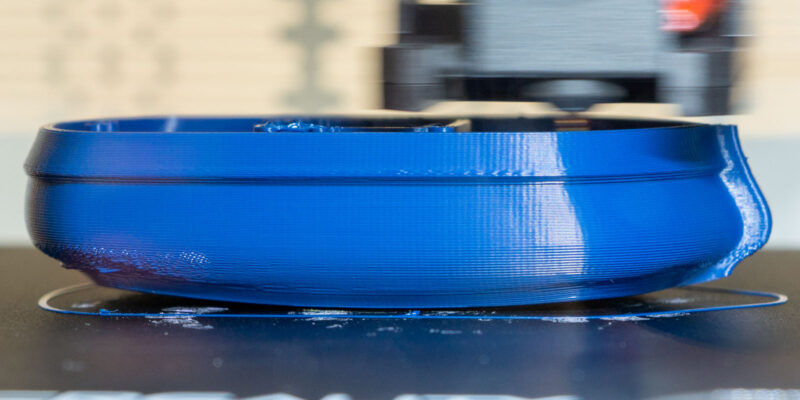
You can also try PLA smoothing for PLA prints and vapor smoothing for ABS prints. Smoothing 3D printed parts gives you a clear and smooth surface finish while concealing any visible gaps and layer lines. Oftentimes, these methods completely eliminate layer lines and remove the need to patch up small gaps.
Conclusion: Can you Fix Holes and Gaps in 3D Prints?
Holes and gaps in 3D prints can be unappealing and affect the overall quality of your 3D printed parts. But with the correct knowledge and fine-tuning of appropriate print settings, you can reduce these imperfections and improve your 3D printing quality.
Remember to calibrate your extrusion settings, printing temperature, infill overlap, and speed settings before you start printing. These go a long way at preventing 3D print gaps in the first place. If you do end up with gaps in your 3D prints, try using a primer, painting or smoothing your parts to fix them.
With these tips, you can get much better results with 3D printing and produce beautiful parts that are free of visible gaps. Good luck!