

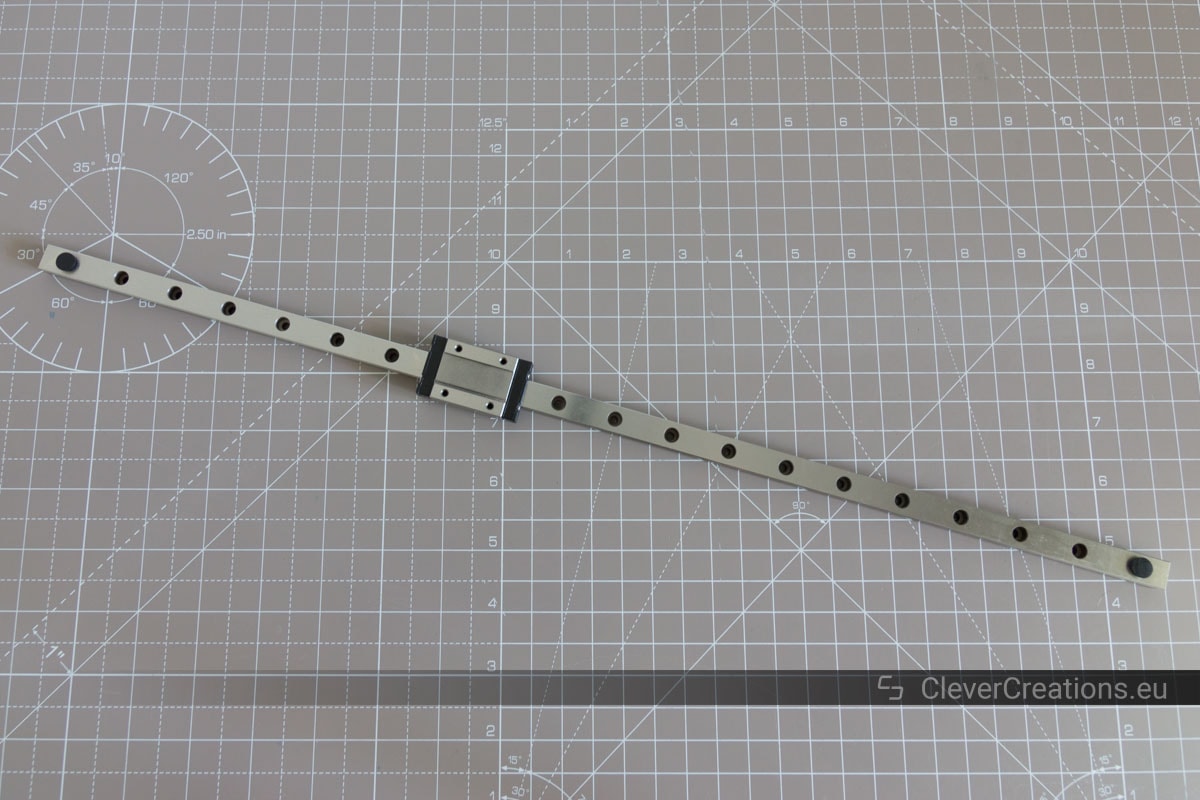
Linear guides are an essential component when it comes to building 3D printers, home CNC machines, and laser engravers that need some kind of linear motion. Unfortunately, high quality linear guide rails are often too expensive for hobby projects.
Cheaper ones are available (typically from China), but they can come with quality issues that limit their effectiveness. For example, the carriage can be ‘sticky’ and not travel smoothly, the bearing balls can make a clicking or grinding sound, indicating some kind of problem. An other common problem is carriage getting stuck at some points along the rail.
Luckily, many of these issues can be addressed in order to improve linear rail performance.
In this article I will share several methods to fix up your cheap linear guides and get better performance without having to spend exorbitant amounts of money on high-end guides. These techniques do not solve all issues, but in my experience they work often enough to be worth trying.
Before explaining how to fix cheap linear guides, I will give some more information on the different quality linear guides that you can find on the market right now.
Buying Linear Guide Rails
From what I can tell, there are several quality classes to choose from when buying linear guide rails. They can be divided in roughly three categories, all with different prices, tolerances and build quality.
Cheap Chinese Linear Guides
These are the linear guides that can be found for very low prices on AliExpress or eBay. Out of all available linear guides on the market, these are the cheapest. Their low price is reflected in the build quality. Inferior materials (compared to the more expensive ones) are used, and the machining quality is also usually not great.
These guides tend to be a bit hit & miss. Some of the units work well, others have issues. Because of their low price, it is possible to buy some extra guides and handpick the rails & carriages that work best. The ones with minor issues can often be fixed. Helping you do so is the goal of this article.
Despite their issues, these guides can still be a good option when building a 3D printer on a budget. By discarding the worst rails & carriages and improving the ones with minor issues, a good result can be achieved for a relatively low price.
Genuine Hiwin / Misumi / Japanese Linear Guides
These are the linear guides at the other end of the spectrum. They are the most expensive, but also the best quality. They have narrow tolerances, smooth travel and work right out of the box.
Because of their high prices, it is often hard to justify these linear guides for most hobby projects.
It is sometimes possible to find these guides for a decent price on the second-hand market. While they do come used, they are still in a more than good enough state for hobbyist applications where extremely narrow tolerances are not that important.
It can be difficult to find these second-hand deals however. Especially when a build calls for an exact type, quantity and length of a specific guide rail.
Linear Guides From Robotdigg
Robotdigg linear guide rails, despite also coming from China, are in my experience of better quality than the cheapest Chinese guides. Both the machining and materials used are superior. They do cost a bit more than the cheap Chinese guides, but nothing extravagant.
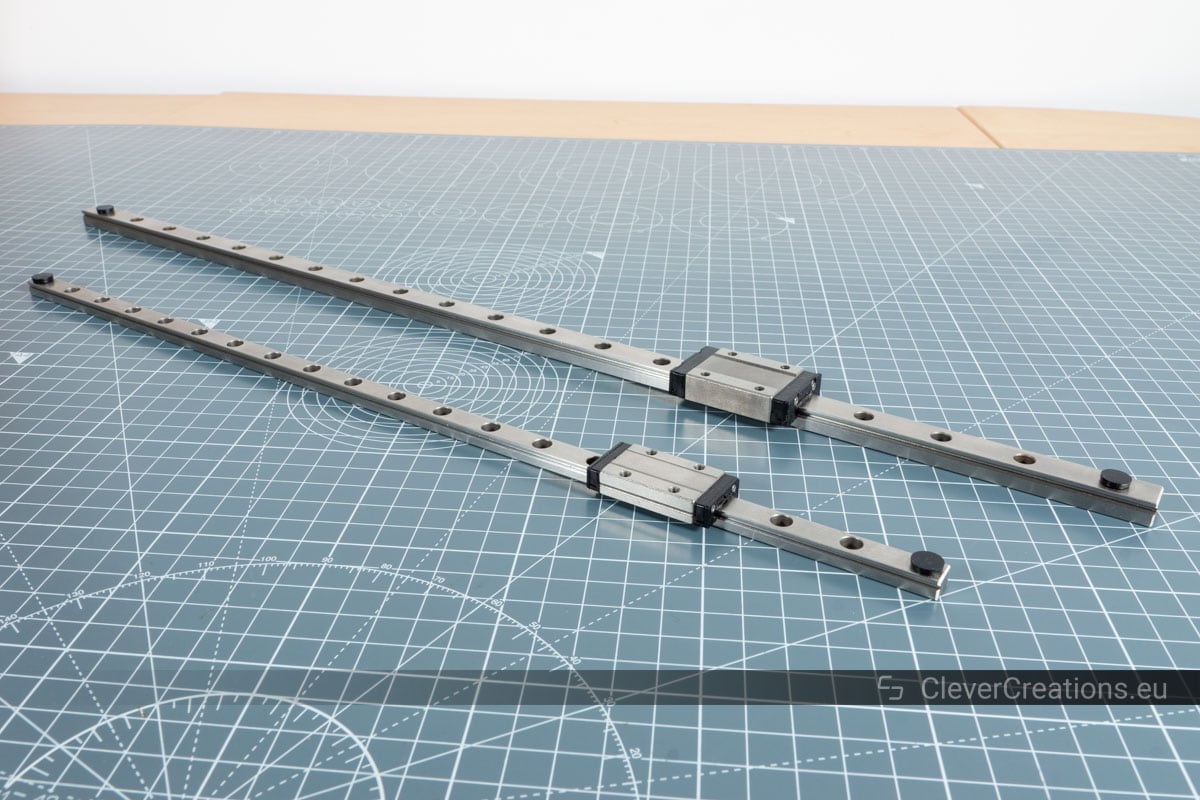
Out of all options these seemed like the best value to me, so I used their 440C SUS MGN9 and MGN12 linear guide rails for all axes in my new 3D printer build.
So Which Linear Guides Should You Buy?
As you can see above, each class of linear guides comes with its own up- and downsides. In the end it comes down to choosing between spending more money vs. spending more time.
Expensive linear guides cost a lot more, but work perfectly right out of the box. Cheaper guide rails, on the other hand, are more likely to have problems and defects, which require an input of time and effort to deal with.
In order to deal with the limitations of cheaper linear guides, several things can be done. Some of the most common methods are listed below. Further down the page I have also included a guide on how to disassemble and reassemble the carriage blocks.
Ways in Which the Performance of Cheap Linear Guides Can Be Improved
Typically when dealing with a linear guide with problems, it can be hard to say what the exact cause of the issues is. There are a variety of symptoms, and an equally large number of possible causes, with a lot of overlap between them.
Some possible causes of a linear guide not working properly are:
- Bearing balls that are the wrong size (slightly oversized or undersized).
- An inconsistent diameter of a few balls in the carriage.
- Thick grease that prevents the balls from rolling freely.
- Burrs (leftover pieces of metal from machining) in the carriage channels.
- Burrs on the linear guide rail itself.
- A mismatch in size between the carriage and the rail. The carriage is slightly too big for the rail, or vice versa.
There are probably even more causes, but I believe that these are the most common ones.
It can be tricky to identify what the exact cause of the problem is, so I typically just work down the list of solutions until the linear guide works as it should.
The list of solutions below is roughly sorted by the amount of effort involved, so I recommend working down from top to bottom.
Removing the Stock Grease
What You’ll Need
|
|
Tools | ||
|---|---|---|---|

|
Check Price | ||
|
|
Parts | ||
|---|---|---|---|
![WD-40 Specialist Cleaner & Degreaser, 24 OZ [Non-Aerosol Trigger]](https://m.media-amazon.com/images/I/41XIr8T9vvL.jpg)
|
Check Price | ||
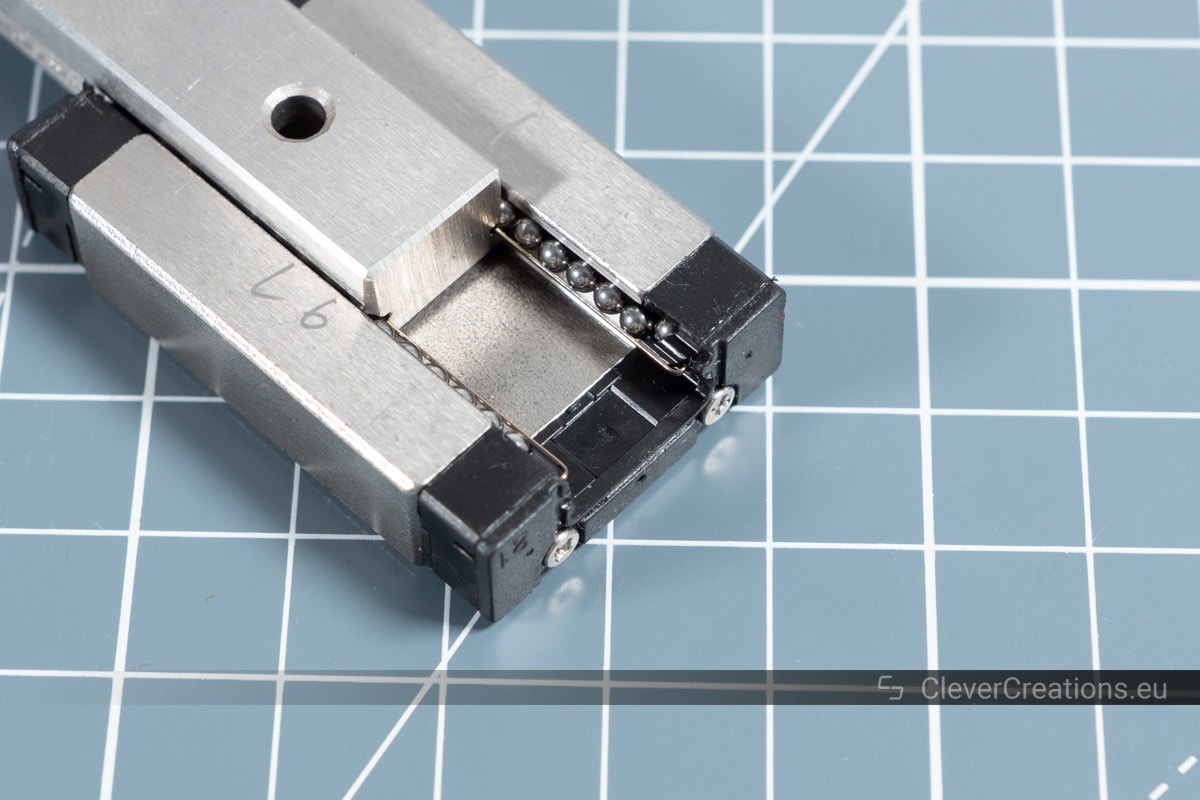
Cheap Chinese linear rails are often coated in the factory with a thick grease that prevents rust and corrosion. This is useful for when the guides are stored in a warehouse or being shipped, but not so much when we want to use them in our builds.
Thick grease adds a lot of friction when the balls in the carriage try to circulate. But if grease is the only thing that prevents the carriage from traveling smoothly, then simply removing it will solve the issue.
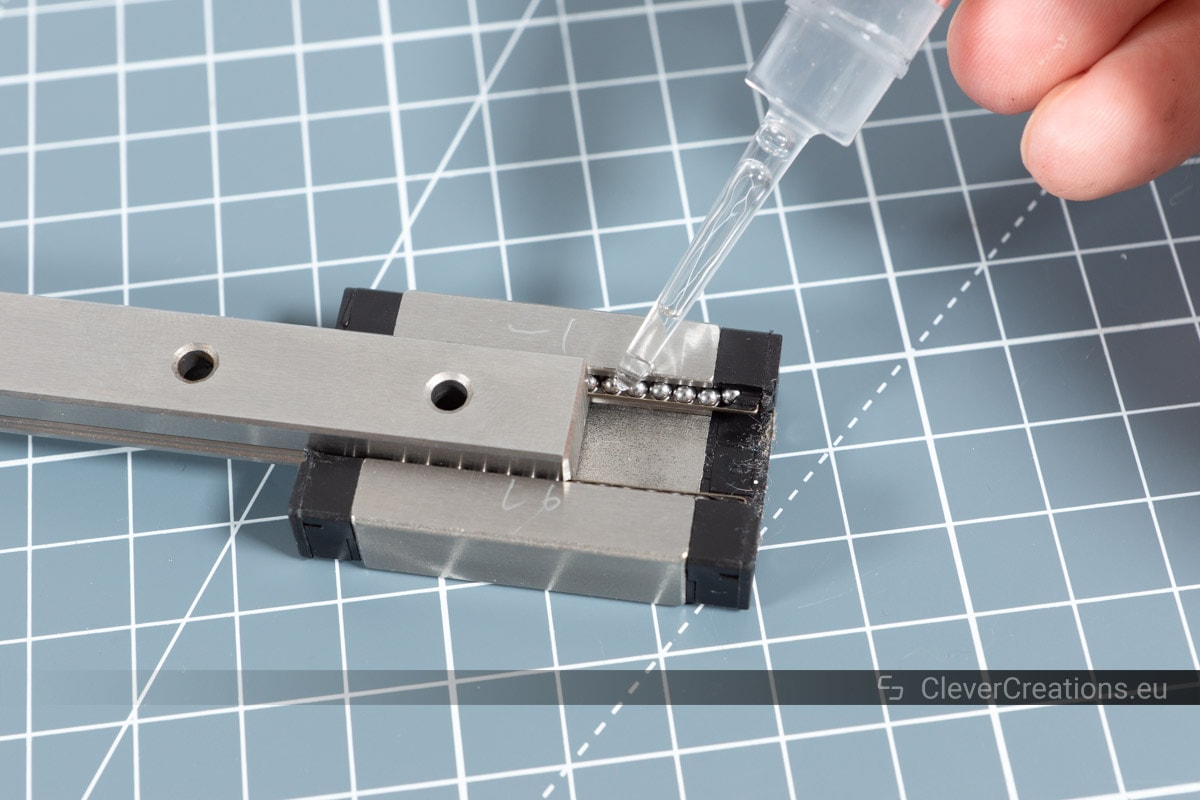
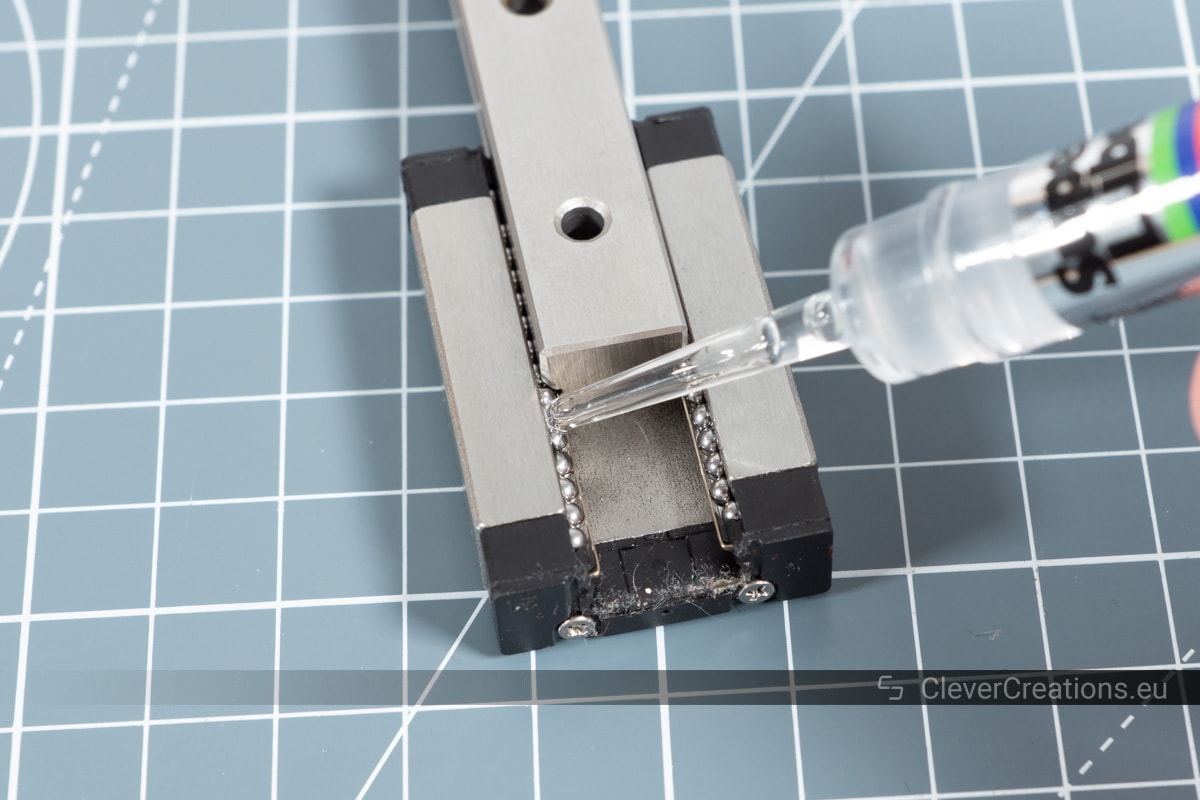
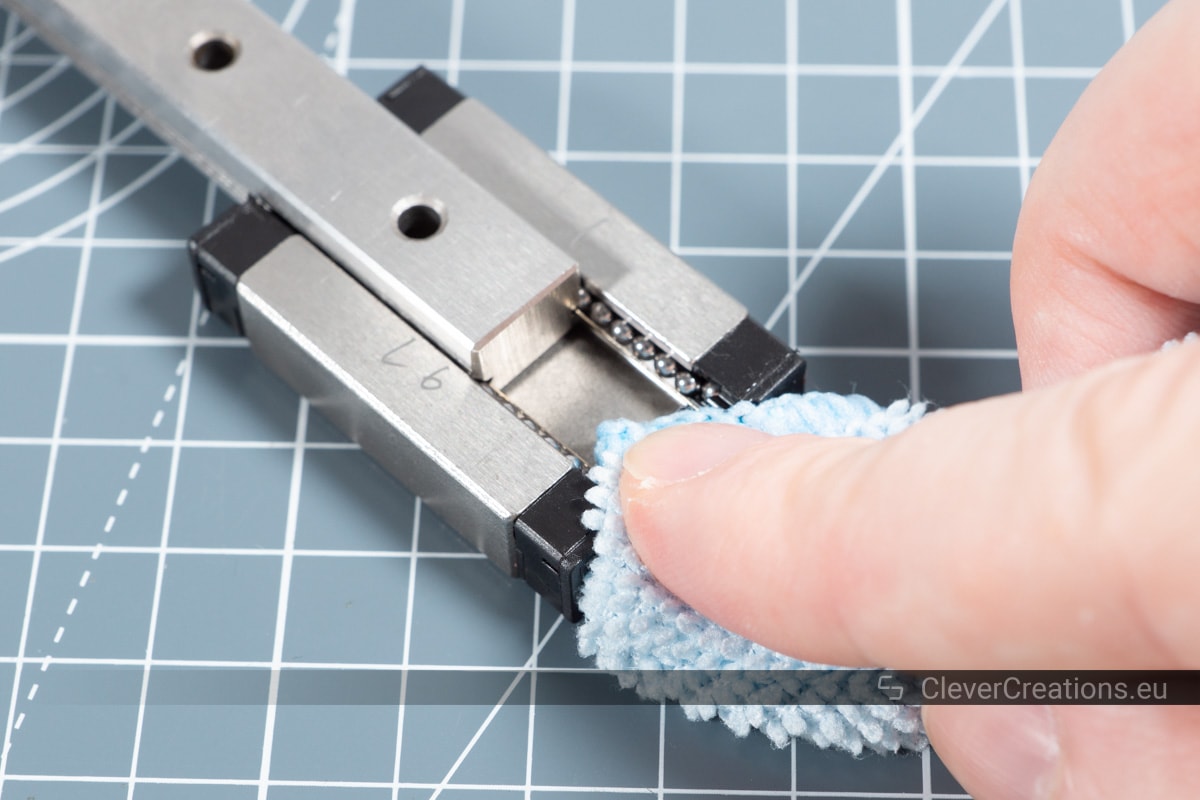
A simple way of removing the grease is to thoroughly wipe down the rail and to lubricate the carriage with a proper lubricant (see the next section).
A more complete way of removing the grease is to disassemble the carriage and to degrease all metal components (bearing balls, metal carriage parts and the rail) with a degreaser. Then reassemble the carriage and lubricate it.
Examples of degreasers that you can use for this are kerosene (paraffin/lamp oil), mineral spirits (turpentine) or WD-40 degreaser (not regular WD-40).
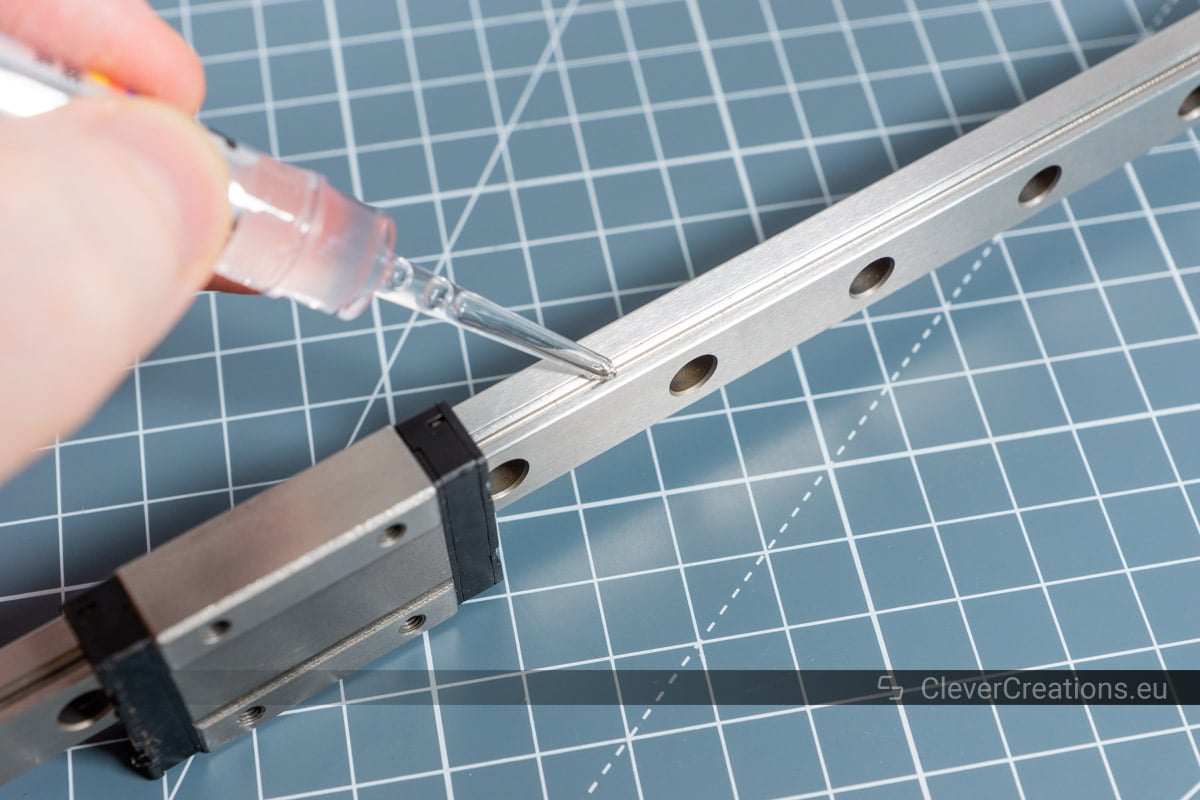
Lubricating the Linear Guide Carriage
The steel balls inside a linear rail carriage need to be lubricated with a small amount of appropriate lubricant. The lubricant shouldn’t be too thick. If you apply a thick, high-viscosity lubricant, the balls will not be able to circulate freely.
If the lubricant is too thin, however, you need to reapply it often. So that’s not ideal either.
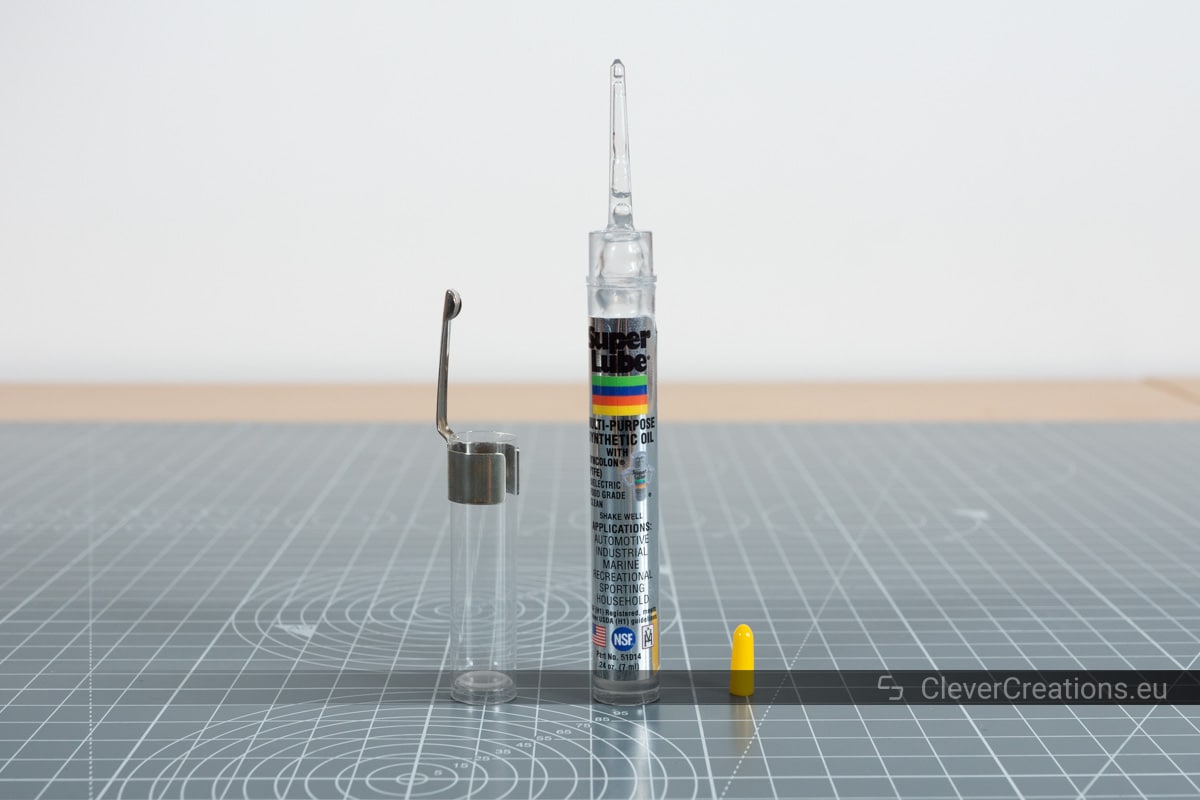
Over the years I have tried various lubricants for the linear motion components of my 3D printers, and the one I have settled on is Super Lube 51010 oil. It is an excellent PTFE-based oil lubricant that lasts for a long time. You can use the Super Lube 51014/51004/51008/51025 product codes as well, as it is the exact same stuff, but in a different container/packaging.
There are also good PTFE-based greases out there that you can use, but I prefer to avoid those. From what I have noticed, grease attracts more dirt and grime than oil does.
How to Lubricate Linear Guide Rails
What You’ll Need
|
|
Parts | ||
|---|---|---|---|

|
Check Price | ||

That is all there is to it. There is not much that can go wrong when lubricating a linear guide rail, as long as you don’t overdo it with the lubricant.
Running in the Carriage
Running in (also known as breaking in) the carriage can be done by moving the carriage back and forth over the rail for a period of time. Ideally this would be done under light load. It allows the moving parts of the carriage block to wear in against each other and create final size and shape adjustments that allow for smoother travel.
Cheap linear rails and carriages especially benefit from this, as they often come with minor imperfections that get evened out from this method.
It is hard for me to say what would be the best amount of time to run in the carriage, but I have had success with moving the carriage back and forth for about 15-30 minutes. In the end it will depend on the severity of the imperfections.
That said, this is not a method that can fix absolutely everything, so at some point it is best to move on to other possible solutions.
Replacing the Stainless Steel Bearing Balls
Some of the cheap linear guide rails come with inferior quality steel bearing balls. This can mean that some of the balls are non-spherical, have a diameter that is incorrect, or are made of a metal that is too soft. All of these things create more friction.
Replacing the bearing balls with better quality ones improves performance and give smoother travel.
You can also find that the carriage has some bearing balls missing, however, this is not always that big of a deal. When one or more balls (up to a certain point) are missing, the remaining ones simply take on a slightly bigger load. In 3D printers (as opposed to CNC machines) loads are typically not that high, so there is little risk of exceeding the load ratings of the carriage with a few bearing balls missing.
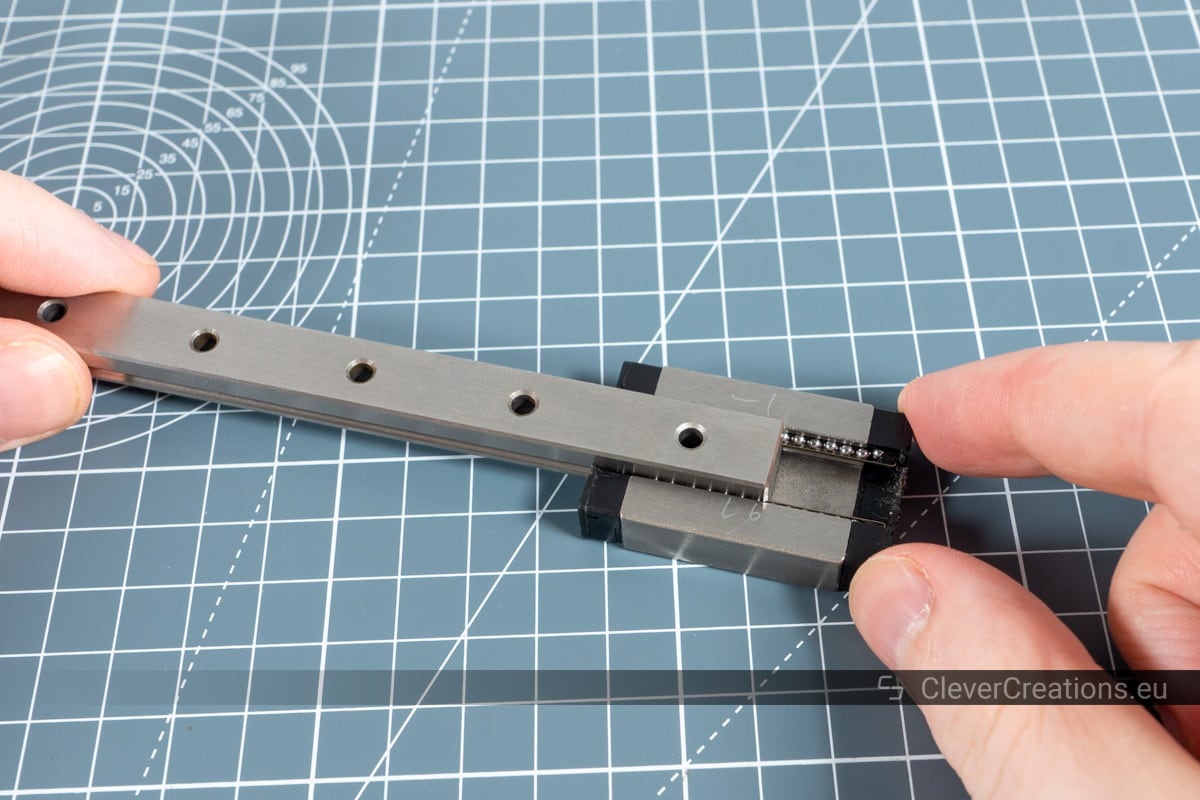
The easiest way to replace the bearing balls is to open up the carriage block (see further down the page), removing the bearing balls and reassembling the carriage block with new, higher quality ones.
The size of the bearing balls in the carriage depends on the size of the linear rail. For example, MGN9 carriages use 1/16″ (1.58mm) bearing balls, whereas MGN12 carriages use 3/32″ (2.38mm) bearing balls.
For reference, the MGN12 carriage that I took apart contained 66 balls.
Bearing Ball Material: Chrome Steel vs Stainless Steel
If you look online for replacement bearing balls, you will see that most of them are either made of chrome steel, or stainless steel. It can be tricky to decide which ones to buy if you don’t know the difference between them.
Chrome steel has a higher hardness than stainless steel and is usually the preferred option. Chrome steel bearings last longer, create less friction and are more silent than their stainless steel counterparts.
Stainless steel bearing balls have the benefit that they can run at higher temperatures and are more corrosion resistant than chrome steel balls. These two properties are most useful in applications with high humidity or high temperature (>150°C), but don’t come into play in things like 3D printers or CNC machines.
Corrosion resistance on chrome steel bearings can also be improved by using a high-quality, protective lubricant, so this is pretty much a non-issue in most applications.
In conclusion: between chrome and stainless steel bearing balls, chrome steel is almost always the better option for linear guides.
Silicon Nitride Ceramic Bearing Balls
But wait! There is also a third option: silicon nitride (Si3N4) ceramic bearing balls. These are used in high-performance bearings and perform better than steel bearings in practically every aspect.
Silicon nitride bearing balls have up to 80% less friction and a 3-10 longer lifetime than traditional metal bearings. In addition, they can operate at significantly higher speeds, have less weight, have higher maximum operating temperatures and run better with limited lubrication.
As you probably figured, the downside is the price. You can expect to pay a lot more than what you would pay for chrome steel bearing balls. A bigger investment, but in return you do get better performance, less noise and a longer lifespan.
At the same time, quality chrome steel bearing balls are often a significant improvement over the balls that you get with cheap linear rails as well. Either option is likely to improve the running of your linear rails, and you shouldn’t worry too much if silicon nitride bearing balls do not fall within your budget.
| Chrome steel | Silicon nitride | |
|---|---|---|
| MGN9 | 1/16″ (1.58mm) | 1/16″ (1.58mm) |
| MGN12 | 3/32″ (2.38mm) | 3/32″ (2.38mm) |
| MGN15 |
7/64″ (2.778mm) |

Reaming the Carriage Channels
The carriage block contains two channels through which the stainless steel balls are circulated. It can happen that during manufacturing these channels are not reamed or deburred properly. This can cause the surface of the channels to have a rough surface. The rough surface causes the stainless steel balls to travel less smooth, or to even get stuck periodically.
To solve this you can place the carriage block in a drill press and use an appropriately sized drill bit to smooth out the channels.
The channels are unlikely to end up perfectly smooth, but depending on the original state of the channels there can be a significant improvement.
A Summary of the Methods You Can Use to Fix Linear Rails
- Removing the stock grease from the rail and carriage.
- Lubricating the carriage with a proper lubricant.
- Running in the carriage.
- Replacing the stainless steel bearing balls.
- Reaming the carriage channels.
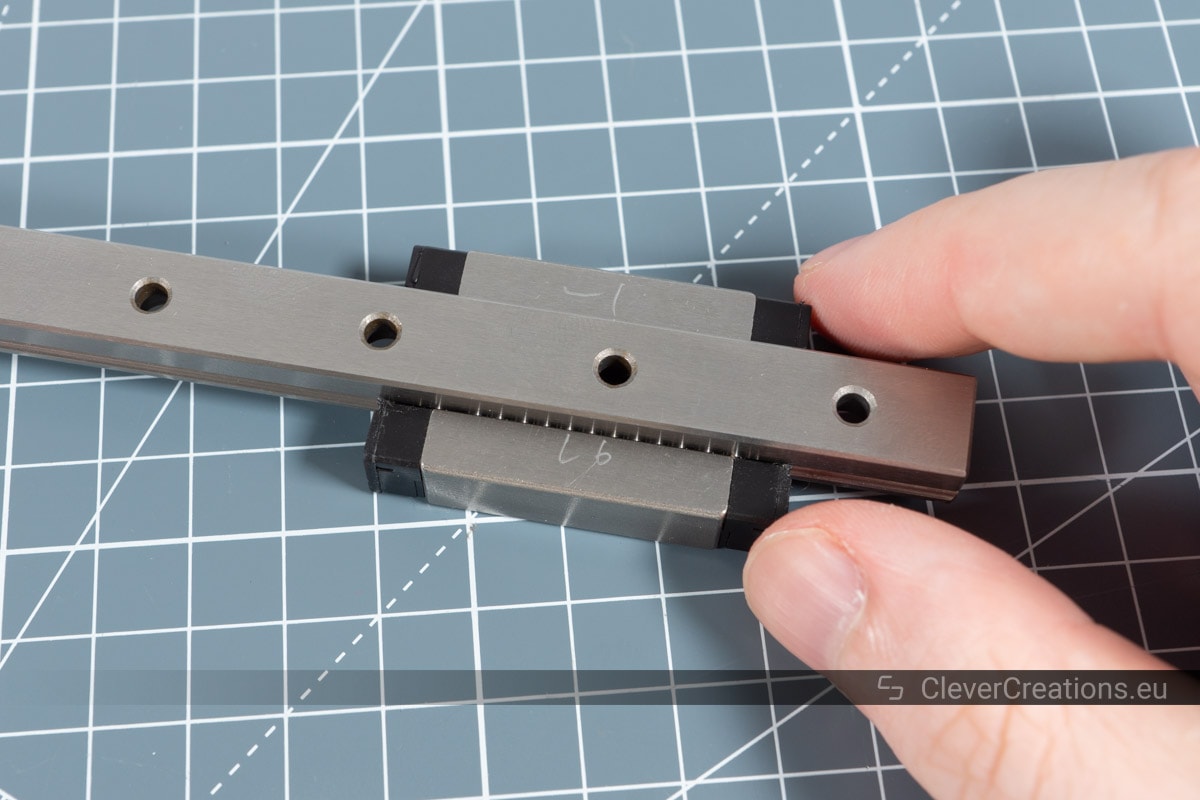
How to Disassemble MGN Carriage Blocks
What You’ll Need
|
|
Tools | ||
|---|---|---|---|
|
Check Price | ||
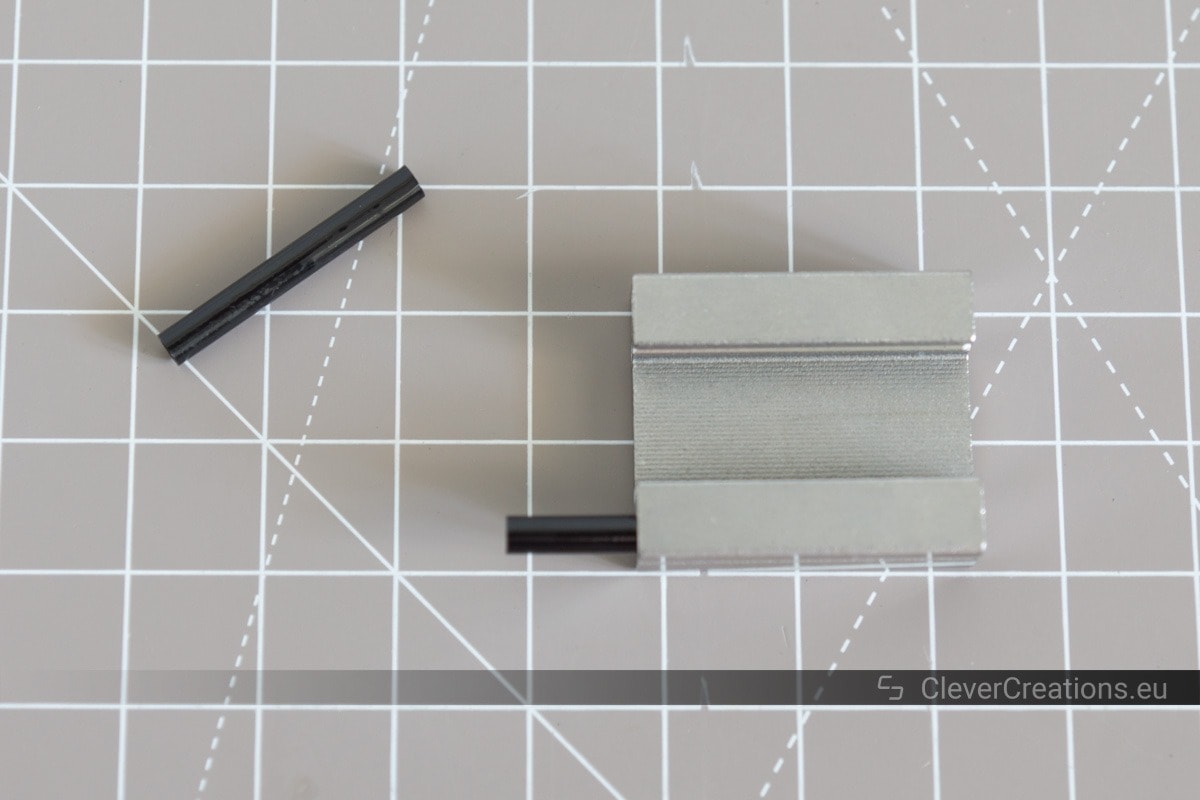
|
Transparent Bag
|
|||

To make things easier for myself I have omitted the bag from the rest of the pictures.


Be careful during this step, the retaining wire needs to be slightly bent in order to remove it, but we do not want to bend it so much that it permanently deforms.
This is also the step where all remaining bearing balls will come out, so be careful with that as well. They are hard to find once they have escaped and found their way to freedom.
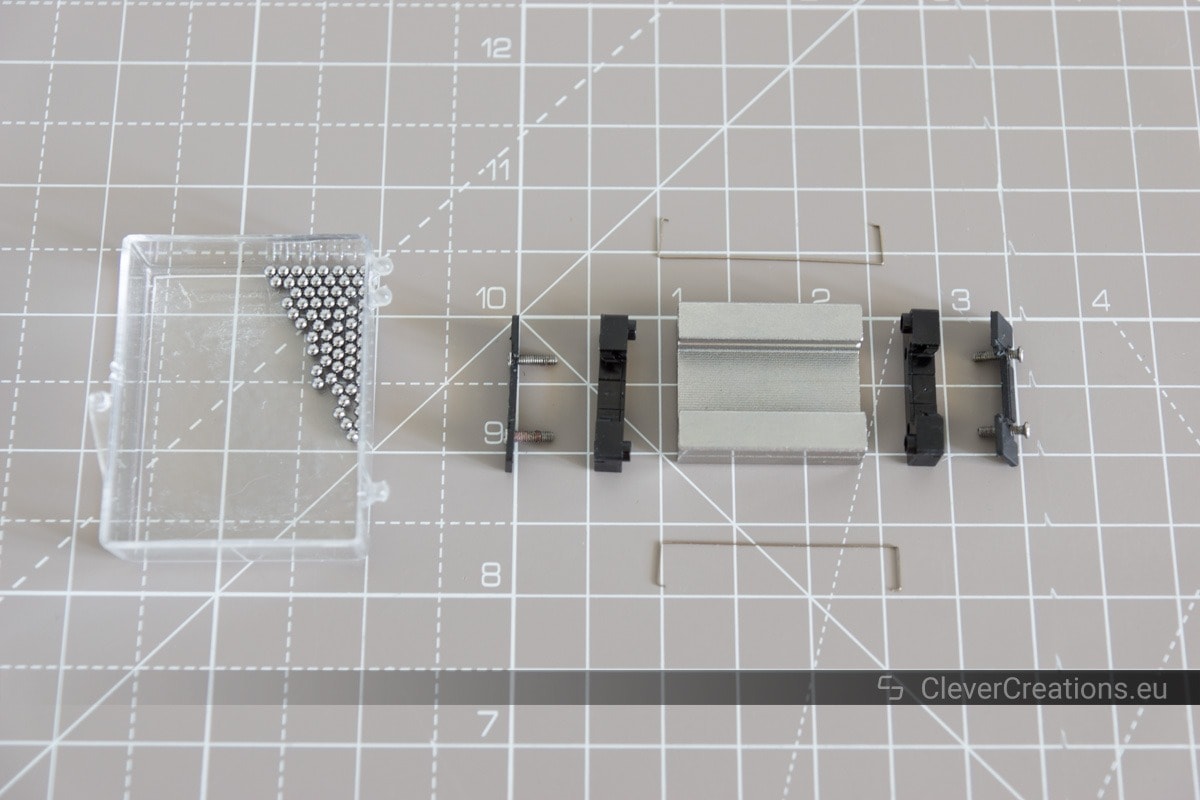
A Summary of the Disassembling Process
- Remove the carriage block from the linear rail.
- Unscrew the screws on the carriage block.
- Remove rubber seals.
- Un-clip the metal retaining wires.
- Don’t lose the stainless steel bearing balls.
Reassembling the Carriage Block
Reassembling the carriage is essentially not much different from disassembling it. It is done with the above steps in reverse.
The bearing balls get inserted manually one by one at the end, after the carriage has been fully assembled. This process is a bit finicky, but patience will get you there.
There might be a better and faster way to insert the bearing balls, but I haven’t found it yet. If you know of a way, please let me know in the comments.

Conclusion
With the methods above I have had good success at fixing the issues that usually come with cheaper linear guide rails. They definitely do not have a 100% success rate, but so far I have found it worth my time to give most of these methods a shot (with the exception of reaming out the carriage channels).
Interestingly, most of the issues I had were with MGN12 rails. Nearly all of the cheaper MGN9 rails that I have purchased worked flawlessly right from the start. I am not sure if there is a difference in manufacturing between the sizes, or I have just been unlucky with the larger rails, but either way I find it an interesting pattern.


Hello, just wanted to tell you, I enjoyed this blog post. It was helpful.
Keep on posting!
Thank you for your feedback, it is much appreciated!
Thank you, I had three bad linear rails (mgn 12) and fixed two of them when I put new balls in
Thanks for this – very useful!
Two notes:
The spatula end of “halbard” spudgers from iFixit are AMAZING for nudging bearings back into place. Nice and wide with a bit of give.
They’re harder to source, but a chuck reamer is the “correct” tool to ream a hole out to a specific size. Generally you drill a slightly undersized hole and then ream to the correct dimension. Honing is another approach.
Drill bits only cut on their bottom surface and not their sides, so any material removed from the side is likely happening by abrasion of misc. particles or some other process.
Thank you as well! That is helpful information.
Do you known the bearing size of the MGH15 H?
Hi Bradley,
MGN15 rails use 7/64″ (2.778 mm) bearing balls.
Hi Tim,
This blog post was incredibly helpful for me to read, thank you so much for writing it. I have some RobotDigg rails ordered and I’m thinking about ordering either some chrome steel or SI3N4 replacement bearings for them, do you know how many bearings I should order per MGN12H carriage that I have coming?
Thanks so much, keep up the great work.
Hi TR,
if I am not mistaken, I found around 66-68 bearing balls in each MGN12H carriage.
That’s a fantastic guide. Thanks a lot!
What would you recommend as an alternative to a drill press if the inside of the ball channels has a rough finish?
A regular handheld power drill with a drill guide might work. But you would need some kind of jig to firmly clamp the drill guide to the carriage block, as the block itself is fairly small.
Warning: 1.58mm may not be the right size, measure your balls. Mine were 2mm in RobotDigg rails.
Thanks for the heads up Chris! I take it these were Robotdigg MGN9 rails?
I managed to pop out most of the bearings trying to put the guide back on the rail of my 3D printer. I found all except 2. This was a very helpful and comprehensive write up. I was going to replace the guide altogether but after reading this I opened it up, cleaned everything and re-lubed and it works fine. Thank you.
Glad to hear! I think the rail will be okay with only two bearings missing.
Hi,
I have used ones with missing balls. How many space should be left, when all balls fitted? I heard 1 ball space should be remain. So I can put all balls in what I can and then remove one, if there letsay the space remaining is less than a half ball?
Br
John
Hi John,
That sounds about right. One ball space is sufficient for all balls to cycle through freely without getting stuck.