Want to print watertight parts but struggling with leaks? You’re not alone. The tiny gaps between layers and porous nature of 3D printing filaments make creating watertight prints challenging. But with the right approach, you can create perfectly sealed vases, waterproof enclosures, and reliable parts for water applications.
A recent study found that untreated PLA prints can absorb up to 2.5% of their weight in water over just eight weeks. This guide will show you exactly how to prevent water absorption and create truly watertight prints.
Let’s dive right in and get ready to make a splash with watertight parts!
Why Waterproof a 3D Print?

Inherently, 3D-printed parts aren’t waterproof. Unlike injection-molded plastics, the small layer lines and crevices on 3D prints allow water to pass through the part and lead to leaks. Moreover, constant exposure to water causes the prints to swell up, lose their shape and form, and even affect their structural integrity.
A 2021 study done by Daniel Moreno Nieto and his colleagues concluded that PLA is highly susceptible to water absorption. The mean weight of PLA specimens increased by up to 2.5% after eight weeks of submersion in water.
By printing waterproof parts, you open a whole new range of applications for 3D printed parts. Aquarium parts, submersible pumps, vases, house decor, and more benefit from being impervious to water. Even simple items like bathroom toys or kitchen utensils benefit from waterproofing.
You extend the lifespan of these 3D printed parts by protecting them against water. In addition, the waterproofing process can make your 3D prints food-safe. Using a food-grade epoxy resin helps improve the print’s water resistance while making it safe to use around food.
What are the Challenges of Watertight 3D Printing?
Achieving a truly waterproof 3D print is difficult. Before exploring the waterproofing methods, it’s crucial to understand the underlying challenges.
Layer Adhesion

Each 3D print is made up of hundreds of layers, one layer stacked on top of the other. While this allows for design flexibility and several other benefits, the layered construction makes waterproofing the part challenging as well.
Even perfect layers have tiny gaps and inconsistencies between them, which allow water to pass through the walls of your parts. These minor imperfections compromise the sealing of the 3D printed print and allow water to penetrate.
Material Properties

Certain materials, like PLA, are inherently prone to water degradation. Without waterproofing PLA 3D prints, they will ultimately fail when exposed to lots of water.
In contrast, though, other materials like ABS, PETG, ASA and Polypropylene offer good water resistance. They, too, are affected by prolonged water exposure and will benefit from post-processing. However, their durability in water-based applications is better than PLA.
Complex Geometries

Many 3D-printed objects feature intricate designs and complex geometries. These design elements pose challenges for achieving watertight seals and affect the waterproofing of your 3D print.
Openings, moving parts, and sharp angles create potential leakage points in your watertight parts. It helps to address these considerations during the design phase itself to prevent loss of time and effort after the 3D printing process.
Post-Processing Techniques

Post-processing techniques like vapor smoothing, epoxy coating, or painting increase the waterproofing of 3D parts.
However, these processes often require additional time, resources, and expertise. It poses a challenge from a manufacturing point of view to waterproof every 3D print, plus their effectiveness varies as well.
Rest assured, however, with the right balance between print quality, part design, material choice, and post-processing, you too can achieve effective waterproof parts.
How to Waterproof Your 3D Prints?
Waterproofing 3D prints is challenging, but it’s worth it if you plan to use them for marine applications. In this section, we’ll explore the various ways to waterproof your 3D prints.
A Note on 3D Printing Technology
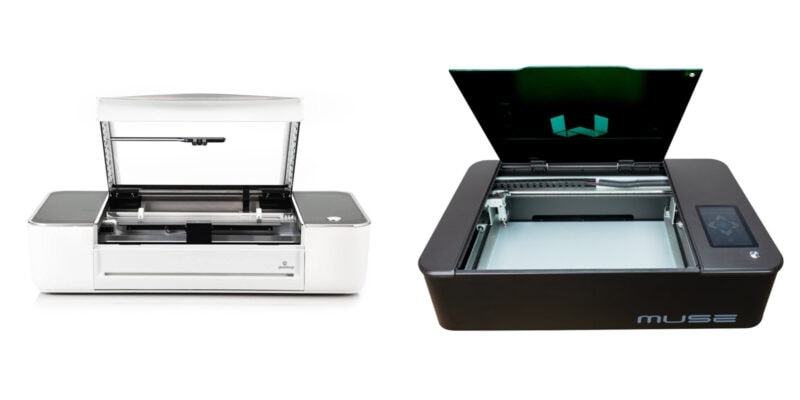
There are three leading 3D printing technologies that are commonly used for home or small business setups. First is Fused Deposition Modeling (FDM/FFF), second is StereoLithography (SLA), and last is Direct Light Processing (DLP).
FDM printing uses various types of plastics like PLA, ABS, PETG, and Nylon. On the other hand, SLA and DLP processes use a photo-curing resin that hardens when exposed to UV light. Both the SLA and DLP processes are similar, with the difference being in the application of UV light.
Compared to FDM, SLA and DLP prints are relatively more waterproof. The resin used is more impervious to water, and the curing process leaves less room for gaps in the 3D prints. So, these 3D printers are excellent for small, watertight parts. However, you’ll sometimes still need to post-process them as the resin is affected by light and isn’t always food-grade.
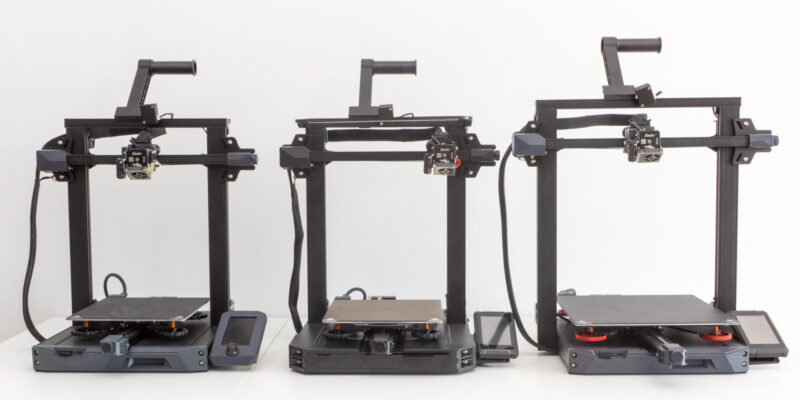
In contrast, FDM 3D prints leak water easily. The layers are not as fine as resin-printed parts, resulting in more gaps. The materials used are also hygroscopic (absorb water) and react negatively when exposed to water.
For the context of this piece, we’ll focus on the FDM 3D printing process. It’s more commonly used than SLA and DLP, and the prints have broader applications as well.
Part Design
Part design plays a crucial role in enhancing the waterproofing of your 3D prints. To improve the water resistance of your printed parts, there are several design tips for you to consider.
Design Thick Walls

Thick walls reduce the seepage of water through your prints. These walls resist the water pressure and improve the waterproofing of your 3D printed parts. They reduce the likelihood of parts cracking, or deforming which create gaps or pathways for water to penetrate.
The exact values for wall thickness vary based on your applications. To begin with, try a wall thickness of 3-4 mm and print the part with multiple perimeters to improve the water resistance.
Simplify Designs

Simplify your complex models by minimizing openings, moving parts, and linkages in the part. These elements are most susceptible to water leakage and reduce the water resistance of your 3D prints.
Moreover, intricate features or internal cavities also create potential weak points and areas prone to layer delamination. This further makes it more challenging to achieve a complete seal.
By keeping your design as simple as possible, you reduce the opportunities for water ingress and increase the overall watertightness of the printed object.
Incorporate Sealing Elements

It can be very helpful to use gaskets or O-rings in your design when the goal is creating waterproof 3D printed parts. These elements provide additional layers of protection against water intrusion. Especially for parts that require access or have moving components, these sealing elements create a tight seal between mating components.
Remember, the design phase is crucial in laying the foundation for a waterproof print. By considering water resistance in the design itself, you save time and effort in the subsequent printing and post-processing stages.
3D Printing Materials
Certain filaments are naturally resistant to water, while others suffer poorly when exposed to moisture. Let’s look at commonly used 3D printing filaments and their waterproofing ability.
PLA (PolyLactic Acid)

PLA is one of the most widely used 3D printing materials due to its ease of use, low cost, and biodegradability. However, PLA has inherent limitations when it comes to waterproofing.
Being a hygroscopic material, PLA tends to easily absorb moisture from the environment. When exposed to water, a PLA part will swell up, soften, and ultimately lose its structural integrity. Additionally, PLA has a low heat resistance. This makes PLA prints susceptible to deformation when you expose them to hot water or sunlight for long durations.
ABS (Acrylonitrile Butadiene Styrene)

ABS is known for its durability, impact resistance, and better water resistance compared to PLA. ABS parts have a higher heat resistance than PLA prints, making them suitable for outdoor applications.
Additionally, you improve the properties of ABS prints through post-processing techniques such as acetone smoothing. Acetone vapor dissolves the outer layer of ABS parts, giving them a smooth and shiny surface. This processing further improves the waterproofing of your prints by closing the microscopic gaps between the layers.
Overall, post-processing of ABS parts allows you to easily use it for outdoor signage, functional prototypes, and mechanical parts subjected to water exposure.
PETG (Polyethylene Terephthalate Glycol)

PETG is kind of a mix between ABS and PLA. It features the ease of printing like PLA, but offers mechanical properties similar to ABS. While PETG is a hygroscopic material, it offers better resistance to water than PLA.
In the study mentioned above, PETG specimens gained a marginal 0.2% weight over nine weeks as compared to PLA prints. This clearly demonstrates how PETG is better suited for printing waterproof parts.
Owing to its durability, transparency, and strength, PETG prints are often used to build water bottles, food containers, and display cases. Additionally, PETG offers good chemical resistance, making it suitable for various industrial and consumer applications that require waterproof parts.
PVB (Polyvinyl Butyral)

PVB is a specialty 3D printing filament developed by Polymaker. Similar to PETG, PVB is highly hygroscopic but offers better water resistance and durability.
The main benefit, however, is that PVB is easy to print and post-process. As acetone smoothes ABS, IPA dissolves the outer layer of PVB and closes all the minor gaps and holes between the layers.
Slicer Settings
The slicer settings you choose for your 3D print will have a significant impact on their water resistance. By properly fine-tuning these settings, you enhance the final results. Here’s a breakdown the most critical settings for for printing waterproof parts:
Wall Line Count

Increasing the number of wall lines (also referred to as perimeters or shells) enhances a 3D print’s resistance to water penetration. This setting directly correlates to creating thicker walls in the design stage itself.
Your slicing software gives the option to adjust the wall count to create thicker walls, providing your prints with a ‘thick’ barrier of sorts. Typically, you should use three or more wall lines to make the parts water-resistant. The increased wall thickness lessens the chances of gaps between layers, further waterproofing your prints.
That said, it is important to keep the nozzle size and wall thickness in mind as well. When printing with a small nozzle, the walls will be thinner and it’s better to increase the number of wall lines. When 3D printing with a large nozzle, you can get away with using less wall lines while keeping your part watertight.
Print Temperatures

A proper bond between the print layers is essential for creating a watertight seal in your 3D prints. Adjusting the print temperatures correctly ensures the filament melts and fuses together effectively. This minimizes the risk of layer separation or delamination of layers.
The optimal print temperature varies based on the filament, 3D printer, print settings (especially the print speed), and other printing conditions. In general, though, a moderately high temperature is recommended for achieving good layer adhesion.
However, setting the print temperatures too high leads to other issues like stringing, oozing, or degradation of the filament. Therefore, 3D printing a temperature tower first is a great idea to determine the ideal printing temperature.
Flow Rate

Fine-tuning the flow rate/extrusion multiplier helps prevent under-extrusion when 3D printing waterproof parts. This setting reduces the small gaps or voids in the print, improving the print’s water resistance. It helps to slightly over-extrude the filament, ensuring each layer is bonded well and compacted.
Start with a higher flow rate, such as 105%, and test print a few parts to determine the ideal settings for your specific printer and material combination.
Infill Settings

A higher infill density provides additional structural support and reinforcement to parts. This reduces the risk of deformation or failure under hydrostatic pressure.
For underwater casings or components, use a higher infill percentage, like 30% or even higher. It provides a good balance between the printing time, material, and the overall strength of the part.
Post-Processing
While the printing process lays down the foundation, post-processing helps to address the minor imperfections, seal gaps and improve the appearance of your prints. The following post-processing tips will help you to improve the water resistance of your prints.
Apply Waterproof Coatings

A waterproof coating is one the most effective ways to seal the surface of your 3D prints and provide an added layer of safety against water. Epoxy resin or varnish coatings create a protective barrier that prevents water from penetrating the print’s surface.
Resin coatings are excellent against water and help to make the 3D-printed part food-safe. Resins like Art Resin are food-grade resins that help seal minor gaps and make your printed part suitable for use in the kitchen or on food contact surfaces. Varnishes give your parts a glossy or matte finish while offering comparable waterproofing properties.
Vapor Smoothing

Vapor smoothing is a chemical post-processing technique commonly used for ABS and PVB filaments. The process exposes a 3D printed part to acetone or IPA vapors, melting the outer surface of the print and effectively closing any gaps and imperfections.
This process gives the part a smooth and glossy surface finish while enhancing its waterproofing capabilities. Vapor smoothing is particularly effective for sealing small gaps between layers and creating a uniform, watertight seal.
You can also use it with filaments like PLA. However, the chemicals required for PLA are not readily available and are more dangerous to handle than Acetone and IPA.
Temperature Treatment

In temperature treatment, you subject 3D prints to heat to improve waterproofing, mechanical strength, and dimensional stability. You can do this by exposing it to hot air from the outside, like by annealing the print in an oven or even by using a hot air gun.
Blowing hot air over the print’s surfaces helps fuse the outer layers together, closing gaps and improving the waterproofing. Heat guns allow you to target the heating of specific areas, providing more precise control over the temperature and duration of treatment.
Lastly, annealing in an oven involves heating the print to a particular temperature for a set time. This promotes molecular rearrangement and improves the layer adhesion of your parts.
This technique is particularly challenging to master, as you risk melting the print. However, when done properly, it will help to enhance the water (and heat) resistance of your 3D printed parts.
Conclusion
Ensuring that 3D prints withstand moisture is crucial for their reliability across various water-based applications. It’s key to consider the design, materials, printing settings, and post-processing methods when 3D printing for underwater use cases.
When designing the part, keep things simple with thicker walls and fewer complex features. You can improve the water resistance of your printed part by using sealing elements like gaskets and O-rings on mating surfaces.
Choosing materials like ABS, PETG, or PVB gives you further options for different levels of water resistance. Don’t forget to tweak those printing settings for optimal quality. Set a slightly higher extrusion rate and temperature and increase the number of walls in the print.
After printing, consider post-processing techniques like waterproof coatings, vapor smoothing, or temperature treatments to enhance the water resistance of the prints.
In the end, it helps to have a holistic approach for waterproofing your 3D prints. From designing to setting the print settings and thoughtful post-processing, each step is an important one. Use this piece as a guide for waterproofing your prints, and let us know how it goes for you in the comments below!