
How long it will take to 3D print depends on multiple parameters. For example, the print speed, size of the 3D model, and printing technology. Typically, 3D prints can take anywhere between a couple of hours to several days.
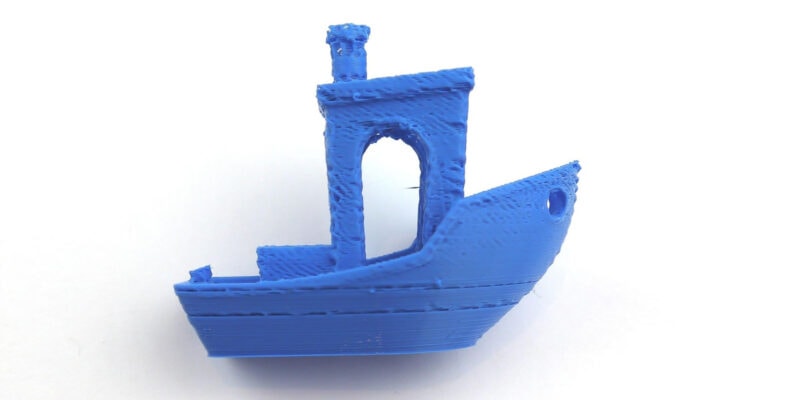
On average, a 3D Benchy takes about two to three hours to print. A 3D printed lithophane can take up to six hours. D&D miniatures take 2–3 hours to 3D print on a resin printer, while a full-face helmet can take days to complete.
All these things can make you wonder why 3D printing time varies so much. Some prints take hours, others days. What factors influence the time it takes to 3D print your models?
In this article, we’ll tackle that question head-on. We’ll look at the numerous factors that influence 3D printing time and teach you how to save time 3D printing without losing print quality.
Continue reading to discover more about 3D printing times and how you can optimize them.
Why is Print Time Important?
Printing time matters for several reasons. Let’s examine them one by one.
Production Times
Longer print durations negatively impact your 3D printing output. If you have to wait a long time to 3D print something, you’ll be able to produce fewer prints within a given time period.
If you work on a fixed schedule, you’ll need to factor in the 3D printing times into your project timelines. Especially when dealing with multipart assemblies, you’ll need to allow sufficient time for the 3D printing phase.
If you use 3D printing for prototyping, print time also affects how much your designs can change over time. A longer print time means you’ll have to wait longer between iterations.
Printing Costs
Longer print times use more energy, raising your per-item costs. Not only that, but printing more material than is necessary can also increase the time and material cost of your prints.
For example, using the wrong support settings, printing unnecessary perimeters, and adding solid layers all increase the time and material used for your prints.
When printing cool 3D printing projects for yourself, it’s easy to forget about such details. There’s no need to pay special attention to them. But when it comes to scaling 3D printing production, print time optimization becomes essential.
If you’re doing 3D printing as a side hustle, want to seriously make money with a 3D printer, or are considering running a print farm, unnecessary expenses can add up and cut into your profit margins.
Success Rate and Quality
As your printing times lengthen, so does the likelihood of 3D printing errors. Prolonged printing times increase the risk of problems including warping, layer splitting, or print delamination. Things like power outages, filament clogs, and other such issues also show up more often with longer prints.
To minimize the risk of these problems, you’ll want to keep your 3D printing times as low as possible. The less potential for error, the higher your chances of getting good-quality prints.
By learning how to optimize your 3D printing time, you can save money and time while still making high-quality 3D prints.
Why Does 3D Printing Take So Long?
The main reason why 3D printing takes so long is the way the technology works. With 3D printing, objects are made by “adding” material. The machine lays down thin layers of material one after another until the model is complete.
In contrast, other manufacturing methods like CNC milling, lathe work, and laser cutting all involve the removal of material throughout the manufacturing process. This allows them to be much faster, often removing chunks of material at a time.
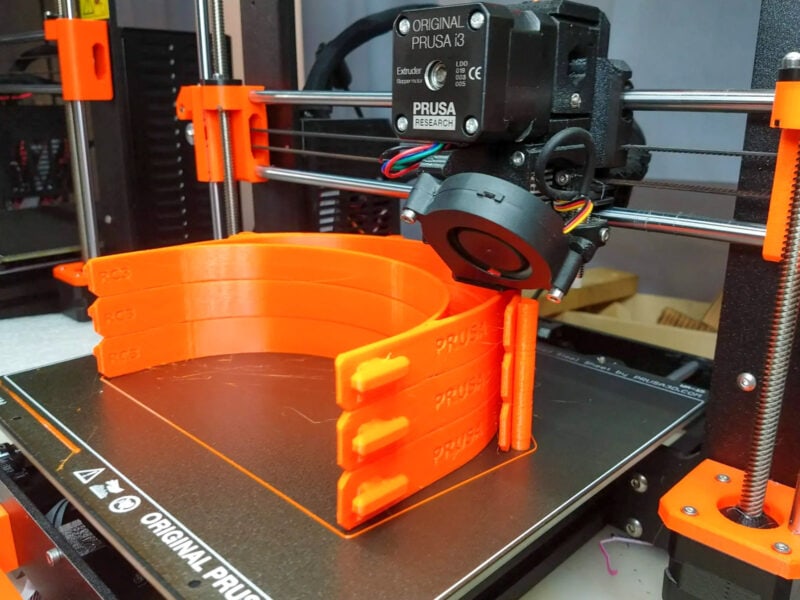
In fused filament fabrication (FFF or FDM) printing, the print head physically moves to each place and deposits the molten material. The printing time is largely determined by the printing speed, acceleration, and frame design of the printer. Even though certain print settings, like layer height, play a role as well.
On the other hand, resin 3D printers make solid models by curing one layer of UV resin at a time. These printers are usually faster than FDM printers. The main factor influencing resin 3D printing time here is the exposure time of the resin material.
The complexity of the model also affects how long it takes to 3D print. For example, a Warhammer miniature has much more complicated details than a simple gear model. When printing a complex model using FDM printing, it often takes more time to produce all the intricate details.
Finally, you must take into account the application of the model. A practical 3D print can be printed a lot faster than a decorative one. Any quality loss from faster 3D printing isn’t as much of an issue when the part is out of sight in its final application.
Factors That Influence 3D Print Time
3D Model Size
3D printing creates an object by stacking layers on top of one another. More layers equal longer print times. As a result, model size has a massive impact on print time.
Since the print head of a 3D printer traces each part of your 3D printed object. It has to move from point A to point B (and so on) on every layer. When combined with a large number of layers, this can lead to a lengthy 3D printing process.
Resin printers are a bit more flexible with model size. In MSLA printers, UV light cures the entire layer at once. Your printing time is solely determined by the print height. Regardless of whether you print a single model or ten, with a resin printer the final print time remains the same.
Printing Technology

As mentioned above, most of the time, resin 3D printers are faster than their FDM counterparts. You can put many models on the build plate at once, and they will all be printed at the same time. As a result, the printing time per model is drastically decreased, and your printing efficiency is increased.
However, 3D printed resin components require extensive time for post-processing. Washing, taking off the supports, and curing can take a long time. So, even though printing takes less time, the whole process of making an object still takes a considerable amount of time and work.
FDM 3D printing, on the other hand, requires much less time and effort for post-processing. Most of the time, the supports are easy to take off. The surface finishing part also depends on what your print is for. If it’s a mechanical or functional 3D-printed part, you can skip the polishing step.
The slower print times of FDM printers are important to keep in mind, but often not the determining factor when deciding on which printing technology to use.
Print Speed
FDM 3D printers greatly benefit from adjusting the printing speed. It controls how quickly the print head moves from one place to another.
A quicker printing speed reduces the total 3D printing time. The 3D printing slicing software lets you set a variety of speed parameters for the 3D print. For example, you can separately set the speeds for infill, outer walls, support structures, and travel moves (the movement of the print head when not printing).
Not every part of a 3D print needs to look good. For example, the infill of a 3D printed part doesn’t need to be printed in high quality. You can set up your printer to print the infill quickly, reducing overall 3D printing time.
For outer walls, you often want to keep the speed relatively low. While it is tempting to speed it up, this is the aspect that influences the final look of your 3D printed object the most.
In contrast, support structures can be printed quickly, as they don’t require a high-quality finish. You don’t want them to collapse while printing, and they need to be reasonably dimensionally accurate, but that’s about it.
To optimize the 3D printing process, all these factors need to be dialed in to make sure you get the best 3D printing results in the shortest amount of time. It’s usually a matter of finding the sweet spot for your specific 3D printer, filament, and desired model quality.
While this process can be time-consuming, if your goal is 3D printing things to sell, it is worth it. Taking the time to optimize your 3D printing process can reduce your production time and costs, which will ultimately result in higher profit margins.
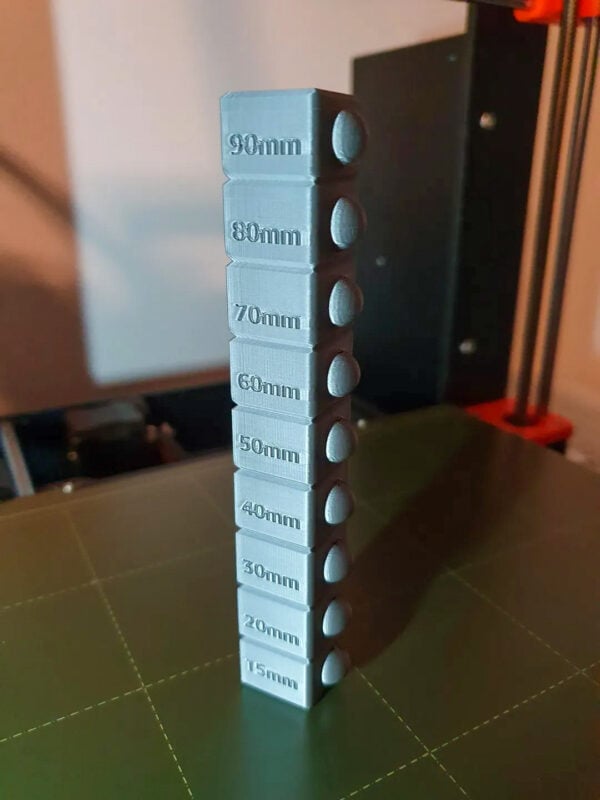
Layer Thickness
Perhaps the quickest and most reliable indicator of both print time and quality is the layer thickness or layer height. The layer height indicates the height of each layer printed by the 3D printer.
The thinner the layers, the more detailed your 3D model will be, and vice versa. You can see it as the vertical resolution of your 3D prints.
As you might have guessed, a thinner layer height means that you have more layers to print, which will in turn prolong the 3D printing time. A thicker layer height results in fewer layers and a faster print time, but also a less detailed 3D model.
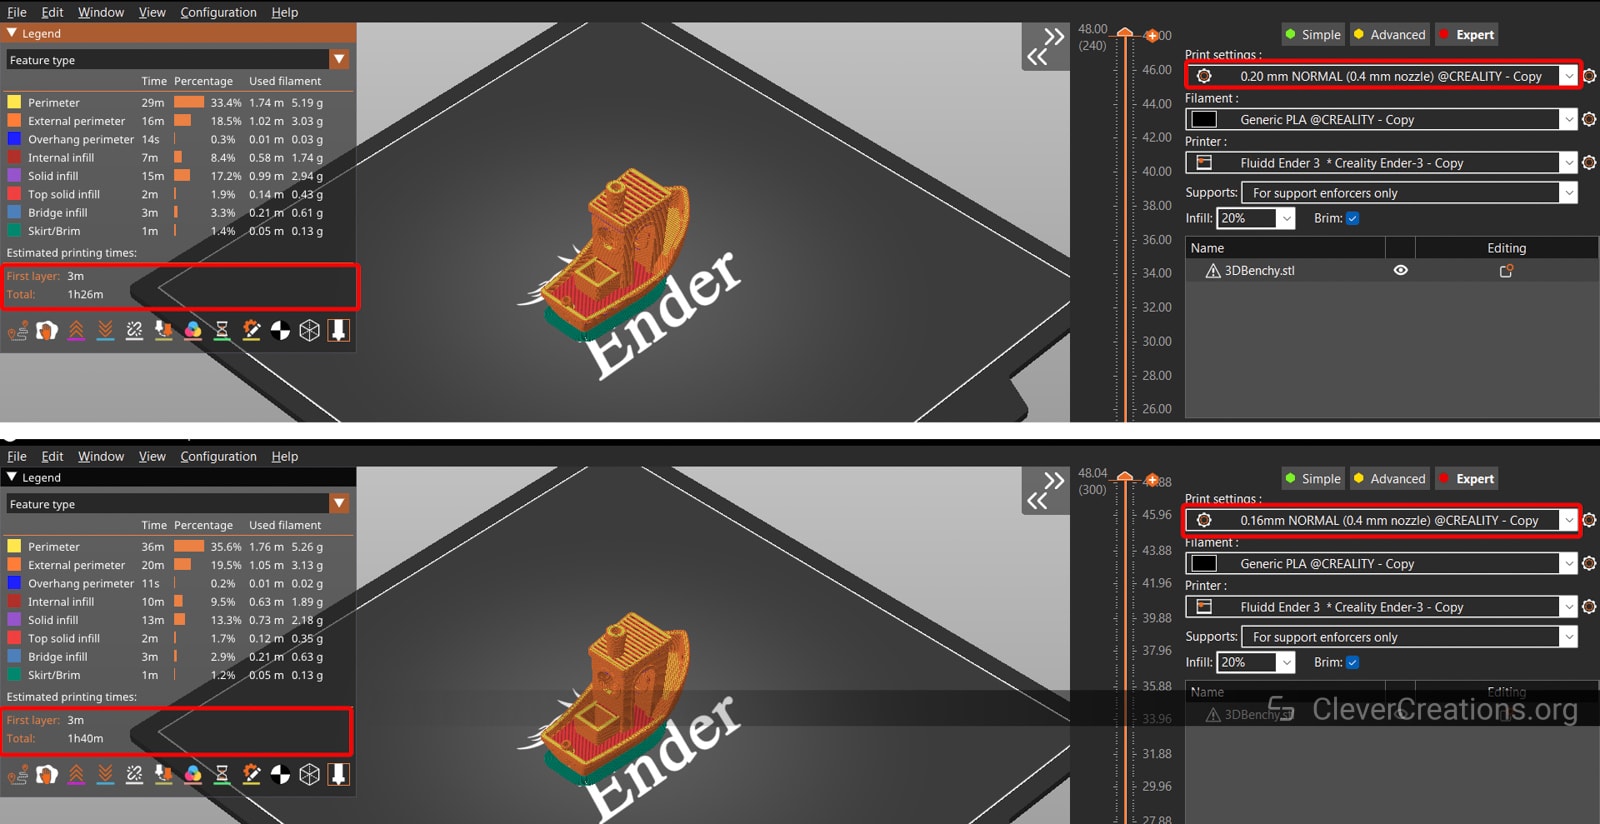
For example, a 3D Benchy with a layer thickness of 0.16 mm (300 layers) takes about 1 hour and 40 minutes to make. At 0.2 mm layer height (240 layers), the same Benchy with all other settings the same takes about 1 hour and 20 minutes.
The printing time is reduced by almost 20%, whereas the visual difference between the two models is minimal.
For most applications, a layer height of 0.2 to 0.3 mm is ideal. It gives plenty of detail for commonly-sized objects but doesn’t take a long time to print.
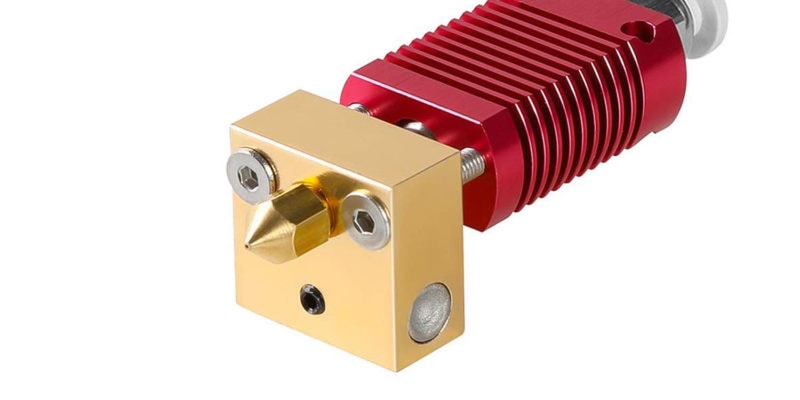
If you are printing large objects that don’t need a high-detail finish, swapping out your 3D printer nozzle for a larger one can make a huge difference in print time. With a larger nozzle, you can print much thicker layers. So for the same size object, you can get away with printing much fewer layers.
Infill
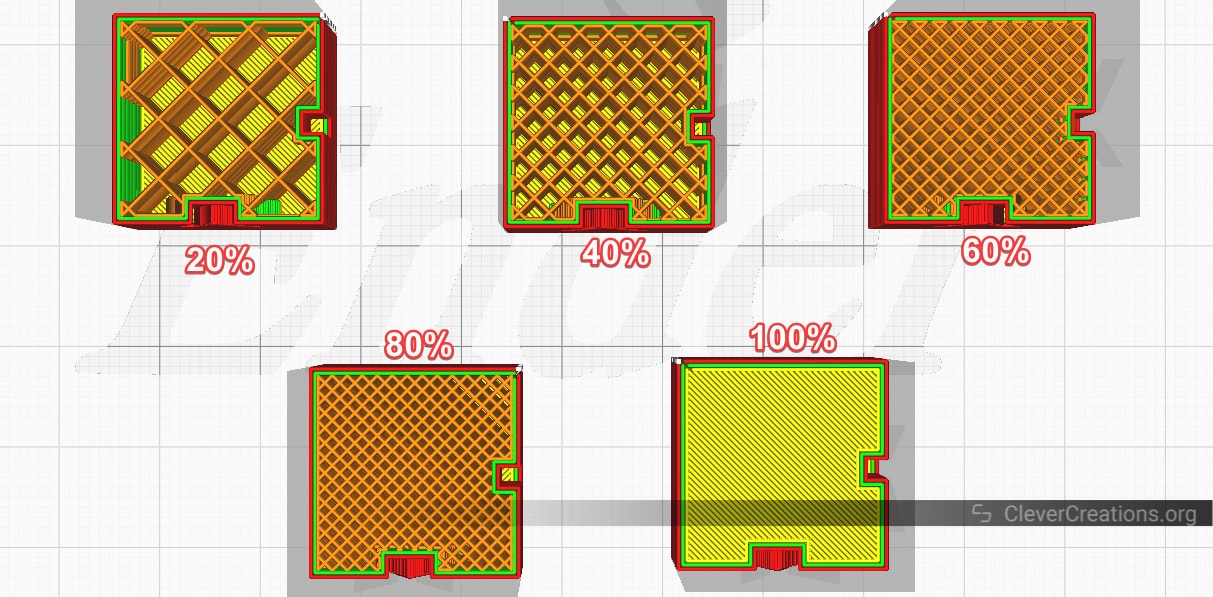
Your 3D printing slicer software lets you control the inner density of your final part. This is referred to as the infill. The infill is usually expressed as a percentage and represents how much of the inner area of your 3D printed part is filled with material.
In the slicer settings, you may change the proportion of infill (material inside the volume of the part). By fine-tuning the infill settings, you can reduce the amount of 3D printing material needed without sacrificing the durability of your object.
The higher the infill percentage, the more material is included in the part. A higher infill takes longer to 3D print and uses more material, but it makes your part stronger.
Conversely, a lower infill percentage gives your part less structural integrity, but it reduces the 3D printing time and the amount of material used.
The best infill setting for a specific 3D printed part depends on the purpose of the object. Generally, a higher infill is best for mechanical parts that will undergo stress or strain. For decorative objects, on the other hand, a low infill percentage does just fine.
The type of infill also has an important effect on print times. The strongest infill pattern is not necessarily the fastest.
For example, a 0.2 mm layer height 3D Benchy with 15% rectilinear infill takes 2 hours and 15 minutes to print. When changing the infill pattern to gyroid infill and keeping the rest of the settings identical, the print time increases to a print time of 2 hours and 22 minutes.
You can see that the effect of changing the infill on print times is often only a few minutes. Much less than changing the layer height. But if you are producing 3D printed parts at a high volume, these small increments can add up.
By taking the time to experiment with your infill settings, you can save on 3D printing time while keeping the parts strong enough for their purpose.
Resin Exposure Time
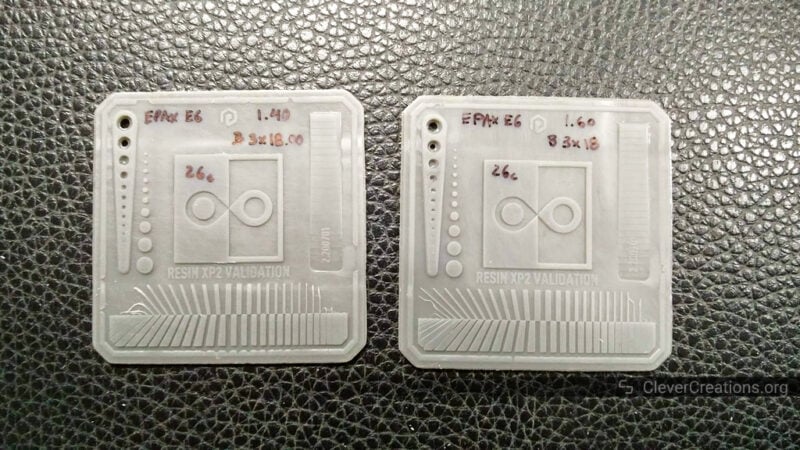
In MSLA printers, resin exposure is the time that the liquid resin is exposed to UV light. It affects how fast the resin hardens, which in turn affects the quality and strength of your 3D print.
The resin exposure duration is determined by the printer, the type of LCD screen, and the resin itself. Exposure periods for monochrome LCD resin printers range from 1-3 seconds per layer. In contrast, exposure times on resin printers with RGB screens might reach 8–10 seconds for a single layer.
This aspect has a direct impact on the speed and duration of your resin prints. Anycubic has a detailed print settings chart for its printers that details the exposure time and numerous settings. It will help you understand more about how resin exposure affects your print times.
How Long Do 3D Prints Usually Take?
3D printing time can range from several hours to many days. It all depends on the factors listed above. Here, we’ll examine a few of the most popular 3D-printed prints to give you an idea of what to expect.
These times are all approximations and with your specific setup, you are likely to get something slightly different. However, as a general guide, these examples give a good starting point.
Miniatures
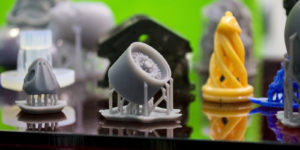
Resin 3D printers are ideal for printing miniatures. Their print quality, texture, and surface finish stand above most other 3D printing methods. With 4k 3D printers and above, you can get parts that resemble injection-molded parts.
A high-quality miniature can take anywhere from 2 to 5 hours to manufacture on a resin printer. The miniature’s orientation and height are the key factors here.
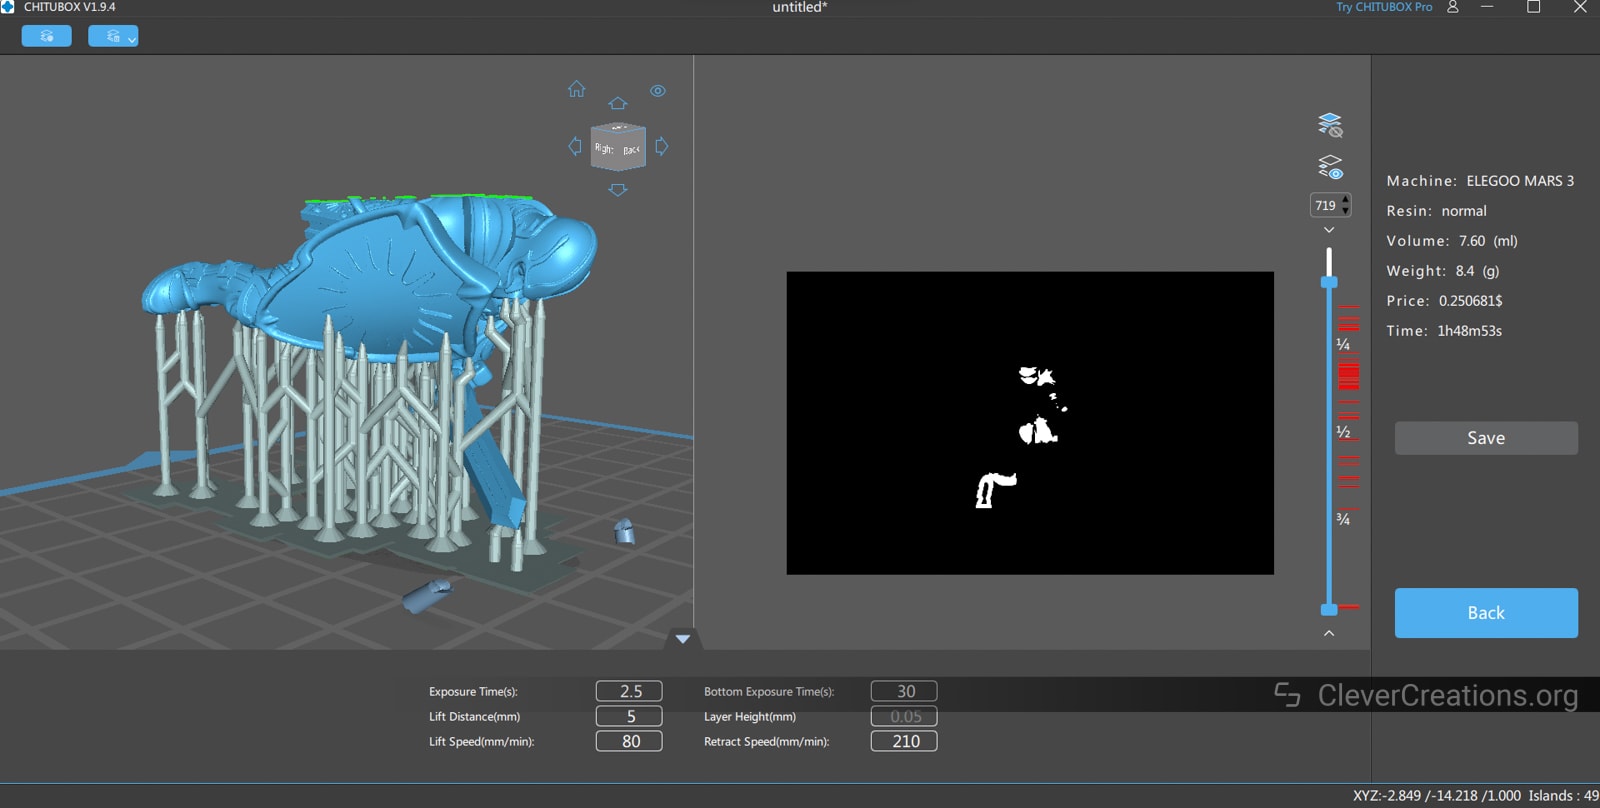
For example, we used ChituBox to slice the iconic Paladin D&D miniature by onmioji. The printer profile used has all of the factory default settings for an Elegoo Mars 3. We got a 3D print time of 1 hour and 48 minutes with support material.
The 3D printing time would remain constant even if we added more copies to the print bed. That goes to show that resin printers can be a good option for mass-producing parts.
Lithophanes
The time it takes to produce a 3D printed lithophane is determined by various factors. The most important is print speed. For better quality and a clear image, lithophanes are typically printed slowly.
Other print settings that are relevant to the print time are Z-height, the number of perimeters, infill percentage, and printing speed.
Because you want a lithophane to have as high of a resolution as possible, a small layer height is preferred. Of course, this increases the 3D print time.
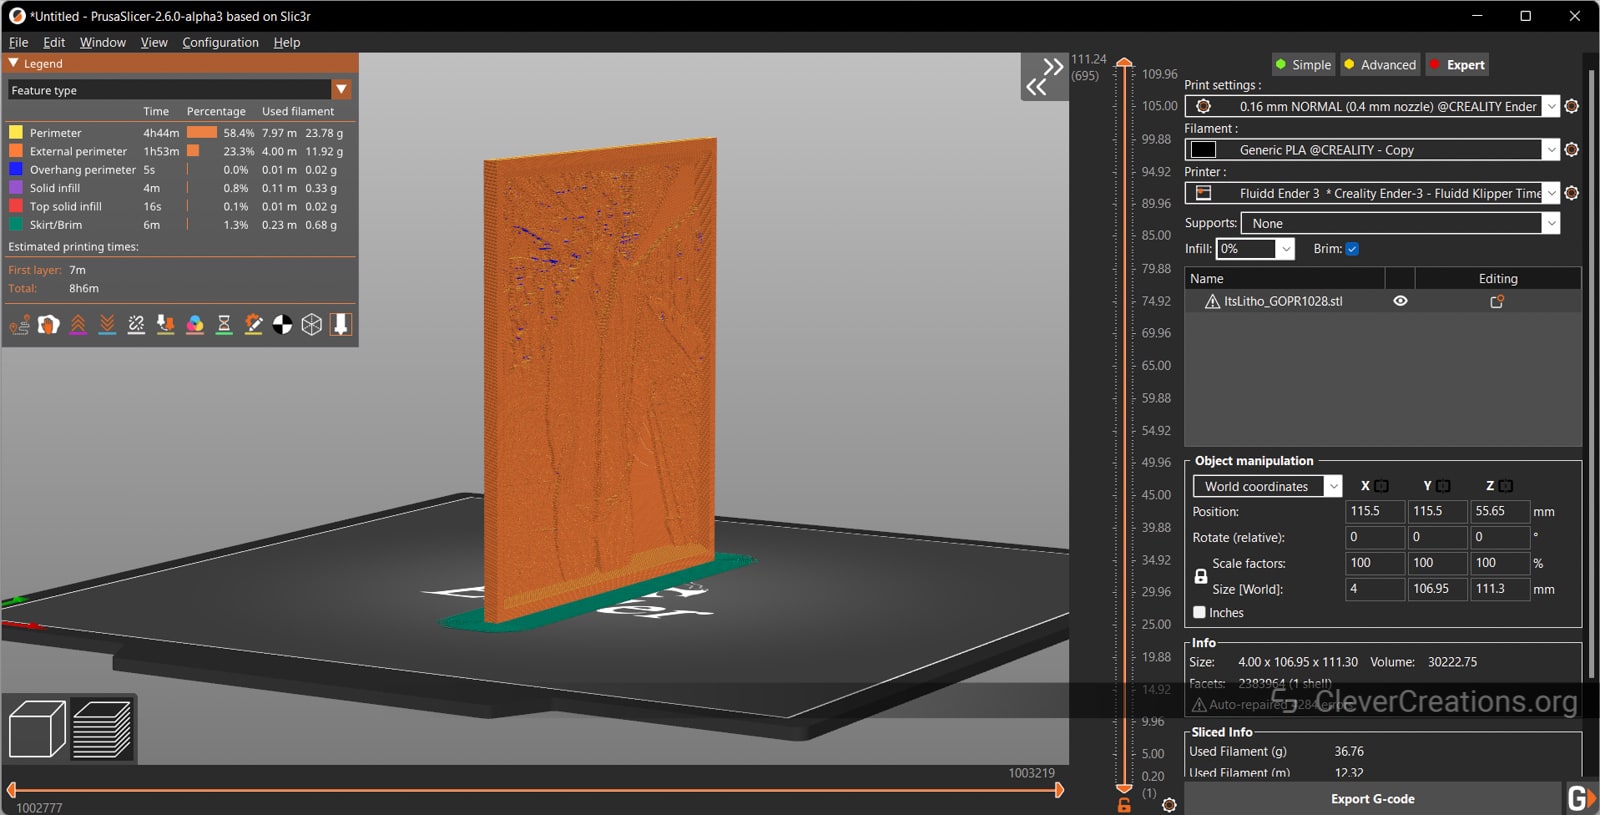
We 3D printed a 111 mm tall lithophane with a layer thickness of 0.16 mm and a print speed of 25-30 mm/sec. On an Ender 3, this took around 8 hours and 6 minutes. You can see that print time is greatly affected by the smaller layer height and slow print settings.
Depending on the lithophane size and print options, you could expect a minimum 3D print time (on an FDM 3D printer) of around 6–12 hours.
Head Sculpture
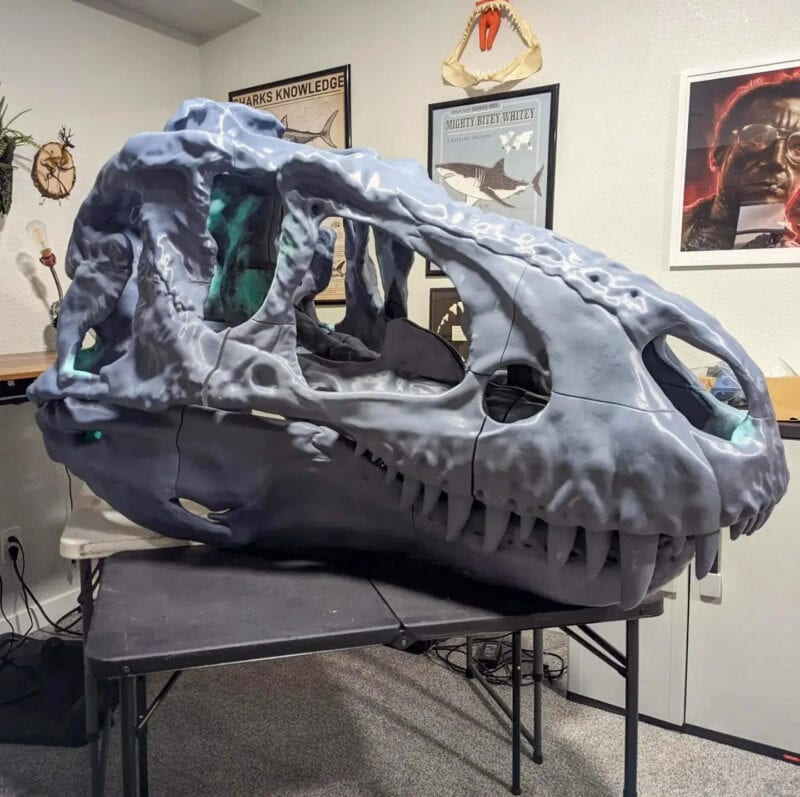
3D printed busts make for fascinating art. They don’t have many moving parts or complicated intricacies, but they are often printed in large sizes. If you have access to a large 3D printer, printing a life-size version in one go is not out of the question.
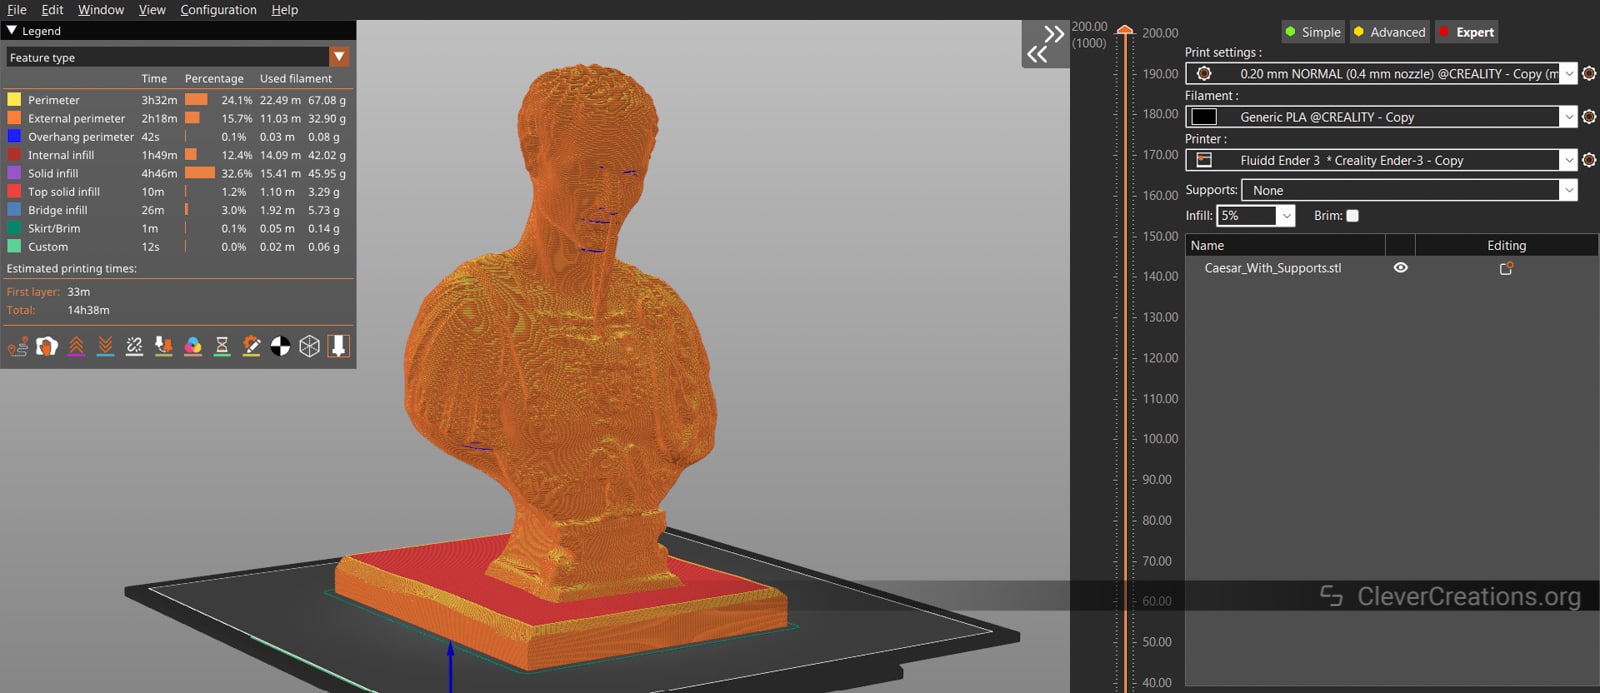
In the PrusaSlicer screenshot above, you can see that the Julius Caesar Pencil Holder takes around 15 hours to 3D print at 100% size. This is with a standard 0.2 mm layer height and a 5% infill percentage. The printing speed was set to roughly 60 mm/s, which is average for an FDM 3D printer.
Full-size Helmet
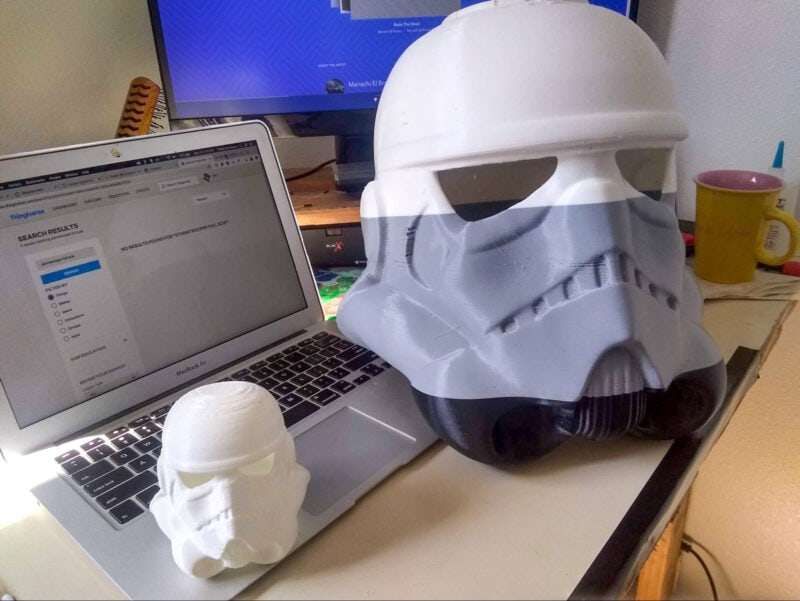
It can be difficult to 3D print a full-sized helmet. You’ll either need a massive 3D printer or to break the helmet down into multiple parts and glue the 3D printed parts together after printing.
3D printing a full-size helmet can take up to 48 hours, depending on the size and print settings. When you factor in smoothing, painting, and other post-processing, you’re looking at a project that could take several days, if not weeks.
How Do You Calculate 3D Print Time?
Using your 3D printer slicing software is the best way to figure out how long does it take to print. After configuring the slicer settings and slicing the model, you get to see a rough estimate of the printing time. If you are not happy with the estimate, you can change settings, like the layer height, to reduce the total printing time.
If you use Klipper firmware with your 3D printer, you will also get accurate estimates. It goes over the Gcode and creates an accurate estimate of how long it will take to 3D print on your machine. In our experience, the estimates are a great indicator of the final 3D print time.
What is the Highest Printing Speed?
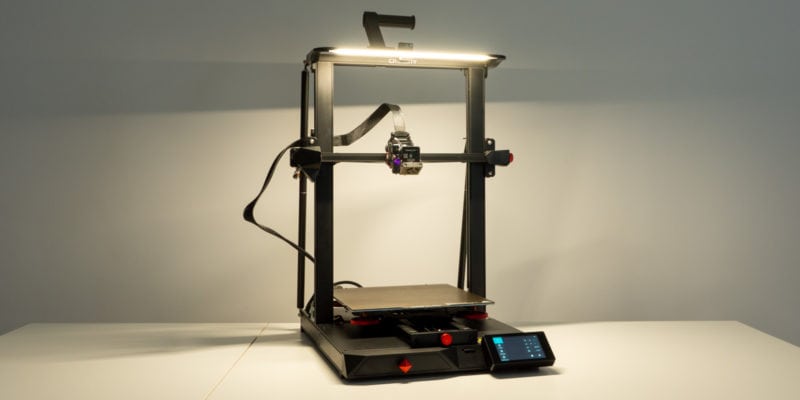
Current FDM 3D printers can print at maximum speeds ranging from 60 mm/s to 500 mm/s. Recent releases, like the Creality K1 we reviewed, BambuLab X1, and Voron 2.4, are capable of printing at speeds of 200–500 mm/s.

Printing speeds for hobbyist resin printers range between 60 and 80 mm/hr. The Uniz Slash Plus is an outlier, though. It has a print speed of roughly 200 mm/s and is one of the quickest resin 3D printers available.
Is It OK to Run a 3D Printer for 24 Hours?
A safe, well-tuned 3D printer can run for 24 hours or longer. Most popular 3D printers under $500 and 3D printers under $1000 have solid safety standards, and there’s not much need to worry about them running overnight.
That said, it’s always a good idea to monitor your printer regularly to make sure that it doesn’t run into any issues. While 3D printers are generally safe and reliable, it is still a technology that is prone to occasional hiccups. Monitoring your printer will help you catch any potential issues before they become major problems.
Conclusion: How Long Does It Take To 3D Print?
The time it takes to 3D print something depends on several factors. The most prominent ones are the part’s dimensions, complexity, print settings, and the capabilities of the 3D printer itself. Typical 3D prints can take a couple of hours, whereas big ones can take days.
Longer 3D print times aren’t always a bad thing. It all depends on your printing requirements. Going slower is alright if you want the highest quality possible. Finding the optimal balance between your machine’s print time and quality is a big part of 3D printing.
Fortunately, modern slicing software makes it easier than ever to find the right settings for your projects. As you become more experienced with 3D printing, you’ll be able to find the optimal settings for your projects quickly and easily.
You now have a clearer picture of how long it will take to 3D print. Feel free to comment below if you have any questions or would like to share your thoughts on this article. Happy printing!