
Leather boots can be a great investment. However, if you want to get the most out of your new work or hiking boots it is important to take proper care of them. Even the best leather will scuff, crack and dry out at some point, and will need to be waterproofed and conditioned.
In this guide I will show you the best methods you can use to condition and waterproof your leather boots yourself at home. With these methods you will be able to fix scuffs and scratches, restore your boots to look like new, protect them from rain and snow, and extend their life.
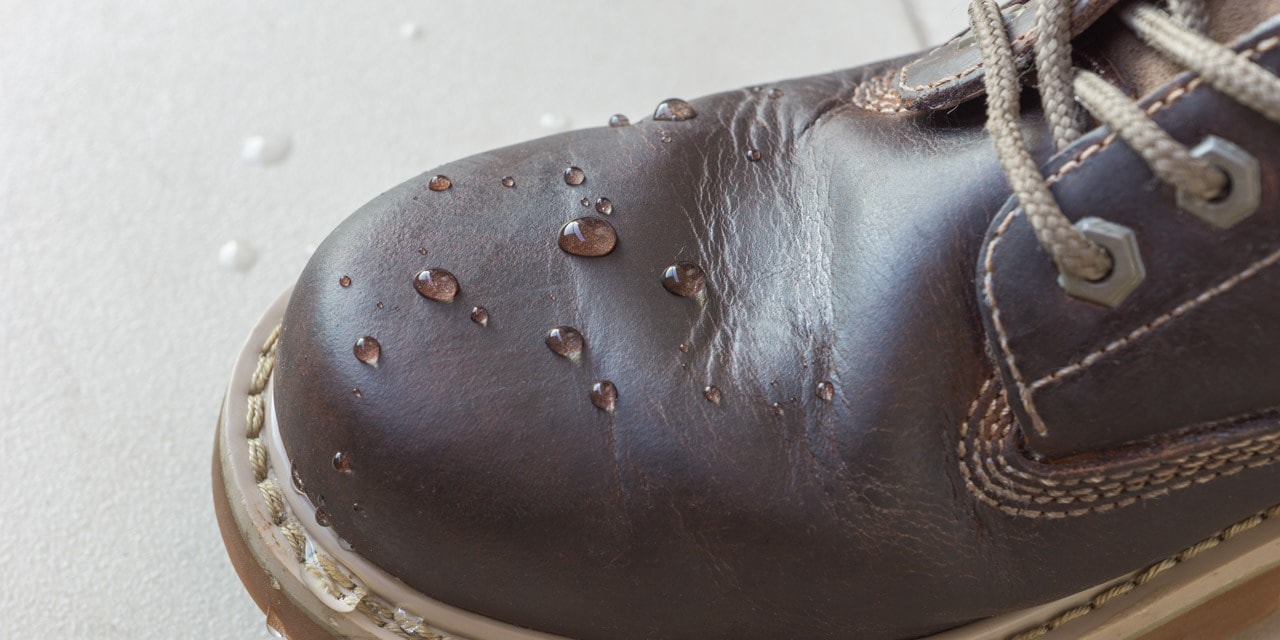
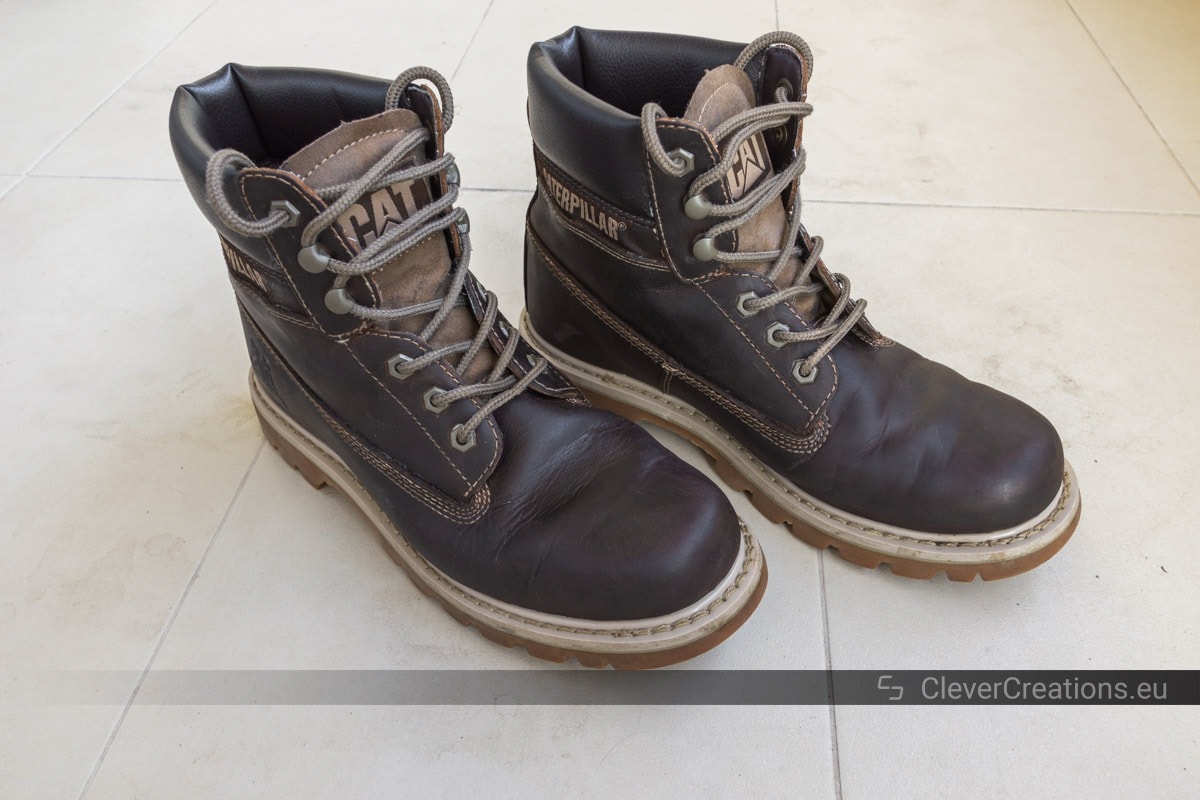
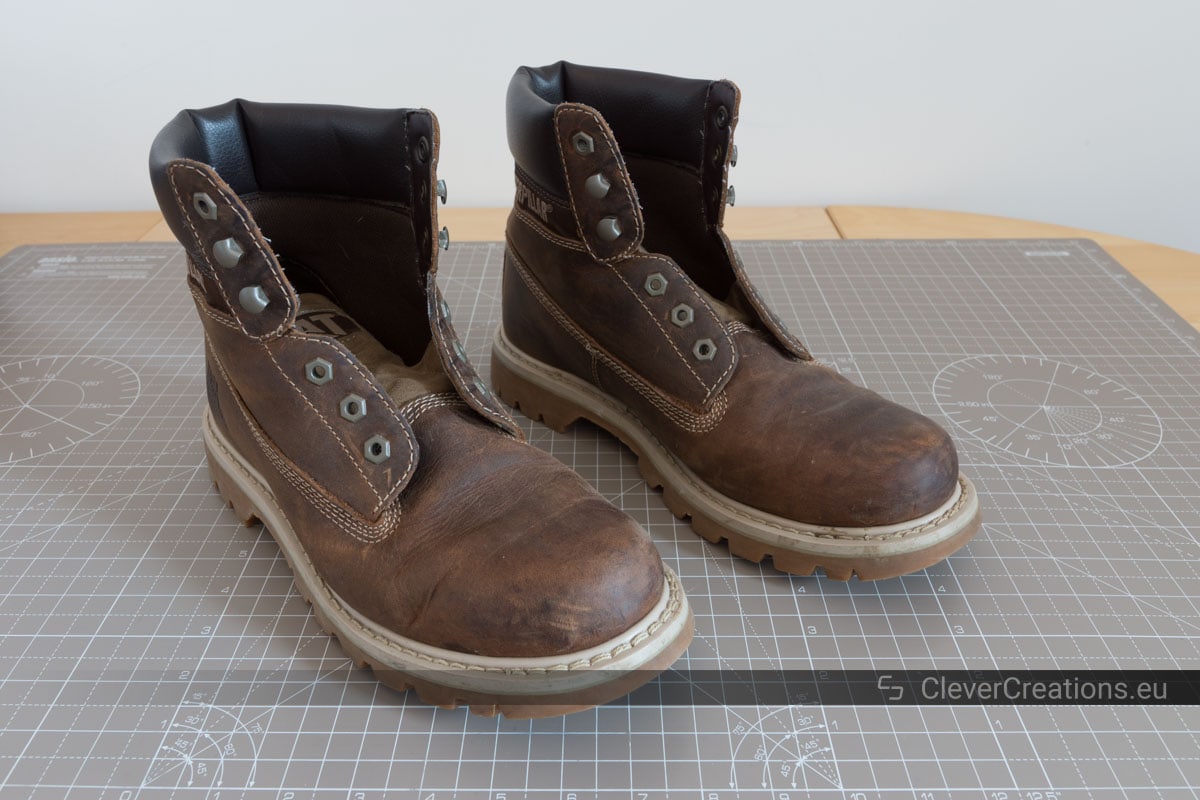
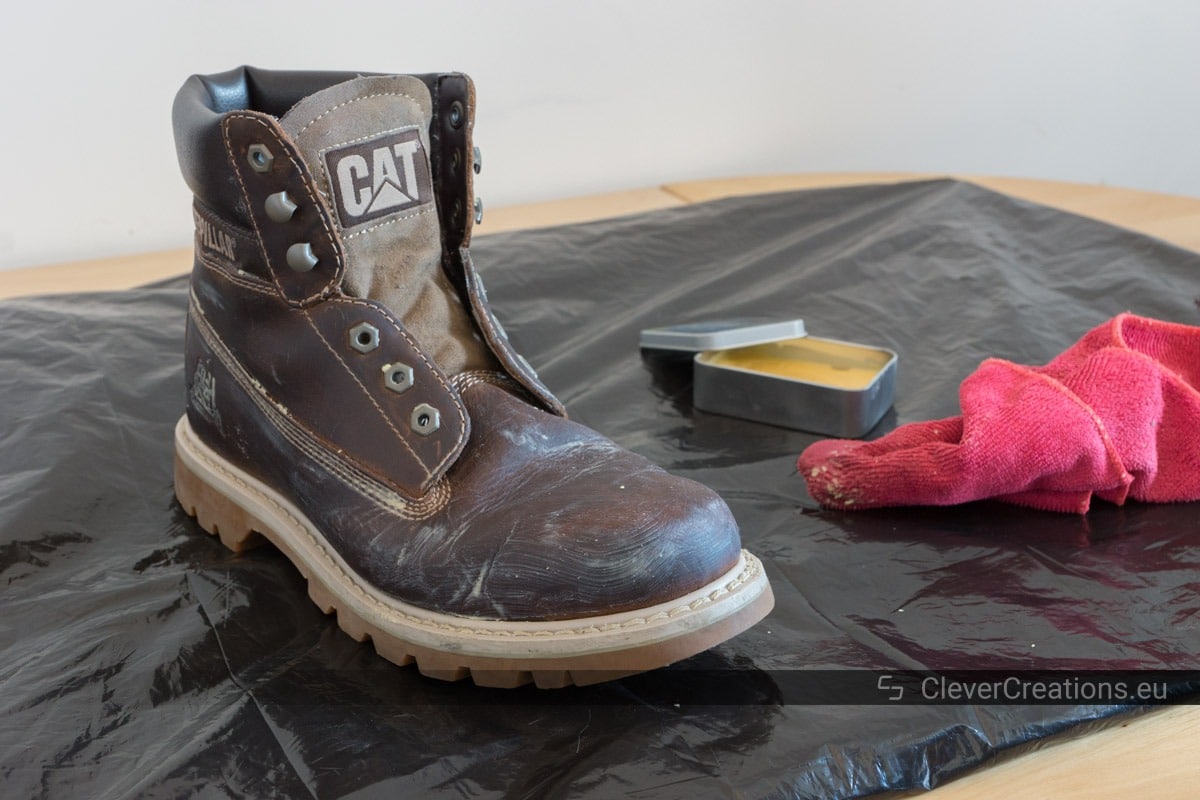
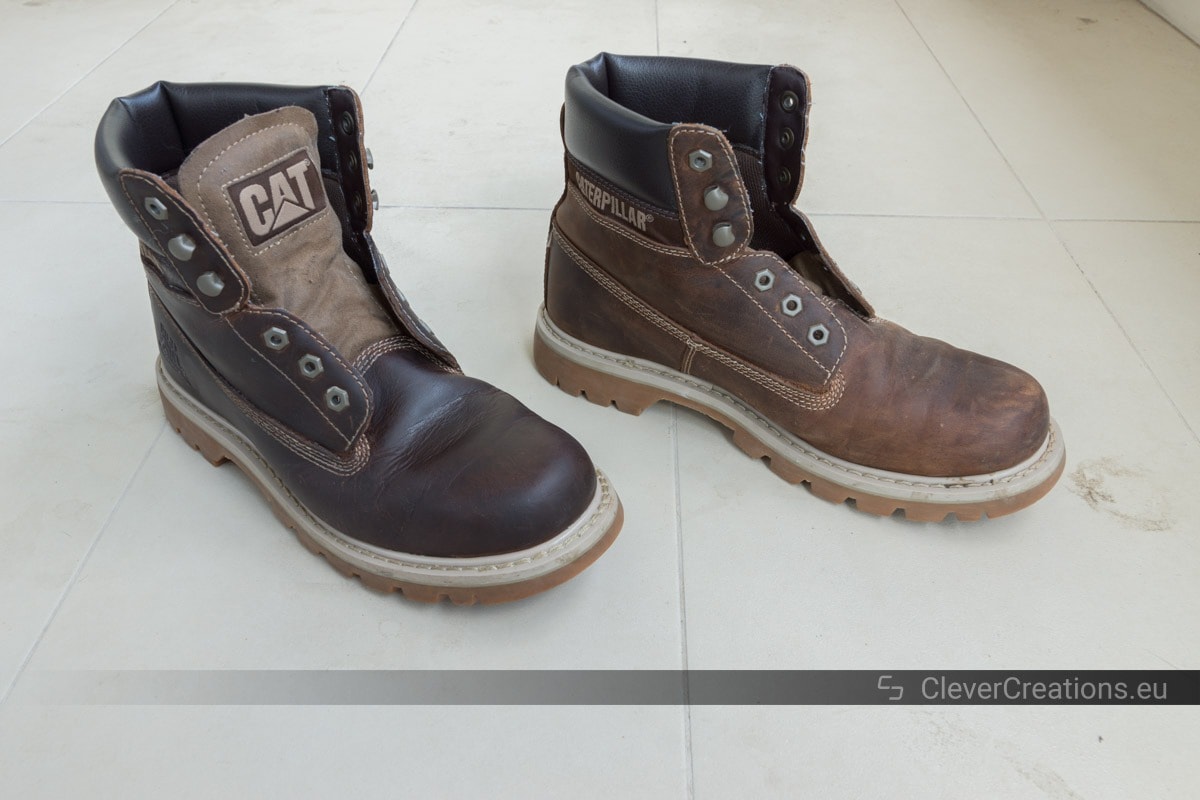
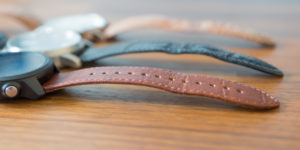
In this article I will restore and waterproof my Caterpillar work boots as an example. After frequently wearing them outdoors in the rain and snow, they ended up quite scuffed and with the color faded away. On my latest walks through the snow they also let moisture through and caused my feet to become damp. When this starts to happen to you, it is a clear sign that it is time to waterproof your boots.

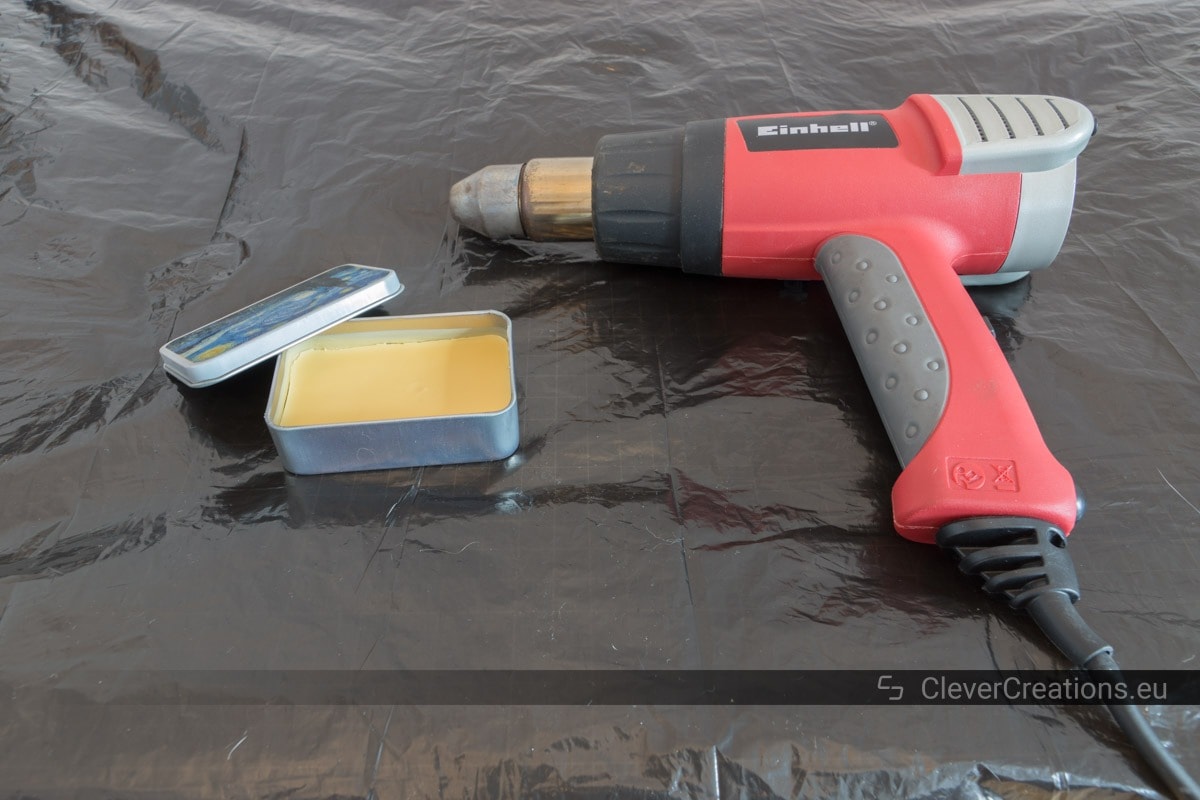
The method I used for my boots was applying a combination of beeswax, carnauba wax and coconut oil to the leather. The coconut oil conditions the leather, while the beeswax waterproofs it. The carnauba wax also protects against water, but adds more of a high-gloss finish.
It isn’t strictly necessary to create your own mixture of waxes. You can also use pure beeswax, or a store-bought conditioning and waterproofing product. The latter are often beeswax based, but also contain other additives that condition the leather and make the wax softer and easier to work with.
Before I show you how to waterproof your leather boots, I will provide some more information and answer several frequently asked questions:
Why Should You Waterproof Leather Boots?
There are many reasons why you would want to take care of and protect your leather boots. They range from making sure the boots keep looking good, to protecting your health and the financial investment you made. You want your boots to last a long time after all. Let’s further explore the reasons for waterproofing:
Keep Your Feet Dry
While damaging your leather boots can be inconvenient, damaging your feet is a lot more problematic. Hiking or working in wet boots for a full day can cause a condition called trench foot. I will save you the details, but this is definitely something you want to avoid.
Keeping your feet dry when you spend an extended time outdoors in wet or snowy situations is essential to maintain the health of your feet.
Prevent Leather Deformation Due to Water Exposure
Leather boots change shape when you wear them for the first couple of times. They adapt and conform to the shape of your feet. This is a process that is called breaking in. When the boots are repeatedly exposed to water however, the leather can deform in a way that is undesired and irreversible.
Waterproofing makes sure that the leather does not absorb excess water, so that you don’t risk your boots permanently deforming.
Fix Scuffs and Scratches
Some waterproofing products (see below) also condition leather and restore its appearance. By conditioning the leather they fix scuffs and scratches, and make the leather look like it is brand new.
Save Money
Buying a new pair of leather hiking or work boots every time the current pair is scuffed, scratched or starts to let water through can get expensive. Having a professional condition and waterproof the boots also is not cheap.
Conditioning and waterproofing your leather boots yourself is relatively easy, and is the most cost-effective option if you want to want to enjoy your boots in the years to come.
Types of Waterproofing Products for Leather Boots
There are many types of products that protect leather boots against water. Some of them, like sprays, only provide waterproofing. Others, such as waxes and oils, also condition the leather. Choosing the right kind of product is vital to get the desired result. Here are some of the most popular types of leather waterproofing products:
- Waxes, such as beeswax, paraffin wax and carnauba wax.
- Sprays, like silicone polymer spray and acrylic co-polymer spray.
- Oils, for example mink oil or neatsfoot oil.
- Creams, such as lanolin. Lanolin is the substance that helps sheep with shedding water from their coats.
When choosing a waterproofing method, it is helpful to pick one that also conditions the leather, especially if the boots are not conditioned yet. Conditioning leather is an essential step before moving on to protecting the leather from water.
Conditioning ensures that leather remains flexible and is less likely to crack or tear. Without replenishing the natural oils that were present before, leather can lose its color and pliability. If this is not taken care of in time, the leather can start to crack and undergo irreparable damage.
In this article I will focus on the two most popular ways of waterproofing leather boots: using wax and silicone polymer spray.
Wax vs Silicone Polymer Spray
The two main ways of waterproofing leather boots are using wax and silicone polymer spray. They are quite different from each other, and they each have their own advantages and disadvantages. Let’s give each of them a closer look:
Wax
Wax sealing is the traditional method for conditioning and protecting leather, with beeswax being the most popular wax type to use. Using wax is a natural way of caring for and nourishing leather, and an excellent way of caring for your boots and making sure that you keep dry feet.
There are various types of wax that you can use for your boots. If you prefer to go the DIY route, pure beeswax or a mixture of waxes (like I used) are good options. However there are also ready-to-use wax products that condition and waterproof.
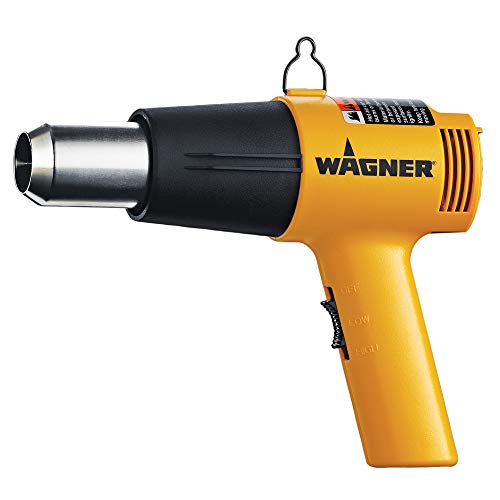
In order to apply the wax, it needs to be massaged into the leather. Depending on the hardness of the wax, it might be necessary to gently heat the wax in order for it to soften. To get the best result you might need to apply several thin layers of wax.
Because the wax penetrates the leather, this method provides the longest protection against moisture. It will still need to be reapplied occasionally, especially if you intensively use your boots. That said, out of all the waterproofing options, the wax-based one lasts the longest.
Recommended Wax Leather Waterproofing Products

Silicone Spray
Silicone spray is arguably the easiest method to waterproof leather boots. You simply spray the silicone coating onto the cleaned boots and wait for it to cure.
This method is best for new leather boots, as these still need to be broken in. In this period the seams will slightly stretch. If you waterproof the boots with wax and subsequently the seams stretch, the wax can end up in the welting. This should be avoided. Using silicone spray instead circumvents this problem.
Because the spray only applies a thin coating on the surface of the leather, the coating needs to be reapplied rather often. Usually you will need to do this every couple weeks, assuming that you wear the boots daily. But depending on the thickness and type of the spray, and how intensively you use the boots, it is also possible that the coating lasts mere days.
Recommended Silicone Leather Waterproofing Sprays

Both wax and silicone products can darken or otherwise affect the appearance of the leather. To make sure that you don’t encounter any unexpected surprises, first test the product on a small area before doing the entire boots.
I have added step-by-step descriptions for waterproofing leather boots using these methods further down the page.
What Do You Need for Waterproofing Boots?
You will of course need your leather work/walking/hiking boots, and the waterproofing and/or conditioning product(s) that you are going to use. However, it is also important that your boots are broken in and the leather has conformed to your feet.
Leather boots will change shape while when you break them in. If you waterproof them before breaking in the boots, and afterwards a seam or a small gap opens up in the stitching or leather, water can get in. So it is important that the boots first acquire their final shape and form before you waterproof them.
Aside from breaking in the boots, it is important that you clean and dry the boots first. Dirt, dust or other particulates can end up caught in the leather during the waterproofing process. You obviously don’t want to walk around with permanently dirty boots, so cleaning before conditioning and waterproofing is essential.
Similarly, in order to get the best results, it is critical for the leather to fully dry after cleaning. Only then can the waterproofing product can be properly absorbed by the porous leather.
To make sure that the leather is completely dry, wait for another 24 hours after it is dry to the touch. Always naturally air-dry leather outside of the presence of heat sources, such as heaters or sunlight.
How to Clean Leather Boots


To clean your leather boots, it is best to use a solution that is gentle on the leather, such as Fiebing’s Saddle Soap. Regular soaps can be too harsh, strip away too many of the natural oils and leave the leather dry. After you have picked the appropriate soap for your boots, follow the following steps:
- Use a clean microfiber cloth to remove any dirt, dust or other particulate matter from the boots. If the dirt is stubborn you will need to use a shoe brush to remove it.
- Apply a small amount of cleaner to a clean section of the cloth.
- Gently use circular motions to apply the cleaner to the leather. Make sure to visit each location at least once.
- Remove the leftover cleaner from the leather by wiping with a clean cloth or rag. It doesn’t matter too much what you use here, as long as it is clean and soft. Strips of an old T-shirt work well.
- Let the boots naturally air-dry before moving on to conditioning and waterproofing.
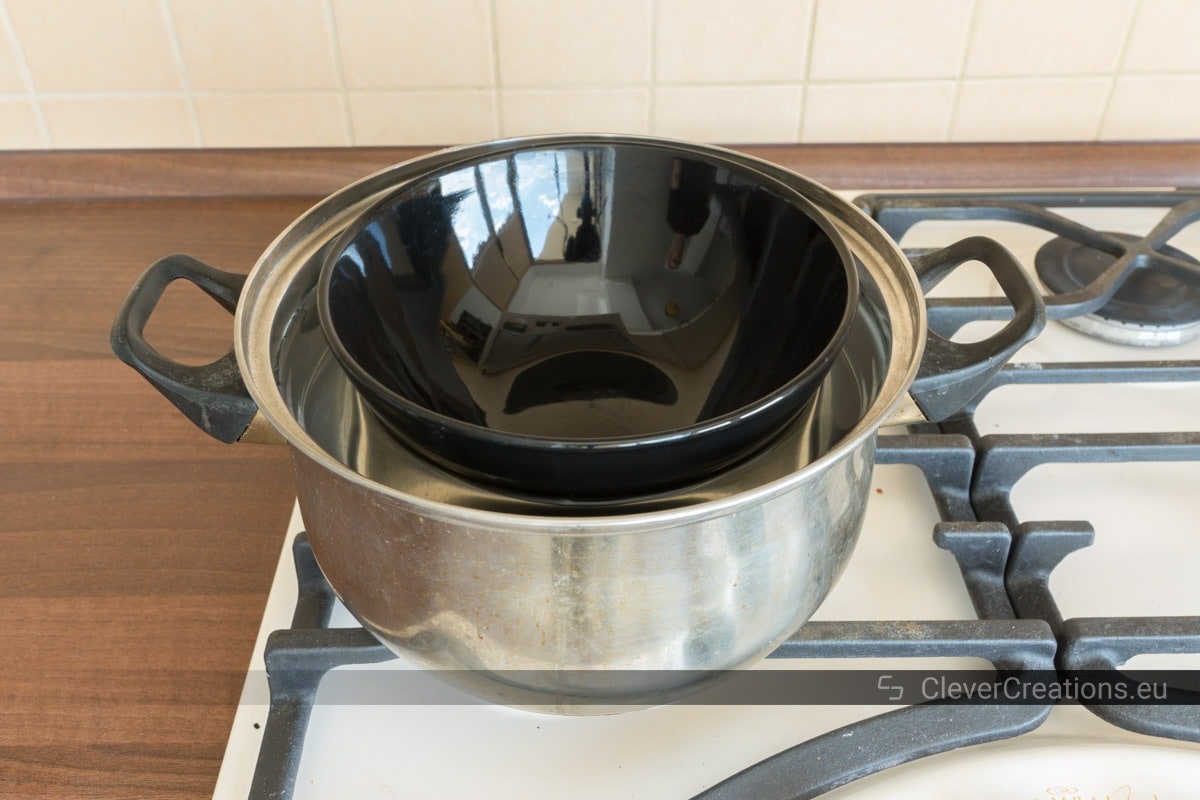
How to Make Your Own Leather Waterproofing Wax
If you want to create your own mixture of waxes, or you have pure beeswax beads that need to be melted, start here. If you already have a wax product that you can use, you can skip to the application section.
What You’ll Need
|
|
Tools | ||
|---|---|---|---|
|
Pan
|
|||
|
Bowl
|
|||
|
|
Parts | ||
|---|---|---|---|
|
No products found. |
Check Price | ||
|
Waxes in pellet form are preferred because they melt faster
|
Check Price | |

|
Check Price | ||

|
Check Price | ||

For my boots I used a mixture of beeswax, carnauba wax and coconut oil, based on a recipe that I found online. It worked well, but you can also just use pure beeswax if you want to keep things simple.
The recipe I used is as follows:
| Ingredient | Amount |
|---|---|
| Beeswax | 1/4 cup |
| Carnauba wax | 1/2 tablespoon |
| Coconut oil | 1/8 cup |
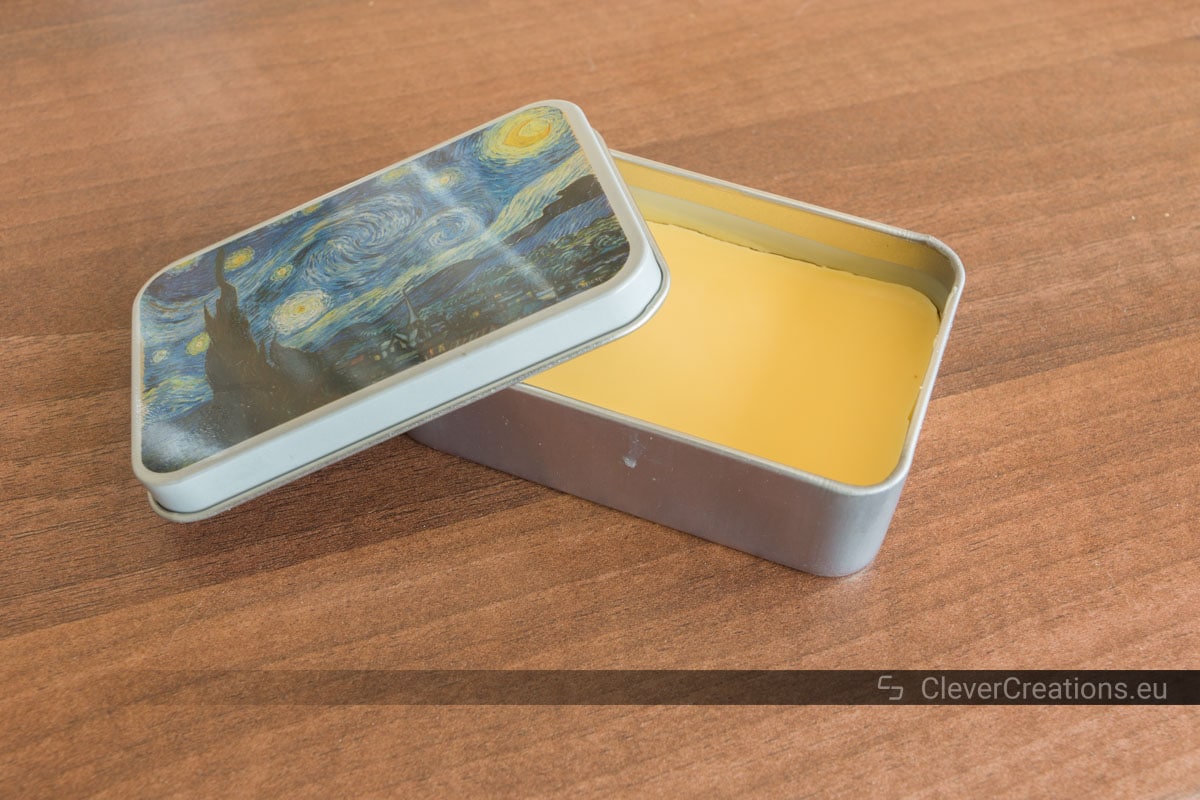
This gives about 50 grams / ~2 oz. of final product, which is enough for 3-4 pairs of boots.
The coconut oil helps condition the leather, but also darkens it. You can vary the amount of coconut oil based on how much darker you want the leather to get.
The carnauba wax gives more of a high-gloss finish. You can add some if this is what you want to go for, but do not add too much. Carnauba wax is quite hard, and adding too much of it will make the final wax product difficult to work with.
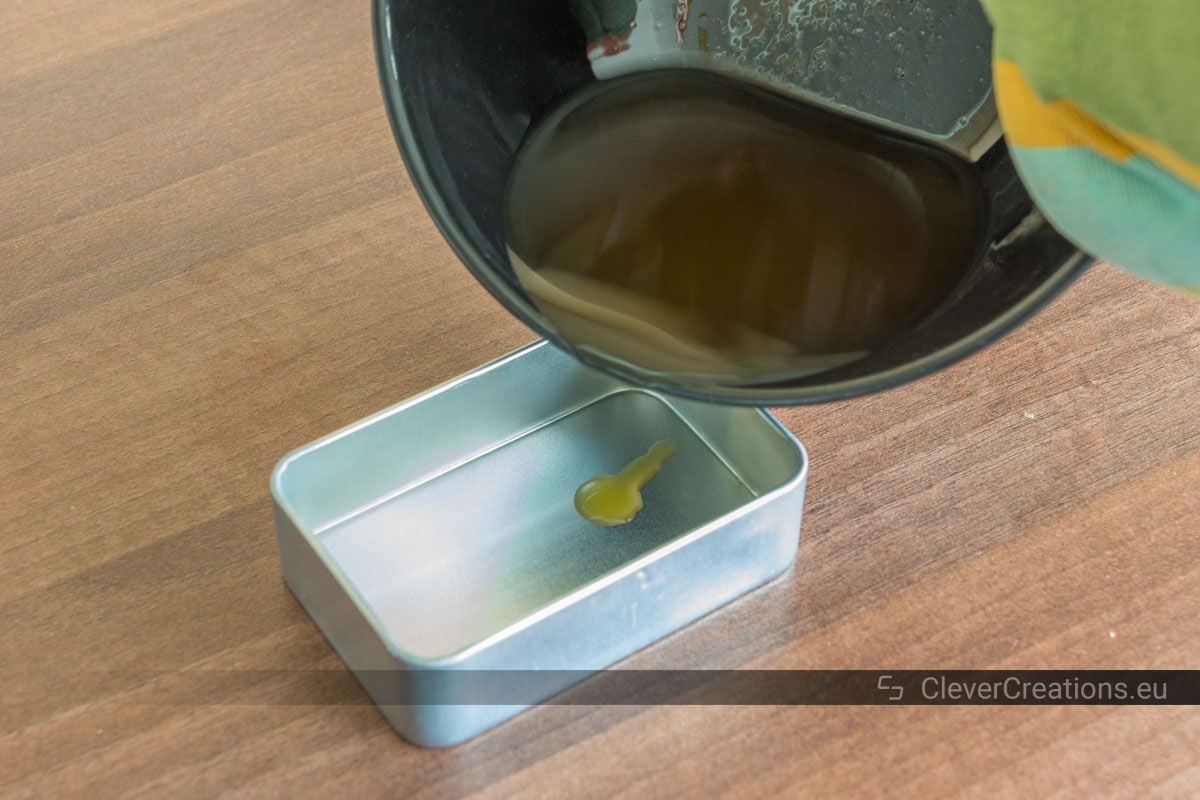
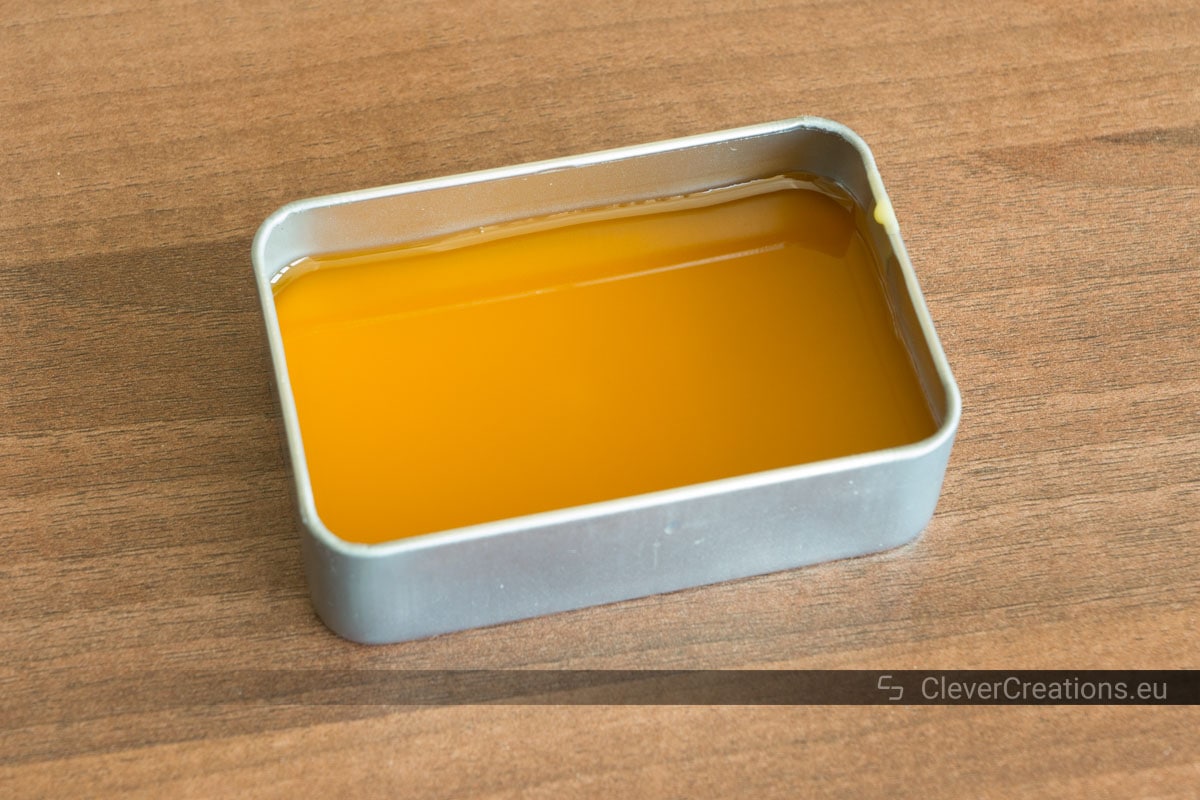
Melting the Wax

How to Use Wax to Waterproof Leather Boots
What You’ll Need
|
|
Tools | ||
|---|---|---|---|

|
Check Price | ||
|
A hair dryer works too
|
Check Price | |
|
|
Parts | ||
|---|---|---|---|

|
Check Price | ||
Preparing the Boots and Work Surface
Applying the Wax to the Leather Boots
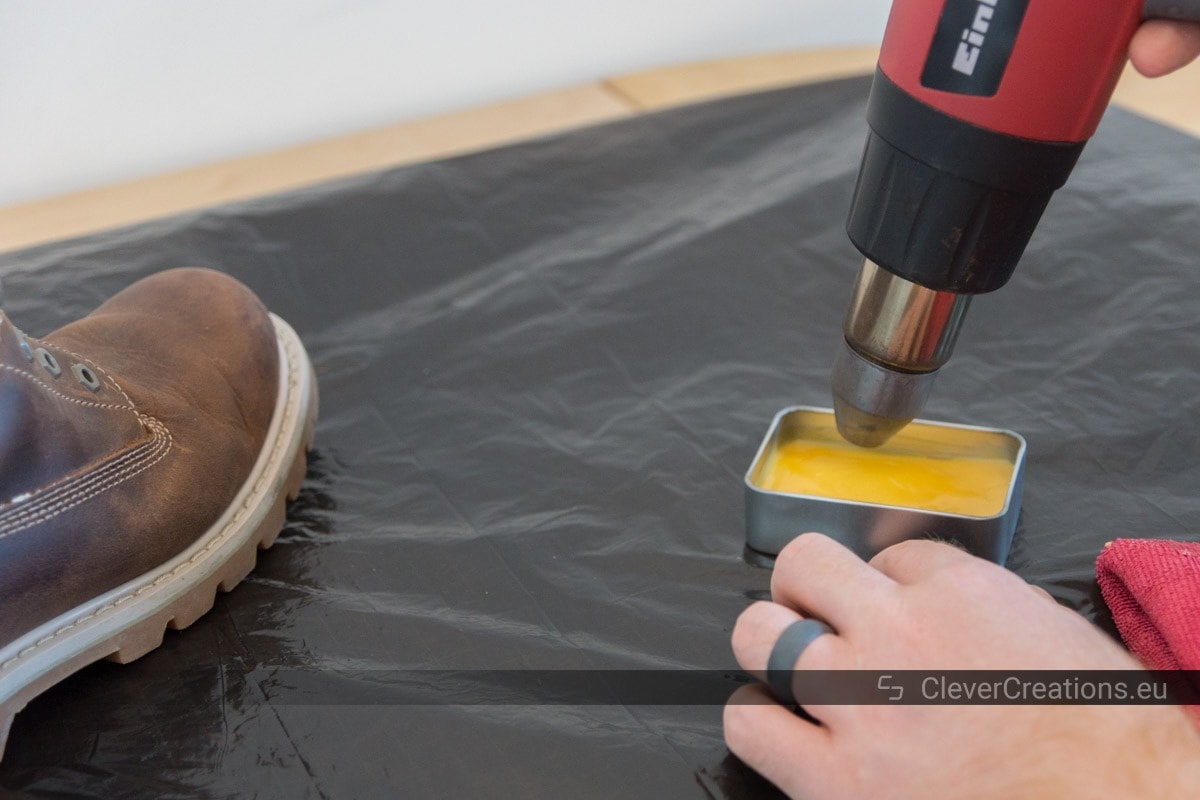
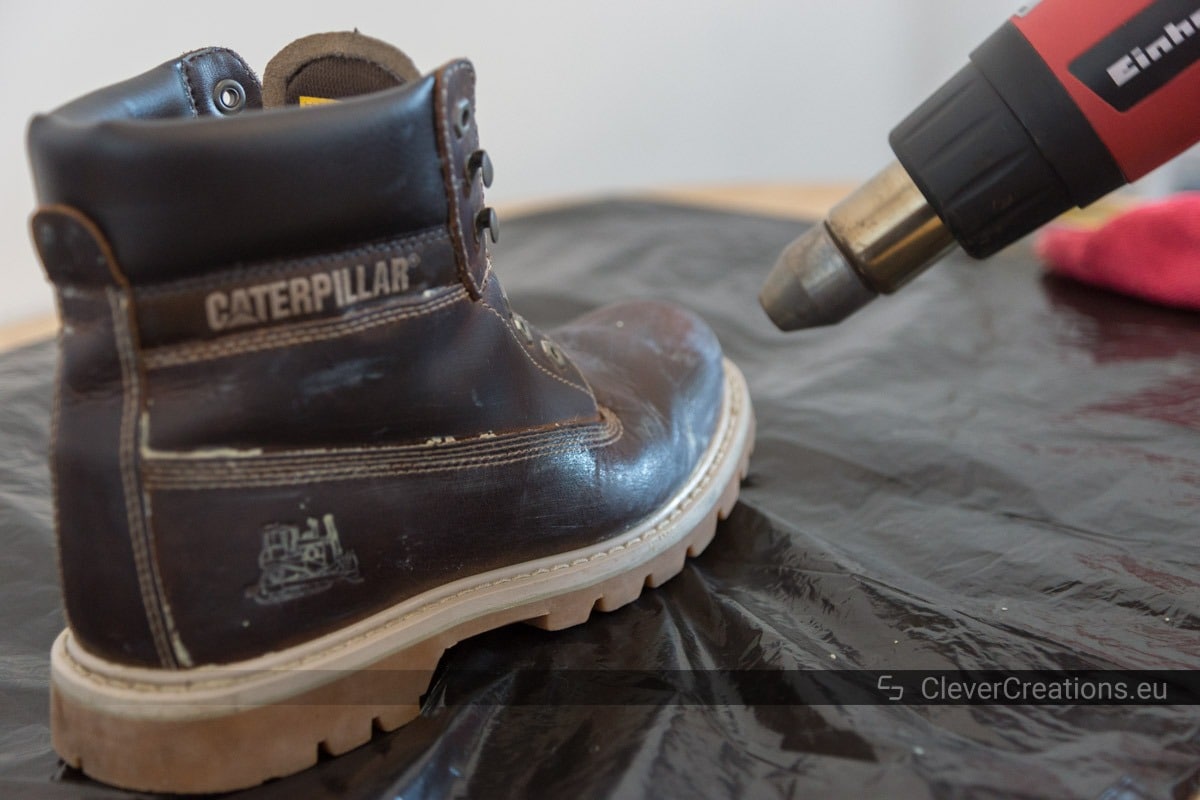
Only use minimal heat, just enough to convert the wax to liquid form.
For the best results, apply and melt several thin layers of wax to fully saturate and waterproof the leather.
Remove any leftover wax by wiping it away with a clean section of your microfiber cloth.
Finishing Up


A Summary of the Wax Waterproofing Process
- (If you are creating your own wax) Melt the waxes that you want to use in a bain-marie or double boiler.
- Pour the molten wax mixture in a container and let it cool.
- Clean your boots and remove the laces.
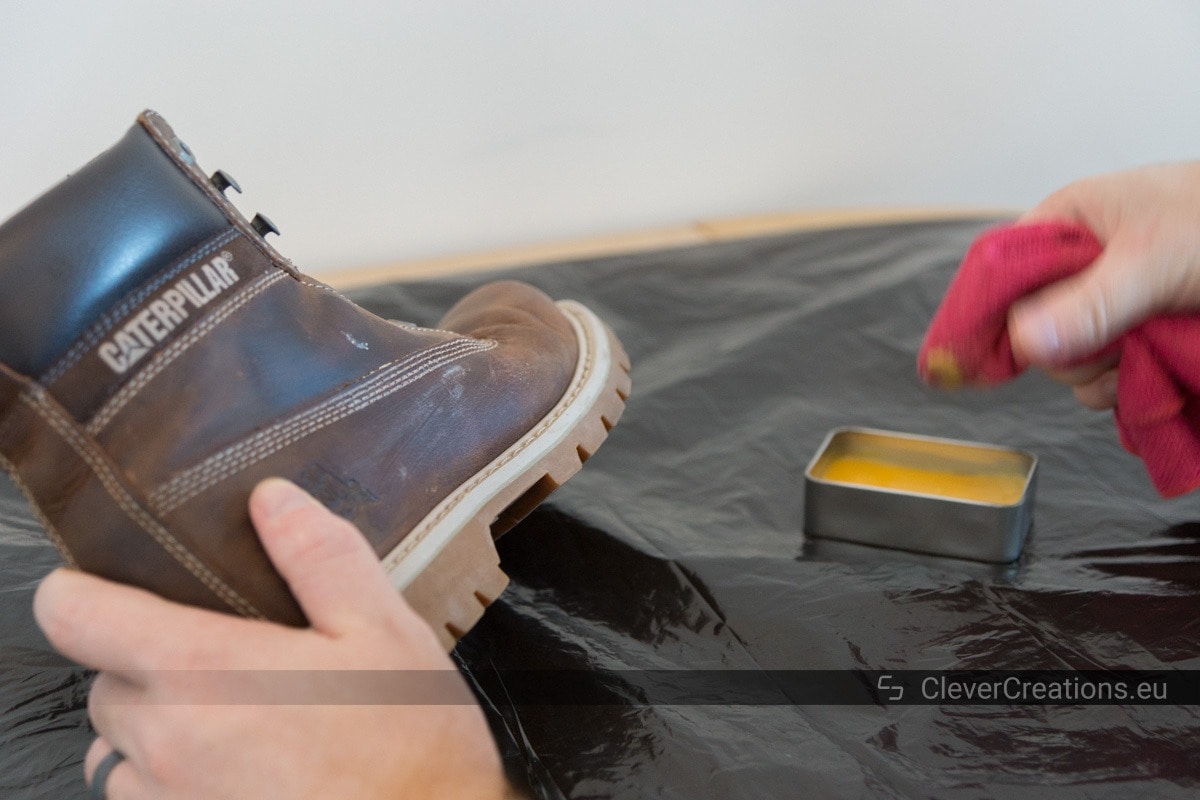
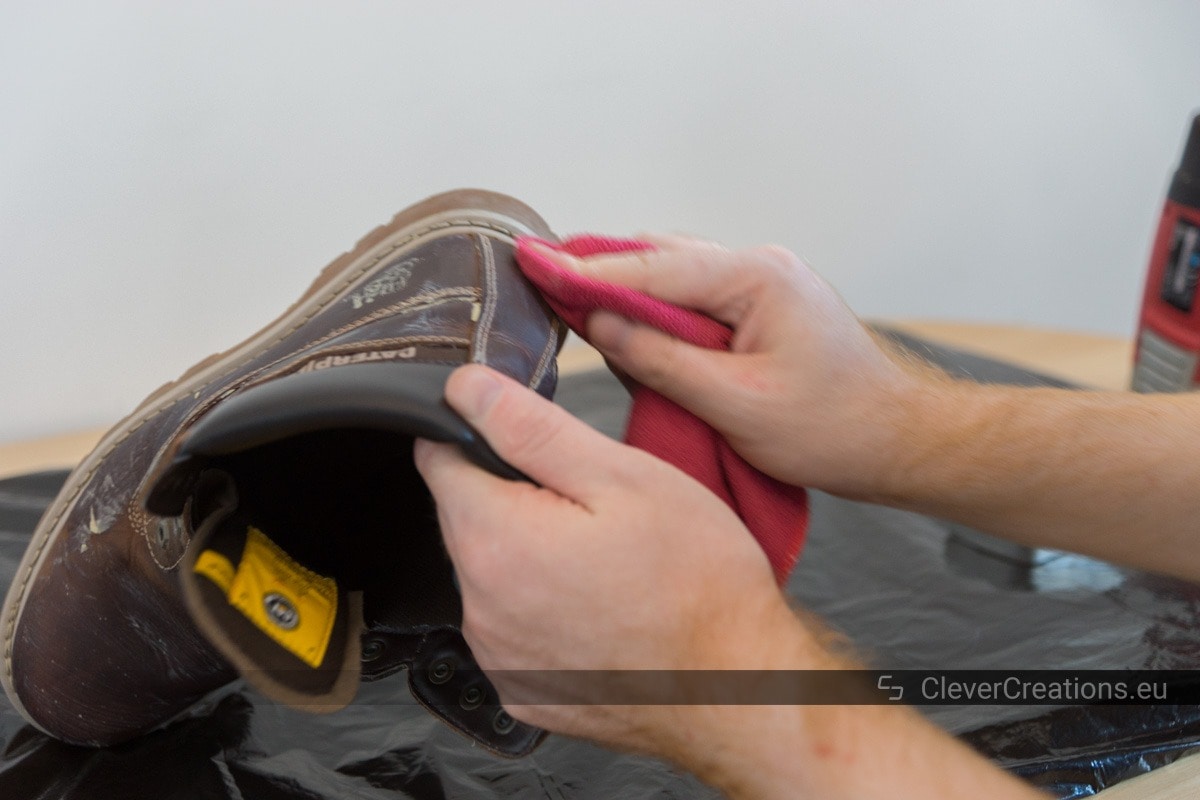
- Apply some wax to a microfiber cloth and rub it over the leather and seams of the boot.
- Continue applying wax until all areas are covered with a thin layer.
- Melt the wax into the leather using friction or minimal heat.
- Apply and melt more thin layers as necessary.
- Wipe away any leftover wax with a microfiber cloth.
- Waterproof the other boot and leave the boots to air dry.
How to Use Silicone Spray to Waterproof Leather Boots
What You’ll Need
The easiest and fastest way to waterproof your leather boots is to use a silicone spray. However, it does not last very long. For boots that see heavy outdoor use, it is better to use the wax method. To waterproof your boots using silicone spray, follow these steps:
- Make sure the leather boots are clean.
- Spray an even coat of waterproofing spray on the exterior of the boot.
- Allow the coating to cure.
As with any purchased wax products, always check the manufacturer’s instructions.
Re-Applying the Waterproofing
You can re-apply these methods as soon as you notice that the leather of your boots start to absorb water instead of repelling it. This is a clear sign that the waterproof coating is beginning to wear out and needs to be refreshed.
Keeping an eye on when this happens and taking swift action ensures that you are able to enjoy your leather boots for a long time.
Just like when you originally waterproofed the boots, it is important to clean and dry the boots before re-applying the coating.
How Often Should You Waterproof Leather Boots?
How often you should waterproof your boots depends on how often you wear them. If you have a pair of hiking boots that you only wear a couple of weekends a year, you can get away with waterproofing them once in that period. On the other hand, a pair of outdoor work boots that you wear daily need more attention.
You will be able to tell when your boots need a repeat of the waterproofing once the coating is visibly wearing out, dark spots (from moisture absorption) start appearing on the leather, or the wax coating is becoming scuffed or scratched in various areas.


thanks for sharing. my coconut oil is solid the one in the picture is liquid and I wonder if I can us it as is or I should get the liquid one.
Hi! The coconut oil turns liquid at 24 degrees Celsius / 76 degrees F, so you have the right oil but it is just at a lower temperature.