
When working with capacitors, especially high voltage ones, a capacitor discharge tool is essential. It is a device that helps you drain capacitors safely before handling them further.
While you can buy a capacitor discharge tool, they are just as easy to make. It is a quick, simple project that only requires a couple of components and a bit of your time.
In this article I will teach you how to make a capacitor discharge tool for yourself and show you exactly how to use it.
What is a Capacitor Discharge Tool?
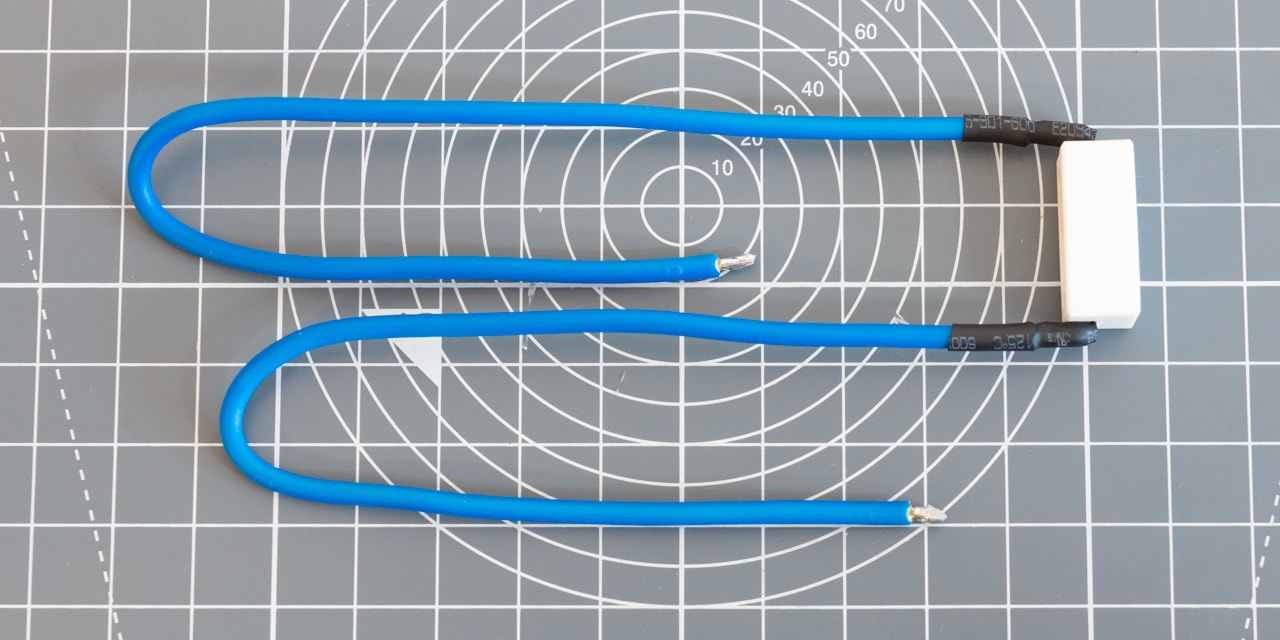
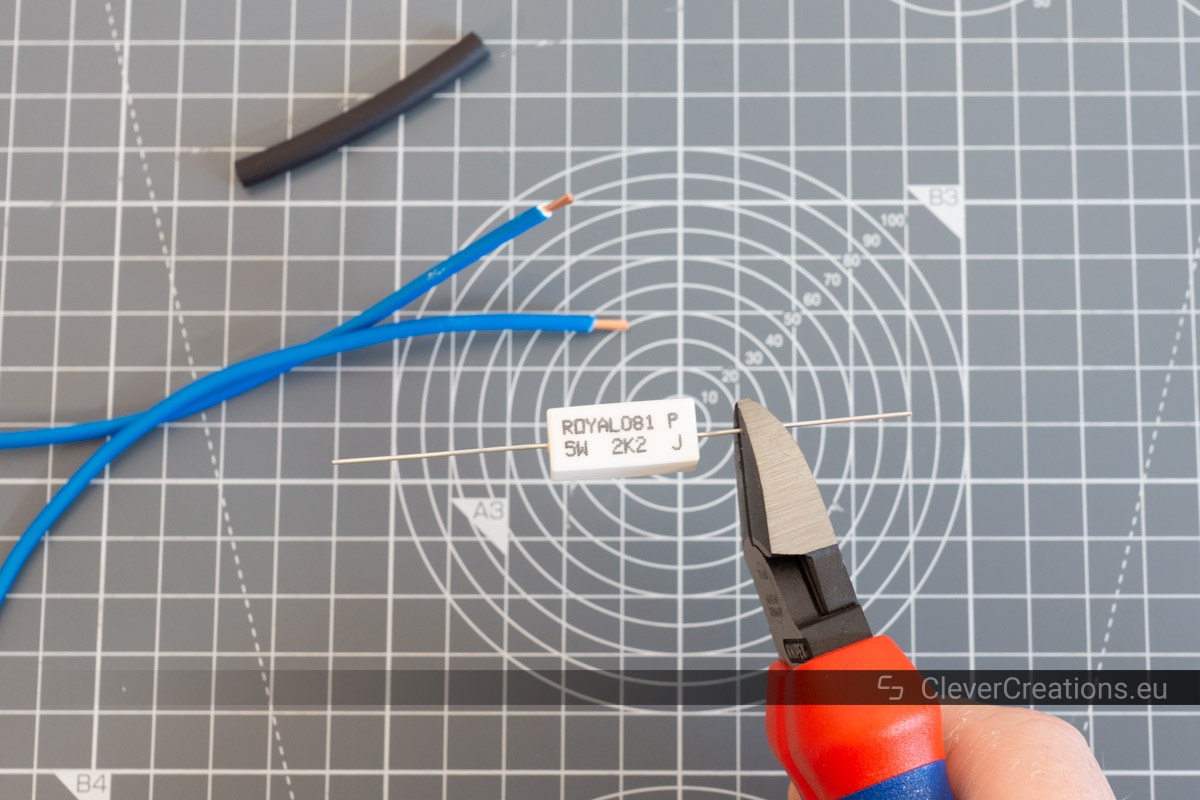
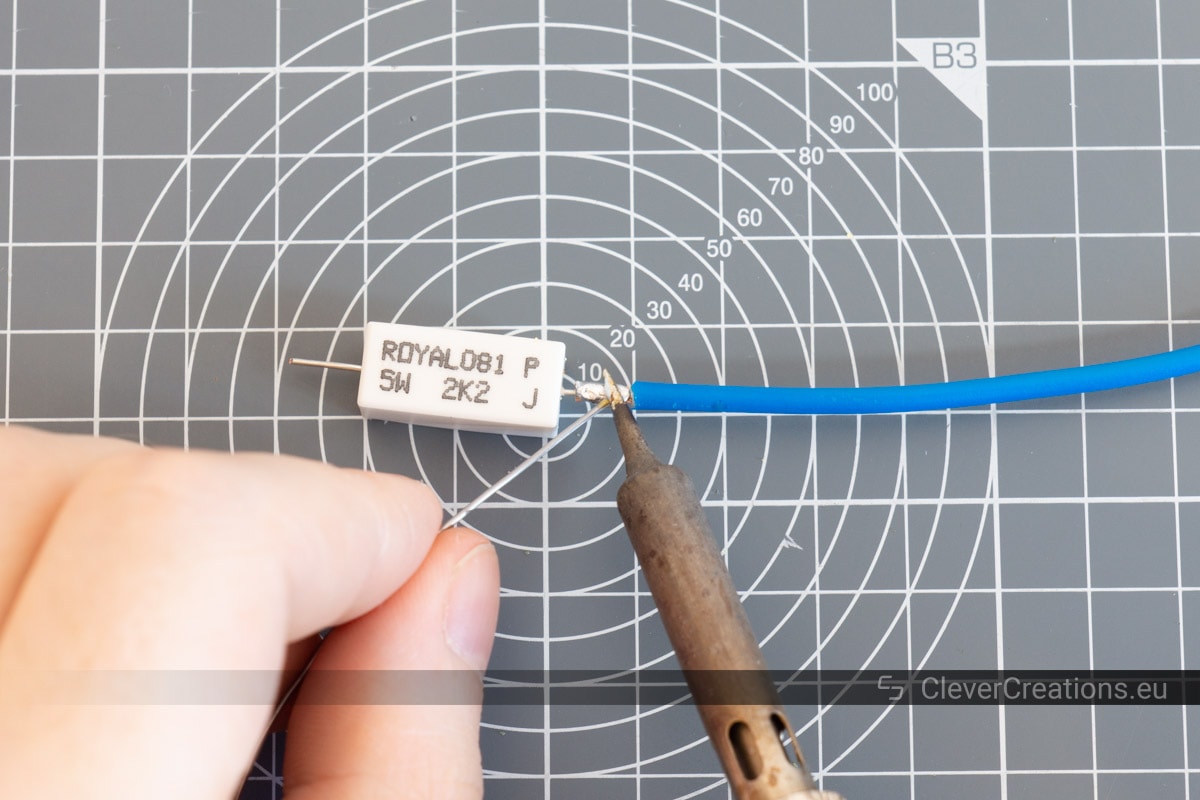
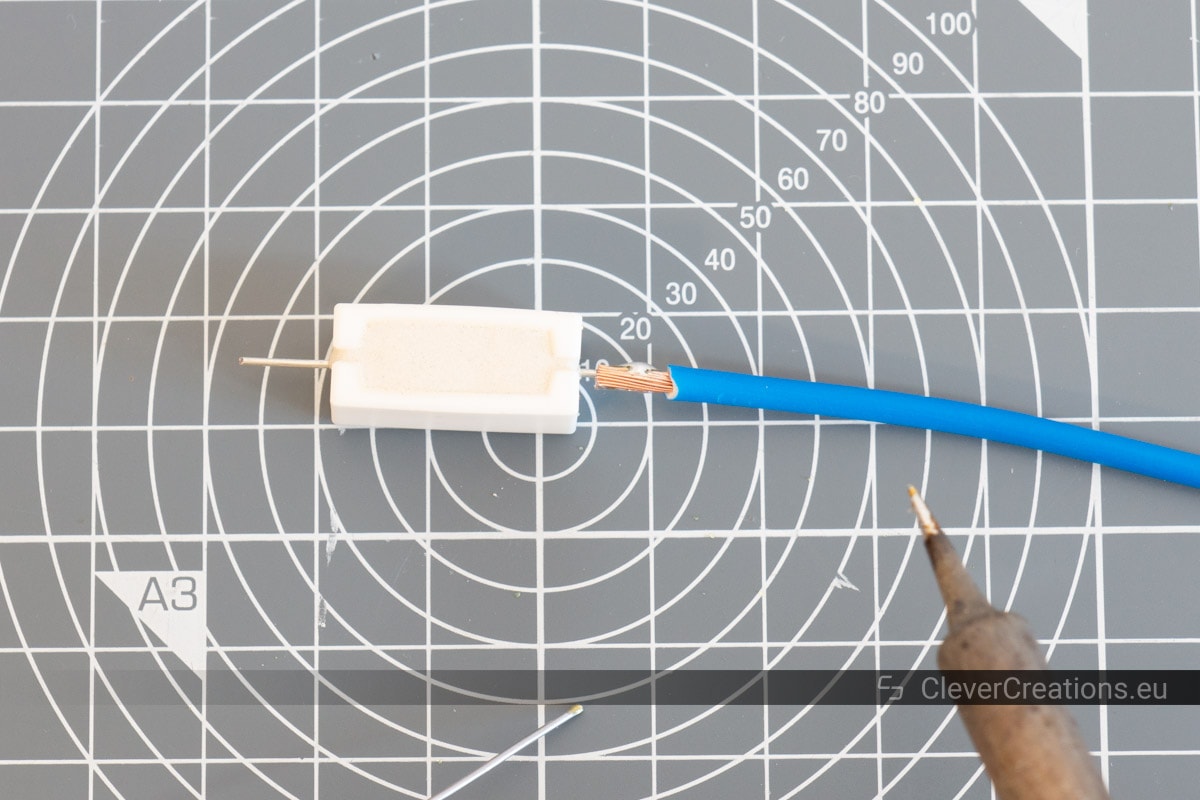
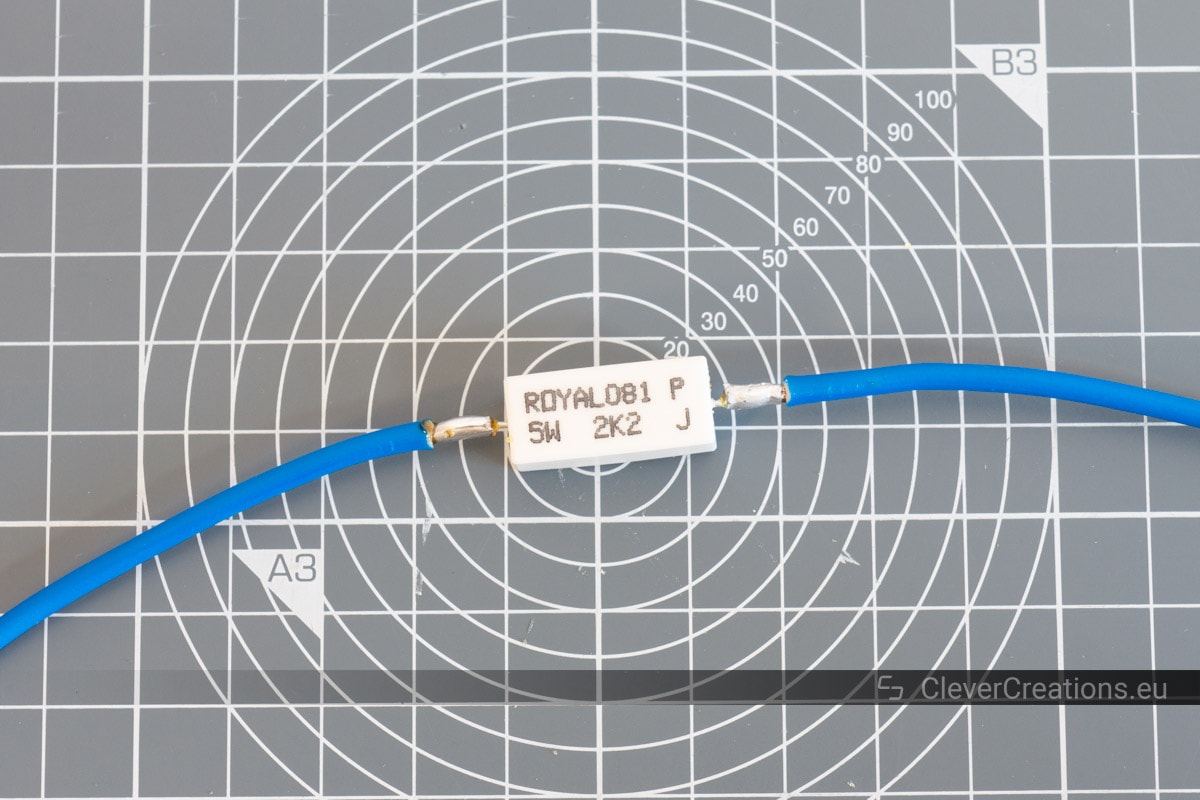
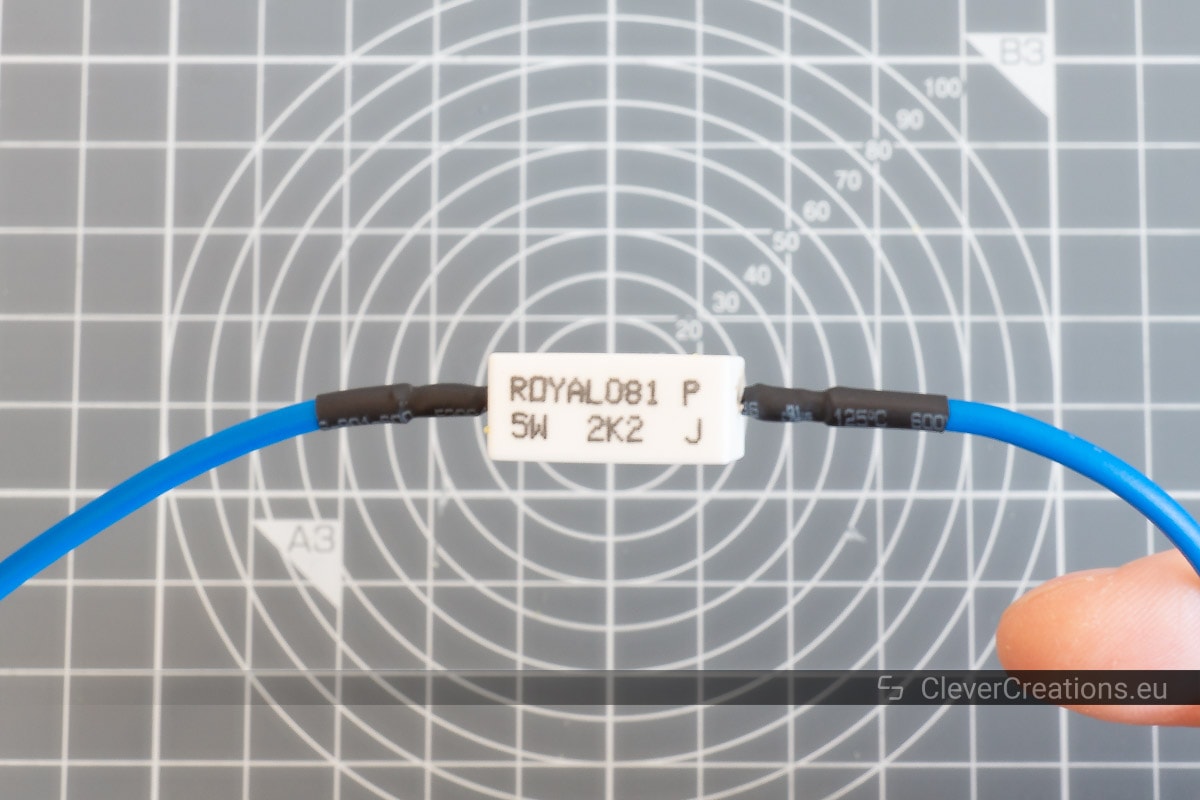
In its most basic form, a capacitor discharge tool is simply a resistor with two wires attached to it, one on either end. It is used to create a path for the charge in a capacitor to drain safely through.
Some capacitor discharge tools come with one or more LEDs that indicate the current charge of the capacitor that it is connected to. Other than that, they are all pretty much the same.
You can also find them under the names capacitor discharge pen, discharge tool, or some other combination of these words.
Why Do You Need One?
When desoldering and replacing a broken capacitor, salvaging components or otherwise working on electronics, you will regularly encounter capacitors that still contain a charge. If the charge is large enough and is not handled correctly, it can be dangerous.
Powerful capacitors with a sufficiently high charge can shock, burn, injure and even kill you. Because of this, you must drain any potentially dangerous capacitor that you come across.
Discharging capacitors with other methods can be unsafe. For example, a commonly used method is to short out capacitor terminals with a screwdriver. This creates a path with very little resistance, releasing a lot of charge in too short of a time.
While this does achieve the goal of discharging the capacitor, it also can damage the capacitor, along with other components on the circuit board, the screwdriver, and you.
To avoid this, it is recommended to use a proper discharge tool that drains charge from capacitors more slowly.
How to Make Your Own Capacitor Discharge Tool
Making your own discharge tool takes a small amount of time and tends to be cheaper than buying one. Especially if you are like me and you have most of what you need already lying around.
The design I used here is as simple as it gets. It is also possible to make a capacitor discharge tool with LED, but I prefer to keep devices like these as simple as possible.
By adding more components like an LED, additional resistor and diodes, you introduce more points of failure. Both in the additional components themselves and in their solder connections.
When discharging high voltage capacitors, it is safer to rely on the voltage measurement of a quality multimeter than on an indicator LED. After all, if the LED is off, you can’t be sure whether the capacitor is actually discharged or if something is wrong with the LED or its circuit.
What You’ll Need


|
|
Parts | ||
|---|---|---|---|
|
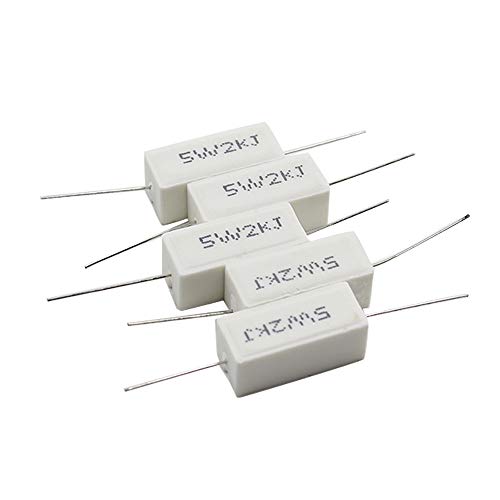
For discharging regular capacitors
|
Check Price | |
|
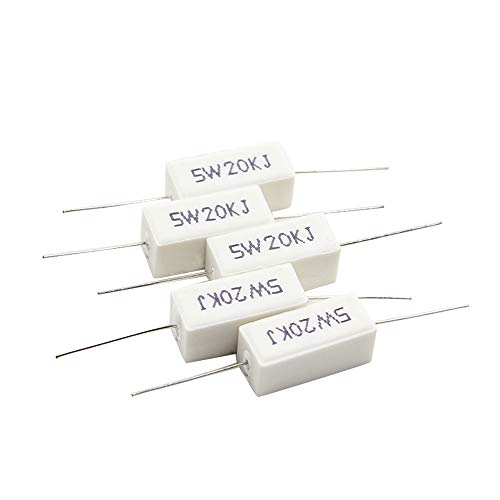
For discharging large high voltage (>400V) capacitors
|
Check Price | |

|
Check Price | ||

|
Check Price | ||
|
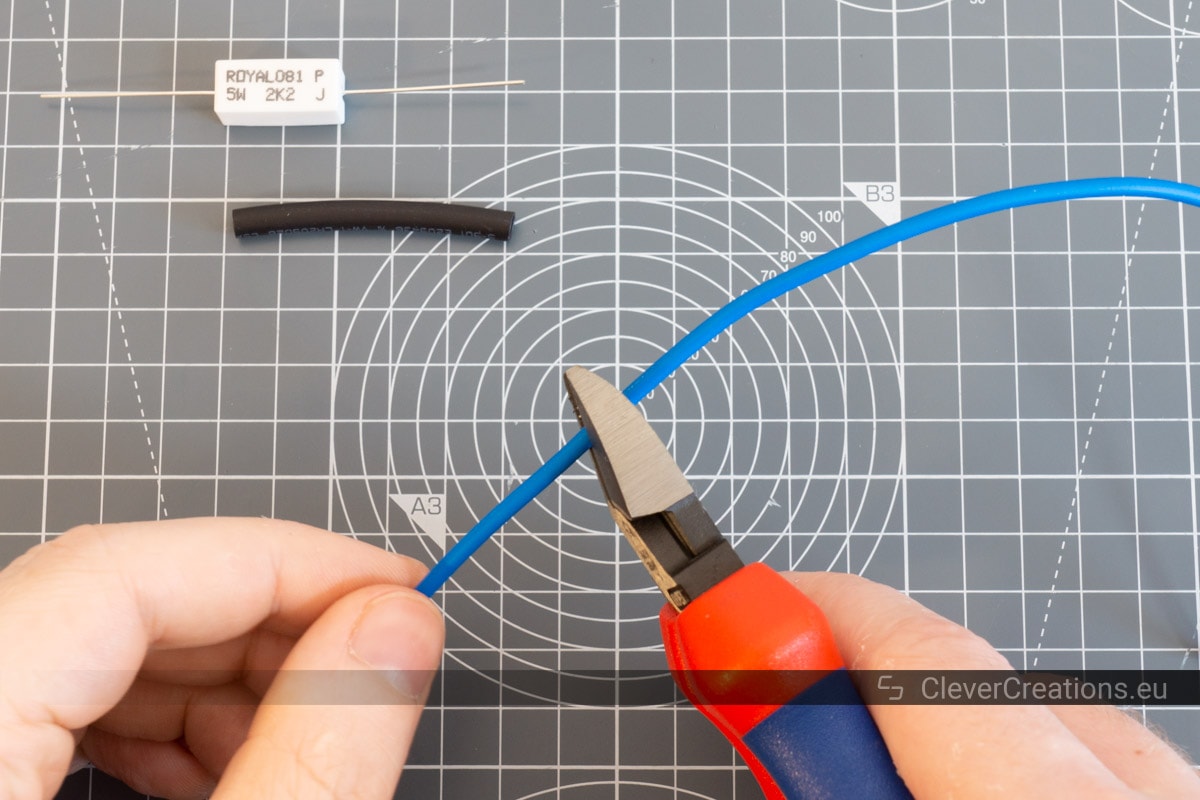
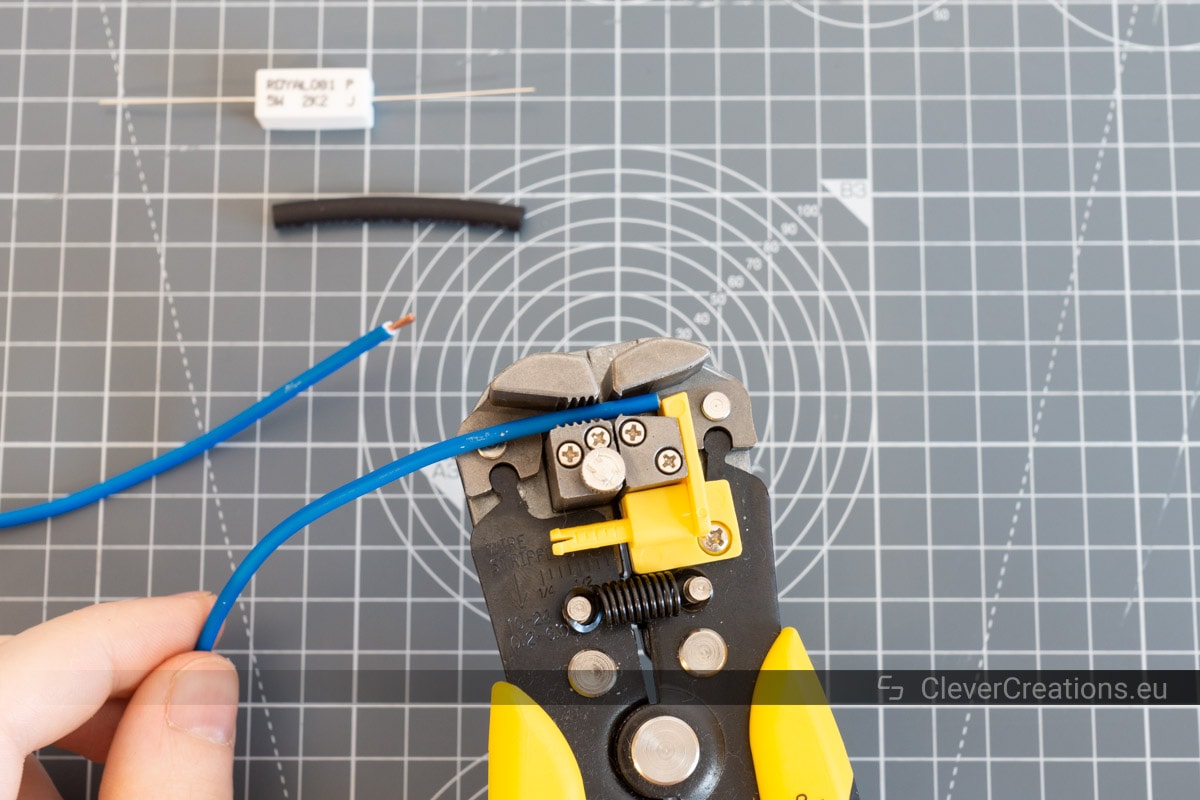
Electrical Wire
Aim for a gauge of 16AWG or thicker. Reusing an old power chord works well for this.
|
|||
Instead of wire, you can also use a set of insulated probes. These are easier to handle and come with multiple probe/clamp options. Just make sure that they are rated for 600V or higher.
Step by Step


Tips
- Make sure that all wires and leads are properly insulated. You don’t want the discharge tool to have any exposed metal that you can accidentally touch.
- Double check that the wires (or probe leads) are rated for the maximum voltage that you will be working with. Most of the time, 600V rated wires are more than sufficient.
How to Use a Capacitor Discharge Tool
For the instructions on how to use the DIY capacitor discharge tool I will refer you to the dedicated article on how to safely discharge capacitors. It has all the do’s and don’ts of properly handling capacitors when working with electronics.

Conclusion
As you can see, it is pretty straightforward to build a DIY capacitor discharge pen. If you are into electronics, chances are that you already have most of the required parts and tools lying around.
What matters is that you use the right resistor (resistance and wattage) for your desired application. On top of that, you need to make sure that the tool has no exposed metal anywhere. Aside from at the tips, of course.