

When it comes to repairing electronics, desoldering is an important skill to learn. Whether you want to replace defective or incorrectly placed parts, fix bad solder joints, troubleshoot an electric circuit or salvage electronic components, desoldering can help you do so.
There are many different methods and tools you can use to desolder, which can make things a bit confusing. In this article I am going to explain to you how to desolder, the best methods, and give tips and techniques to get you started.
What is desoldering?
Desoldering is the process of removing solder and components from a circuit board. It involves getting rid of one or more solder joints to free up the component before removing it. There are various methods through which this can be done. It is the opposite process of soldering, but can be done with mostly the same tools.
How does desoldering work?
Desoldering generally consists of multiple steps. The first one is to heat up the solder of one or more solder connections. This is usually done with a soldering iron or a hot air source. Sometimes you remove the solder. After this, you manually take the component from the circuit board.
All commonly used desoldering methods are described in more detail further down the page.
Why desolder?
There are several reasons why you would want to desolder. For example, to repair solder joints or replace broken components on a circuit board. Another reason would be to troubleshoot an electrical circuit that is not working correctly. You can also desolder components to salvage them for use in other projects.
General (safety) tips for desoldering
Before going in detail about the various desoldering methods that are out there, I would first like to give some general tips for desoldering that apply to most, if not all of the methods.
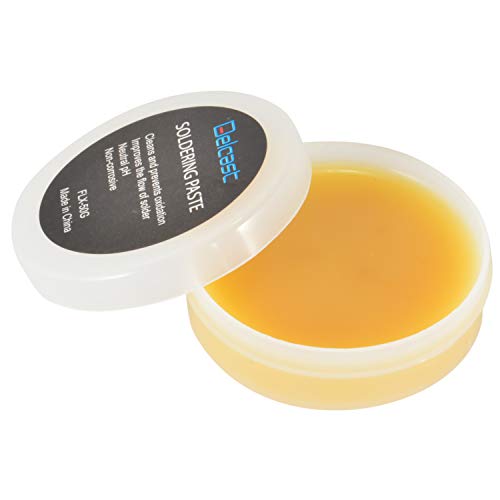
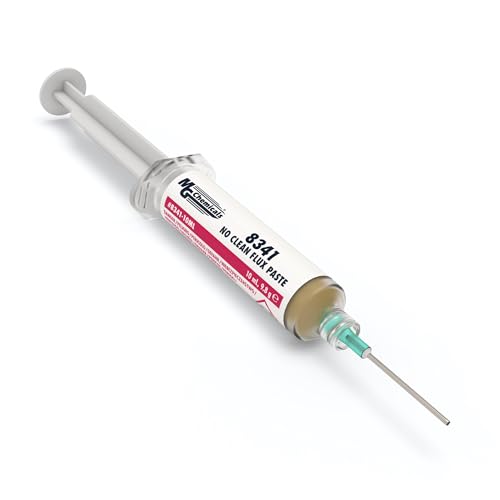
- When it comes to desoldering, flux is your friend. If you have trouble getting the solder to flow to where you want it to go, add flux. It removes metal oxides from solder joints, helps transfer heat and lets solder flow more easily. Rosin flux and no-clean flux are both good options.
- Always limit exposure time of components to heat as much as possible. High heat for a prolonged period of time damages components and boards. Don’t blindly turn the temperature setting of your soldering iron all the way up to make desoldering easier.
- If you are desoldering something that has been soldered with lead-free solder, add some leaded solder to the solder joint. Leaded solder has a lower melting point than lead-free solder. Mixing it in lowers the overall melting temperature and makes desoldering easier. You can also use Chip Quik for this (you can find more info on how to use Chip Quik further down the page).

- If possible, use a temperature adjustable soldering iron for desoldering. A temperature adjustable soldering iron allows you to set the right temperature to prevent overheating components and solder pads.
When using a simple, non-adjustable iron, aim for one that uses 15 to 30 watt.
- Breathing in solder and flux fumes is unhealthy. Make sure to protect your lungs by using a fume extractor, or at the very least by blowing a fan over your workspace.

- Similarly, protect your work area from the heat of your soldering iron or hot air rework station. A silicone soldering mat does wonders for this.
What temperature should you desolder at?
Choosing the right temperature for desoldering can be tricky. To prevent overheating, the goal is to use the lowest temperature that still allows you to remove the component in a short amount of time. Unfortunately, there is no single temperature that works in all situations, because of the large number of factors involved.
The most important factors that influence desoldering temperature are:
- The type of solder that was used to solder the component. Leaded solder has a lower melting point than lead-free solder, and thus can be desoldered at a lower temperature.
- The mass of the component that you are desoldering. If the component is large, has large pins or has a heatsink, it takes more heat to heat up. On the other hand, small surface mount components barely have any thermal mass. Basically, the more metal, the more heat you need to introduce to melt the solder.
- Any ground, power and/or thermal planes that the component is connected to. These are large areas of metal that further increase the amount of heat required to desolder the component.
- The number of layers in the PCB. More layers means more copper, which means more heat being conducted through the board away from the component.
- If you are using a hot air rework station, the distance from the nozzle to the component. Holding the nozzle further from the component increases the area over which the heat spreads. Moving the nozzle back and forth over the desoldering area does the same. You do want to spread out the heat to reduce thermal stress on a single point, but doing so increases the desoldering time.
As you can see, there are a lot of things to keep in mind when selecting the right temperature on your soldering iron or hot air rework station. In practice, I usually find myself using the following settings:
| Device | Setting |
|---|---|
| Soldering iron | 330 to 360°C (630 to 680°F) |
| Hot air rework station | 350 to 380°C (660 to 720°F), with low to medium airflow. |
When desoldering, experience helps you a lot in finding the sweet spots for the settings. I recommend practicing and experimenting on old circuit boards to get a feel for desoldering. It is important to learn how to desolder while minimizing possible damage to components and circuit boards.
What desoldering methods are there?
There are various desoldering methods you can use, each with different benefits and situations in which they are the most useful. For example, a desoldering pump is most useful to remove large amounts of solder at once, while desoldering braid is the best option for cleaning solder pads.
Here is a list with the most common desoldering methods:
- Desoldering braid / Solder wick
- Desoldering pump
- Desoldering gun
- Hot air rework station
- Desoldering tweezers
- Chip Quik
- Soldering iron only
Desoldering braid / Solder wick
What is desoldering braid?
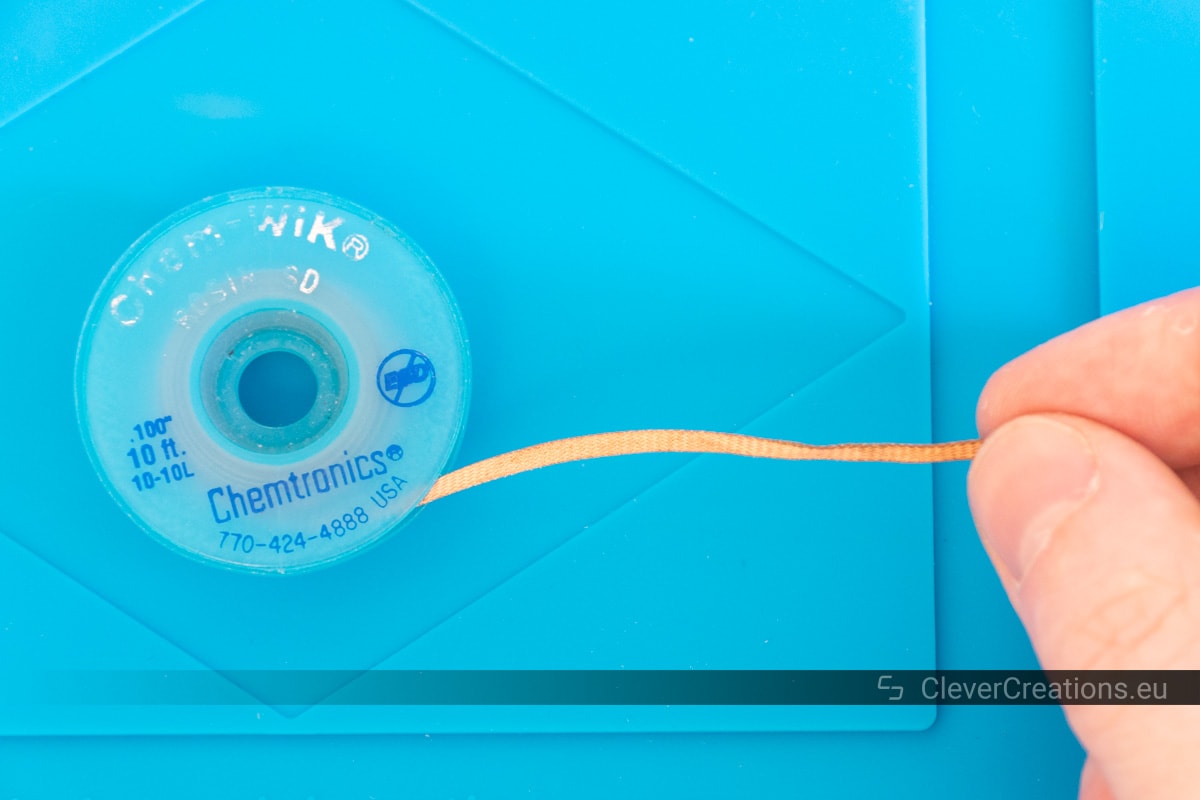
Desoldering braid is a desoldering tool that consists of thin copper wires that have been braided and that are usually coated with flux. It is used in combination with a soldering iron to remove solder from solder joints and components. You can purchase desoldering braid on rolls, in various widths. It is also known as desoldering wick or solder wick.

Advantages of desoldering wick are that it is easy to use and affordable. Unlike other desoldering tools, it does not require maintenance or upkeep. Instead, it is disposable. Used sections of desoldering braid are discarded.
How does desoldering braid work?
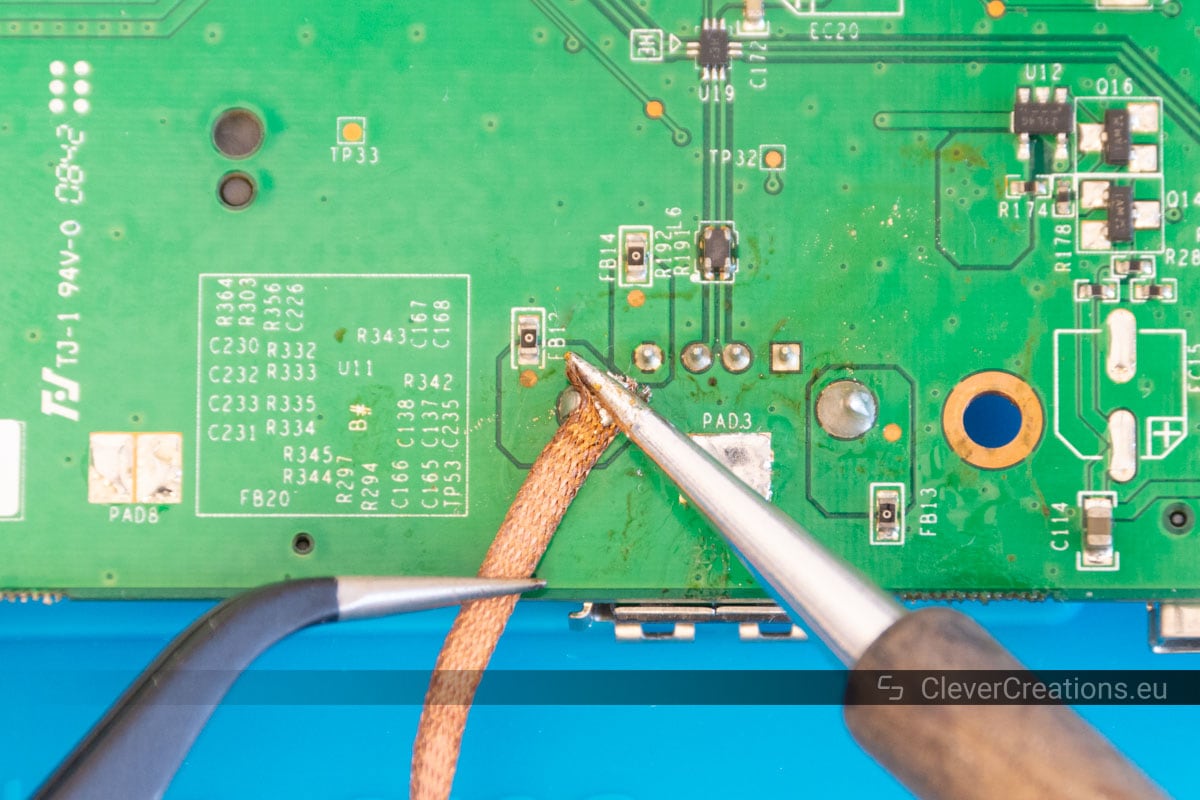
When you place desoldering braid over a solder joint and heat it with a soldering iron, the solder of the solder joint melts and the flux of the desoldering braid activates. As a consequence, the solder flows from the solder joint up into the braided copper through capillary action.

Best use for desoldering braid
Desoldering braid is best used for cleaning up leftover solder from solder pads, or when you want to remove solder from the pins of through-hole components. It is not practical for desoldering surface mount (SMD) components, because of the difficult-to-reach solder between their pins and the circuit board.
How to use desoldering braid
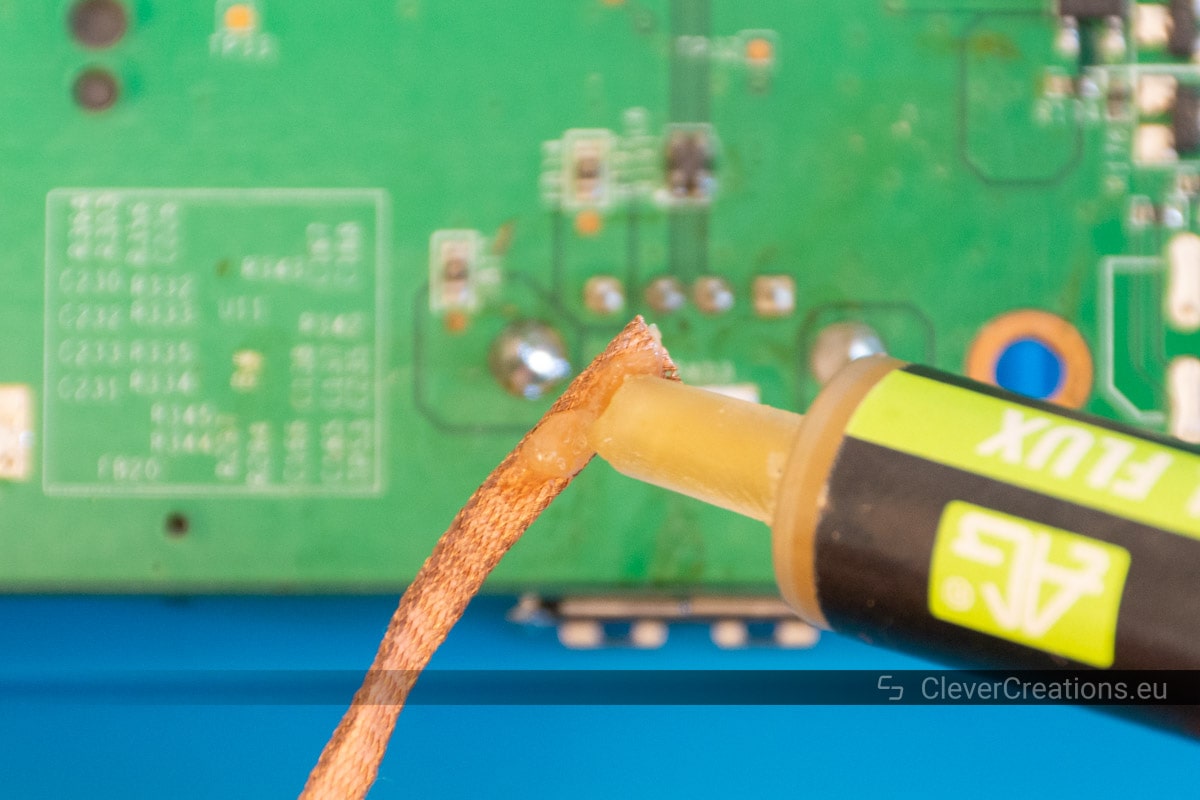
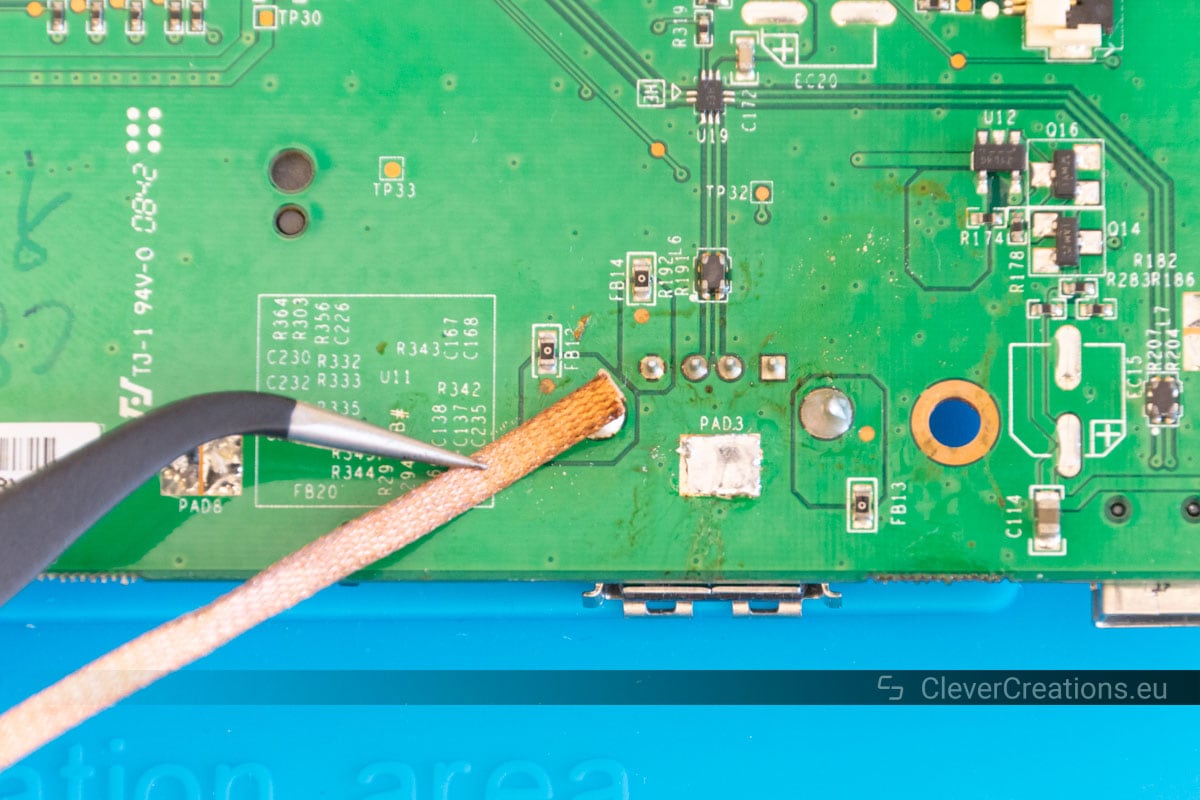

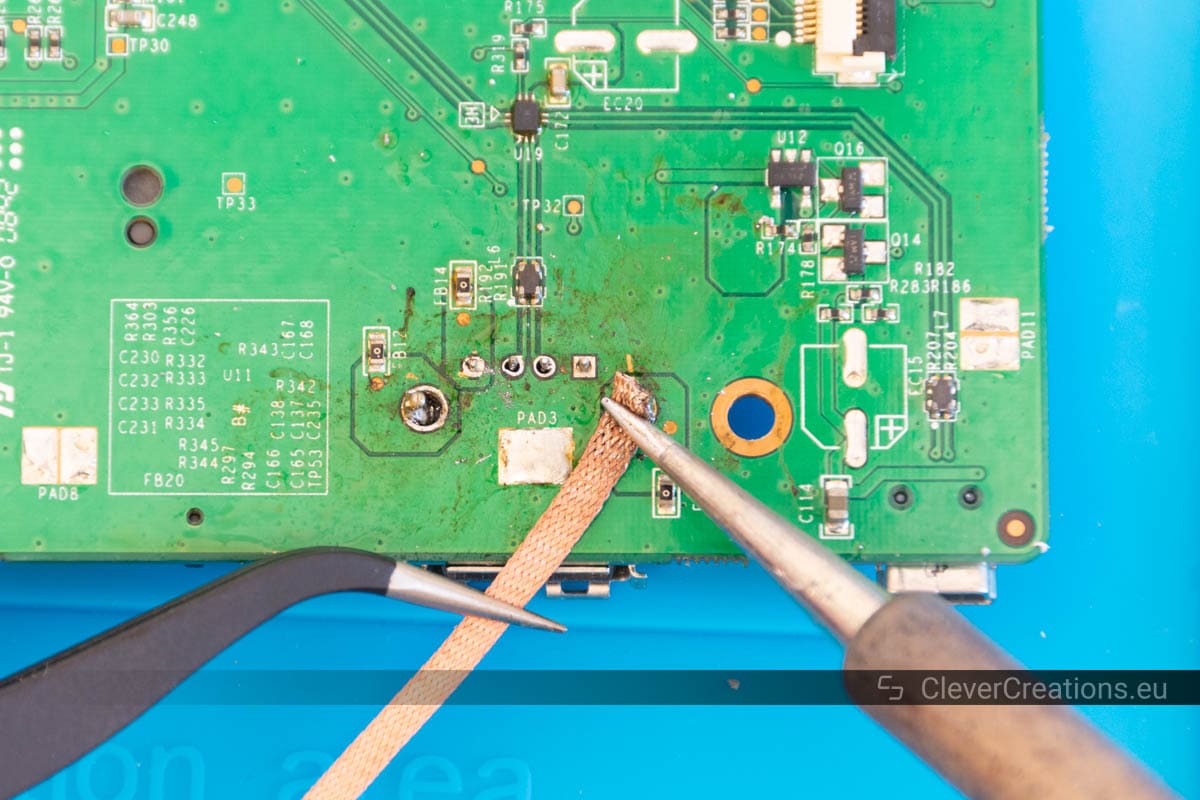
If you plan on replacing the component you just desoldered with a new one, first clean the solder pads.
Additional tips for using desoldering braid
- Make sure that the tip of your soldering iron is clean and tinned. Removing any oxidation and adding fresh solder to the tip helps the soldering iron conduct heat better.
- Use a pair of tweezers to hold the braid in place. The braid conducts heat and thus gets hot when you use it. Using tweezers allows you to adjust its position during soldering and protects your fingers from getting burnt.
- Use a static dissipative (ESD-safe) spool of desoldering braid if you are working on static sensitive components. ESD-safe spools usually have a blue color that you can recognize them by.

- Select a soldering iron tip that is equal to the width of the braid. With a tip that is too wide you risk heating up other components, especially on a densely populated PCB. A tip that is too narrow heats the braid up unnecessarily slow.
- Pick the right width of desoldering braid.
How to choose the right size (width) of desoldering braid
When selecting a desoldering braid, you want make sure that you pick the right width. Ideally, it would be the same width or slightly narrower than the thing you are trying to desolder. Additionally, try to use a soldering iron tip that is a bit narrower than the solder wick itself.
By using a desoldering braid that is too wide, you can accidentally desolder other components on the circuit board. It also takes longer to heat up.
Solder wick that is too thin does not remove enough solder. You can still use it, but you need to use a long length of it to wick all solder away.
The typical industry-standard sizes of desoldering braid and their applications are as follows:
| Size # | Width | Application |
|---|---|---|
| 1 | .030″ 0.8 mm |
Integrated Micro Circuits, SMDs/Fine-Pitch Circuitry |
| 2 | .060″ 1.5 mm |
Small Pads, Surface Mount Devices |
| 3 | .080″ 2.0 mm |
Medium Pads |
| 4 | .110″ 2.8 mm |
Large Pads |
| 5 | .145″ 3.7 mm |
Terminals |
| 6 | .210″ 5.3 mm |
Large Lugs and Posts |
| BGA | BGA Pads and Chips |
What types of desoldering braid are there?
There are different types of desoldering braid that you can choose from. The braided copper part is roughly the same between all of the types. Instead, the difference lies with the flux. Some solder wicks come with rosin flux pre-applied, others come with a no-clean flux, whereas the remainder is completely unfluxed.
Let’s look at them in more detail:
- Rosin fluxed braids. Out of all desoldering braids, the rosin fluxed braids work the fastest. The increase in wicking speed does come with a downside however. The rosin flux leaves a residue behind on your workpiece that you need to clean afterwards.
- No-clean fluxed braids. Unlike rosin fluxed braids, no-clean fluxed braids do not require any cleaning after desoldering. They do leave a residue behind, but it is transparent and non-conductive and therefore does not need to be cleaned.
- Unfluxed braids. Unfluxed braids are typically only used in environments where a very specific flux is required. That flux has to be applied to the braid by the user.
It is important to note that without adding flux, unfluxed braid is not capable of wicking up solder. So make sure that you don’t accidentally buy this type of desoldering braid and are left wondering why it does not work.
Can you reuse desoldering braid?
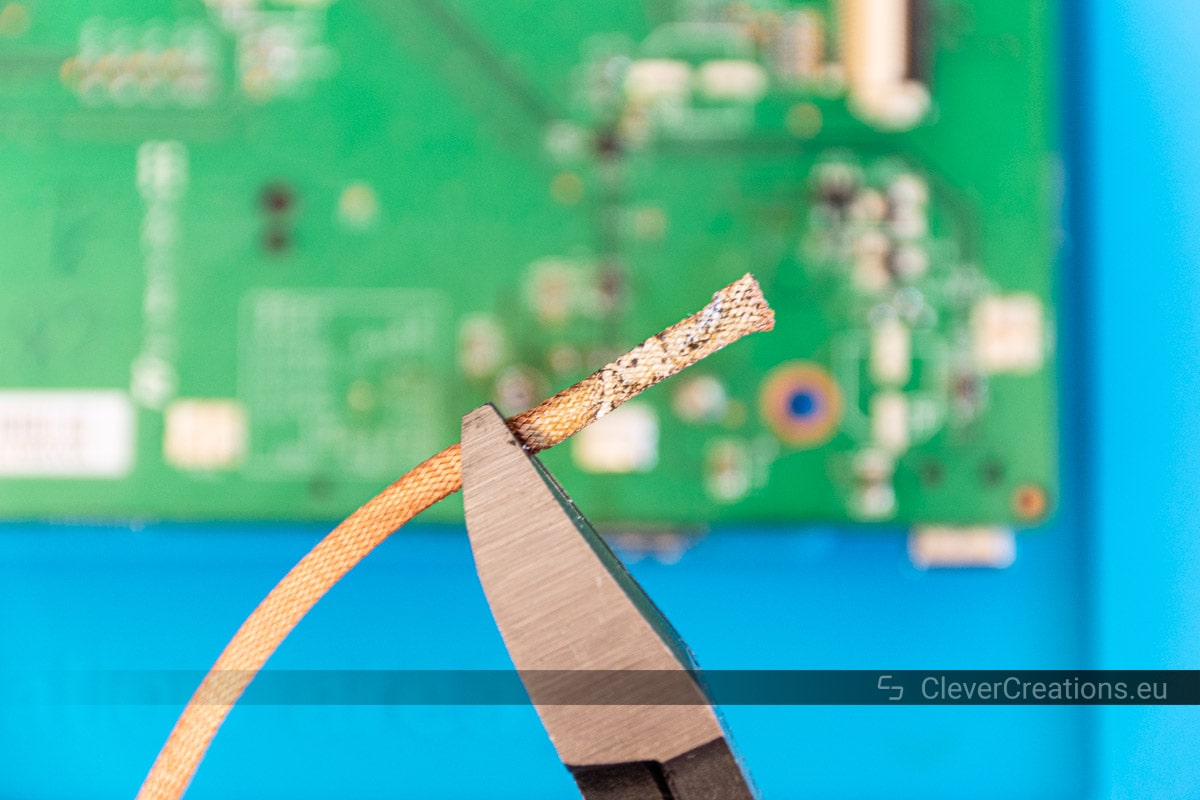
No, it is not possible to reuse a piece of used desoldering braid. Once a section of braid has been saturated with solder, it can not be used again. You need to clip it off the roll, discard it, and continue desoldering with a clean, new section of braid.
What is the difference between desoldering braid, desoldering wick and solder wick?
There is no difference between desoldering braid, desoldering wick and solder wick. They are different names for the same thing; (usually pre-fluxed) braided copper that you can use to desolder electronic components or clean up solder.
Recommended products
My general recommendation for hobbyists is to start with one or two medium sizes of no-clean desoldering braid (e.g. #2 & #4, or #3 & #5), and work with that until you need something more specialized.


Desoldering pump
What is a desoldering pump?
A desoldering pump is a manually-operated tool that you can use to remove solder. At the press of a button, it uses suction to take in any molten solder that is placed in front of its heat-resistant nozzle. It is also known as a solder sucker.
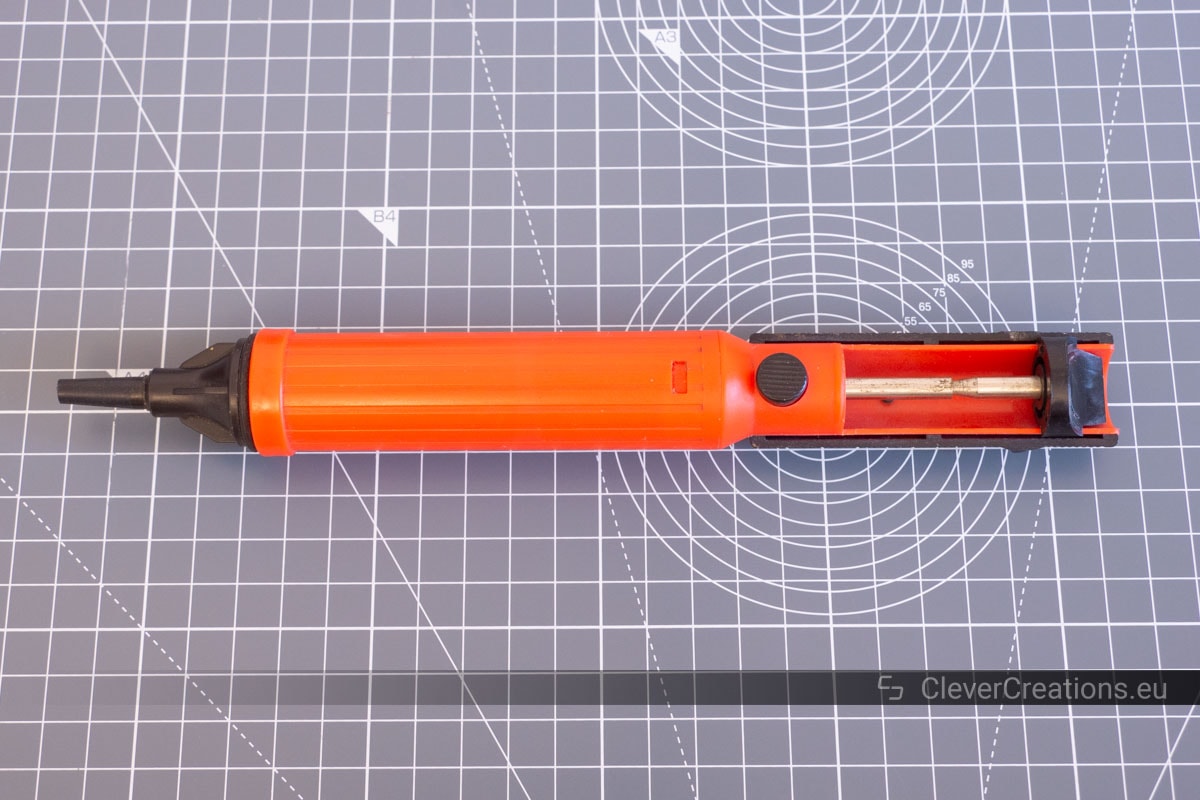
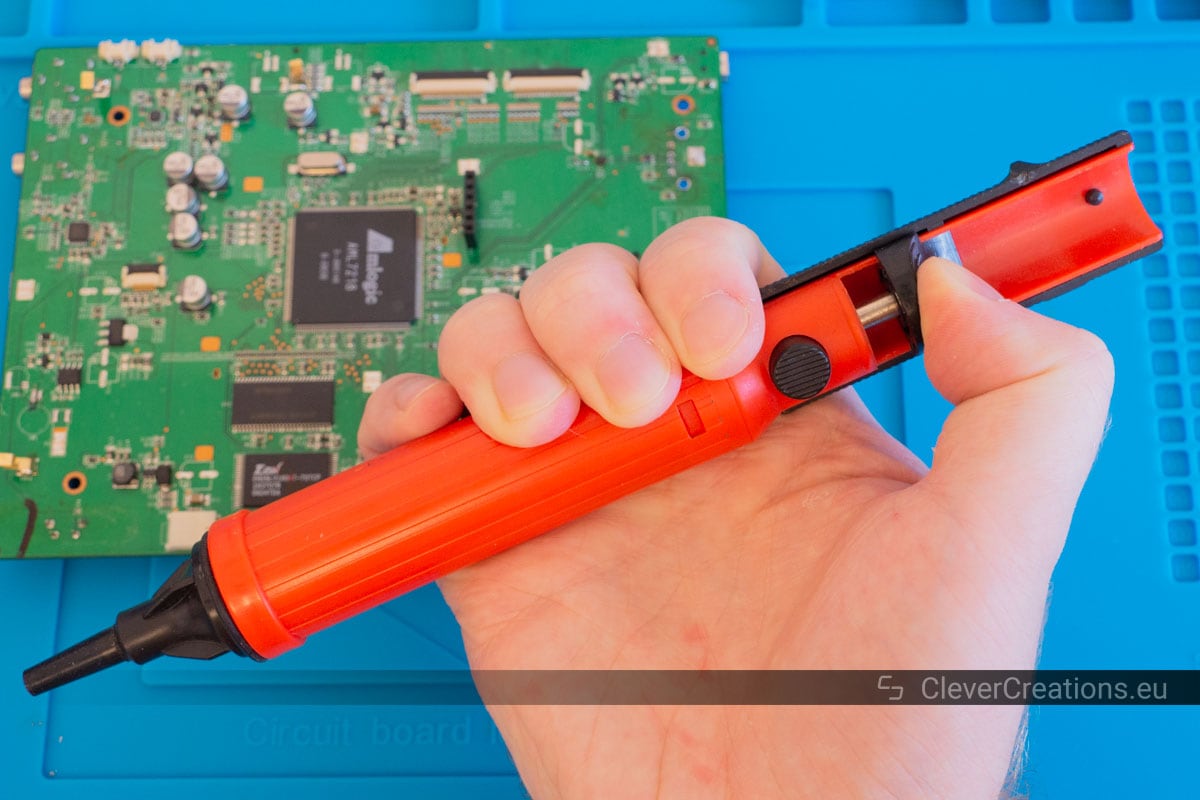
How does a desoldering pump work?
Before a desoldering pump can suck up solder, it first needs to be primed. This is done by pressing its plunger down until it locks into place. When you now press the release button, the spring-activated plunger rapidly moves backwards, creating suction in the process. This suction is what sucks the solder up through the nozzle.
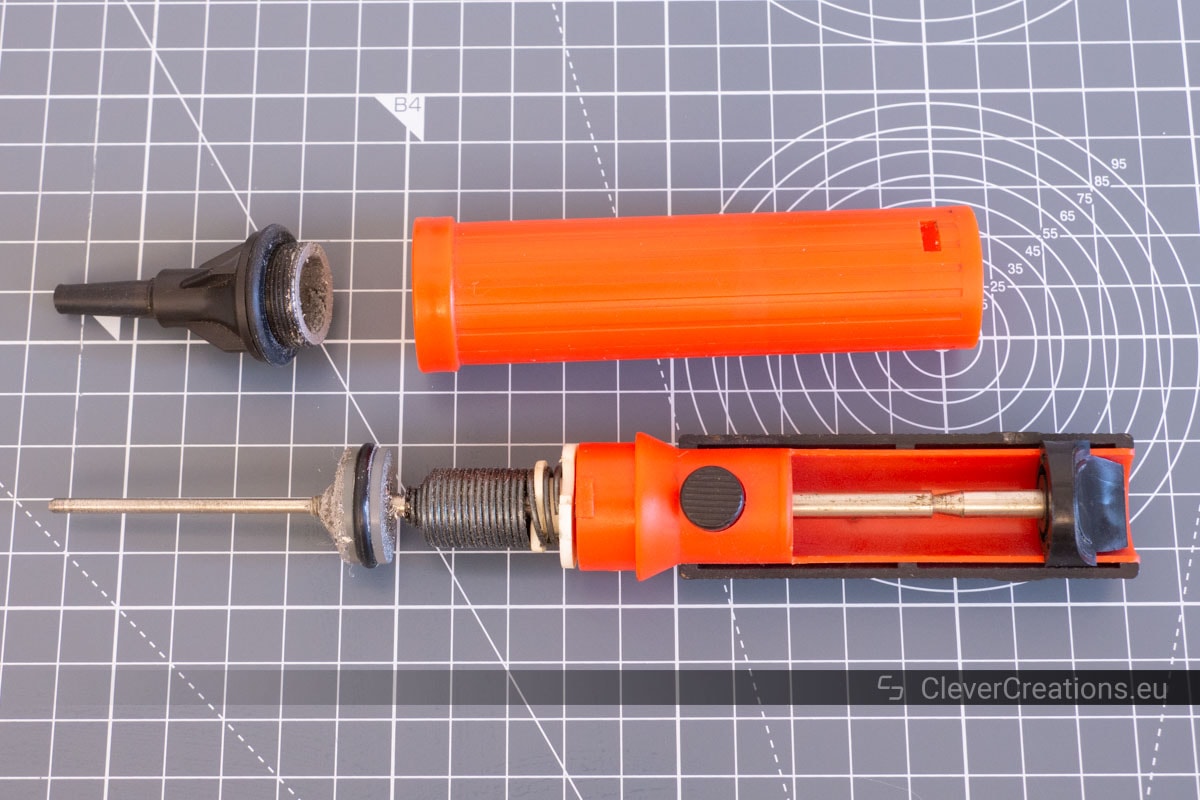
How to use a desoldering pump
You can also unscrew the tip to clean the inside of the solder sucker. The tip itself needs to be regularly wiped clean.

Best use for a desoldering pump
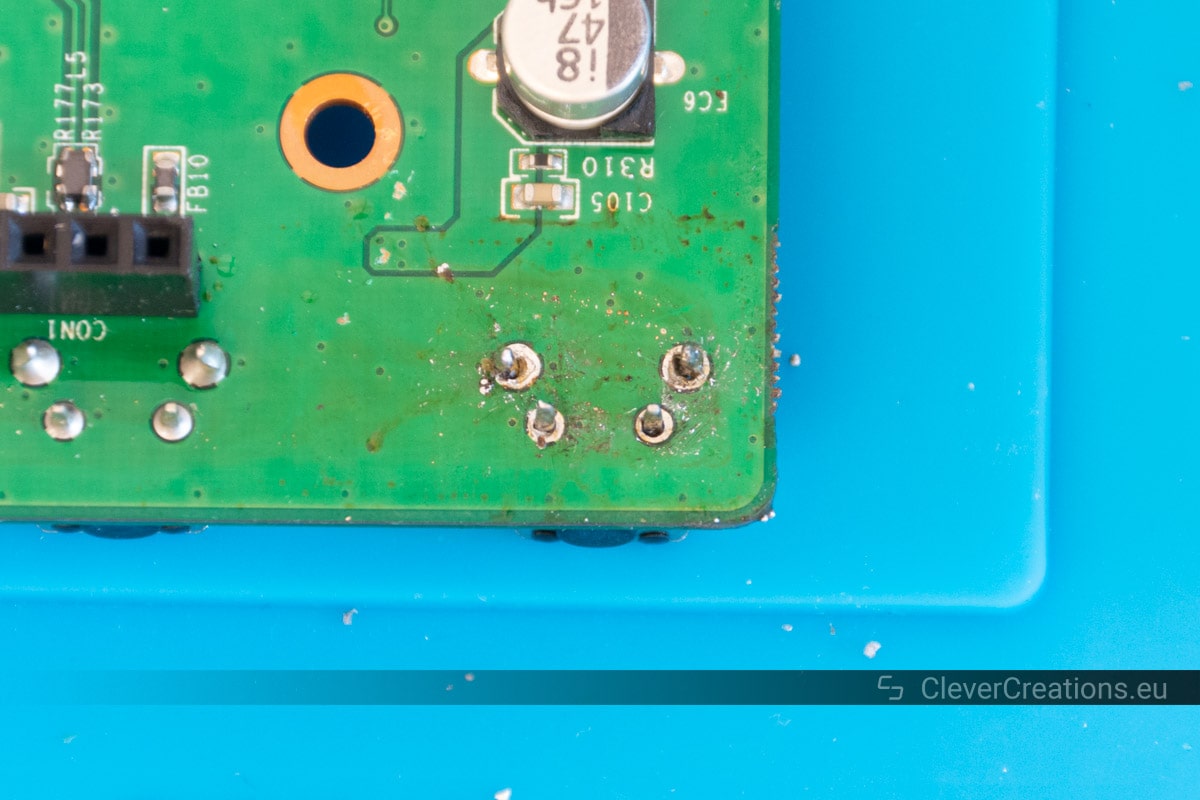
Desoldering pumps are most useful for removing large volumes of solder, and work great when desoldering through-hole components. They are also my go-to tool for removing solder out of through-holes.
They are less useful when working on hard to reach areas. This is because despite the nozzle being small, the body of the solder sucker itself is rather large. Using them for surface mount work is also not recommended, because of the risk of sucking up small components.
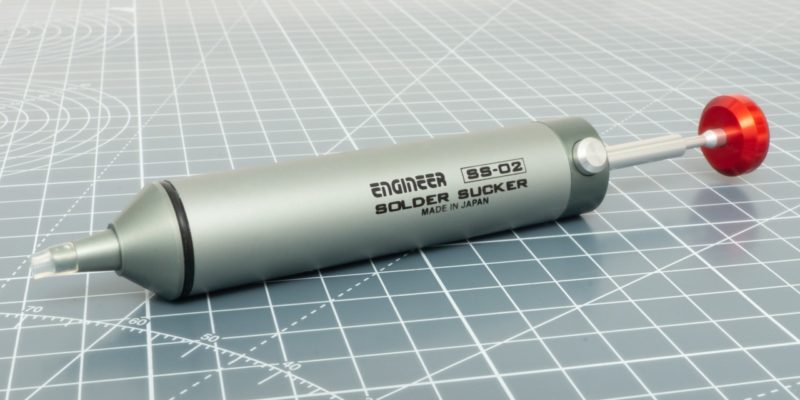
Recommended products
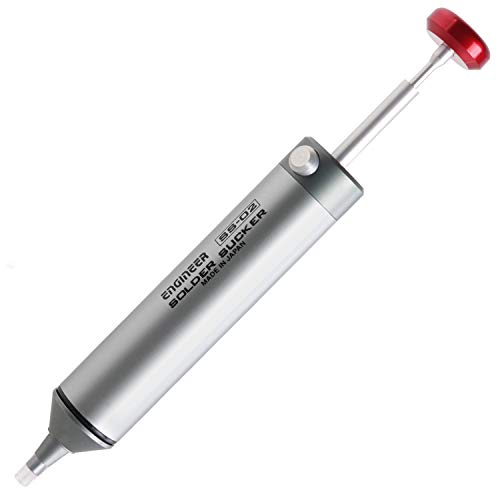
The basic $5-$10 desoldering pumps work okay, but if you have a bit more to spend you can get one with a silicone nozzle (seals better) that is easily usable with one hand. The one I recommend is the Engineer SS-02 Solder Sucker.
Hot air rework station
What is a hot air rework station?
A hot air rework station is a tool that uses hot air to solder or desolder electronic components. Its temperature and airflow can usually be regulated to get ideal results. Most units come with swappable nozzles that allow airflow to be directed over a certain surface area.
How does a hot air rework station work?
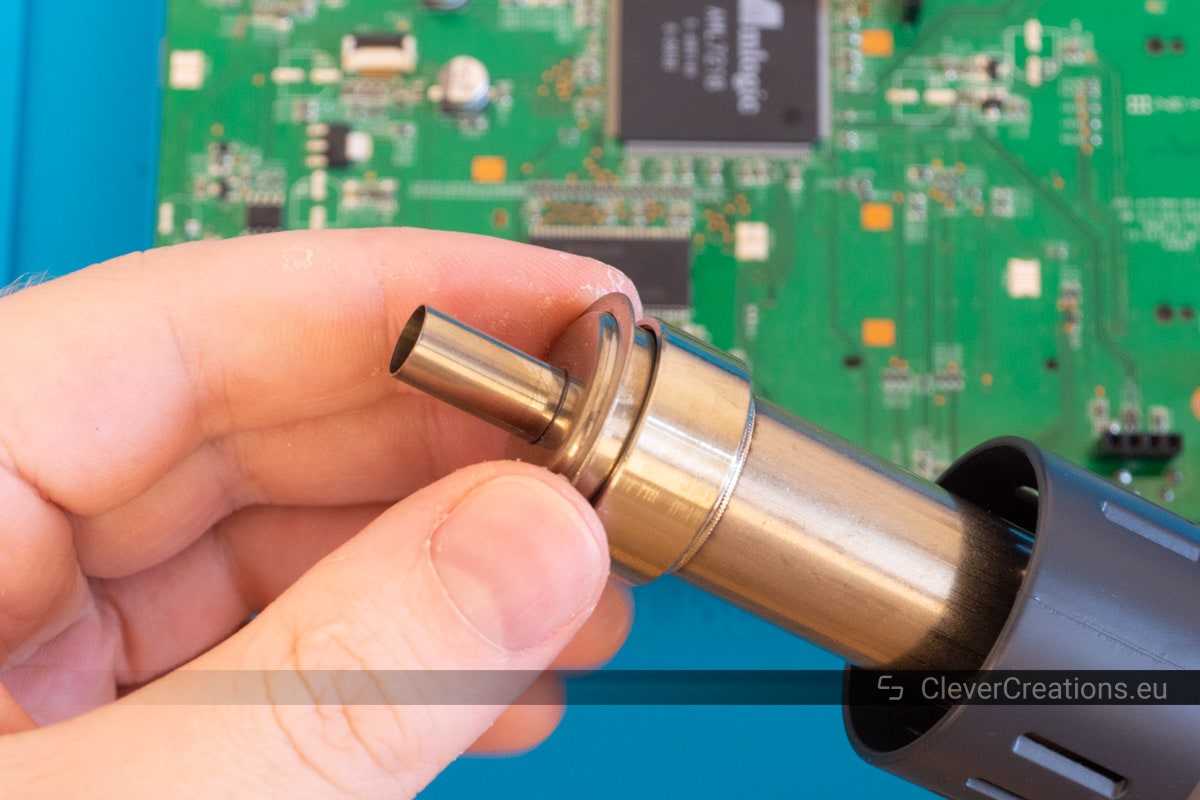
Hot air rework stations use an air pump to pump air through a hose. The end of the hose has a handle with a nozzle and a heater element. The nozzle directs the air towards the location it is pointing at, while the heater element heats the air up to a user-set temperature.
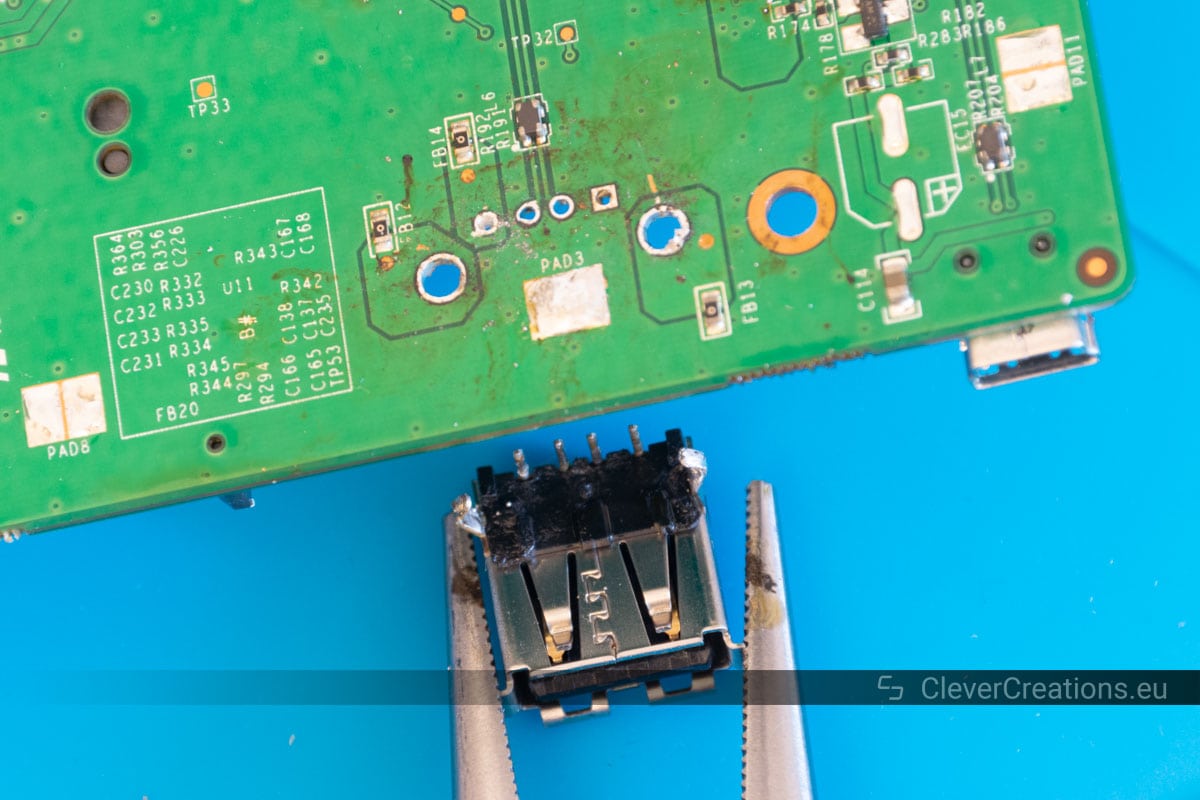
How to use a hot air rework station for desoldering

If you plan on soldering a new component to the empty solder pads, clean them first.
Best use for a hot air rework station
A hot air rework station is one of the best tools for desoldering SMD components, but it also works well for through-hole parts. A rework station can also be used for soldering SMD parts, but if you plan on soldering a lot of them it will be more economical to use a reflow oven instead.
Additional tips for using a hot air rework station
- Make sure to remove the components as soon as the solder has molten. This helps reduce thermal damage to the components.
- If the circuit board gets hot enough to melt the solder of components outside of the rework area, then you are applying too much heat. This includes components on the opposite side of the circuit board.
Rework stations vs heat guns
While it is possible to use a heat gun or hot air gun for desoldering, the results often leave much to be desired. Heat guns have inaccurate temperature control, too much air flow and heat too large of an area. The only thing they have going for them (compared to hot air rework stations) is their low cost.
If we think of a hot air rework station as a scalpel, then a heat gun can be thought of as a hacksaw. When working on SMD components or any electronic parts that we want to reuse, we need to make sure that we are using a scalpel.
Recommended products
When starting out on a budget, an Atten 858D(+) hot air rework station (or one of the Chinese clones) is usually a good station to start learning with. Make sure to check the reviews of the specific unit first though, as they can be hit or miss.
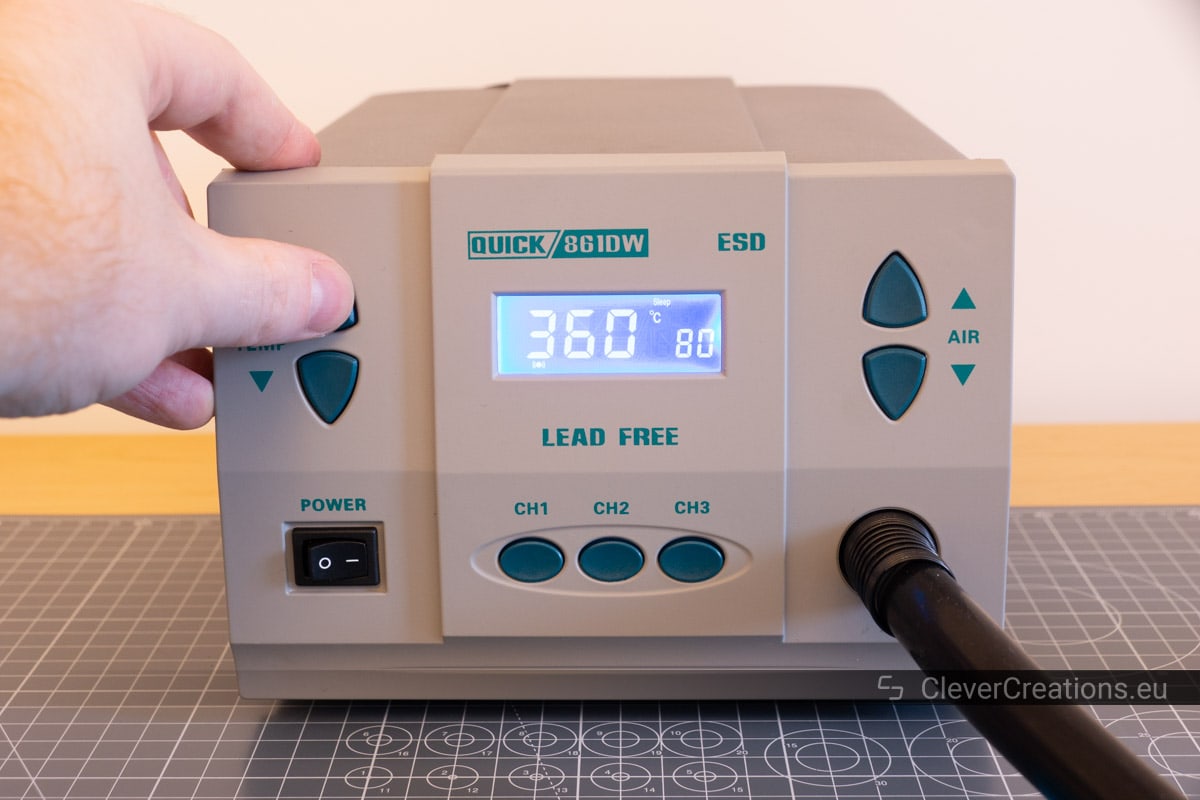
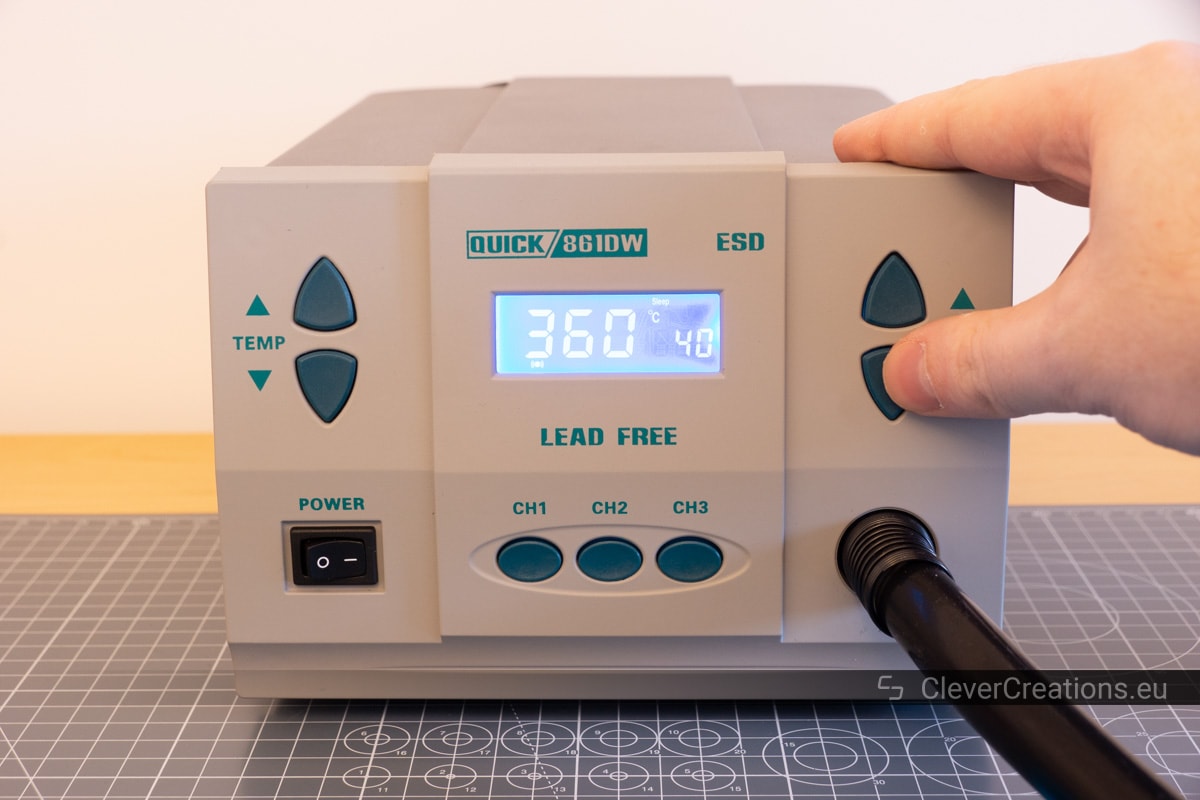
Once you are ready to upgrade, or if you have a bit more to invest in a hot air rework station that will last for years, I recommend the Quick 861DW. It is an accurate, easy to use unit that competes with >$1000 rework stations for only a fraction of the cost. This is the rework station that I use myself.


Desoldering gun
What is a desoldering gun?
A desoldering gun can be best thought of as a combination of a soldering iron and a desolder pump. It has the ability to melt solder and to immediately suck the solder away from the circuit board. Instead of a manual plunger system, like with a desoldering pump, it uses an electric vacuum pump to create a vacuum.
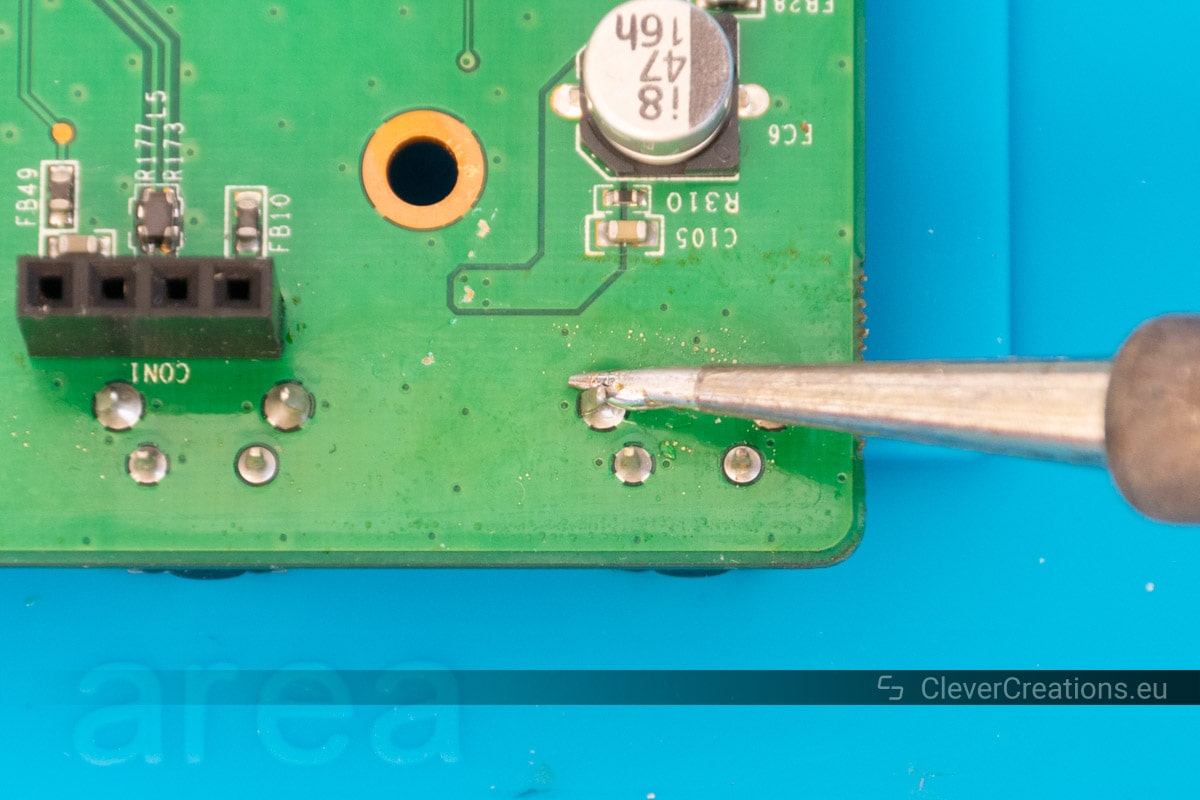
How does a desoldering gun work?
The front of the desoldering gun has a nozzle that heats up because of a heating element. Bringing the nozzle into contact with a solder joint melts the solder. The desoldering gun has a trigger that when pressed, activates a vacuum pump that sucks the molten solder away through the nozzle.
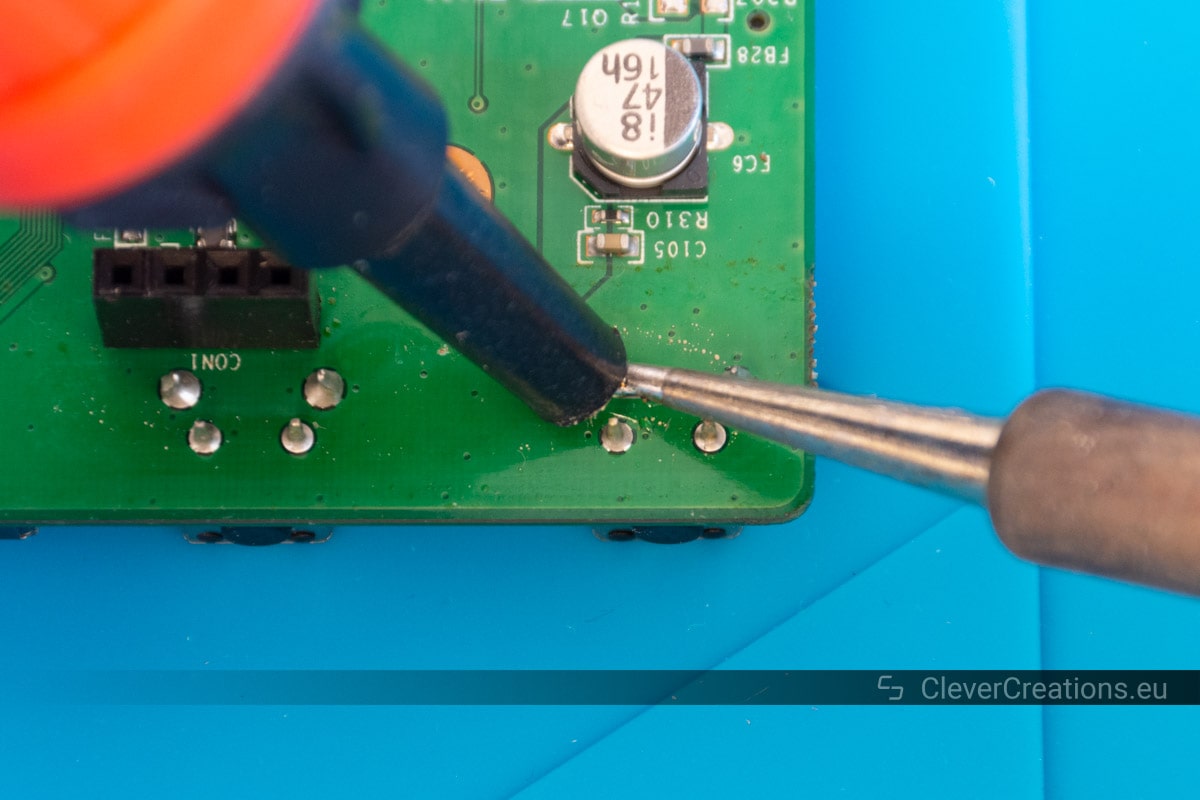
How to use a desoldering gun
- Prepare the desoldering gun by plugging it in, turning it on, and setting the desired temperature.
- Wait for the nozzle to get up to temperature, and then apply solder to it. The solder helps form a heat bridge between the nozzle and the solder on the circuit board that needs to be molten.
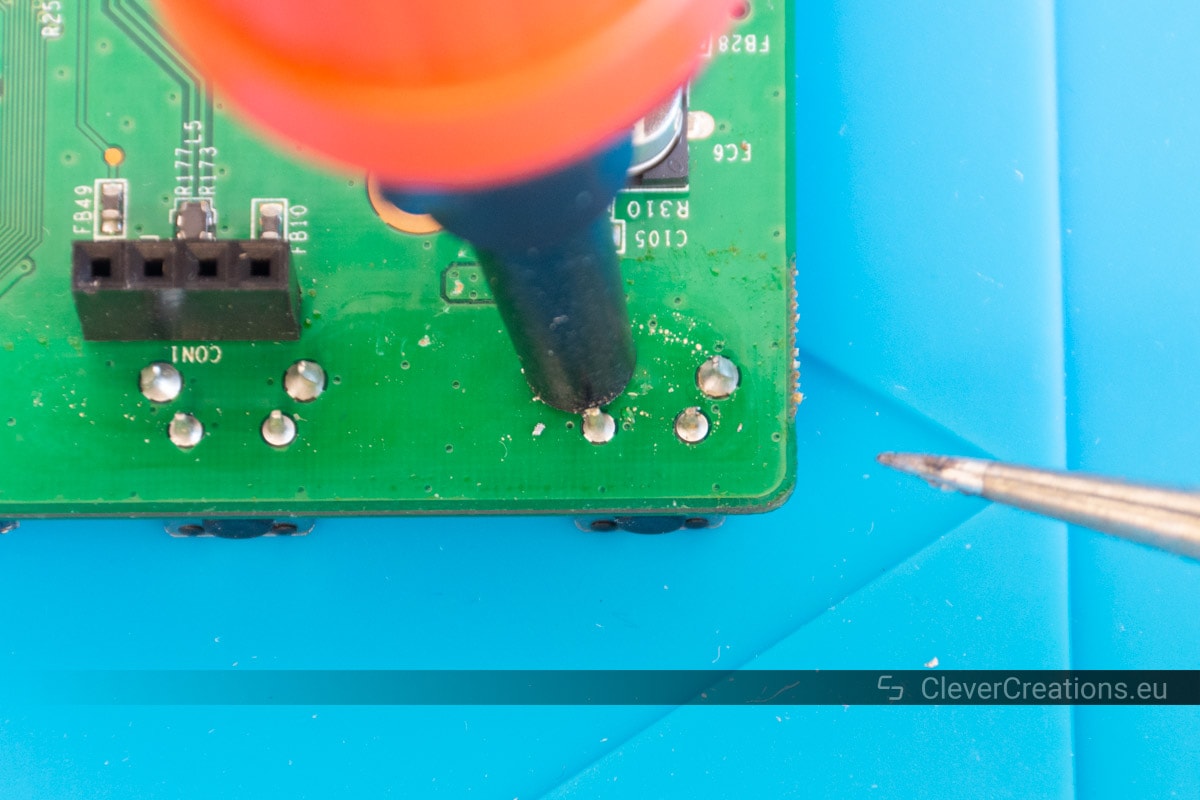
- Place the nozzle over the pin, wire, or pad that needs to be desoldered. Hold it in place until the solder has molten.
- Once the solder has molten, pull the trigger of the desoldering gun to remove the solder. When desoldering pins or wires that pass through a through-hole, you can check whether the solder has molten by moving the nozzle side to side. If you are able to move the pin or wire with the nozzle, the solder is ready to be removed.
- If the solder was insufficiently removed, resolder the solder joint with new solder and try again.
Best use for a desoldering gun
A desoldering gun is most useful when you need to desolder a large number of through hole components, and using solder wick or a desoldering pump would cost too much time. Just like a desoldering pump, a desoldering gun should also not be used for small SMD components, due to the risk of sucking them up.
Can you use a soldering gun for desoldering?
No. Soldering guns run electrical current through a wire to generate heat. This can cause the wire to carry a stray voltage that can damage your circuits and components. In addition, ESD-sensitive components can get damaged by the electromagnetic spike that is generated when triggering the soldering gun.
Recommended products
For a long-lasting and easy to maintain desoldering gun I recommend the HAKKO FR-301. There are some cheaper alternatives, like the Chinese S-993A desoldering guns, but their quality can be questionable and they likely don’t last very long.


Desoldering tweezers
What are desoldering tweezers?
Desoldering tweezers (also known as hot tweezers) are a tool used for desoldering small components with two poles, like SMD diodes, resistors and capacitors. By manually adjusting the distance between the two heated tips of the desoldering tweezers, it is possible to melt solder in the exact places you want. They can also be used to immediately pick up and remove the desoldered parts.
How do desoldering tweezers work?
The ends of desoldering tweezers are basically two very small soldering irons with precision tips. The user can adjust the width between them in order to match it to the width between two solder joints.
How to use desoldering tweezers
- Prepare the desoldering tweezers by plugging them in, turning them on and setting the desired temperature. I recommend checking the manual of the desoldering tweezers to check for the advised tip temperatures.
- If necessary, apply a bit of extra solder or flux to the component and/or tweezer tips. It is important that the tips make good contact with the component to conduct heat and melt the solder joints.
- Place the tips of the desoldering tweezers on the component and wait until the solder melts.
- Once the solder has molten, gently squeeze the tweezers to grab the component.
- Lift and move the part to a new location, and open the tweezers to release it.
Best use for desoldering tweezers
Desoldering tweezers show their strength when you want to quickly desolder SMD components with two poles, such as SMD diodes, resistors and capacitors. Their big advantage is that they don’t heat any of the surrounding components, unlike when you desolder SMD components with a hot air rework station.
Recommended products
Desoldering tweezers are often sold as an extra accessory for specific soldering stations. A good one to start with is the Hakko FX-8804CK, which is sold as an accessory for the Hakko FX888D soldering station.


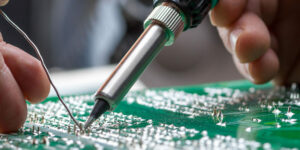
Desoldering with a soldering iron only
Aside from using one or more tools specifically designed for desoldering, it is also possible to desolder with just a soldering iron. It won’t give great results and it can pose some risk to the components and solder pads due to overheating, but it is still a valid option when other tools are not available.
How to use only a soldering iron for desoldering
- Turn on and preheat your soldering iron to the desired temperature.
- Melt all solder joints of the component that you want to desolder. This can be tricky if you are desoldering a part with multiple leads. It is important to have all solder joints in a molten state, so that you can remove the component.
- One way to remove some of the molten solder is to tap the side of the board on a surface so that the solder falls off. Another method is to use compressed air to blow the solder away, but this can get messy.
- Remove the component by using pliers to pull it out. It is better to pull on the leads of the component than on the component itself, to prevent damage. This is especially important if you plan on salvaging and reusing the part.
Additional tips for desoldering with only a soldering iron
- If you are desoldering a component with many leads/pins that you do not want to re-use, you can simply clip the leads off, remove the component and invidiually desolder the remainder of the leads.
When to only use a soldering iron for desoldering
The only reason to use a soldering iron and no other tools for desoldering is when you don’t have other tools available. Keeping all solder molten without removing it is tricky to do and comes with the risk of overheating and damaging components. You can also easily overheat solder pads and inadvertently damage or pull them from the circuit board.
Recommended products
The Hakko FX888D is a great value digital soldering iron that allows you to store and access the temperatures that you often solder and desolder at.
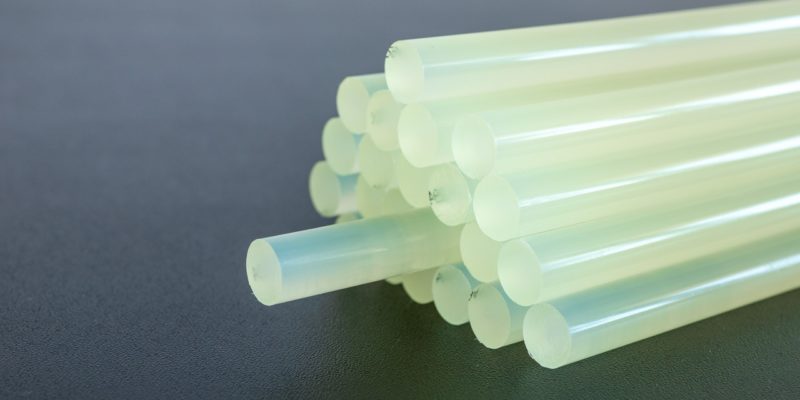
Chip Quik
What is Chip Quik?
Chip Quik removal alloy is an alloy that you can melt and mix with existing solder on the pins of a component. It significantly lowers the melting temperature of the solder and keeps it molten longer. Chip Quik allows you to easily remove SMD components without damage with a soldering iron, instead of with a hot air rework station.
How does Chip Quik work?
Chip Quik removal alloy has a melting point of 58°C (136°F). Mixing it with the solder already present on the solder joints creates a mixture that has a low melting point. In practice this means you can remove SMD components with temperatures under 150°C (300°F) without the risk of overheating anything.
How to use Chip Quik
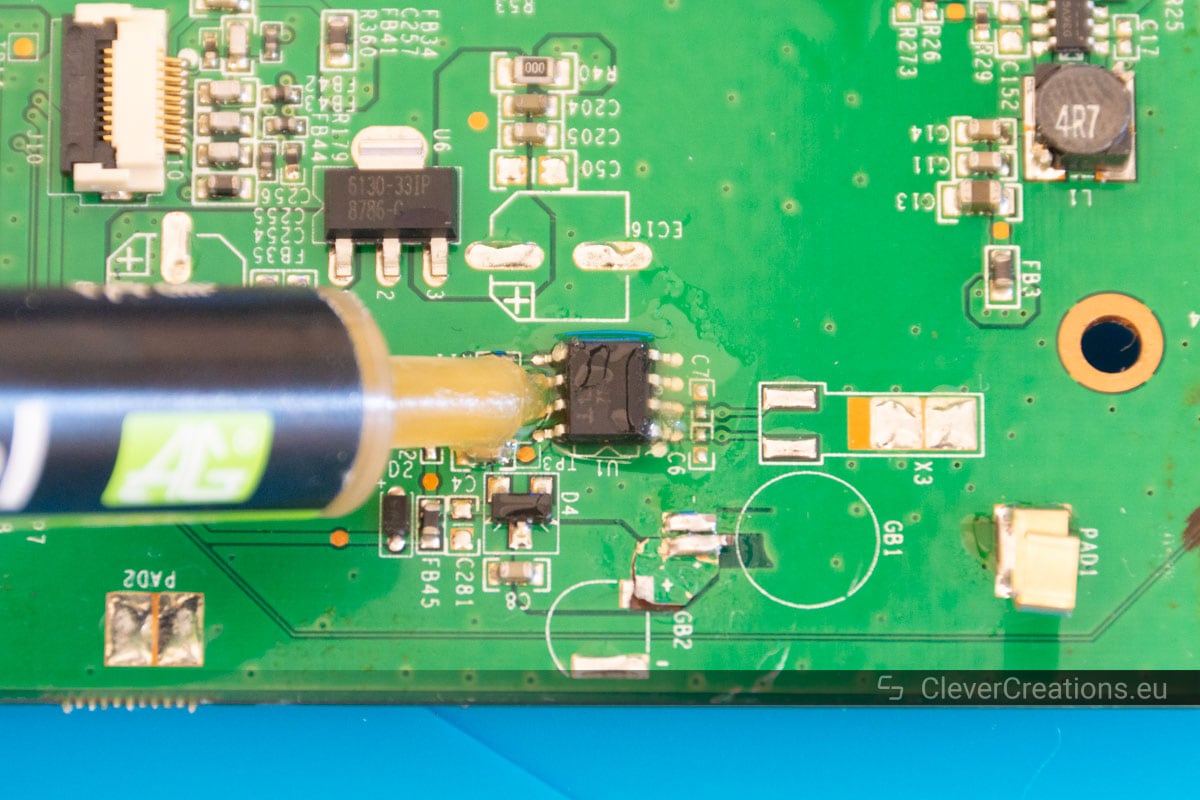
- Apply the included SMD291 flux to the leads of the SMD component.
- Use a soldering iron to melt the Chip Quik alloy on all pins of the component. Make sure to keep it in a molten state.
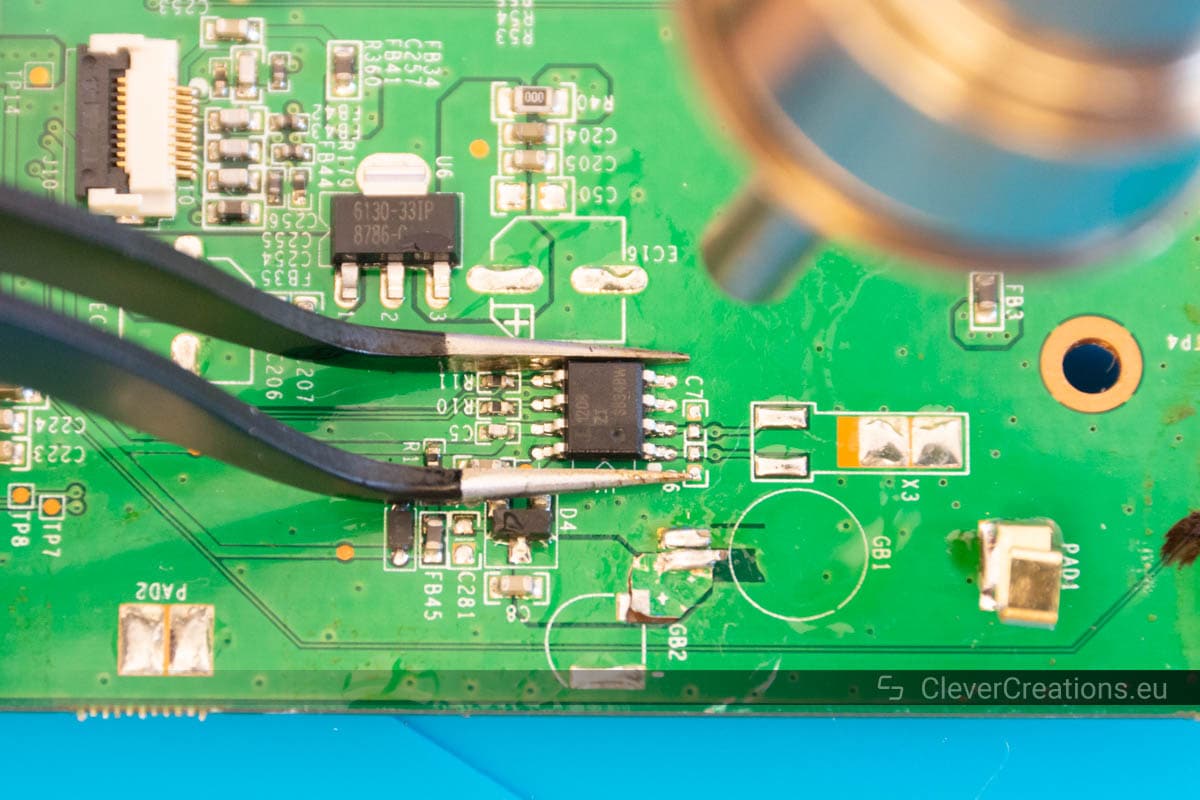
- Use a pair of tweezers, vacuum pen or toothpick to lift the chip from the board.
- Remove any remaining flux from the solder pads. You can use desoldering braid for this, or even a cotton swab dipped in flux, while you apply heat.
- Thoroughly clean the solder pads and surrounding area with alcohol.
Best use for Chip Quik
Chip Quik is best for when you need to remove large surface mount components (like ICs), that otherwise would need a lot of continuous heat applied to keep the solder on all pins molten. It also gives you the opportunity to remove SMD components with a soldering iron instead of a hot air rework station.
Recommended products
The ChipQuik SMD1 Leaded Low Temperature Removal Kit comes with everything you need to remove SMD components. It has Chip Quik Removal Alloy, flux and even alcohol wipes to clean the PCB.
In summary – what are the best desoldering methods for each situation?
| What to desolder |
Best tool(s) |
|---|---|
| A couple of through hole components | Soldering iron + desoldering braid + desoldering pump |
| A lot of through hole components | Desoldering gun |
| Surface mount (SMD) components | Hot air rework station |
| Large surface mount ICs | Soldering iron + Chip Quik |
| Many two-pin surface mount components | Desoldering tweezers |
How to clean a PCB after desoldering
Why do you need to clean a PCB after desoldering?
If you are planning on soldering new components after desoldering, it is important to first clean your circuit board and its solder pads. This means removing any leftover solder and flux residue. If you skip this step, it can be tricky to solder a new component to the solder pads with a good connection.
How to clean flux residue from a PCB
Cleaning a PCB after desoldering is relatively simple and can be done with desoldering braid and a flux removal solution.
- Remove any leftover solder from and around the solder pads with desoldering braid. See also: How to use desoldering braid.
- Apply flux remover onto the flux.
- Brush the area with a non-abrasive cleaning brush.
- Hold the board sideways and rinse the flux remover with deionized/demineralized water. Try to have the flux and water flow over the least components possible.
- Check whether the board is clean and if so, let it dry. If it is not clean, go back to step 2.
Recommended products
My go-to flux remover is MG Chemicals 413B Heavy Duty Flux Remover. It works on a wide range of flux types. Be careful where you apply it though, it is aggressive on plastics and can damage them. It is best to only use it on the solder (bottom) side of the board, or on the component side if the components do not contain plastic parts.
For a plastic-safe alternative, you can use MG Chemicals 4140A Flux Remover.


Conclusion
The methods and techniques described above are a good start for learning how to desolder. Whether you want to desolder surface mount or through-hole components, there are various methods and tools to choose from. For example, a desoldering pump (for removing a lot of solder), a hot air rework station (for desoldering SMD components), and desoldering braid (for cleaning up solder pads).


lead free solder tip was something i hadn’t thought about and made my life alot easier. thanks.
My 40w desoldering pump doesn’t remove leadfree solder as it not hot enough what’s the minimum wattage for desoldering.