

If you frequently deal with old lenses or live in a humid climate, you are probably already familiar with camera lens fungus. Lens fungus is microbial growth that makes its way into your lenses and quickly grows out of control in the right conditions.
Because of its potentially harmful consequences, lens mold must be taken seriously. Not only can it permanently damage glass lens elements if you do not address the problem in time, but it can also spread to the rest of your camera gear.
In this article, I will explain the causes of lens fungus, how you can remove it yourself at home, and show which steps you can take to prevent further problems with it in the future.
Let’s see how we can keep your precious camera equipment safe!
What is Lens Fungus?
Lens fungus, or lens mold, is fungus that has found its way on or into a camera lens. It typically starts out with only a couple of spores. As these multiply and spread out, it quickly becomes a problem.
Why is It a Problem?
Camera lens fungus is a problem because it interferes with light that is on its way to the camera sensor or film. Depending on severity and location of the fungus, the consequences range from slight image degradation to a completely unusable lens.
In mild cases with only a bit of mold, your lens might only experience a slight loss in contrast and/or lens flare in certain lighting conditions.
Severe cases, however, show up more strongly in your photos. Low contrast, areas that are out of focus, or even completely blocked portions of images are all possible.
Interference with light is not the only issue. As fungi eat, they secrete an acid that causes serious harm to a lens’s protective coatings and glass elements. Once glass has been etched, it can not be repaired.
Regardless of whether your lens has a little or a lot of fungus, it must be addressed as soon as possible. Fungus is a living organism and when not kept in check, it keeps growing to cause more and more problems.
What Causes Fungus on a Lens?
You might wonder how fungus can get into a camera lens and why it would grow in there. The answers to these questions are relatively simple.
Mold and other fungus spores are microscopically small and are found everywhere. When a camera lens focuses or zooms, it exchanges a bit of air with the environment. This provides an easy way for spores to make their way into the lens.
The answer to the second question has to do with the conditions in which the lens is used and stored.
In order for fungus to grow, it needs nutrients, moisture and darkness.
Both nutrients and moisture are supplied by the same air that carried the spores in. Fungus is more than happy to feast on any small dust particles in the lens, and humid air has plenty of moisture that can get trapped inside.
Darkness is not hard to find either. A camera bag or lens cap is sufficient to block all light from entering.
As you can understand, storing unused lenses somewhere tucked away in an uncontrolled environment like a shed, garage or basement is an easy way to quickly grow fungus in them.
What Does Camera Lens Fungus Look Like?
Spotting fungus in a camera lens is fairly straightforward. Any time you see something strange on your lens’s glass elements that does not look like dust, condensation or a crack, it is nearly always fungal growth.
To check your camera lens for mold, do the following:
- Detach the camera lens from the camera.
- Remove the front and rear lens caps.
- Get a bright light source. A phone flashlight usually works fine.
- Hold the light source up to one end of the lens while you look down the other end.
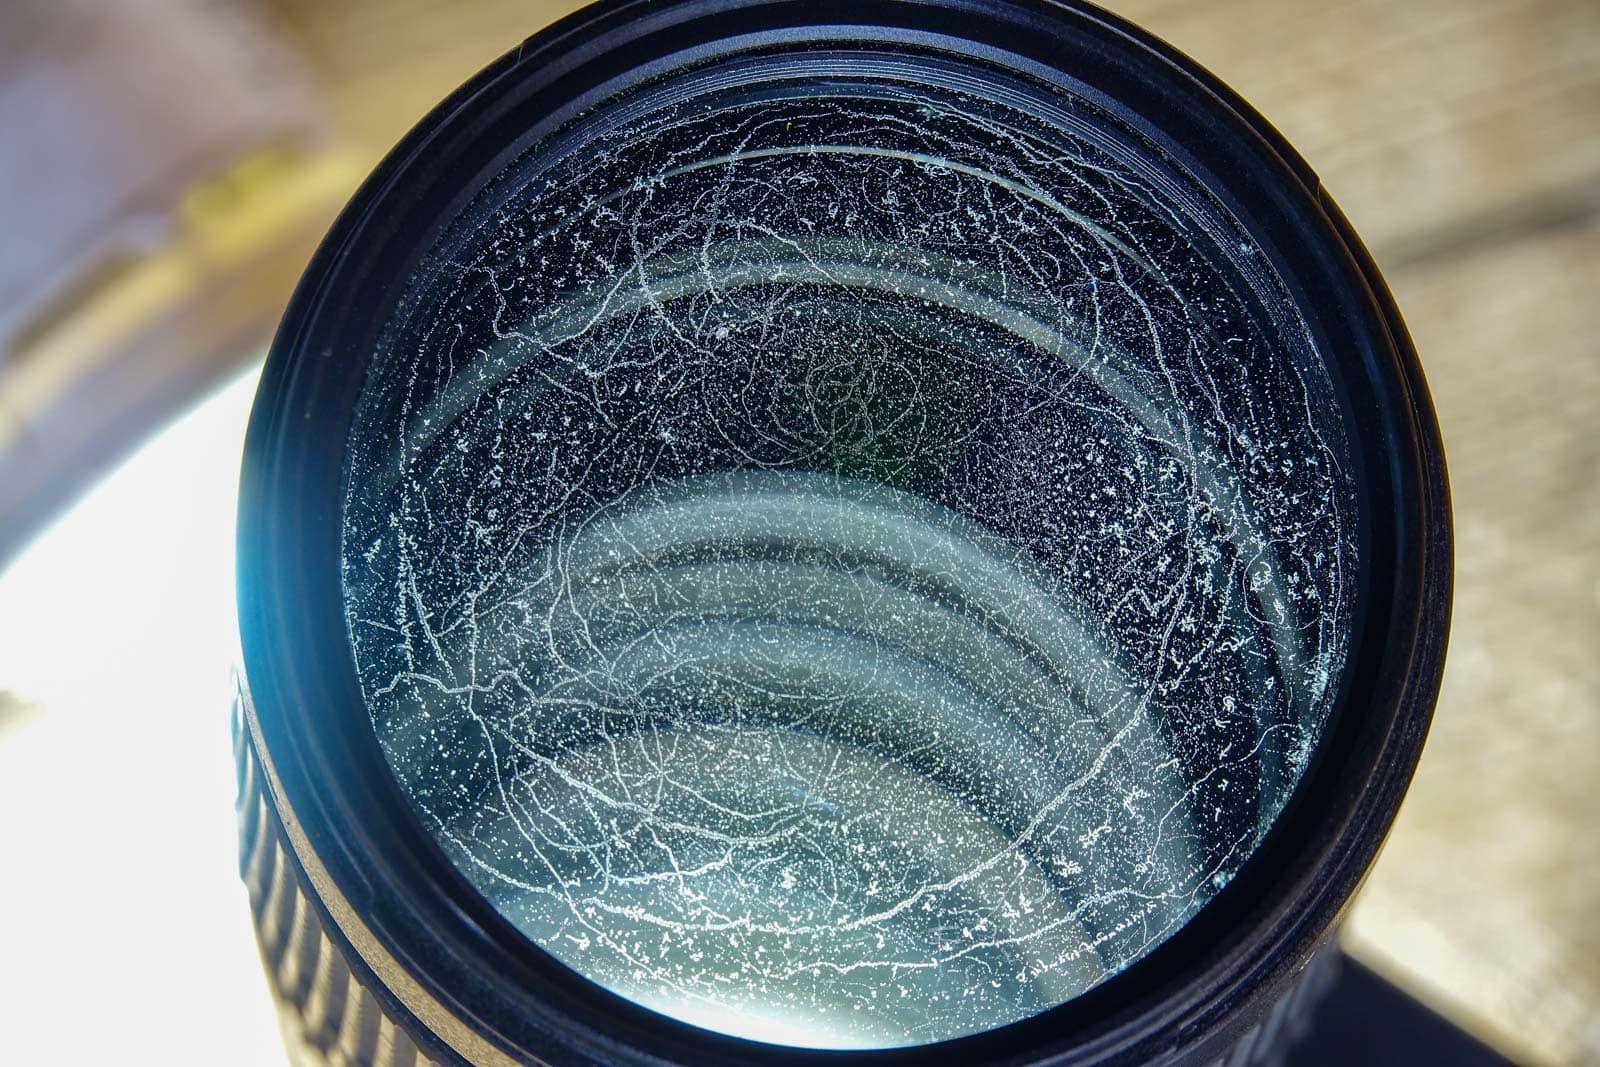
- Inspect the glass elements for anything that looks like fungus. Below you can see several examples.
Examples
There are many types of fungus, and not all of them look the same. Here are some examples of what fungus in a camera lens can look like:
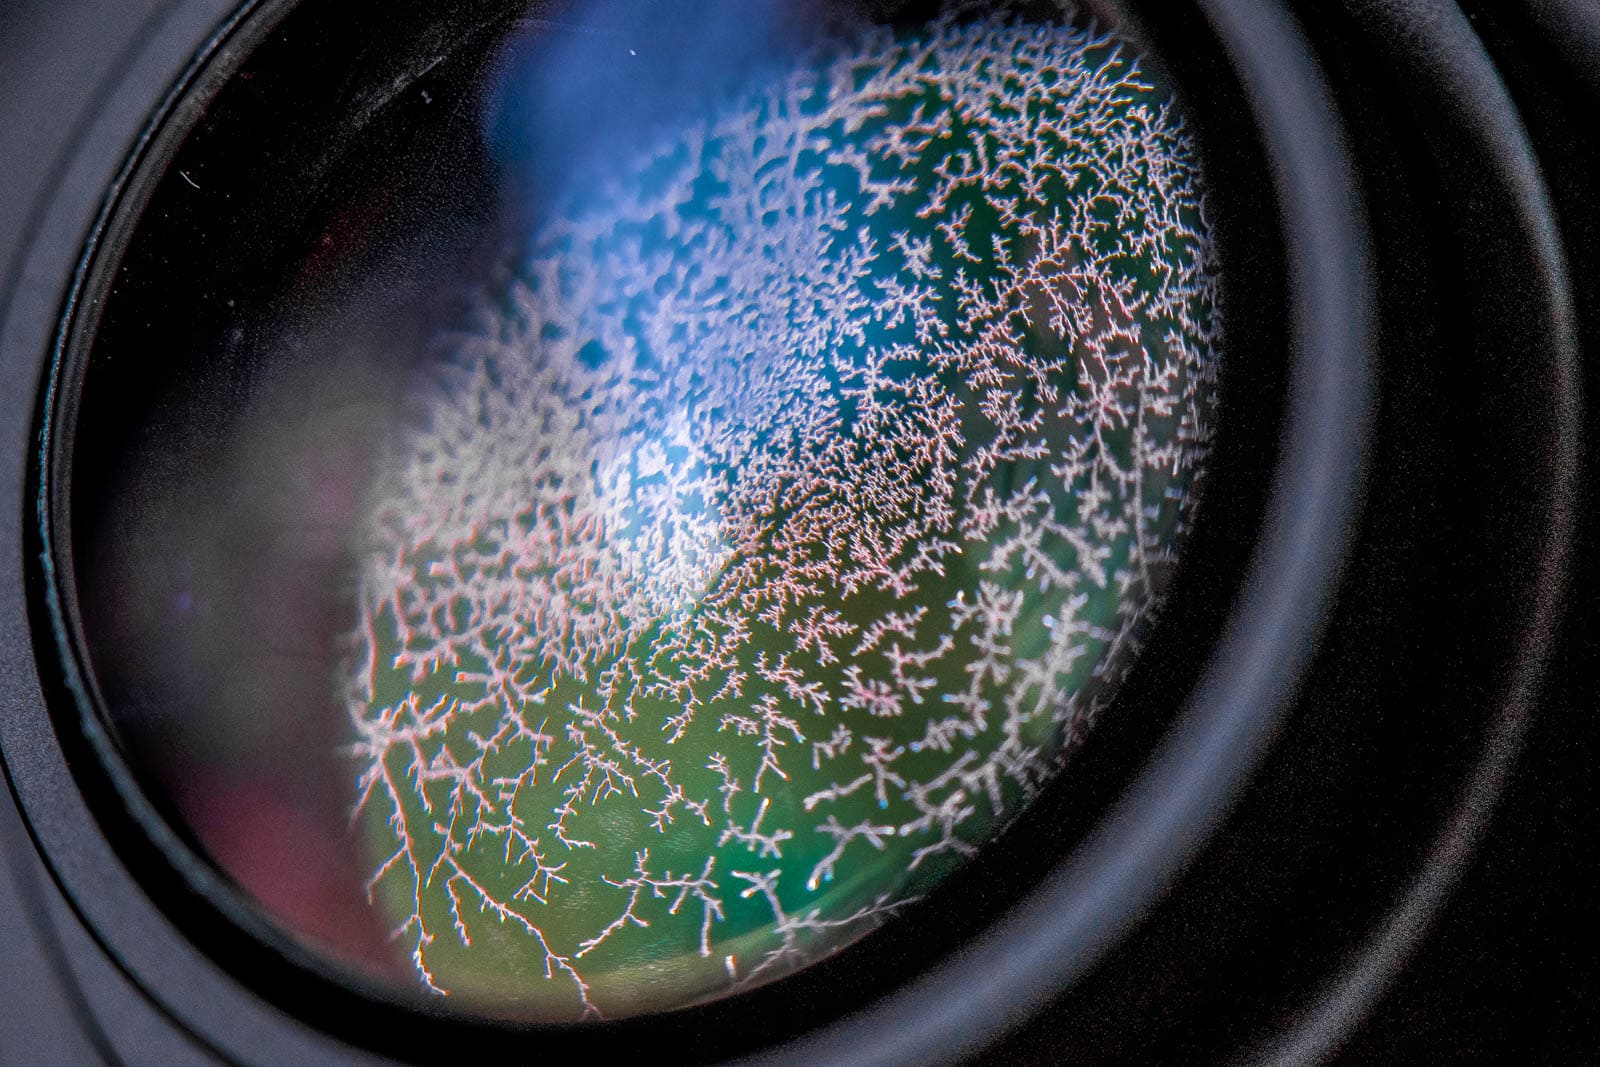
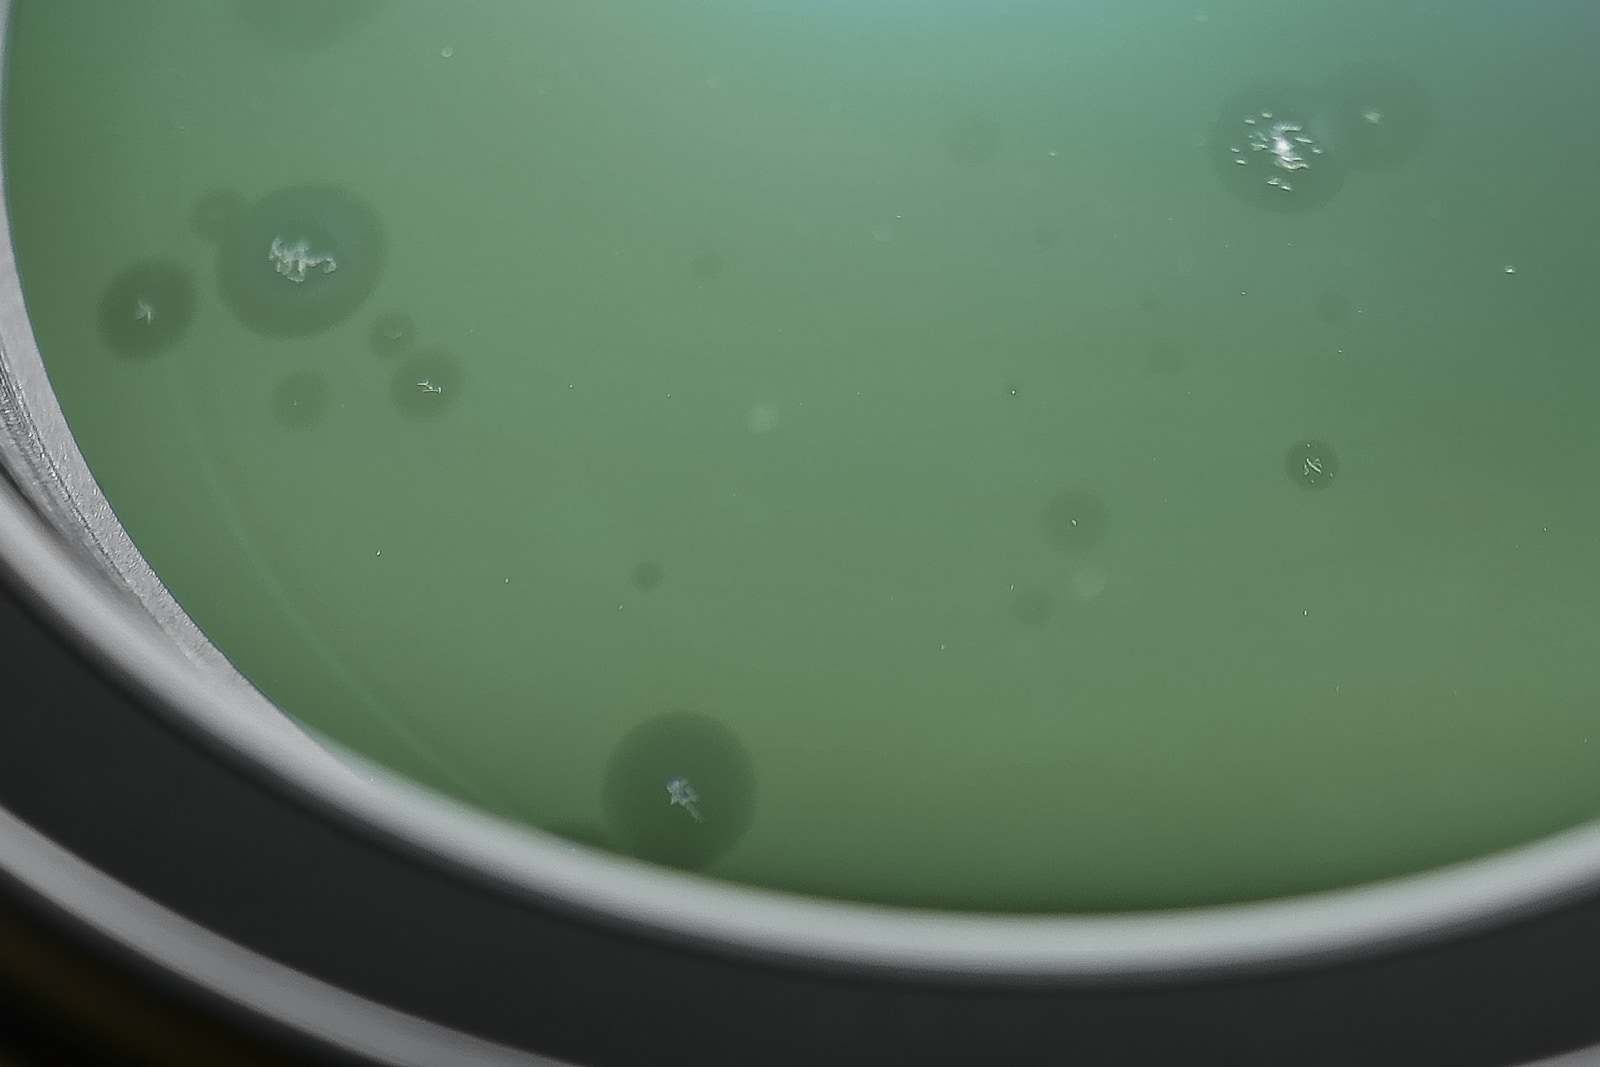
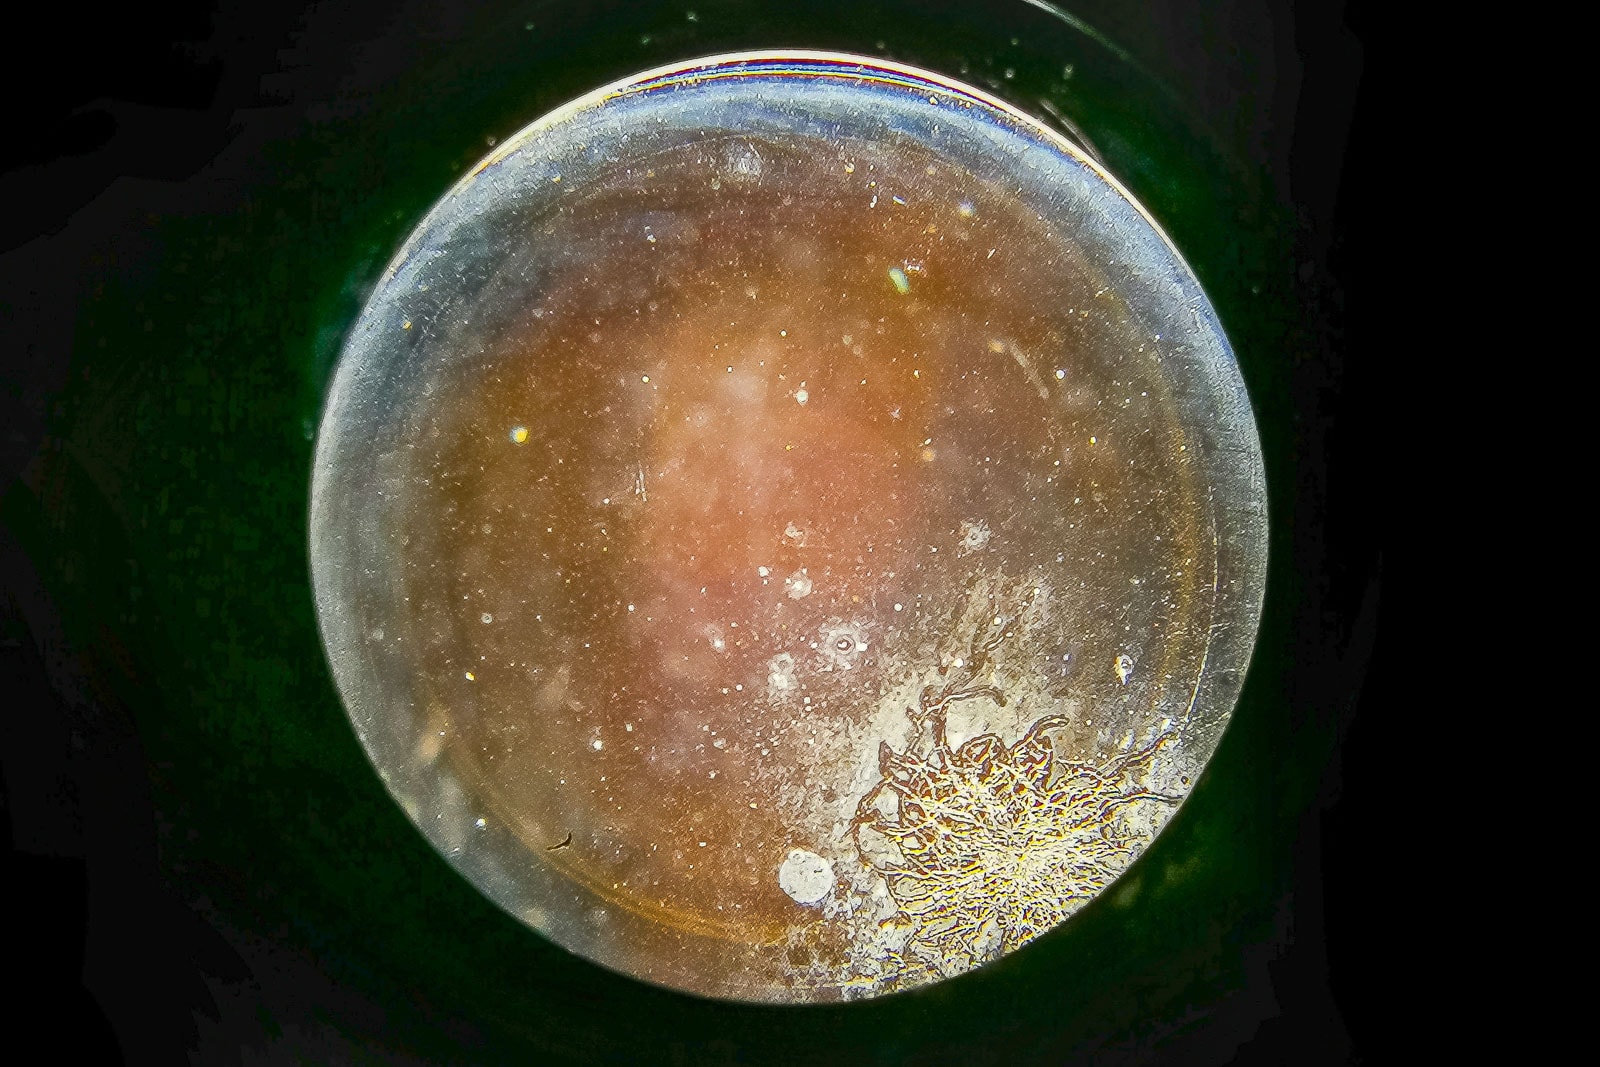
Other fungi look like tendrils or hairs (see the image further up in this article), or as a more general cloudy haze. Basically, if it looks like something organic, you can be fairly sure you are dealing with fungus.
What to Do When You Discover Mold Inside Your Camera Lens
The first thing to do when you have identified fungus inside of your camera lens is to separate that lens from all your other photography gear. I cannot stress this enough. You don’t want to contaminate the rest of your equipment.
After that, it is a matter of identifying the severity of the situation and deciding on your next steps.
Mild Cases
If the fungus infection is minor, you can expose the camera lens to UV light to kill any live fungus on the glass elements. This does not remove anything from the surface of the glass, but it will stop fungus from growing and getting worse (for now).
As a source of UV light you can use sunlight or a germicidal UV-C lamp with a ~254 nm wavelength. Regular UV lamps with UV-A/UV-B wavelengths are not effective enough for this purpose.
No products found.
To disinfect the inside of the lens, open its aperture blades and let UV light shine through for at least 45 minutes. Make sure to remove any UV filter from the front of the lens beforehand.
If you use a germicidal lamp, follow its instructions and do not directly look at it with your naked eyes.
When using sunlight, make sure that the lens does not focus the light onto something flammable behind it. And avoid overheating the lens by leaving it in direct sunlight for too long, as this can cause sticky aperture blades.
This method will not kill all fungus inside the lens. There will always be some spores left alive in the plastic/metal housing of the lens and other components where light does not reach. For that reason, it is important to use proper preventative measures to keep the fungus from reproliferating later on.
Severe Cases
In more severe cases, the only option (if you still want to use the lens) is to open the lens up and thoroughly clean it. Doing this yourself is tricky, and generally the best option is to hire the services of a professional lens technician.
I have placed a short guide on how to clean fungus from a camera lens at home further down this page, but your results will vary on the amount of fungus present, the complexity of the lens and your technical skills. A modern-day zoom lens is significantly more complex than a prime lens from 30 years ago, for example.
To give you an idea of how tricky lens mold is to deal with; it is practically never covered under warranty and the service departments of Zeiss and Canon refuse to even accept lenses with fungus. Last time I checked, Sony and Nikon do offer cleaning for this problem, but do expect to pay a decent price.
How to Prevent Fungus in a Camera Lens
As with many things, prevention is better than cure. When it comes to fungus in camera lenses, there is no exception. The best way to keep lenses clean is by keeping spore growth in check.
As we discussed above, the main factors that accelerate fungal growth are moisture, light and nutrients.
We can influence the amount of moisture and light our gear is exposed to (as I will explain in this section), but nutrients are outside of our control. Particles such as dust, lint and dirt will find their way into the lens regardless of what we do.
Temperature is technically a factor as well, but since the suitable temperature range for most fungi (10-35°C / 50-95°F) is the same as typical living/working conditions, there is not too much we can do about that.
Controlling Exposure to Moisture
Arguably the most important factor in fungal growth is moisture. Since we can control this both when shooting and when we store our lenses, this is the best place to start in preventing fungus in our camera equipment.
For reference, the official ZEISS guidelines recommend keeping lenses in a relative humidity of between 30% and 60%.
Out in the Field
When shooting outdoors, keeping the camera body and lens dry can be challenging. In poor weather (rain/snow/etc) and other situations with splashing liquids, it is almost inevitable to end up with some drops on your gear.
Drizzle and mist can be dealt with relatively easily. Regularly wiping your camera and lens down during use is often enough to keep things dry enough.
Light rain is a bit more challenging. Holding your camera under your jacket or coat until you are ready to shoot and putting it back afterwards is a good solution to reduce exposure to moisture.
In moderate to heavy rain, or if you are not able to keep your camera under your coat, you will need something more, like a rain cover. These do a great job at protecting your camera from a continuous barrage of water.

Any extra lenses or gear that you are not actively using is best carried in a waterproof camera backpack. To reduce the humidity of the air inside the backpack, I recommend using desiccant packets. These contain silica gel beads that absorb moisture from the air, creating a dry and safe space for your camera equipment.

![Dry & Dry 5 Gram [100 Packets] Silica Gel Packets Silica Gel Desiccants,...](https://m.media-amazon.com/images/I/518-s09qHVL.jpg)
The above covers actual liquids, but does not cover water vapor that lenses encounter in the outside air. Not much can be done against that during shooting, unfortunately.
Lenses typically exchange air with their surroundings when zooming and/or focusing. It is inevitable that water vapor comes along for the ride. Not even water sealed equipment can protect against this.
Because we can not avoid moist air in a lens while we use it, we must address this as soon as possible when we are done shooting and are preparing to store our gear.
In Storage
After using a camera lens outdoors, especially in humid conditions, one of your first steps should be to remove the lens caps. This helps trapped moisture evaporate out of the lens.
If the lens is a zoom lens, you can also zoom in and out a couple of times to exchange the air inside the lens with drier air from the room.
The next step is to store the lens in proper conditions. Recommended is a dry (30-60% relative humidity) location. Ideally it would have ventilation or air flow, but this is not as important as the right humidity levels.
There are several popular ways in which people create a suitable environment for storing their lenses.
The Budget Option
One of the easiest ways to create a storage solution for lenses is to take a transparent container, add desiccant to it, and place your equipment in it.
This setup removes moisture effectively, lets light through, is cheap, and is easy to set up. A clear food container and regular desiccant packets are basically all you need.

This method does have downsides, however. Namely, there is no air ventilation, and it is easy to accidentally make the container too dry.
Camera lenses should not be kept under 30% humidity for long periods of time. This dries out the lens’s sealants and adhesives to the point where the lens is not able to function properly anymore.
If you decide to go down this route, it is best to use a simple humidity sensor to keep an eye on the humidity levels and adjust the amount of desiccant to keep the RH levels between 30% and 60%.
The Easier Option
A better (but more expensive) option to store your camera lenses is in an electronic dry cabinet. These cabinets electronically control humidity levels and are designed to continuously keep your camera gear in safe conditions.
Devices like these are automated, so there is no need to manually renew desiccant or periodically check on the humidity inside. Simply put your lenses and other gear in after shooting, and any excess moisture will be drawn out and kept out.
The initial investment is higher than going with the budget DIY option, but it is still cheap compared to the price of camera lenses and the cost of replacing a moldy one. Especially if you live or work with camera lenses in a humid area, you can not go without one of these.

Exposure to (UV) Light
In controlling fungus, UV light exposure is easier to do than humidity regulation. Humidity needs to be controlled continuously, whereas exposing a lens to UV light only needs to be done once every couple months.
Camera lenses that are regularly used outdoors do not need any extra care, as occasionally seeing the light of day is enough to keep fungus spores in check.
Lenses that are stored most of the time, or those that are exclusively used indoors, can benefit from UV light to prevent mold growth. There are several methods you can use for this.
Using the Lens Outside
Periodically taking a lens outside (in daylight) and shooting with it goes a long way in preventing fungal growth.
This is not a valid option for everyone, however. Whether it be due to time restrictions, owning many (never too many!) lenses, living in an area with long dark winters, etc.
Window Sill
A valid alternative is to place your lenses in a window sill or a safe place outdoors for a while. Any place that has plenty of sunlight and does not have nosy children, pets or other animals roaming around will do.
The only thing you need to do is remove the lens caps, open the aperture as wide as possible and leave the lenses for a couple of hours. Of course, you will need to remove any UV filters beforehand.
I personally prefer doing this on a slightly overcast day, as it is a bit safer. There is less risk of lenses overheating and ending up with sticky aperture blades, and the sun also isn’t so bright that you risk focusing the sun onto the end cap or table and melt/burn it.
UV Lamp
If you want to have more control, or be less dependent on the weather, a germicidal UV-C lamp will do the trick just as well. These emit light around the 524 nm wavelength, which does a great job at killing fungus spores, bacteria and other pathogens.
To use it, place your lenses around the lamp and remove any UV filters and end caps. Then turn the lamp on without looking at it and leave the area, because UV-C light is quite harmful for your eyes.
No products found.
Things to Avoid
There are several things you should never do if you want to keep your camera gear clear of fungus.
- Keeping lenses in humid (>70% RH) conditions for longer than a couple of days.
- Storing lenses in darkness for long periods of time.
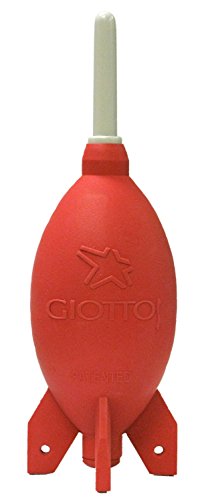
- Blowing on lenses. For example, when you want to remove dust or fog the lens for cleaning. Not only does breath contain a lot of moisture, but it also can contain all kinds of microorganisms that would be more than happy to grow in your photography equipment. Instead of your breath, use a rocket air blaster for blowing and lens wipes for wiping purposes.
- Permanently storing cameras or lenses in camera bags. The fabric of these bags is an excellent place for mold spores to settle and multiply. Obviously, camera bags are still an essential tool to use while on the go, but make sure to add plenty of desiccant and remove your gear from the bag when you are done shooting.
Aside from fabric bags, leather bags and wooden containers can also increase problems with fungal growth.
How to Remove Fungus From a Camera Lens
Before I explain the basics of how to clean camera mold, I must first give a few words of warning.
Firstly, If you are wondering if it is possible to remove mold from a camera lens without opening it, I am sorry to say that it is not. Only if the mold is located exclusively on the outer elements, but that is uncommon. In all other cases, opening up the lens and giving it an in-depth cleaning is the only way to remove all fungus.
Secondly, depending on what kind of fungus you are dealing with, how much of it there is, and for how long it has been there, it is possible that the fungus has etched the glass itself. Once that happens, cleaning or restoring the glass is impossible.
Lastly, the cleaning process is difficult. Or well, taking the lens apart and cleaning its components is easy, but putting them all back together correctly is a challenge. Everything needs to be perfectly aligned. Put one element of the lens back reversed or misaligned, and your lens is unusable (until you fix the issue).
That said, you can still get good results if you are careful and take your time. You can consider it a rainy day project that gets you a fully working lens if everything goes well. If not, it is still good practice for repairing other camera lenses in the future.
It might go without saying, but for any expensive lenses that you care a lot about, it is better to enlist the services of a qualified lens repair technician.
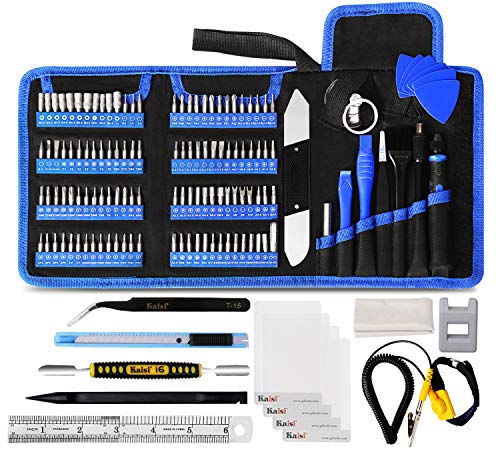
What You’ll Need


|
|
Parts | ||
|---|---|---|---|

|
Make sure to use clean ones that are do not have dirt and oils on them
|
x 2-3 | Check Price |
![Ridex Disposable Gloves Latex-Free Clear Vinyl Gloves [100-Count]...](https://m.media-amazon.com/images/I/41Iqkq4JvkL.jpg)
|
Check Price | ||

|
Check Price | ||
|
91% Isopropyl Alcohol
|
|||
|
Cotton Balls
|
|||
Some people use a solution of hydrogen peroxide and ammonia for cleaning mold from camera lenses. Even though this gives good results, I prefer to go with soap and isopropyl alcohol. It works just as well and does not come with the risk of working with hazardous chemicals.
Disassembly
The first step in removing fungus from a camera lens is to fully disassemble it. To remove all traces of mold spores, you must have proper access to the internal components. Especially to the individual glass elements.
Because there are so many different brands, types and models of lenses available, it is difficult to give a single one-size-fits-all disassembly guide for lenses. There are just too many different constructions out there.
I already have an existing guide that involves disassembling a Minolta 50mm F1.4, and to avoid making this article even longer than it already is, I will refer you to the disassembly steps in that article for a visual reference.
As for how to disassemble your specific lens, I find it works best to look up the service manual for a lens that I need to take apart, or find any existing picture/video guides online that show the visual process.
Cleaning
Once you have disassembled your lens and have separated all glass elements from the lens barrel, it is time to clean them. My typical approach for this is roughly as follows:
- Soak the glass elements in a bowl with a soapy solution (warm water and a bit of soap). You can soak all elements at once, or do them one by one. To avoid contact between the glass and the bowl, you can place a lens cloth on the bottom of the bowl.
- After soaking for a couple of minutes, gently wipe the fungus from the glass with a cotton ball. To reduce the risk of damaging soft lens coatings, it is important to apply as little pressure as possible.
- If not all mold comes off right away, continue alternating between soaking and gently wiping until the glass is completely clean.
- Once the glass is clean, rinse it with isopropyl alcohol to kill anything left on the surface. Make sure to do this in a well-ventilated area.
- Inspect the glass under a bright light and gently wipe it with a microfiber cloth to remove any smudges.
Ideally, you would also repeat this process for the other (non-glass) parts of the lens to remove any traces of mold from those components as well. At the very least, expose these parts to plenty of UV light to kill as much fungus as possible. With a disassembled lens, you can shine light on areas that it usually does not get to.
Reassembly
Reassembly of a camera lens is basically the same as the disassembly steps in reverse. Make sure to put all components back in the same position and orientation as you found them, respecting any witness marks. Any internal cables that were disconnected during reassembly must, of course, be reattached.
If you also cleaned the non-glass components of the lens and removed grease from the focusing helicoil, it is important to apply new grease. This will ensure smooth operation of the lens. Helicoid Grease #10 from Japan Hobby Tool is an excellent grease for this.

Other Tips
- Wear gloves to avoid leaving traces of oil and finger grease on the lens. Not only does this affect image quality, but it also provides future food for fungus.
- Some lens elements look similar on both sides and it is easy to get their orientation mixed up. Make sure to keep track of how everything goes back together by making notes, pictures and witness marks during disassembly.
- Auto-focus lenses contain a lot of electronics. Extra care must be taken to not damage their fragile cables.
How Does Fungus Get into a Camera Lens?
The most common way for mold spores to enter a camera lens is when the lens focuses or zooms and exchanges air with the environment. It can also make its way in through different routes, such as from the fabric of a camera bag.
Is It Worth Buying a Lens With Mold?
I would say that in most cases, buying a camera lens with fungus is not worth it. Not only is there the risk of the fungus growing further and making the lens unusable, there is also the possibility of it spreading to the rest of your equipment.
The only reason to buy a lens with mold is if you have the skills, equipment and time to clean it yourself. Or if you want to learn lens repair/cleaning and need something to practice on.
How Do I Know if My Camera Lens Has Fungus?
The best way to check for fungus is to take a bright flashlight and shine it down the barrel of the lens. Anything organic-looking inside that is not dust or scatches is likely to be mold.
How Much Does Fungus Affect Image Quality?
This depends on the type of fungus, how much of it there is, and where it is located. For example, fungus located on the front element of a lens tends to show up less in your photos than an infection found on the rear element group closer to the sensor.
Does Sunlight Kill Lens Mold?
Yes, regular sunlight exposure is sufficient to keep lens mold away. Especially if you do not have a UV filter attached all the time.
Can You Still Use a Lens With Fungus?
Technically, yes. If the fungus does not affect the image quality significantly, you can still use the lens. However, if the fungus spores are still alive, you really don’t want them to spread to your camera and the rest of your gear. So it is better to stop using it.
Can You Clean Mold From a Lens Without Opening It?
Unfortunately, a lens needs to be opened to properly clean it. While you can prevent growth of more fungus spores with exposure to UV light, cleaning requires the lens to be disassembled, cleaned and reassembled. There is no other way.
Which Lenses are Most Likely to Get Fungus?
Fungus is more common on older lenses, but this is mostly because they have had more time being exposed to moisture. The same goes for lenses that are used in humid or tropical areas. As far as brands, prices or build quality goes, there is no difference.
Weather-sealed lenses do help against moisture entering in the form of liquids, but they aren’t completely foolproof. They still exchange (humid) air with the environment when they zoom and focus.

Conclusion
Camera lens fungus is a tough problem to prevent or remove. If not properly taken care of, any lens can end up with it.
To prevent mold in lenses, it is important to take preventative measures both in the field and in storage.
Any gear that you take with you is best kept in a waterproof backpack with plenty of desiccant bags. This keeps the air inside dry and ensures that there is no moisture or fungus buildup in the fabric.
Controlling humidity when storing camera lenses is even more important, as lenses tend to spend more time in those conditions. The best option is to use a electronic dry cabinet that keeps your camera gear at the right humidity all year round. DIY options are also available, but these tend to need more monitoring and maintenance (replacing of desiccant).
Cleaning camera lens fungus yourself at home is possible, but difficult. The right tools, lots of patience and a careful approach are key. It is essential to have a service manual or disassembly guide at hand, and to keep track of the position and orientation of every component during the disassembly process.

Thank you VERY much for your wonderful article on mold on camera lenses. It was very informative and clearly written. Thank you again.
Bruce Leeds (Thailand, where I lost my Canon 70-200L to mold!)
I am glad it was of use, Bruce. I imagine this information is particularly useful for dealing with the Thai humidity!
You save my recent inventory of expensive gears of Leica M series from ruins of mold growth. I lost a whole batch of Nikon gear from invasion of mold growth. Sad to the bone. I swear not to store my expensive equipment with molded lenses for them to spread the harm again. Thanks for your insightful advice.