
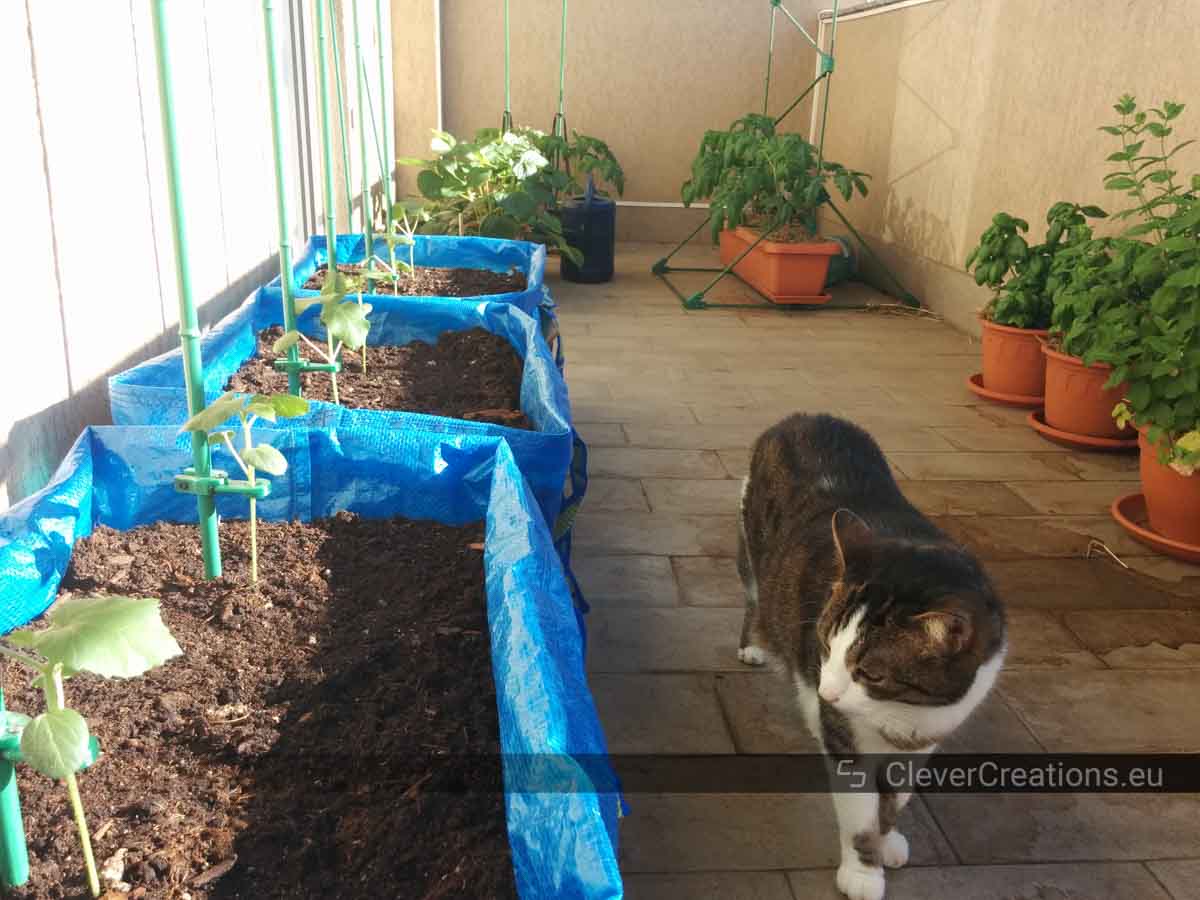
In our household we love to grow our own vegetables and herbs. It feels very rewarding to grow our own food. In the summer you can always find a collection of vegetables growing on our balcony.
Last year we wanted to grow some okras, but we did not have pots that were big enough. Okras require a lot of soil and require deep pots if they are not grown directly in the ground.
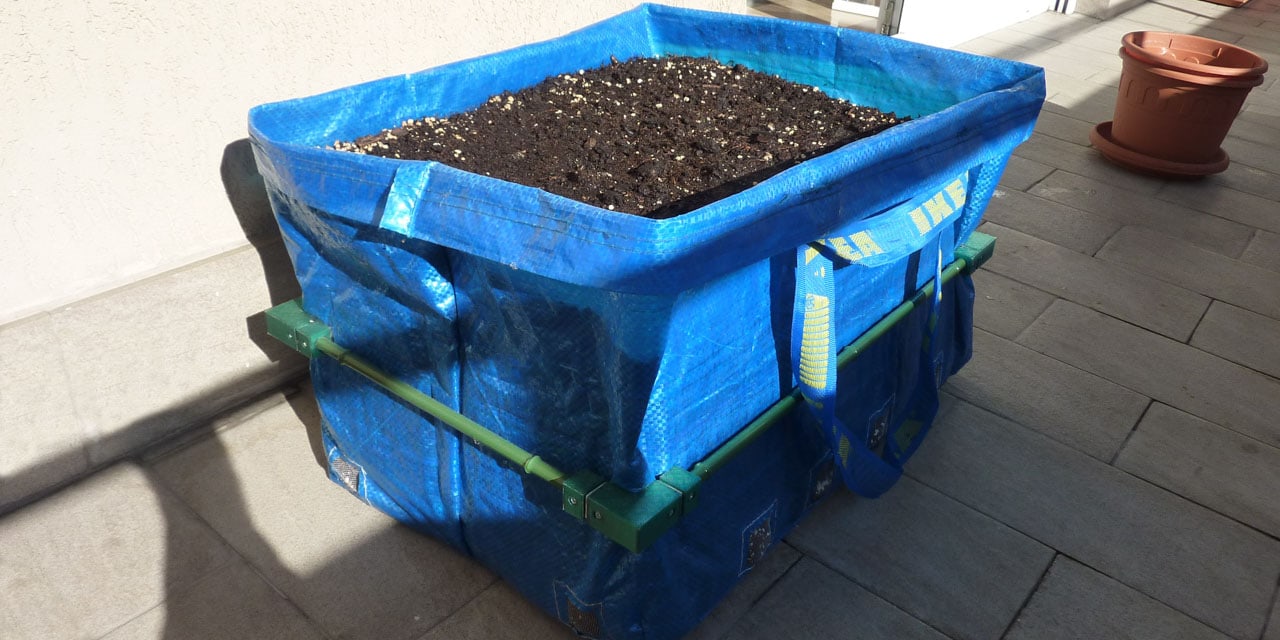
Instead of buying pots, we decided to create our own DIY grow bags. We could have bought grow bags, but we prefer to upcycle things when possible. We still had some IKEA FRAKTA bags that were a perfect candidate for this upcycling project.
The IKEA bags need some modification before they can be used to grow fruits and vegetables. Before I show you how to make your own DIY grow bags, I will share some information on grow bags and on what I think makes them so great.
What are Grow Bags?
Grow bags are bags that are filled with a growing medium and that are used for growing crops. The growing medium can either be soil, or a soilless organic material.
The bags are often made out of a breathable fabric, and come in a variety of sizes. They are a great way to grow things like potatoes, tomatoes, okras and salad crops.
What are the Benefits of Grow Bags?
When evaluating grow bags, they are most often compared to pots. So let’s look at some of the benefits of grow bags over pots:
Less Risk of Overwatering
Traditional pots are impenetrable. When watering their plants, it is possible to add too much water and over-water them.
It is important for roots to have access to enough oxygen. This is why a well-draining container is important. Too much water also encourages fungus- and mold-growth.
Grow bags are made from a porous material that allows excess water to easily leave the bag. This greatly reduces the chance of overwatering the plants.
The Roots Stay Cooler
The breathable material that lets the water through, also lets heat pass through. This gives grow bags a temperature-regulating quality that helps keep the roots cool.
Pots can get very hot in direct sunlight, especially during the summer months. When the temperature of the roots gets too high, plant health is negatively affected.
The Roots are Healthier
A common problem when growing plants in pots is that the roots start (and keep) growing in circles, and end up constricted. This happens because when the roots reach the edge of the pot, they keep looking for nutrients and water.
This is referred to as a root bound or pot bound plant. The entangled roots significantly reduce the plant’s growth.
The opposite happens in a grow bag. When the roots reach the outside of the bag, they detect air and an absence of humidity. At that point, the roots know they can not grow further and they stop their own growth in a process called air-pruning. This leads to healthier roots and thus a healthier plant.
Less Storage Space
Pots take up a lot of space. If you want to put them away somewhere, they will take up valuable storage space. Alternatively, you can assemble them into an ugly stack that you leave in the corner of the garden or balcony for next spring.
We also keep our pots on the balcony in the winter. Aside from being not pleasant to look at, there is also a risk of damage. Freezing and expanding water in the pots can cause them to crack.
Grow bags can be folded when they are not in use. Their small volume allows you to store them practically anywhere. This means you save a lot of space in the winter.
How to Make Your Own Grow Bags
It is quite easy to make your own DIY grow bags. You can modify existing bags, or use breathable fabric to sew your own grow bags from scratch.
It is important that the bags can drain well, they have the right volume for what you want to grow, and ideally they would have handles. The handles make moving the grow bags a lot easier when they are filled with soil. They can get heavy!
We used large IKEA FRAKTA bags (172.283.40) to make the grow bags. They had the right shape and volume for what we needed (to grow okras), and they already had handles.
The smaller variant (603.017.07) works just as well, it just has less volume. It all depends on what you want to grow and how much soil it needs.
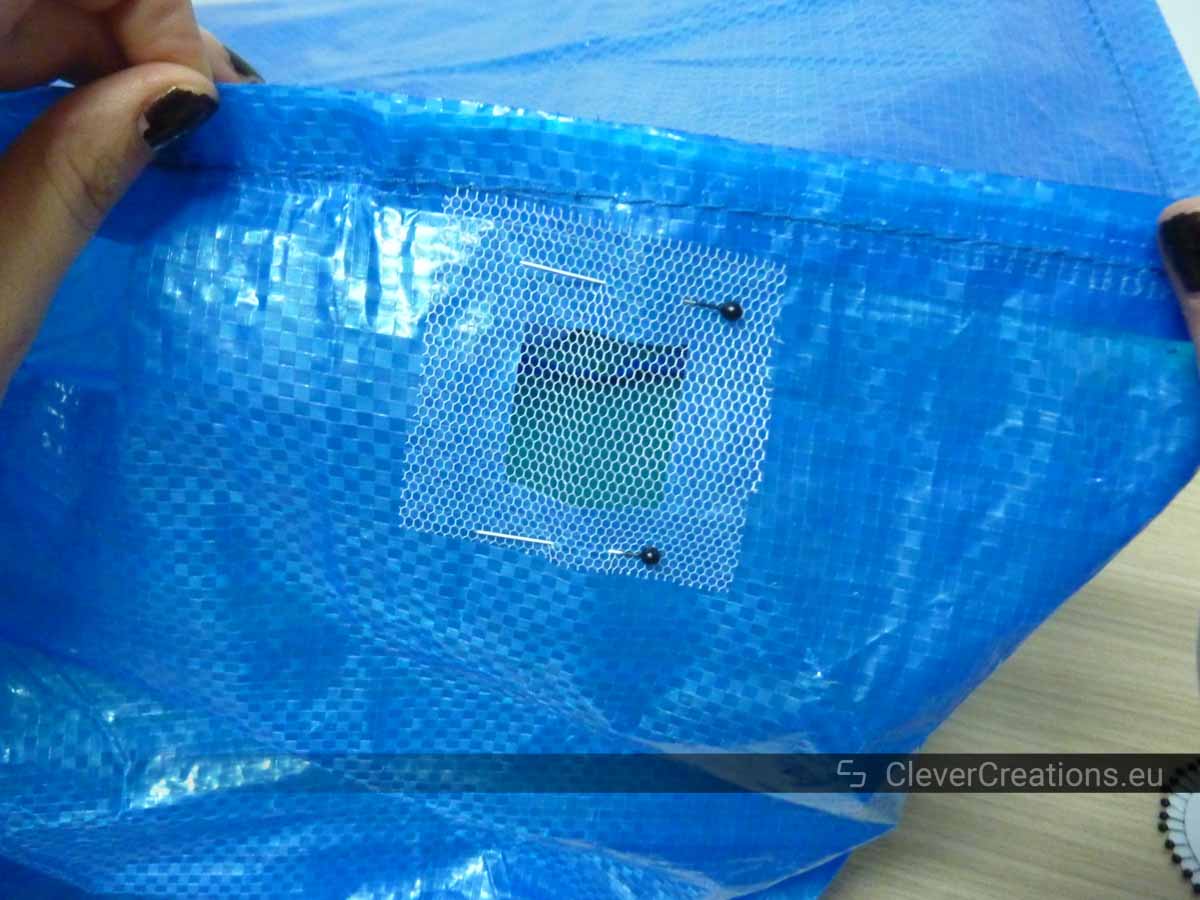
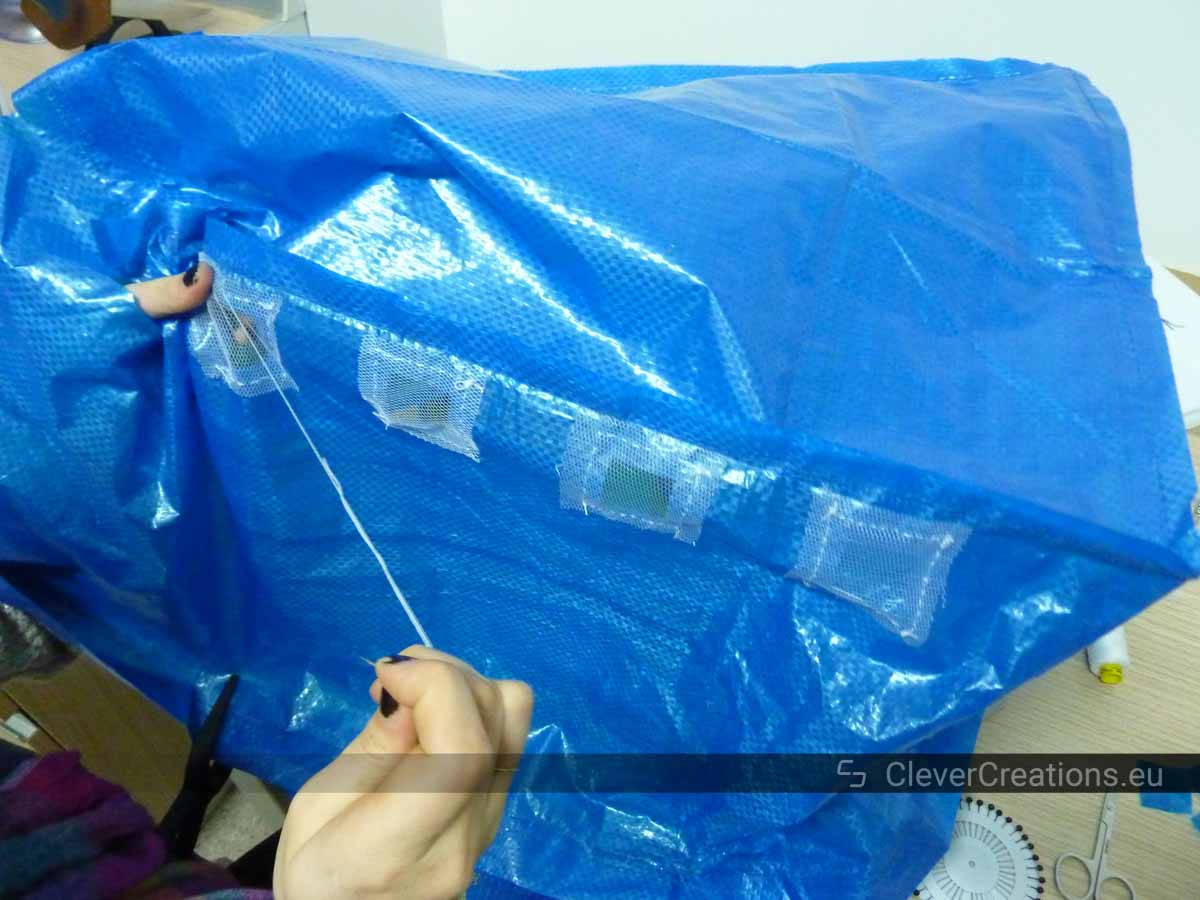
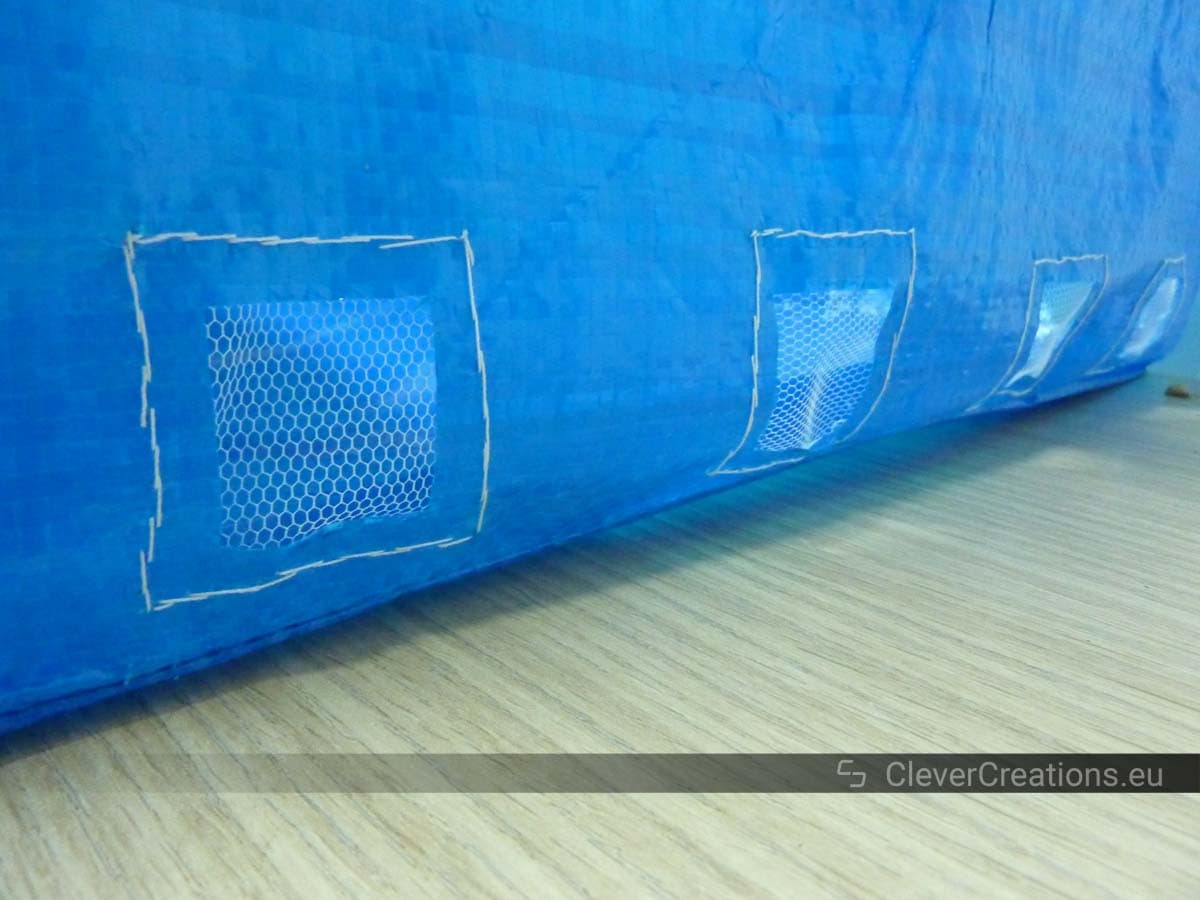
We found that the fabric mesh of the FRAKTA bags was a bit tightly woven and we weren’t sure if it was breathable enough, so we added some extra drainage holes at the bottom to make sure the bags would drain well.
We had no experience using IKEA FRAKTA bags as grow bags before this, and we did not want to risk running into problems half-way throughout the summer.
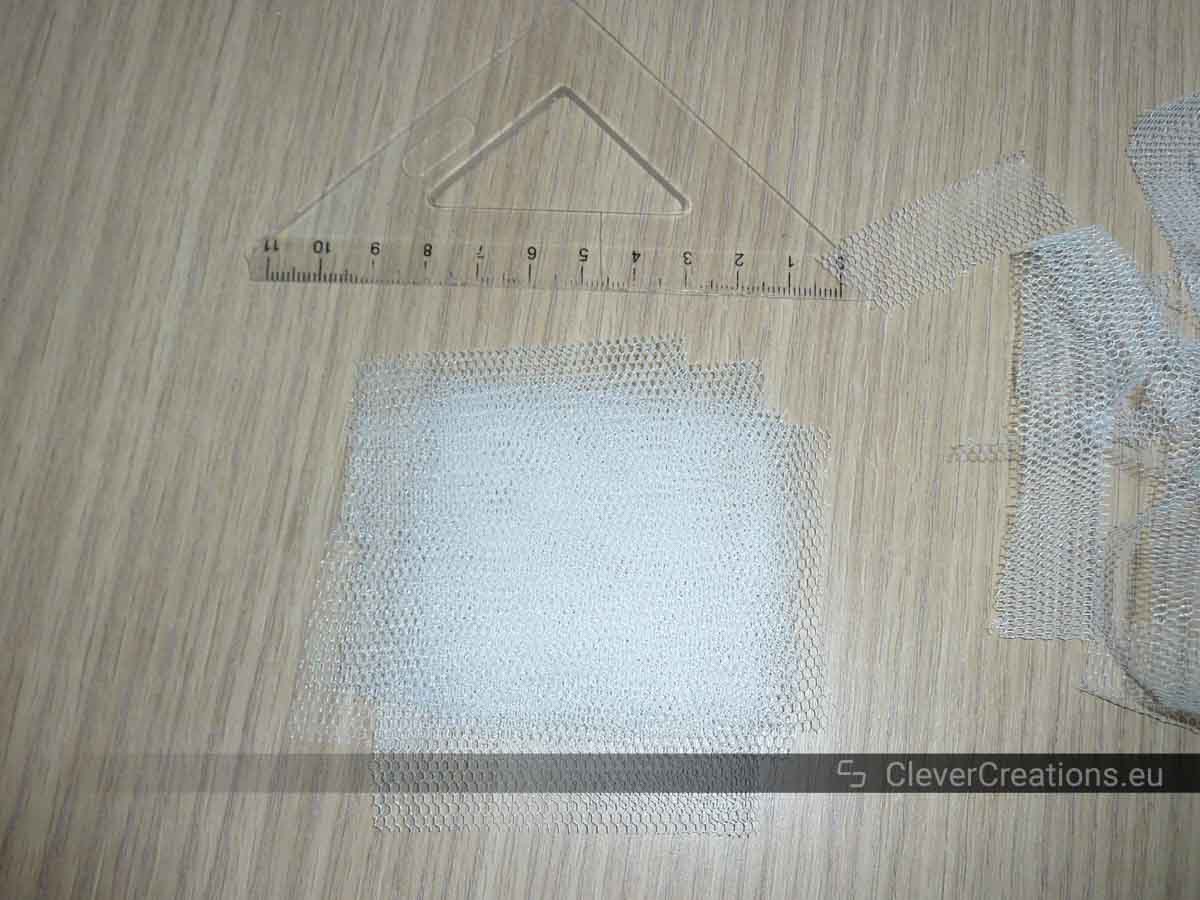
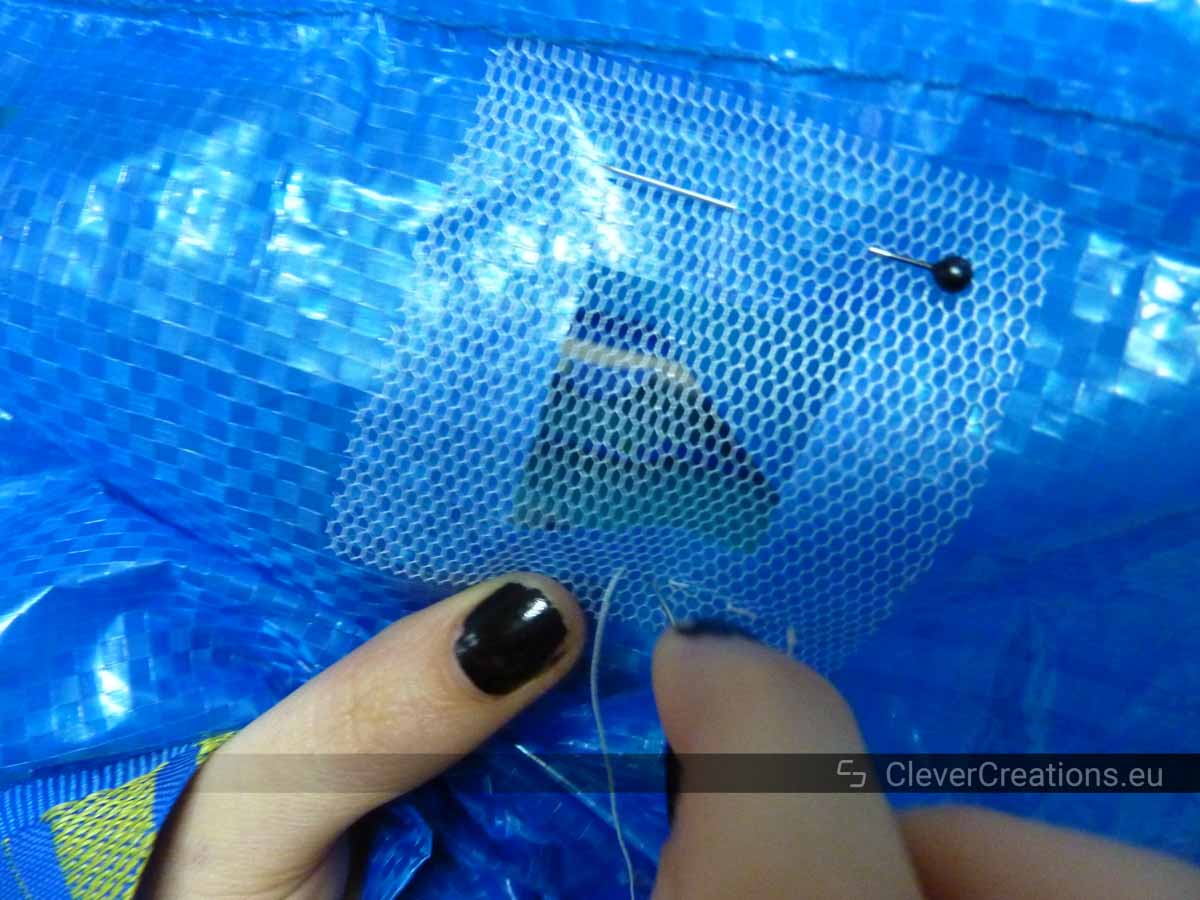
The drainage holes are sealed with window mesh to make sure that the water can drain out, but the dirt stays in place.
How to Make Your Own Grow Bags From IKEA Bags
What You’ll Need
|
|
Tools | ||
|---|---|---|---|
|
Utility Knife
|
|||
|
Tape Measure
|
|||

|
Check Price | ||
|
|
Parts | ||
|---|---|---|---|

|
IKEA product number 172.283.40
|
Check Price | |

|
Check Price | ||

|
Check Price | ||
Cutting the Drainage Holes


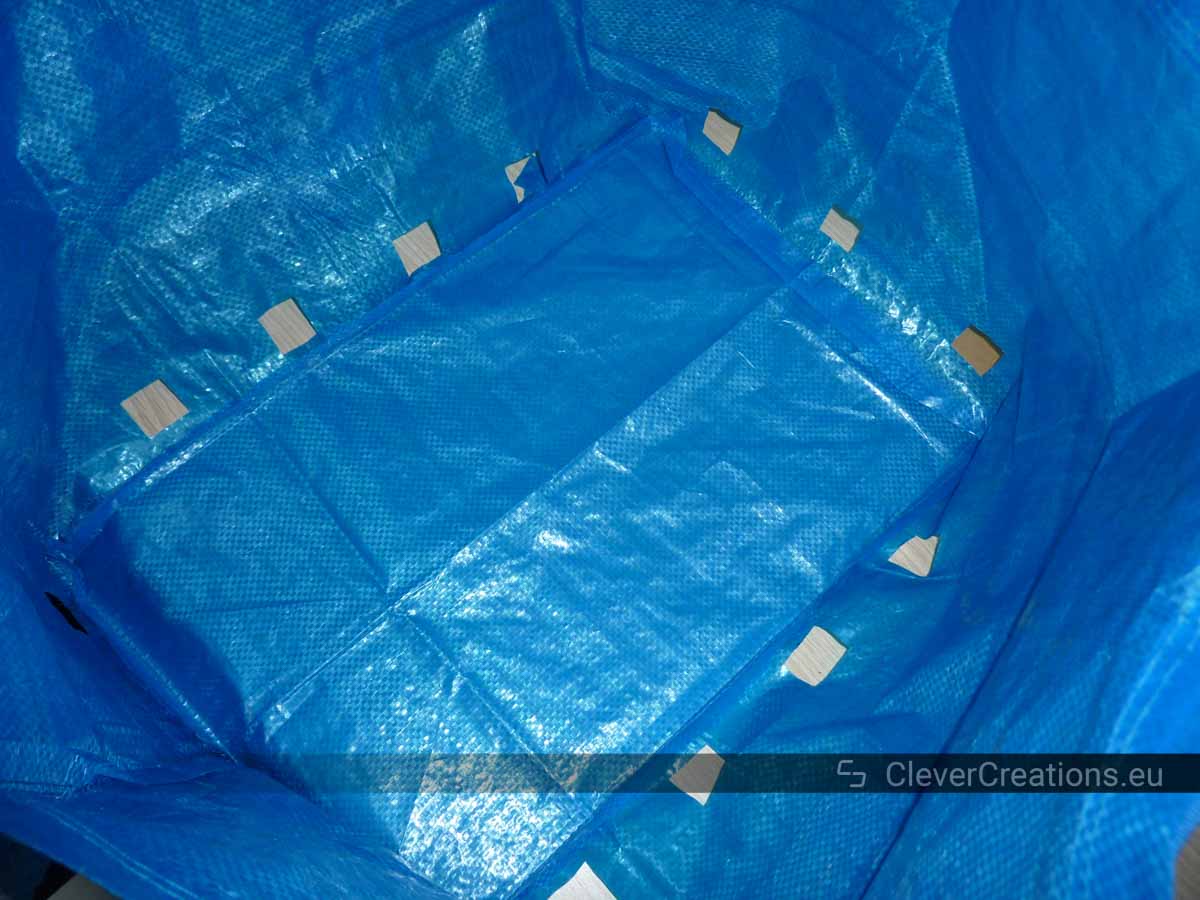
Installing the Mesh
I haven’t tried this myself, so I do not know how well it works. But if the adhesive sticks well enough, then it is an easier solution than sewing mesh to the grow bag.

Finishing Up

After adding the soil, you can add the vegetables, fruits or herbs that you want to plant.


Conclusion
We had good success with the DIY grow bags. The okras grew very well throughout the summer. And after harvesting we did not have to find a place to store giant pots.
All in all this is a great upcycling project that allows you to grow potatoes, carrots, tomatoes, or any other crop you wish to grow on your balcony.


What is the green rod helping to structure the bag in the top photo? Would love to hear how you created that part!
I would also like to know how to make the green support structure!