
- Captures detailed full-color 3D models
- Able to capture color texture data
- Fast scanning saves a lot of time
- High single scan accuracy (0.05mm)
- Easy to get up and running
- Software feels a bit clunky and outdated
- No handheld mode
- Scanning process is sensitive to daylight
The field of 3D scanning has evolved rapidly in recent years, and with that has come a range of affordable desktop 3D scanners. Not just useful for businesses, 3D scanners are also becoming increasingly popular with hobbyists and enthusiasts alike. Scanning objects for 3D printing purposes, 3D modeling, heritage preservation, or reverse engineering now lies within reach for many people.
Several companies have recently joined this market, but Shining 3D has been one of the more established players in the game. Their initial Einscan S was released in 2015 after a successful Kickstarter campaign. While it delivered detailed scans at an affordable price, it was lacking in the user experience department.
With its follow-up Einscan SE (budget) and Einscan SP (premium) desktop 3D scanners, Shining 3D has released two more capable machines at different price points. These devices promise to be much easier to use, with a more user-friendly interface and better scanning quality.
In this review, we’ll be taking a look at the Shining 3D Einscan SP to show what it can do, and how it stacks up against the competition. After reading this Einscan SP review, you will know if this is the best 3D scanner for your needs, or if you are better off with one of the other options.
Einscan SP Specs
| Einscan SP Specifications | |
|---|---|
| Price | Amazon |
| Accuracy | ≤0.05 mm |
| Range of Single Capture | 200×150 mm |
| Minimum Scan Volume | 30x30x30 mm |
| Maximum Scan Volume | 200x200x200 mm in Auto Scan 1200x1200x1200 mm in Fixed Scan |
| Light Source | White Structured Light |
| Scan Speed | ~4s |
| Point Distance | 0.17 mm – 0.2 mm |
| Texture Scan | Yes |
| File Format | OBJ, STL, ASC, PLY |
| Power Supply | 40 W |
| Input Voltage | DC: 12V, 3.33A |
| Turntable | Turntable with markers |
| Load Capacity of Turntable | 5 kg |
| Weight (unpacked) | 4.2 kg |
| Weight (packed) | 7.0 kg |
| Dimension | 570x210x210 mm |
Unboxing the Einscan SP
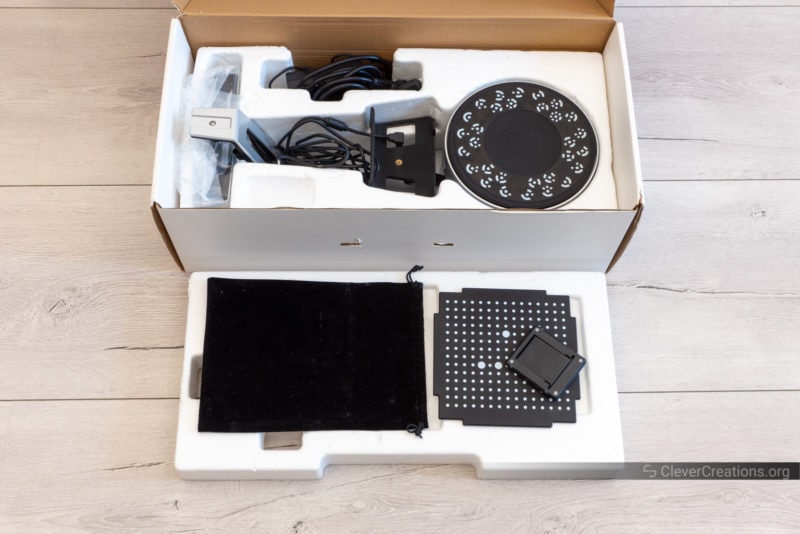
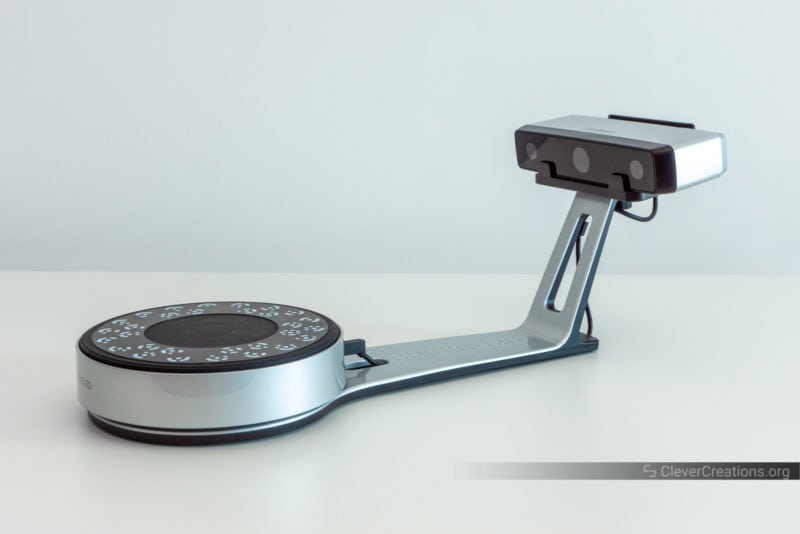
The Shining 3D Einscan SP comes well-protected in a foam-filled cardboard box. Shining 3D sent us a review unit instead of a brand new device, so the unboxing experience you see here might differ slightly from what you receive.
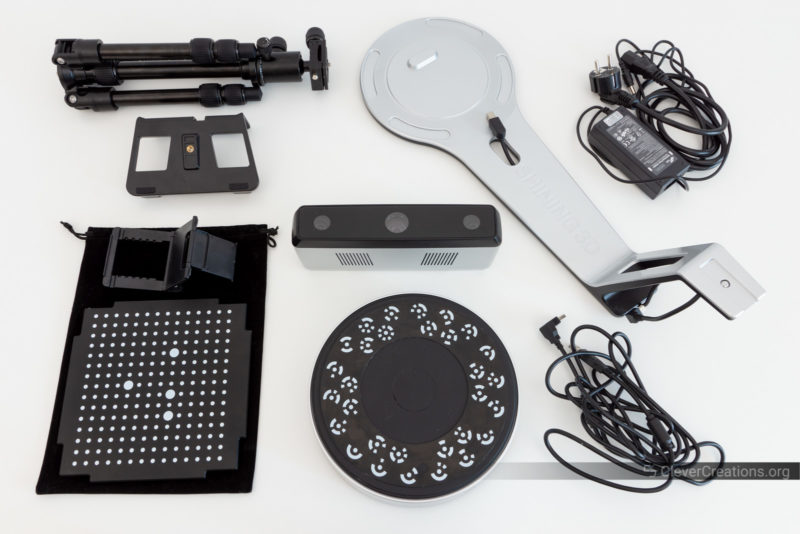
Inside the box, you’ll find the following items:
- Einscan SP scan head
- Turntable
- Scanner stand
- Scanner bracket
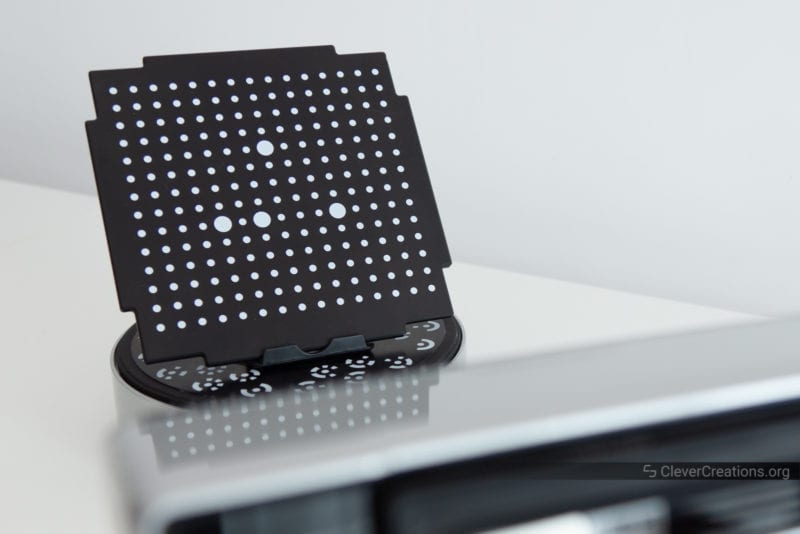
- Calibration board
- Calibration board holder
- Power cord
- Power adapter
- USB cable (2x)
- Tripod
- Reference point markers
- Quick start guide
This is essentially everything you need to get started scanning objects right away. The only thing that’s missing is a computer. You will need to use a PC, as the Einscan SP software is not compatible with macOS or Linux.
We would have liked to see something like a small statuette included to use as a first scanning subject. This is always included with the Revopoint scanners and it’s a great way to see how well the scanner works right out of the box.
Its exclusion is not a big deal and perhaps Shining 3D does not consider its target audience for the Einscan SP to be interested in such things.
Getting Started with the Einscan SP
The process of setting up the Shining 3D Einscan SP is straightforward. The whole process from unboxing to scanning takes about 15 to 20 minutes. Probably even faster if you don’t need to take a bunch of pictures and write a review at the same time.
Setup & Calibration
1. Assembly
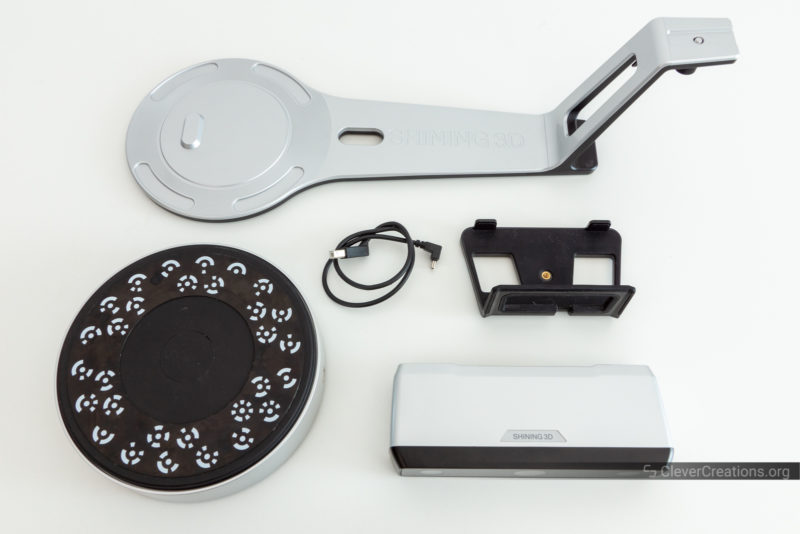
The first thing you’ll need to do is assemble the components of the box into a cohesive unit. This means assembling the turntable, mounting the Einscan SP 3D scanner head on the stand, and running the USB cable through the slot on the underside.
The process is easy and explained well in the quick start guide. There is only a single thumbscrew that needs to be tightened to attach the Einscan SP scan head to the turntable. This screw is pre-attached to the turntable and you can turn it by hand, so there is no need for you to use tools.
2. Install the Software
After assembling the Einscan-SP, you’ll want to install the latest version of the EXScan S software. In our case this was V3.1.2.0. This is also the software we did all our testing with.
3. Calibrate
Calibration is essential for structured light scanners. Without it, you’ll get subpar results or no acceptable results at all. The Einscan SP is no different in that regard.
Typically, 3D scanners come fairly well calibrated out of the box, but it can’t hurt to run the calibration process just to be sure. You never know what the device was exposed to during shipping.
In our case, working with a (likely heavily used) review unit, we definitely wanted to make sure that our Einscan SP was properly calibrated.
To calibrate, you’ll need to use the included calibration board and follow the instructions in the software. It involves placing the calibration board on the turntable and letting the Einscan SP scan it from various angles.
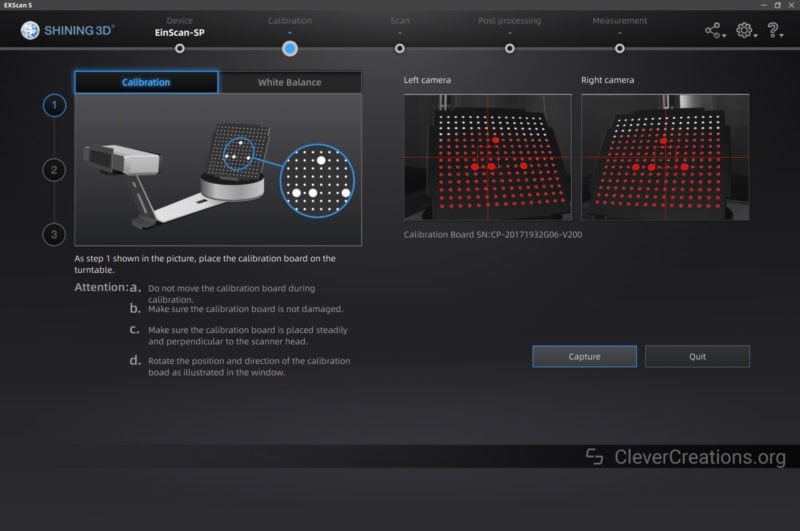
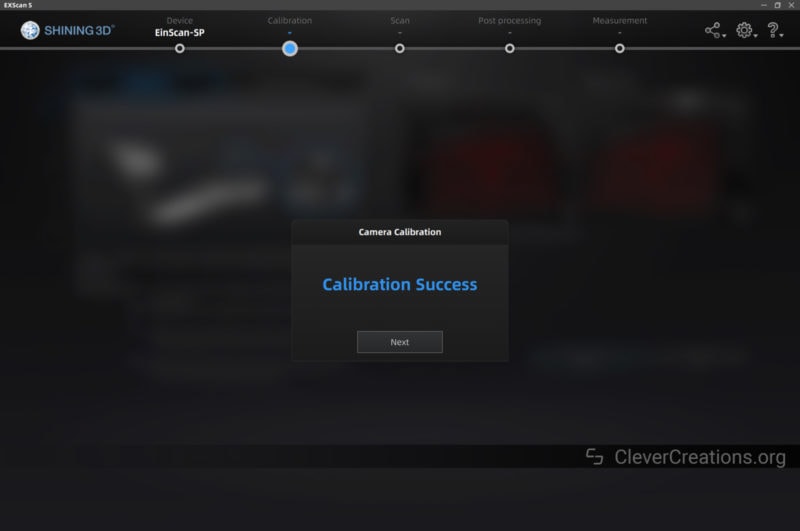
There isn’t any feedback from the software during the various stages of the process, so you’ll just have to trust that it’s working. If there is an issue, you’ll only find out once the process is complete, at which point you can try again.
In our experience, we didn’t have any issues with our calibration and everything went smoothly.
Unlike in Revopoint’s software, there is no numerical value that indicates the final accuracy of the calibration. However, based on the scanning results, we are confident that the Einscan SP was calibrated accurately enough.
A notable difference between the Einscan SP and Einscan SE is that the SP comes with a durable (possibly coated ceramic) calibration board. The SE, as the more affordable version, uses a less durable foam board.
If you are interested in long-term use of the 3D scanner, which you probably are given the price, then the SP’s calibration board guarantees more accurate results over time.
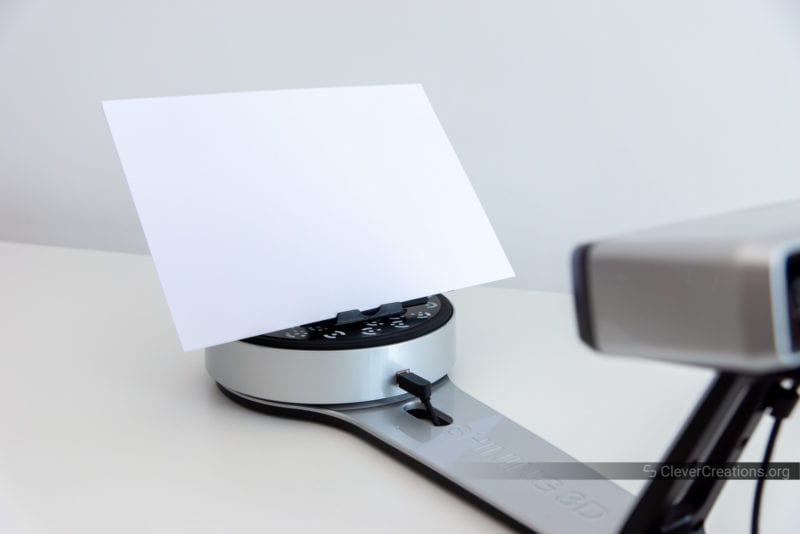
The calibration section of the software also lets you configure the white balance. This helps adjust the color of your textured scans to better match reality. It involves scanning a white piece of paper and letting the software adjust its parameters based on that.
First Scan
Software Setup
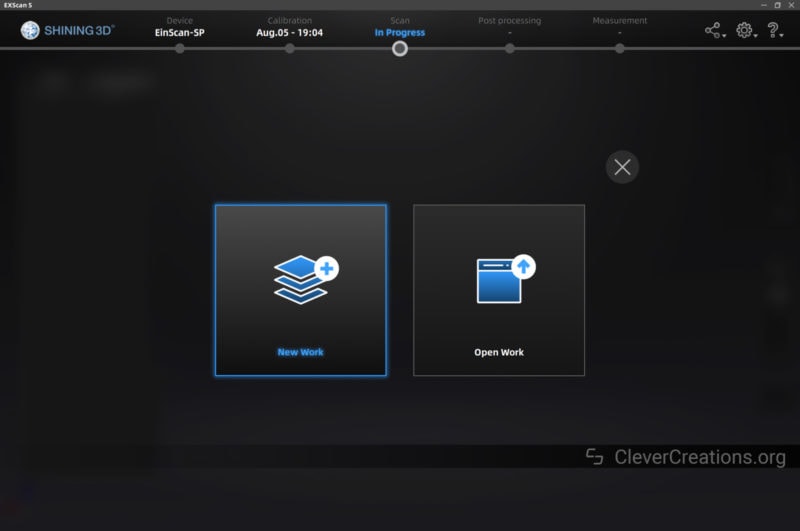
To start your first scan, you’ll first have to start a new ‘work’ in the software. This means selecting or creating a folder where the software can store all related files.
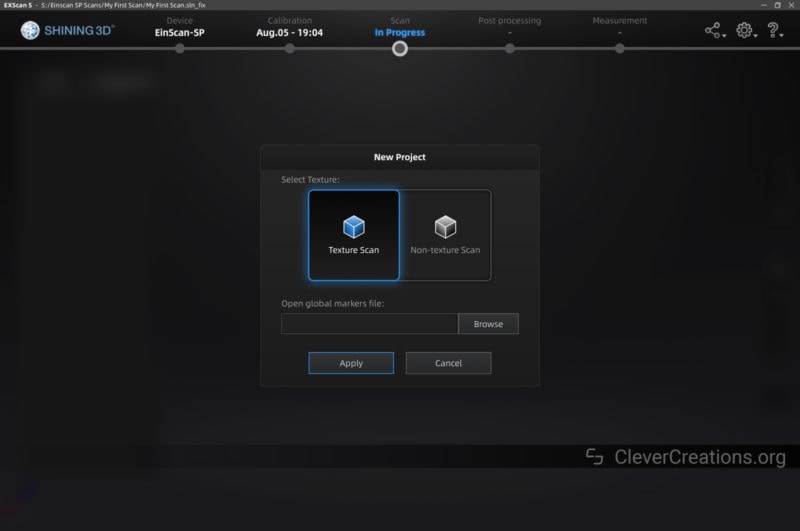
You can then create a new project, at which point you have to decide on creating a texture or non-texture scan. The difference between the two is that texture scans generate a color digital model, while non-texture only generates a digital model without color data.
For things like game/VR asset design or other 3D modeling applications, you’ll probably want to go with the texture scan. But, if you’re looking to recreate an object through 3D printing or just want a quick model for reverse engineering purposes, the non-texture scan is better (and faster).
After selecting the desired scan type, you’ll be led to the scan section of the software. Here you can select the scan settings that you want to use.
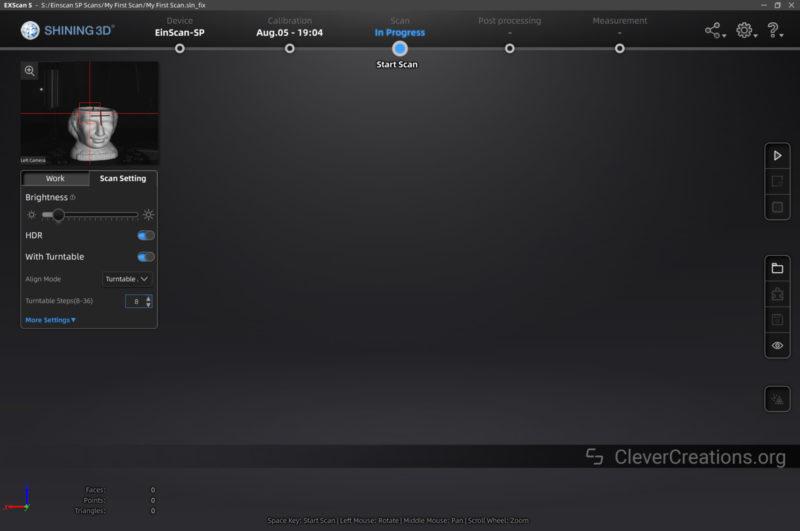
The main settings you can choose from are the brightness, align mode, and turntable settings.
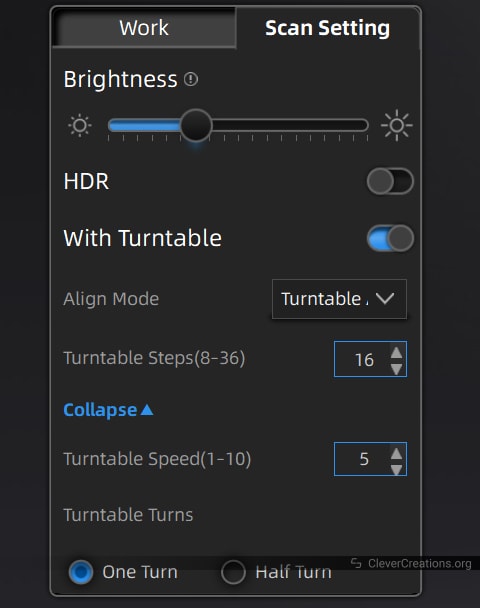
The brightness setting essentially adjusts how much light is used during the scanning process. The tradeoff here is that more light results in better scan quality, but you have to be careful not to over-expose your subject.
The align mode lets you select between various options (features, turntable coded targets, markers, turntable align) that indicate what the software uses to stitch the scans together.
For the small-to-medium objects we scanned, we found the ‘turntable coded targets’ option to work well. This lets the software use the embedded coded targets on the turntable to more accurately line up the scans.
This alignment option is only available on the Einscan SP. On the Einscan SE, you will have to use one of the other (in our opinion inferior) options to stitch your scans together.
The turntable settings let you adjust the rotation speed and number of turntable steps for each scan.
For most of the scans you see in this review, we set the number of turntable steps to 16. The default of 8 steps works alright for non-detailed objects, but when dealing with curves and other organic shapes, increasing it to 16 steps lets you capture more detail.
As for the turntable speed, you basically want to set it as fast as possible. If the object on the turntable shifts position, you have set it too fast. The turntable moves in between each captured frame, so there is a lot of starting and stopping that can cause the object to shift at higher speeds.
Object Setup
After selecting the right settings for your scan, you’ll want to prep the object for scanning. You’ll find some more tips on this further down, but the main idea is to coat any black or shiny surfaces with a 3D scanning spray.
This ensures that enough structured light from the scanner’s projectors reflects back to the scanner’s cameras instead of being absorbed or reflected away.
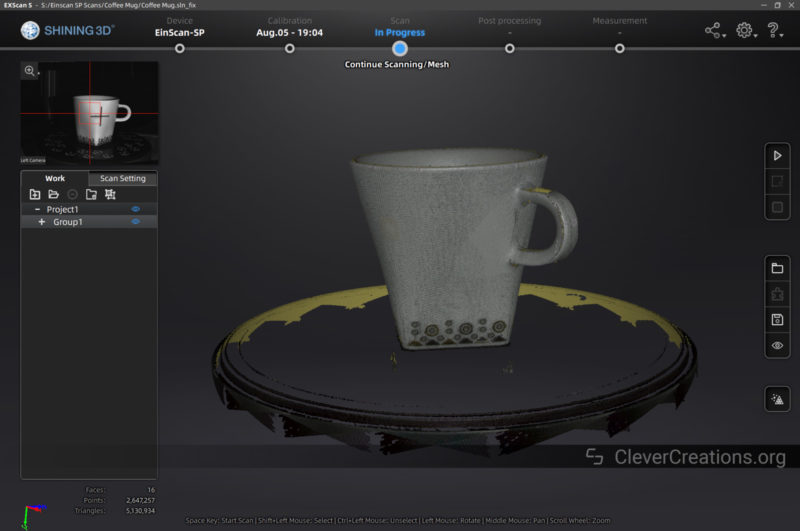
Once you have done that, you can place the object on the turntable and start the scan. One thing we particularly like about the Einscan SP is that it projects an alignment crosshair on the object. This makes it very easy to center the object on the turntable.

Depending on the object that you are scanning, you might want to mount the scanner on the tripod instead of the turntable mount. This lets you get more of a top-down view of the object, which can be helpful for scanning things like shoes or other objects with a lot of surface area that would otherwise be difficult to scan.
Once you have the object and scanner setup, you can start your first scan by hitting the ‘Start Scan’ button on the right-hand side of the screen.
Scanning

At this point, the Einscan SP will start scanning. It project structured light on the object, capture a set of data, and then move to the next turntable position.
The minimum time for a single scan takes about 4 seconds, but depending on your settings, it can be longer. Capturing color data just about doubles the time compared to only capturing the shape. You’ll read more about the scanning speed later.
The entire capture process is automated, so you don’t have to do anything else once you hit the start button.
What you do need to do is to manually reposition the object if you need to capture it from a different angle for additional data.
We found that using a grippy material that doesn’t show up in the scans, like black putty clay, works exceptionally well for this. You can mold it to shape and position it to hold the object at the desired angle.
After capturing all the data you need, the next step is to process the point cloud data and turn it into a mesh. We’ll cover this process in the software section of this review.
Einscan SP Features
Scanning Technology
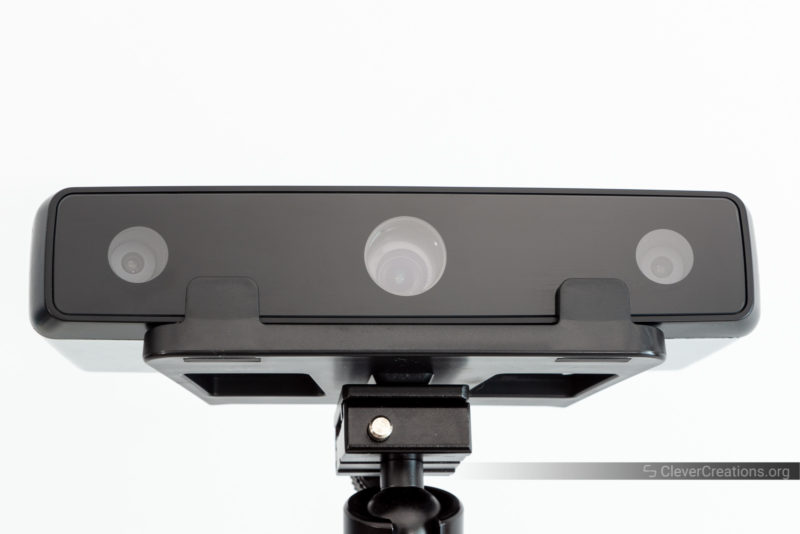
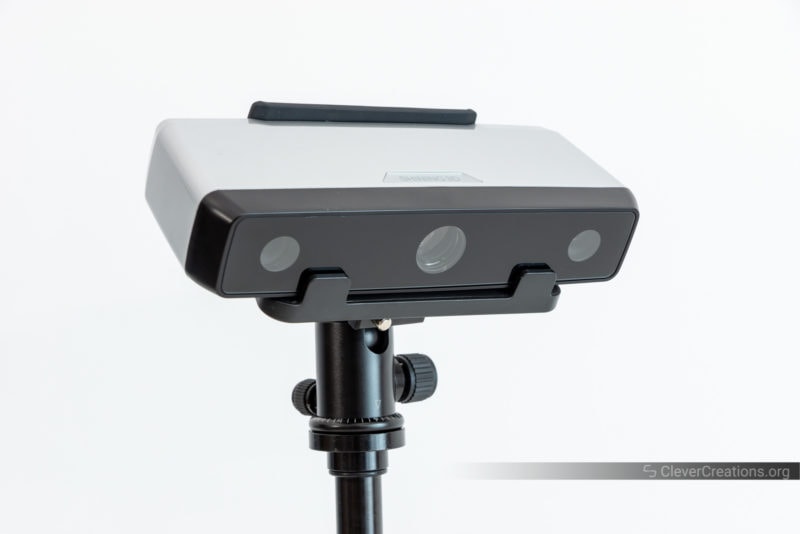
Just like most desktop 3D scanners that have been released on the market in the past years, the Shining 3D Einscan SP uses structured light technology.
Structured light 3D scanners work by projecting a pattern of light onto an object. By analyzing the distortions in the pattern, the scanner can reconstruct a 3D model of the object.
Compared to more expensive laser scanners, this provides a faster scanning process. Capturing a scan only takes seconds. With a laser scanner, this process takes notably longer.
Laser scanners have the advantage of being less dependent on the environment. They are easier to use in outdoor environments and can work in a wider range of lighting conditions. This is one of the reasons why it is important to keep your scanning needs in mind when choosing a 3D scanner.
Both 3D scanning technologies have similar issues with capturing dark or shiny surfaces. These surfaces don’t reflect as much of the structured light, so it is more difficult to capture detailed data from these surfaces.
These are important things to be aware of. Oftentimes, first-time users of 3D scanners are disappointed with the results of their first few scans. More often than not, this is caused by shiny or dark objects, poor lighting conditions, or both.
You will find some solutions to this problem later on.
Scan Volume
The minimum scan volume of the Shining 3D Einscan SP is 30x30x30 cm. This means that the object you scan should have at least this volume. If it doesn’t, the scanner will not be able to detect and process it correctly.
This is a similar minimum scan volume as its sibling, the Shining 3D Einscan SE, but a larger volume than the Revopoint POP 2 and Revopoint MINI. Smaller minimum scan volumes are best for scanning smaller objects. If that is something you want to primarily focus on, you might want to look at these other two scanners as well.
The maximum scan volume of the Einscan SP is 200x200x200 mm when auto scanning with the turntable. When using the fixed scan mode, you can scan objects that are a maximum of 1200x1200x1200 mm in size.
Interestingly, this volume is significantly larger than the 700x700x700 mm maximum scan volume of the Einscan SE. Since both devices are very similar in hardware, this difference is likely due to software restrictions or optimizations.
One hardware limitation that the Einscan SP does have is that it requires you to position the 3D scanner at a 280 to 490 mm distance from the object you are scanning. While this is a pretty wide range, it can present issues if you want to scan large objects.
At a 490 mm distance, the scanner can only capture sections of 200×150 mm at once, meaning it takes a long time to scan objects close to the maximum scan volume.
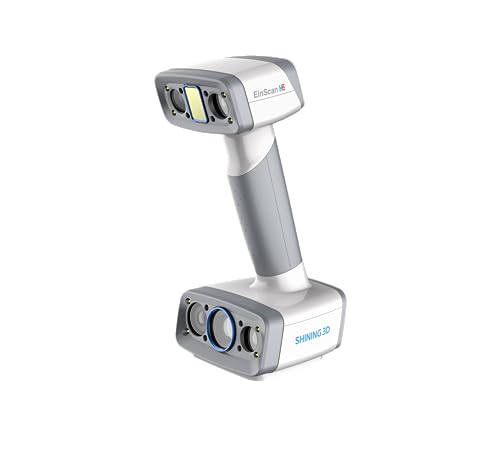
For larger objects, you might be better off anyway with a handheld scanner like the Einscan H or Einscan Pro HD. With a significantly larger capture area, a similar accuracy, and the capability to 3D scan complete bodies and more, they make for better options for 3D scanning larger objects.
That said, the Einscan SP is still a great 3D scanner for most scan needs. And right now, you won’t find a 3D scanner with a larger scan volume at its price point.
Accuracy
One of the biggest differences between the Einscan SP vs SE is the accuracy. At 0.05 mm, it is double the detail of that of the SE (0.10 mm).
I should point out that this number refers to the single shot accuracy. This is the accuracy that you get when taking one scan of an object. To build a 3D model, the software captures multiple scans and stitches them together, which does not result in a model with an accuracy of 0.05 mm.
We haven’t done any hands-on testing of the Einscan SE or side-by-side comparisons of the two scanners, so we have no concrete evidence of whether the final 3D model accuracy of the Einscan SP is (significantly) better than that of the SE.
The claimed double accuracy is somewhat surprising, given that the SP and SE use the same camera and surrounding hardware. However, according to Shining 3D, the accuracy of the SP is better due to improved parts and testing, a better algorithm, and a more accurate metal calibration plate.
Regardless, the accuracy of 3D scanners is not an exact science. The advertised accuracy is often based on ideal scanning conditions that don’t always reflect real-world use. For example, if the object you are scanning has low reflectivity, the scanner will have a harder time capturing accurate data.
The same goes for objects with intricate details or deep shadows. These can also be hard to capture accurately. In our experience, it is often best to scan these objects from multiple angles and in optimal lighting conditions to get the best results.
What we can say about the Einscan SP accuracy, is that compared to the Revopoint POP 2, which also boasts a 0.05 mm accuracy, the Einscan SP captures significantly more detailed models.
How much of this is due to hardware and how much to software, we don’t know. Both devices have their own proprietary software, so it is hard to do an apples-to-apples comparison.
You can see comparison scans of the same 3D model below so that you can judge for yourself.
Einscan SP
Revopoint POP 2
Model

Auto Scan & Fixed Scan
The Shining 3D Einscan SP 3D scanner can be used in two different modes: auto scan and fixed scan.
The auto scan mode is the easiest way of using the desktop 3D scanner. Simply place the object you want to auto scan on the scanner’s turntable and hit the ‘scan’ button in the software. Of course, this assumes that you already have set up the Einscan SP and configured the software.
The scanner will then automatically start scanning the object as the turntable rotates, resulting in a 360-degree capture. There are always some areas that are not scanned, like the underside, and you can capture these with a second capture that gets stitched together with the first one.
You can also use the Einscan SP in fixed scan mode, without the turntable. In this mode, you mount the 3D scanner on the included tripod and position it around the object.
The fixed scan mode requires more effort, but it is the only option for objects that are too big to fit on the turntable (larger than 200 ×200×200 mm) or for fragile objects that you don’t want to move, like ancient artifacts and whatnot.
In our experience, both methods work well. We didn’t run into any issues with stitching or accuracy with either. The auto scan mode is our favorite, however, just because it is the quickest and easiest way to scan objects.
Scan Speed
The Einscan SP boasts a four-second scan speed, which is fast for a desktop 3D scanner. It is half that of the Einscan SE, which requires a minimum time of eight seconds for each capture.
The actual scan speed depends on additional factors, like whether you are capturing texture/color, the number of captures in the scan cycle, and the turntable speed.
In practice, we found the following times for different scan cycles:
- No texture, 8 turntable steps, maximum turntable speed: 46 seconds
- Texture, 16 turntable steps, maximum turntable speed: 1 minute 36 seconds
- No texture, 8 turntable steps, maximum turntable speed: 2 minutes 50 seconds
- Texture, 16 turntable steps, maximum turntable speed: 5 minutes 47 seconds
As you can see, that’s quite some variation, depending on the scan settings. Scanning with texture enabled and increasing the number of turntable steps takes significantly longer.
Now, if you need multiple scan cycles from different angles, you will need to multiply the respective scan times by the number of sets you need. This can quickly become time-consuming, depending on how many angles you want to capture.
Typically, you’ll want 1 or 2 extra cycles to capture the underside of an object or details that were in shadows during the first capture.
The bottom line is that the Einscan SP is a fast desktop 3D scanner, but you will want to plan your captures accordingly to avoid spending too much time scanning. Especially if your goal is to make money with your 3D scans, you will want to be as efficient as possible.
Software
The software of a 3D scanner is essential, and that of the Shining 3D Einscan SP is no exception. The SP uses the same EXScan S software as the Einscan SE and S use. It is only available for Windows, so Mac and Linux users are out of luck.
In our testing of the Einscan SP, we used V3.1.2.0 of the software on Windows 10.
Our first impressions of the software were quite negative. The user interface looks fairly outdated and the controls feel a bit clunky. The software also launches full-screen, stretching and blurring the low-resolution user interface images on the 4k screen we used.
There are no settings in the software to modify the UI or resolution, but you can resize the window to make it smaller. We found this to help with the blurring issue, but the overall look and feel of the software still feel dated.
We also quickly ran into a couple of quirks of the software that are less than ideal.
- If you plug the Einscan SP 3D scanner in when the software is already running, you must restart the software to get it to detect the scanner
- The license activation took a couple of tries, with button clicks not registering and having to restart the software. This was a one-time thing however, and only took up a couple of minutes to fix.
After dealing with this, however, the software was fully functional and stable. What mainly stood out when using the Einscan software is how well the stitching algorithms work.
We did a lot of testing with various objects, both small and large, and the software was nearly always able to create a watertight mesh. Exceptions were times when we scanned objects smaller than the minimum scan volume (like coins or pulleys).
In these cases, the software would not have enough points for the algorithms to work and we would end up with deformed or incomplete meshes. But for the vast majority of our test scans, we were content with the results.
Ease Of Use
Overall, the Einscan software is very intuitive and easy to use. There aren’t any confusing sliders or values that you need to set to process your mesh, as we ran into with the Revopoint software. It’s all just taken care of for you.
The tradeoff is that you have less control over the post-processing settings, but because the algorithms of the Einscan software are so good, we didn’t really miss having those settings.
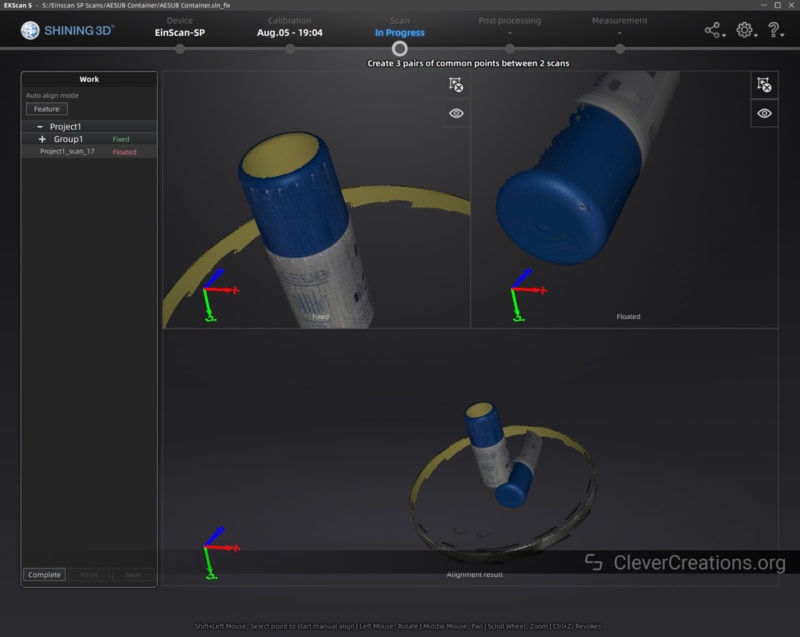
If the software isn’t able to stitch your scans together automatically, there is a neat feature that lets you manually stitch them together by selecting three points that are shared between the two scans. This works alright on larger objects, but it lacks the precision for smaller ones.
Aside from the aforementioned quirks, there are still some other things that could be improved:
- You can’t have spaces in the filenames of exported files.
- We ran into an issue with not being able to select points accurately in the Scan section. The selection tool in the Post processing section does work properly. So if necessary, the latter can be used for cleaning up the results.
- Mesh data is not saved by the software. If you want to store your mesh data, you will have to manually export it as an .asc, .stl, .obj, or .ply file which takes some extra time. There is a reminder to export your mesh data when exiting the software to make sure you don’t forget.
The software also features some practical features, like a button to export your mesh to Geomagic or to Solid Edge (a license for the latter is included with the Einscan SP, but not with the Einscan SE).
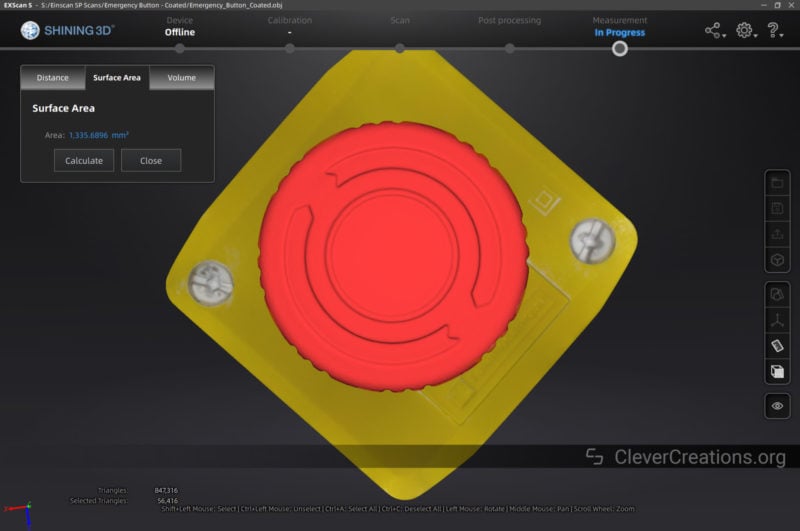
There are also a variety of metrology functions that you can use for reverse engineering purposes. Taking the distance between two points, measuring the surface area, or the total volume of your object is easy to do with a few clicks.
When testing the measurement functions, we couldn’t find any issues with accuracy. In fact, the small inaccuracies that we did run into were more likely caused by the tolerances in our calipers.
Performance
In order to convert the point cloud data from the scanner to usable mesh data, you will greatly benefit from a powerful PC. The setup we used for our testing consisted of an AMD Ryzen 9 3900x CPU, an ASUS TUF 3080 GPU, and 32 GB of DDR4 RAM.
With this setup, converting 48 faces, 7.3 million points, and 14.2 million triangles of scan data into a final mesh of 2.5 million triangles took about 6 minutes and 10 seconds.
Pushing things even further, transforming 96 faces, 12 million points, and 23 million triangles to a 2.5 million triangle final mesh took 8 minutes exactly.
During this time, the CPU was maxed out and the GPU endured a ~33% load. We were happy to see that the software is optimized for multi-core CPUs and could utilize all 24 threads of the 3900x we used.
In that regard, you will benefit from a fast multicore CPU, like those from the Ryzen 9 and the more budget-friendly Ryzen 7 series. A Threadripper CPU would make even quicker work of the post-processing.
The bottom line is that if you want to scan larger objects or save valuable time, a powerful CPU is a worthwhile investment if you will use the Shining 3D Einscan SP a lot.
Stability
No matter how much data we threw at the software, we never experienced any crashes or freezes. The software always chugged along, steadily processing the data into a mesh. The 32 GB of RAM definitely played a part here.
The only times we did have to restart the software was when we plugged in the Einscan SP after starting the software. This is a bit annoying to run into, but since the software doesn’t take too long to start, it was not the end of the world.
Overall, we were very pleased with how easy it was to use the Shining 3D Einscan SP and its software. Despite the software quirks, its simplicity and ability to get results without manual intervention make it a great choice for those who want to quickly and easily scan their objects.
Accessories
While the hardware and software are the most important parts of any 3D scanner, the accessories can also make a difference in terms of how easy it is to use the device and how much time you’ll spend getting results.
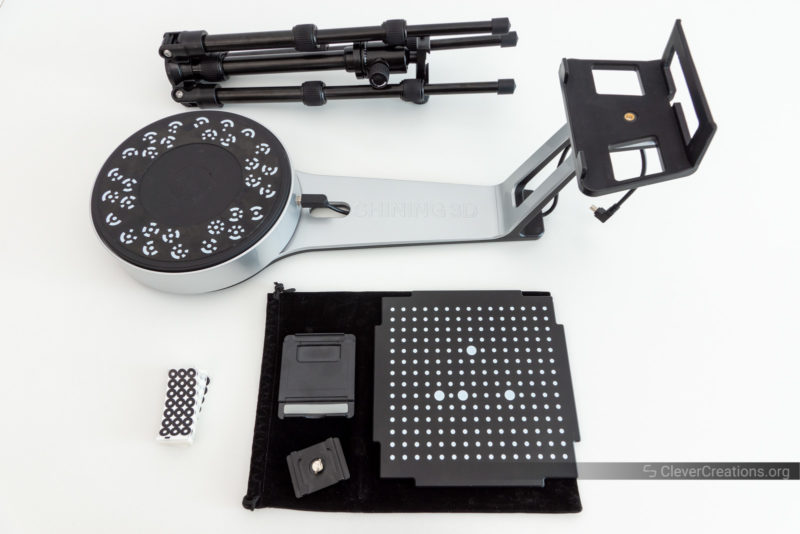
The Shining 3D Einscan SP does not come with a lot of accessories. This is what you’ll find included:
Turntable
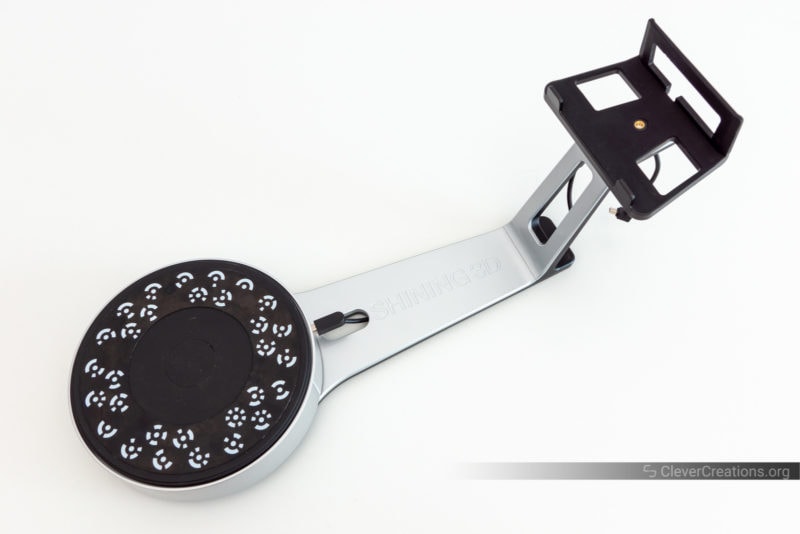
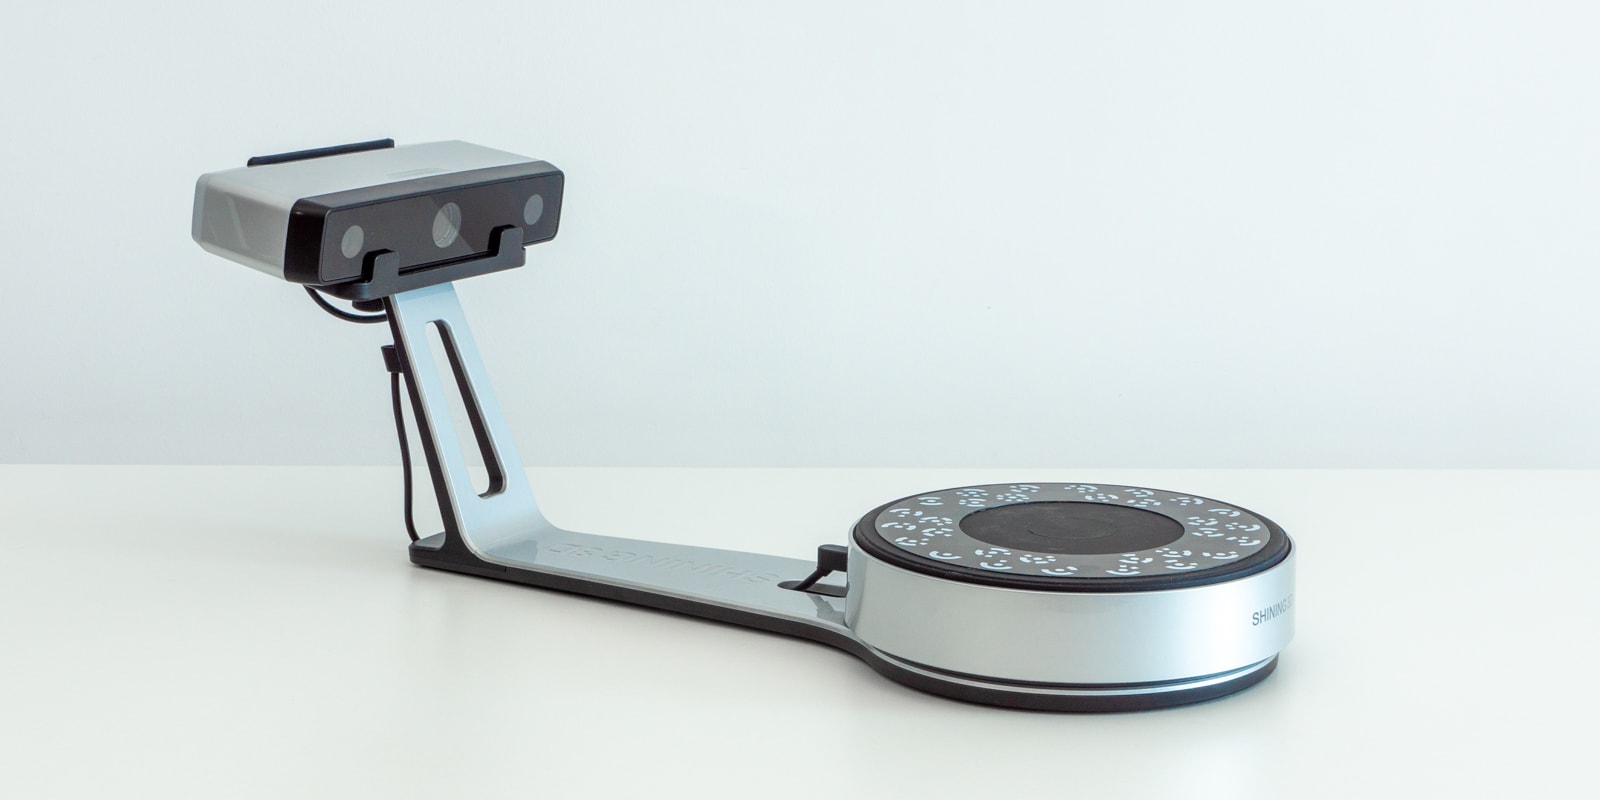
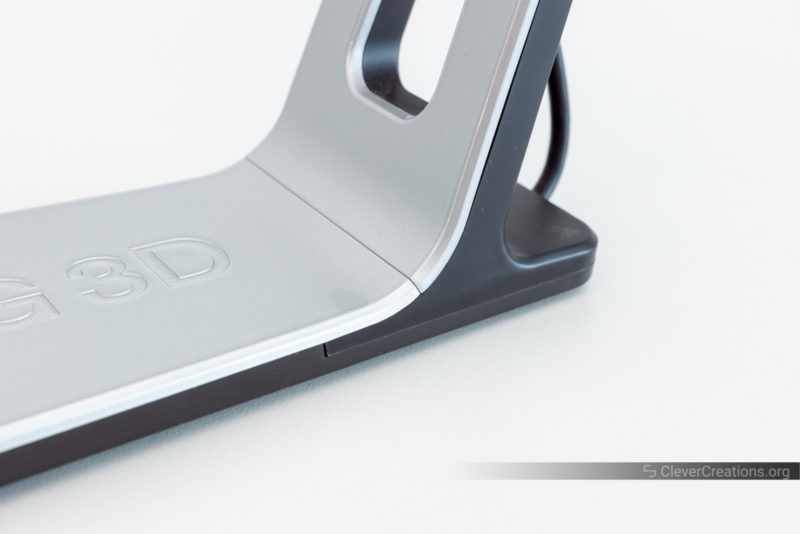
The automatic turntable of the Einscan SP is its largest and most useful accessory. Its purpose is to automatically rotate your object at specific moments to create a complete 360-degree scan. This is very helpful, as you won’t have to manually rotate your object or scanner during the scanning process.
The way it is built, the turntable holds the Einscan SP scanner head at an optimal distance from the rotating platform (about 38 cm from the center). This makes it a lot easier to use than a loose turntable, as you won’t have to deal with positioning the scanner at the correct distance from the object.
Angling the scanner head up and down to adjust for tall or flat objects is a bit more tricky. The mount for the head is friction-based, so it’s easy to accidentally move it out of position when you’re trying to make an adjustment.
That said, when dealing with large or oddly-shaped objects, you might want to use the tripod anyway. This also lets you scan from steeper angles, giving you the opportunity to capture data that you would miss with the turntable.
Another nice thing about the turntable is that it is fully controlled by software. It does not rotate continuously, but instead, it only moves in between scans. This means that the software can precisely capture the data it needs every n degrees of rotation.
This gives you a lot more control over your scanning data, as you can choose to add more or fewer scans depending on the detail you want to capture. It also removes the issue of capturing too much overlapping scan data.
The latter is something we ran into while testing the Revopoint POP 2. Accidentally leaving it scanning for an extra turntable revolution would capture an extra set of data that would cause issues.
The Einscan software algorithms are way better at dealing with overlapping data, so this isn’t as much of an issue anyway. But it’s still nice to have more precise control over the scanning input with the Einscan SP turntable.
Tripod
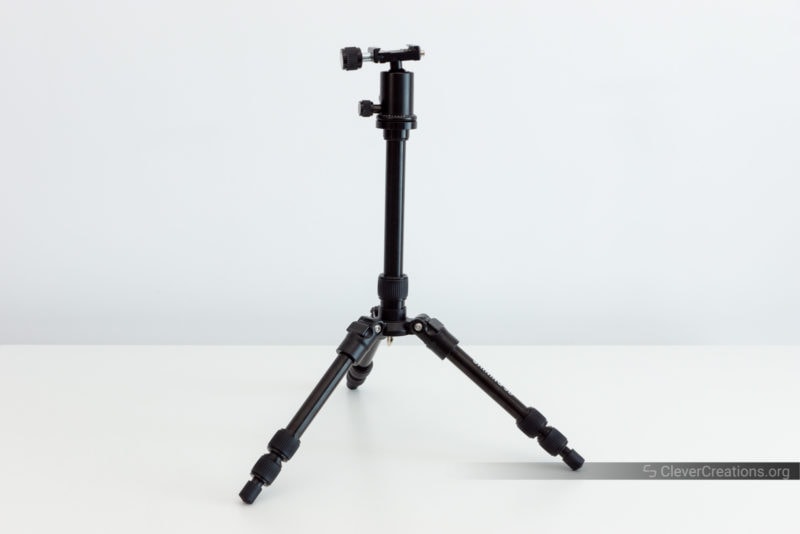
As mentioned above, the tripod is very helpful for scanning large and oddly-shaped objects on a manual turntable. Its usefulness comes from the fact that it lets you position the Shining 3D Einscan SP scanner head in higher positions or at alternate angles from the turntable. For this, you’ll need to use the fixed scan mode.
The tripod’s build quality is pretty good. It actually has some weight to it and it feels like it is built to last. No loose parts or wobbly joints, and it’s good enough to use for other purposes when it is not in use for 3D scanning. Its quick-release has a standard 1/4-20 UNC tripod thread, so you can mount all kinds of devices on it.
The only thing we didn’t like about the tripod is that it is a bit short. At its maximum height, it is only 70 cm tall. With a maximum scan height of 120 cm for the Einscan SP, you might run into some limitations if your objects are on the taller side.
In that regard, a compact K&F or Manfrotto tripod will be a better solution. They are relatively affordable and offer you a larger height range, easier adjustability, and a better quick-release system.
The included tripod is still perfectly usable, however, and it will serve most users just fine.
Calibration Board
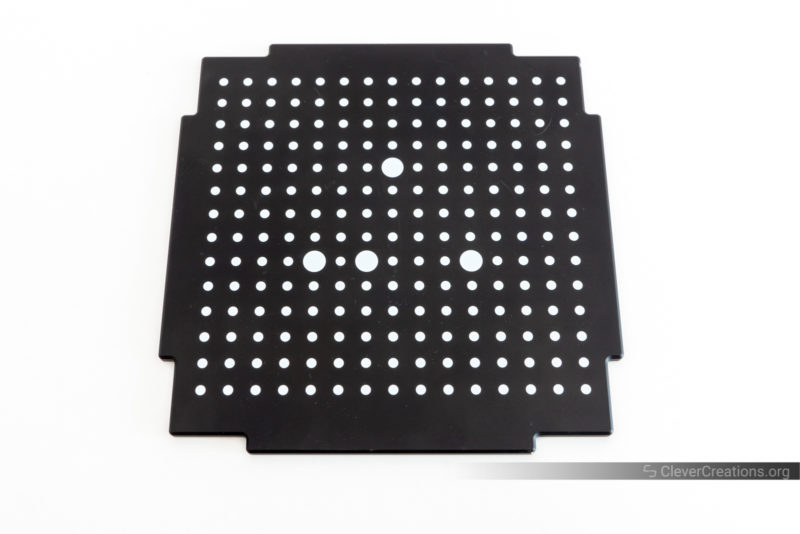
The calibration board of the Shining 3D Einscan SP does what it is supposed to. It is a durable painted ceramic or metal plate that is built to last. There isn’t too much more to say about it.
Compared to the foam calibration board of the Einscan SE, you can expect it to hold up better over time. But if you take care of the foam board, it will serve you just as well.
Reference Marker Stickers
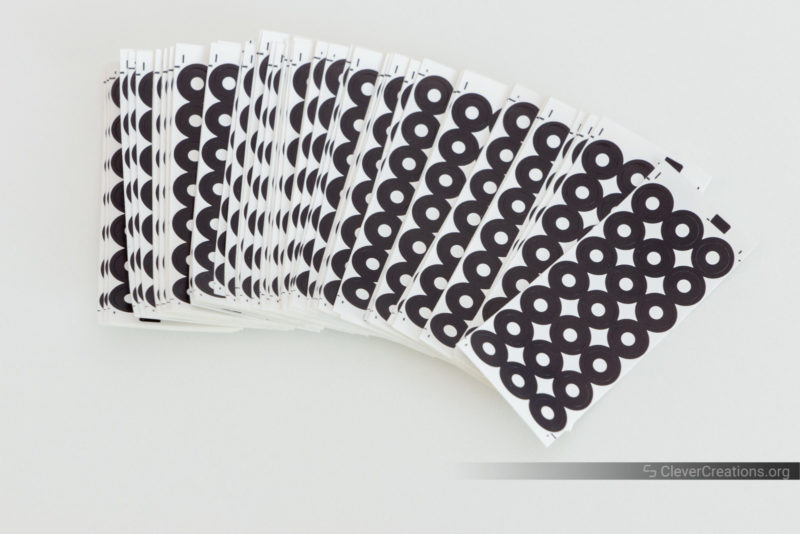
With some objects, you will need to use some kind of reference marker stickers to ensure proper tracking and registration of your 3D model. These are usually small black stickers with a white dot in the center that you place on strategic positions of your object.
The Einscan SP comes with a large bundle of these markers. They are very thin stickers that you can easily peel off and stick on your object. They are also very small, which is important because you don’t want to spend a lot of time removing them in your final digital model.
The tracking dots are most useful for objects without distinguishable features, like large plain surfaces or a cube with similar faces.
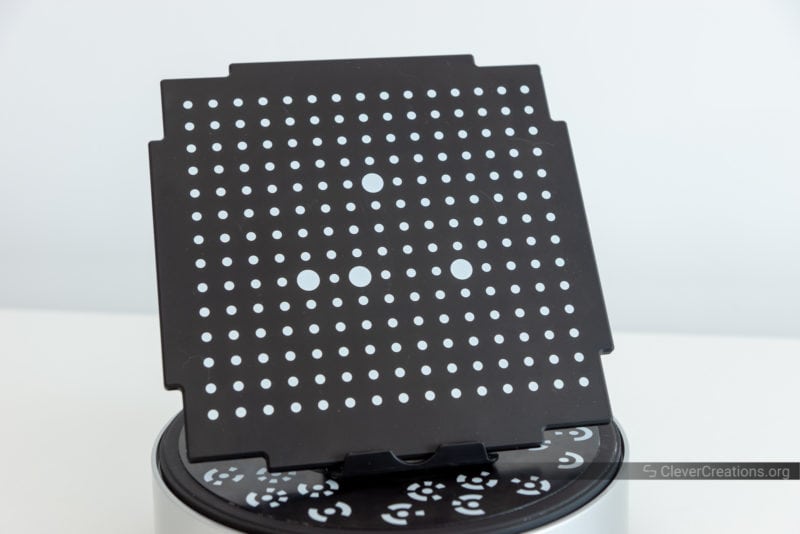
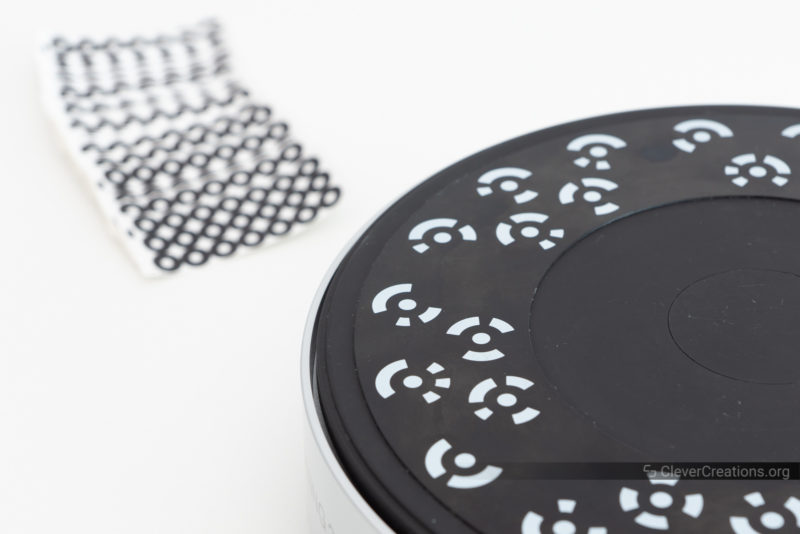
When using the turntable, you can use the 12-bit coded targets that are placed on the surface of the turntable for tracking instead. To enable this, you’ll need to select the ‘turntable coded target alignment’ in the 3D scan settings.
When enabled, each time the turntable rotates, the software will use the information from the coded targets to precisely register each new scan with the previous ones. This results in improved tracking performance and registration quality. You can only do this with the Einscan SP 3D scanner, as the Einscan SE does not support it.
While the Shining 3D Einscan SP comes with everything you need, it still feels a bit lacking in accessories. We would have loved to see at least a demo scan object included in the box. A container of 3D scanning spray would have been nice too, even though a pressurized container might present some issues with shipping.
For comparison, the premium package of the Revopoint POP 2, which supports both turntable and handheld operations, comes with a lot more. It includes not only a calibration board and tracker dot markers, but also a tripod, phone holder, carrying case, power bank, small statue, and a portable turntable. All of this at around $900.
While the Einscan SP is clearly superior in terms of scanning results and software, it does feel like the competition is starting to catch up a bit. If (or when) the competition’s software catches up in the future, it might become difficult to justify the premium price of the Einscan SP.
Build Quality
The build quality of the Shining 3D Einscan SP is nothing special. Both the scanner head and turntable are, aside from the electronics components, made entirely of plastic. At this price point, that does feel a bit cheap.
Despite that, the device will last you a long time if you take care of it. During regular use, it won’t see any wear and tear. But if you drop it or bang it against something hard, it is likely to endure damage.
The Einscan SP does not come with a storage or transport case, so if you need to move it around a lot, it is a good idea to keep the original box along with its foam inserts.
Our unit was a review unit, which from the looks of it saw quite a bit of use. While it still worked well, we also know that Shining 3D made sure to send us a working unit, so it is hard to say how well the device holds up over time in the real world.
Tips
To get the best results with the Einscan SP, Einscan SE, or any other structured light scanner, there are several things you can do. These especially apply if you want to 3D scan dark or reflective surfaces.
- Remove as much environmental light from the room as possible. This includes sunlight, artificial light, and reflections from nearby surfaces. Using a scanning area that is as dark as possible will help the scanner to more easily see the projected patterns.
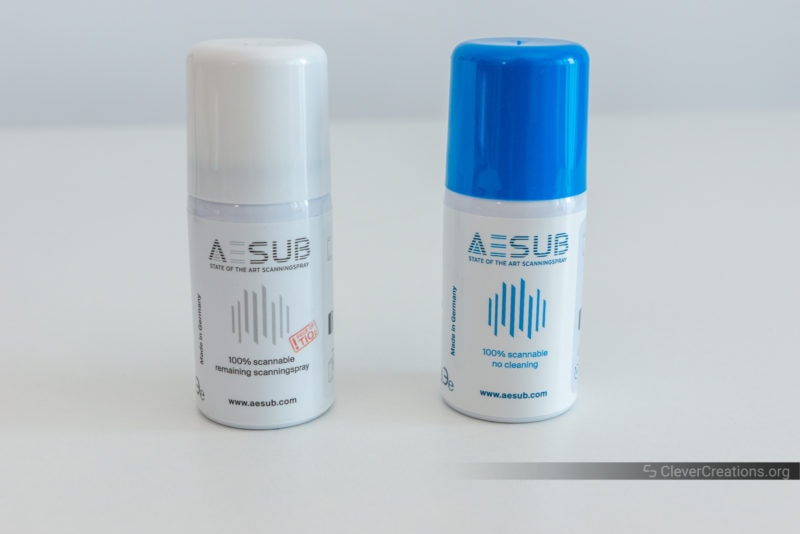
- For black or shiny surfaces, apply a 3D scanning spray such as AESUB scanning spray. You can also use baby powder or cornstarch for this purpose, but that gets messier. The spray or powder will help the scanner to see the surface better by letting it reflect the scanner’s light properly.
- When starting, be patient and learn how to get the best results. There is a learning curve for these types of scanners, and it can take some time to get the hang of it. But once you do, you’ll be able to produce amazing results.
- If you want to save valuable time, make sure to dial in the scan settings and use a powerful PC to convert the point cloud data to mesh data. In the long run, this will make a big difference. If you want to use the Einscan SP or Einscan SE for professional purposes, this is the way to go.
Einscan SP 3D Scan Results
3M Respirator Cartridge
We were very impressed by this scan. The Einscan SP picked up a lot of detail at the grill at the top. Even the leftover bit in the center where the injection molding sprue was attached is included in the model. Surprisingly, all black text and the large black label on the back were captured without issues too.
Emergency Button
We used AESUB scanning spray on the black shaft (under the red button) of this emergency button, as well as on the two reflective bolts on the top. Our first attempt was without spray, but that lead to those sections not being captured properly.
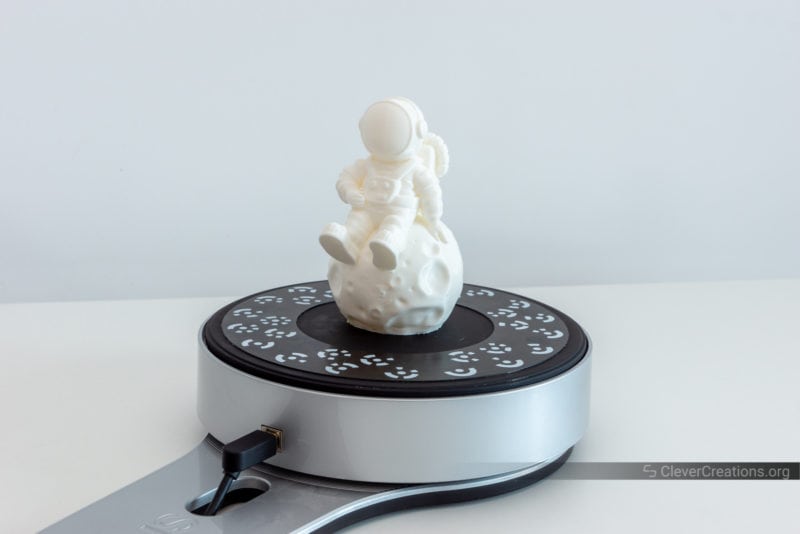
Astronaut 3D Print
This a 3D scan of an astronaut we printed during our Sermoon V1 Pro review. You can see a bunch of artifacts on the moon. Those are actually leftover support material from the printing process that we were not able to remove from the print. Along with those, the Einscan SP also captured the horizontal layer lines in the print. Again, super impressive!
Pear
The texture of this pear is a bit blurry, despite being processed at the highest quality. A couple of white spots due to the reflectiveness of the surface as well. Still a perfectly usable 3D model, however.
Funko Pop
Here is another model that we scanned both with the Einscan SP and the Revopoint POP 2. The SP version looks a lot cleaner, with more detail and less artifacts (see the legs). The POP 2 version was manually processed and smoothed after scanning, whereas the other was only touched by the Einscan software algorithm. The one from the Einscan SP does have some small surface imperfections, but manually smoothing would take care of these.
Einscan SP
POP 2
Alternatives to the Einscan SP
At the moment, Shining 3D is the only manufacturer of desktop 3D scanners in the $1000-$2500 price range. This makes it hard to find a true competitor to the EinScan SP or Einscan SE, but also an easy purchasing decision if this is the exact budget you have in mind.
Several new manufacturers have recently joined the desktop 3D scanner market, like Revopoint and Creality, but their products can be put in the sub-$1000 category.
While the software implementations of the competitors are not as good as that of Shining 3D, their products might still be worth looking at for you. Depending on your needs, their 3D scanners could still be a good option. Not to mention, the software is something that is continuously updated over time, so these products will improve in that aspect.
Einscan SP vs SE
First and foremost, let’s compare the Shining 3D Einscan SP 3D scanner to the Einscan SE. At about half the price, the Einscan SE looks like a great alternative to the SP version. But is it?
The SE uses roughly the same scanning hardware as the SP, and most differences in specifications seem to be due to artificial limitations in the software and firmware.
Most evident is the doubled single scan accuracy of the SP (0.05 mm vs 0.1 mm), and the increased maximum fixed scan volume of the SP (1200x1200x1200 mm vs 700x700x700 mm).
While we can’t say for sure if the real-life scan performance of the Einscan SP is twice as accurate as the Einscan SE, the increased scanning volume is certainly welcome for users who want to scan larger objects.
The SP also features double the scanning speed of the Einscan SE. If you are looking for a desktop 3D scanner for professional purposes, this will save you a lot of time (i.e. money).
Lastly, there are the ‘turntable coded targets aligning mode’ for the SP, a more durable calibration board, and the inclusion of a Solid Edge license. Small differences compared to the other ones, but still relevant for some users.
So, if you are looking for the best possible performance in a desktop 3D scanner and can afford it, go for the SP version. If not, the Einscan SE is still a great option that will save you some money.

| Einscan SE vs SP | Einscan SE | Einscan SP |
|---|---|---|
| Price | Amazon | Amazon |
| Accuracy | ≤0.10 mm | ≤0.05 mm |
| Range of Single Capture | 200×150 mm | 200×150 mm |
| Minimum Scan Volume | 30x30x30 mm | 30x30x30 mm |
| Maximum Scan Volume | 200x200x200 mm in Auto Scan 700x700x700 mm in Fixed Scan |
200x200x200 mm in Auto Scan 1200x1200x1200 mm in Fixed Scan |
| Light Source | White Structured Light | White Structured Light |
| Scan Speed | ~8s | ~4s |
| Point Distance | 0.17 mm – 0.2 mm | 0.17 mm – 0.2 mm |
| Texture Scan | Yes | Yes |
| File Format | OBJ, STL, ASC, PLY | OBJ, STL, ASC, PLY |
| Power Supply | 40 W | 40 W |
| Input Voltage | DC: 12V, 3.33A | DC: 12V, 3.33A |
| Turntable | Turntable | Turntable with markers |
| Load Capacity of Turntable | 5 kg | 5 kg |
| Weight (unpacked) | 4.2 kg | 4.2 kg |
| Weight (packed) | 7.0 kg | 7.0 kg |
| Dimension | 570x210x210 mm | 570x210x210 mm |
Einscan H
The next step up in Shining 3D’s line-up is the Einscan H. It’s a handheld scanner that is best used for things like artwork, furniture, and other large objects.
The Einscan H is especially useful for bodies, as it uses both visible light and infrared light. This makes it better to scan dark surfaces, like hair.
It’s about as accurate as the Einscan SP 3D scanner but much faster, partially because it’s able to capture 420×440 mm at a time.
At more than double the price of the Shining 3D Einscan SP, the $5000 Einscan H is not for everyone. Especially considering you’ll need to pay extra for an automatic turntable accessory if you are interested in one.
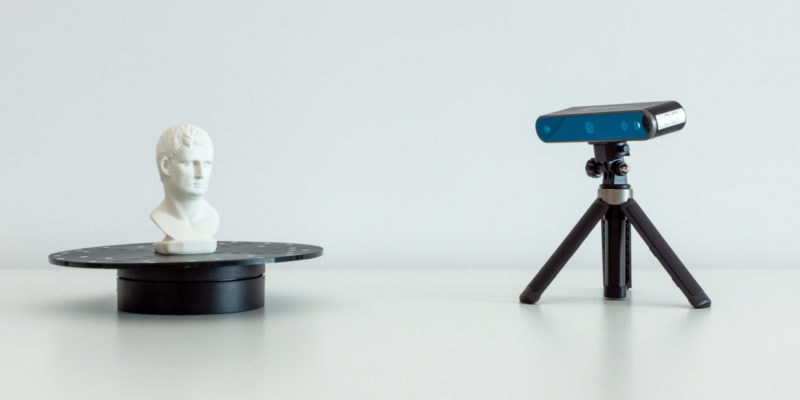
Revopoint POP 2
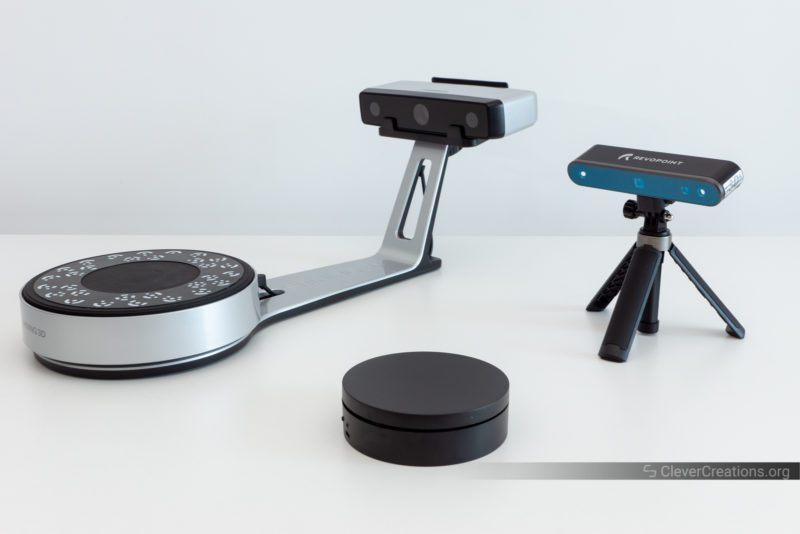
The Revopoint POP 2 is a more affordable ($800-$900 depending on the package) 3D scanner that you can use both with a turntable and in handheld mode.
Its claimed single scan accuracy is the same the Shining 3D Einscan SP offers, but in practice we found it to be less accurate.
On the software side, there is still a lot to be desired as well. You will spend a good amount of time cleaning up scan data and resolving stitching issues. With the Einscan SP and SE, nearly all of that is taken care of for you by the Einscan software.
Despite that, the Revopoint POP 2 is still perfectly capable of delivering high-quality scans. You’ll just have to put in a bit more work to get there.
At about 40% of the price, the Revopoint POP 2 is the superior option for most hobbyists. When there is money involved, however, the ease of use and quick scanning of the Einscan SP make it the better choice for professionals.
Others
Other options you could look at are the latest Creality scanners, the CR-Scan Lizard and the CR-Scan 01. We haven’t had any hands-on experience with either of them, but despite being similarly priced, we couldn’t find any information that indicates them to be better than the Revopoint options.
Alternatively, the iPhone 12 Pro (Max) and iPhone 13 Pro (Max) could be valid solutions for some people. Their built-in LiDAR scanning isn’t as accurate as a dedicated 3D scanner, but it is certainly enough for some use cases.
Conclusion: Is the Einscan SP Worth the Money?
Whether the Shining 3D Einscan SP is worth buying for you depends mainly on your use case. If you are a hobbyist who wants to scan small to medium-sized objects, you will be better off with the less expensive Einscan SE or even the Revopoint POP 2.
On the other hand, if you are a professional in the market for a desktop 3D scanner, the Einscan SP is the best, but also the only option in the $1500-$2500 segment.
Despite its shortcomings (outdated software, limited accessories, no handheld option), it is worth the money if you need the high resolution and speed. The ease of getting quality results in a short amount of time is very valuable for professionals. The Einscan SP offers exactly that.
The Einscan SE is a more affordable version, but its low scanning speed and software limitations make it a less appealing option for those who need to scan more frequently.
If you are looking to scan faces, bodies, furniture, or other large objects, you will be better off with the Einscan H. It’s more expensive but also more versatile and faster.
While new manufacturers are emerging and the technology is constantly evolving, Shining 3D is still a couple of years ahead of the competition. So for that reason, we can say their Einscan SP 3D scanner is still the best desktop 3D scanner in 2022.

There is ways to increase the performance and scan range and scan overhall area and detail. By simply changing manualy some variavles on an config file in einscan software.
Also if you give to chatgpt or ai to describe it will be easy to play with some software tweaks that is safe for the hardware.