
- Excellent scan results for the price
- Remote operation through Wi-Fi
- Comes with a wide range of practical accessories
- High build quality
- Solid customer service
- Software is not beginner-friendly
- Underdeveloped stitching algorithms
- No Linux-compatible software
- Depending on the object, good scan results can take some time
Revopoint launched the original POP in 2020 as a Kickstarter project. Boasting a variety of features not seen before in budget 3D scanners, it quickly caught the attention of 3D scanning enthusiasts. However, it’s unpolished software at launch prevented it from becoming a mainstream success.
The Revopoint POP 2 promises better scanning precision and with its improved software attempts to bring true low-cost 3D scanning to the masses. Whether this new and improved model lives up to the hype is what we’ll be finding out today.
In this Revopoint POP 2 review, we’ll take a look at all the upgraded hardware, new features, and scan results to see how it stacks up against both its predecessor and the competition.
Revopoint POP 2 Specifications
Micro-structured IR light
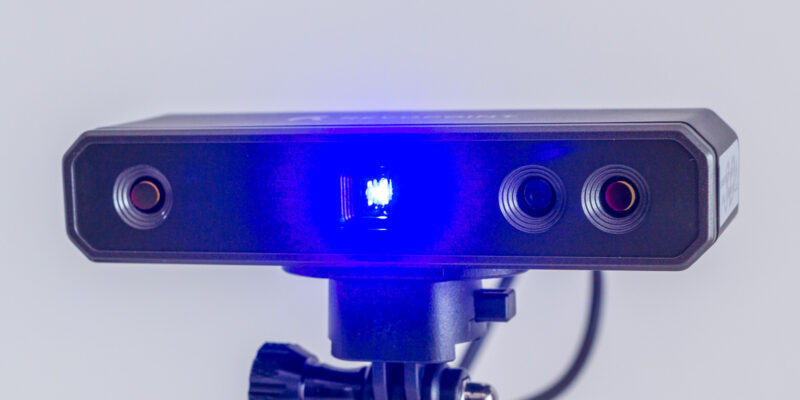
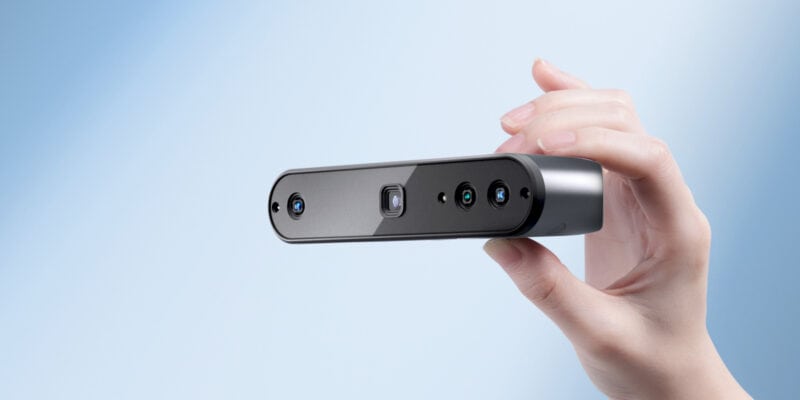
The Revopoint POP 2 boasts 3D scanning through the aid of binocular micro-structured light and its proprietary micro projecting chip. What this essentially means is that it uses an infrared projector to create a pattern on the object in front of it. To capture the position of that object, the POP 2 has two IR cameras (one on either side) that capture this light.
Manual and Turntable Operation
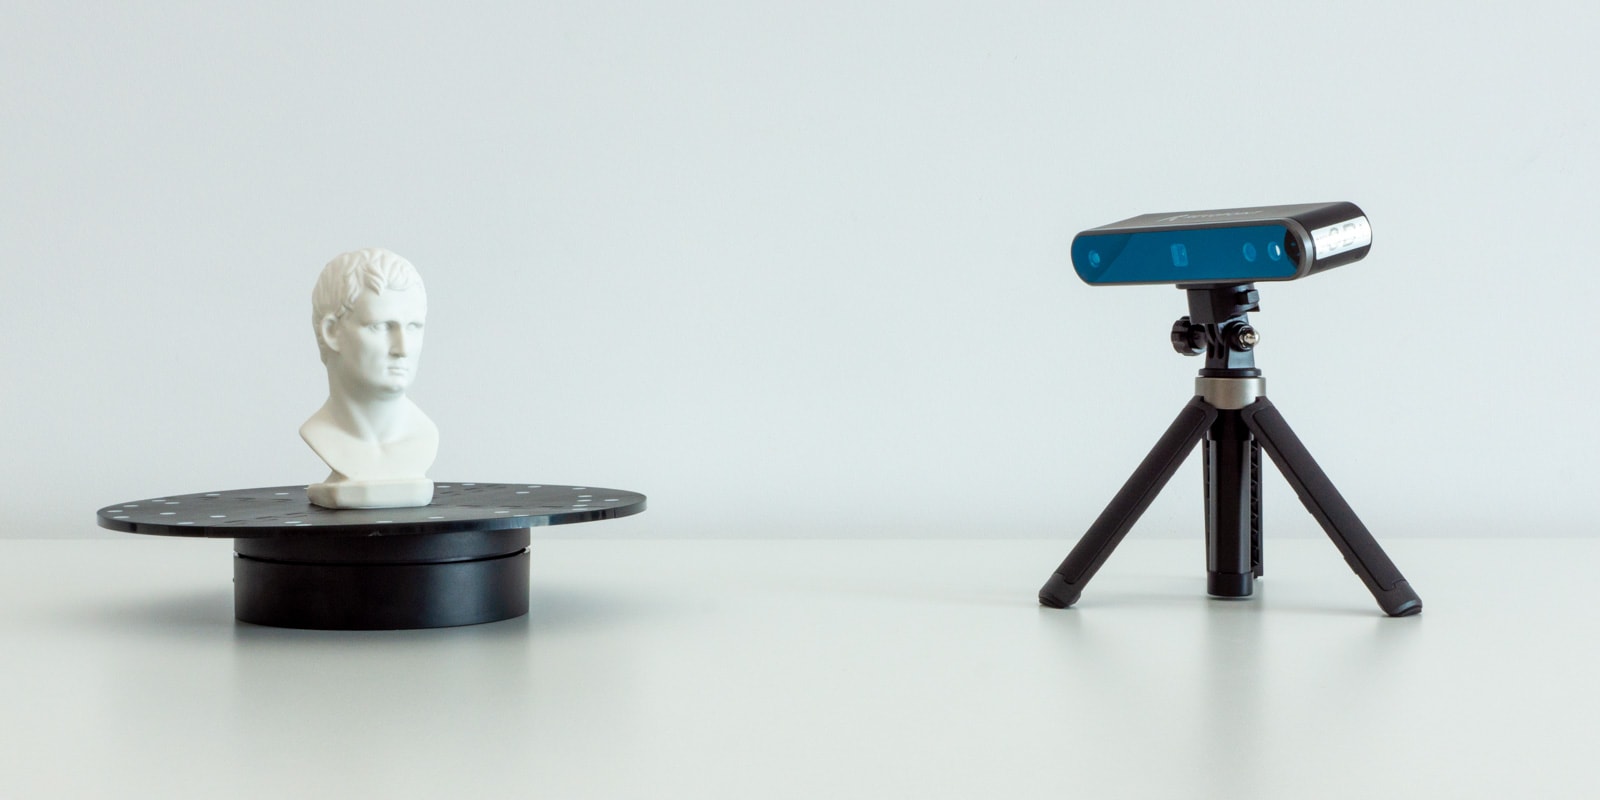
The POP 2 works with both handheld scanning and with a turntable. The turntable gives you the option to automate a part of your scanning, but with the handheld mode, you can scan large objects that don’t fit on the turntable.
It must be said that in our testing, the turntable gave better results than handheld scanning. Both gave high precision scans, but handheld mode tends to lose track of the object more. The turntable, on the other hand, keeps better track and ultimately helps reduce stitching errors.
Precision
The POP 2 is listed as having a precision of 0.05 mm on single frames and 0.15 mm in point cloud data. This data is acquired in a lab environment, however, and you can expect the real-world precision you get with the POP 2 to be a bit less. Or at least in our testing, we found this to be the case.
Regardless, the precision is enough to capture most details. However, if you plan on scanning something with really small features, you will be better off with a different 3D scanner. But given that there aren’t really any 3D scanners that offer higher detail at this price point, you’ll have to be ready to shell out more money.
One 3D scanner that boasts a higher precision is the Revopoint MINI. With its 0.05 mm point distance and 0.02 mm precision, it offers higher detail scans than the POP 2, albeit with some tradeoffs.
Scan Volume
You can use the POP 2 3D scanner for objects with a minimum scan volume of 20x20x20 mm. This is a significant improvement over the original POP scanner, which was only capable of working with objects with a 30x30x30 mm volume.
The recommended scanning distance is between 150 mm and 400 mm, which we indeed did find to be the sweet spot for getting both high precision scans as well as good scan coverage.
High Frequency Updating
The Revopoint POP 2 comes with a scanning frame rate of 10 fps. Combined with the responsive software, this means that there is no noticeable lag to deal with during scanning.
Full-Color Scanning
One cool feature of the Revopoint POP 2 is that it has a texture scanning mode for generating color-accurate scanned models. Or in different words, you can capture full-color models without the need for an additional external camera.
If you are into creating assets for games, VR, or AR, this is a significant time-saver. Or if you just want to have a model with realistic colors, the POP 2 is an excellent way to achieve that.
Built-in Wi-Fi
Because the POP 2 has built-in Wi-Fi, you can use it in combination with your phone (iOS/Android) to 3D scan wirelessly. There is no need to be tethered to a computer or laptop. This gives you the freedom to move around while 3D scanning and makes it easier to scan objects with a large volume.
| Revopoint POP 2 Specs | |
|---|---|
| Price | Revopoint | Amazon |
| Technology | Dual camera infrared structured light |
| CPU | Dual core ARM Cortex-A7 |
| Single capture precision | Up to 0.05mm |
| Single capture range | 210mm x 130mm |
| Working distance | 150 ~ 400 mm |
| Minimum scan volume | 20x20x20 (mm) |
| Scan speed | Up to 10 fps |
| Light source | 1 class infrared Laser 1 |
| Alignment | Feature, marker and color |
| Hardware triggering button | Yes |
| Output format | PLY, OBJ, STL |
| Texture scan | Yes |
| Scanner weight | 195 grams |
| Dimensions | 154.6 x 38.2 x 25.6 (mm) |
| Printable data output | Able to export 3D model directly to 3D printing |
| Required computer configurations | Windows 8/10, 64-bit, Android, iOS, MAC |
| Wi-Fi & Bluetooth | 2.4GHz |
| Connector Type | Micro USB |
Unboxing the Revopoint POP 2 3D Scanner
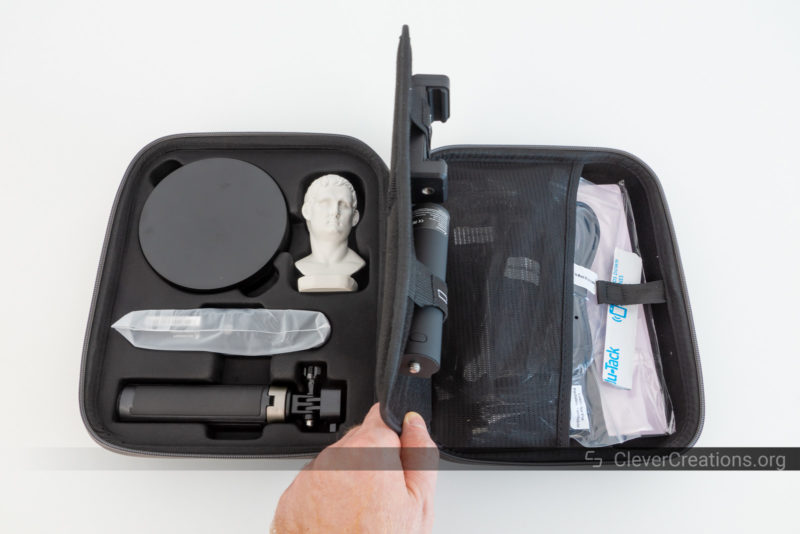
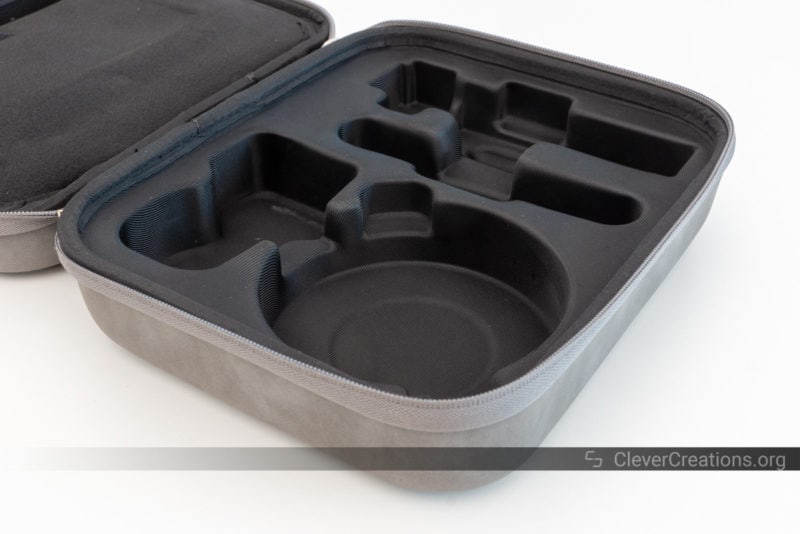
Unboxing the Revopoint POP 2 3D scanner is a fairly straightforward affair. The scanner itself is well-protected in the carrying case, and all the accessories are stored neatly in their own compartments.
We should point out here that Revopoint sent us the POP 2 premium package to review. Compared to the standard package, the premium package includes a variety of accessories (including the carrying case) that are not included in the cheaper standard option.
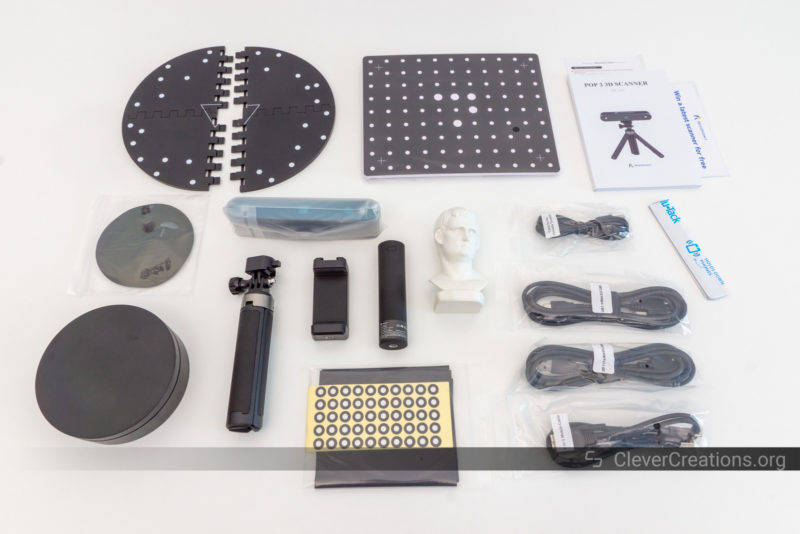
In the list below, the items that are only included in the premium package are highlighted in bold.
- POP 2 3D scanner
- Tripod
- Quick setup kits
- USB A/C cables
- Phone holder
- 2-in-1 mobile cable
- Calibration board
- Tracking dot markers
- Sample Sculpture
- Strip of Blu Tack
- Carrying case
- Power bank
- Portable turntable
Both packages include everything you need to get started with 3D scanning, with the obvious exception being a computer or phone to capture the scanning data. The standard package does not include the carrying case, power bank, or portable turntable, but those are all fairly optional accessories.
We will cover all accessories in more detail later on in this Revopoint POP 2 review. For now, let’s take a closer look at the 3D scanner itself.
Getting Started with the Revopoint POP 2
If the Revopoint POP 2 is your first 3D scanner, you might be wondering how to get started. Luckily, the setup process is relatively straightforward and Revopoint has put together a comprehensive getting started guide. However, there are a couple of things to be aware of when it comes to working with 3D scanners like the POP 2.
Setting Expectations
A common misconception is that people can point the Revopoint POP 2 or similar 3D scanners at any object and end up with a quality scan. Unfortunately, that is not the case.
The main limitation is the light that the scanner emits onto objects. It has a relatively low brightness, and as a result, nearly all of the light that reaches dark surfaces is absorbed. The direct consequence of this is that the 3D scanner will have a very difficult time scanning anything that is dark.
Similarly, highly reflective objects can also pose problems. Reflections cause the infrared light to scatter in all directions, also making it difficult for the 3D scanner to detect any specific points in space.
This does not mean that it is impossible to scan dark or reflective objects. There are ways to work around these limitations (which we will cover in more detail later on).
For now, just keep in mind that high-quality scans are possible with many types of objects, but some will require a bit of preparation.
Now that we have set expectations, let’s see what the actual scanning process with the Revopoint POP 2 is like.
Your First Scan
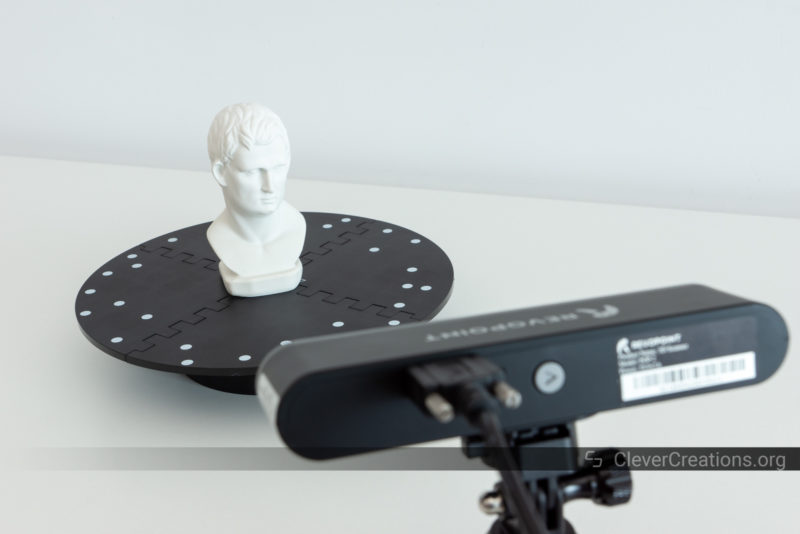
Given the limitations that we have outlined above, you won’t be surprised that the Revopoint POP 2 comes with a white statue to start your first scan with. The statue is a good size for the scanner to work with (around 11 cm / 4″ tall) and has sufficient details, but it also has a straightforward shape without dark or reflective surfaces.
Setup
The first step in scanning with the Revopoint POP 2 3D scanner is to install the Revo Scan software. There are options for nearly all modern systems: Windows, Mac, iOS, and Android. We used the Windows version, and therefore all screenshots you see below are from the Windows interface.
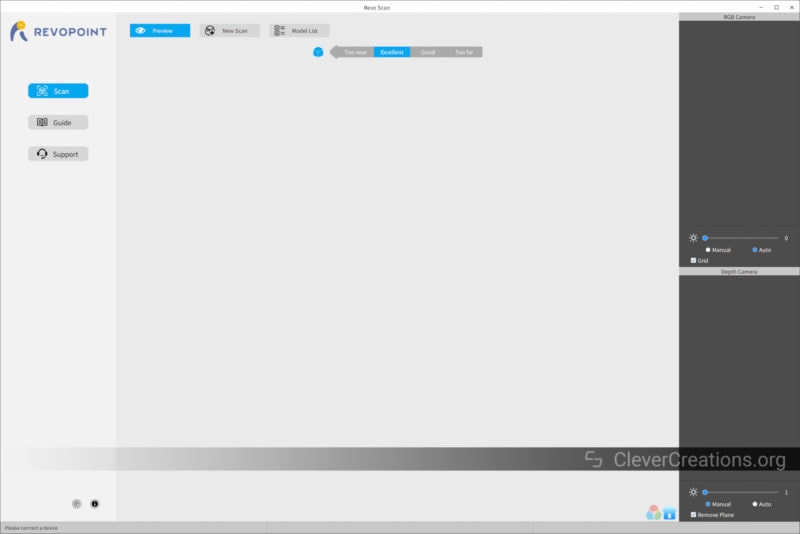
Once you have installed and launched the Revo Scan software, you are presented with a simple interface. The interface is designed to be as user-friendly as possible and has been intuitive in our experience.
At this point, you might want to prep your object and place it in the right position relative to the scanner. To scan the white statue, place it in front of the POP 2, either on a flat surface or on the included turntable.

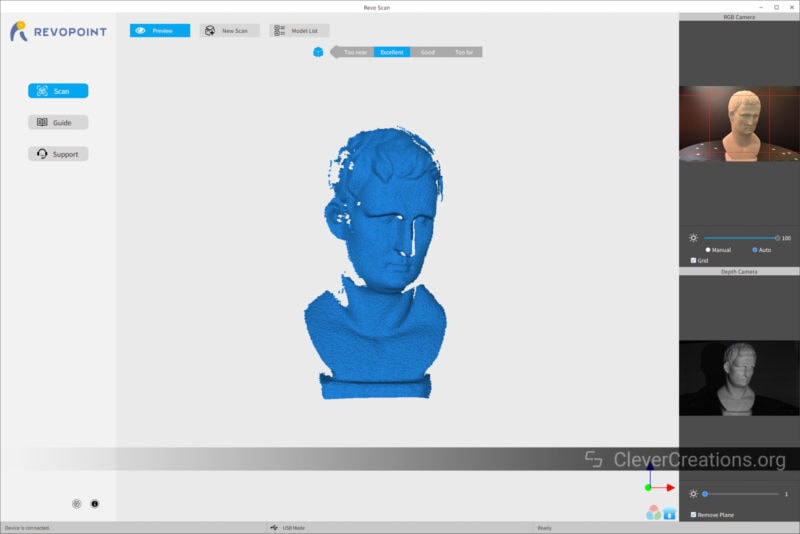
During setup and scanning, it is important to ensure that the range indicator in the software indicates ‘Excellent’. This is an indication that the scanner is at the right distance from the object and will result in the best possible scan.
To start the scan, simply click on the “New Scan” button. This will prompt you to create a new project and lets you select a variety of settings.
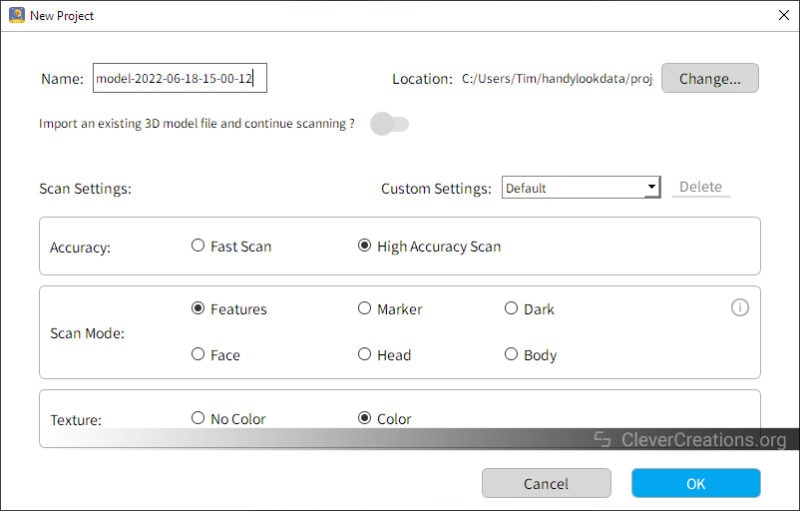
These settings are all explained in detail in the manual. In short, the ‘Accuracy’ setting lets you select the scan speed. A fast scan results in a faster scan with decreased accuracy, whereas a high accuracy scan gives you higher precision with a reduced scan speed. We haven’t ever found the need to use the ‘Fast Scan’ mode. The high-precision scanning mode is vastly superior.
The ‘Scan Mode’ section lets you choose between a variety of special object scanning modes depending on the object you are scanning. This helps the scanner know what to look for when scanning specific things, like a face, a head, or a particularly dark object.
Lastly, the Color/No Color setting allows you to store color data in the scanned model. It is important to point out that if you plan on exporting STL files for 3D printing, the color data is not exported. It is only included when exporting PLY and OBJ file formats.
Scanning
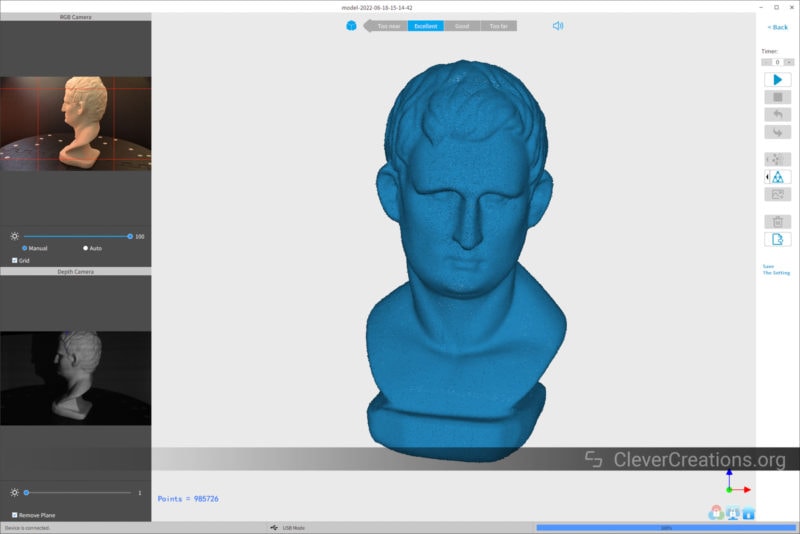
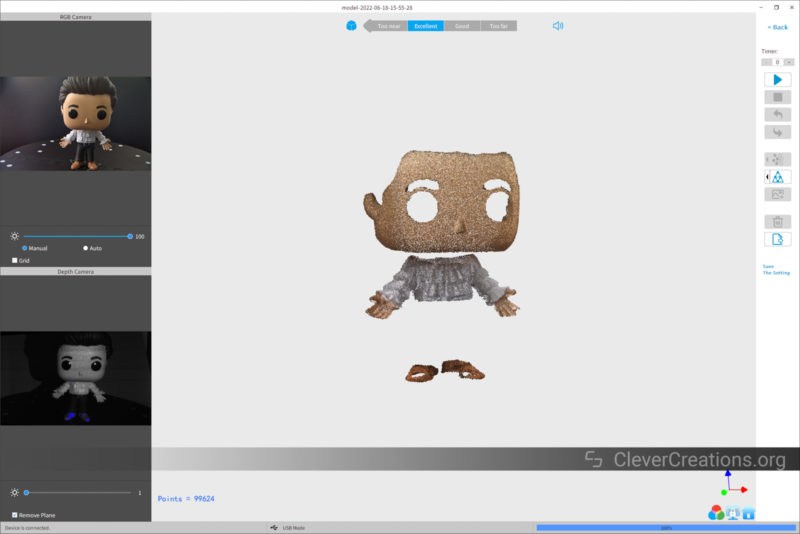
Once you have set up the object and configured the scan settings, click ‘OK’. You are now taken to the scanning interface. This is where the real magic happens.
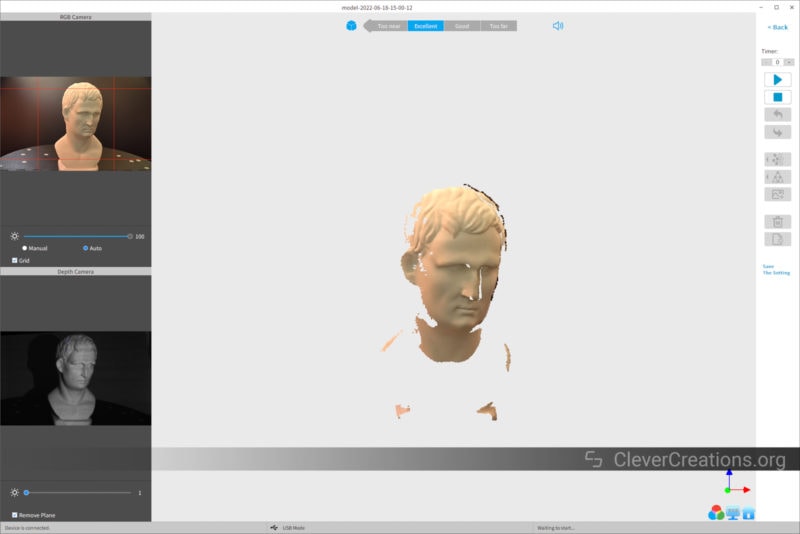
When clicking ‘Start’ (or pressing the spacebar), you will notice that the software automatically starts capturing point cloud data of your object. You can stitch this point cloud together later to create a 3D model of the object.
The point cloud data on the screen updates a couple of times per second. This lets you see in real-time what the scanner ‘sees’. If there are any areas that aren’t captured yet, you can slowly move the scanner around to ensure that those areas are also scanned.
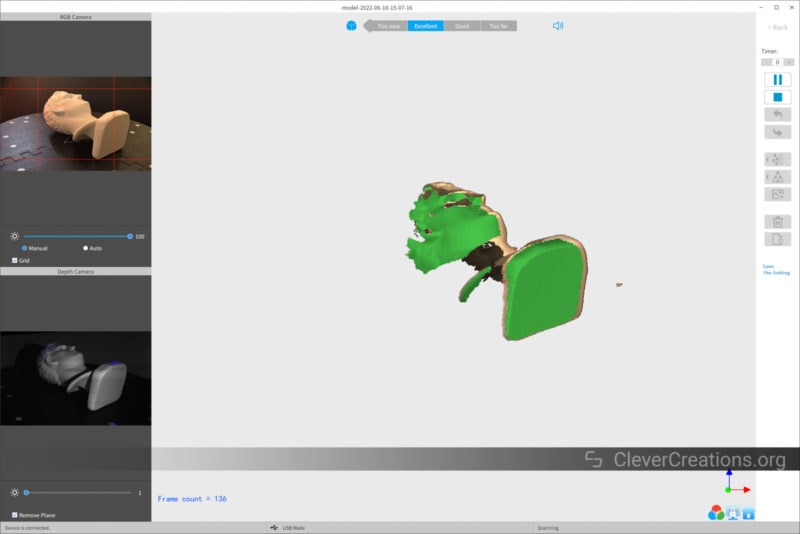
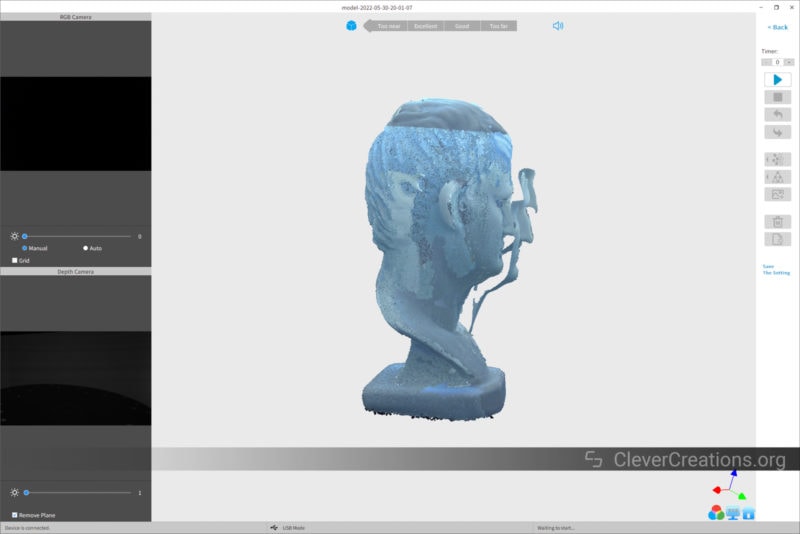
If you are working with the portable turntable instead, you will notice that some areas are never reached by the scanner.
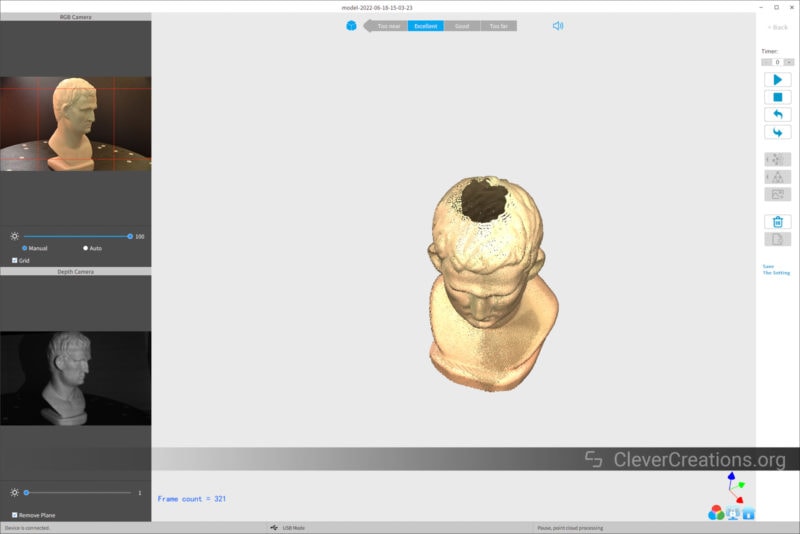
The easiest way to deal with this is by making another scan of the object, but placing it in a different orientation. This will give you a second set of data that can be combined with the first set. This lets you fill in the missing areas.
Once you are happy with the scan, click ‘Stop’. The software will then prompt you to complete the scan before you have the option to export the result in a point cloud or a mesh.
The process for 3D scanning any other object with the Revopoint POP 2 is the same. Prep the object (if necessary), capture the point cloud data, convert that data to a mesh, and then export the point cloud/data for 3D printing or whatever other purposes you might have.
You can find examples of more scans in the rest of this review, but let’s take a closer look at the Revopoint POP 2 software first.
Software
The software is one of the important aspects of a 3D scanner. After all, if the software is difficult to use or buggy, the scanner becomes much less useful.
The predecessor of the Revopoint POP 2 3D scanner, the POP 1, had some issues with its “Handy Scan” software. It was buggy and often crashed. Thankfully, the company has made big improvements with the new Revo software line, resulting in a much more stable and reliable user experience.
For reference, we tested the POP 2 with Revo Scan v4.0.2.0525A and Revo Studio v3.0.6.9 on Windows 10. On mobile, we used v.3.0.6 of the Android version of Revo Scan.
It is possible that there are issues on other platforms or with different versions of the software, but during our testing, we did not experience any crashes or bugs. We found the software is intuitive and easy to use. Getting up and running with the scanner and software only took a few minutes.
The three pieces of software that are used with the Revopoint POP 2 are Revo Scan, Revo Studio, and Revo Calibration. You can find all of them for download here.
Revo Scan
The Revo Scan software is the main piece of software you will be dealing with when operating the Revopoint POP 2. Its main purpose is to capture point cloud data from the objects that you scan.
A point cloud is basically a collection of points in 3D space that describe the shape of an object. Point clouds are the output of 3D scanners and photogrammetry software. They can be converted into 3D meshes, which is what you ultimately need for 3D printing, creating digital models, or when working with VR or AR.
As you can imagine, since point data is the start of the whole process, the quality of the point data that is captured by the scanner is extremely important.
When getting started with the Revo Scan software, we had quite a few issues with capturing accurate point data. The main issue we encountered was with overlapping point clouds. These are caused by the scanner incorrectly interpreting data from surfaces that are already scanned. This creates inaccurate point data and makes it difficult to create a single, complete model.
After some trial and error, we realized that it is best to not capture multiple additional passes of surfaces that were already scanned. When we stopped doing this, we got much cleaner and more detailed point clouds.
You can run into similar problems when you scan an object that has multiple similar-looking surfaces. In that case, the Revo Scan software has difficulty telling them apart and stitching them together. Placing the included tracking markers on the object before scanning can help with this issue.
Once we figured out how to properly scan objects, we were able to get some pretty good results with the Revo Scan software. Every issue we initially had could be attributed to either user error or lack of knowledge, rather than the limitations of the hardware or software itself.
Further down you can read a bunch of important tips that can help you 3D scan with success. Revopoint’s documentation and forums are great sources of information as well.
The bottom line here is that there is a learning process involved with using any 3D scanner, including the Revopoint POP 2. It’s easy to blame the software or scanner when things don’t go right. However, in our experience the Revo Scan software is acceptable and a big improvement over the previous Handy Scan software of the POP 1.
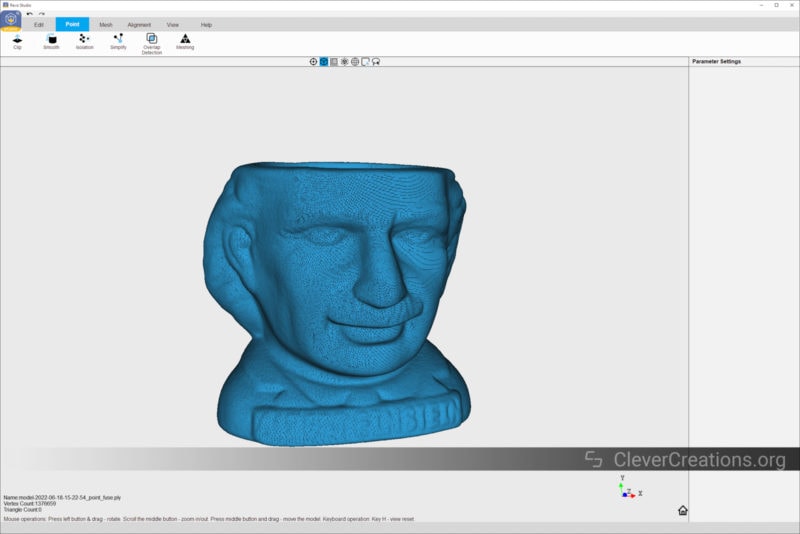
Revo Studio
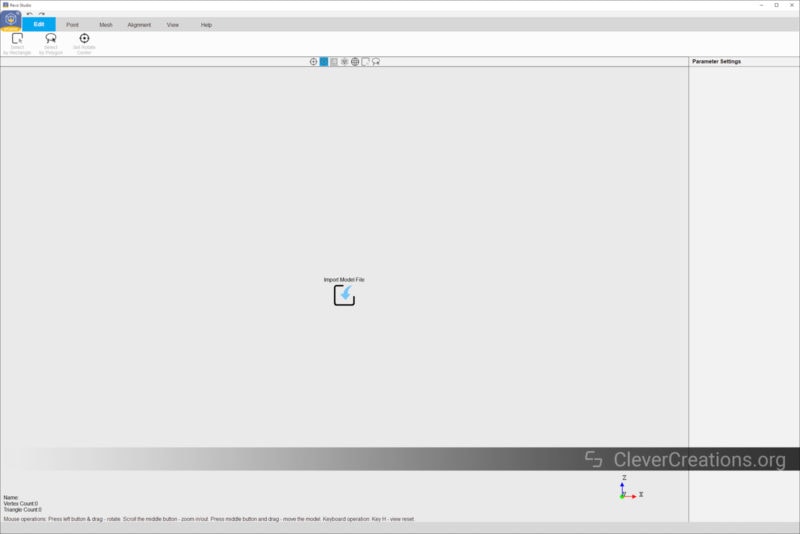
The Revo Studio software is used for two main purposes: to process point clouds captured with the Revo Scan software and to convert them into 3D meshes that can be exported for use in other software.
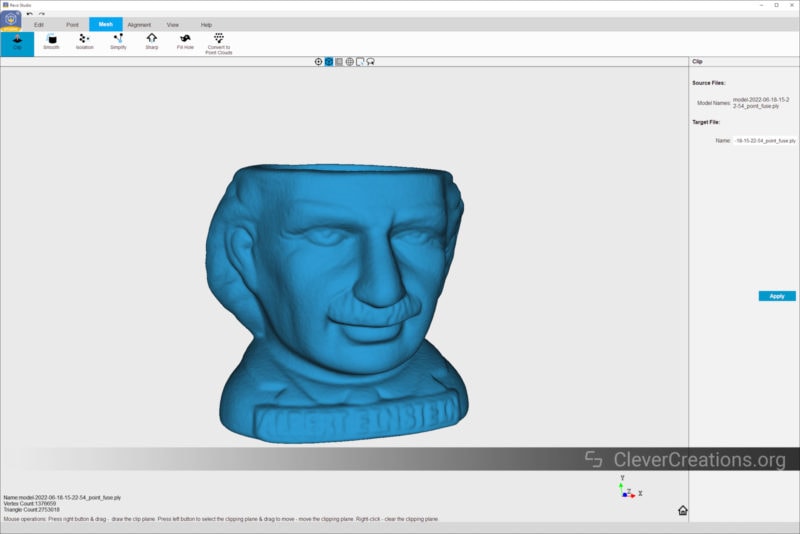
Point Cloud Processing
Point cloud processing is useful for cleaning up incorrect data in your point cloud. This is important because sometimes small amounts of incorrect data can throw off the entire 3D mesh that is generated from the point cloud.
The point cloud processing in Revo Studio is fairly straightforward. Load in the point cloud file, select the operation that you want to apply to that data, configure its settings, and then hit “Apply”. The software will do what you asked before outputting an updated point cloud file.
The main operations that you can perform on point clouds are Clip, Smooth, Isolation, Simplify, Overlap Detection, and Meshing. They all have their own specific purposes, which are detailed in the software’s documentation.
We found that Smooth and Simplify were the most useful for getting smooth and detailed models. The Overlap Detection operation, on the other hand, did not always give us the desired results.
All in all, the point cloud operations feel a bit difficult to understand for beginner users. Revopoint could benefit from explaining them better. For example, setting the correct target pitch for simplifying a mesh is something that not many beginners will know how to do.
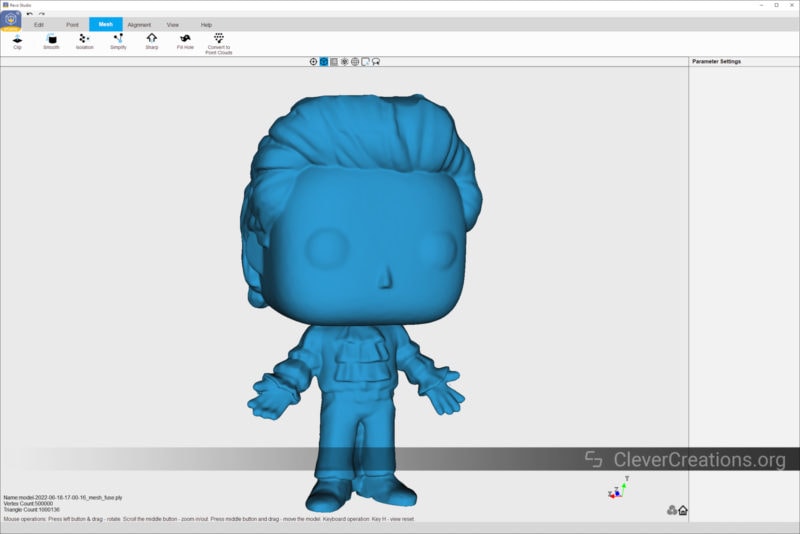
Mesh Processing
After using the ‘Meshing’ operation in the Point section, you will end up with a mesh that you can use in the Mesh section. This area lets you perform additional operations, like Sharpen and Fill Hole, but also repeats many of the Point section’s operations.
In this section, we found the Fill Hole operation the most useful. This operation quickly fills in any holes that exist in your mesh. This will fill in gaps in the mesh data. Keep in mind that it does this filling with flat surfaces without any details.
The rest of the operations have the same problem as the ones from the Point area of the software, their parameters are difficult to understand.
That said, as far as exporting your mesh to a .STL/.OBJ/.PLY file for 3D printing or other purposes, Revo Studio does that well. No complaints there.

3D printing the above 3D scanned Albert Einstein planter on our Ender 3 S1 gave excellent results. We are very impressed with both the details and the dimensional accuracy in the scanned model.
There is definitely a loss of some of the finer details because of the non-high-precision nature of the scanner. The fact that we printed the model on an FDM machine with 0.2 mm layer height also abstracted away some details. 3D printing with a smaller nozzle, a lower layer height or a resin 3D printer would have let us recreate even more of the details.
Nevertheless, very impressive results.
Revo Calibration

Revo Calibration is a piece of software that you can use to calibrate the camera on the Revopoint POP 2 3D scanner. If your camera isn’t calibrated properly, your 3D scans won’t be as accurate as they could be, so this is an important process.
Fortunately, this process is easy to do. By using the included calibration board and following the instructions on the screen, you can have your camera calibrated in just about 5-10 minutes. Alternatively, you an follow along with the steps in this video:
You only have to do this once in a while. Mostly when you notice that your scans have become inaccurate. In the time we have used the POP 2, the scanner’s accuracy stayed on point and we only calibrated it at the start of our use.
The Revo Calibration software also includes a test for checking the accuracy of the POP 2 3D scanner, so if you are uncertain if your 3D scanner is accurate, you can use the test to check.
Accessories
The Revopoint POP 2 3D scanner has a variety of accessories that are designed to make your 3D scanning life easier. Not all of them are included in the premium package (see the unboxing section above), so you’ll have to purchase some separately if you want them.
It must be said that nearly all of the POP 2 accessories we encountered have a qualitative feel to them. They are all well-made and designed to last.
The sole exception here is the turntable. While it works well, it feels too plasticky to justify its $79 asking price.
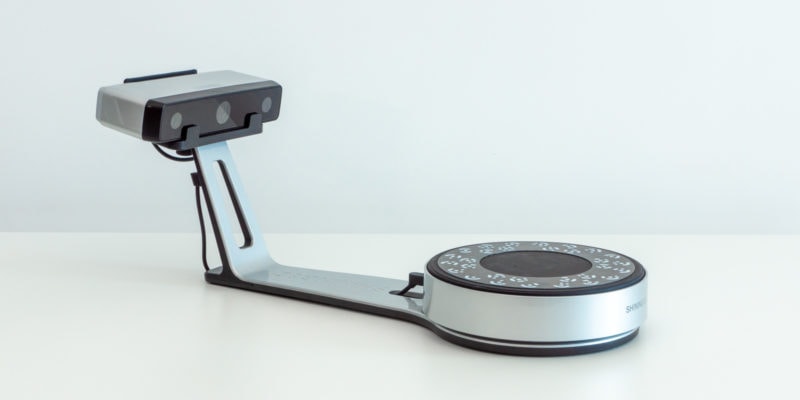
Portable Turntable
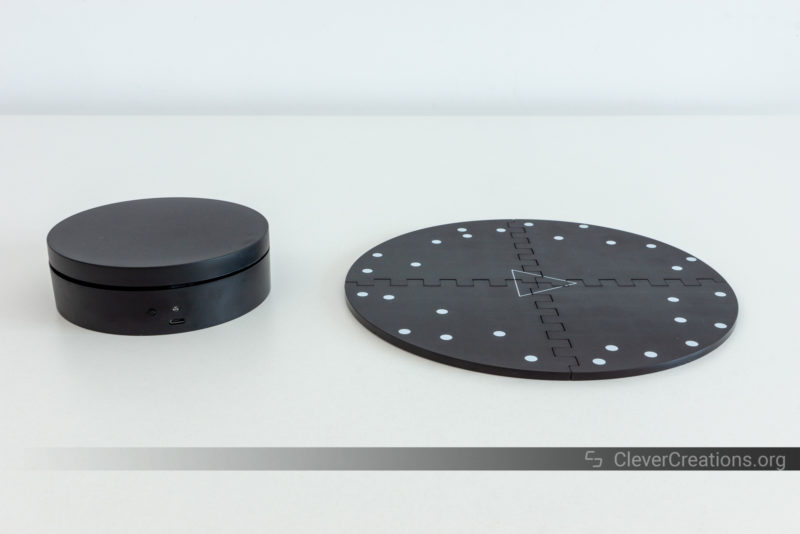
The portable turntable is arguably the most useful accessory that you can get with the Revopoint POP 2 3D scanner. It lets you scan objects without having to manually rotate them or rotate around them. This is a huge time saver and gives you much more consistent results.
It rotates anticlockwise at about 3 RPM and can be operated on either batteries or through the included USB power cable. If you are planning on scanning a lot of smaller objects, this is a must-have.
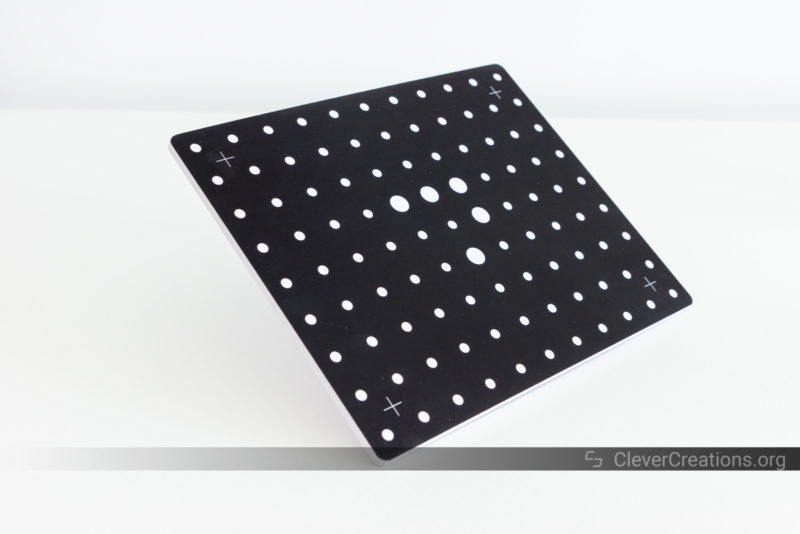
Unlike the portable turntable currently listed on Revopoint’s site, ours came with an optional large platform with tracking dots that can be placed on top. Very practical for scanning larger objects that won’t fit on the turntable itself.
Of course, the portable turntable is not strictly necessary. It is still possible to manually rotate objects or walk around them to capture a full 360-degree view. However, for the best results possible, we highly recommend getting the portable turntable if you can.
For large or heavy (>3kg) objects, you won’t be able to use the turntable and will have to scan the object by hand.
Carrying Case

The carrying case is mostly useful for storage purposes and for when you need to take the scanner on the road. If you won’t do a lot of traveling with the Revopoint POP 2, then you can probably get away with just storing it in a safe place.
Interestingly enough, out of the three people we have asked in our office, all three said the outer surface of the case smells like mushrooms. Feel free to use that information however you want.
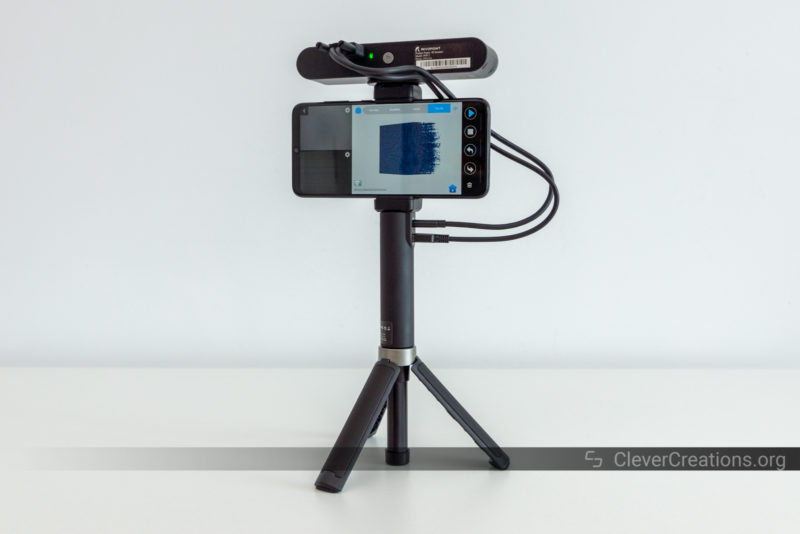
Power Bank

The power bank is a 4000mAh battery back that you can use to directly power the Revopoint POP 2 3D scanner. As a result, you don’t have to be tethered to an AC power supply, giving you a lot more flexibility when scanning. The POP 2 itself can be connected through Wi-Fi, so there are no cables required for data either.
Because the power bank has a section of thread at the top and a threaded insert at the bottom, it can be screwed directly in between the tripod handle and the 3D scanner itself. This is a great design and prevents the need for an extra solution to secure the power bank.
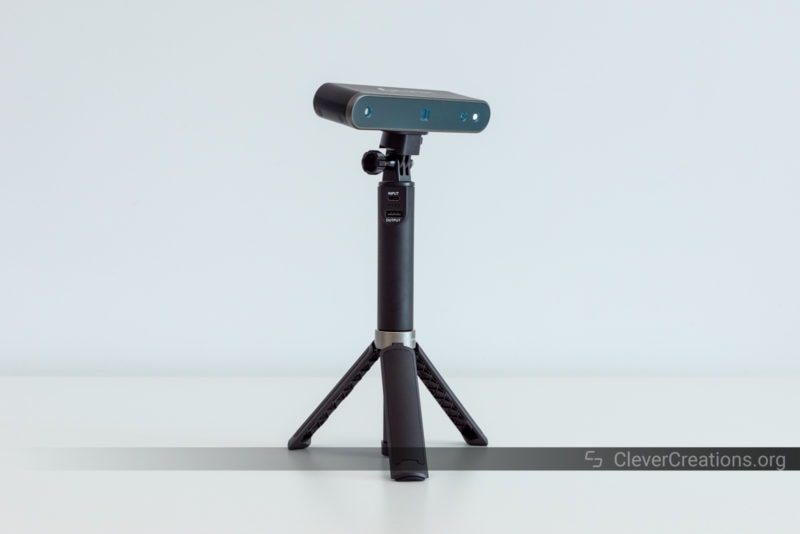
Tripod
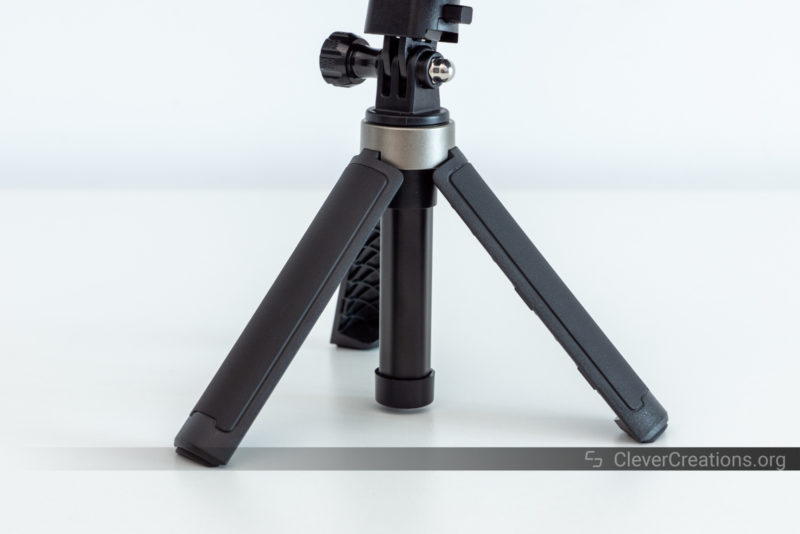
The included tripod is great to use as well. Its three legs provide a stable surface for the POP 2 to rest on. There’s no height adjustability, however, so you’ll have to get creative if you want to scan something on the turntable that’s not at the correct height.
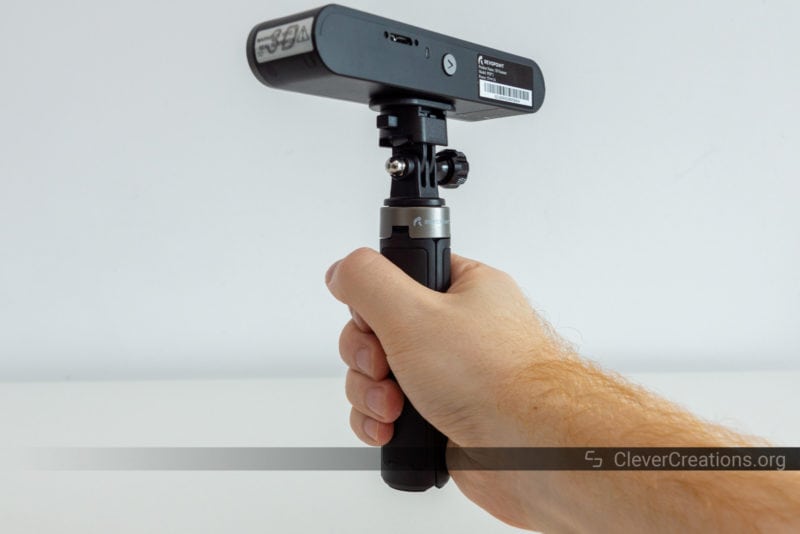
One way of doing this is by using a tripod as a handheld solution. You do this by simply folding up the legs. Their outer surface has a rubberized texture on it, so grabbing onto them is easy and comfortable. We did not experience any grip issues when scanning with it for longer periods of time.
Phone Holder
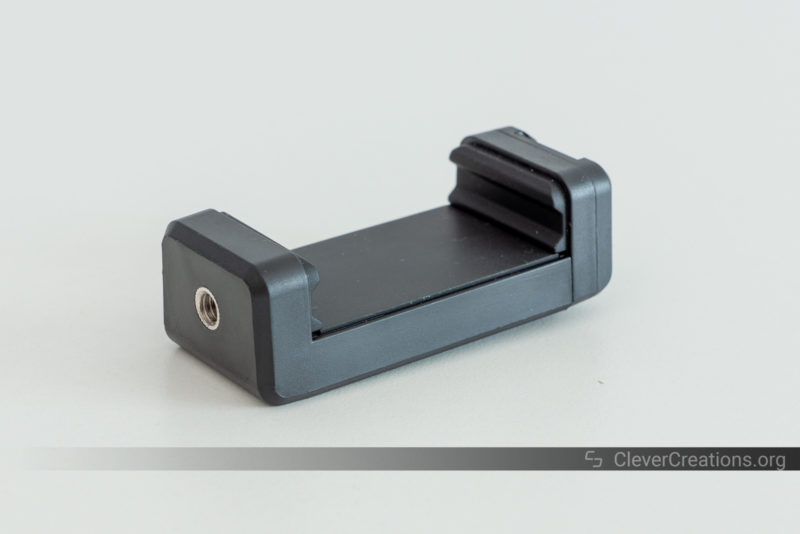
The phone holder for Revopoint POP 2 3D scanner can either be threaded onto the tripod or onto the power bank. It is solidly constructed and works well if you plan on using your phone as the controller.
One limitation of the phone holder is that it only extends up to about 7.5 cm / 3″ in width. So larger phones are unlikely to fit. We tested the POP 2 with a Samsung A70 and we only managed to get that phone to fit after removing its phone case.
Build Quality

The build quality of both the Revopoint POP 2 and its accessories is excellent. We weren’t able to detect any areas where Revopoint cut corners on quality, aside from the turntable accessory. To reiterate what we pointed out earlier, the turntable feels lightweight and plasticky and it is hard to justify its $79 asking price when bought separately.
From a longevity standpoint, we haven’t noticed any components that are likely to wear out quickly. In fact, Revopoint seems to have set durability as one of its main priorities.
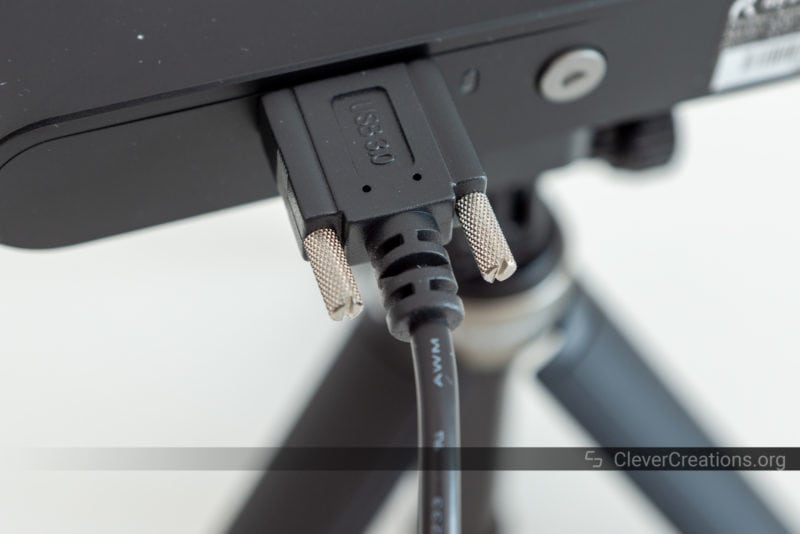
An example of this is the strain relief solution on the POP 2’s USB cable. With one captive thumbscrew on either side of the cable, the USB connector is well protected from wearing out over time. This is rather important on a device that you will be waving around a lot, as this creates a lot of strain on the connector.
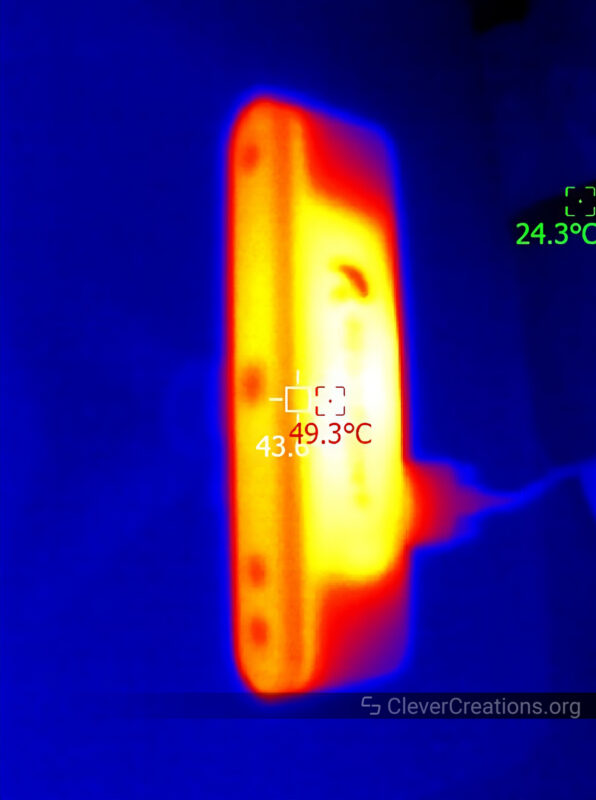
One thing we did notice is that the Revopoint POP 2 3D scanner gets relatively hot during long use. Whether this is something to be concerned about, we don’t know. It is possible that this presents no problem, but it is also possible that this might cause long-term reliability issues. In the end, this depends on the thermal limits of the internal components, which we don’t have insight into.
Tips
Even the most expensive 3D scanners require you to go through a learning process before you get good results. With the Revopoint POP 2, this is no different. In this section, we will share some tips to get you started.
Object Prep
In order to 3D scan black and/or reflective surfaces, it is important to add a white coating on them beforehand. Without this, the infrared light emitted by the Revopoint POP 2 3D scanner is either absorbed or scattered, and not enough reaches back to the scanner.
One of the cheapest ways to do this is by using cornstarch or dry shampoo. Simply spray or brush some of the areas you want to scan. Afterward, you can brush it off. But while this method is cheap, it does not always lead to the best results. A better method is to use a scanning spray powder.
3D scanning spray powders add a layer of matte white crystals that are easily picked up by 3D scanners. Some sprays even sublimate away after a couple of hours, so you are left with a clean object afterward that does not need any cleanup.
The go-to brand for this is AESUB. Their AESUB white leaves a permanent coating, whereas their AESUB blue vanishes after a couple of hours. AESUB green is the cheapest option but requires you to use your own spray gun. Unlike their names suggest, all sprays are actually white.

The downside of these products is that they are significantly more expensive than cornstarch or dry shampoo. Can be hard to justify for users who occasionally 3D scan. However, if you want the best results without wasting your time, this is the product you should be using.
Generally, you only need a thin layer, especially when dealing with opaque objects. If your object is see-through, you might need to add a bit more for the surfaces to be properly detected.
The final scan after we coated the above Jerry with Puffy Shirt figurine with a thin layer of AESUB white. This solved all the issues with black surfaces not being detected.
One limitation of the Revo Studio software that we ran into with this scan is that the Fill Hole function decided to fuse the inside of the legs together in the 3D model. We could not find a way to prevent this in the software.
Tracking Dot Markers

If you are dealing with objects that have multiple similar faces, say some kind of cube, you are well-advised to use photogrammetry dots (also known as marker points, reference dots, or some variation of those words). These help the Revopoint POP 2 3D scanner differentiate surfaces from similar-looking surfaces. That way, the software knows which surface is which and can properly reconstruct the 3D model without stitching errors.
The POP 2 comes with 100 tracking dots included, which should last you a while. If you need more, Revopoint offers 500, 1000, and 1500 bulk packs.
Sunlight
Because the sun emits some of its light in the infrared spectrum, sunlight can interfere with the scanning process and reduce the quality of your 3D scan results.
Outdoor scanning is still possible, but to avoid interference, try to minimize intense light from the sun shining onto your objects. The same goes for any other strong light source that emits in the infrared spectrum, such as halogen lamps.
Alternatives to the Revopoint POP 2
POP 2 vs POP
Aside from the $200 lower price, there is no reason to go with the Revopoint POP over the Revopoint POP 2. The POP 2 is superior or equal in every category.
We could dive into a detailed comparison here, but given the low detail scanning of the POP 1 compared to the POP 2, it isn’t worth the time in our opinion. The original POP 3D scanner simply feels like outdated hardware that isn’t worth buying anymore.

Revopoint MINI
The Revopoint MINI is a newer 3D scanner than the Revopoint POP 2, but they aren’t direct competitors. Instead, they complement each other.
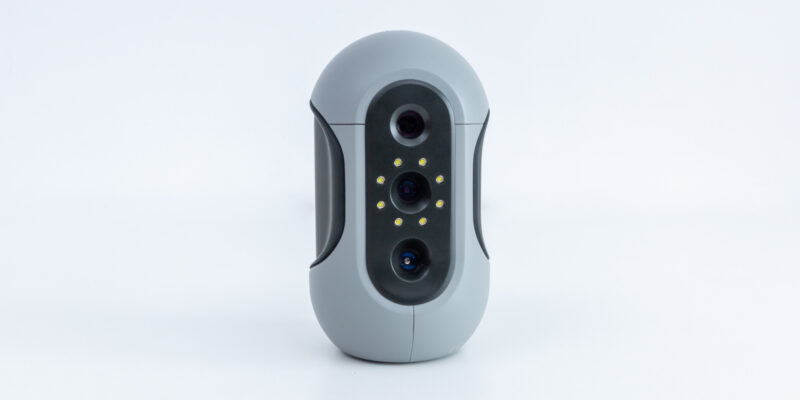
Unlike the POP 2, which uses infrared light, the MINI is a blue light scanner that uses blue light. The shorter wavelength of blue light allows it to deliver higher precision scanned models. It also helps deal better with bright ambient light, something the POP 2 struggles with.
The claimed single capture accuracy of the Revopoint MINI is 0.02 mm, which lets it capture a lot more detail than the 0.05 mm accuracy of the Revopoint POP 2 allows.
You might be tempted to just get the MINI instead, but there is a significant downside to be aware of. Because the MINI is designed around 3D scanning small objects, it comes with a smaller capturing frame.
That means that if you want to scan large objects, it will take you a lot longer with the MINI since you will have to move it around a lot more. If you mostly scan medium-sized objects, the Revopoint POP 2 is a better choice.

Einscan SE
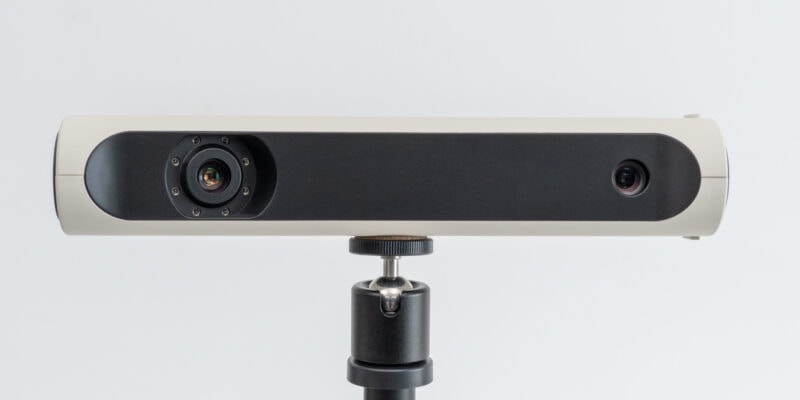
The Shining3D Einscan SE is a 3D scanner that has a lot of similarities to the Revopoint POP 2. For example, both scanners have a similar capture volume and accuracy.
Notable differences are that the Einscan SE offers better software, additional file format outputs, and uses white light as a light source. White light is considered to be long-term safer for the eyes than the infrared light that the POP 2 uses. If you plan on 3D scanning faces, this is a considerable advantage.
Another difference is the price. The Einscan SE costs about 50% more than the Revopoint POP 2. A significant difference that might only be worth it if you plan on doing lots of 3D scanning.
That said, with the POP 2’s current software limitations, we consider the Einscan SE to be the superior choice at the moment.


Creality CR-01
The Creality CR-01 is a 3D scanner that looks good based on its specifications but is unfortunately not as good in practice. Especially considering its costs about the same as the Revopoint POP 2.
For example, the CR-01 boasts a 0.1 mm scan accuracy, but several reviewers report that this number is actually closer to 1 mm. At the same time, scans have issues with noise, the software is buggy, and documentation is limited.
In that regard, the CR-01 is very similar to the POP 1; an ambitious first scanner, but ultimately disappointing due to poor software. While the POP now does give better results with the new Revo Scan software, this can’t be said for the CR-01.
All things considered, we can’t find many reasons to go with the Creality CR-01 over the Revopoint POP 2 3D scanner.
Verdict: Who is the Revopoint POP 2 for?
The Revopoint POP 2 3D scanner is an excellent solution for people who want to do low-volume 3D scanning without capturing the smallest of details. At $699, there is no other 3D scanner on the market that offers similar value at such an affordable price.
While the software is on the weaker side, it is still usable and the results are great if you have the patience. Revopoint also seems to be committed to improving its software. It is likely that by the time you read this, the software will have improved further.
If you are looking for a 3D scanner to use at home for fun, it is also a good solution. For this purpose alone, the price is probably hard to justify for most. But if you can afford it, you won’t get better for the money.
If you are looking for professional-grade precision and/or need to scan very small objects, like jewelry, you will have to look elsewhere. The Revopoint POP 2 simply does not have the capabilities for reverse engineering objects with high precision. Make sure you don’t buy it with this end goal in mind.
Similarly, if you plan on 3D scanning a lot, you might be better off with a scanner with superior software. The Einscan SE is the one that comes to mind here, even though it is a step up in terms of pricing.
What the Revopoint POP 2 excels at is 3D scanning medium-to-large-size objects with reasonable accuracy. If you are into 3D printing, creating digital artwork, or creating assets for games, VR, or AR applications, the Revopoint POP 2 is the best 3D scanner you can get right now for this price.