


When left out in the open, 3D printer filament can absorb moisture from the air. “Wet” filament can ruin our prints, and thus this is something that we want to avoid.
In order to prevent filament from absorbing moisture, we need to properly store it. This means we have to keep it in a humidity-controlled environment, such as a filament storage box.
Recently I bought some extra colors of PLA filament for the IKEA ALEX label & handle system and for several other upcoming projects. In order to keep the filament dry I decided to build filament dry boxes out of IKEA SAMLA storage boxes.

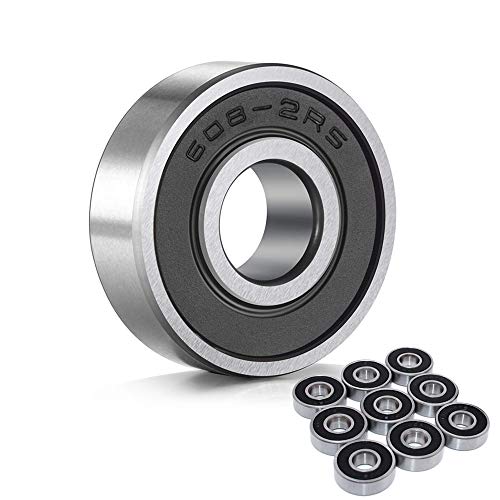
The shaft in the storage boxes is mounted on bearings. That way I can use the boxes not only to store the filament, but also to directly print from them. The rotating shaft allows for less friction when feeding the filament into the extruder.

In this article I will show you how to build your own filament dry boxes, so that you can keep your filament dry.
Before explaining how to build the filament dry boxes, I would like to give some more information on the relationship between filament and moisture:
How and Why Does 3D Printer Filament Absorb Moisture?
3D printing filaments such PLA, ABS, Nylon and Polycarbonate consist of polymers. These polymers are hygroscopic, meaning they have a strong tendency to attract moisture. This moisture is typically absorbed from the air.
Why Do You Need to Keep Filament Dry?
Wet filament can cause a variety of problems. For example, PLA becomes very brittle and can snap when it only gets bent a little. Wet nylon filament can turn opaque instead of transparent.
Some other problems that can occur with wet filament are:
- 3D prints have a rough finish texture
- Reduced part strength
- Extruder jams
- Reduced print bed adhesion
- Excessive stringing
How Can You Prevent Filament From Absorbing Moisture?
The best way to keep filament dry is to limit the exposure of the filament to air. This is done by storing the filament in a sealed environment.
For hobbyists, the most affordable solution is to keep the spools in an air-tight container. Adding desiccant to the container will help keep the air and filament dry.
What to Do When Filament is Already Moist?
Your filament can still be saved if it has absorbed a lot of moisture. You can do this by exposing the spool of filament to dry, hot air for a prolonged period of time.
There are several ways to do this:
- Drying the filament in an electric oven.
- Drying the filament in a modified food dehydrator. Food dehydrators often contain plastic racks that can be removed to create enough space for one or more spools of filament.
- Using a dedicated filament dry box to dry the filament.
The filament drying temperature varies, depending on the type of filament. You want the temperature of the air to be lower than the glass transition temperature of your filament. That way, you don’t overheat the filament and cause the filament on the spool to melt together.
It is recommended to dry filament for three hours or longer. Both the filament on the outside and on the inside of the spool need to have enough time to get rid of their moisture.
How to Build Your Own Filament Dry Boxes
What You’ll Need
|
|
Tools | ||
|---|---|---|---|

|
Check Price | ||

|
Check Price | ||
|
For cutting the pipe/dowel to size
|
Check Price | |
|
|
Parts (qty per box) | ||
|---|---|---|---|
|
IKEA SAMLA box - 22L / 6 Gallon
IKEA product number 798.508.75
|
|||
|
M4*16mm Hex Bolt
|
x 4 | ||
|
M4*30mm Hex Bolt
|
x 4 | ||
|
M4 Washer
|
x 8 | ||
|
M4 Nut
|
x 8 | ||
|
x 4 | Check Price | |
|
Piece of PVC pipe or wooden dowel
~296 mm long and 18-32 mm in diameter
|
|||

|
For removing any existing moisture from the boxes
|
Check Price | |
|
|
3D Printed Parts (qty per box) | ||
|---|---|---|---|
|
Base
|
x 2 | ||
|
Backplate
|
x 2 | ||
|
Bearing Retainer
|
x 4 | ||
|
Lid Clip
|
x 4 | ||
|
Drill Jig
The included drill jig is for 22L / 6 Gallon SAMLA boxes
|
|||
I printed the parts with 2 shells, 25% infill. The printed parts support a lot of weight from the filament spools so I do not recommend printing them with a lower infill percentage.
The bearing retainers need to be printed with support material.
Preparation

Drilling the Holes in the SAMLA Box


Assembling the 3D Printed Components


Cutting the Shaft

Inserting the Filament Spools


The final step is to drill some small holes in the SAMLA box that allow the filament through.
Depending on how you plan to use the box, you can drill the holes either in the lid of the box, or in the side.
Alternatively, you can take the lid off when printing with the filament, as pictured in the image above. This does expose the filament to more moisture however, so this is not ideal.
Adding Silica Gel Desiccant to Keep the Filament Dry
Update 28/06/2019
I have added reusable silica gel beads to the filament storage boxes to help keep the filament dry. While the SAMLA boxes reduce the amount of air the filament is exposed to, they are not 100% airtight. As a result, there is still some moist air entering the boxes.
The silica gel beads adsorb the moisture from the storage boxes, so that only a minimal amount ends up in the filament.

What Does the Silica Gel Do Exactly?
The silica gel beads adsorb moisture from the air inside the filament box. In turn, the filament has less moisture available to absorb and stays dry for a longer period of time.
How Can the Silica Gel Beads Be Reused?
As the silica gel beads adsorb moisture, they change color to indicate their level of moisture saturation. The orange silica gel beads turn green over time, and the blue variant turns pink.
When you notice the beads have changed color and are saturated with moisture, you can reactivate them by placing them in an oven or microwave for a while. This removes the moisture from the beads.
After this, you can put the beads back with the filament. This cycle can be repeated many times with a single batch of silica gel.
Is it Expensive?
Not at all. Reusable silica gel is very affordable. Especially when comparing it to the cost of moist filament that might has to be thrown out, the time spent on solving print issues due to moist filament, etc.
![Dry & Dry [2 LBS] Blue Premium Indicating Silica Gel Beads(Industry...](https://m.media-amazon.com/images/I/41jP3CrV90L.jpg)
How Much Silica Gel Should You Use?
I use about 250 grams (~ 1/2 lb) per filament box. This covers the floor of the 22L IKEA SAMLA boxes with a generous layer. So far this has been working well.

Does It Actually Work?
I was curious about this as well, so I decided to log the relative humidity (RH%) in the filament boxes in order to get some actual data.

It took about 10 minutes after inserting the silica gel for the humidity to drop to a minimum level of 10%. Even now, after a couple months, the humidity sensor still indicates 10%.
I should note that the humidity sensor I use only goes down to 10%, so it is likely that the RH% in the boxes is even lower than that.
Either way, the humidity in the boxes has significantly dropped since adding the silica gel beads.
From a more subjective standpoint, I don’t seem to have any printing issues due to moist PLA anymore, so it is safe to say that this works.
How Often Does the Silica Gel Need to Be Dried?
That depends on the circumstances. The main factors that influence it are:
- The humidity of the environment.
- How well the dry box is sealed.
- How often the dry box is opened.
That said, I added silica gel balls in the boxes two months ago and they have only discolored a bit so far.
The environment the boxes are in has about 50% humidity, and I do not open the boxes that often.
Conclusion
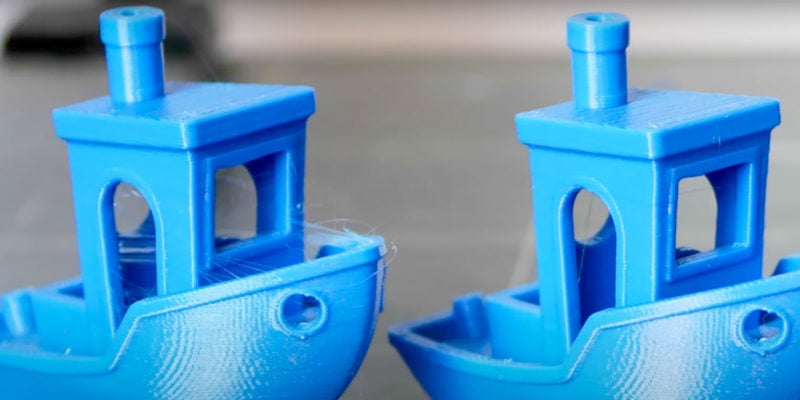
The filament dry boxes in combination with the silica gel beads work very well. With this setup I haven’t had any printing issues with PLA anymore. So far the PLA remains flexible, prints without bubbles, with little stringing and with a smooth finish.
I must say that the SAMLA boxes are not a 100% ideal for this purpose, as they are not perfectly sealed and still let in some air. But for the budget I spent on it, I am quite happy.


Looks as a good cheap system.
The humidity dropped very, very quick. Not strange because you use a lot silica in a small place.
Do you have the idea or experience that it wil dry PLA that was stored looong time at the wrong place ( just on a shelf in the living)?
Hi Tor! I think that if you want to dry moist PLA filament you will have better results with a filament dryer.
These storage boxes work best for keeping dry filament dry.
Built this up yesterday – works really well! First proper “project” with my printer with a real use. Cheers for the great instructions. 🙂
Hi Niall,
I am glad it works well for you. Good luck on your 3D printing journey and thanks for the comment!
Tim
Hi Tim,
I just successfully built my dry box using your excellent tutorial, thanks so much!
Hi Anders,
you are welcome! Thank you for letting me know!
Hi Tim,
Thanks for sharing this with the rest of us! I haven’t made it yet, but I was just thinking about the following; does the shaft actually rotate while printing? I’m just thinking out loud here, but if you would have 3 or 4 rolls on the shaft and you are printing from one of them, then I would imagine the friction between the printing roll and the shaft (assuming it’s made from PVC and therefore ‘slippery’), would be less than the friction that occurs when moving all the rolls along with the shaft over the bearings. Because if that’s the case, the bearings (albeit very nice looking) are overkill and I can save myself some work. 🙂 TIA!
Hey Bas,
Yep, the other spools happily roll along, even when they are brand new (heavy). One thing to note, however, is that unused spools should not have their filament sticking through the box because they can start unrolling themselves.
This system is definitely not a perfect solution. An airtight box with bearings for each spool would be a better. But on a low budget, this system is okay.