- Great way to reduce wasted filament
- Simple touchscreen interface
- Good build quality with solid hinges and precise alignment
- Helpful audio indicators for process completion
- USB power offers portability
- Pre-programmed temperature settings for common filaments
- Safer than DIY methods like soldering irons
- Relatively affordable at $35
- PTFE sleeves are consumable items
- Long heating times (3-5 minutes) due to USB power limitations
- Splices don't always form perfectly (practice!)
- No integrated filament cutter
- Lightweight design makes it move around during use
- Manual temperature adjustments overwrite presets without warning
Every 3D printing enthusiast faces the same dilemma—what to do with those partially used spools of filament. You know the ones: too short for your next big print, but too long to justify throwing away. These leftover pieces often end up collecting dust on shelves, representing both wasted materials and money.
SUNLU’s FC01 Filament Connector aims to solve this common frustration by offering a way to join these shorter pieces into usable lengths. Beyond just combining leftovers, it opens up possibilities for creating custom multi-color prints with any 3D printer. This ~$40 device promises to transform those unused partial spools into practical printing material.
Having spent extensive time testing the FC01, I’ve discovered its true capabilities, limitations, and where it fits in a maker’s toolkit. This review dives deep into my hands-on experience with the device, exploring everything from basic functionality to advanced techniques and real-world applications.
Specifications
| Feature | Details |
|---|---|
| Compatible Materials | PLA, ABS, PETG, PCL, PA, PC (1.75mm) |
| Power Supply | USB (5V 2A) |
| Maximum Temperature | 240°C |
| Temperature Accuracy | ±3°C |
| Heating Time | 3-5 minutes (material dependent) |
| Dimensions | Compact and portable |
| Package Contents | FC01 unit, 200 PTFE sleeves, USB power cable |
Unboxing
When I opened the box of the FC01, I found exactly what I needed and nothing more. Inside was the unit itself, a pack of 200 PTFE tubes (these are the special tubes you need for joining filament), and a regular USB power cable.
I noticed right away that the overall style of the FC01 is similar to that of SUNLU’s S4 Filament Dryer, which I’ve reviewed before. It’s got the same clean look and branding elements, telling me they put some thought into how it’s designed.
Connecting Filament with the FC01
The filament joining process with the SUNLU FC01 requires careful attention to detail. Through multiple testing sessions, I’ve refined the workflow to achieve consistent results.
It begins with cutting the filament ends—the most effective method I discovered is cutting both ends simultaneously at an angle. This technique ensures that the two ends line up properly later and maximizes the contact surface area for joining.

After cutting, you’ll insert your prepared filament ends into one of the included PTFE sleeves. This step requires careful alignment to ensure the ends meet properly within the sleeve.


Next comes preheating the device through the interface. Setting the correct temperature for your filament material is crucial. Too high of a temperature and the filament gets too soft. Too low of a temperature, and the filament does not melt properly.

After that is the most tricky part: when you put the filament in the heating section and close the clamp, you need to push the ends together just right.


Too little force, and the filament won’t join properly. Too much force, and you get a bulge in the filament that can jam your 3D printer. It took me a while to get a feel for this, and it’s different for each type of filament. I will show you further down what the results are supposed to look like.
The FC01 beeps when it’s done heating. When you hear that, you can open it up and take the filament out. One thing I learned quickly is to leave the filament alone while it’s cooling. It’s still soft at this point. If you bend it, it hardens in a crooked shape.
Once the filament has cooled, use the Filament Connector’s built-in cutter to slice open the tube and peel it off. I found this step a bit finicky sometimes, mainly because I had to look for the cut on the underside of the tube.


I found the whole splicing process with the SUNLU FC01 much easier than other methods I’ve tried (like using a soldering iron), but I noticed it takes some practice to get right.
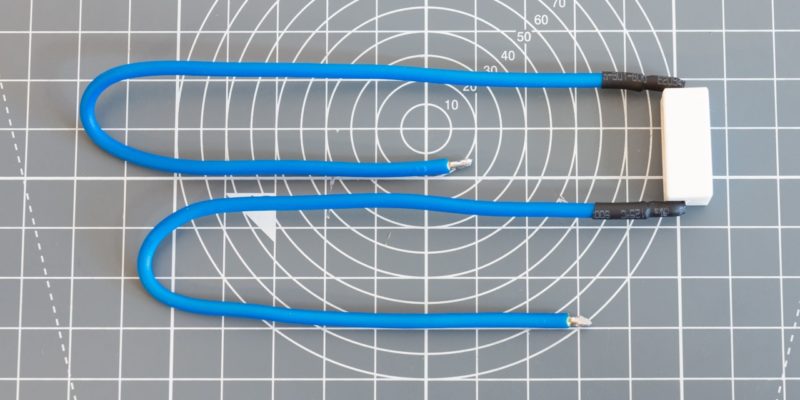
Joining Results

In the picture above, I purposefully applied too little and too much pressure on SUNLU’s PLA+ 2.0 filament during heating in two of the tests.
The top result, in which I did not apply enough pressure, clearly shows gaps and bubbles in the filament. This joint is very weak and probably won’t even survive being fed into the printer.
For the middle joint, I applied just the right amount of pressure. As you can see, the joint is smooth, free of bubbles, and has a uniform diameter.
On the bottom, I applied too much pressure and also kept the filament in the heater for a couple seconds longer than intended. Both make it easy for the filament to bulge and deform. When this happens, the filament fuses well, but its shape can cause it to get stuck in your printer’s PTFE tube or in the extruder itself.

As you can see above, I got good results with other types of filament as well. From top to bottom:
- Polylite PETG + Polylite PETG
- QIDITech UltraABS + Polylite ABS
- SUNLU Wood PLA + Creality Carbon Fiber PLA
It was no problem to join different types of PLA or even brands of material. I noticed that the main criteria is that the melting point of the filaments is roughly the same.
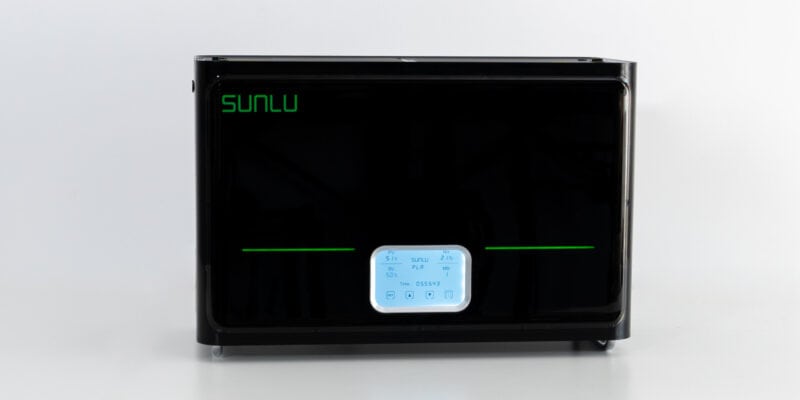
Using the Controls
The device has a simple touchscreen where you can turn it on and off, pick the type of filament, and change the temperature. Here are the standard settings it comes with:
| Material | Temperature | Heating Time | Joining Time |
|---|---|---|---|
| PCL | 85°C | 1 min | 5-6s |
| PLA | 185°C | 3 min | 7-8s |
| PETG | 210°C | 3-4 min | 7-8s |
| ABS | 220°C | 3-4 min | 7-8s |
| PA/PC | 230°C | 5 min | 9-10s |
During use, I found out something important: if you change the temperature manually, it stays changed for the currently selected preset even after turning the unit off and on again. This caught me out when switching between different brands of PLA (not all PLAs need the same temperature).
So if you find yourself switching between different temperatures manually, make sure to switch the temperature back to the original setting for that material afterwards.
Build Quality

During my first few test sessions with the FC01, I noticed a distinct odor coming from the heating element. This isn’t unusual for heating elements in new equipment—I’ve experienced similar with new hotends and filament dryers.
The smell gradually disappeared after several uses, suggesting it was just the initial breaking-in period of the components. If you get one, don’t be alarmed by this; just make sure to use it in a well-ventilated area for the first few sessions.
One aspect that I think could use improvement is the unit’s weight. The FC01 is surprisingly light. This can seem like a benefit at first, but it actually creates some practical challenges.
When I try to insert filament or apply pressure during the joining process, the device tends to slide around on my workbench. I found myself having to hold it steady regularly. A bit more weight or larger rubber feet would have made this process much easier.

Despite its lightweight nature, I’m still impressed by the overall design quality. The hinges, which often become a failure point in low-budget (3D printer) accessories, feel robust and well-engineered.

The fit between components is precise, and all the plastic parts align perfectly—crucial for a device that needs to create precise filament joins. The closing mechanism of the heating clamp provides a satisfying click.

Out of curiosity, I decided to check the heating element with my thermal camera. I discovered something interesting: the surface temperatures were consistently about 30-40°C lower than what the LCD was displaying.
For example, when the display showed 185°C, the thermal camera measured around 150°C on the surface.

This temperature difference doesn’t seem to affect the device’s functionality—it still joins filament effectively.
I suspect SUNLU has calibrated the displayed temperature to account for this difference, ensuring the actual melting point is reached regardless of what the thermal camera shows.
What It’s Like to Use the FC01
My daily use of the FC01 revealed several important aspects that weren’t immediately obvious.
First, there’s the heating time. A filament join requires a 3-5 minute wait for the device to reach temperature, which honestly feels quite long when you’re in the middle of a project.
I understand why—the device runs on USB power (5V 2A), which limits how quickly it can heat up. The upside of USB power is portability; I successfully tested it with a standard USB power bank, which means you could use it anywhere.
Still, I frequently found myself wishing for faster heating times. Once the FC01 is heated up, however, there is no more waiting for the next splices.
Safety became a noticeable concern during my testing, particularly regarding the placement of the sleeve cutting blade. The current design puts the blade for removing PTFE sleeves behind the heating section. Several times, I found myself nearly touching the hot area while trying to cut the sleeve.
A better design would have placed the heating element in the back of the unit and the cutting blade in the front, creating a safer workflow. As it is, I recommend being extra cautious during the sleeve removal process or waiting a bit longer for things to cool down.
Perhaps the most important aspect to consider is the PTFE sleeve system. The FC01 comes with about 200 sleeves, and replacement packs cost around $7 per 200.

This might seem like a lot of sleeves, but they disappear faster than you might expect. During my testing, I had several failed splices that wasted sleeves, and even successful ones consume one sleeve each.
I tried using standard PTFE tubing as a replacement, but I (somewhat expected) discovered this doesn’t work—regular PTFE tube is too thick, doesn’t fit, and would also prevent proper heat transfer to the filament. This means you’re locked into buying SUNLU’s official sleeves.

It’s not a huge expense, but it’s definitely something to factor into the long-term cost of ownership.
Something else that I think the FC01 could have benefited from is a built-in filament cutter. I found myself having to cut filament ends multiple times before they lined up well with each other. Until I discovered that I could cut both ends at the same time, that is. Still, an integrated filament cutting tool would make the whole process easier.
Print Results

Taking all these leftover pieces of filament and turning them into something useful is what the FC01 is all about. I joined the above pieces of different colored PLA together with the FC01 and 3D printed them to make the vase below.
Should You Buy It?
After using the FC01 for a while, here’s what I think: if you print a lot, especially with expensive filament or a 3D printer that has a long bowden tube, the $40 price tag is justifiable. The more (expensive) filament you can save, the more benefit you get out of this device.
It’s also great if you want to try multi-color printing, though it takes time to join lots of pieces together. Plus, you can’t control exactly where the filament will switch. I found it most useful for things like vases, where the exact point where the filament switches color doesn’t matter that much.
I also want to point out that if you’ve got a printer with an automatic material switching (AMS) system, you won’t have much use for the FC01 Filament Connector.
The things I like most about it: it really does help save filament, it makes multi-color printing possible on any printer, and it’s pretty easy to use once you get the hang of it.
The downsides: you need to keep buying those PTFE tubes, not every splice turns out perfect, and it takes a while to heat up. Also, watch out for the hot section when using the cutter.
Would I get one myself? Yes! I print a lot, regularly use expensive materials (Polycarbonate, carbon-filled, Nylon, etc.) and hate wasting filament. But for any 3D printing enthusiast it’s a handy tool to have around—just be ready to practice a bit before you get perfect joins.