If you are a 3D printing enthusiast, chances are that you will need to repair or edit STL files at some point. This is especially true of files downloaded from STL file-sharing sites like Thingiverse since they are sometimes modeled by beginners who haven’t test-printed them. Thankfully there are a number of free STL editors available for this exact reason!
To learn how to import, edit, repair, and export an STL file in various free STL editors, keep reading! We’ll cover step-by-step instructions for editing and repairing STLs for 3D printing in everything from premium options like Fusion 360 to open-source solutions like Blender to web-based programs like TinkerCAD.
What Are STL Files?
The STL file type is one of the most popular file formats for 3D printing because of its simplicity and versatility. It encodes the surface information of a 3D object, without any additional factors like color or texture. While this makes the STL format ill-suited for animation, video game design, and other uses that need a fully detailed object, it is perfect for 3D printing and other rapid prototyping methods.
Why Edit STL Files?
There are many reasons you may want or need to edit STL files. If the model has design issues or errors such as holes, thin walls, or other mesh problems, you will need to fix them before you attempt to print the file. An STL editor with automatic mesh repair tools is an invaluable resource in these scenarios since they check for damage in the mesh and correct it in a few simple steps.
You may also need to edit STL files to personalize them before 3D printing or when the original model doesn’t quite work for your intended use. Tasks like scaling the STL file up or down, widening or shrinking holes, or even adding additional shapes or elements (such as a torus to turn the model into a keychain) can all be done in a variety of free STL editors.
| Free STL Editor | Price | Compatibility | Download |
|---|---|---|---|
| Fusion 360 | Free for the first year | Windows, Mac | Fusion 360 |
| FreeCAD | Free | Windows, Mac, Linux | FreeCAD |
| MeshMixer | Free | Windows | Meshmixer |
| MeshLab | Free | Windows, Mac, Linux | MeshLab |
| TinkerCAD | Free | Web-Based | Tinkercad |
| 3DSlash | Free | Web-Based | 3DSlash |
| SculptGL | Free | Web-based | SculptGL |
| Blender | Free | Windows, Mac, Linux | Blender |
How to Edit STL files in All Free STL Editors
Fusion 360
Fusion 360 is a full 3D CAD software by Autodesk. It is built to be a professional CAD solution and is an industry favorite. Even so, the interface is easy to navigate and has a nice selection of advanced tools, so it is a perfect solution for beginners and experts alike. While it technically is a paid service, you can get a year or more free with a student or hobbyist license.
- Price: Free for the first year
- OS Compatibility: Windows, Mac
Opening STL Files
First and foremost, you will need to install Fusion 360 on your computer, create an account, and get your license or free trial. You’ll need to log in to access the program’s interface. Once you’ve done that, you can import an STL file of your choice.
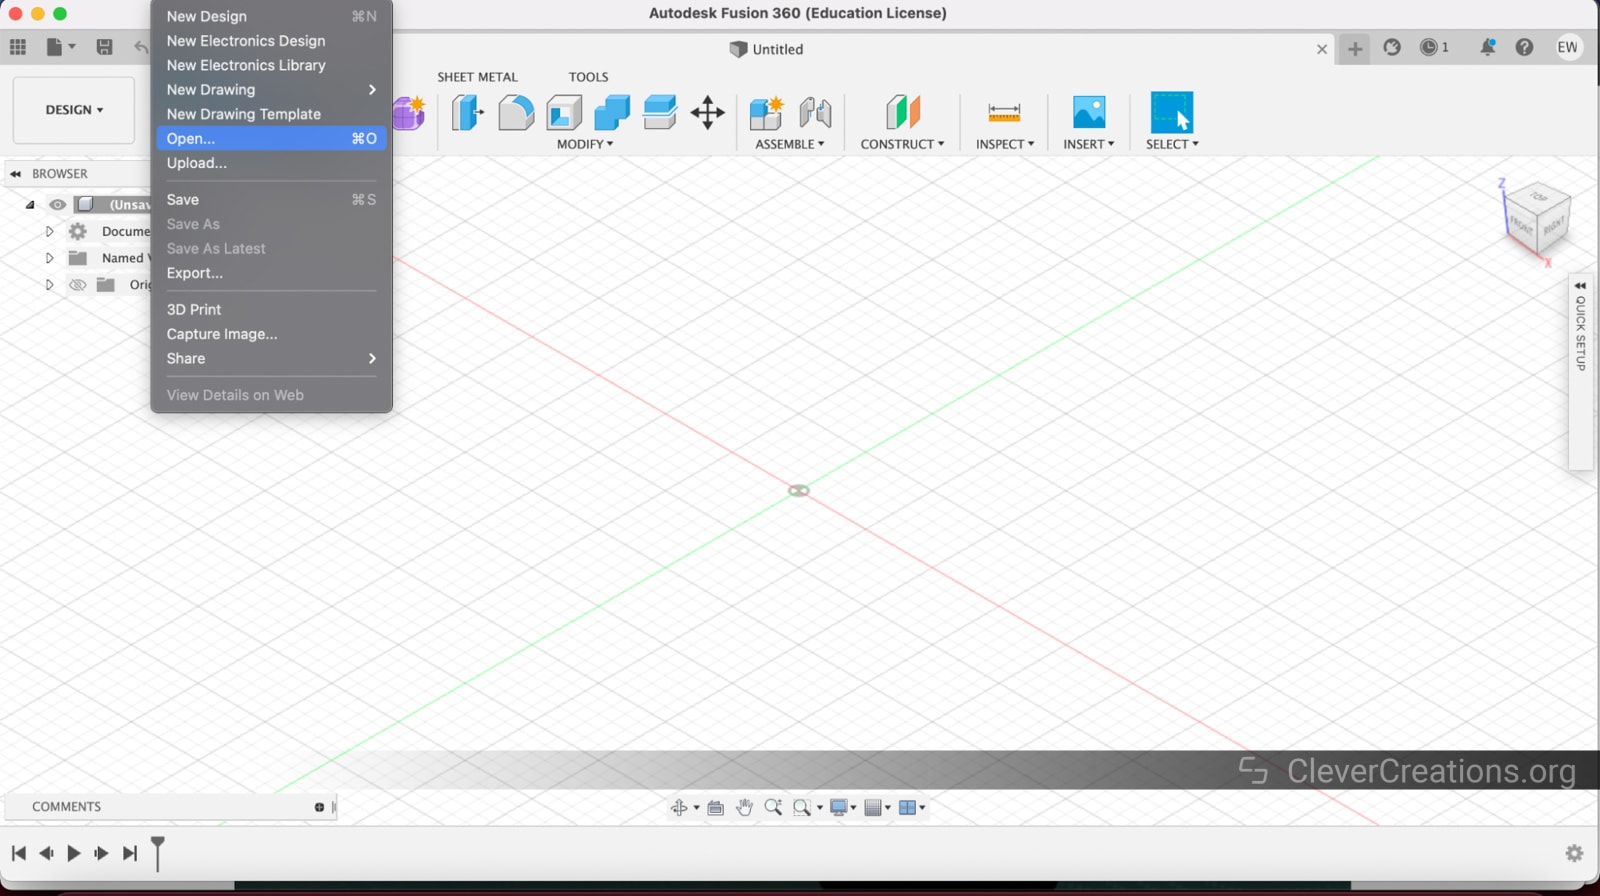
- Choose File -> Open from the toolbar.

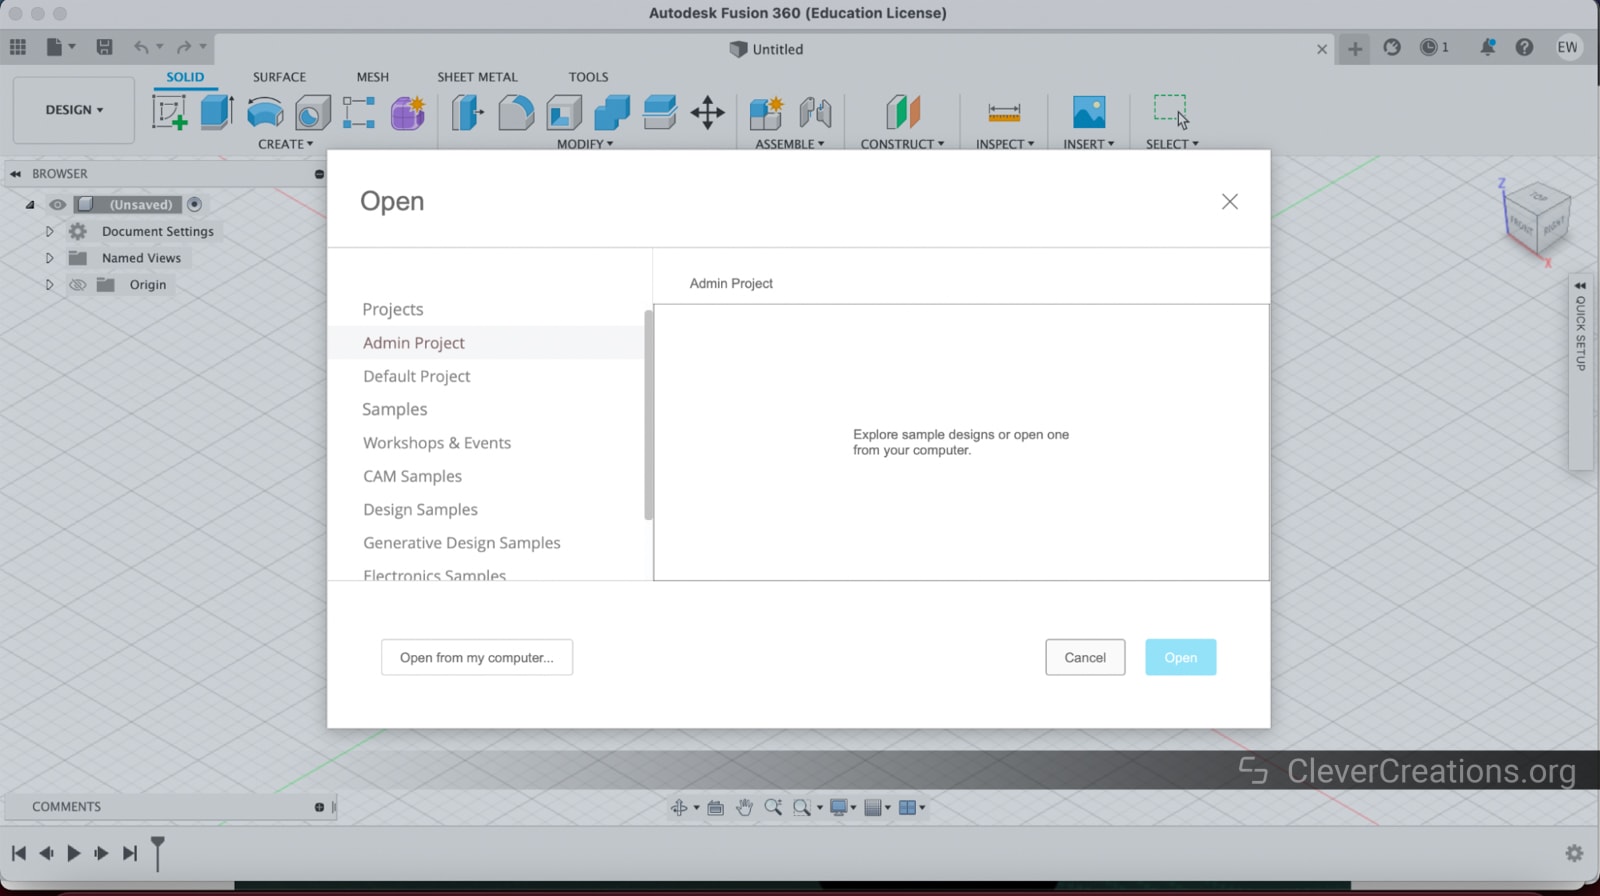
- Click Open from my computer…
- Select the desired STL from the file explorer.
- Click Open. Your STL file will appear in the workspace after.
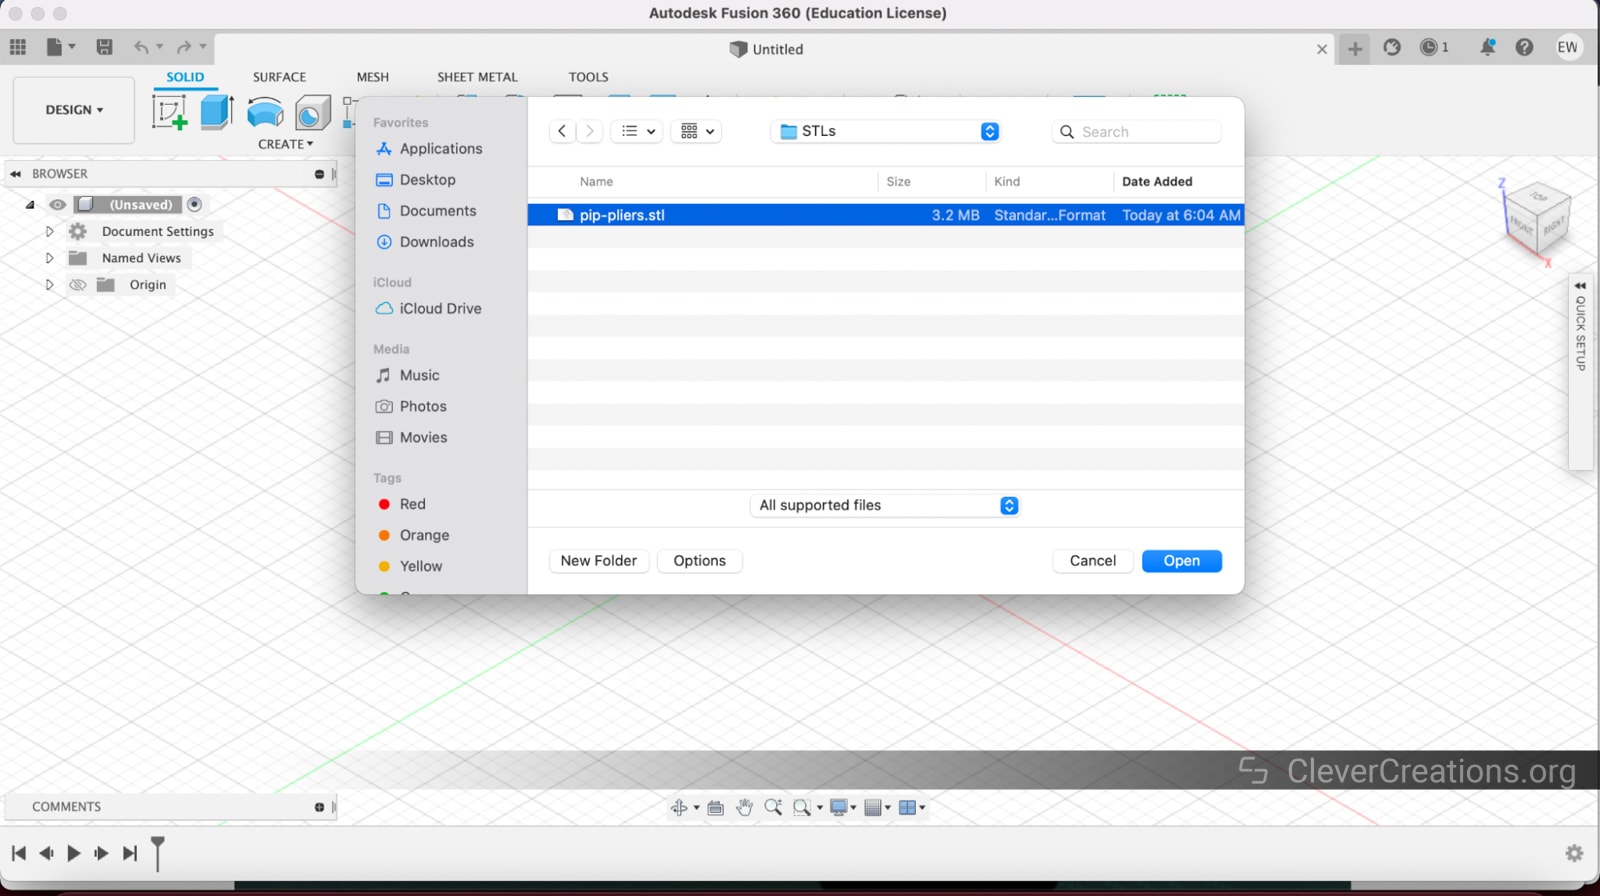
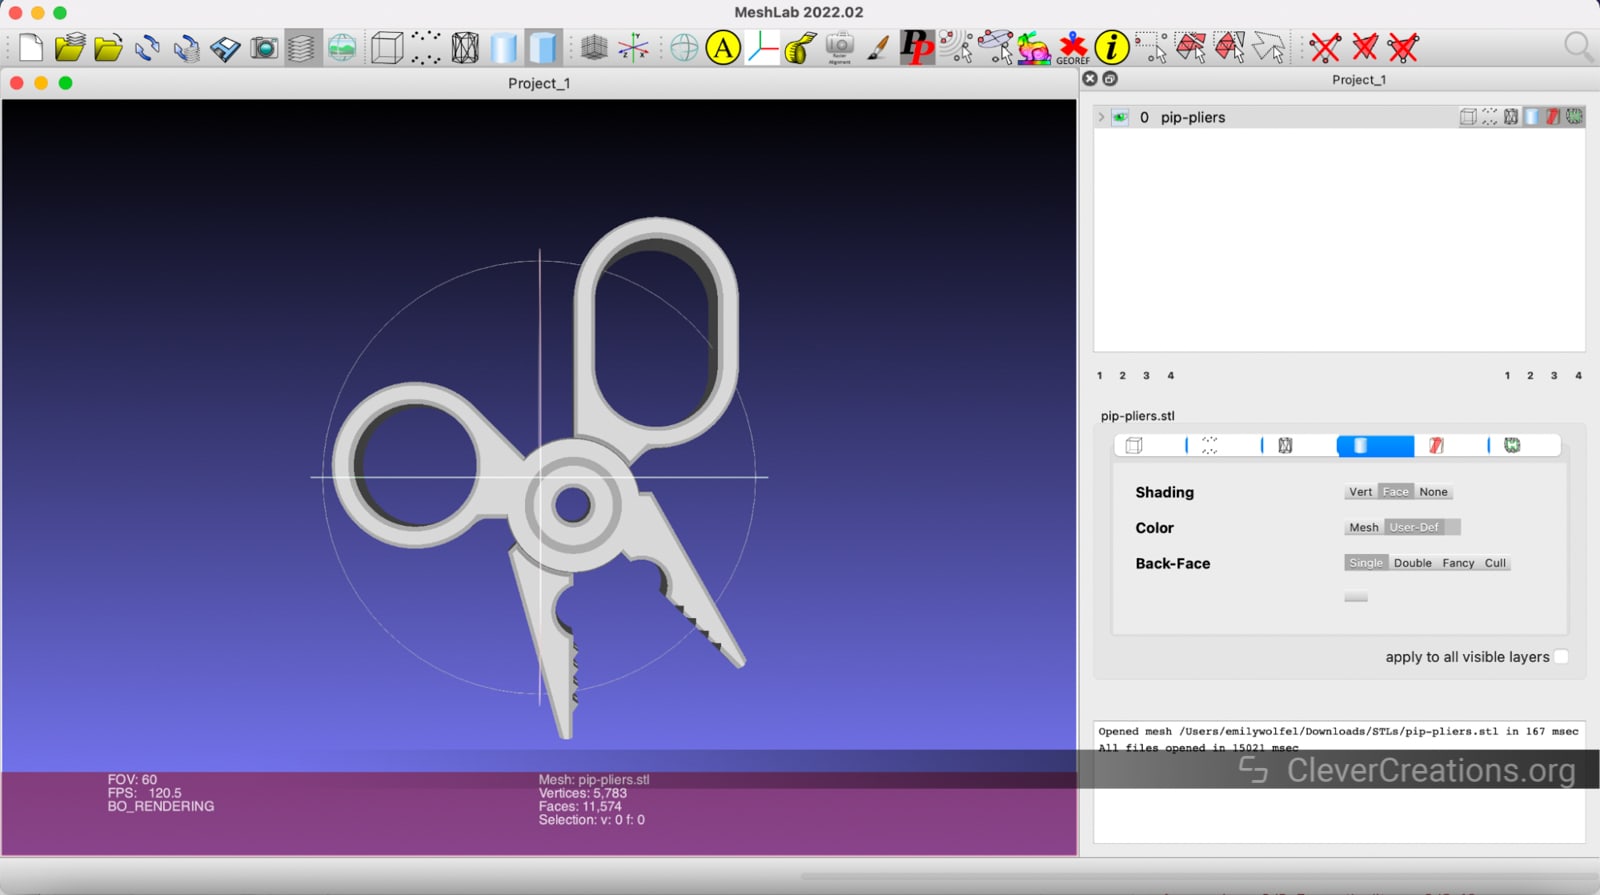
(The STL used in this article is 3D Printable Pliers by Fernando Jerez.)
Editing STL Files
Fusion 360 has a number of surface and mesh editing tools. Which tools you select depends on what you are trying to edit in the model. You can scale, slice, remesh, reduce, and much more using the tools under the Modify toolbar in the Solid, Surface, and Mesh tabs. You can even open additional STL files and merge them or use the shape tools available in Fusion 360 to add to the current STL.

Repairing STL Files
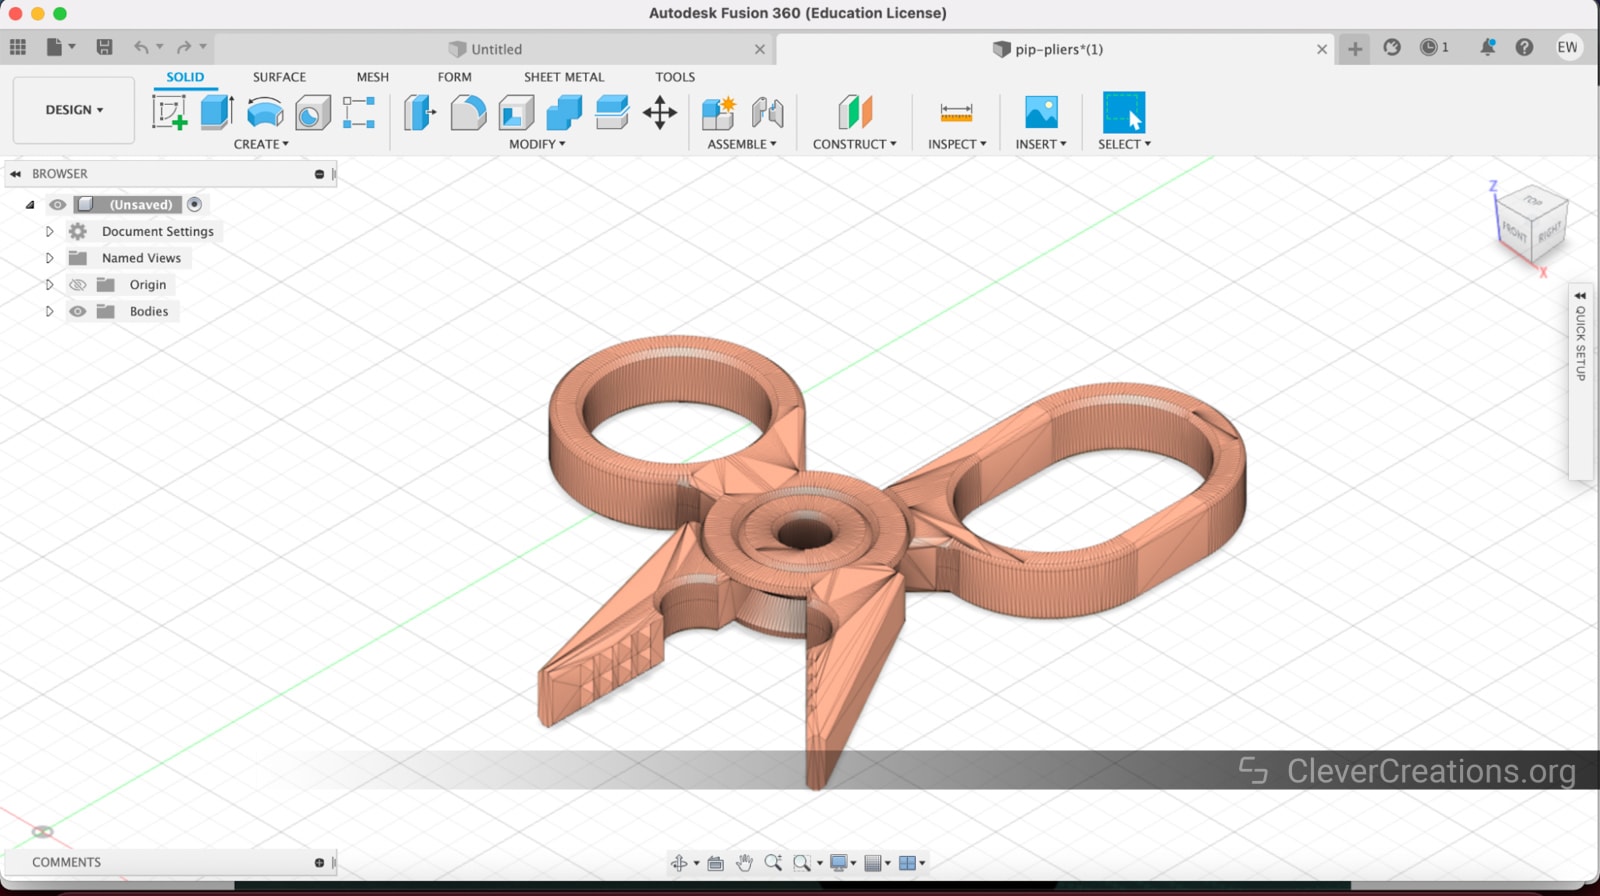
To repair an STL file, you can use any number of mesh editing tools shown in the previous step, depending on the issue. Fusion 360 usually lets you know there is an issue with your file when you import it, so it’s easy to diagnose. Fusion 360 also has a repair tool that automatically fixes errors and issues with the mesh as well.
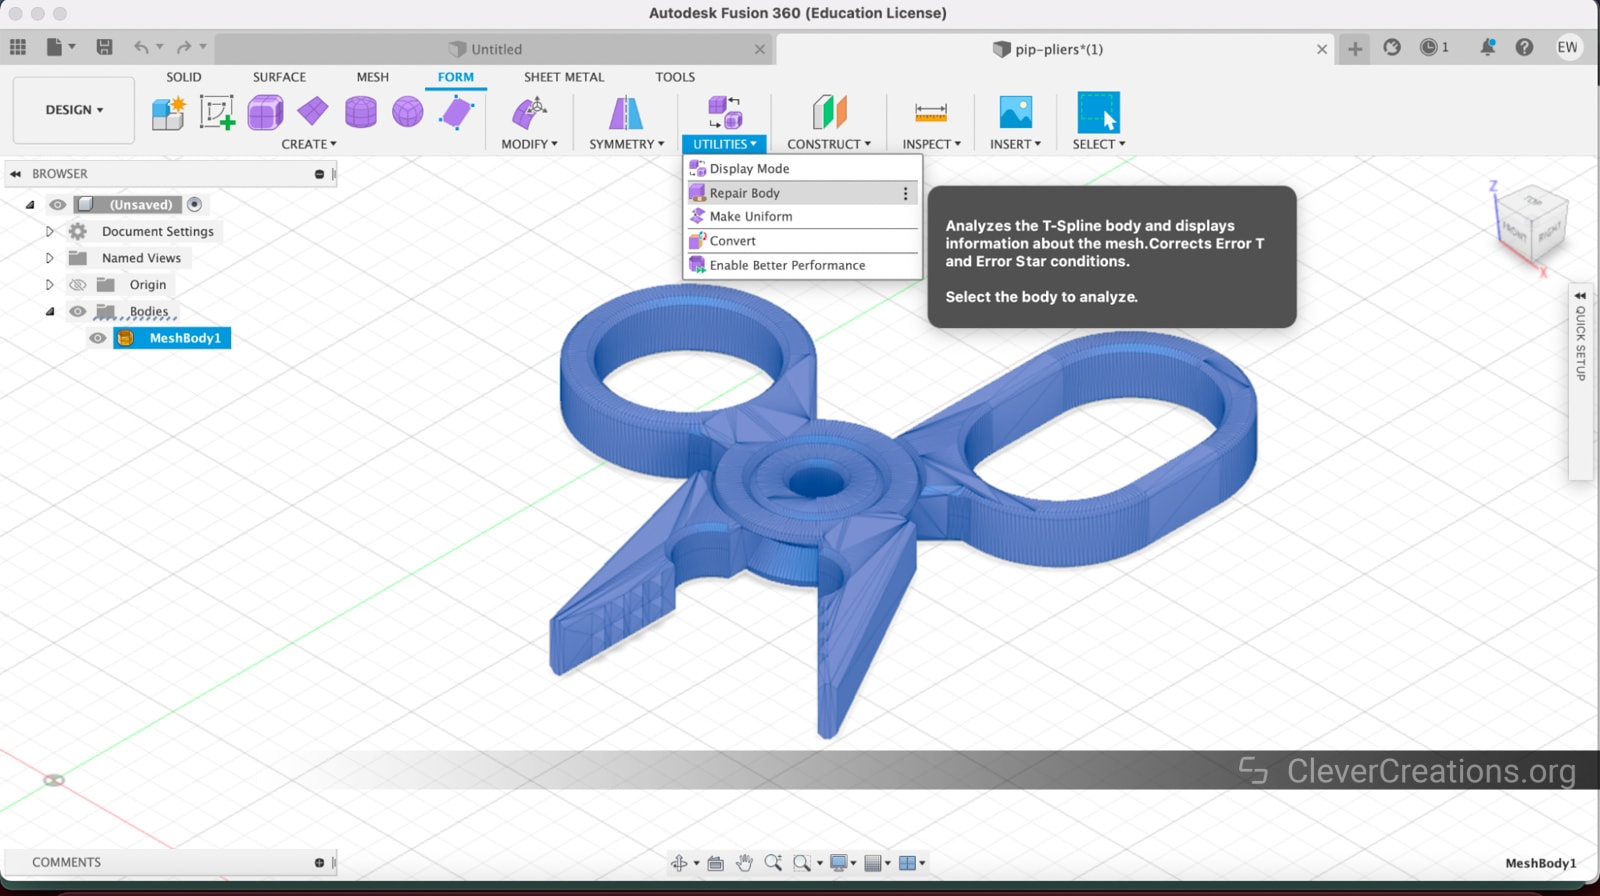
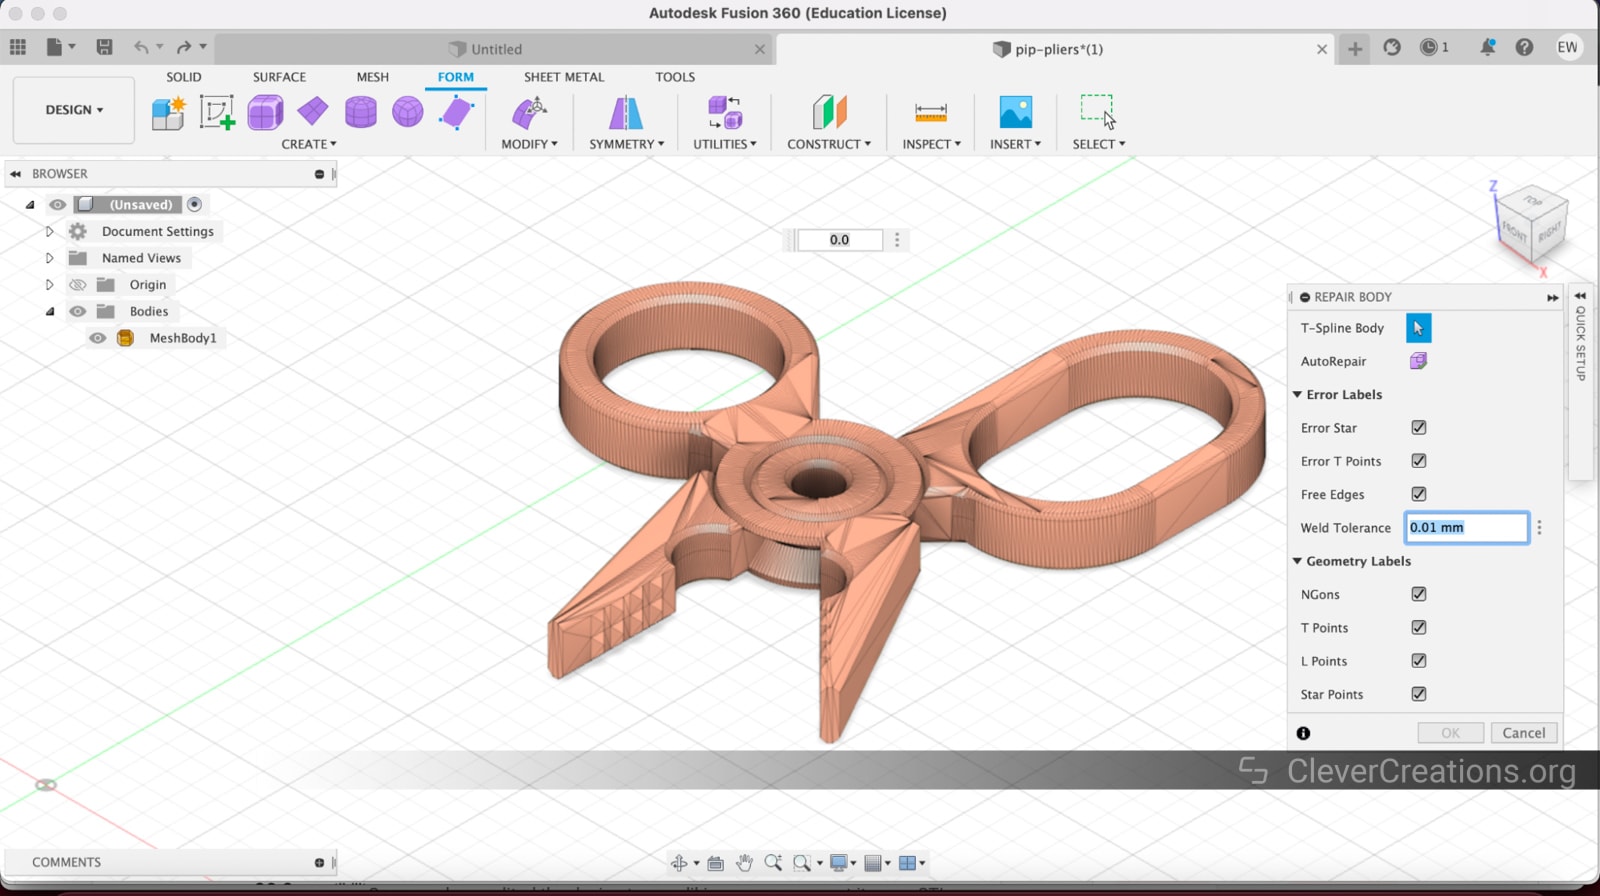
- Go to Form -> Utilities and select Repair Body.
- Choose a tolerance (the default is 0.01mm) in the dialog box that appears.
- Click OK to run the tool.
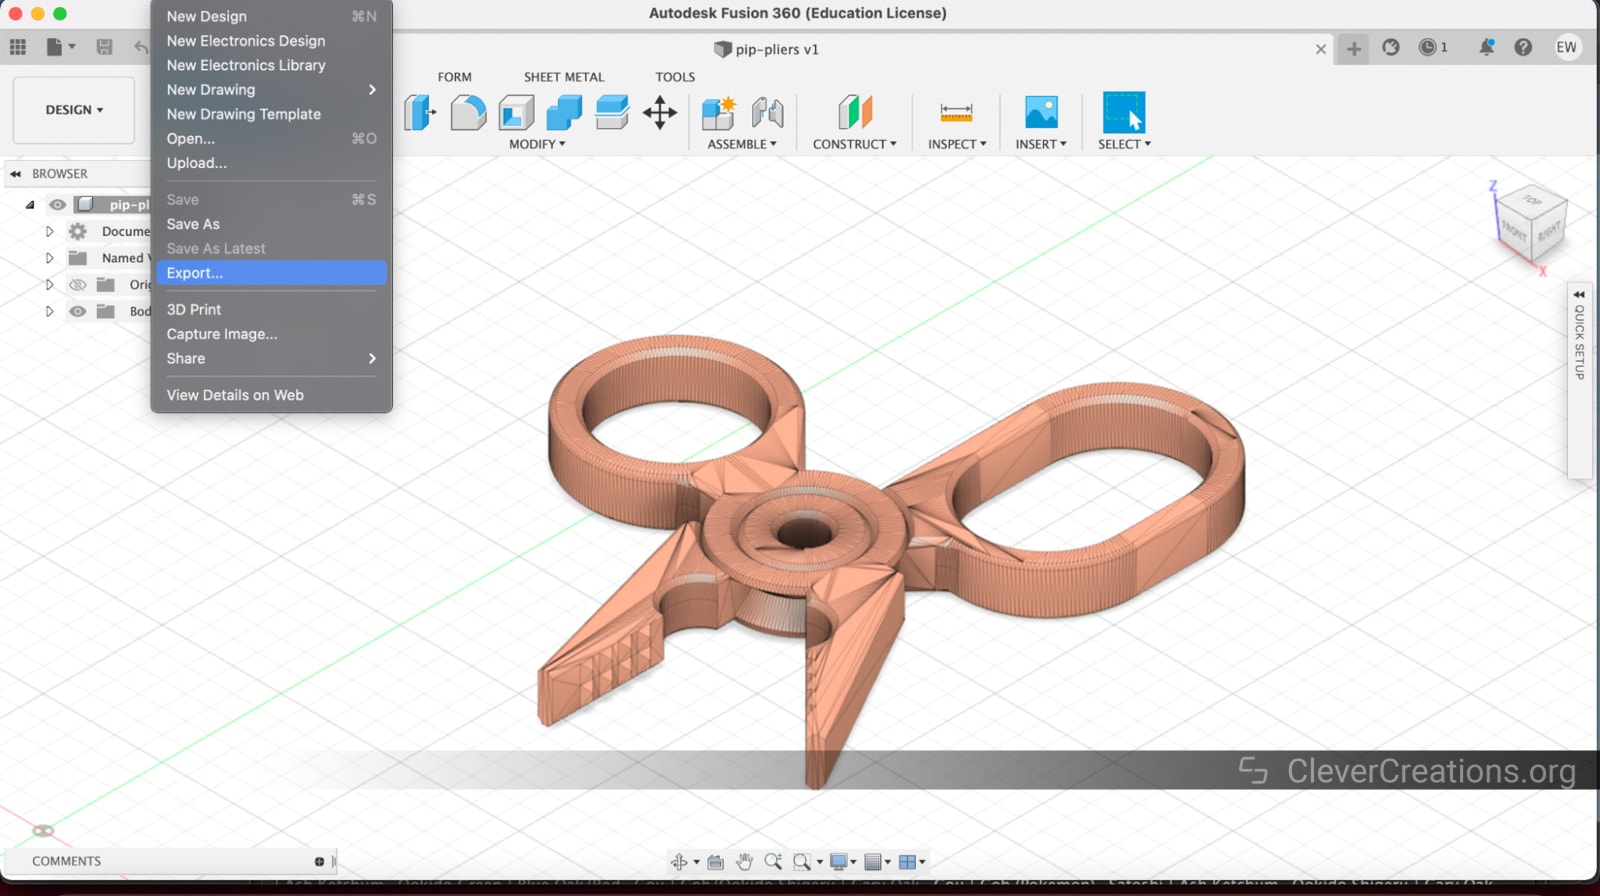
Export STL File
Once you’ve finished editing or repairing your STL file, you can export them.
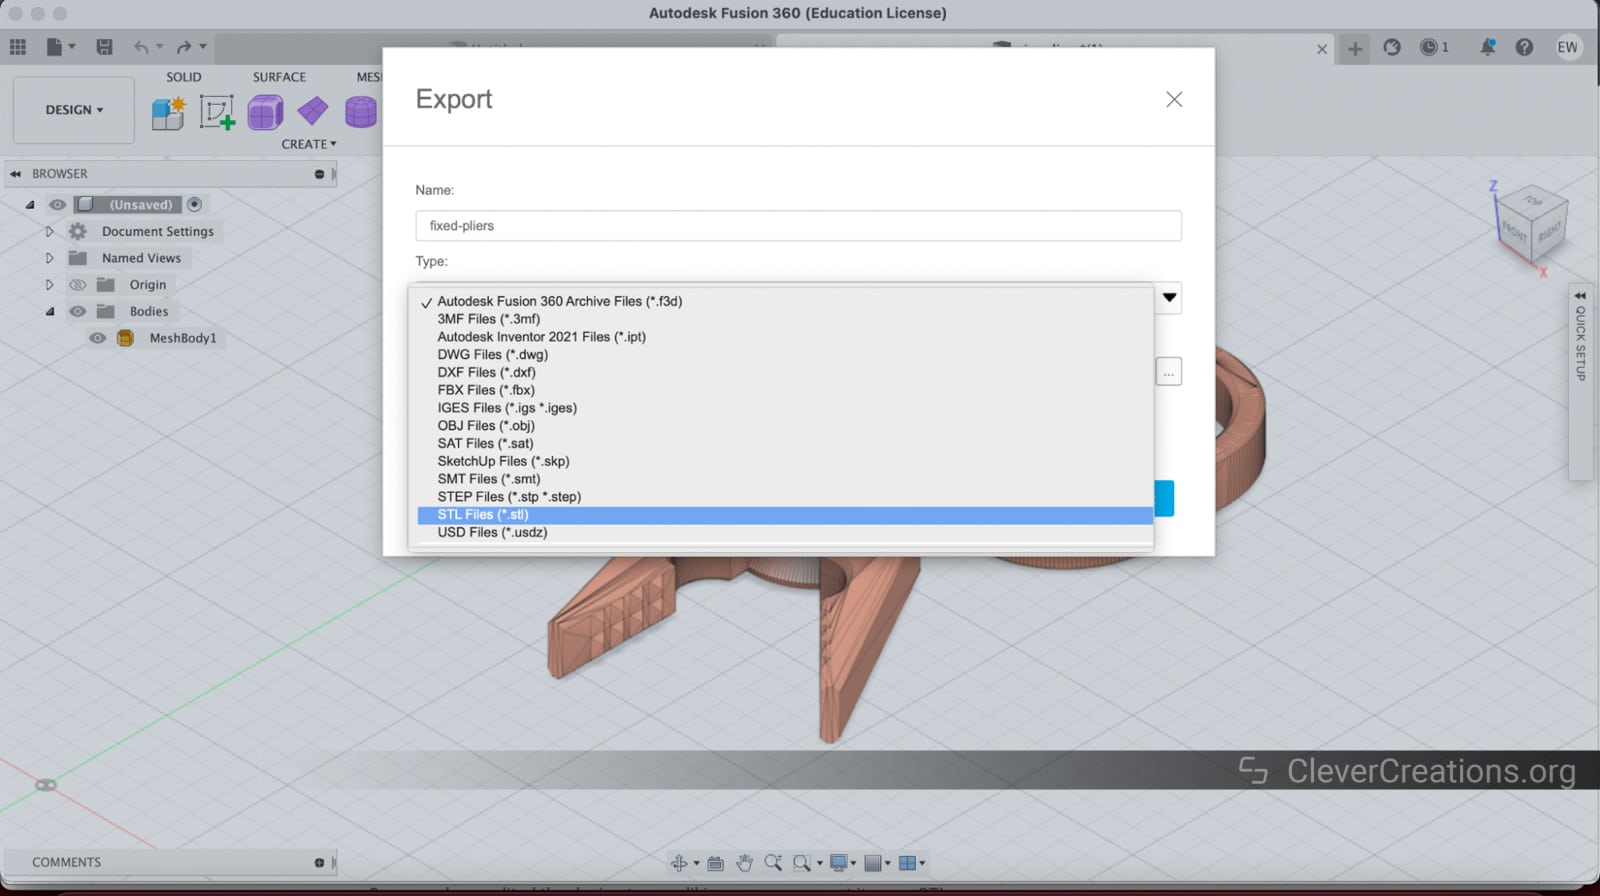
- Choose File -> Export from the main toolbar
- Name your file and select STL from the Type dropdown.
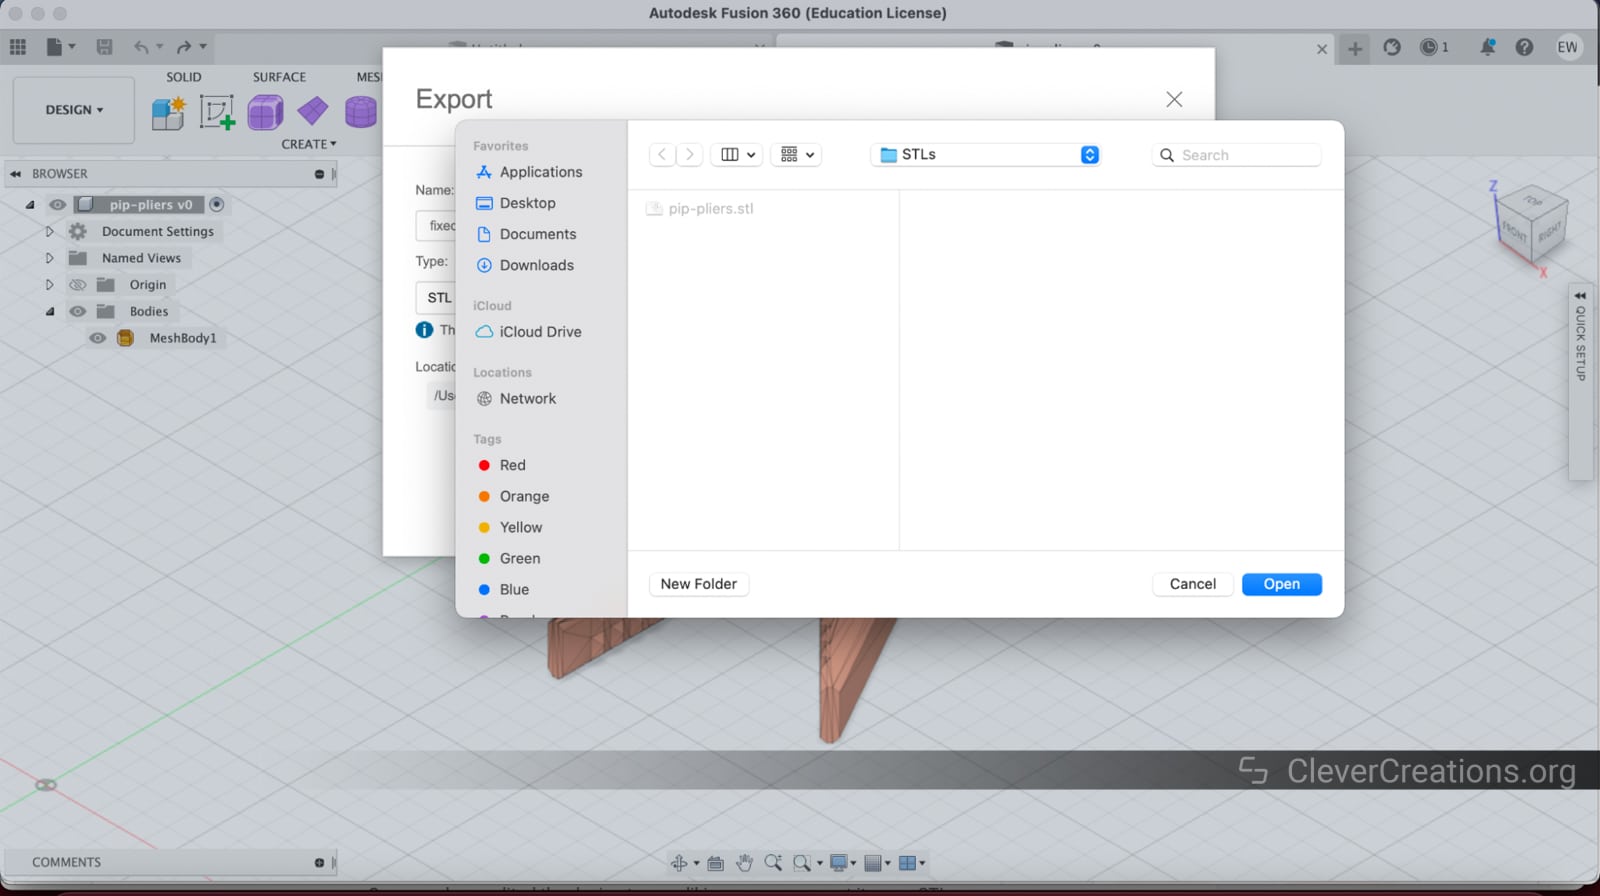
- Choose a destination for your file. It will default to the location you imported it from unless you choose somewhere different.
- Click OK to start the export. The job status pop-up will show you the progress of your export.

FreeCAD
FreeCAD is an open-source CAD software capable of creating and editing complex 3D models. Since it supports the STL file format, it is a great STL editor for 3D printing purposes. It has an easy-to-use visual interface for beginners, as well as built-in Python support for more advanced users.
- Price: Free
- OS Compatibility: Windows, Mac, Linux
Opening STL Files
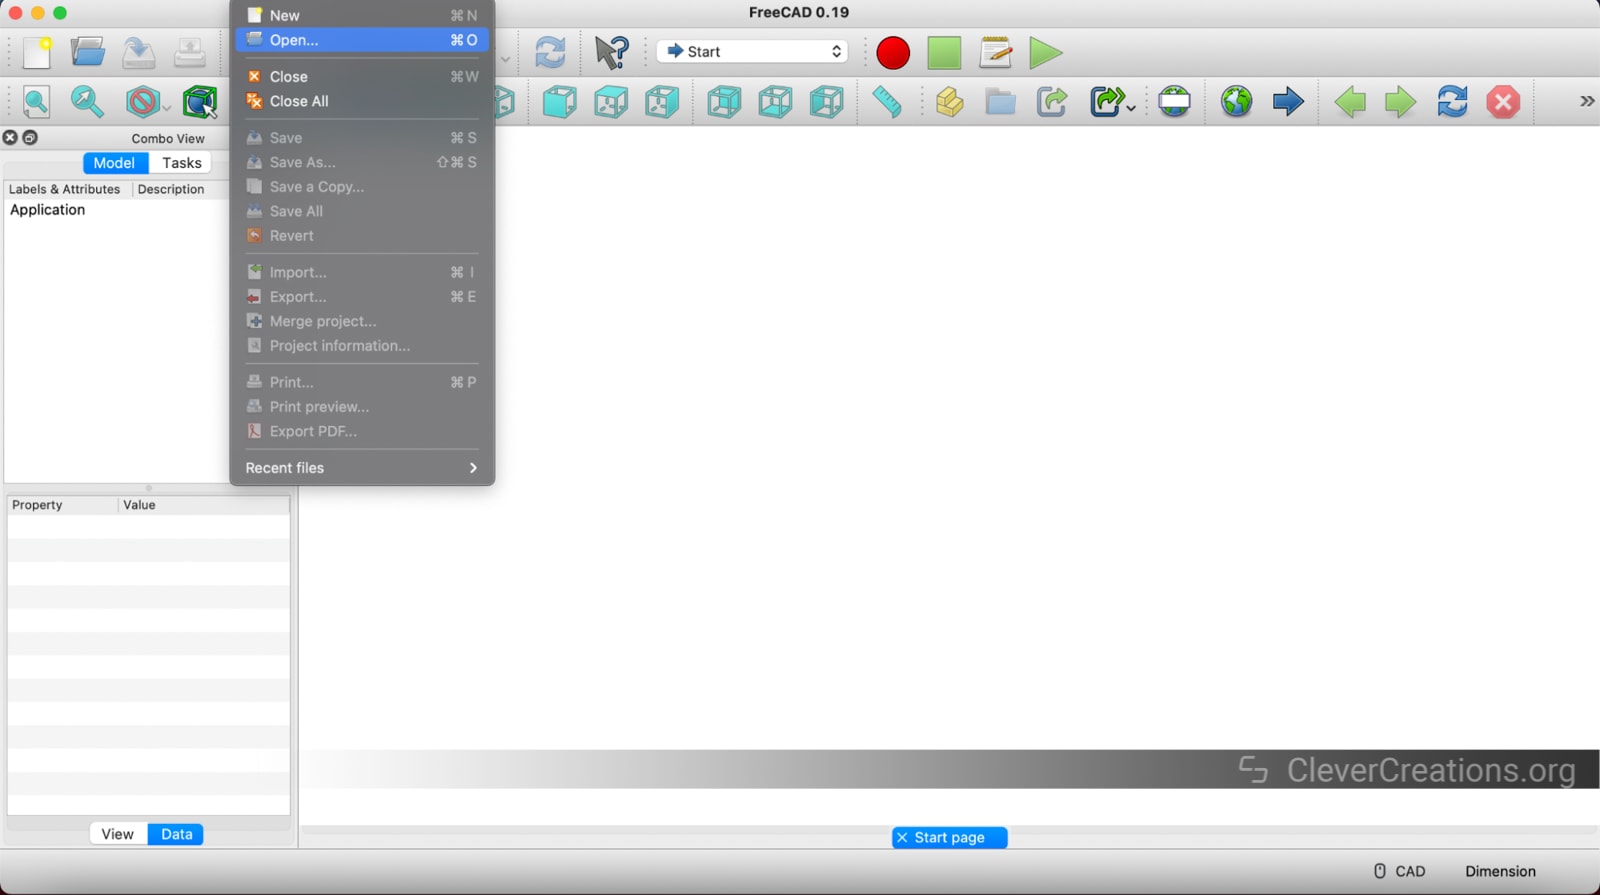
You will first need to install FreeCAD on your computer and open it.
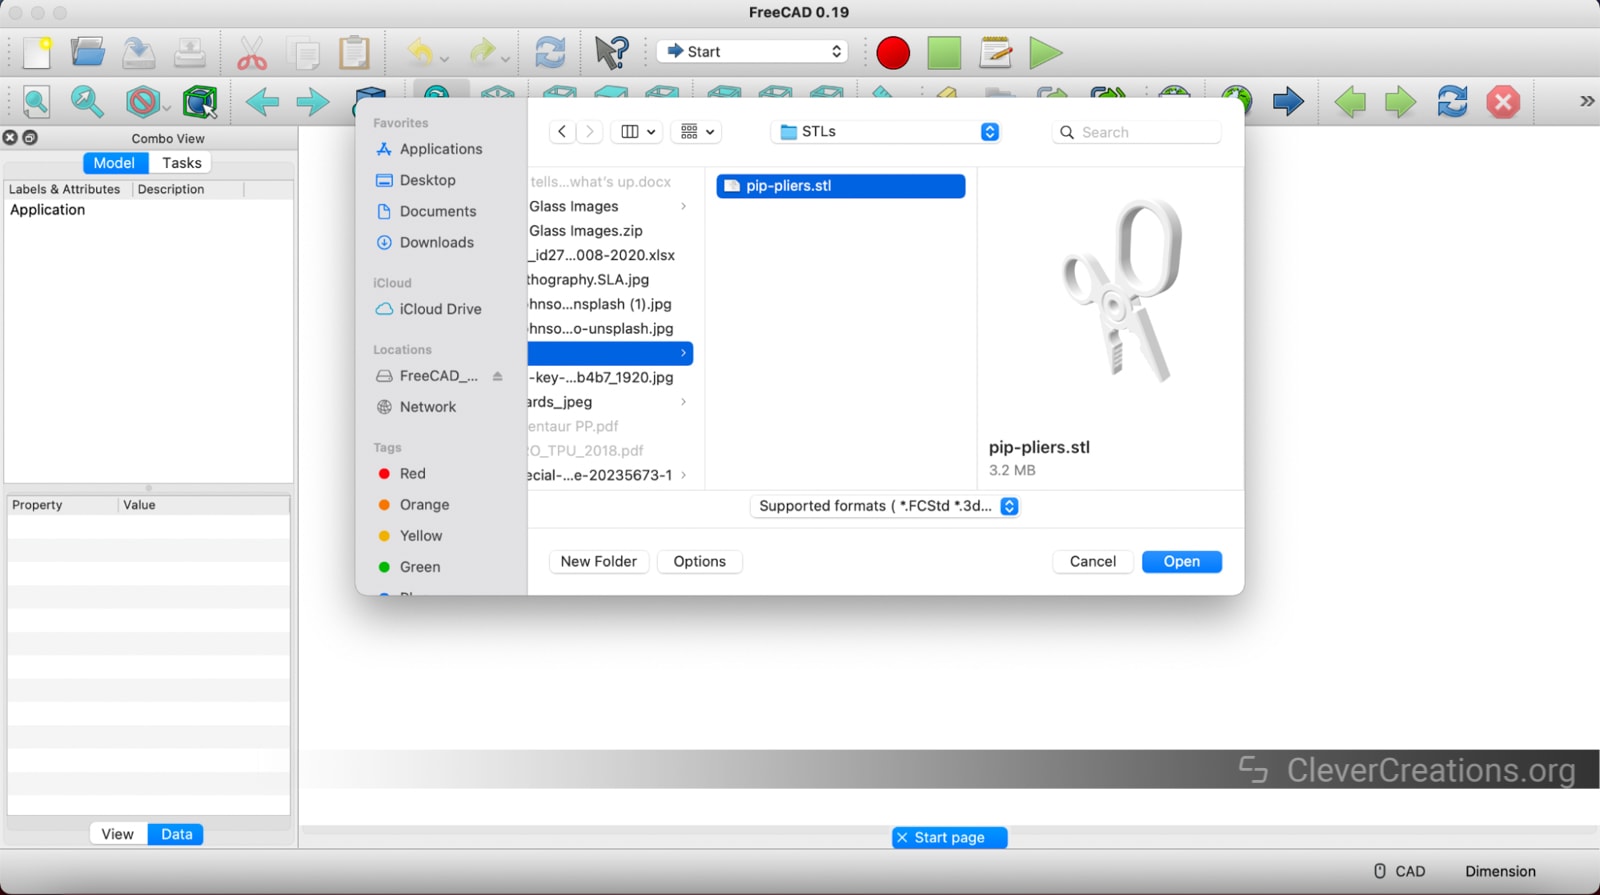
- Go to File > Open. Or you can select File > New Document and File > Import.
- Select the STL file you want to open.
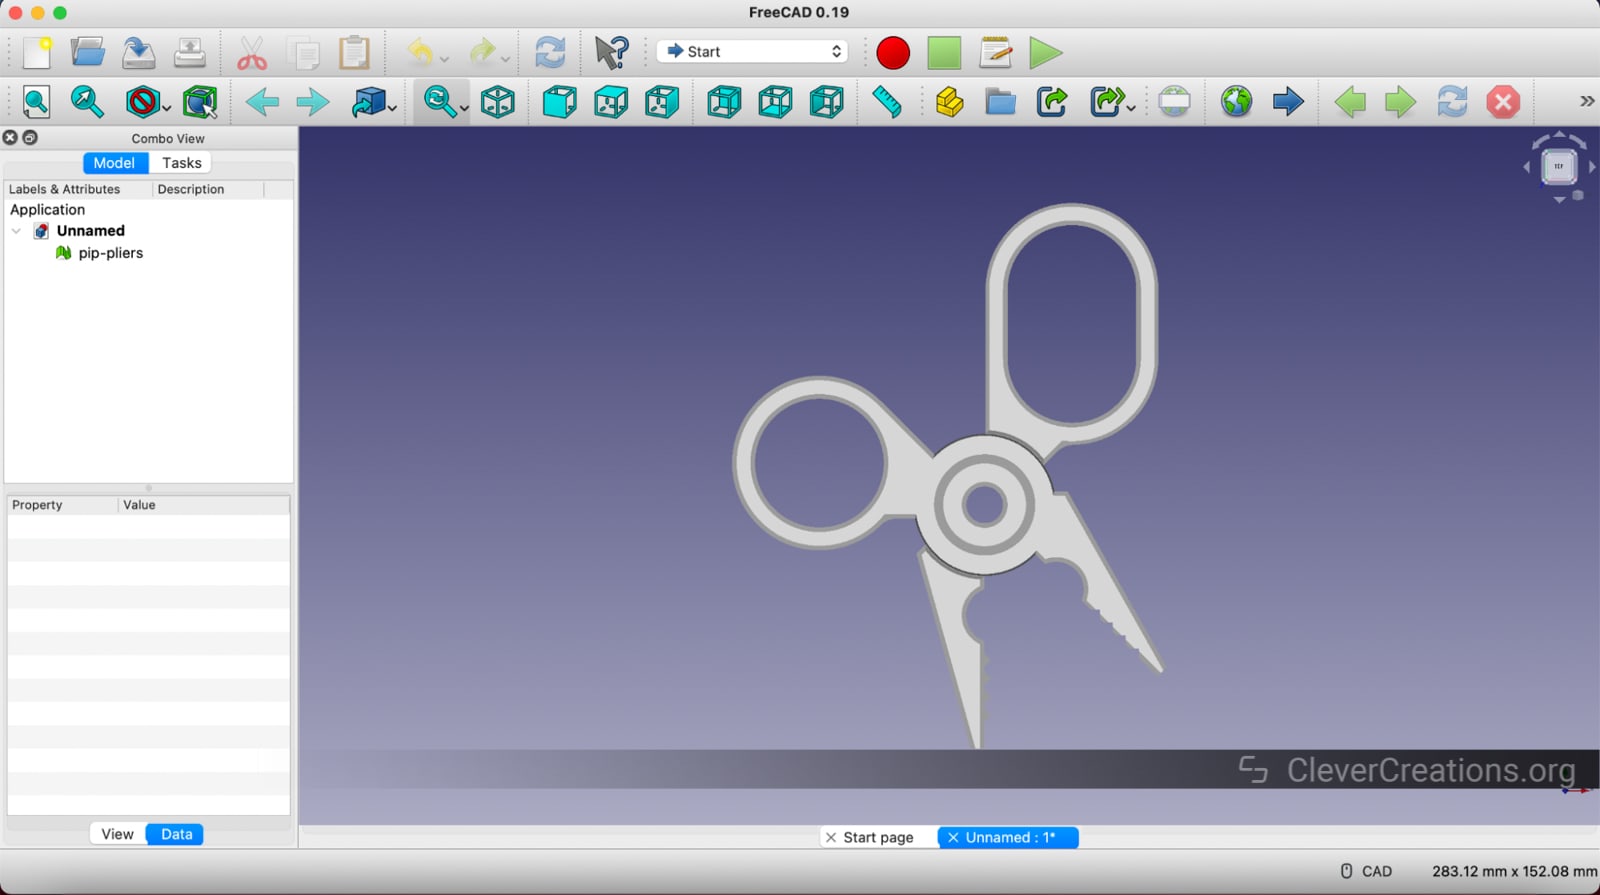
- Click Open to bring the model into the workspace.
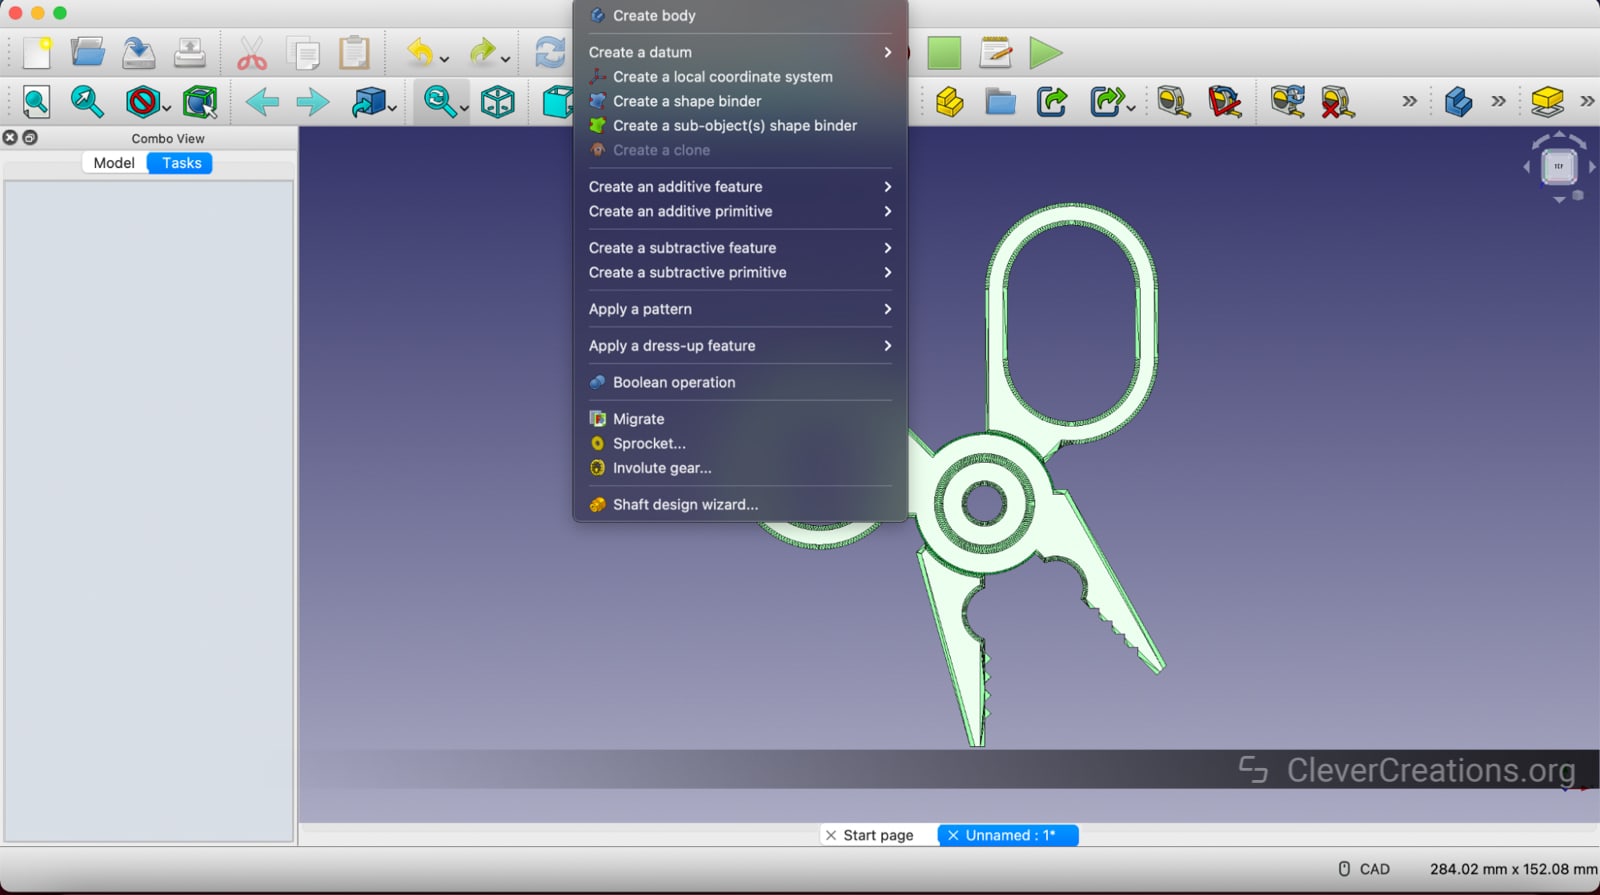
Editing STL Files
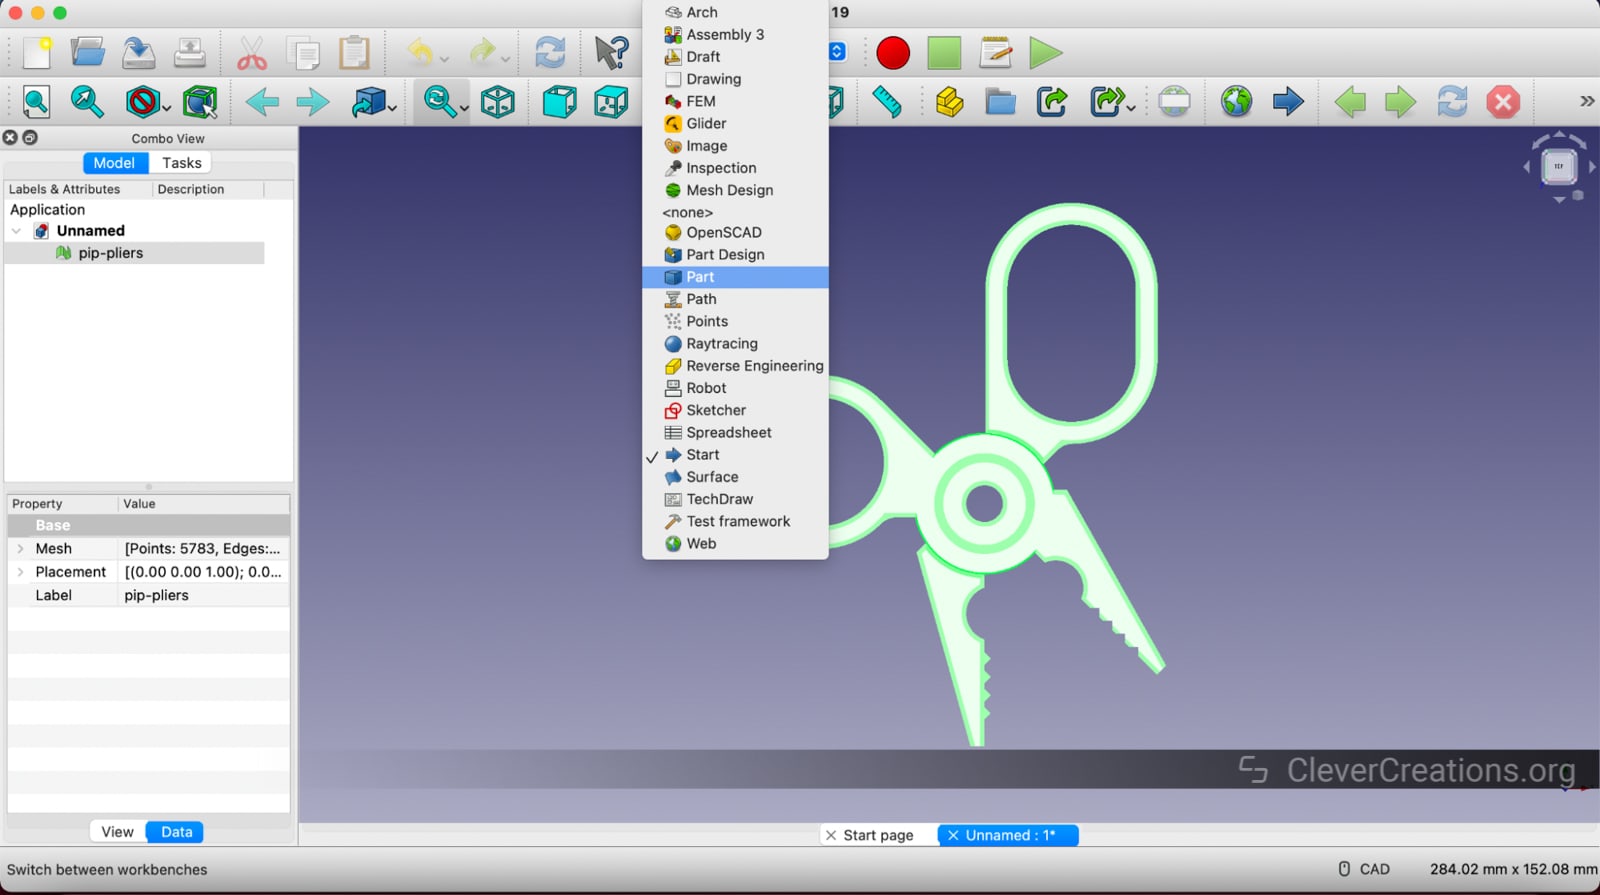
To edit STL files in FreeCAD, it’s best to convert it to a mesh first.
- Tab over to the Part workspace.
- Select Face > Create shape from mesh.
- Set the tolerance. The default is 1, but you can go down to 0.1 for more complex geometry.
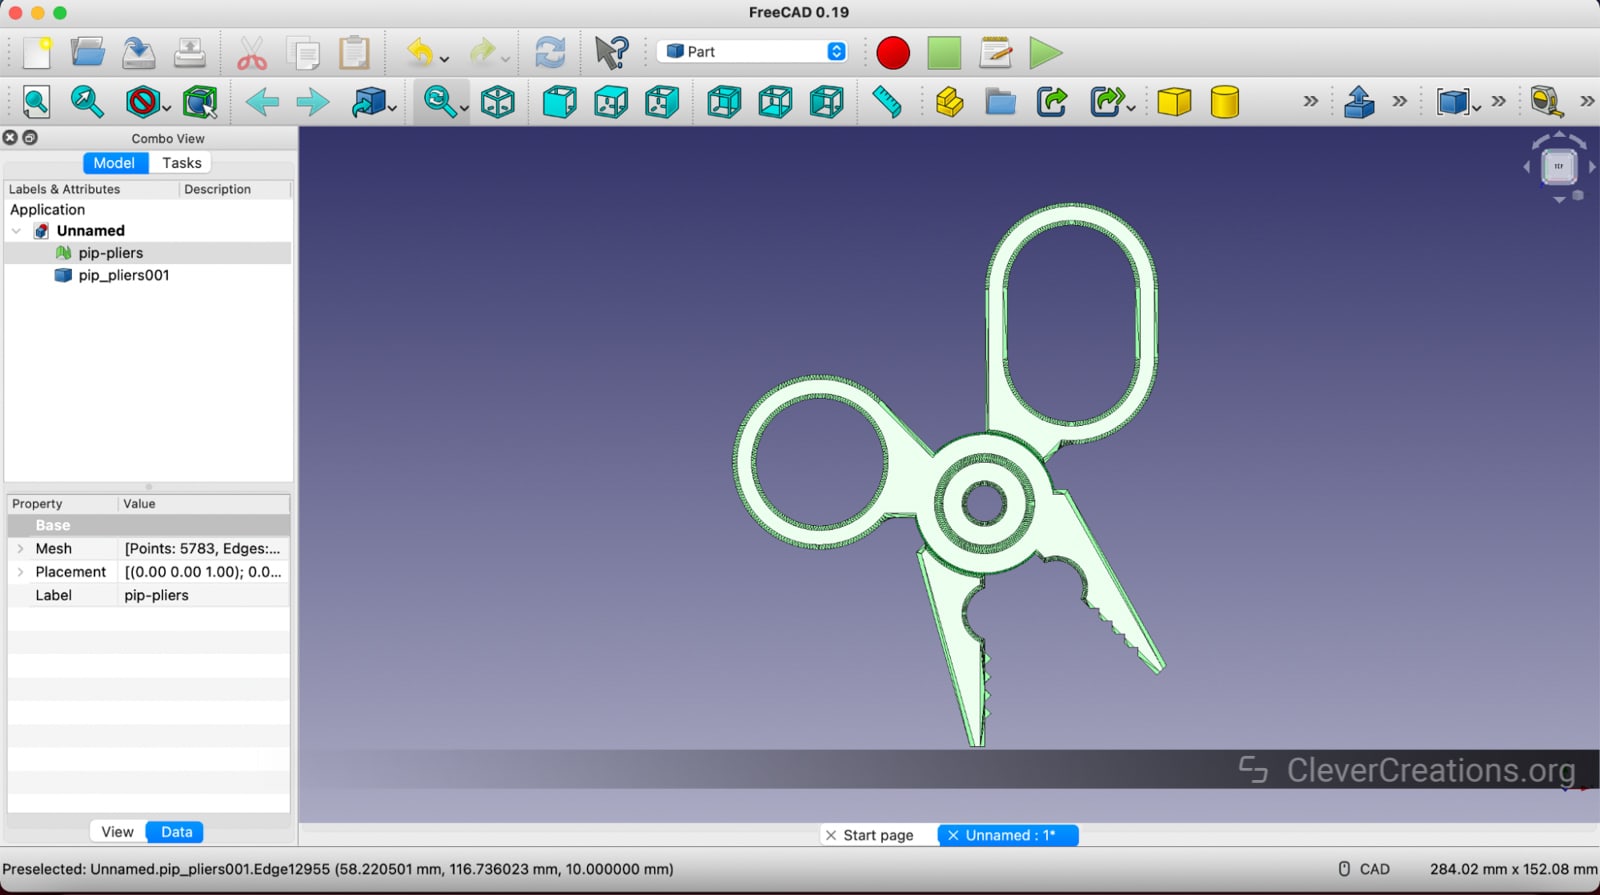
- This converts the model to a mesh and allows you to use more tools in the program to manipulate it.
- Use the tools under Part > Part and Part Design > Part Design dropdowns to make changes to the STL file or use the sketch function to sketch and extrude shapes to add to the existing mesh.


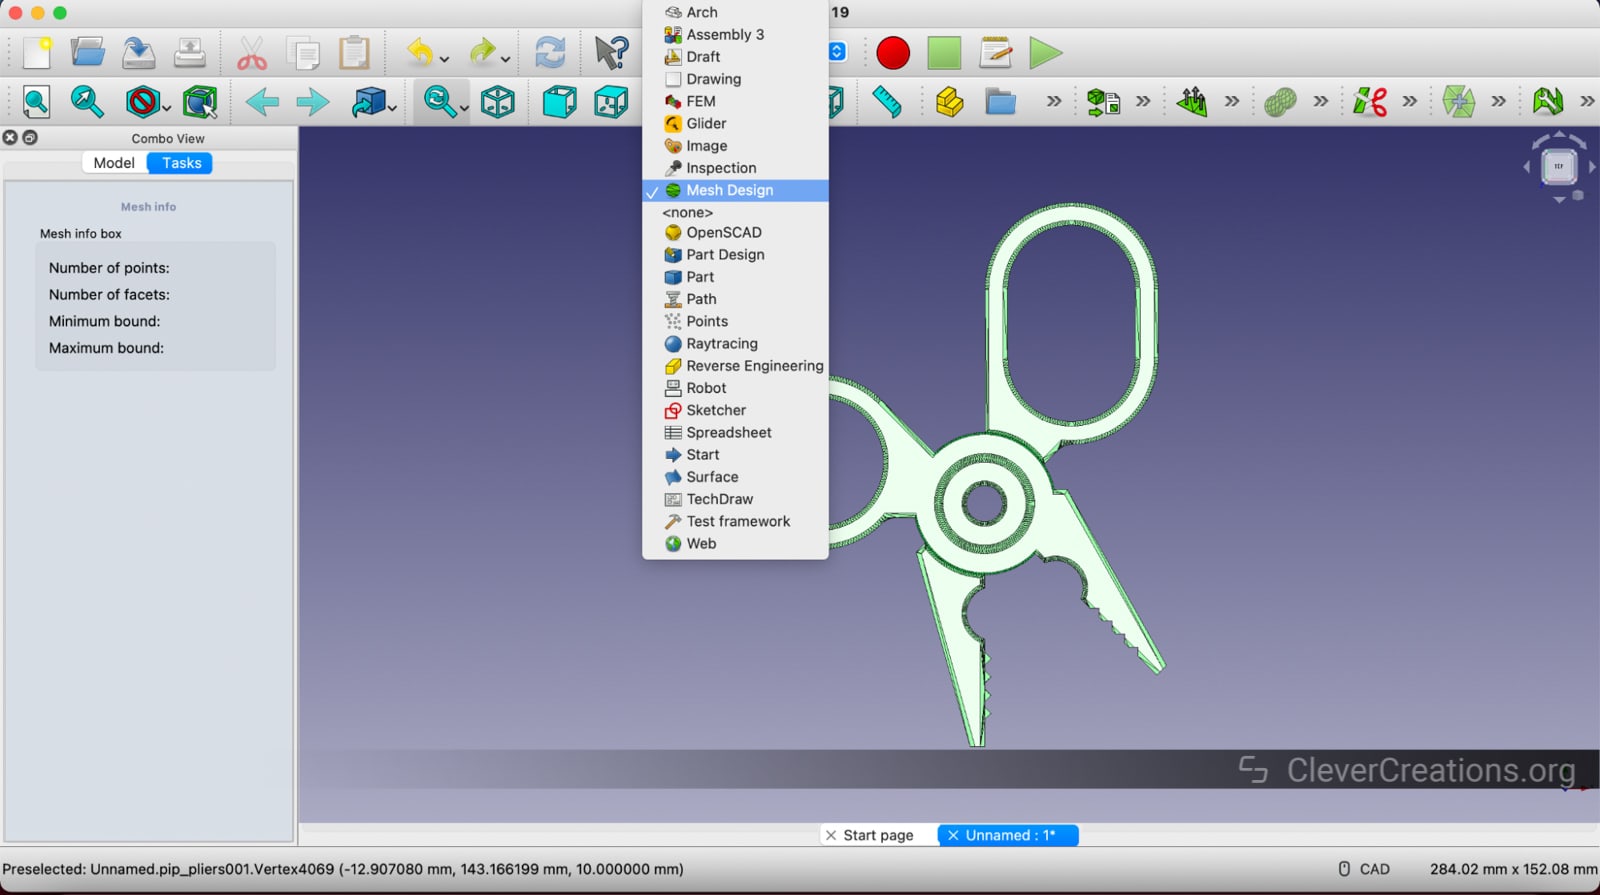
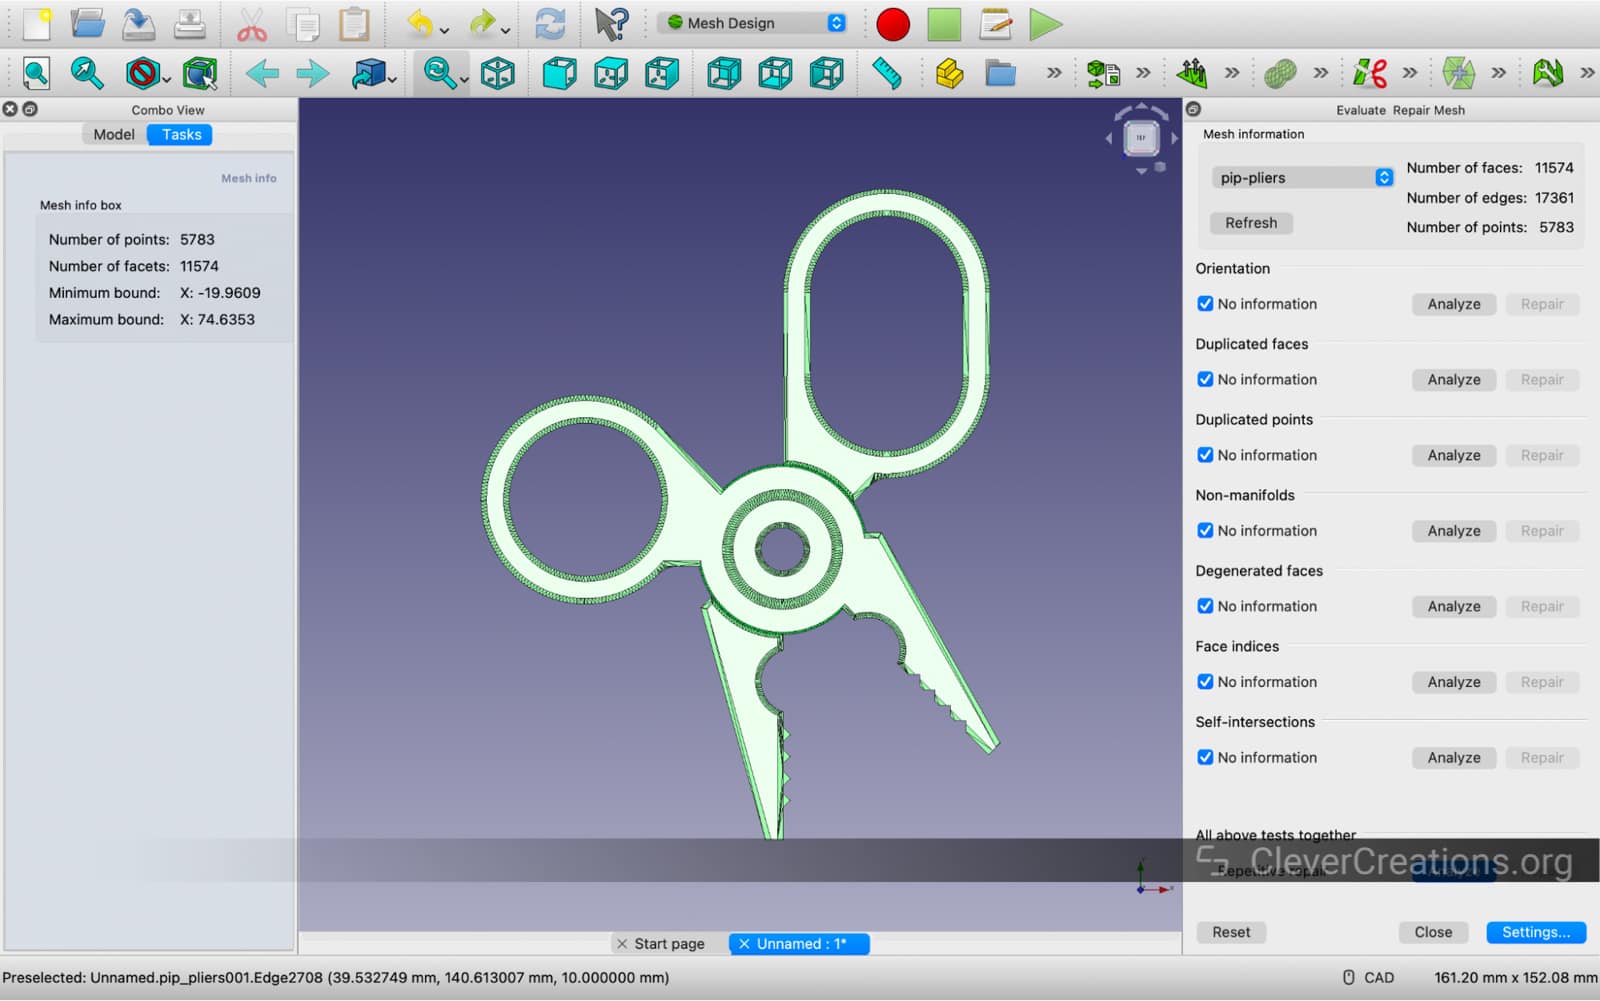
Repairing STL Files
It is easy to repair STL files in FreeCAD thanks to its built-in repair tool.
- Tab over to the Mesh Design workspace.
- Go to Meshes > Analyze > Evaluate and repair mesh.
- Check the boxes for all the diagnostic tests you want FreeCAD to run.

- Press Analyze to run the tests. If it shows any issues, you can select the Repair button next to the problem and it will automatically correct it.


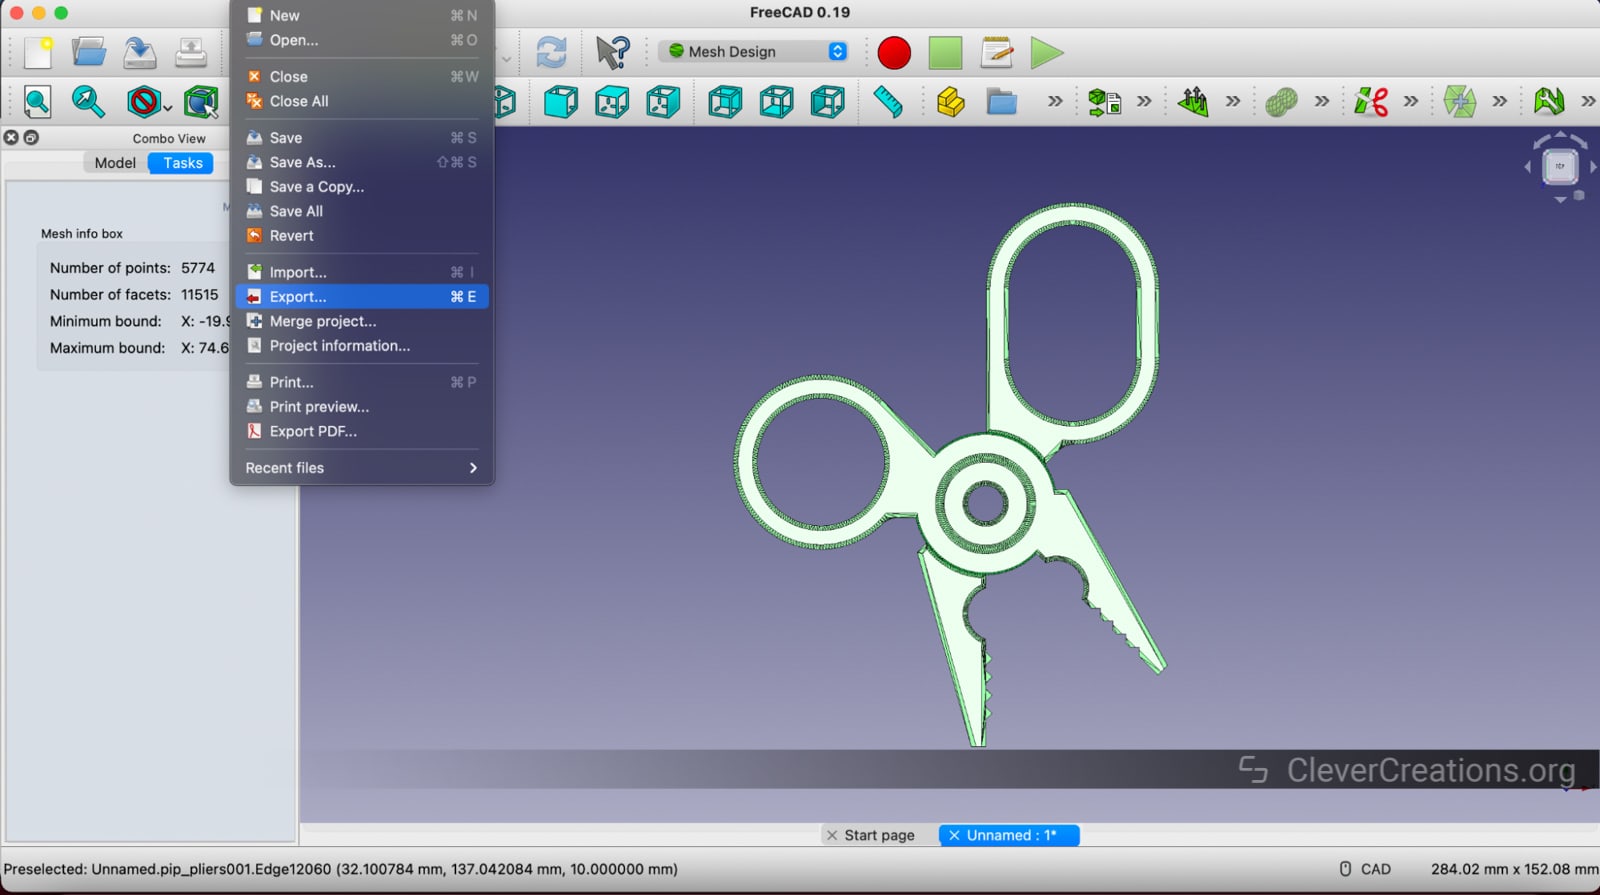
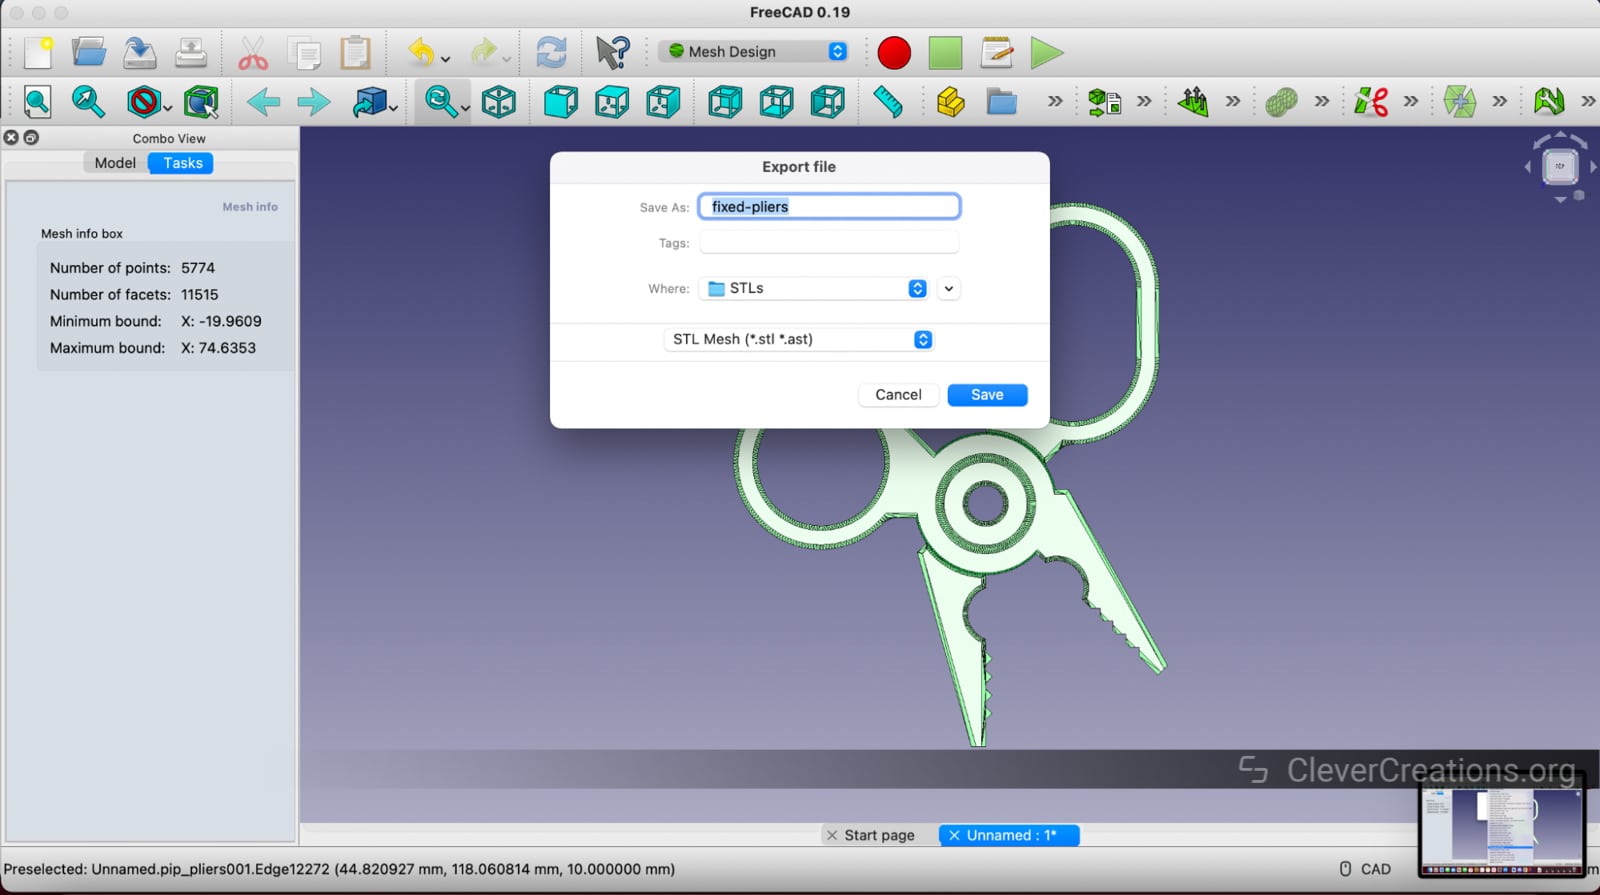
Exporting STL Files
- Go to File > Export in the main toolbar.
- Name your file, select STL as your file type, and choose where to save it. Press Save to finish the process.
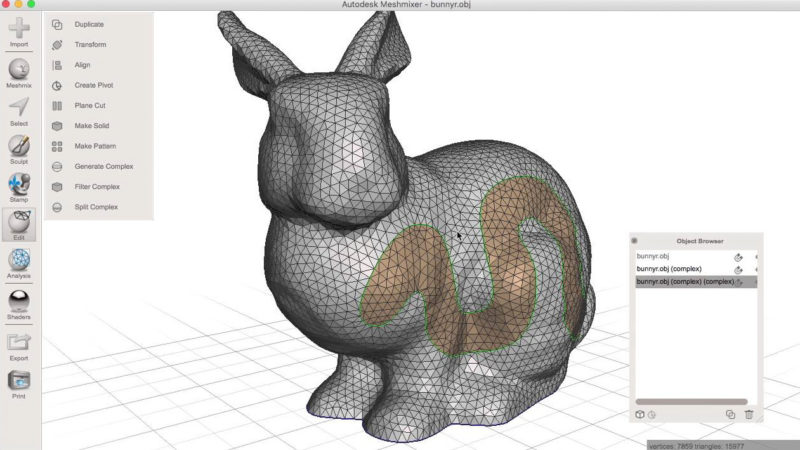
MeshMixer
MeshMixer is a free STL editor designed for combining, splicing, and otherwise remixing files for 3D printing. It also has tools to easily repair STL files to fix things like wall thickness, holes, and other issues that would lead your 3D printing projects to fail.
The downside of MeshMixer is that Autodesk has discontinued all support for it, so it is difficult to find an installer for any systems besides Windows and the software may stop working on newer computers as it ages. They have integrated most of MeshMixer’s features into Fusion 360, so if you aren’t able to install a copy of MeshMixer, that is your best alternative.
- Price: Free
- OS Compatibility: Windows
Opening STL Files
Install the MeshMixer software onto your computer if you have not already done so.
- Select Import from the home menu.
- Choose your STL file of choice and press Open.
- Your file should now be in your workspace.


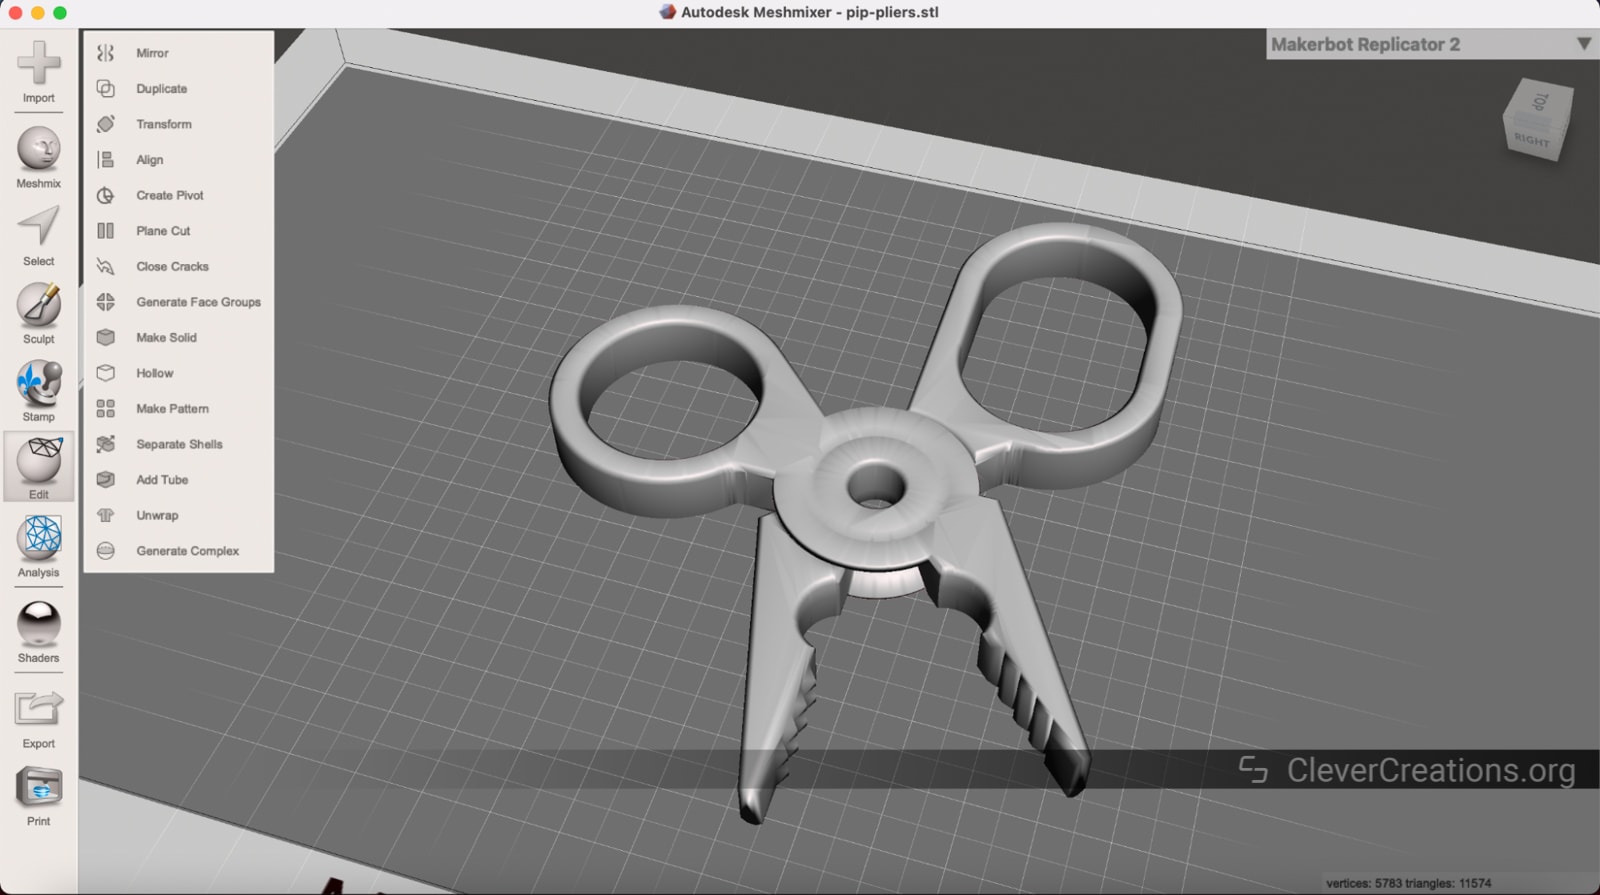
Editing STL Files
MeshMixer has several types of tools to build and edit STL files. They have an extensive library of built-in polygon objects that you can add or subtract from your existing mesh.

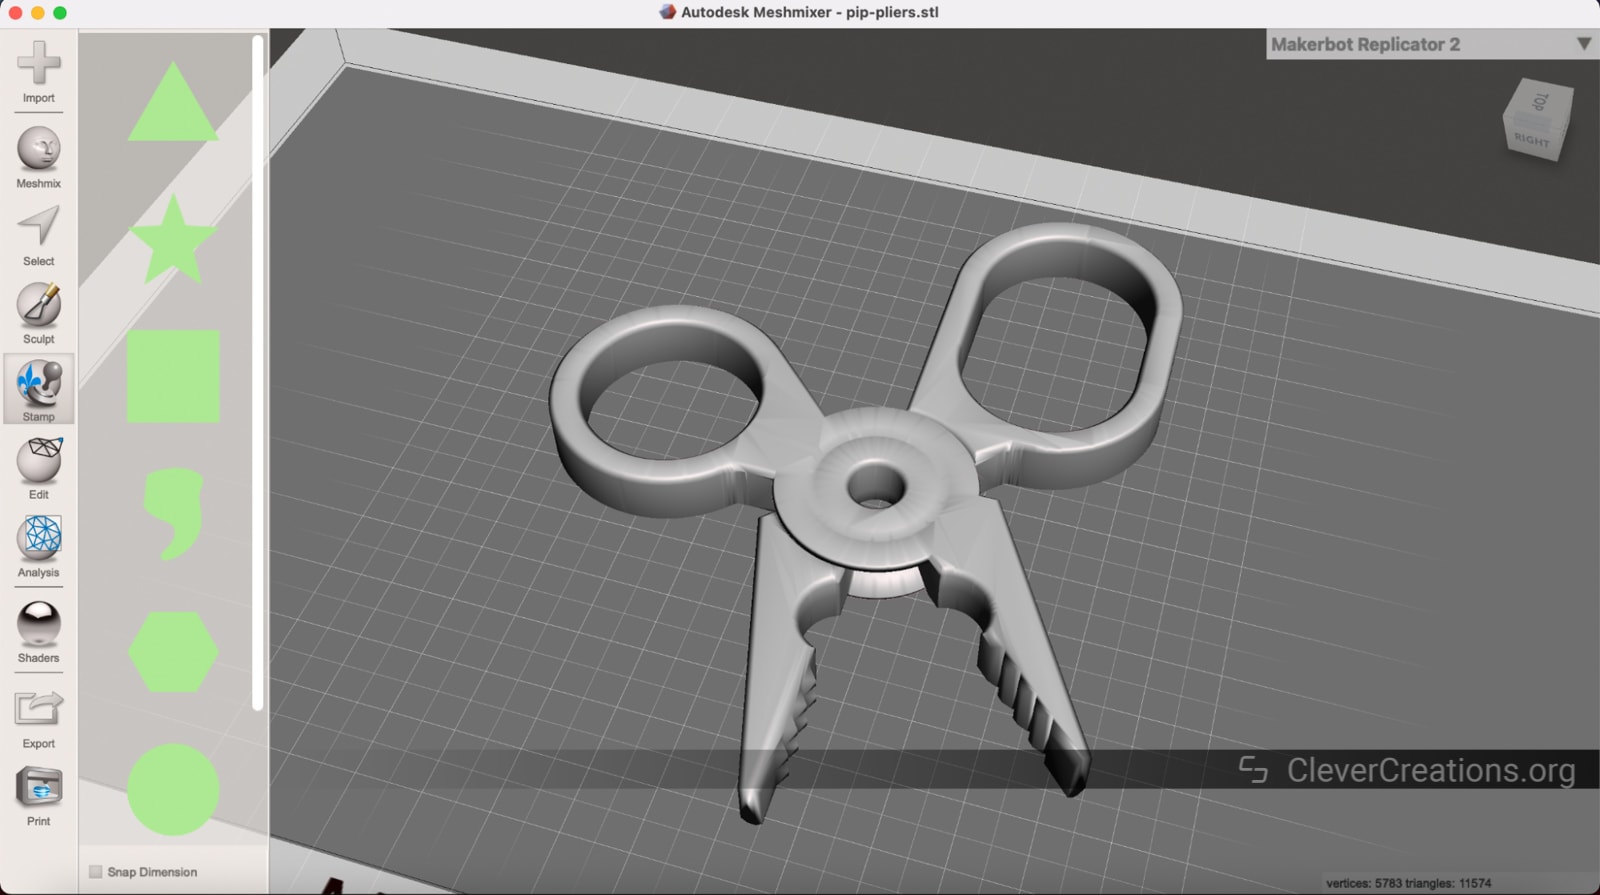
There are also basic shapes that can be stamped into the mesh’s surface with the Stamp Tool.
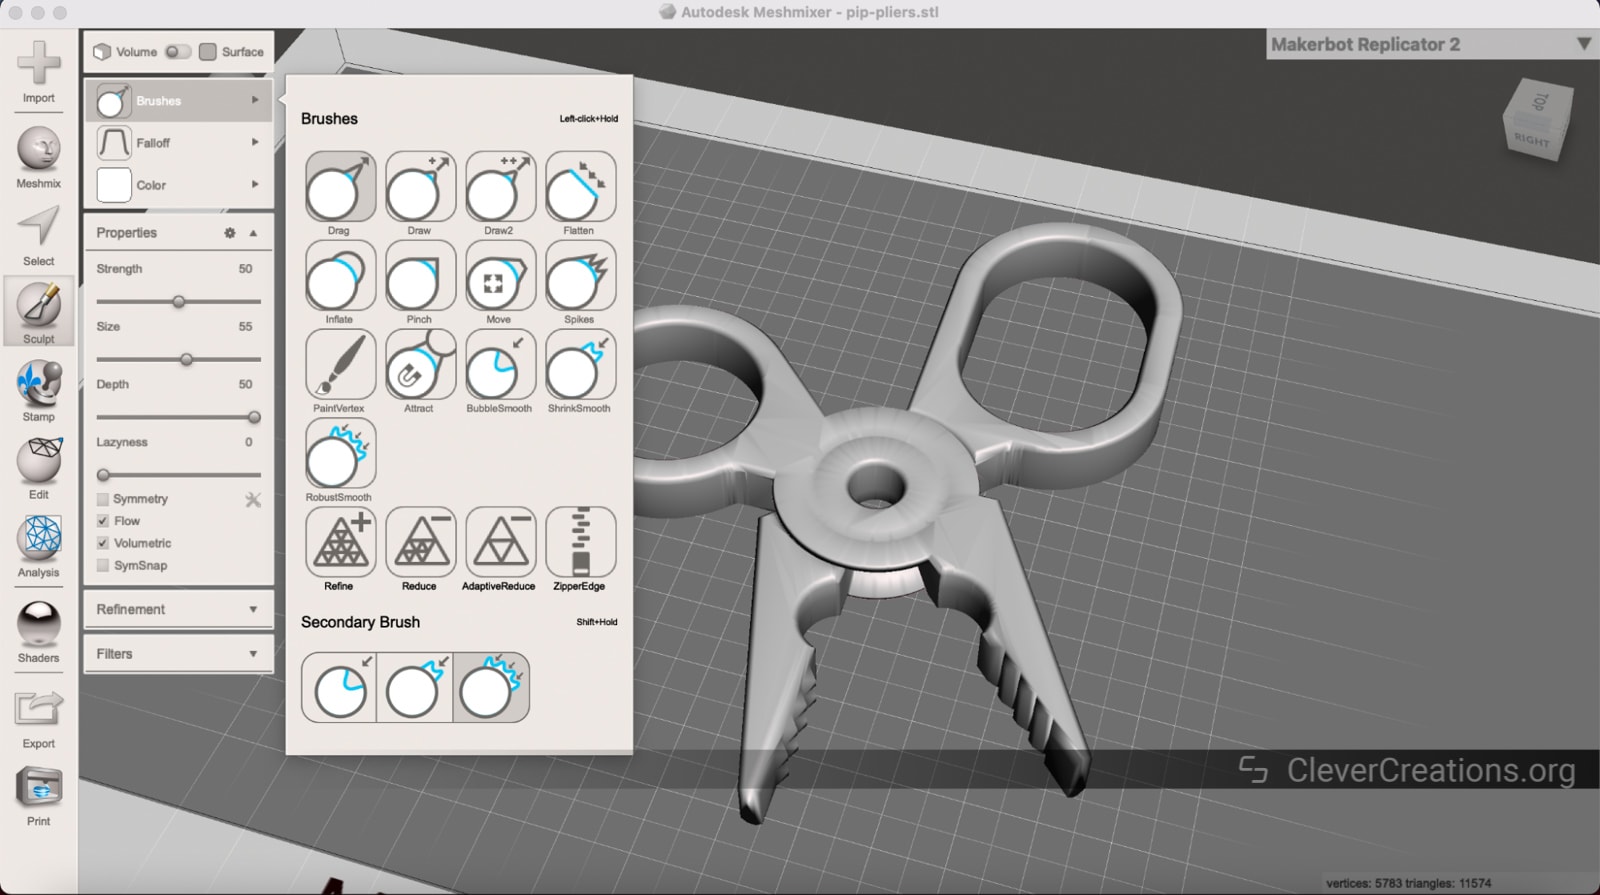
Meshmixer also has a rudimentary set of sculpting tools that can serve as a quick and easy way to add details to or deform the mesh.
Repairing STL Files
MeshMixer’s STL repair features are where it becomes one of the best free STL editors to have for 3D printing. It has several tools made specifically to repair STL objects including an automatic STL repair function.
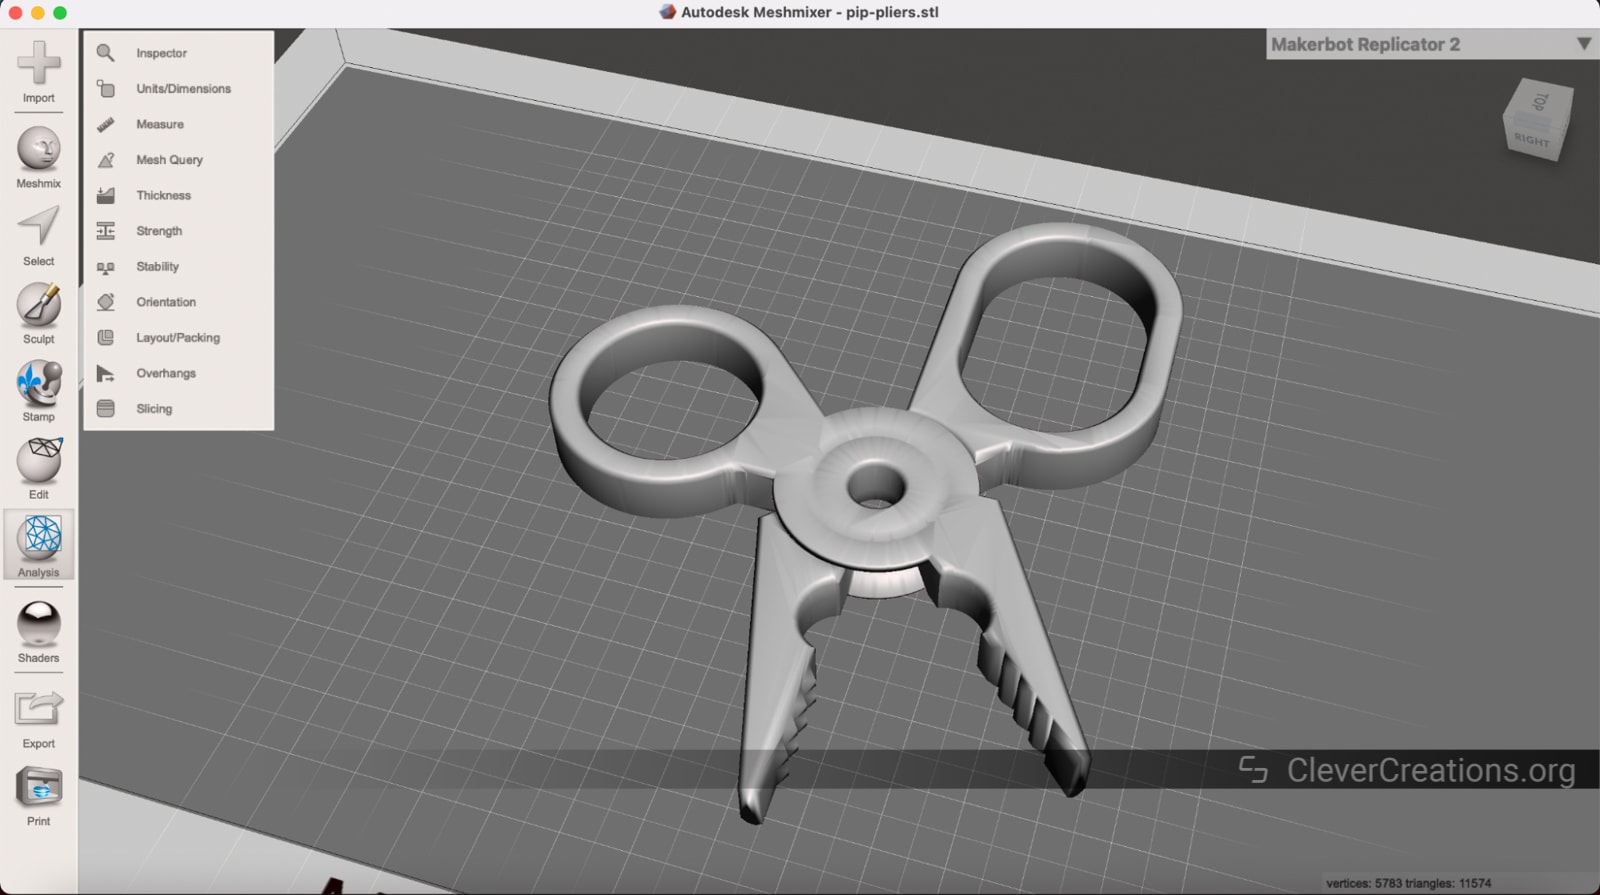
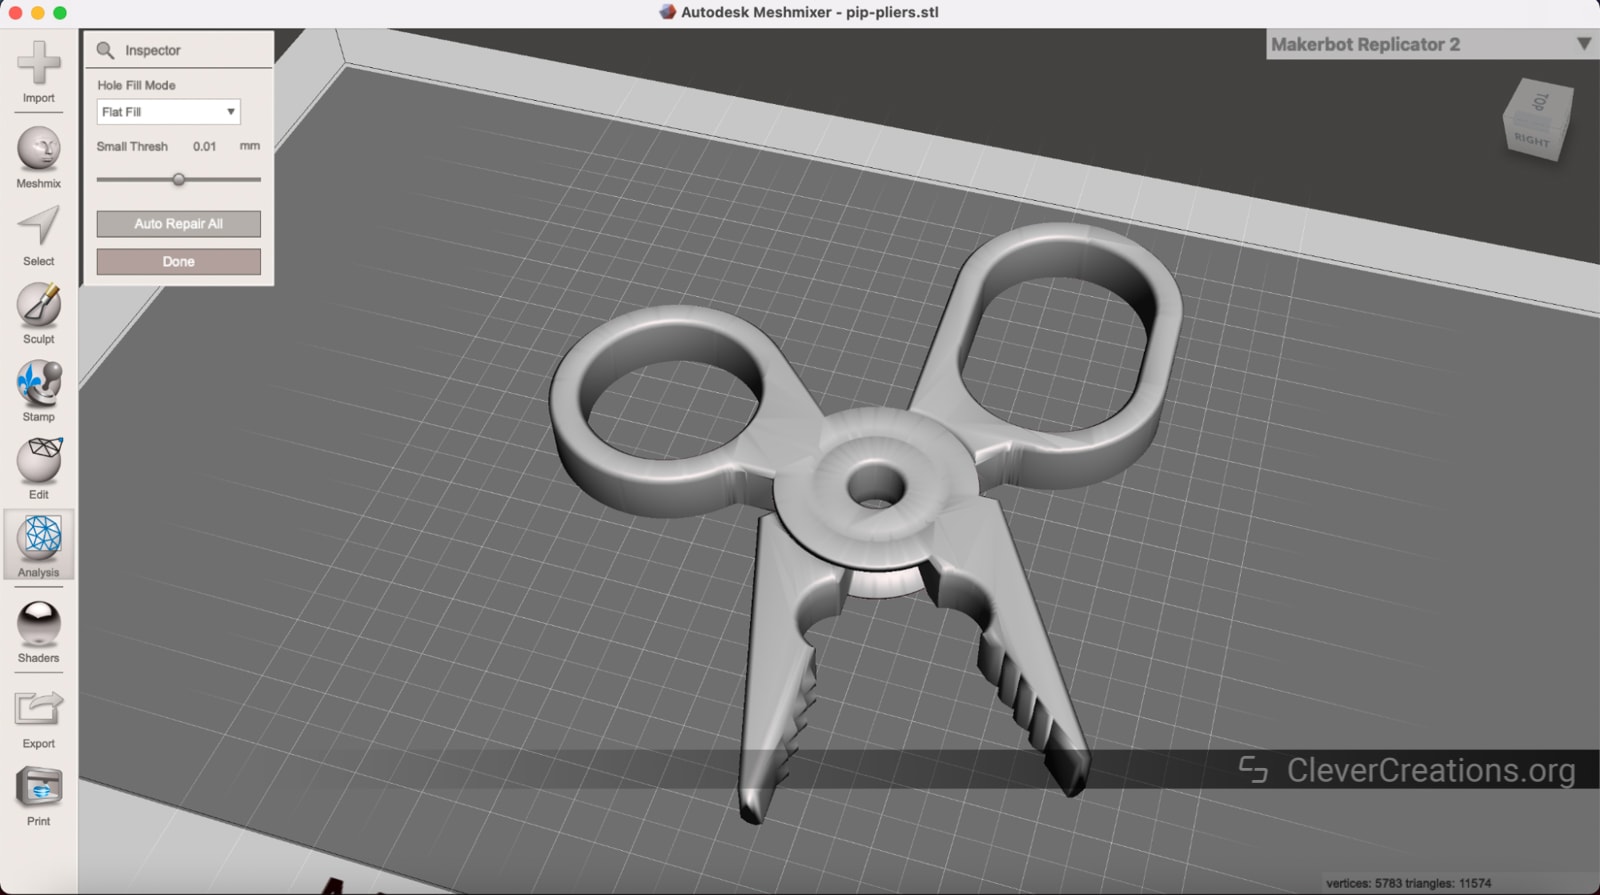
- Go to the Analyze tab to access the various repair tools. To automatically diagnose and fix errors on the STL file’s surface, choose Inspector.
- You can choose one possible mesh issue to diagnose and repair or you can simply choose Auto Repair All to analyze and fix all categories at once.
- The other tool you will likely use regularly from the Analyze menu is the Thickness tool. This helps you adjust the thickness of the mesh’s surfaces and set a minimum wall thickness to prevent fragile printed objects and other failed 3D printing attempts.

Exporting STL Files
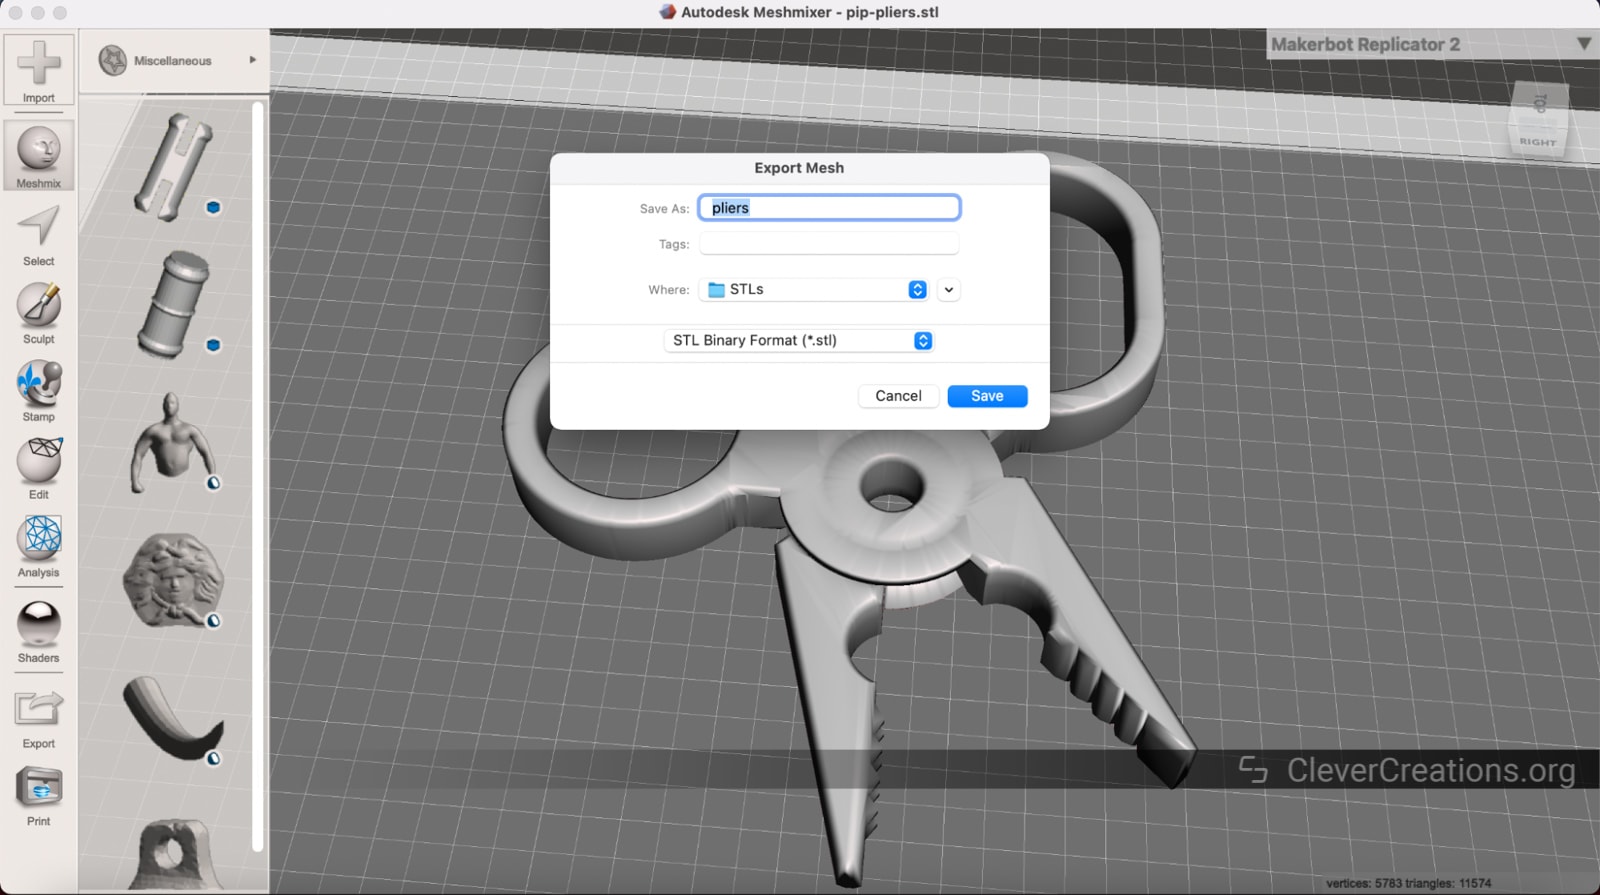
- To export your object, choose Export from the side menu.
- Name your file, choose a destination for it, and set the file type to STL. Click Save to export your STL.

MeshLab
MeshLab is a free mesh editing software that is designed to optimize a pre-downloaded STL file. While you can technically build a mesh file from scratch, the interface is not well suited for it. MeshLab, like MeshMixer, is more suited to edit or repair STL files than produce them.
- Price: Free
- OS Compatibility: Windows, Mac, Linux
Opening STL Files
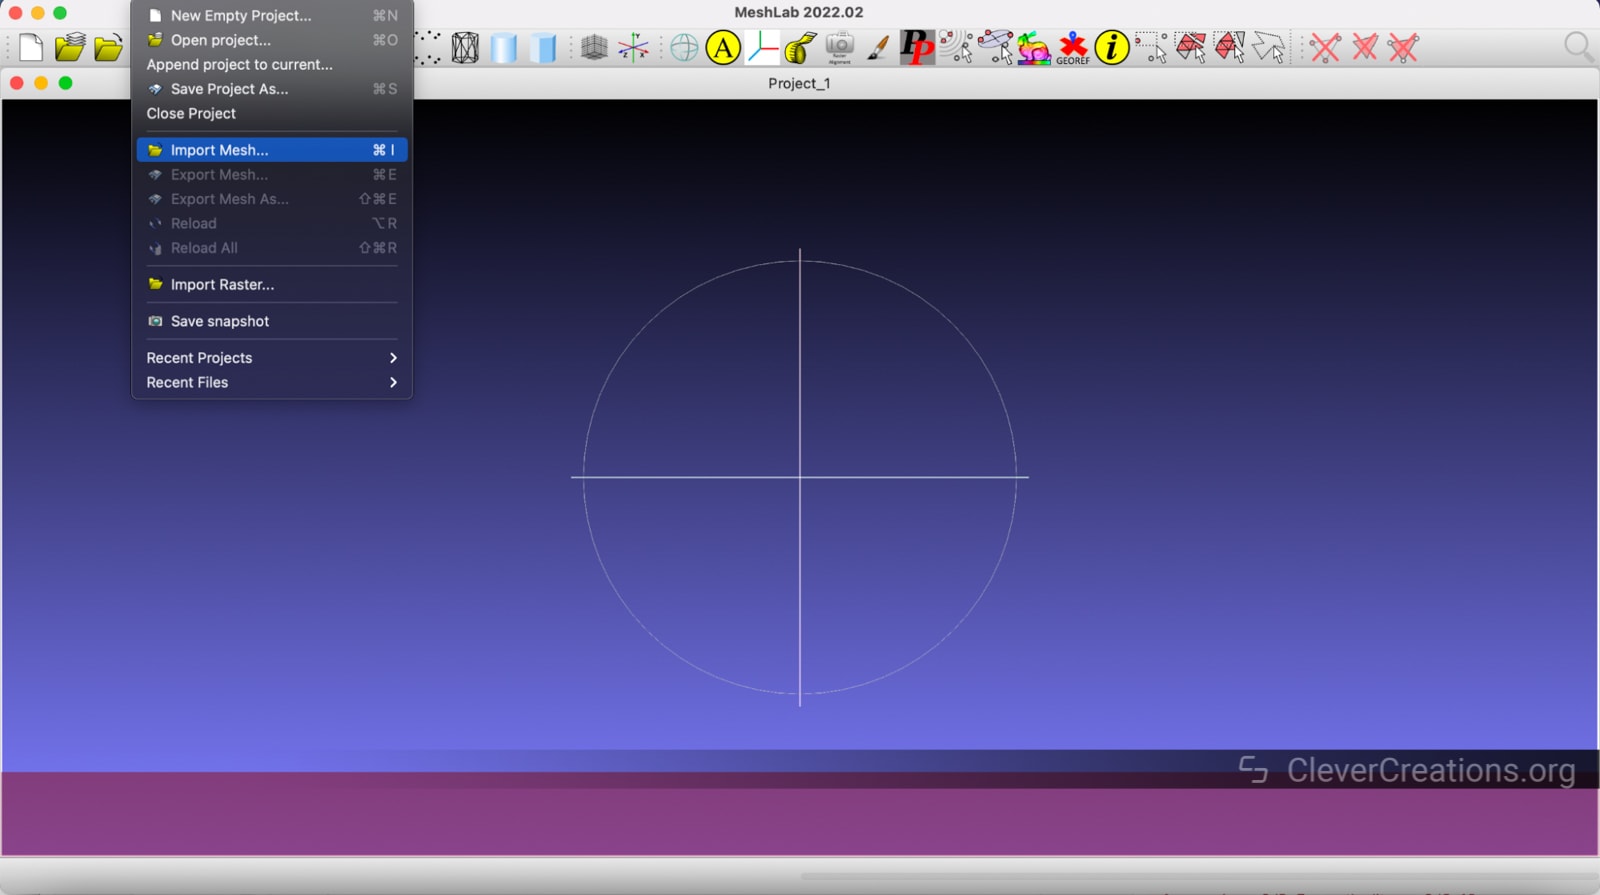
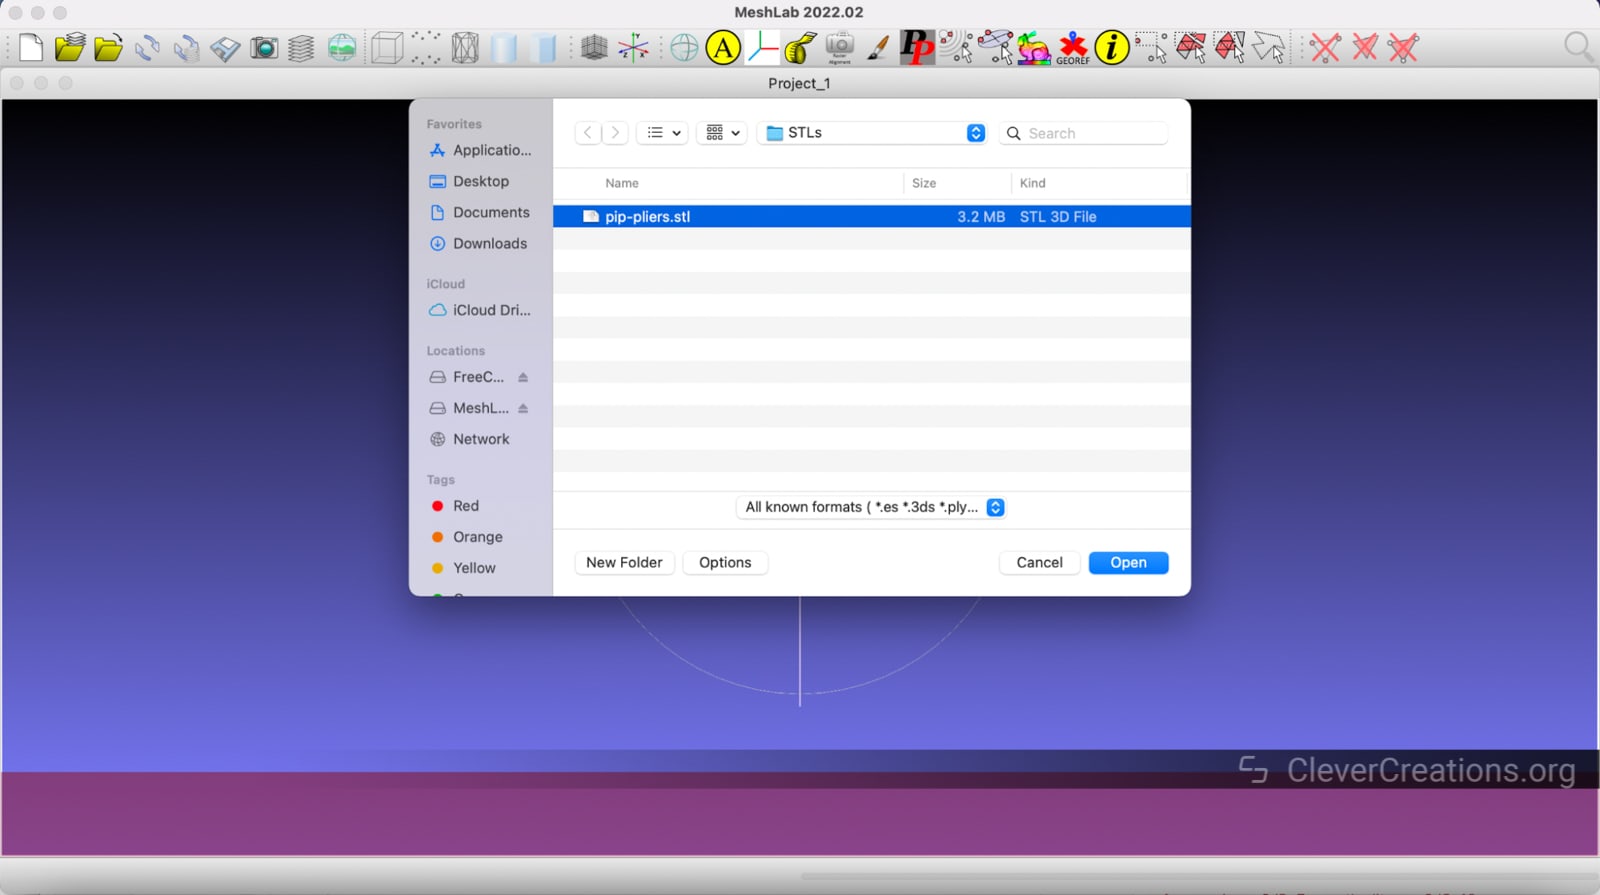
- Select File > Import Mesh from the main toolbar.
- Choose your STL file. Click Open.
- If you haven’t saved your pre-open preferences, this dialog box will pop up. This cleans up your vertices, but you can deselect it to do it manually later if you’d like. Press OK.
- Your STL file should now appear in your workspace.

Editing STL Files
MeshLab has several tools to edit STL files depending on your needs. You can add new shapes to your mesh or use any of the many tools in the Filters menu to change the mesh as needed.
Repairing STL Files
While MeshLab doesn’t have a tool to automatically diagnose issues in your mesh, it does have several repair features.
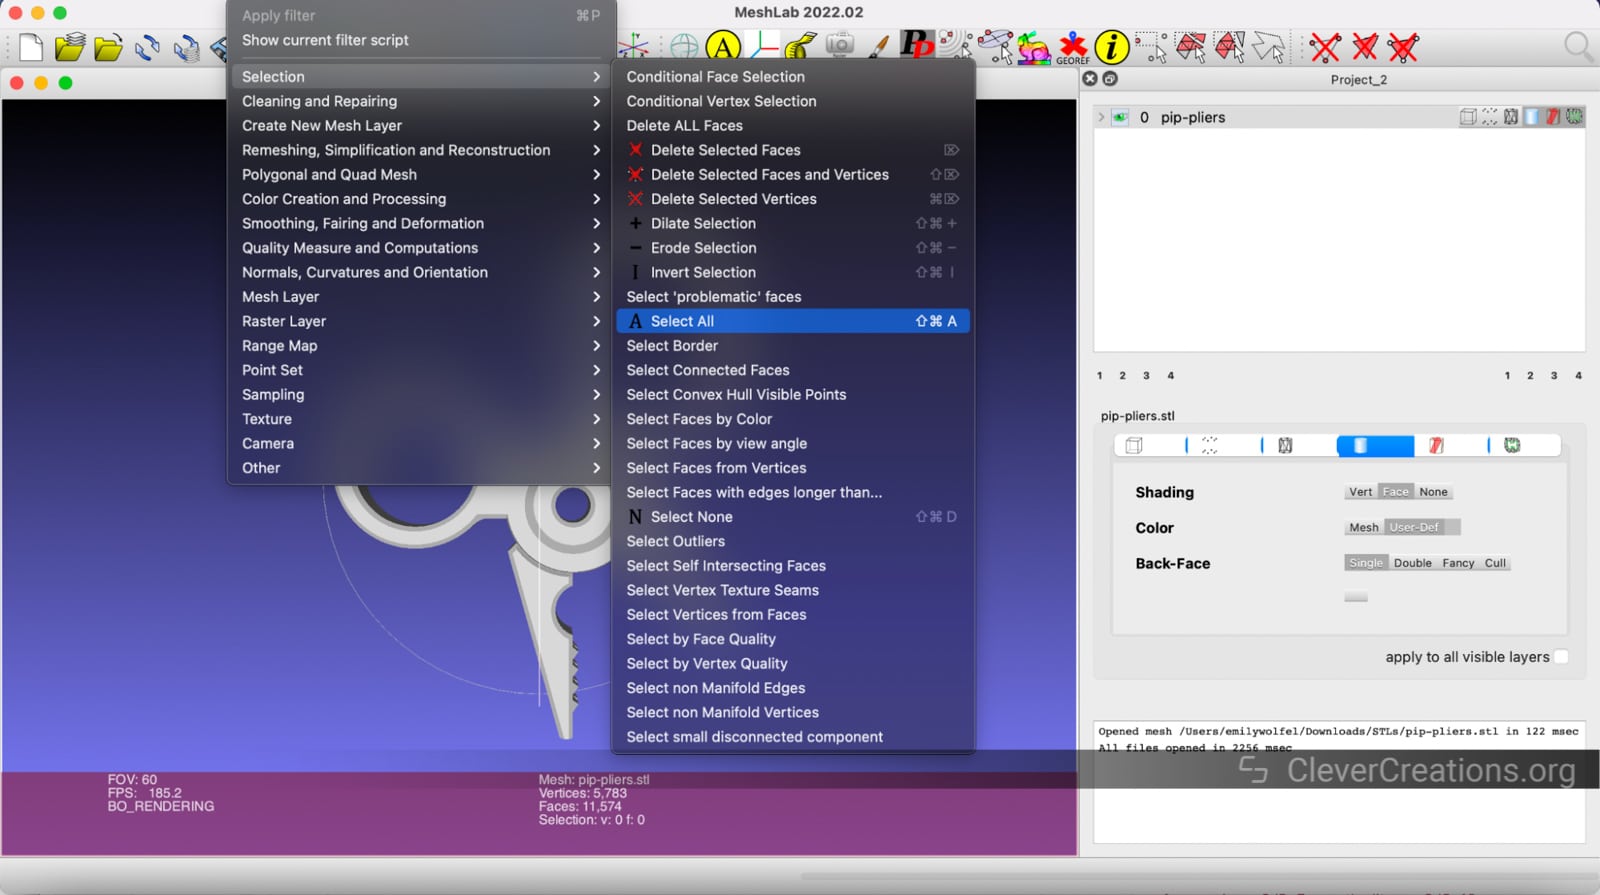
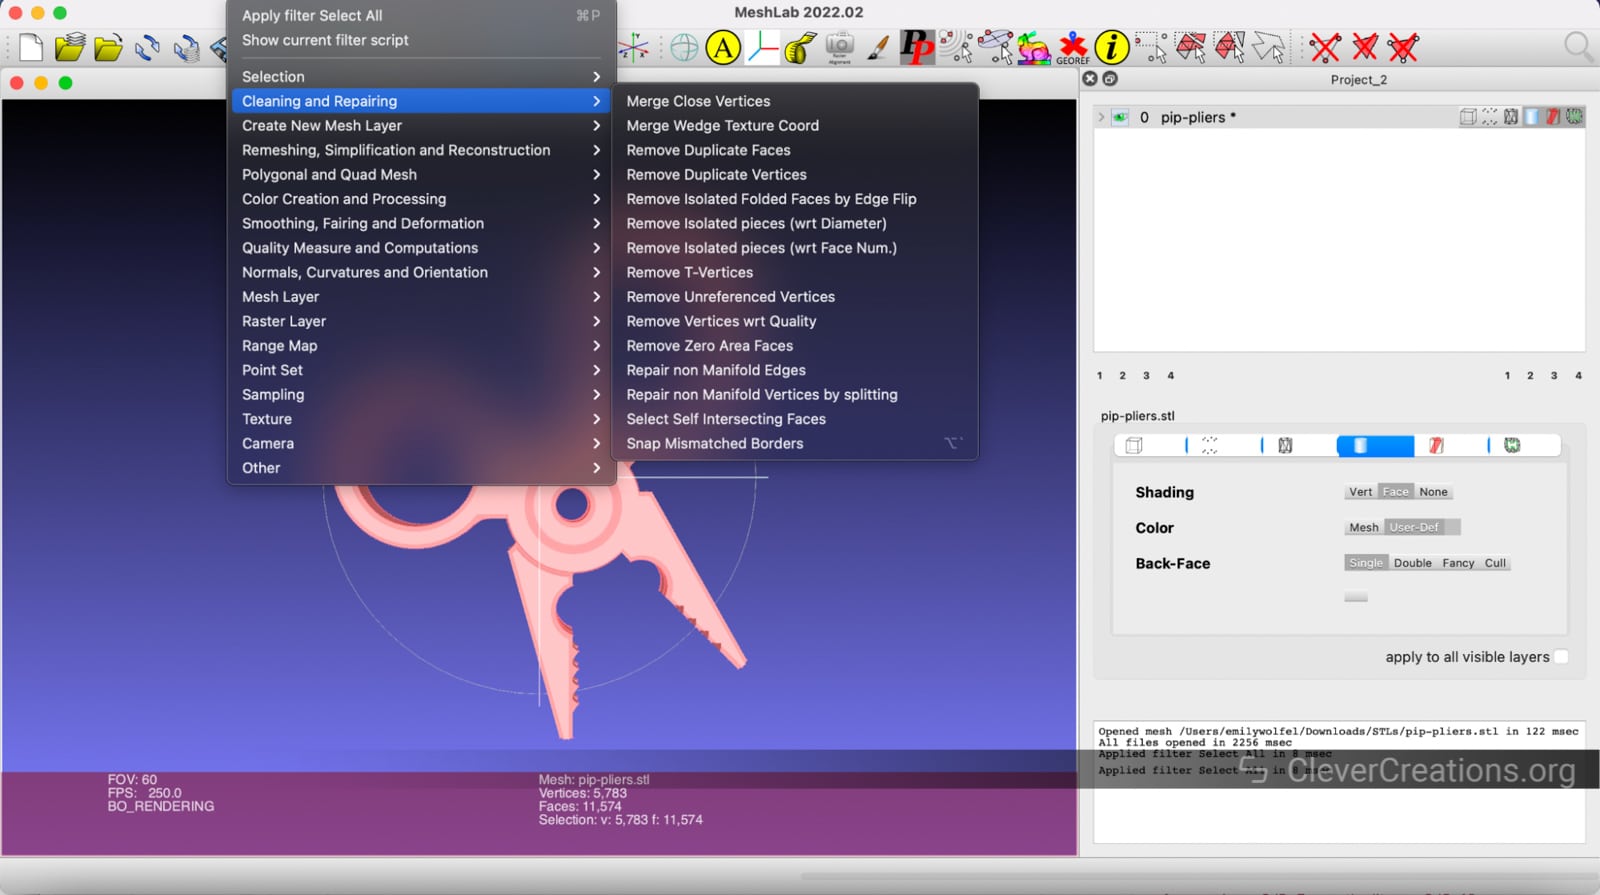
- Go to Filters > Selection > Select All to select the entire object.
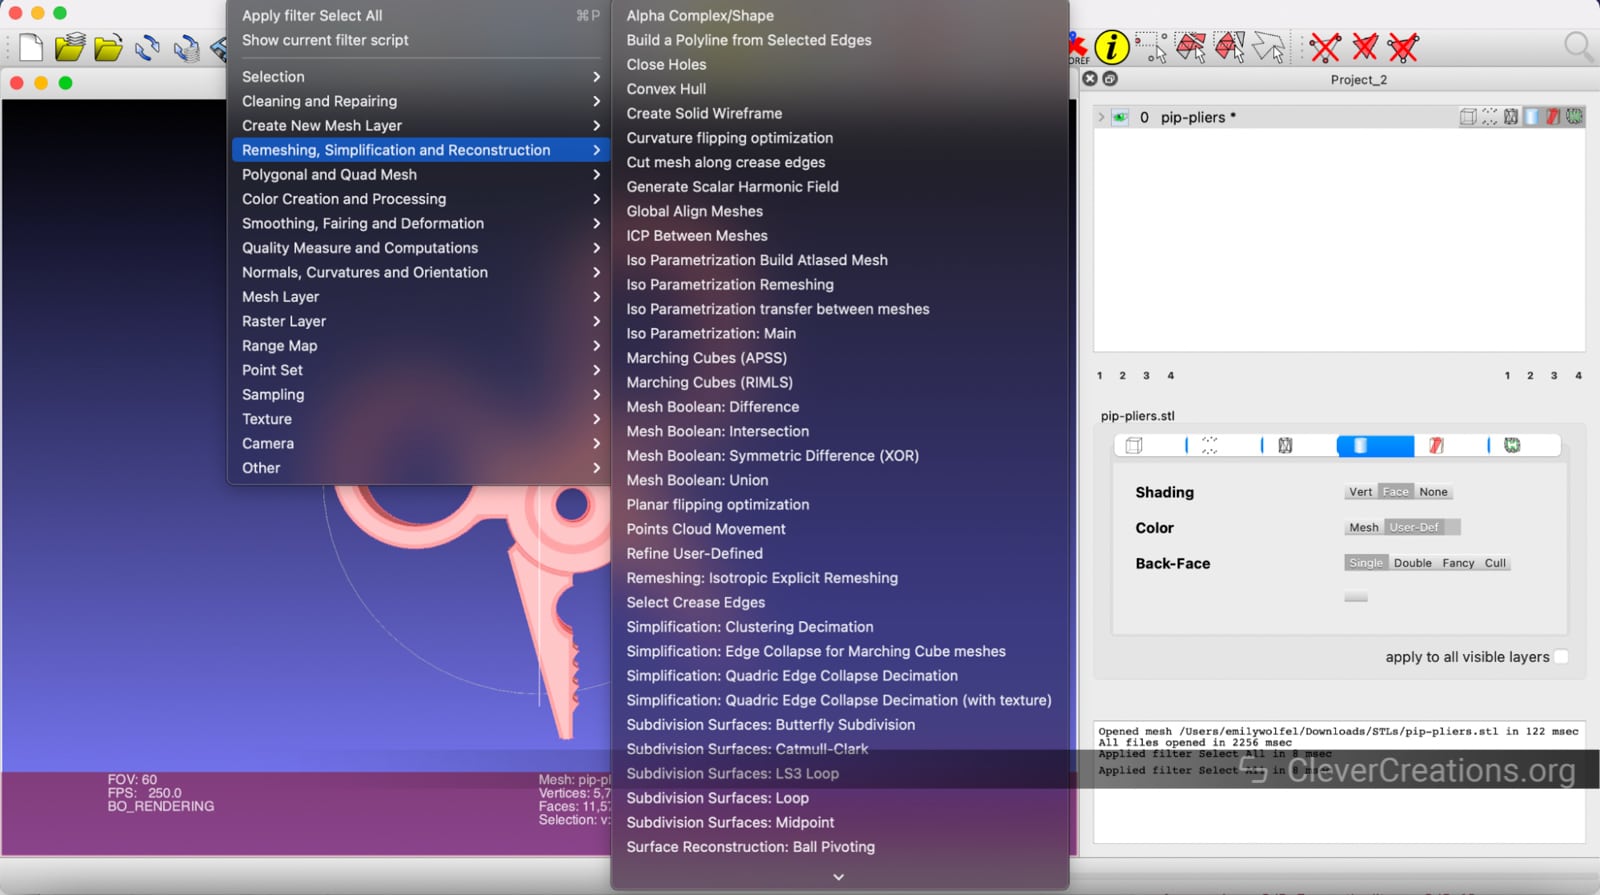
- Choose one of the many options from Filters > Cleaning and Repairing that addresses the issue your mesh has.
Exporting STL Files
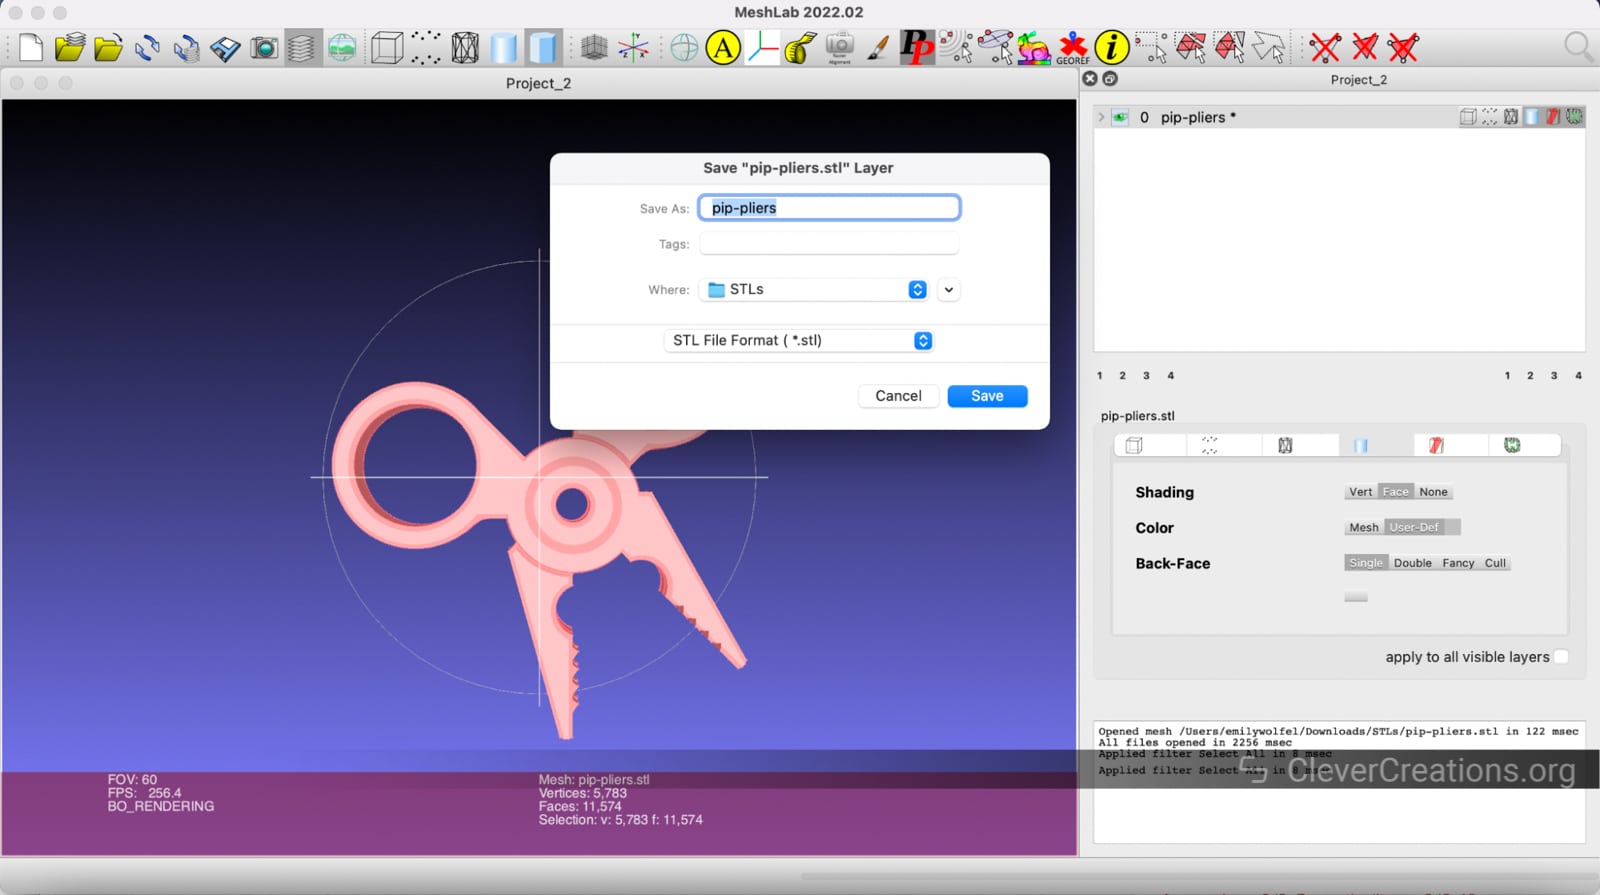
- Go to File > Export Mesh As.
- Select STL as your file type, choose your save destination, name your file, and click Save.

TinkerCAD
Tinkercad is an in-browser computer aided design software. It started as a way to teach absolute beginners the basics of CAD, but it has evolved to serve as one of the most popular basic free STL editors for 3D printing enthusiasts looking for a simple design solution.
- Price: Free
- OS Compatibility: Web-Based
Opening STL Files
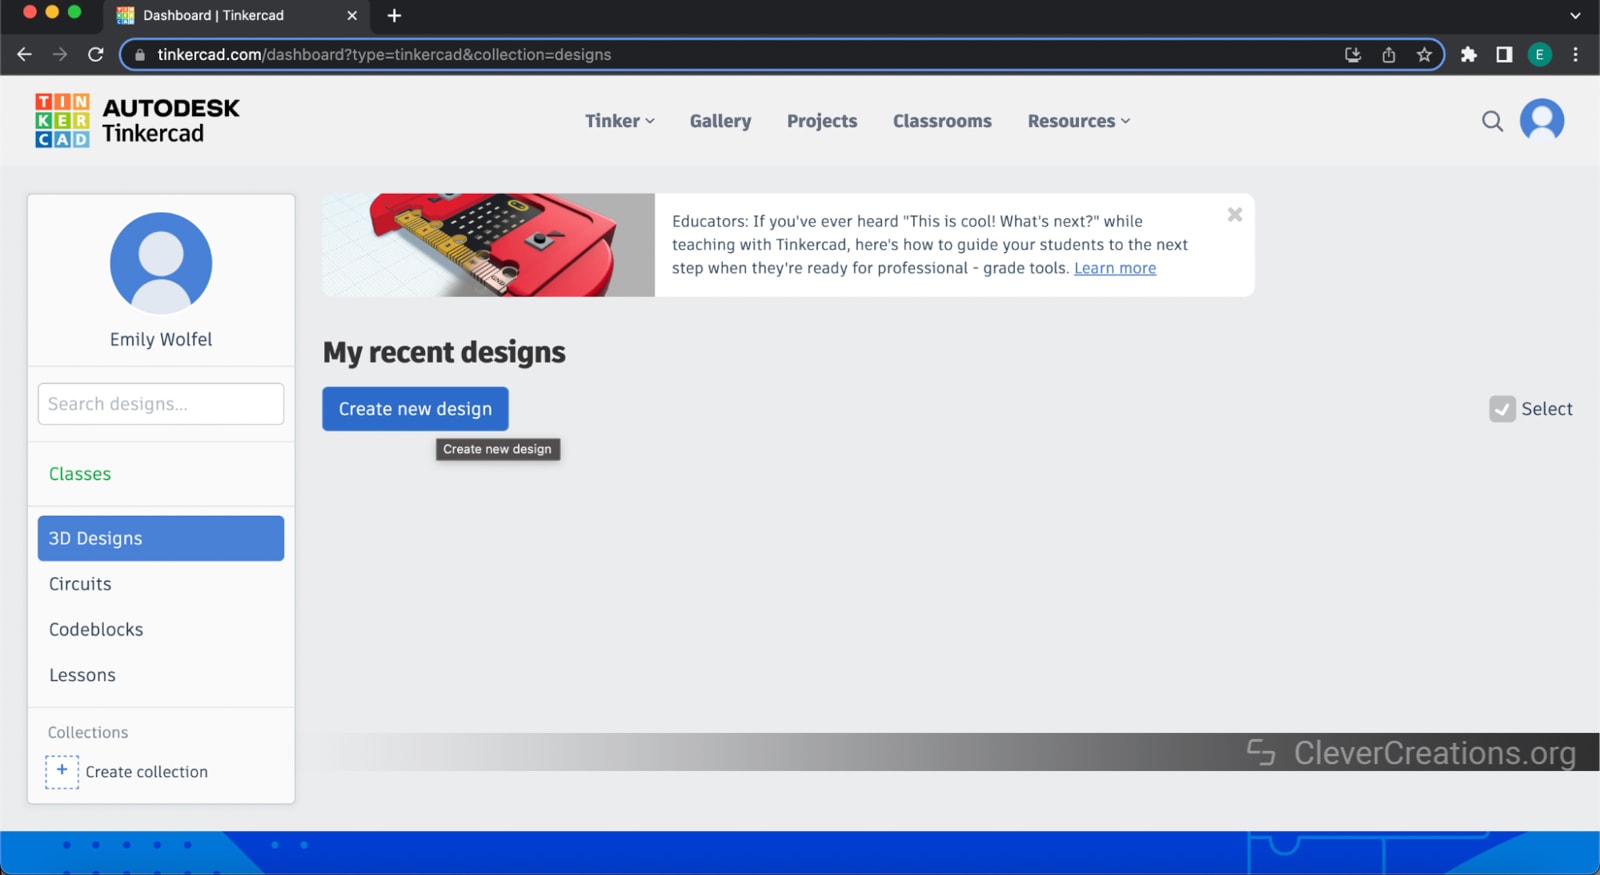
- Choose Create new design to open a blank project.

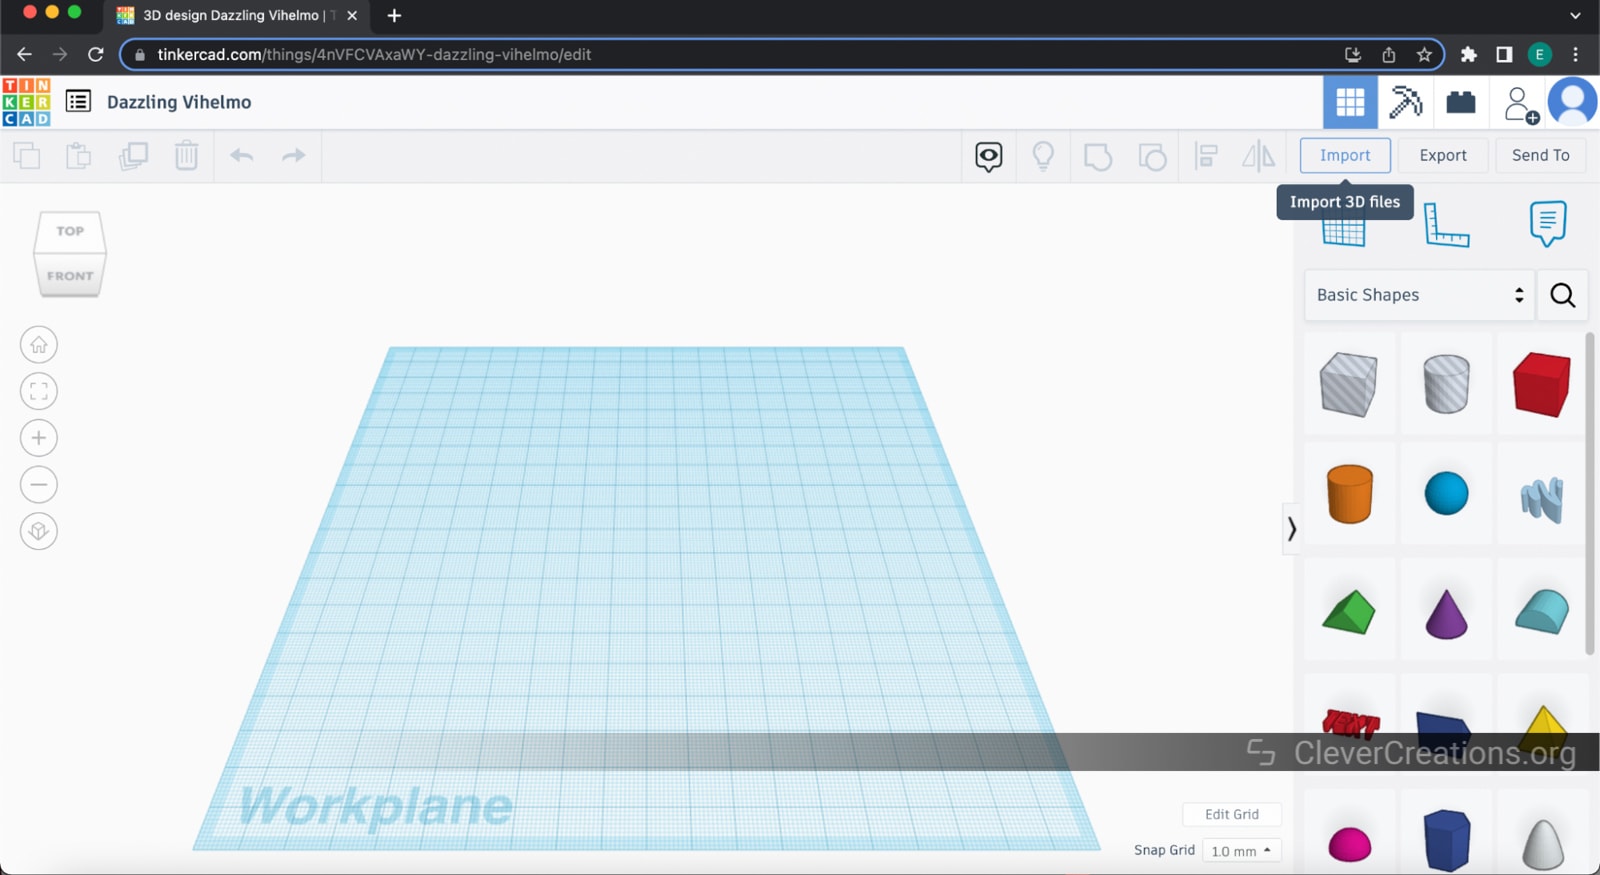
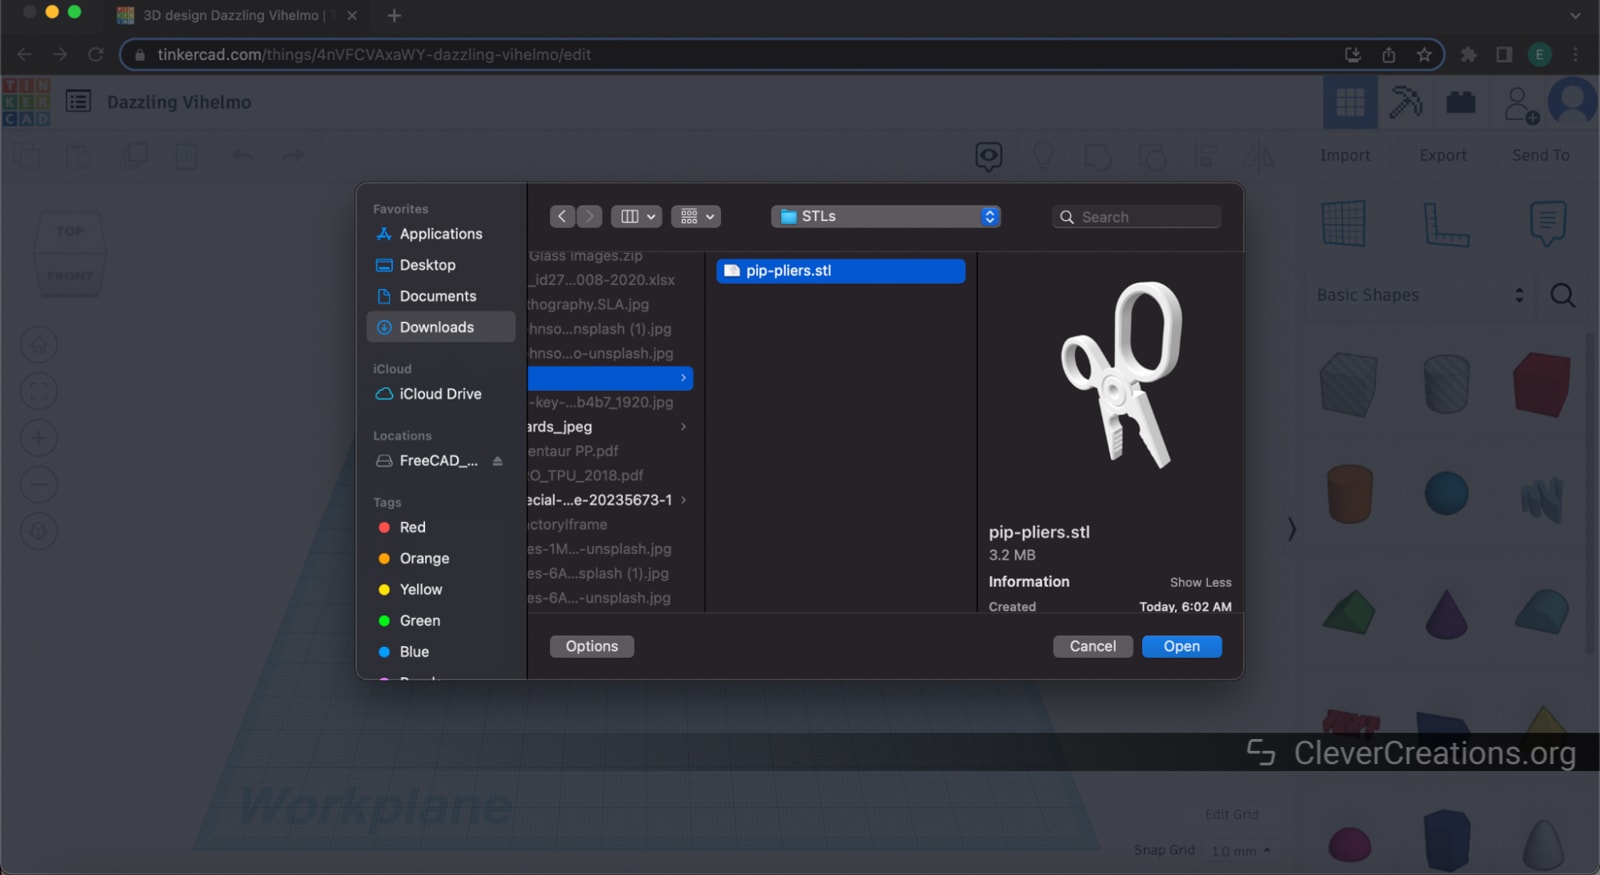
- Select Import to add an outside mesh file.
- Choose your STL file and press Open.
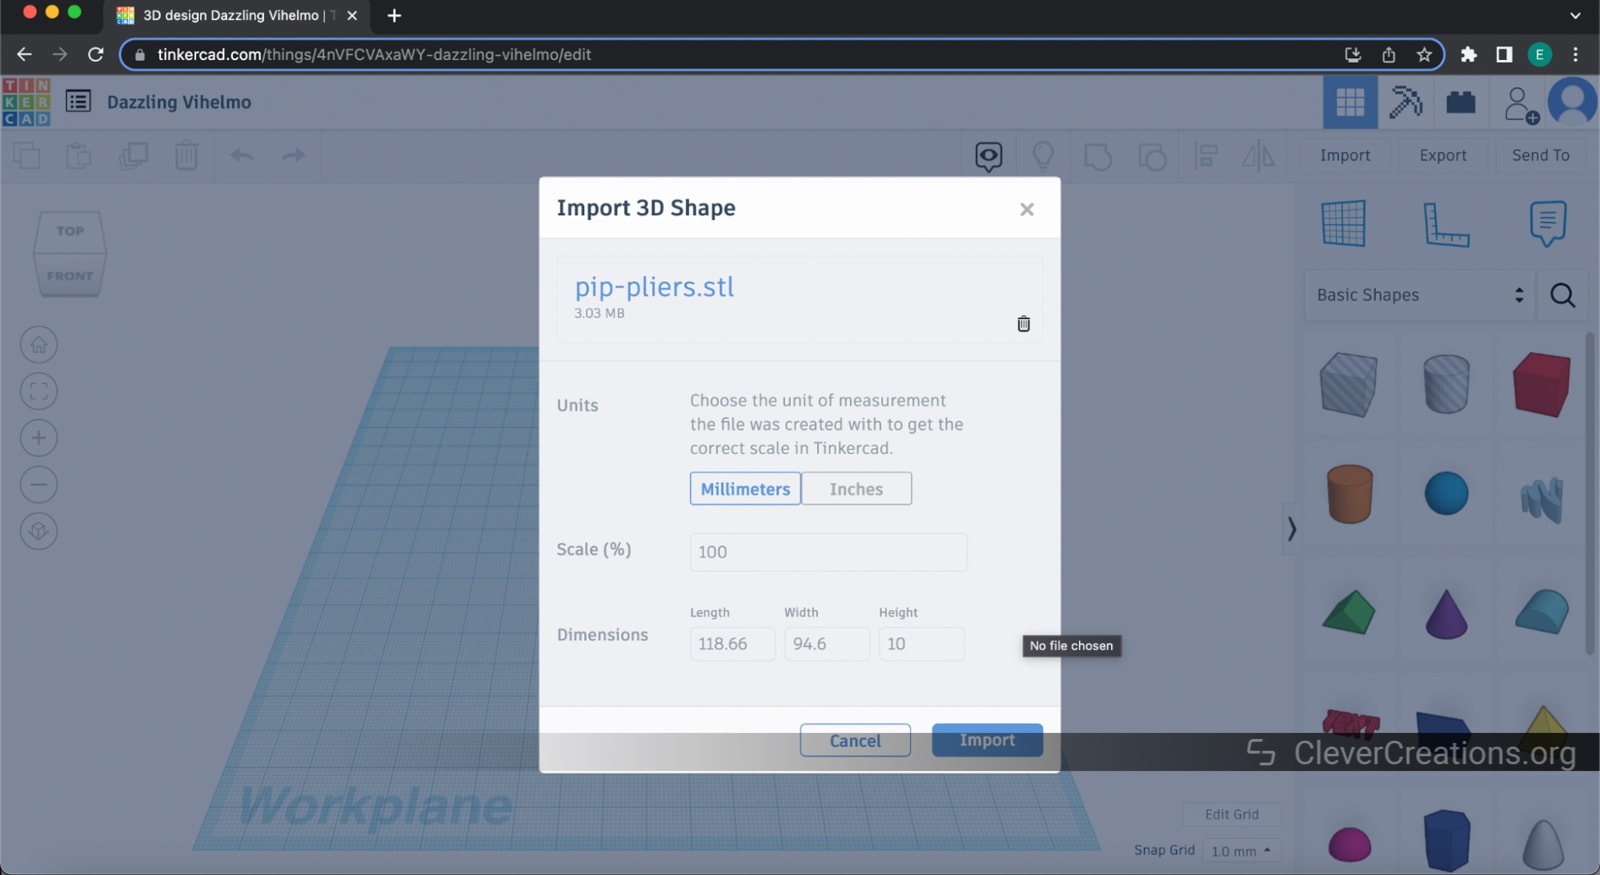
- You can make changes to the scale and dimensions of the file before it loads into the workspace.
- Click Import to load your model into the workspace.
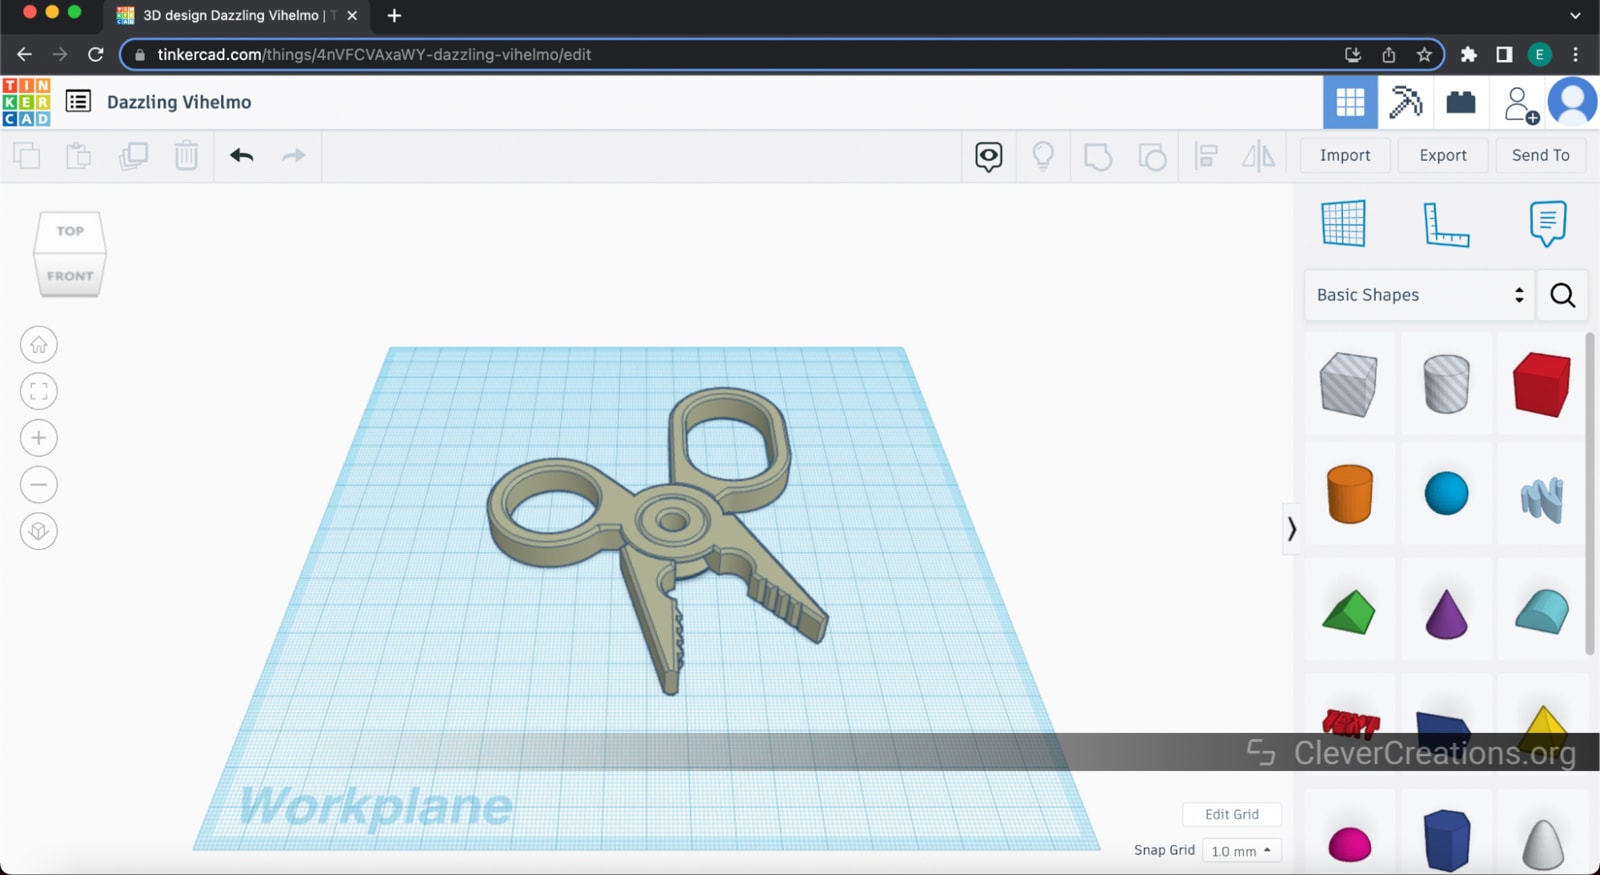
Editing STL Files
TinkerCAD lets you merge any of its impressive number of different shapes to your object, so you can easily add elements to your model. You can also change the dimensions and scaling within the program as well.

Repairing STL Files
TinkerCAD doesn’t have any dedicated tools to repair STL files, so you are limited on the types of mesh repair you can do. Usually any fixes done in TinkerCAD consist of filling holes or pieces that aren’t needed or changing the size of the object in some way.
Exporting STL Files
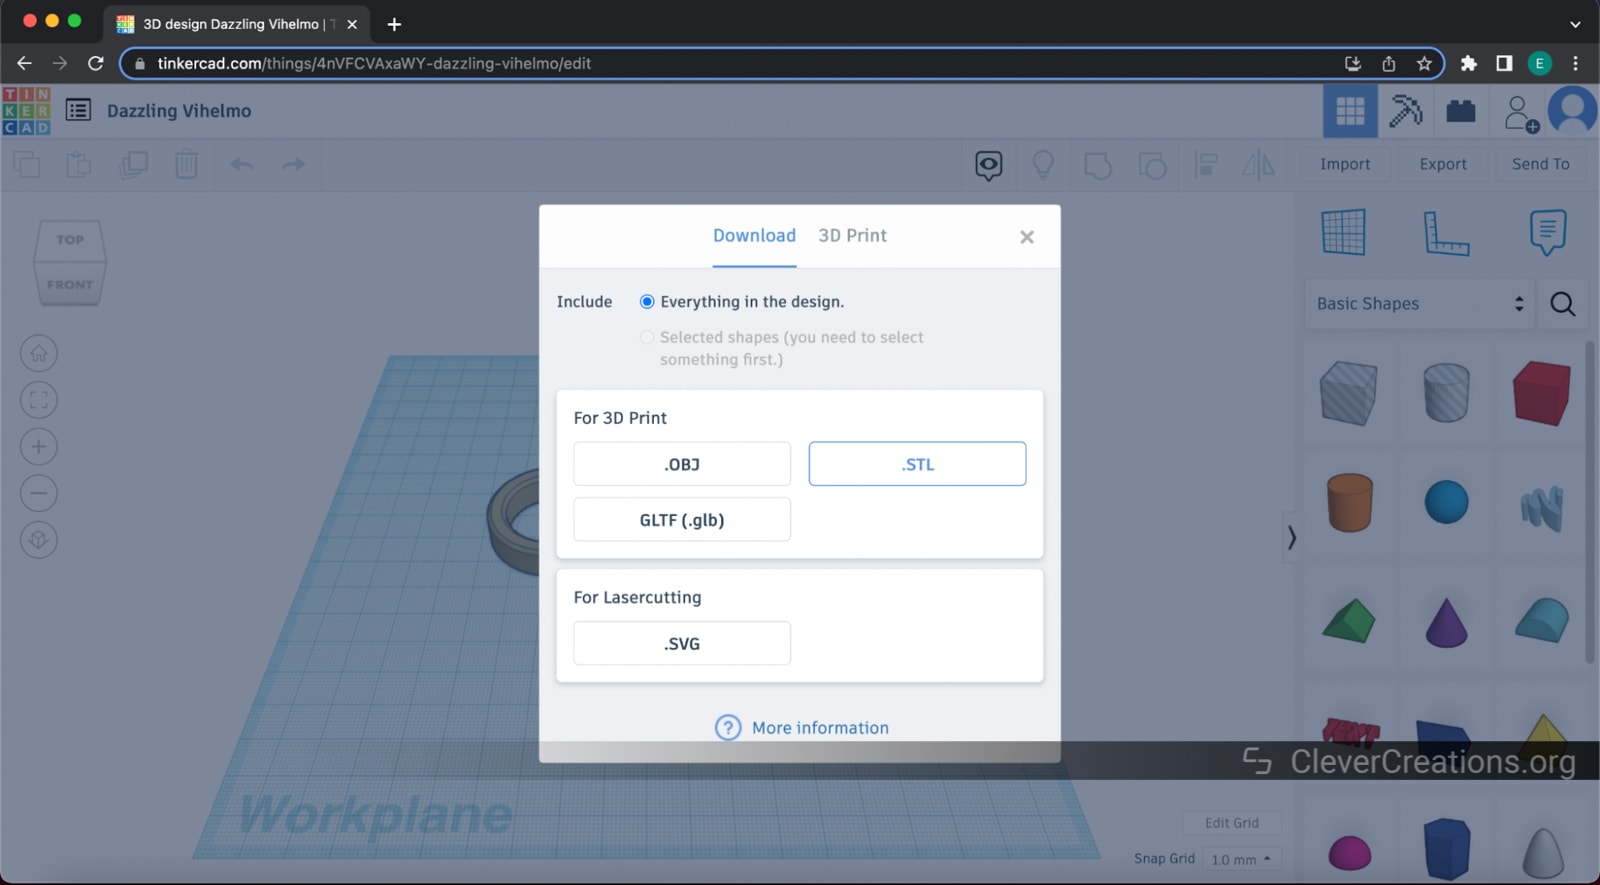
- Select the Export button.

- Click the .STL button. It will automatically launch your download.

3DSlash
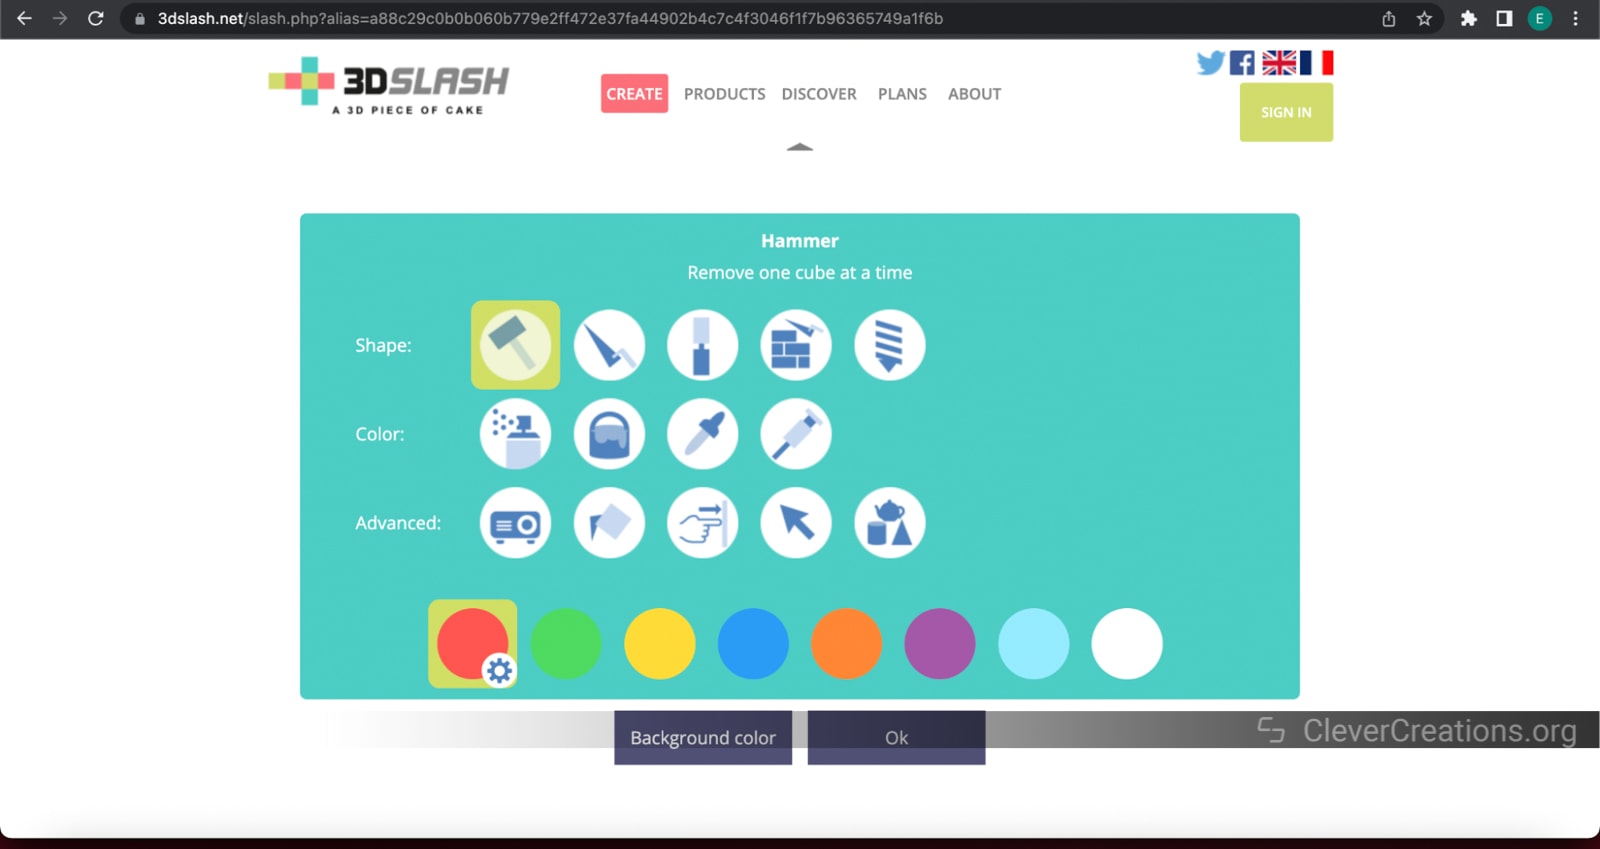
3DSlash is an easy, intuitive online STL editor. Instead of using traditional CAD software tools, they have easy-to-use tools that more closely resemble a game than a program to create or edit STLs. You typically start out with a cube in the program (but you can import your own models as well) and delete or add smaller cubes from the model’s surface in order to shape your model.
If you enjoy processes like building in Minecraft or using Legos, this is one of the best free STL editors to start learning modeling basics.
- Price: Free
- OS Compatibility: Web-Based
Opening STL FIles
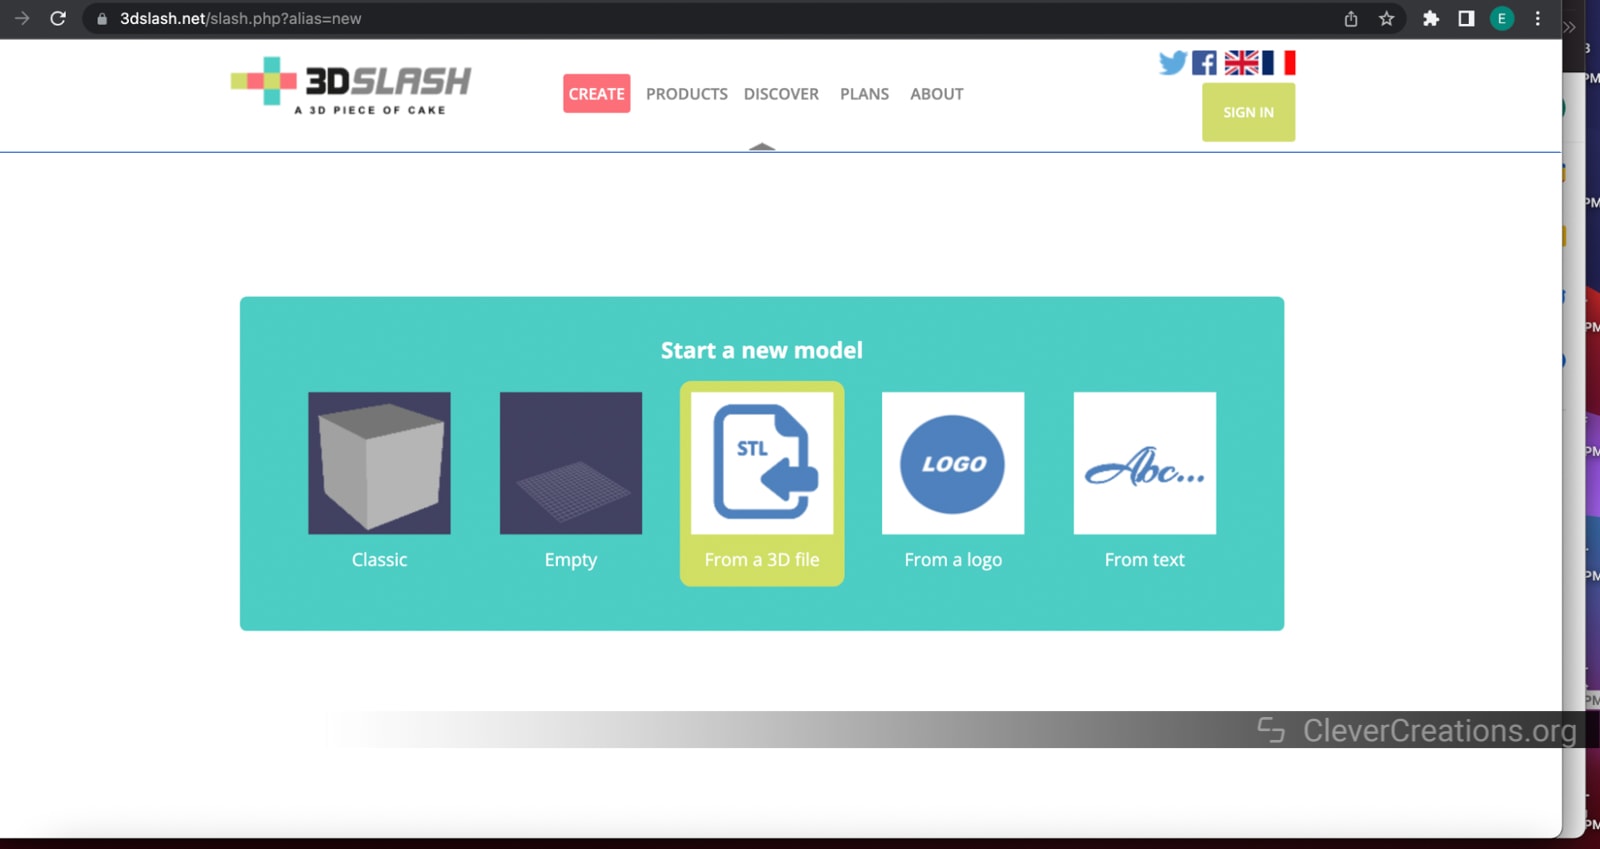
- In the create section, select From a 3D file.

- Choose your STL file and click Open.
- Your model should now be ready to use in your workspace.

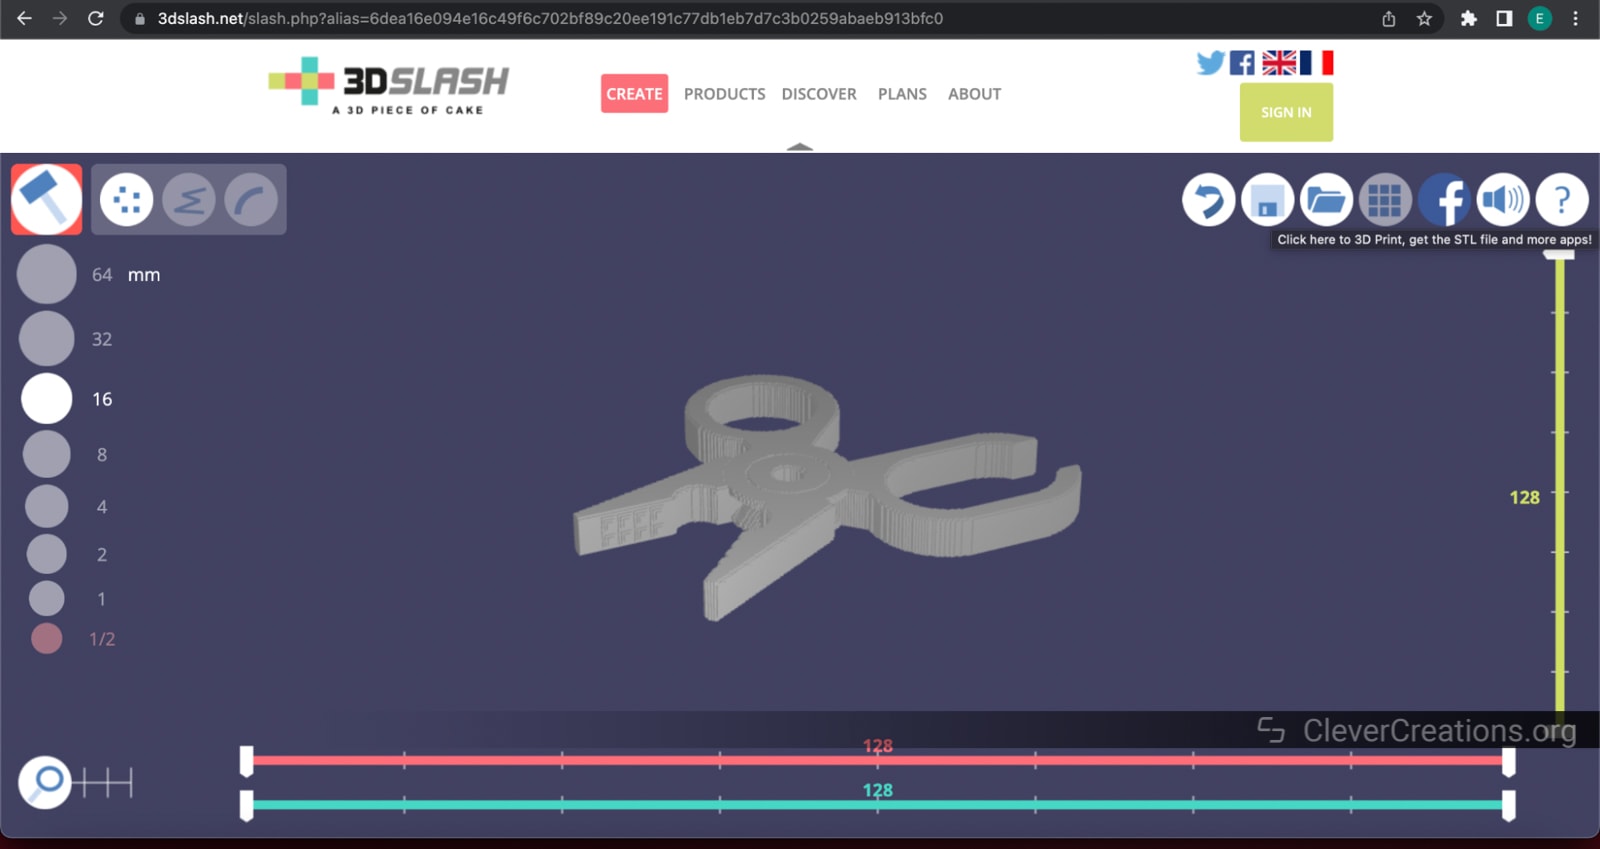
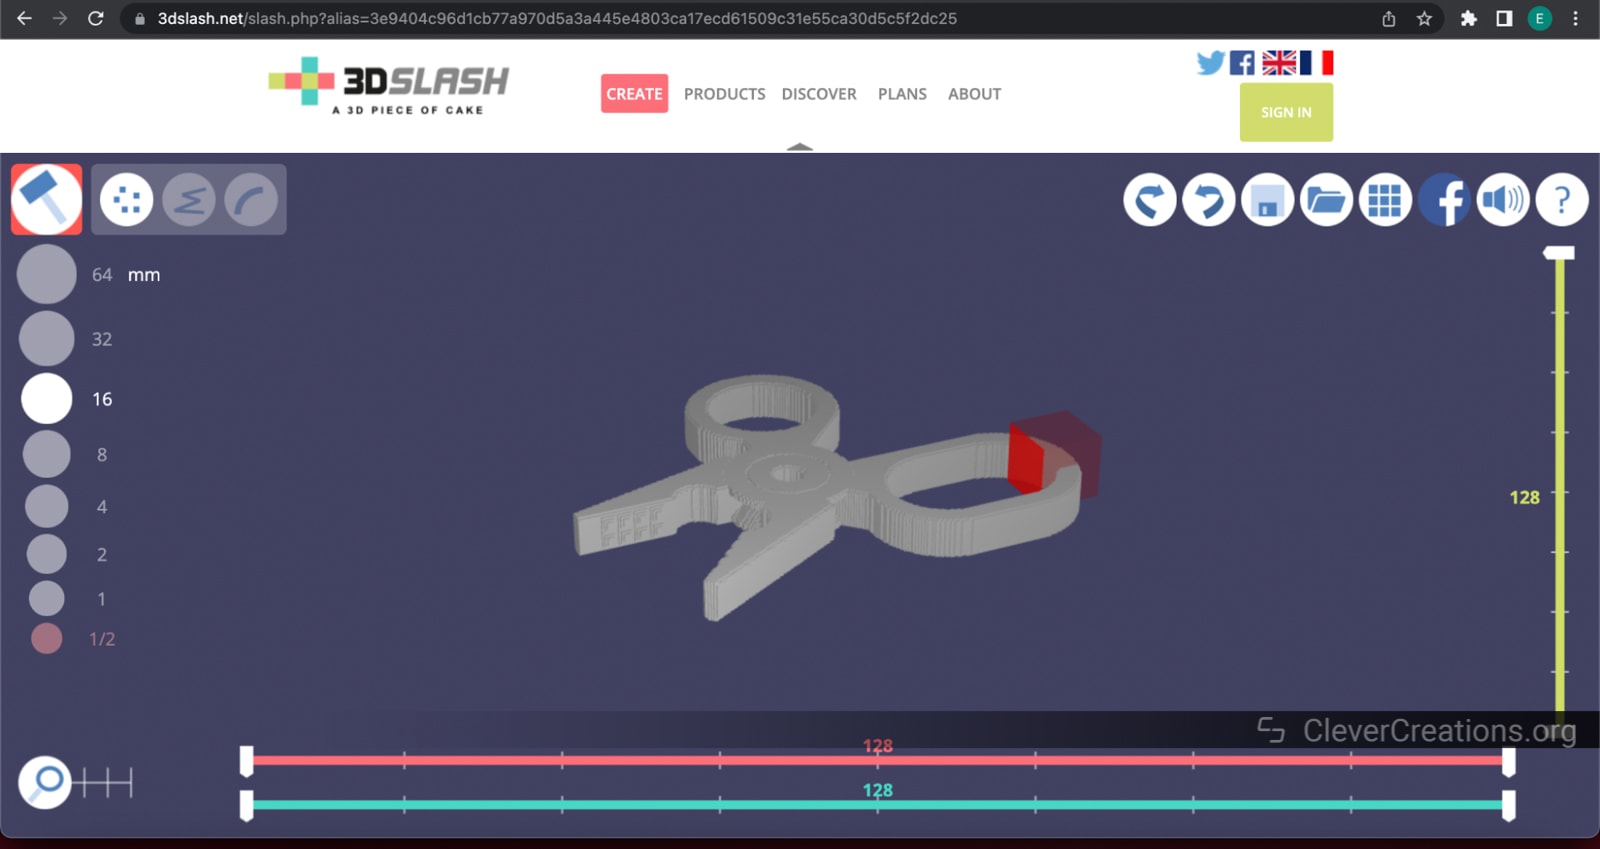
Editing STL Files
To edit your STL file in 3DSlash, you have a few tools that should help.
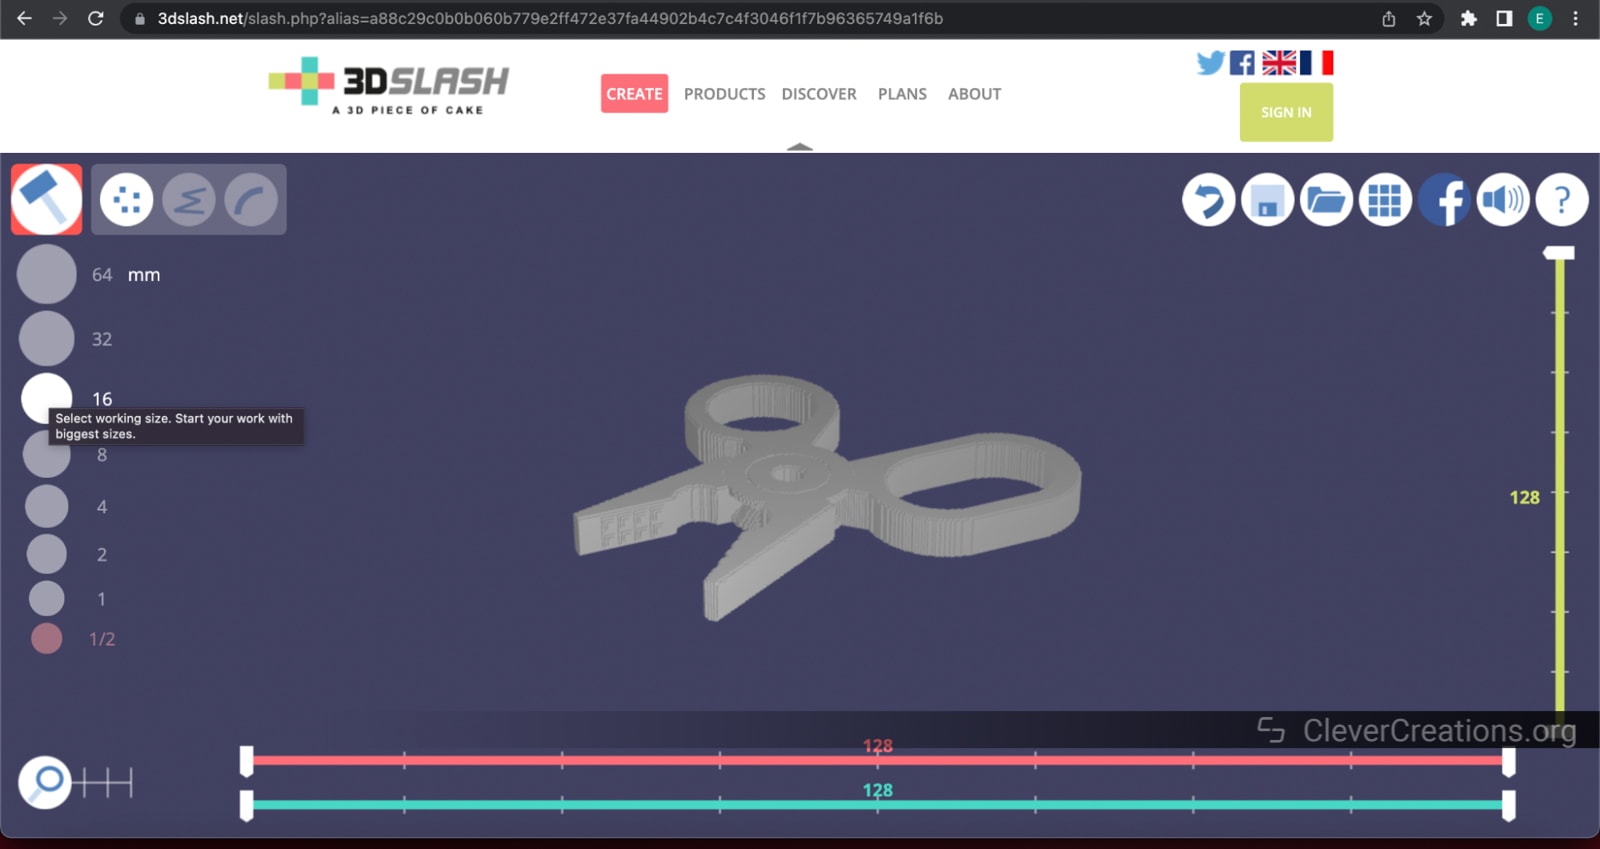
- Set the tool size from the left-hand side of the screen.
- Choose your tool. You can use five different tools to edit your shape, all of which work off the idea of adding or removing cubes.
- Use the tool to select the portion of the STL that you want to edit
- Apply the modification
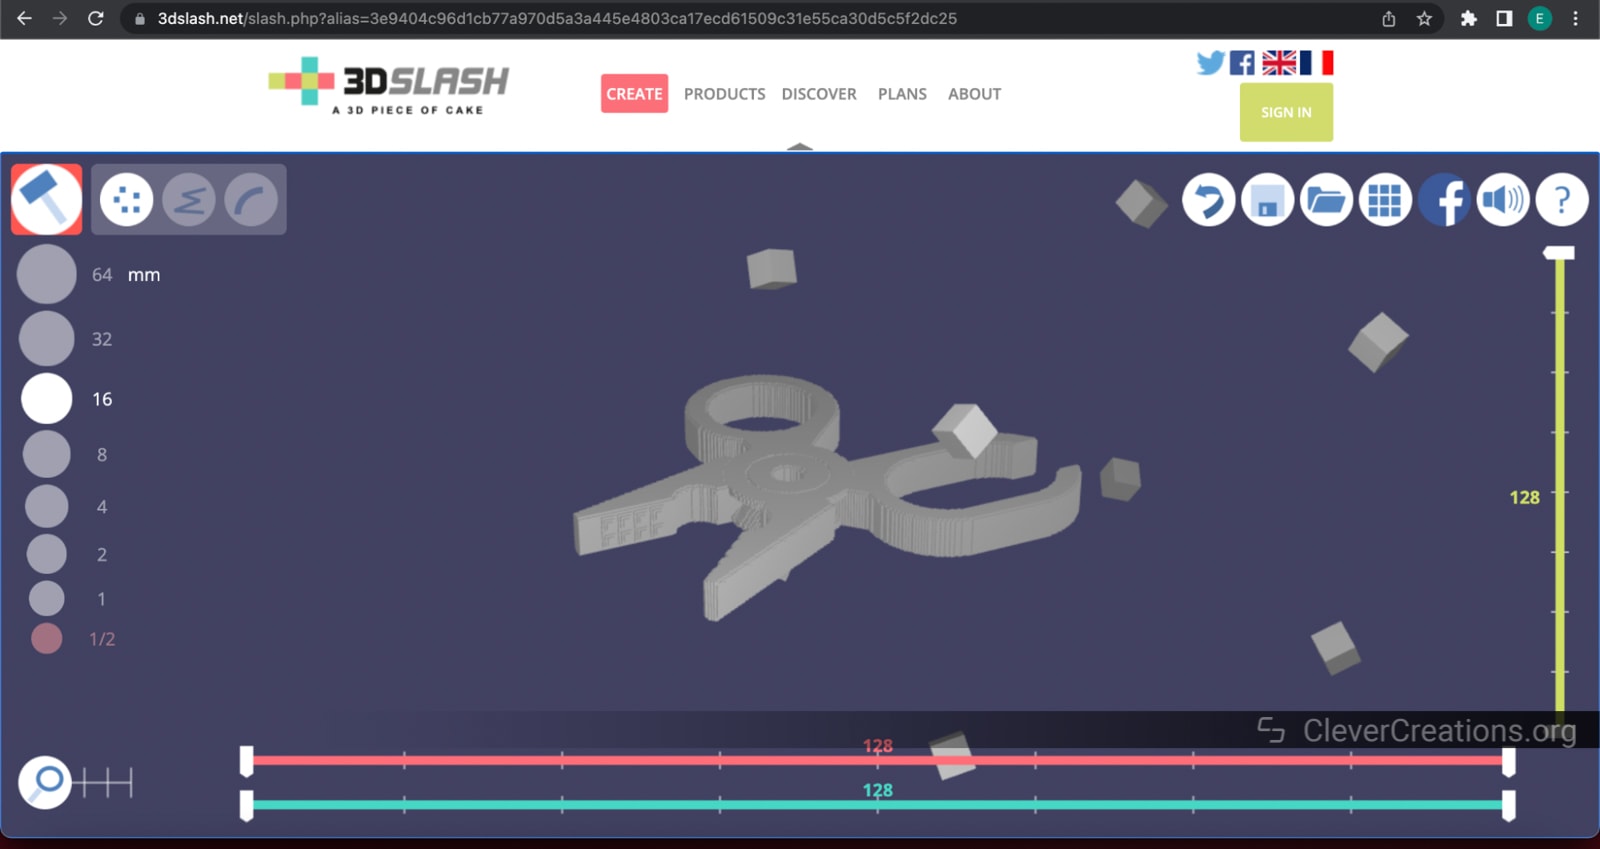
Repairing STL Files
3DSlash does not have an extensive mesh repair tool like other modeling software options. If you need basic tools to fill in a hole or other simple functions, you can use 3DSlash’s editing tools. Otherwise, you are better off choosing a different modeling software from the list.
Exporting STL Files
- Choose the Apps icon to see the export options.
- Select .STL and click the Download button. Your file will automatically be sent to your download queue.

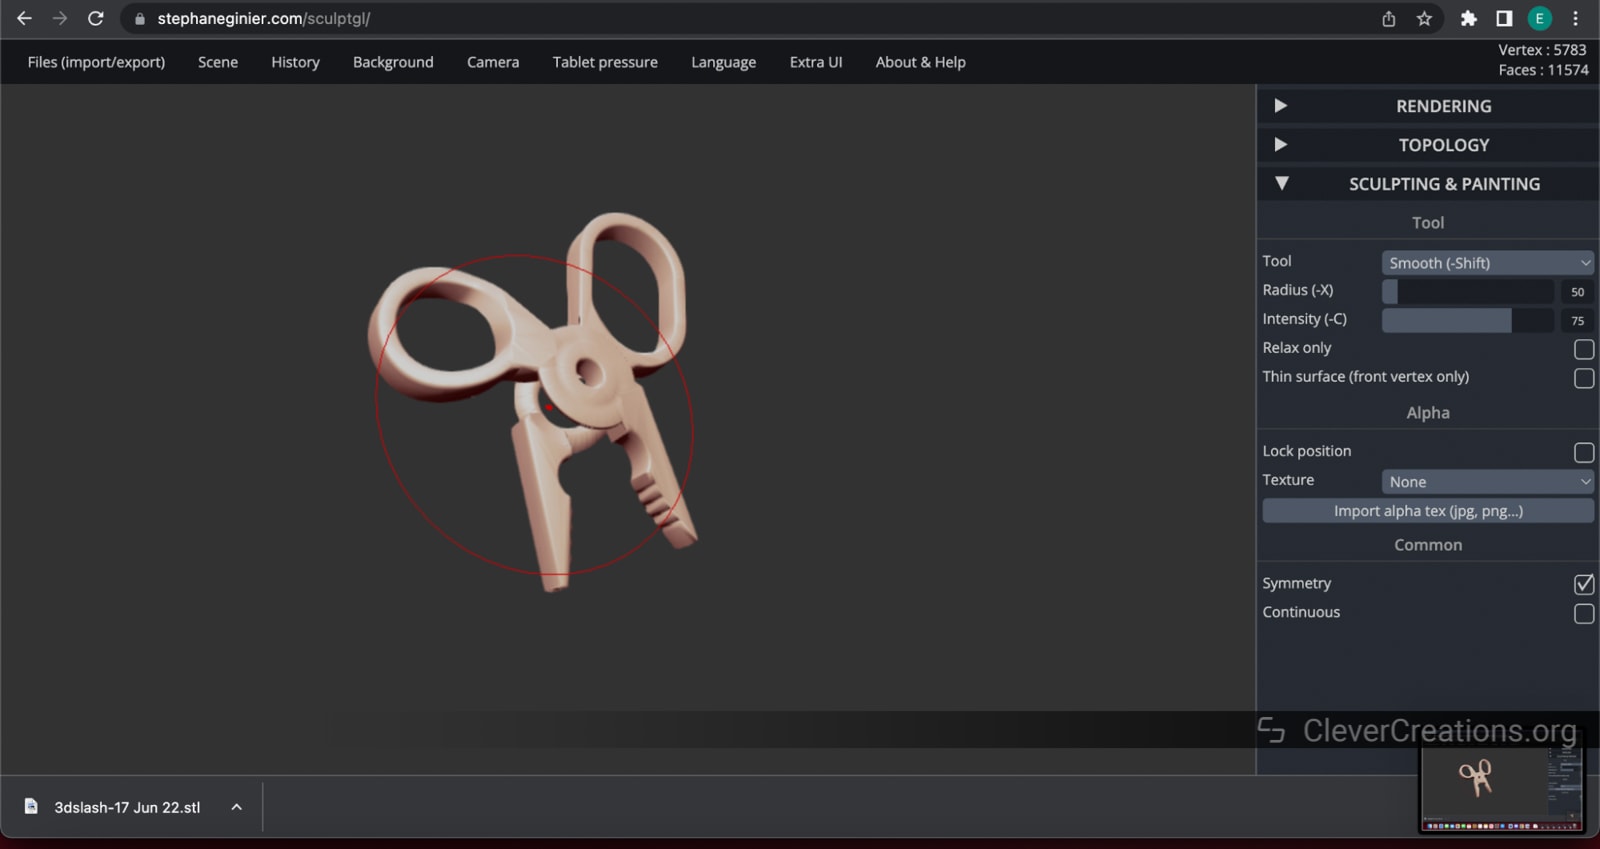
SculptGL
SculptGL is a free web-based 3D sculpting program. Sculpting software like ZBrush and Mudbox are great solutions to quickly creating organic models, and while SculptGL only has the basic tools found in those other programs, it is still a quick and free way to edit your STL files.
- Price: Free
- OS Compatibility: Web-based
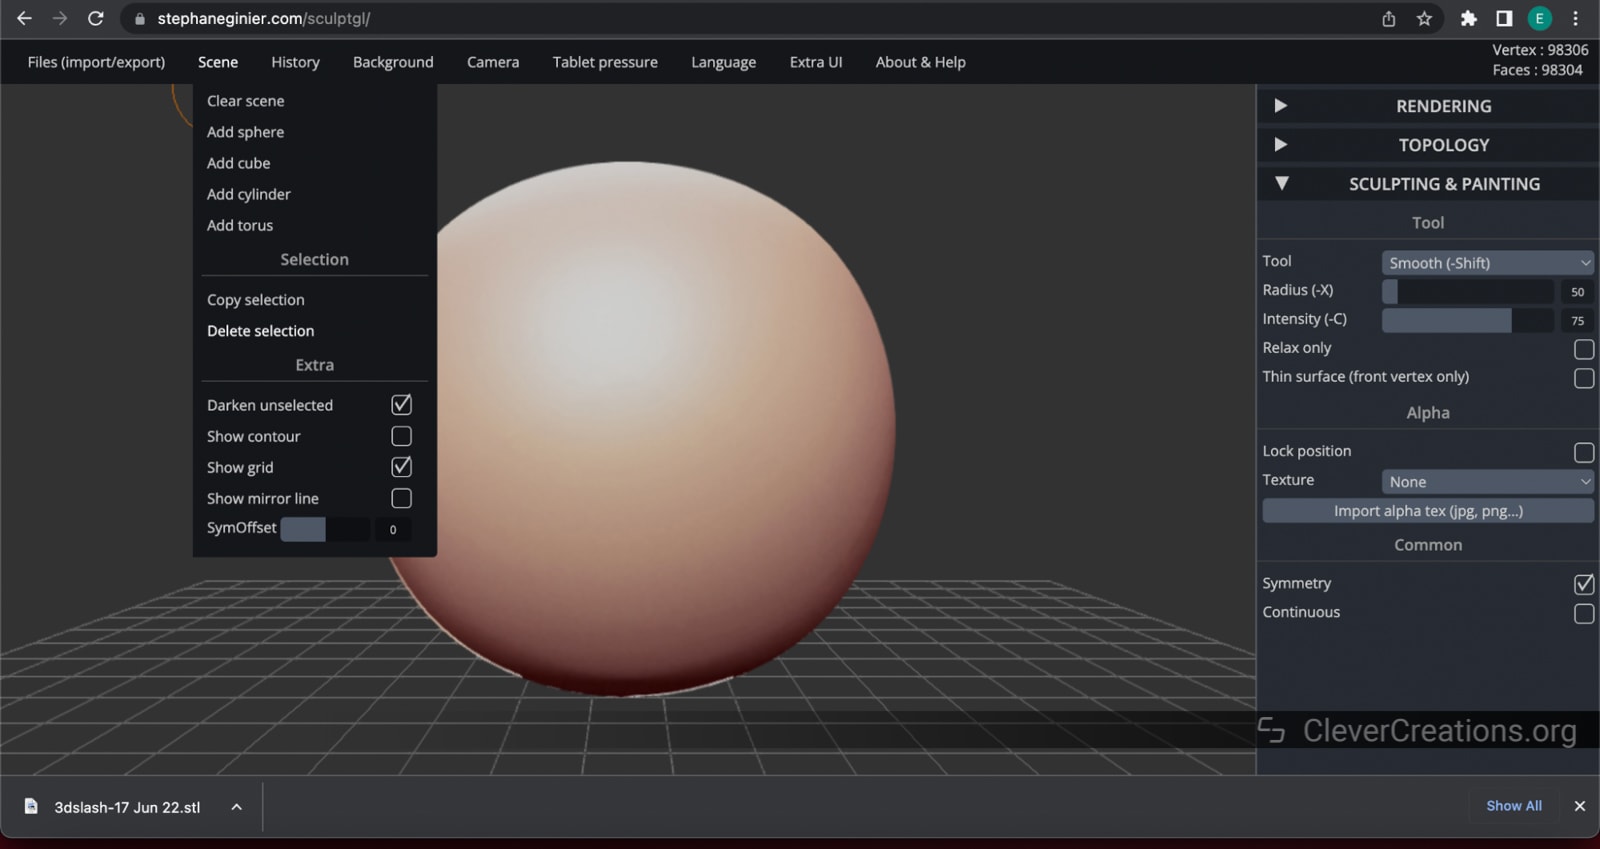
Opening STL Files
- The program loads in a basic sphere automatically. Go to Scene > Delete Selection to remove it.
- Go to Files (import/export) > Add (obj, sgl, ply, stl).
- Select your STL file of choice and click Open.


Editing STL Files
Like other sculpting programs, SculptGL uses brushes to move or affect the topography of the mesh. Choose the one you need.
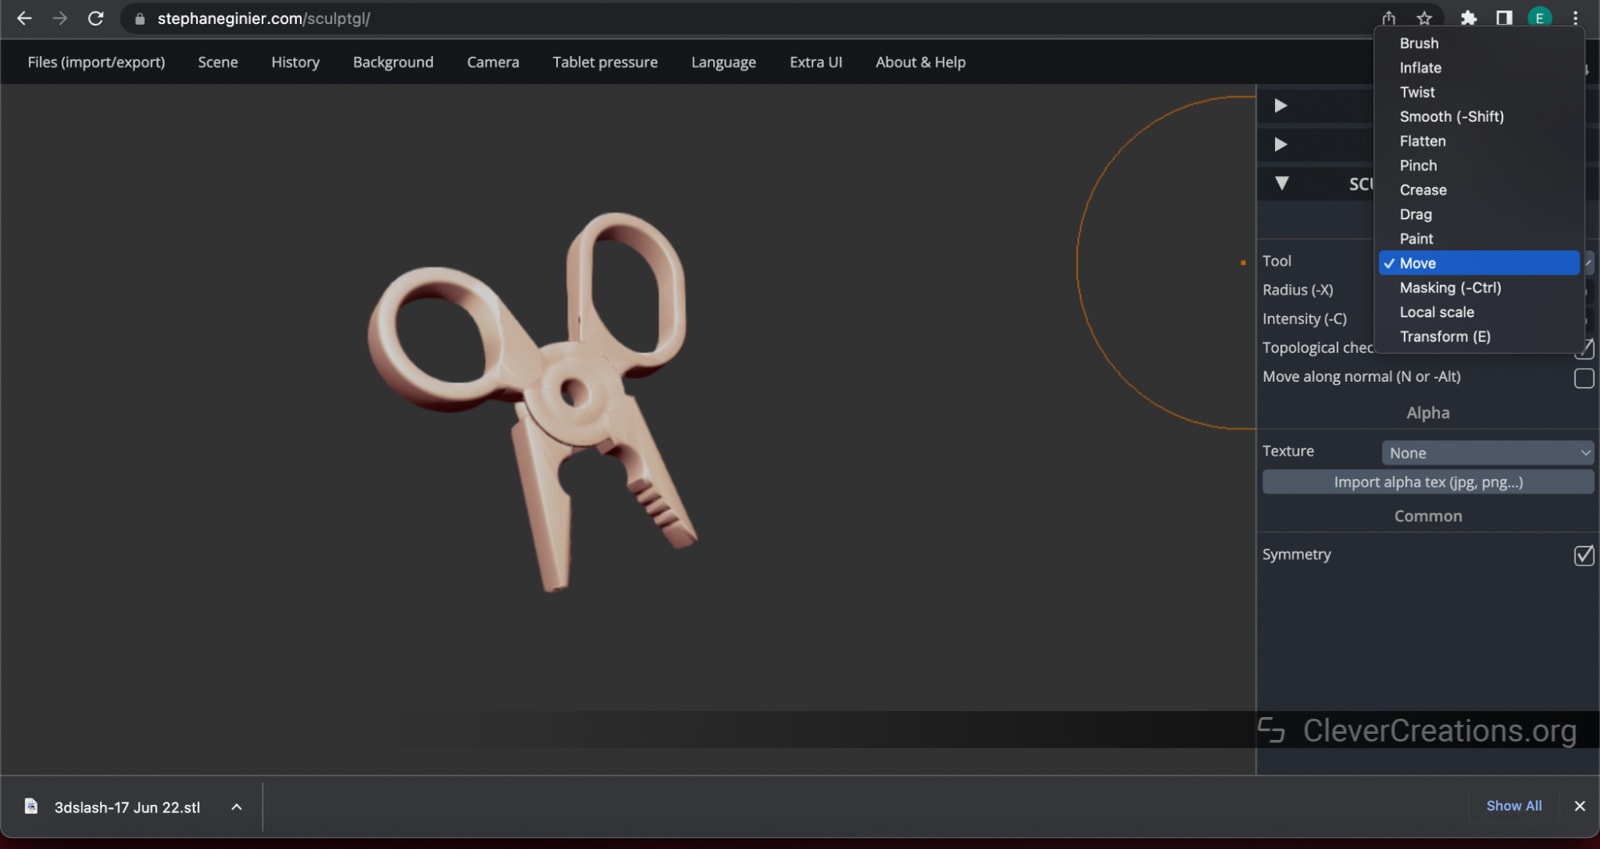
Click and drag your mouse along the area you want to be affected by the brush.
Repairing STL Files
SculptGL does not have mesh repair tools. If there are some issues with an organic model like a figurine or bust, you could most likely sculpt those away in the program, but sculpting is not a good method for highly technical models (like the plier model I’m using in this article).
Exporting STL Files
Go to Files (import/export) > Save .stl. Your file will automatically be sent to your download queue.

Blender
Blender is a free open-source program that goes far beyond STL editing. Like Autodesk Maya, it is a fully-equipped animation software. However, Blender goes a step further by incorporating a full sculpting environment into its interface as well. This allows you to do pretty much everything step of a complex modeling or animation workflow in one program. Blender is easily one of the best STL editor options available even with the steep learning curve for its UI.
- Price: Free
- OS Compatibility: Windows, Mac, Linux
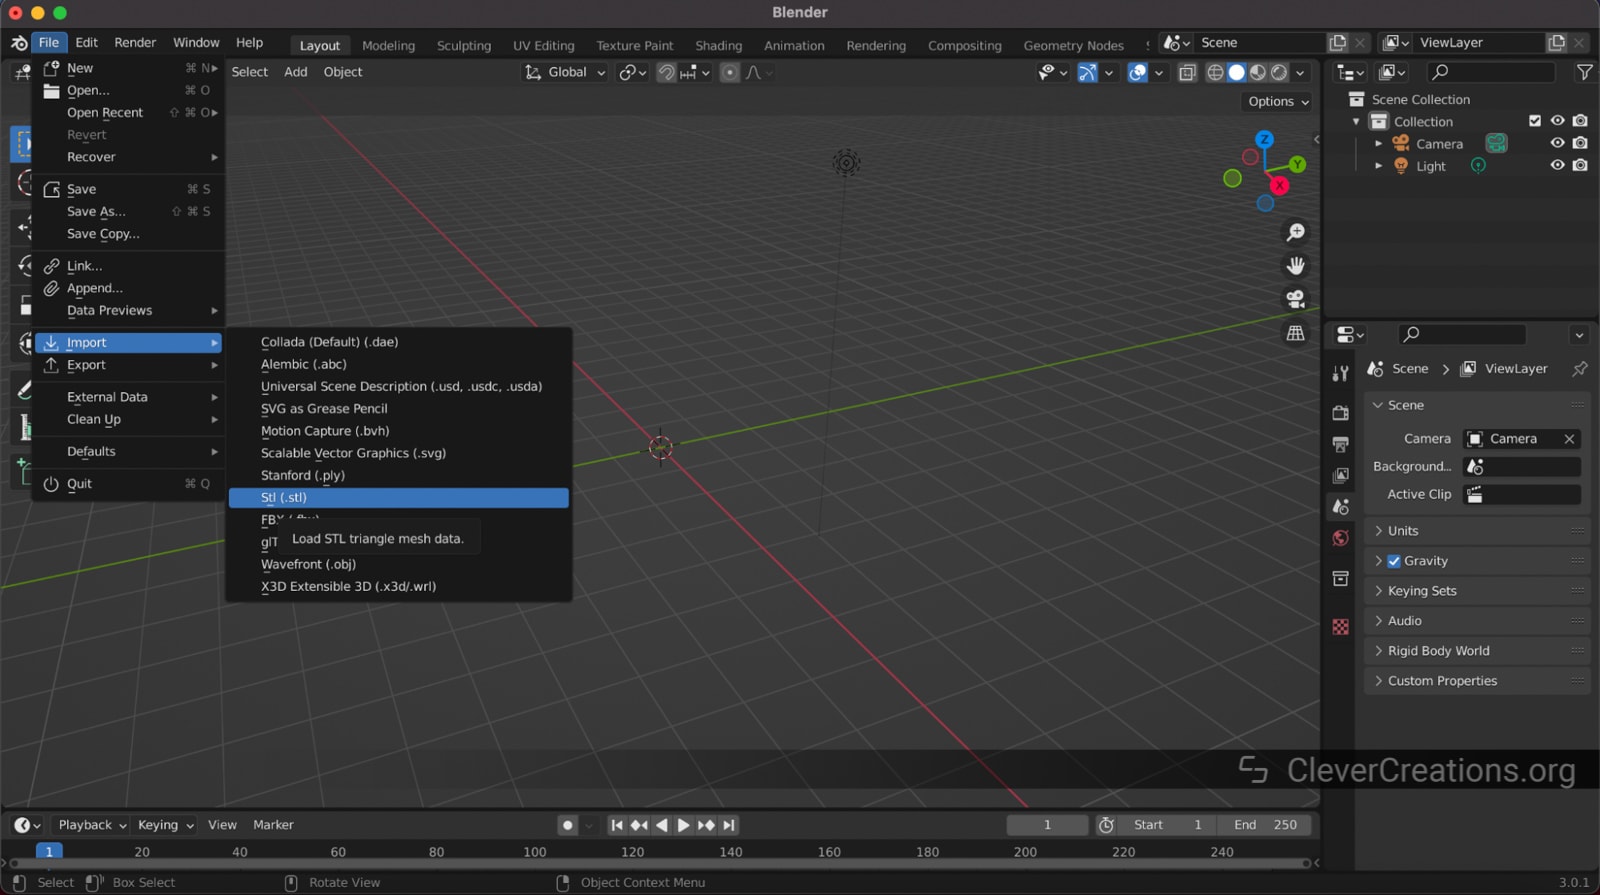
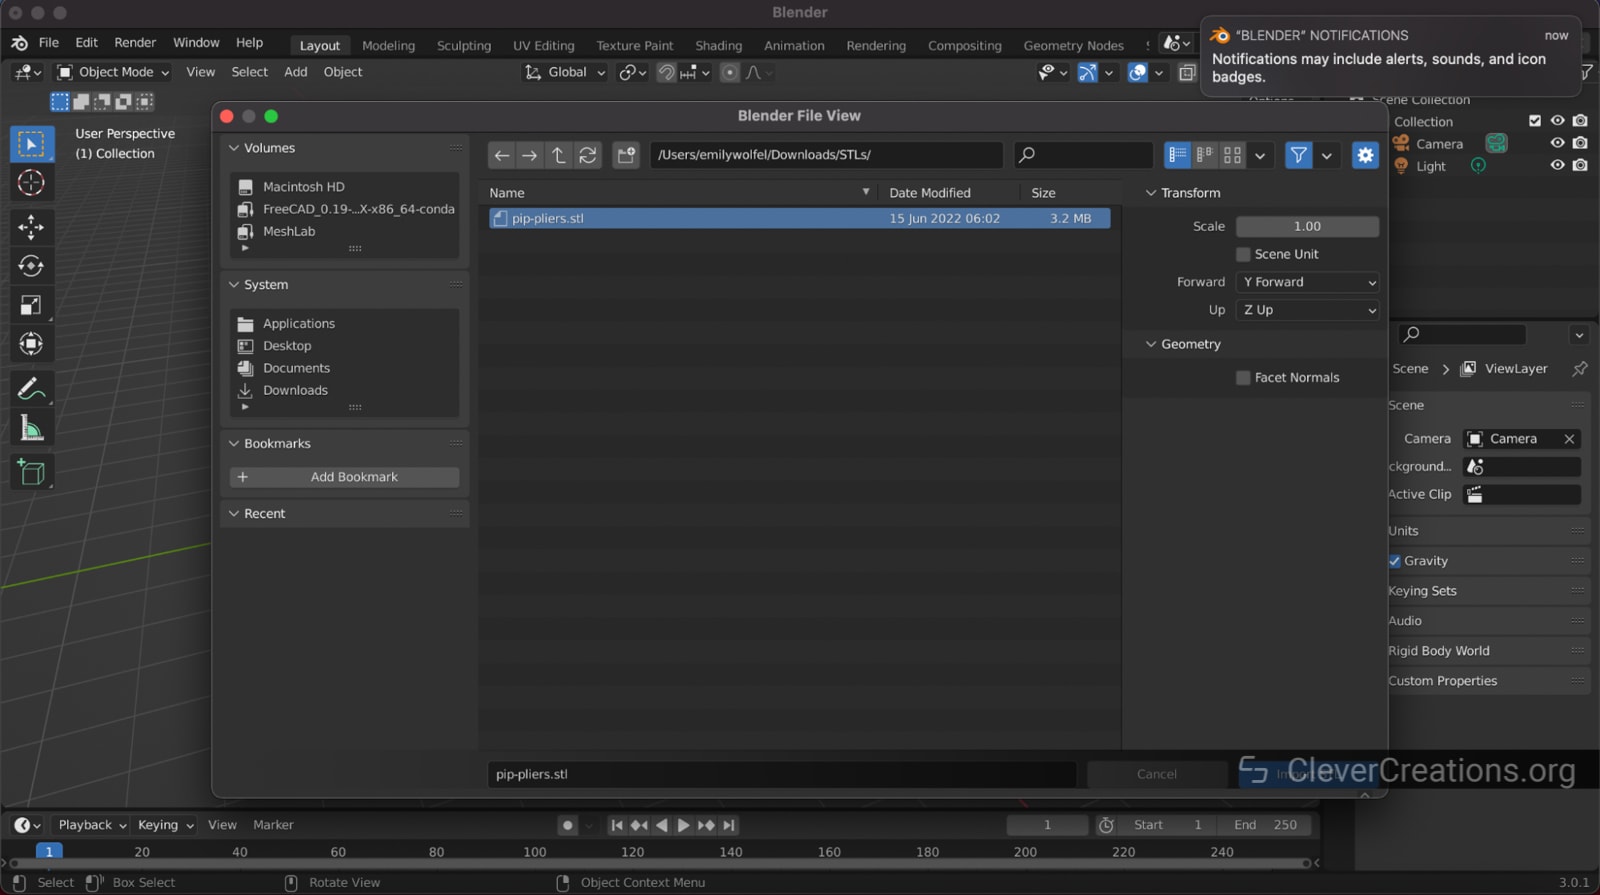
Opening STL Files
- Blender opens a new project with a cube on the workspace by default. Select it and either Right-Click > Delete or press X on your keyboard to delete it.
- Go to File > Import > Stl (.stl).
- Choose your STL file and press Import STL.

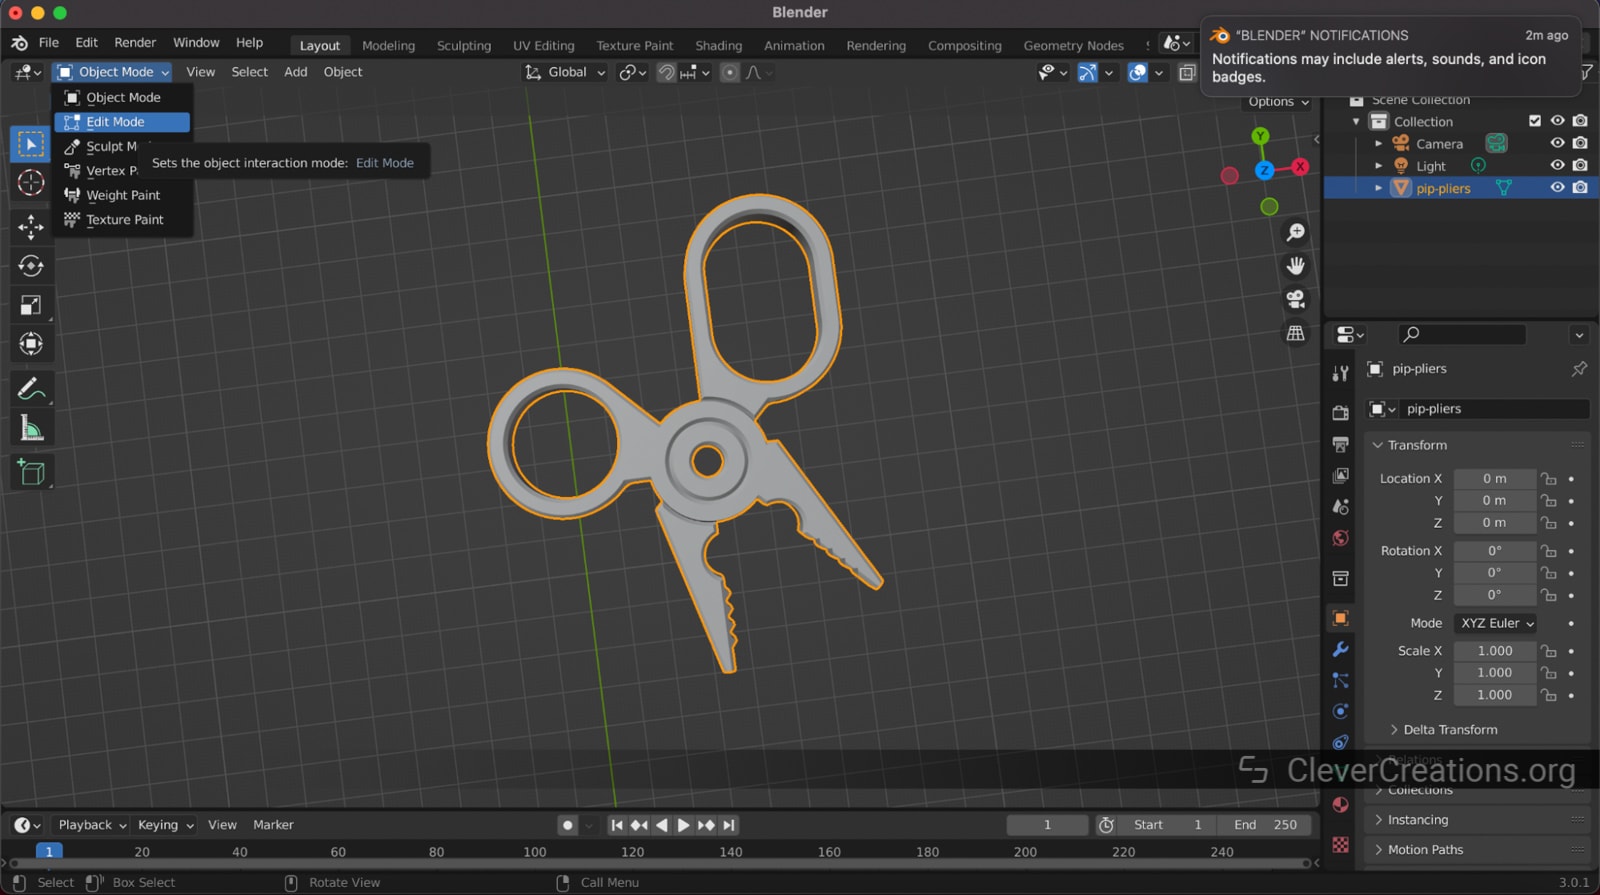
Editing STL Files
As we mentioned before, Blender is one of the most robust free mesh editing software options available. You can do traditional box modeling and sculpt within the program, so your options to edit STL files are only limited to your understanding of the many mesh editing tools in the software.
- Switch from Object mode to Edit mode.
- Tab across the different workspaces (Layout, Modeling, Sculpting, UV Mapping, etc.) to access all the different tools.
Repairing STL Files
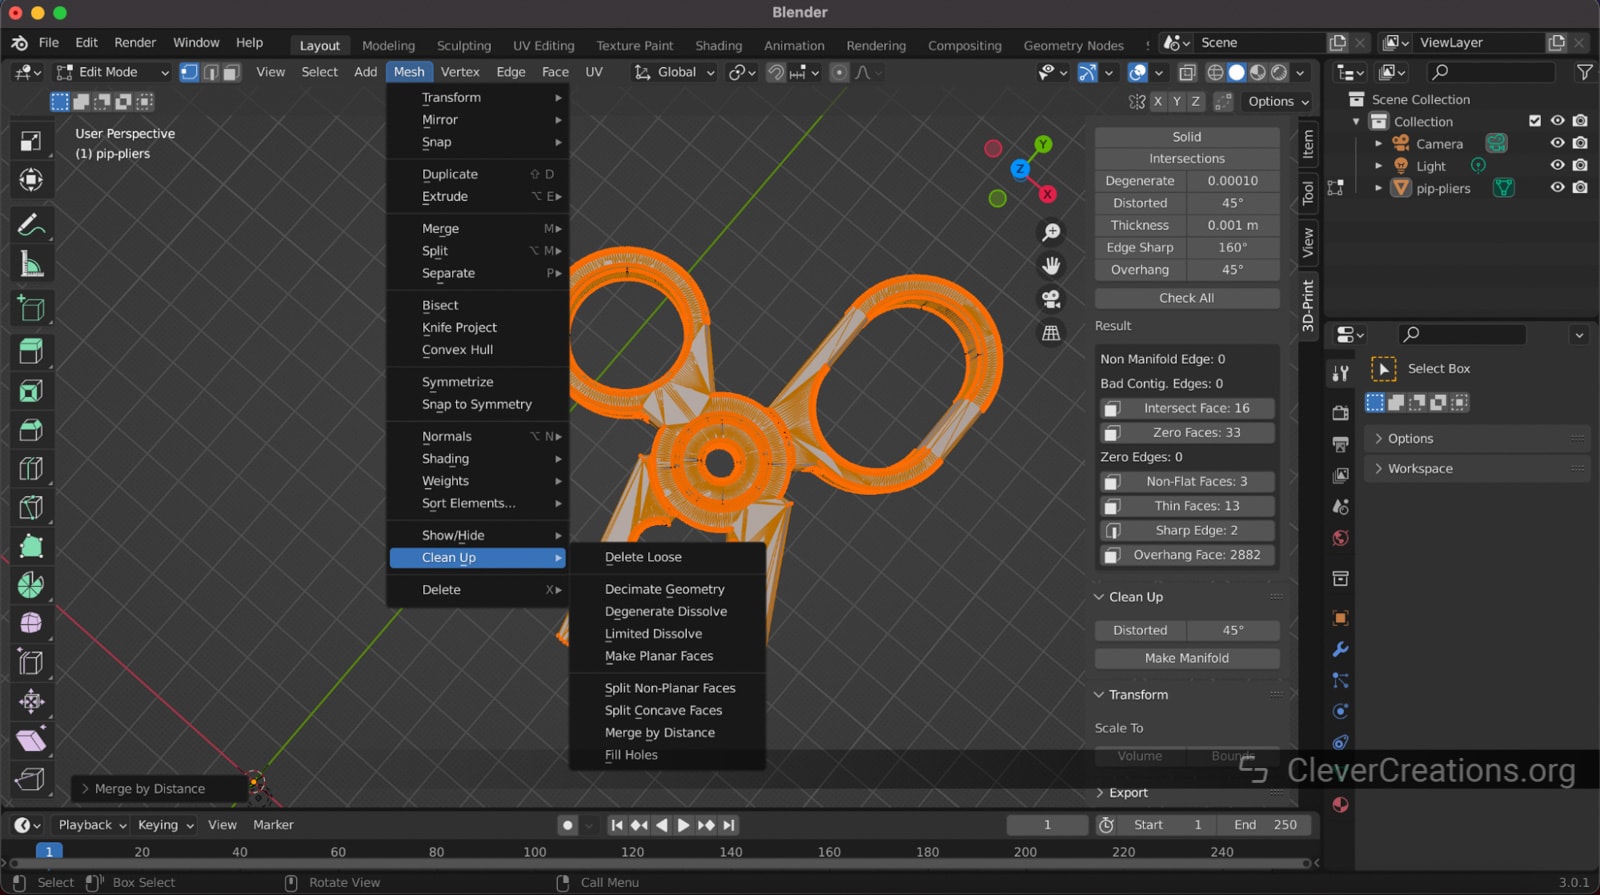
Blender does have some built-in tools to analyze and repair STL files. Before you can use them, you must enable the 3D Print Toolkit add-on.
- Go to Edit > Preferences. Choose Add-ons and make sure Mesh: 3D Print Toolbox is selected.
- You should now have a 3D-Print tab on the right side of your workspace. Restart the program if you don’t see it.
- Choose Check All to analyze your imported mesh.
- If the program finds issues with your model, go to Mesh > Clean Up and choose the tools you need to repair it.


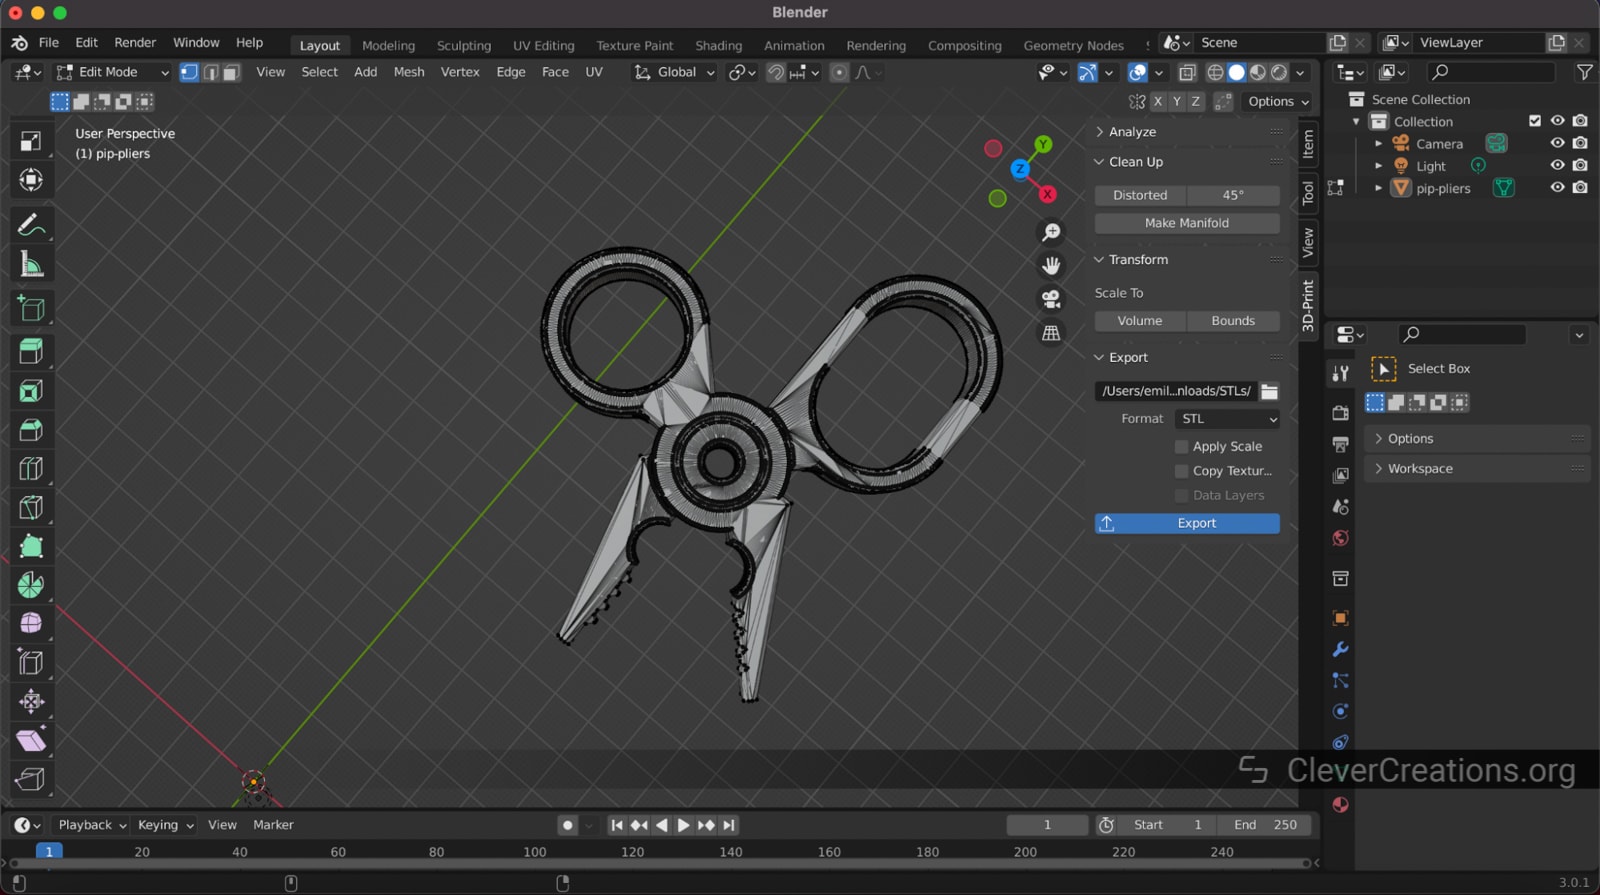
Exporting STL FIles
You can easily export your STL file from the 3D Print Toolbox. Choose your outgoing folder, select the STL file format, and click Export to save your model.
Can All STL Files Be Edited?
Yes, all STL files can be edited. One exception is if the file is corrupted, then it may not be possible to edit it.
How Do I Edit the Text in an STL File?
STL files are made up of a whole bunch of numbers that specify the shape of an object. There is no “text” in an STL file, so it’s not possible to directly edit the text.
However, if you have a blank plane to work with that you want to add text to, then TinkerCad is a good solution that lets you do so.
How Do I Cut Part of an STL File?
Splitting or cutting a model in an STL file is a fairly straightforward process in most computer-aided design software. In SolidWorks, for example, you can simply use the “Split feature” to cut the model into two or more parts. You can then save each part as its own STL file.
If you need to cut a model at a specific point, you can use software like MeshLab to split the STL file manually. Netfabb would work just as well.
What Is the Best STL Editor?
There is no one “best” STL editor. The best editor for you depends on your needs and preferences. Some people prefer simple, graphical editors while others prefer more complex ones with more features. Some editors are better suited for editing STL files while others can edit a variety of file types.
There are many factors to consider when choosing an STL editor, so it is best to just play around with various free STL editors (or a free version of paid software) until you find one that you like best. You can always switch whenever you want.
Final Thoughts
The STL format is one of the most versatile and useful file formats for 3D printing. They are small files compared to other 3D object file formats, and they are compatible with most CAD software options for importing and exporting. Because of how common they are in the 3D printing community, it is easy to download them from a variety of online model-sharing sites.
These files usually slice and print with no issues; however, sometimes the files are damaged during the modeling or exporting process and must be repaired. Other times, these files don’t quite fit your needs and need to be modified slightly. Whatever the reason, the variety of free STL editors available to you should cover any possible edits or repairs you might need to make.
Out of all the free modeling software options, we like Fusion 360 the best because it has enough advanced features to tackle pretty much any project or problem without cluttering its clean and beginner-friendly user interface. Now that Autodesk has migrated most of MeshMixer’s features into Fusion, it is a perfectly balanced option for 3D printing enthusiasts.
Blender comes in at a close second thanks to its wide variety of features and functions. Its box modeling and 3D sculpting capabilities make it an excellent option for working with organic and complex models like figurines and busts.
Do you have any questions about editing or repairing STLs? Let us know in the comments!