- Fast print speeds
- Automated calibration
- Easy assembly
- Innovative features
- Multi-color printing w/ AMS Lite
- Dual-sided print surface
- Pleasantly silent
- Intuitive user interface
- Unreliable bed temperature
- WiFi connectivity only (no USB)
- Plasticky feel
- AMS Lite takes up additional space
- High material wastage w/ AMS Lite
When it comes to the world of 3D printing, the Bambu Lab A1 is a name that has certainly made its mark. You might remember it from the headlines a while back when it was recalled due to an issue with the heated bed cable.
We’ve covered the A1 recall (and Bambu Lab’s excellent approach) in more detail, but today, we’re going to delve into the Bambu Lab A1’s comeback story and explore the standout features that make it a strong contender in the 3D printing arena. From its multi-color print abilities (with AMS-lite accessory) and speed to its user-friendly interface and robust build, the A1 has a lot to offer on paper.
So, whether you’re a 3D printing veteran or just starting out on your journey, we invite you to join us as we test the potential of the Bambu Lab A1. Keep reading to find out if this 3D printer is worth spending your money on at the moment.
Bambu Lab A1 Specs
| Item | A1 Specification | |
|---|---|---|
| Body | Build Volume (W*D*H) | 256*256*256 mm³ |
| Toolhead | Hot End | All-Metal |
| Nozzle | Stainless Steel | |
| Max Hot End Temperature | 300 °C | |
| Nozzle Diameter | 0.4 mm (Included) 0.2 mm, 0.6 mm, 0.8 mm |
|
| Heatbed | Build Plate | Bambu Textured PEI Plate (Included) Bambu High Temperature Plate (Smooth PEI) Bambu Cool Plate |
| Max Build Plate Temperature | 100°C | |
| Speed | Max Speed of Tool Head | 500mm/s |
| Max Acceleration of Tool Head | 10m/s² | |
| Supported Filament | PLA, PETG, TPU, PVA | Ideal |
| ABS, ASA, PC, PA, PET, Carbon/Glass Fiber Reinforced Polymer |
Not Recommended | |
| Sensors | Chamber Monitoring Camera | Low Frame Rate Camera (Up to 1080P) Timelapse Supported |
| Filament Run Out Sensor | Yes | |
| Filament Odometry | Yes | |
| Power Loss Recover | Yes | |
| Filament Tangle Sensor | Yes | |
Unboxing


Unboxing the Bambu Lab A1 was an experience in and of itself. We were pleasantly surprised by how compact the box was, considering it housed both the 3D printer and the AMS-lite accessory. It felt like opening a Russian nesting doll, where each layer revealed another surprise.
With everything unpacked, we had a well-organized, comprehensive kit that included everything needed to get the printer up and running. Not only did it include the machine and AMS Lite, but also an extensive toolkit as well as an assortment of extra hardware components for optional 3D printable upgrades.

One aspect that might initially disappoint is the filament offering. The package only includes a single section of white filament. This might seem like a shortcoming, but Bambu Lab takes an interesting approach here. Instead of providing a large amount of one type of filament, they offer a range of filament swatches.
These swatches are 3D printed samples of various filament types and colors. It’s a clever way to let you explore the possibilities and decide which colors you prefer before committing your money.

In total, you’ll get the following when you buy the A1 with the AMS Lite kit:
- A1 3D printer components
- AMS Lite components
- Power cable
- Sample filament (not much)
- Accessory box with assembly & maintenance tools, spare parts, and screws.
Getting the Bambu Lab A1 Up and Running
Assembling the 3D Printer


The Bambu Lab A1 is a breath of fresh air when it comes to assembly. The main components come pre-assembled, with only two large sections needing to be joined together. We’ve found that unlike many other 3D printers, many components are pre-attached and pre-wired. For example, the touch screen and print head.
In addition, the screw holes for each step are clearly labeled. We believe that even if you wanted to, it’s difficult to get lost in the assembly process of the Bambu Lab A1.

The small number of cables that you’ll need to plug in are also labeled clearly. We’ve noticed cables being one of the more challenging assembly steps for beginners, but there’s little risk of anything going wrong here.

We’ve assembled a fair share of 3D printers, and the Bambu Lab A1 stands out as one of the easiest and most guided setups we’ve encountered. Its ease of assembly makes it an attractive option for beginners, while also saving time for seasoned 3D printing enthusiasts.

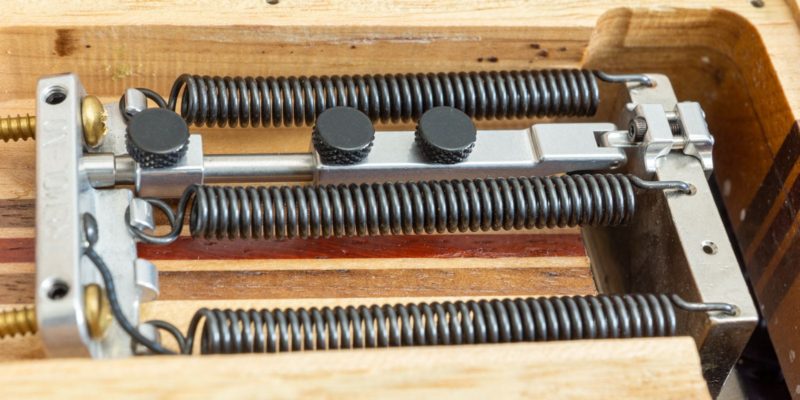
Assembling the AMS Lite

The assembly of the AMS Lite multi-color printing accessory is also a straightforward process. The task primarily involves screwing in a couple of screws, attaching the spring-loaded spool holders, and inserting the PTFE tubes.
Just like the Bambu Lab A1 itself, important components are clearly color-coded, making the assembly process less daunting. The color-coding acts as a useful guide and ensures you connect the right parts together.


The most time-consuming step we encountered was attaching the PTFE tubes. We didn’t find it particularly difficult per se, but it was a bit finicky to get them routed properly.
After successfully assembling the Bambu Lab A1 and the AMS Lite, we moved on to the initial calibration. To our delight, this process was even more straightforward than the assembly.

Initial Setup


The setup and calibration of the Bambu Lab A1 is practically all done through the 3D printer’s interface. It guides you through a series of steps to get the machine ready for the first print.
First off, we were prompted to select the language of the machine. The Bambu Lab A1 offers a variety of languages, making it accessible to a wide range of users. After selecting the language, we accepted the privacy policy.
The next step was connecting the Wi-Fi. This step is optional, but we find it to be a useful feature to enable for operating the 3D printer remotely. Especially because the A1 does not have a USB port for a wired connection to a computer.
Calibration


Then we moved on to the calibration process. The Bambu Lab A1 calibrates itself to ensure optimal print quality. This process consists of three steps: Motor Noise Cancellation, Vibration Compensation, and Automatic Bed Leveling. Here’s a quick rundown of what they do:
- The Motor Noise Cancellation test runs the stepper motors at different movement speeds to figure out at what frequencies they make the most noise. With this information, the 3D printer can minimize the vibrations and noise produced by the stepper motors during 3D printing.
- The Vibration Compensation checks the machine’s resonance from 10 to 500hz on both axes. It gives more precise and higher-quality prints by decreasing resonance from the rest of the 3D printer.
- The Auto Bed Leveling calibration lets the machine compensate for unevenness in the print bed. The machine first probes the bed in a 7×7 grid, then in a 21×21(!) grid. This step took the longest, but it’s crucial for getting a well-sticking first layer.
After the automated calibration process, the Bambu Lab A1 prompted us to turn our attention to the Y-axis. This was the only step in the calibration that required a hands-on approach.
The task at hand was simple—apply and spread out the lubricant (included with the machine) onto Y-axis the guide rails. We followed the instructions and didn’t encounter any issues.

In case you are wondering, the instructions are easily accessible via a QR code displayed on the 3D printer’s screen.

While the instructions were clear and easy to follow, one thing did catch our attention. The documentation mentioned WD-40 as a lubricant option. It’s important to note that WD-40 is not a lubricant and using it as such could potentially harm your machine in the long run.
You’ll be better off sticking to the included lubricants (oil or grease, depending on whether you lubricate the Y- or Z-axis).
Things We Liked About the Bambu Lab A1
After the smooth assembly and setup experience, we were eager to put the Bambu Lab A1 to the test. Our initial impressions were positive, but we wanted to see if this 3D printer could truly deliver on its promises.
We spent several weeks exploring the features, testing the robustness, and pushing the limits of the Bambu Lab A1. Here are some standout aspects that we came to appreciate during our hands-on experience.
Reliable Extruder


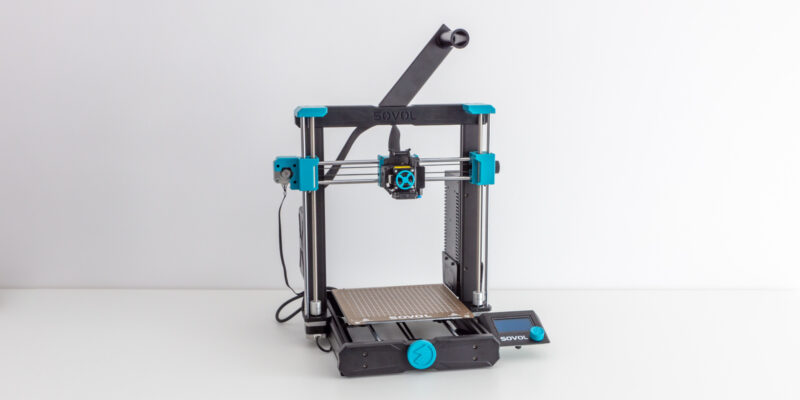
One of the first things we noticed about the Bambu Lab A1 is its extruder. Specifically its bright yellow wheel that indicates if and how the extruder motor is spinning. It’s a neat design feature, but not crucial for the performance, which is what we’re really interested in.
Luckily, the extruder didn’t disappoint in that regard either. In terms of precision, reliability, and compatibility we weren’t able to find anything to complain about.
We pushed the extruder to its limits by testing it with a variety of common materials. From PLA to PETG and even carbon-filled filaments, the Bambu Lab A1 handled them without missing steps or jams. All prints came out dimensionally accurate without notable issues.
Advanced Extruder Features
Part of that might have been due to the printer’s Active Flow Rate Compensation feature, which continuously adjusts the extrusion rate based on real-time feedback from a sensor in the print head.
In addition, the print head contains additional sensors that we’ve found to improve the user experience by a lot. For example, there’s a filament tension sensor on the print head and a filament sensor positioned before the extruder.
Bambu Lab claims these sensors can detect tangled or broken filament. Based on our testing, we’ve found them to do exactly that. We’ve had several prints that dealt with broken filament (mainly older, more brittle filament that we used because of their specific color), and the A1 paused the print each time it detected any inconsistencies in the filament supply.

We believe there was a single time where we ran into a false positive that was triggered by one of the sensors, but on the whole, the system proved to be reliable.
Feature-Rich Hot End

You’d think that a hot end would have less new features, after all, it’s just a metal block that heats up and melts filament, right? However, the Bambu Lab A1 has managed to pack some impressive innovations into its hot end design.
One of these standout features is a nozzle pressure sensor that allows for ‘Active Flow Rate Compensation’. This means that the printer can detect and adjust the extrusion rate in real-time, based on the pressure at the nozzle.
In our testing, there was a noticeable improvement in the filament flow. Especially around corners, where you’d normally see bulging at high speeds, prints were more dimensionally accurate. It’s what you would usually dial in pressure advance for, but the difference here is that everything is handled automatically.
The hotend of the Bambu Lab A1 is capable of reaching a maximum temperature of 300 °C. This is more than sufficient for high-temperature filaments. We recommend against using high-temperature filaments given that the A1 does not have an enclosure.
This could potentially lead to warping and other issues due to the lack of a controlled environment. If you’re looking to print with high-temperature filaments, the P1S can be a better option.
Another feature we were happy with is the nozzle-based leveling. The A1 uses the nozzle itself to probe the print bed for a direct and precise measurement of the distance between the nozzle and the bed. This feature eliminates the need for an external probe and makes the print head more compact.

The 3D printer also uses nozzle probing to automatically set the Z-offset. This means that you no longer need to perform the traditional ‘paper test’ to set the correct distance between the nozzle and the print bed. It’s something else we noticed that adds to the ease of use and user-friendly experience of the A1.
The hot end of the Bambu Lab A1 is not just innovative, but also impressively easy to swap. Held in place with a rigid metal clamp, you can quickly release and replace the hot end with a version sporting a different nozzle size. This is particularly useful when you want to experiment with different sorts of prints that require various nozzle sizes.


In our testing, we found this process to be hassle-free. It’s equally useful when dealing with nozzle clogs. We must point out, however, that during our test prints we did not encounter any clogs.
Double-Sided PEI Print Surface

The Bambu Lab A1 boasts a flexible print bed with a PEI coating. This type of coating is generally excellent for both adhesion and durability and is a popular choice on modern-day 3D printers.
We’ve found the surface to stick well to the most popular filaments (PLA, PETG, PLA+). That said, it was necessary to wipe the surface with alcohol after every couple of prints. Without doing so, small parts had trouble sticking.
The print surface is held firmly in place with powerful magnets. Stable enough to hold the surface in place the printing process, while also allowing for effortless removal when it’s time to take off your prints.
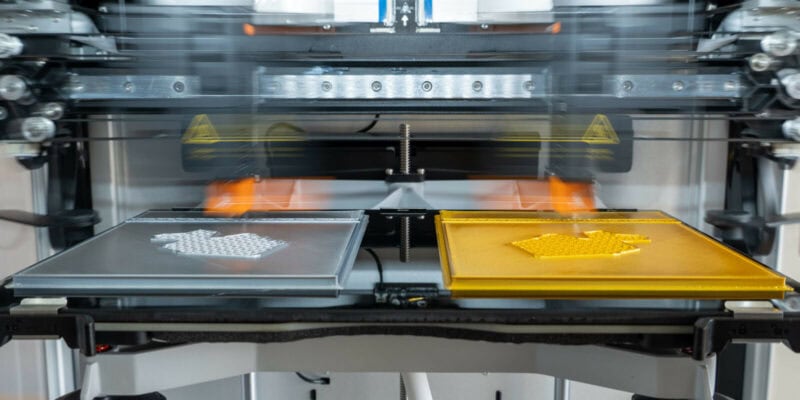
Adding to its versatility, the print surface is double-sided. This feature is a definite plus, as it effectively doubles the lifespan of the print bed and gives you the flexibility to flip it over when needed.

Impressive Print Speeds
One of the standout features of all Bambu Lab printers is their impressive print speed, and the A1 is no exception. While it may not have the rigid CoreXY cube frame of the P1P, X1 Carbon, or P1S, it compensates well with features such as Vibration Compensation and Active Flow Rate Compensation.
These features work together to maintain high print quality, even at higher speeds, by preventing ringing and ensuring a steady filament flow. In practice, this works well. Even with fast print speed and dialing the 3D printer up to its ‘Ludicrous’ Mode, the print quality falls within what we find to be acceptable.

Pleasant Noise Levels

One of the aspects you might be curious about is the noise levels of the Bambu Lab A1 3D printer. We’re pleased to report that the A1 operates at a comfortably low noise level at normal print speeds. We haven’t measured them with a decibel meter, but subjectively there’s nothing bothersome about them.
The noise levels become even less noticeable when you select the ‘Silent Mode’ during printing. This feature adjusts various printer settings to reduce mechanical movements and vibrations, resulting in a quieter operation. These adjustments typically include lowering the speed and acceleration of the print head and reducing the fan speeds.
That said, the printer is loud when going through its short calibration process prior to each print. It moves the print head back and forth at high speeds and vibrates your table or 3D printer workbench.
This sound is bothersome enough to disturb people in adjacent rooms or floors, so make sure to keep this in mind when starting up a 3D print during silent hours.
Fast Heating Times
One feature of the Bambu Lab A1 that deserves special mention is its remarkably fast heating times. We were genuinely impressed by the minimal wait time for the hot end and heated bed to reach their desired temperatures.
The hot end heater is rated at 60W, which allows the nozzle to heat up to 200°C in just 40 seconds from room temperature. Reaching the maximum temperature of 300°C took only 1 minute and 40 seconds in total.
We also measured the heated bed to draw a whopping 1050W. It took a mere 23 seconds to hit 60°C and just 60 seconds in total to reach its maximum temperature of 100°C. We haven’t seen such fast bed heating times in any other 3D printer we’ve tested.
If you’re someone who values efficiency and quick turnaround times on your parts, you’ll appreciate this aspect of the A1 3D printer.
Things We Didn’t Enjoy as Much
While our overall experience with the Bambu Lab A1 was largely positive, we did come across a few aspects that didn’t quite meet our expectations. Let’s dive into some of the areas where we feel the Bambu Lab A1 could improve.
Print Bed Temperature


One of the few areas where the Bambu Lab A1 didn’t quite hit the mark was the temperature of the print bed. During our testing, we found that the surface temperature of the print bed was about 5°C off when measured externally, compared to the temperature reported by the printer itself.
While this discrepancy might not seem significant, it can affect the print quality, especially when you’re dealing with temperature-sensitive materials.
In addition to this, we noticed that the temperature wasn’t distributed evenly across the print bed. There were several spots where the temperature was noticeably lower, which can lead to inconsistent print results.
We haven’t disassembled the print bed to investigate this issue further, but we suspect it might have something to do with the high power output of over 1000W dumped into the print bed at specific locations. This uneven distribution of heat could be the reason behind the temperature inconsistencies we observed.
While this isn’t a deal-breaker by any means, it’s something we feel could be improved in future iterations of the Bambu Lab A1.
No USB Port

One aspect of the Bambu Lab A1 that might be a drawback for some users is the lack of a USB port. For those who are used to directly connecting their 3D printer to their computer, this could be a bit of a hurdle.
However, the A1 does come equipped with a micro-SD card slot and Wi-Fi capabilities. We found the Wi-Fi connectivity to be exceptionally reliable throughout our testing period, and we used it exclusively in combination with the official Bambu Lab software without any issues.
For those who don’t have Wi-Fi in their workshop or hobby area, the lack of a USB port could mean having to deal with the fiddly micro-SD card more often than you’d like.
Material Wastage (Multi-Color Printing Only)

One aspect of the Bambu Lab A1 that we found less enjoyable was the material wastage when using the AMS Lite for multi-color printing. While the AMS Lite allows for exciting color variations, the process does lead to a significant amount of wasted filament.
This is a natural consequence of AMS-type systems, not just specific to Bambu Lab. Similar systems from other manufacturers, like Creality’s MMU and Anycubic’s ACE, experience the same issue. When you switch colors, the system needs to purge the old filament before introducing the new one, leading to a strip of discarded filament.
This wastage stands in stark contrast to true dual extruder 3D printers with multiple physical extruders. These do not require constant purging and waste less material.
Bambu Lab has made efforts to mitigate this issue, however. In the slicer, you can set the print to use the purged material as infill, effectively recycling the otherwise wasted filament.
It’s a clever solution, but it doesn’t work for all prints. For example, those with little to no infill don’t see much benefit.
We’ll delve into the AMS Lite in more detail further down this review. But for now, it’s worth noting that while the multi-color printing capability is an exciting feature, it does come with the trade-off of increased material wastage.
Plastic-y Feel
While the Bambu Lab A1 boasts an array of impressive features and capabilities, there is a significant use of plastic in its construction, both in the machine itself and the AMS Lite.
During our hands-on experience, we found that the extensive use of plastic can sometimes give the machine a somewhat cheap feel.
That said, it’s important to consider the price/value ratio of the A1. Given its myriad of advanced features and capabilities, we found that the plastic feel was quickly overshadowed.
Thoughts on the Overall Build Quality

Despite the aforementioned plastic-y feel, the Bambu Lab A1’s build quality is excellent. Most notably, all the crucial structural components are made of metal. In addition, the frame is rigid enough to withstand the high print speeds. Ideal if you want to maintain precision and quality in your 3D prints.
We are also happy with the wire management on the A1. There are no loose wire bundles that could potentially interfere with the printing process.
Improved Heated Bed Cable

When writing this Bambu Lab A1 review, we can’t ignore the heated bed cable issues that plagued the machine at its launch. The company had serious concerns about the durability and safety of the heated bed cable, which led to a recall.
With this new version of the A1, Bambu Lab assures that they’ve made significant improvements to the heated bed cable. According to the company, the cable now boasts Kevlar reinforcement, thicker insulation, softer copper, optimized wire winding interval, Nylon sleeving, and an extended strain relief.
While we haven’t disassembled the cable to confirm these enhancements—as it would be too destructive—we have no reason to doubt Bambu Lab. Their transparent handling of the previous issue gives us confidence in their claims.
In our hands-on experience with the updated A1, we also encountered no issues with the heated bed cable. It’s likely these types of issues appear after longer use, however.
We can confidently say that its user interface (UI) is more than satisfactory. It’s not just good, it’s great! You’ll find a lot of overlap in functionality with other 3D printers in its class, making it familiar and easy to use.
One unique feature that stood out to us was the on-screen QR codes. These handy little squares direct you to the Bambu Lab Wiki, where you’ll find detailed instructions for various tasks. For example, when the prompt to lubricate the Y-axis pops up, simply scan the QR code and you’ll be guided through each step.
Moreover, the UI of the Bambu Lab A1 has a polished, professional feel. We didn’t encounter any mistranslations, no bugs, and no confusing elements. It’s a contrast to some other recent 3D printers we’ve tested.
Bambu Studio Slicer Software

Our experience with the Bambu Studio slicer software was overwhelmingly positive. Just like the on-screen UI of the Bambu Lab A1, the software is polished, intuitive, and easy to understand.
Despite its user-friendly interface, the Bambu Studio doesn’t skimp on features. It offers a comprehensive set of settings that will satisfy both beginners and experienced users alike.
During our testing, we didn’t find the need to switch to other slicers like Cura for additional features. In fact, what sets the Bambu Studio apart are its unique features that we’d like to see in other slicers. For example, the scarf joint seam does an excellent job at hiding the seam. It’s not something we’ve encountered in any other slicer.
Thoughts on the AMS Lite

The AMS Lite is an accessory that comes with the Bambu Lab A1. It’s a standalone unit that can hold up to four spools of filament, giving you greater flexibility and the ability to print in multiple colors without having to manually change the filament each time.
One of the features we particularly appreciated about the AMS Lite is its automated filament loading and unloading. It takes the hassle out of changing filaments. Combined with the integrated cutter in the 3D printer’s print head, it’s capable of handling the entire filament swapping process without manual intervention.
However, as we mentioned earlier, the AMS Lite does result in a fair amount of filament wastage when switching colors. This is a common issue with multi-filament systems, but it’s something to consider if you’re planning to do a lot of multi-color printing.
In terms of stability, we found the AMS Lite to be well-balanced. Even with two full spools on one side, it didn’t topple over.
During our testing, we encountered a couple of jams caused by filament breaking inside the PTFE tube from the AMS Lite to the A1 3D printer. We believe this was mainly due to our use of brittle filament rather than a fault with the AMS unit itself.
One of the downsides we noticed with the AMS Lite is that it takes up a significant amount of desk space. However, Bambu Lab offers a solution to this problem. You can 3D print an upgrade to mount the AMS Lite on top of the machine to free up your workspace.

Another limitation we found is that the AMS Lite doesn’t fit all spools. It’s designed to accommodate spools with a maximum weight of 1kg, 40-68 mm width, and a hole diameter ranging from 53-58mm.
In our testing, we ran into an issue with SUNLU’s spools, which have a larger diameter. Again, we were able to solve this problem by 3D printing an adapter.

It’s also important to note that the AMS Lite doesn’t work well with all types of filament. For example, it’s not recommended with flexible filament and particularly stiff filaments, such metal- or carbon-filled ones.
Having said that, we’ve printed with PLA-CF through the AMS unit and it worked fine.

Loading filaments is also super easy, as the AMS unit detects when you insert filament. It then feeds it through further into the PTFE tube, so you won’t have to do that by hand. Another neat quality-of-life feature.
Is the Bambu Lab A1 Worth Getting Without AMS Lite?
You might be wondering, is the Bambu Lab A1 worth investing in without the AMS Lite? Based on our experience, we can confidently say—absolutely.
At its current price point ($399), the A1 stands as a robust, feature-rich 3D printer that delivers exceptional value. Even without the multi-color printing capabilities of the AMS Lite, the A1 shines in its own right.
Most notable, the A1’s impressive print speeds don’t compromise much on quality. The printer handles all common materials with precision and consistency.
You’ll also find that the A1’s user-friendly interface and easy assembly make it a breeze for both beginners and seasoned 3D printing enthusiasts. The A1’s fast heating times, reliable extruder, and advanced hot end features sweeten the deal even further.
Equally important to point out is that should you wish to explore multi-color printing down the line, the option to purchase a separate AMS Lite unit is always there.
Print Tests
Traffic Cones for RC Model Cars
One of our first prints of the Bambu Lab A1 involved printing a set of small traffic cones. Basically a quick multi-color test to assess the printer’s ability to swap filament. Due to the small size of the cones, the seam is slightly more noticeable than we would have liked. The color transitions came out great, however.

Wildlife Kit Card
Next was a set of Wildlife Kit Cards. A good way to test the multicolor printing abilities and the accuracy of the Bambu Lab A1. The 3D printer did well here, with the components and sprues coming out well and fitting properly when assembled.


Marlin
Our next print test brought the beloved character Marlin from Finding Nemo to life. The Bambu Lab A1 did a good job at printing the vibrant colors. We did notice some visual artifacts that can be attributed to the high print speed we chose for this test.
Additionally, a dense horizontal line is visible at the point where we paused the print for a few hours. While we’re not entirely sure if this was due to a cooling issue or a slight offset when the print resumed, but either way we recommend avoiding long pauses when aiming for aesthetic prints on the A1.


Minecraft Heart Keychain
Our next venture with the Bambu Lab A1 was crafting a set of Minecraft Heart Keychains. The 3D printer brought the pixelated design to life neatly. We did encounter a small hiccup with one of the black cubes on one of the hearts—it didn’t adhere well to the bed. This served as a gentle reminder to thoroughly clean the bed before each print or to consider using a brim for better adhesion. Despite this minor issue, we’re happy with the overall results.


LED Lamp 001
We also made an LED Lamp with Bambu Lab’s LED Lamp kit. This print turned out to be an absolute delight. The print came out flawlessly, and thanks to the A1’s speed, it was completed in no time at all.
If you’re interested in similar practical projects, we highly recommend exploring Bambu Lab’s range of hardware kits.


Conclusion: Should You Get the Bambu Lab A1?
We can recommend the Bambu Lab A1 with AMS Lite for anyone who is interested in multi-color 3D printing and does not want to splurge on higher-end multi-color 3D printers. At its current price point, you won’t find anything better right now.
The Bambu Lab A1 on its own (without AMS) is a good pick as well. It stands out with its high print speeds, advanced extruder and hot end features, and user-friendly interface. If you’re a beginner, you won’t mind the easy assembly either.
The A1’s additional positives, including its fast heating times, double-sided print surface, pleasant noise levels, and pleasant user interface, far outweigh the few negatives we encountered. Even the issues we noted, such as the plastic-y feel, lack of a USB port, and material wastage during multi-color printing, can be worked around or are minor inconveniences at most.
Long story short, if you’re looking for a robust, feature-rich 3D printer that delivers exceptional value and the added bonus of multi-color printing capabilities, the Bambu Lab A1 is well worth your consideration.