


- Great scanning results for a handheld 3D scanner of this price
- Excellent software
- Solid build quality
- Practical carrying case
- Unsuitable for smaller objects
- Low capture detail
- Not ergonomically designed
- Demanding system requirements
- Noisy fan
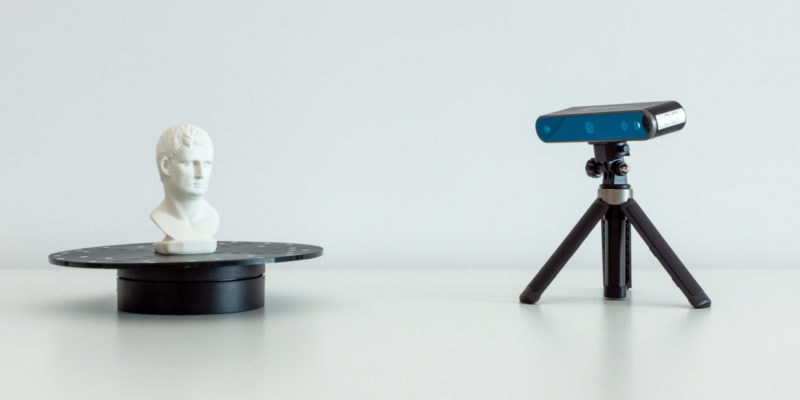
With 3D scanners typically costing in the thousands or tens of thousands of dollars, sub-$1000 models were unheard until recently. By releasing its new Einstar, Shining 3D is part of a new wave of low-cost 3D scanners designed to bring 3D scanning capabilities to a wider audience.
The Shining 3D Einstar is a handheld 3D scanner designed for entry-level users. Its specifications suggest an easy-to-use device for capturing textured and detailed 3D models.
Today, we’ll take a closer look at the Shining 3D Einstar 3D scanner and see how it performs. By the title, you can probably guess that the Einstar comes with some caveats, but there is still plenty to like and explore.
Shining 3D Einstar Specifications
| Shining 3D Einstar Specs | |
|---|---|
| Price | Shining 3D | Shining 3D EU | Amazon |
| Scan Mode | Structured Light Scan |
| Point Distance | 0.1 mm – 3 mm |
| Light Source | Infrared VCSEL structured light |
| Working Distance | Effective: 160mm-1400mm Optimal: 400mm |
| Depth of Field | 160-1400 mm |
| Maximum FOV | 434×379 mm (under optimal work distance) |
| Scan Speed | 980,000 points/s, up to 14FPS |
| Align Modes | Feature Alignment, Hybrid Alignment, Texture Alignment, Global Markers |
| Safety | Eye-safe |
| Texture Scan | Yes |
| Outdoor Scanning | Yes |
| Interface | USB2.0 or above |
| Output Formats | OBJ; STL; PLY; P3; 3MF |
| Scanner Size | 220x46x55 mm |
| Carrying Case Size | 245x245x90 mm |
| Scanner Body Weight | 500g |
Unboxing

Unboxing the Shining 3D Einstar 3D scanner is an enjoyable experience. Every step of the unpacking process has a premium feel to it.
The Einstar and its accessories come in a quality carrying case, with all cables individually packed in clearly labeled boxes. It’s a bit of extra work to unbox, but does give the impression that Shining 3D has paid attention to detail.

What’s included with the Einstar is as follows:
- Einstar 3D scanner
- USB cable
- Power adapter
- Power cable
- Calibration board
- Quick start guide
- Reflective markers (500x)
As this is a handheld scanner, there is no turntable or tripod included. While we have found a turntable to be useful for scanning smaller objects with the Einstar—more on this later—you won’t need one for most scanning tasks.
Also not included is 3D scanning spray. If you plan on scanning black or reflective surfaces, we recommend picking up a can. Coating a surface with 3D scanning spray ensures that the light emitted by the Einstar is reflected back properly and the scanner can pick up maximum detail.

Einstar Features
Shining 3D lists a number of features and claims for its Einstar 3D scanner. Based on our experience, some of these are accurate, whereas others are overstated. Let’s go through some of the key features and see how they hold up to reality.
High-Quality Data

To start, the Shining 3D Einstar is listed as collecting high density point cloud data with a point distance of up to 0.1 mm. This is significantly smaller than the 0.17 mm-0.2 mm listed for the Einscan SP that we recently reviewed, suggesting that the Einstar provides more detailed results.
In our testing, however, we found the opposite. The Einstar delivers less detail than the Einscan SP, and compared to the Revopoint POP 2 it does not do much better either. You can see the comparison scans further down this review.
Our Einstar was calibrated after unboxing and seemed to function properly, so we can only assume that this value is overstated.
For a scanner that can scan medium-to-large objects, the Einstar still produces decent results that are more than satisfactory for most uses. Especially considering the price of this handheld 3D scanner. But if you require more detail, you are better off with one of the recommendations further down this page.
Scanning Speed up to 14 FPS
The scanning speed of the Einstar 3D scanner depends a lot on the settings you choose. If you select the low detail setting and disable the scanning of textures, the Einstar scans relatively quickly.
If you scan at maximum detail and decide to capture textures as well, the process takes considerably longer. The Einstar is not a fast 3D scanner by any means.
Combined with the user-unfriendly ergonomics of the device—also more on this later—this 3D scanner takes a good amount of your time and effort to use.
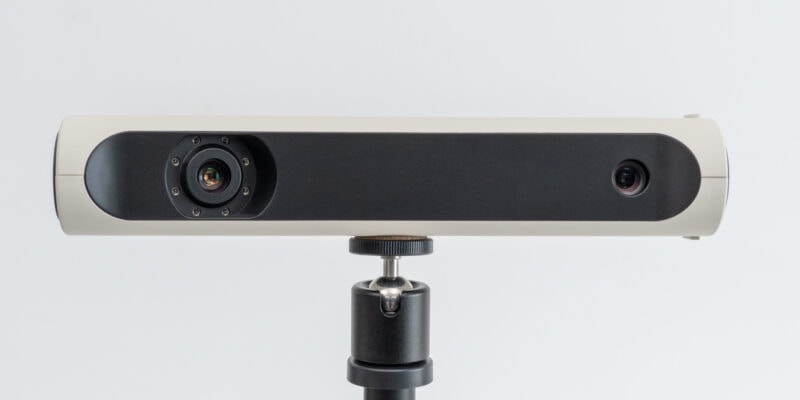
RGB Color Camera

The RGB color camera of the Einstar 3D scanner lets the device capture textures. The captured textures are of decent quality. For any sort of photorealistic rendering, they are not detailed enough, but that is to be expected from a handheld 3D scanner in this price range.
They are sufficient for basic 3D models and are useful to add some visual appeal to otherwise dull 3D scans. That said, capturing textures takes more time and computing power, and is not always necessary in all scanning tasks. It’s best to decide whether or not you need it for each individual project.
Outdoor Scanning
We’ve only used the Einstar briefly in natural light and it performed relatively okay. But while the device is able to capture geometry and texture in outdoor conditions, there is a big catch.
For the Einstar to work, it needs to be tethered to both a powerful computer and an external power source. Outdoors, it is difficult to have access to these things, so this use case feels more like a theoretical option than an actual practical reality.
Instead, you are much better off scanning outdoors with a true standalone 3D scanner, like the Revopoint POP 2, or even by using photogrammetry with your phone.
Ergonomics

Handheld 3D scanners, like the Einstar, need to be lightweight and easy to hold, otherwise the scanning process will get uncomfortable after a while.
We feel like Shining 3D missed the mark here. At 600 grams (1.3 lbs), the Einstar is a bit hefty and not easy to work with for long periods of time.
Its weight makes it a challenge to precisely and slowly move the Einstar around an object. This is especially true for detailed objects where the slow and steady movement is needed.
This problem could be alleviated by an ergonomic design, but the rectangular shape of the Einstar is the exact opposite of that. We often found ourselves supporting one arm with the other to keep the device stable.
The 3D scanner does have a silicone case that makes it a bit easier to hold, but it isn’t enough to make up for the discomfort. The case features a wrist strap that we recommend you use, as dropping the Einstar from a large height isn’t something you want to experience.

User Interface

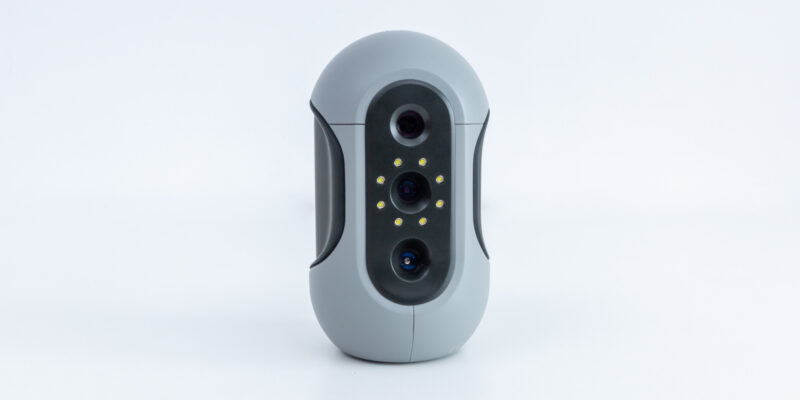
The Shining 3D Einstar’s user interface is located on the back of the device. It comes with three buttons for input, as well as a set of LED lights that indicate current status information.
We’re big fans of the buttons. The middle one lets you start or stop scanning without having to use the software interface for this process.
The two adjacent buttons, the ‘+’ and ‘-‘, let you either zoom in/out in the software, or increase/decrease the scanner sensitivity.
By double clicking the middle button, you can switch between the zoom mode and the sensitivity mode, so basically everything you need to control the device can be done using these three buttons.
It’s a nice system that keeps you from having to walk back and forth to your computer during the scanning process.

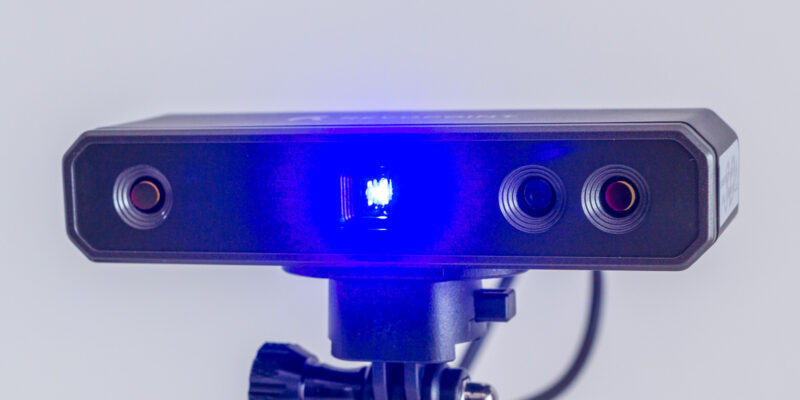
Also part of the user interface are two LED light indicators.
The top indicator is used to show the distance from the scanner to the object. Blue means the distance is too far, green is good, and red is too close. To capture maximum detail, you want to keep the indicator green as much as possible.

The bottom LED indicator shows the status of the Einstar 3D scanner. Blue means everything is okay, whereas red signals a problem.
Unlike the buttons, we found the lights to be a lot less useful. While using the 3D scanner, you’ll be looking at your computer screen >90% of the time to check the scan progress and scanner positioning.
Because the scanner to object distance is more clearly displayed in the software, you don’t really need the top LED indicator on the device.
Another potential shortcoming is that the red, green, and blue distance LEDs are all placed under the same white diffuser. For people with Deuteranomaly (red/green color blindness), this will make it difficult to differentiate between the colors.
In the software this is handled better. The distance indicator is laid out vertically in multiple segments, making it easy to tell how close or far you are from the object.
Overall, the user interface of the Shining 3D Einstar 3D scanner is good, but there is room for improvement. The buttons are definitely the most useful, with the LED lights being something that you will barely need.
Software

Whereas Shining 3D’s Einscan SE and Einscan SP 3D scanners use the company’s Exscan S software, the Einstar has its own Exstar software.
If you work with multiple Shining 3D scanners, it can get challenging to keep track of all of these similarly named devices and pieces of software. For us, at least, their naming scheme is starting to become a challenge.
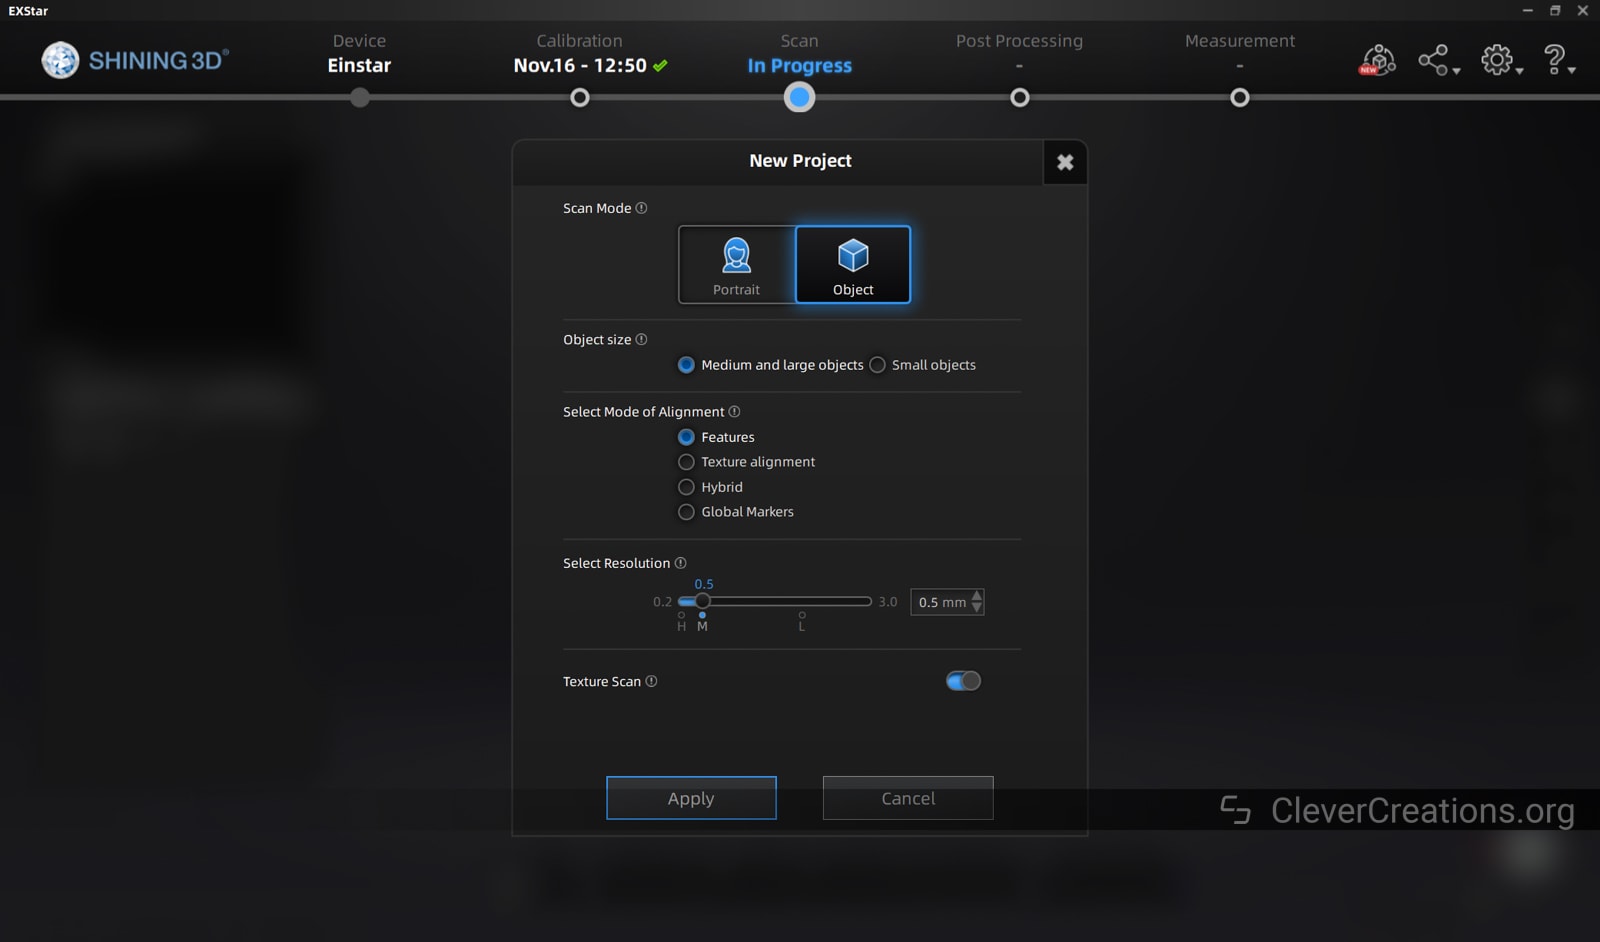
The Exstar software has a couple of neat features that we haven’t seen before in Shining 3D’s budget scanner software. The most notable is the ‘Data Quality Indicator’ setting that you can enable while 3D scanning.
What this setting does is that it displays the current scan in a color gradation from green to red. Green means that enough detail has been captured, whereas yellow and red indicate that you need to collect more data in those areas.

This is a useful feature for quickly and accurately assessing the quality of a scan. It is also a big time-saver when it comes to figuring out which areas of the scan you are done with and which you still need to capture more detail from.
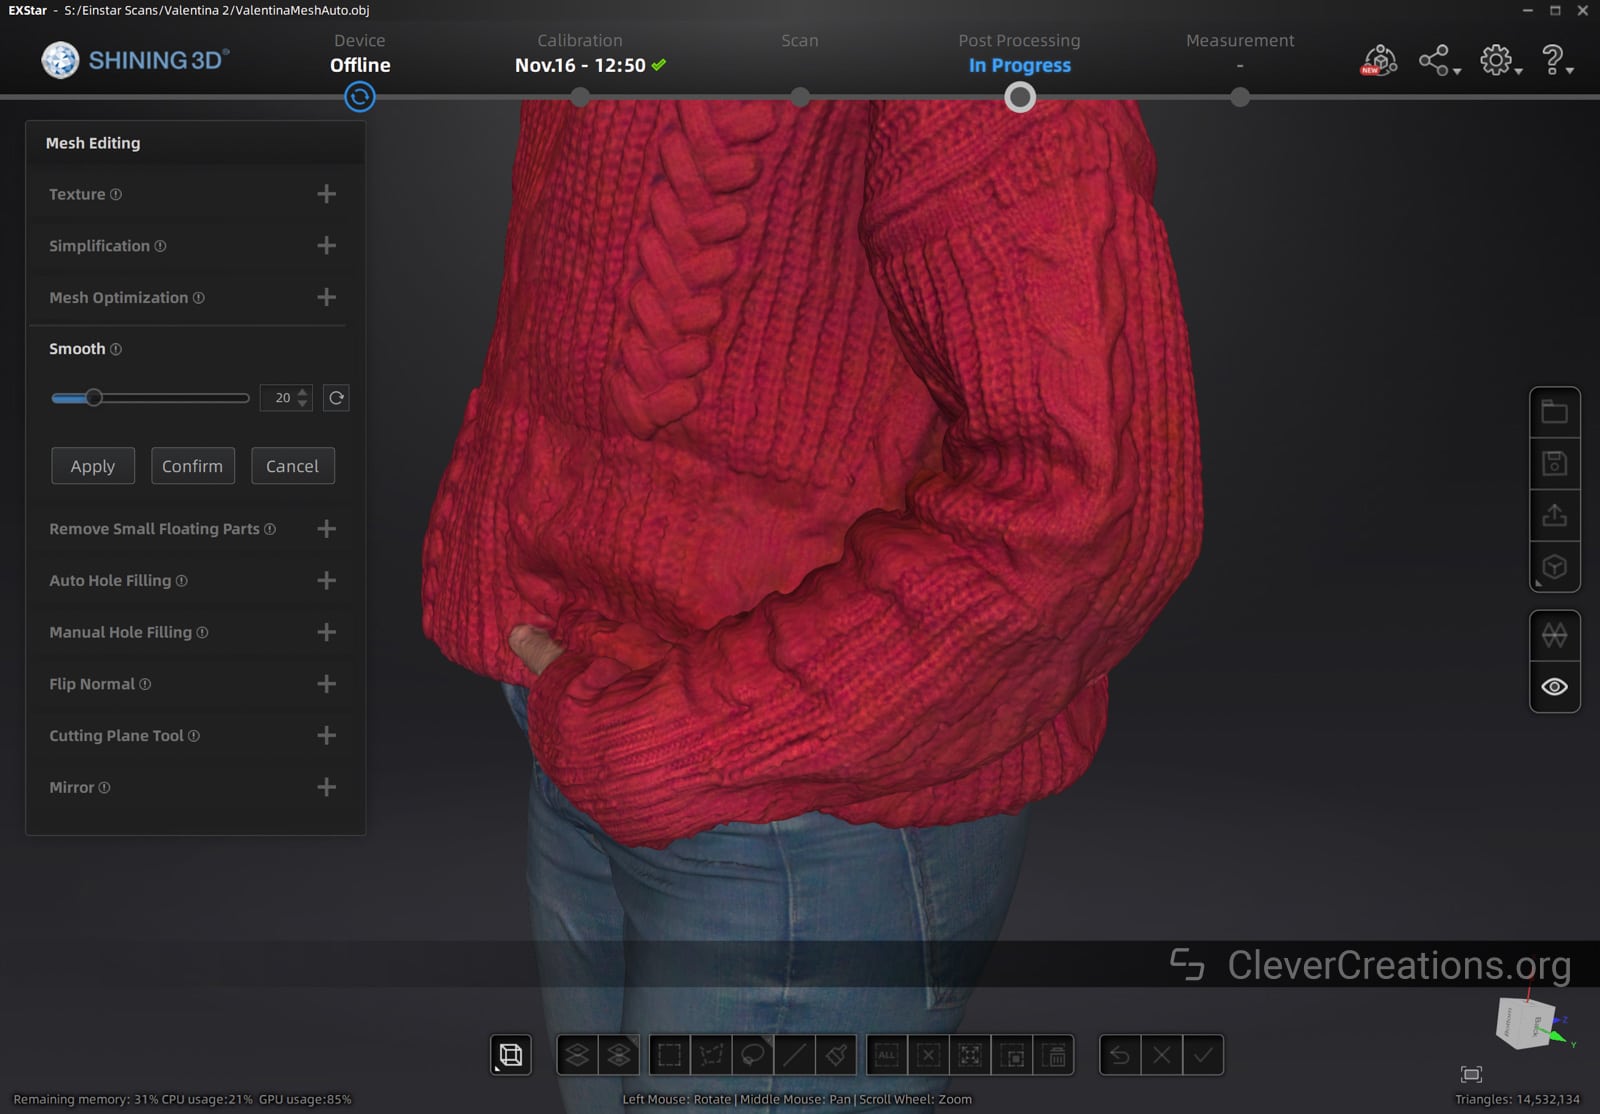
The post-processing section has been revamped as well. All mesh-related tools are now clearly labeled and placed on the left side of the screen, along with their corresponding sliders and settings.
It’s a welcome improvement, as the icon-based solution of the Exscan S software was a bit too cryptic for our taste.
Still the same is that all features (calibration, scanning, post-processing, measurement) exist within this one piece of software. This stands in contrast with Revopoint’s software, which uses 3 separate pieces of software for the same tasks.
We prefer the single-software solution of Shining 3D’s scanners, as it makes the user experience more consistent and less confusing.
On a similar note, the scan stitching of the Exstar software is also better than Revopoint’s. We reviewed the Revopoint MINI as recently as a couple of weeks ago, and it’s clear that Revopoint’s algorithms still need some work.
That said, it is more of a challenge getting good results with Shining 3D’s Einstar than it is with their Einscan SP. This is mostly because the Einstar is a handheld scanner.
If you move the Einstar over an object too fast, the software has a tendency to lose track of the scan. So you want to move the device slowly and methodically to avoid this.
System Requirements
A hurdle for some potential Einstar users will be the demanding system requirements of its Exstar software. You’ll find that a computer that can handle the software will cost at least the same as the scanner itself. The official recommended specs are as follows:
| System Requirements |
|
|---|---|
| CPU | Intel Core i7-11800H or above |
| RAM | 32 GB or above |
| GPU | NVIDIA GTX 1060 or above |
| VRAM | 6 GB or above |
You might think that those specifications are overstated, but nothing could be further from the truth. We maxed out our more powerful testing system on multiple occasions.
| Test System | |
|---|---|
| CPU | AMD Ryzen 9 3900X |
| Motherboard | Gigabyte X570 AORUS ELITE |
| RAM | 32 GB 3200Mhz Corsair Dominator Platinum DDR4 |
| GPU | Asus TUF GTX 3080 10GB |
The main limitation we ran into was RAM usage. The Exstar software is extremely RAM-hungry. This is most notable when working with scans containing many frames at the highest detail.
When processing the point clouds of these scans, we encountered several instances where our 32GB RAM was not sufficient and the Exstar software was not able to finish processing.
Even closing all other applications did not do the trick, so if you scan at too high detail settings without having enough RAM, you will have to rescan with less detail or upgrade your RAM.
CPU performance, on the other hand, has a lot of influence on the time it takes to process point clouds and meshes. The faster the processor, the shorter the wait times.
The bottom line is that you should have a powerful computer to be able to use the Shining 3D Einstar 3D scanner.
Again, if you want to use the Einstar outdoors with a laptop, this presents an issue. A laptop with these specifications will be quite expensive and heavy. Bulky power adapters might also become a nuisance if you are traveling.
Build Quality & Design

The Shining 3D Einstar 3D scanner is solidly built, like a brick. As we covered in the ergonomics section, it also feels and handles like one, so that has its disadvantages.
A couple of things drew our attention about the design of the Einstar.
The first is the connector used to connect the USB/power cable to the 3D scanner. It seems to be some version of LEMO’s self-latching system. These are very robust and durable, so you won’t need to worry about the connection coming loose or wearing out. As long as you treat the cable with respect, it should last you a long time.

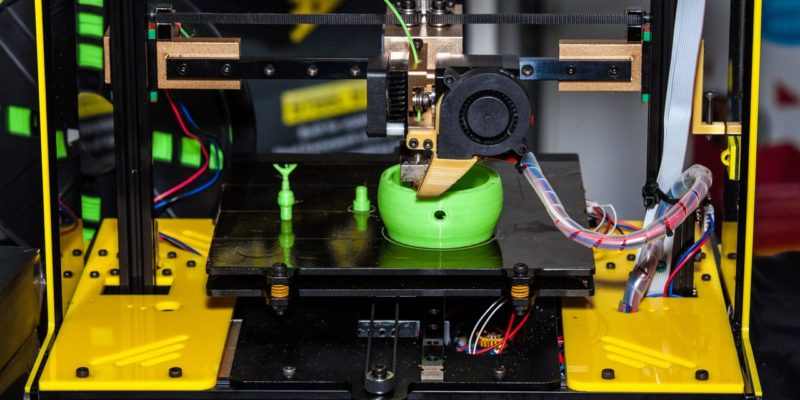
The second is the small fan that is placed at the top of the Einstar 3D scanner. It’s a miniscule 20x20x6 mm fan that emits an annoying high-pitched whine.
This fan is probably a necessity to get sufficient airflow through the densely packed body of the Einstar. There are several heat-generating components that need adequate cooling.
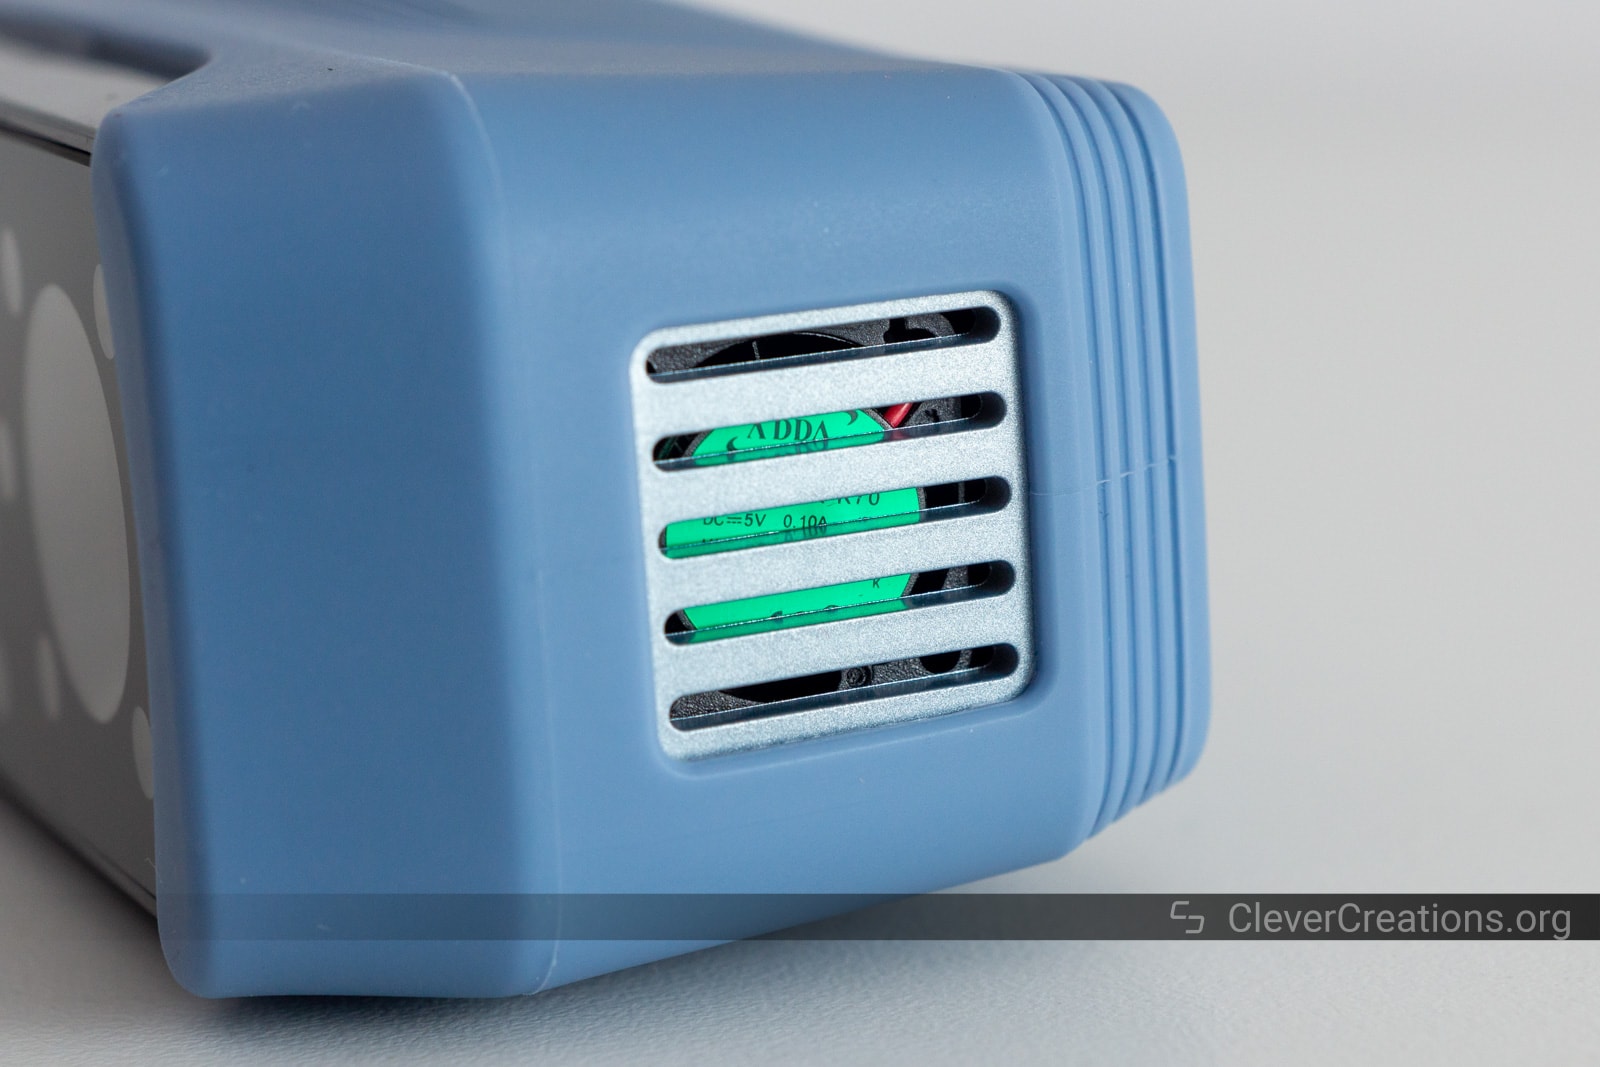
Based on what we can see on the fan’s label, it is an ADDA AD2005LX-K70. It comes with a durable HYPRO bearing and isn’t just a random fan grabbed from the bargain bin.
These two details lead us to believe that the engineers at Shining 3D put some thought into making sure the Einstar can last a while. It’s all we can deduce without opening the device up, but there is nothing that indicates the company cut corners anywhere.
Accessories
The Shining 3D Einstar is shipped with a couple of accessories that improve your overall experience with the 3D scanner. They are all of high quality and we haven’t encountered any problems with them.
Carrying Case

The first is a carrying case that houses the Einstar and its accessories. It is well built, has plenty of room for the device and cables, and features a couple of pockets to store things like the manual and calibration board.
Aside from a regular carrying handle, the case also comes with an adjustable shoulder strap. Both are of good quality and they do what they are supposed to.

Calibration Board

Unlike the calibration boards of the Einscan SE and SP, which were made out of foam and ceramic respectively, the calibration board of the Einstar 3D scanner is made out of glass.
It is cheaper than ceramic and more durable than foam, but it does require more care when handling and storing it. If you store it in its pouch in the case, it is relatively well protected.

Tracking Markers

Another change from the Einscan series is the tracking dot markers that are included with the Einstar. These stickers help 3D scanners track the surface of objects. They come in handy when the object you are scanning has few defining features or textures.
The Einstar comes with metallic silver tracking dots, whereas with the Einscan desktop 3D scanners, these markers are plain white.

Shining 3D includes the metallic silver markers with their handheld scanners because they are more reflective and identifiable. They are more costly, but also give better results.
In total, the Einstar comes with 10 sheets of 50 markers. 500 tracking dots sounds like a lot, but when you are 3D scanning medium to large objects regularly, they go quickly. They aren’t reusable, so picking up an extra set or two can’t hurt if you plan on 3D scanning a lot.
Einstar Scan Results
Astronaut
This 3D printed astronaut is one of our go-to objects to scan. It has a mix of smooth and textured surfaces, as well as some hard-to-reach areas.
While the Einstar 3D scanner was able to capture most features, the overall detail is noticeably less than with desktop 3D scanners like the Einscan SP and Revopoint MINI.
Some things to note are that we used a turntable to help capture the object from all angles, and that this was the smallest object that we were able to scan with the Einstar. Anything under 10 cm3 / 4″3 simply isn’t tracked well by the Einstar.
Einstar
Einscan SP
Revopoint MINI
Sneaker
Moving on to a slightly larger object, this sneaker is a good example of what the Einstar can do in terms of capturing details. Things like the laces, but also feature like subtle stitching were all picked up by the scanner.
We purposely left the holes in the mesh to show the limits of the Einstar 3D scanner. Even though it was able to capture small details on surfaces, anything located in slightly hidden areas wasn’t picked up. Patching those mesh holes during post-processing will fix them but won’t create any detail in those areas.
Person
Now for something that the Einstar excels at, scanning people. We used the Einstar 3D scanner to scan a person in about 15 minutes. The results were impressive for a scanner at this price point and make it a good option creating 3D scans of people on a budget.
We’ve removed the head from the scan to protect privacy, but both the face and hair were correctly picked up by the scanner. Their detail wasn’t spectacular, but it was more than enough to create a representative 3D model of the person.
The model you see below is also simplified by about 15x to reduce its size (Sketchfab limits), so the full-size scan contains more detail than this. We’ve also added a screenshot to show what the high-detail model looked like.
Overall, the Shining 3D Einstar is a great entry-level handheld 3D scanner that can give good results with the right objects. It’s clear, however, that if you’re looking for more detail on the same budget, then an Einscan or Revopoint desktop 3D scanner may be a better option.
Alternatives to the Einstar
Einscan SP / Einscan SE
Based on our testing, Shining 3D’s Einscan series provides better scanning detail than the Einstar. Not only does it have a higher scanning resolution, but the scan quality is also better and it’s easier to get good scans of complex shapes.
As desktop scanners, however, the Einscan SP and Einscan SE are not suited for 3D scanning things like faces and bodies. They excel at scanning small-to-medium objects, but don’t have the portability to scan people or other large things.
So in the end, it really comes down to the kind of 3D scanning you plan on doing. If you will be scanning mostly small-to-medium objects, then the Einscan series will give you the best results. However, if you want to scan faces and bodies or other large objects, then the Shining 3D Einstar 3D scanner is the way to go.
The Einscan-SE has about the same price as the Einstar, whereas the Einscan-SP is double the price. Whether or not that is justified you can read about in our Einscan SP review.

Revopoint MINI
The Revopoint MINI and Shining 3D Einstar are both 3D scanners under $1000, but have different strengths and weaknesses.
The MINI is the superior choice if you need a desktop 3D scanner that can scan small objects with great detail. As a blue light scanner, the MINI is ideal for small parts, something that the Einstar is not very good at.
On the other hand, the Einstar is the better option for 3D scanning medium to large objects. They can be seen as complementary scanners. If you need both types of scanning capabilities on a budget, the MINI and Einstar make a decent combination for only $2000.

Einscan H
We were a bit hesitant to list the EinScan H as an alternative to the Einstar, but as it is the next step up in Shining 3D’s handheld 3D scanner line-up, we decided to include it.
Our main objection was that the Einscan H costs over five times as much as the Einstar. As a result, the comparison between the two does not feel all that fair.
Needless to say, the Einscan H outshines the Einstar in practically every category—aside from the price. From scan detail to speed and ergonomics, the Einscan H is the better device.
If you are looking for a handheld 3D scanner on a budget and don’t need the more precise results of the Einscan H, then the Shining 3D Einstar can be a good solution.
However, if you are a professional that doesn’t want to fiddle around attempting to get a good scan, then the Einscan H is the bare minimum of what you should be using. In the end, the Einstar is a budget device that offers matching results.
Verdict: Who Should Buy the Einstar 3D Scanner?
When deciding on buying the Shining 3D Einstar, it is best to place the device in the context of other 3D scanners.
On its own, this 3D scanner has a number of undesirable qualities, such as lack of detail in scans and poor ergonomics. This can make it seem like a poor product, but once you understand what the Einstar is designed for it can be a valuable tool.
Compared to other handheld 3D scanners on the market, the Einstar is a great budget option. For hobbyists and casual 3D scanners that want to scan larger objects, the device provides decent results for a fraction of the price.
For 3D scans of exclusively small-to-medium objects, however, you are better off with a desktop 3D scanner like the Einscan SP/SE (small-to-medium objects), or Revopoint MINI (small objects). At about the same cost as the Einstar, you will get more detailed results.
Similarly, if you expect to get high resolution scans of bodies, faces, statues, or other large objects, you should look elsewhere. The Einscan H is the next step up from the Einstar and offers better results in less time—though its price reflects that.
We hope that this Shining 3D Einstar 3D scanner review has helped you decide if it is the right device for you. If not, then take a look at our other 3D scanner reviews to find the best option for your needs. Good luck!
Hi Tim,
Thank you for this great article. I have a small question to ask you! I have a Revopoint Pop 2, I bought it to scan parts of vehicles in order to design then on CAD software parts dedicated to overlanding.
It can be as well interior parts like a drawer system, as exterior parts like a roof rack, rock slider or skid plates.
I had some difficulties when trying to scan the inside of my trunk, the Pop 2 loses a lot of tracking. I got dry shampoo spray everywhere (which dirtied the whole vehicle and took me all afternoon to clean), and markers everywhere. The problem is that as soon as the POP 2 doesn’t have 5 markers in sight, it is lost! So I have to come back often to the same places to resume the tracking, and it sometimes adds “layers” of additional scan, additional thickness, which distorts my scan.
On the other hand, I had a smaller scan to do, the entire inside of the window to create an aluminum laser cutout that would go exactly around the back window, and there it was. Same thing, I scanned the top of my car stereo to create a custom piece, and that was fine too. But I still have to use dry shampoo and markers if it’s black, as it often is in a vehicle.
Do you think I would be better off selling it and getting an Einstar for my use? And could I do without putting dry shampoo everywhere?
I’m hesitant to sell it. Thank you very much for your help!
Hi Henry,
Thanks for reaching out! We have hands-on experience with both scanners so I think I can answer your question.
As you discovered, the POP 2 software is not great at tracking. The Einstar will give you much better results in that regard.
For some of the objects you are describing, I don’t think the Einstar is a great option. Based on our experience with it, it doesn’t do that well with large, relatively featureless objects. You’ll still be looking at tracking dots. And if the objects are dark, you will have to use scanning spray/dry shampoo regardless.
With feature-rich objects, the Einstar will give good results. If they are dark, you can use AESUB blue scanning spray and there is no clean-up required.
For the more challenging objects, you might have to look at the Einscan H instead. Its cost can be justifiable if you are using it for professional reasons.
The POP 2 will never give you the results you are looking for. Or at least not unless Revopoint updates its software algorithms by a lot.
Let me know if you have any other questions.
Hello
Can You please tell me if I can use Einstar shining for scaning an interior of the boat and is it possible to put the file in AUTO CAd and get all the measurments.
Which file types it supports.
Thank You in advance
Robert