

- Captures detailed 3D scans
- Solid build quality
- Plenty of practical accessories included
- Built-in Wi-Fi
- Full mobile scanning solution (in combination with phone)
- Software can use improvements
- Unstable tripod
In the last couple of years, Revopoint has been making waves in the 3D scanner market. Usually first released as Kickstarter campaigns, Revopoint’s scanners are known for their affordable price tags and solid performance.
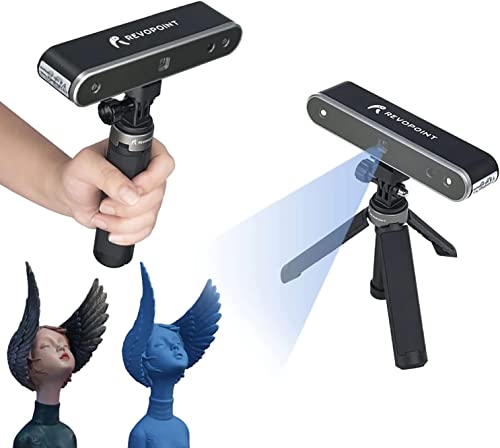
The Revopoint MINI is their latest release, and it’s a precision 3D scanner designed for small-scale objects. As this was something that their previous devices did not excel at, the Revopoint MINI is a much-welcome addition to the company’s lineup.
In this Revopoint MINI review, we’ll be taking an in-depth look at the scanner’s performance, features, and design. We’ll also be testing it out on a few objects and directly comparing it to Revopoint’s other scanners, as well as those of the competition.
Let’s dive into our detailed scanning adventure!
Revopoint MINI Specs
| Revopoint MINI Specifications | |
|---|---|
| Price | Revopoint | Amazon |
| Technology | Dual camera blue light |
| Single-frame precision | Up to 0.02 mm |
| Single-frame accuracy | Up to 0.05 mm |
| Single capture range | 64×118 mm |
| Working distance | 100~200 mm |
| Minimum scan volume | 10x10x10 mm |
| Point Distance | Up to 0.05 mm |
| Scan speed | Up to 10 fps |
| Light Source | Class 1 Blue Light |
| Alignment | Feature, Marker |
| Press button | Yes |
| Output format | PLY, OBJ, STL |
| Texture scan | Yes |
| Special object scanning | For dark, highly reflective and/or transparent objects, it is recommended to use scanning spray. |
| Scanning environment | Indoor |
| Scanner weight | 160 g |
| Dimensions | 120×38.5×25 mm |
| Printable data output | Direct export to 3D printing software application; |
| Computer requirements | Windows 8\10\11 (64-bit), Android, iOS, MAC |
| Wi-Fi | 5 GHz |
| Connector Type | Micro-B – Type-A USB |
Revopoint MINI Features
Structured Blue Light Scanning
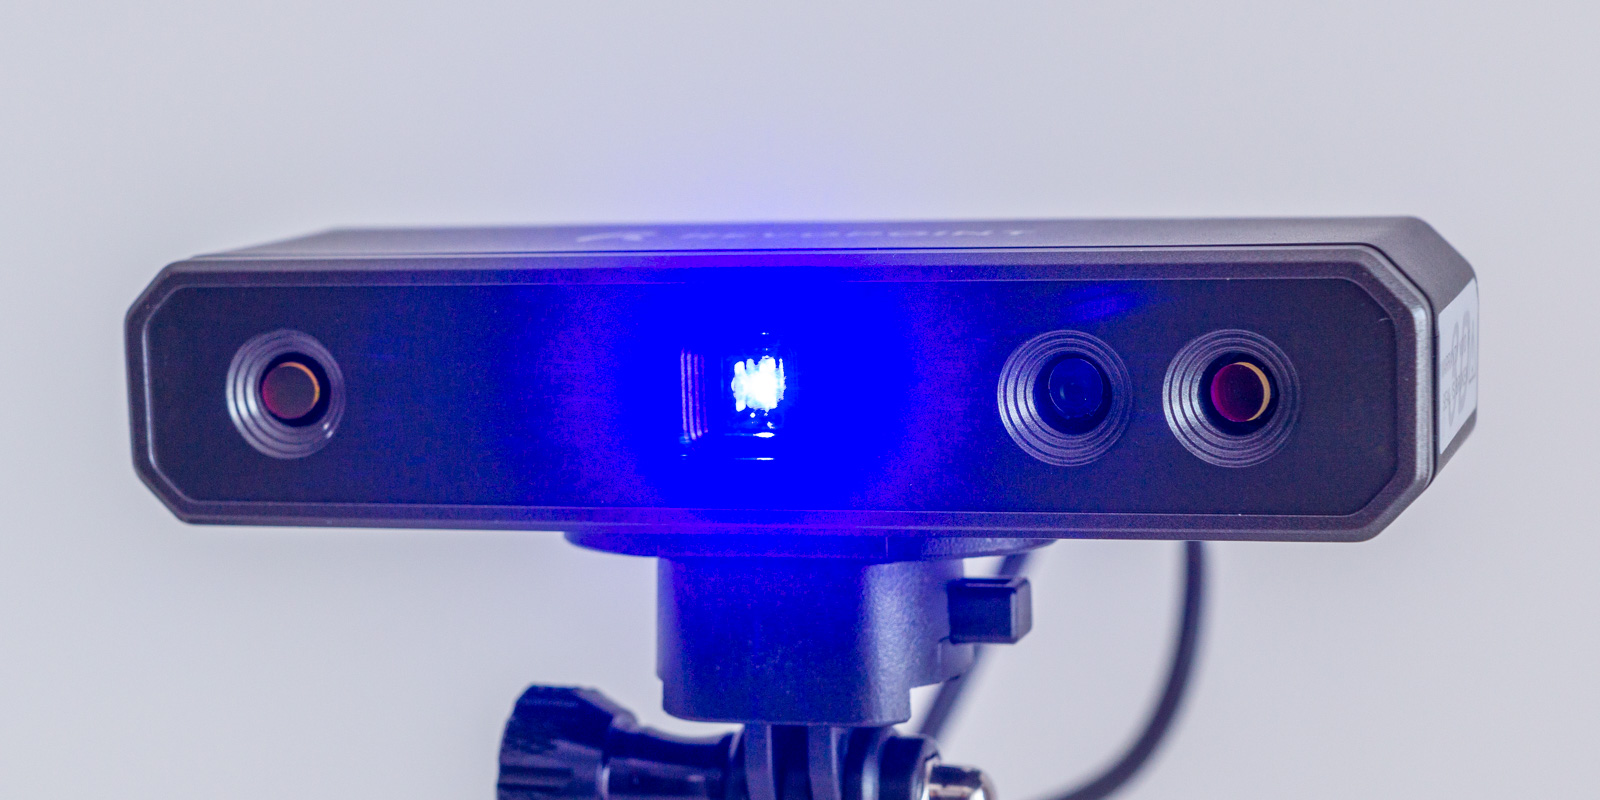
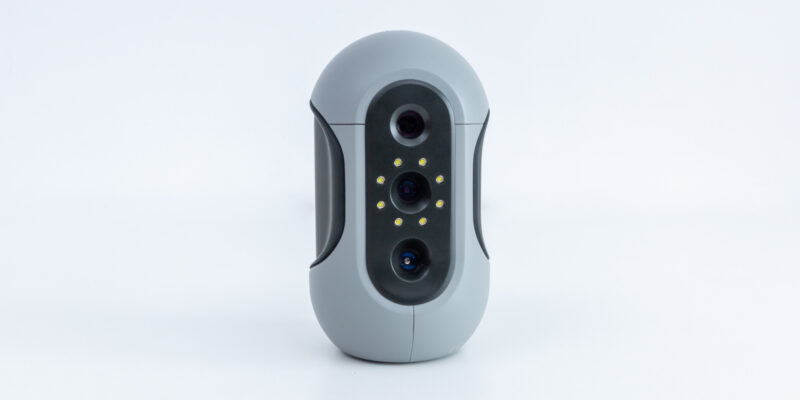
The Revopoint MINI is a blue light scanner. Whereas Revopoint’s previous 3D scanners, the POP and POP 2, used infrared scanning technology, the Revopoint MINI uses structured blue light to illuminate the target objects.
Because the wavelength of blue light is shorter than that of infrared, the MINI is able to capture much smaller details. This makes it ideal for scanning small objects with intricate features.
For large objects, the Revopoint MINI is less ideal. The 3D scanner works best with objects up to 500x500x500 mm in volume.
While you can in fact 3D scan larger objects, it requires a more powerful computer to deal with the huge amount of data that is generated, as well as the knowledge on how to properly process it.
This is often the tradeoff for the high level of detail that comes with blue light scanning. So if you need to scan larger objects, you’re better off with a different type of 3D scanner, like the Revopoint POP 2 or the Einscan SP.
Scanning Precision
Revopoint boasts a 0.02 mm 3D scanning precision for the MINI. This is a lot more detailed than the 0.05 mm precision of the POP 2.
It is important to point out that this number is the single-frame precision of the 3D scanner. This number is measured in ideal conditions in a lab and isn’t representative of real-world use.
As such, you shouldn’t expect to be able to capture all of the details of an object with 0.02 mm precision.
A better number to look at is the minimum point distance. This is the distance between two points in the created 3D point cloud data and is generally a better indicator of scanning quality.
For the MINI, the point distance is 0.05 mm. This provides a lot more detail compared to the 0.15 mm of the POP 2.
Further down in this Revopoint MINI review you will see some A/B comparisons between the results of the Revopoint MINI 3D scanner and other scanners on the market. They will give you a better indication of what to expect from this 3D scanner instead of these raw numbers.
Scan Volume
As mentioned above, you will have the best results when 3D scanning objects with a maximum volume of 500x500x500 mm (20″ x 20″ x 20″).
The minimum volume, however, is a mere 10x10x10 mm (3/8″ x 3/8″ x 3/8″). This is one of the smallest volumes that we’ve seen from a desktop 3D scanner and is a big advantage if you want to scan small objects.
For example, while reviewing the POP 2, we ran into issues when attempting to scan objects smaller than around 20x20x20 mm. Oftentimes, the object would simply be too small for the 3D scanner to register, whereas other times the scanner could not capture detailed enough data to properly stitch the scans.
With the same small objects (some of which you’ll see below), the Revopoint MINI was able to create perfectly usable point clouds.
Handheld and Turntable 3D Scanning
Just like Revopoint’s other models, you can use the MINI both in handheld mode and in turntable mode. Included with both the MINI Standard Package and the MINI Dual-Axis Turntable Combo are a handheld tripod and a turntable.
We’ll go into more detail on the accessories a bit later, but suffice it to say that being able to 3D scan in both modes is a big advantage.
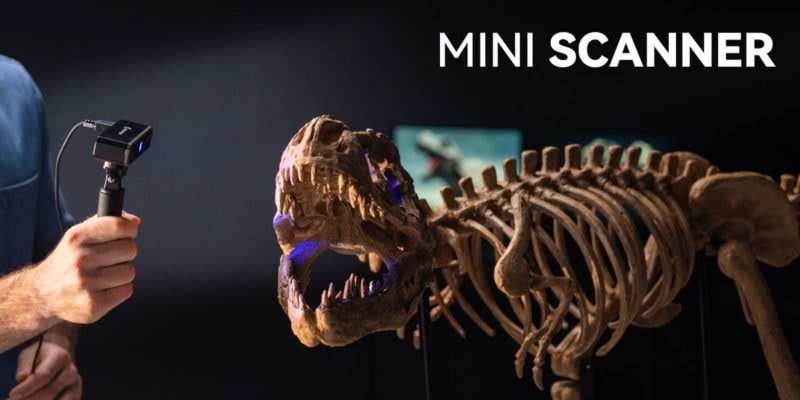
While the turntable yields the best results in terms of accuracy and completeness, it’s not always the most practical option. If you want to 3D scan a larger object or one that is difficult to place on a turntable, the handheld mode is the way to go.
It’s nice not to be tied down to one scanning method, and being able to use the Revopoint MINI in both modes is a big selling point. The turntable is included in the standard package, which is nice too.
The dual-axis turntable of the combo package is a new addition to Revopoint’s lineup. Aside from rotating, it tilts objects up to 30° from the horizontal. This removes some of the need to reorient objects during 3D scanning.
If you plan on getting a 3D scanner for your business, this turntable will save you time and money. While reorienting an object two or three times is not time-intensive, it can quickly add up when you’re scanning a lot of objects.
Revopoint sent us the standard package to review, so we will only show you what it is like to use the MINI with the standard turntable.
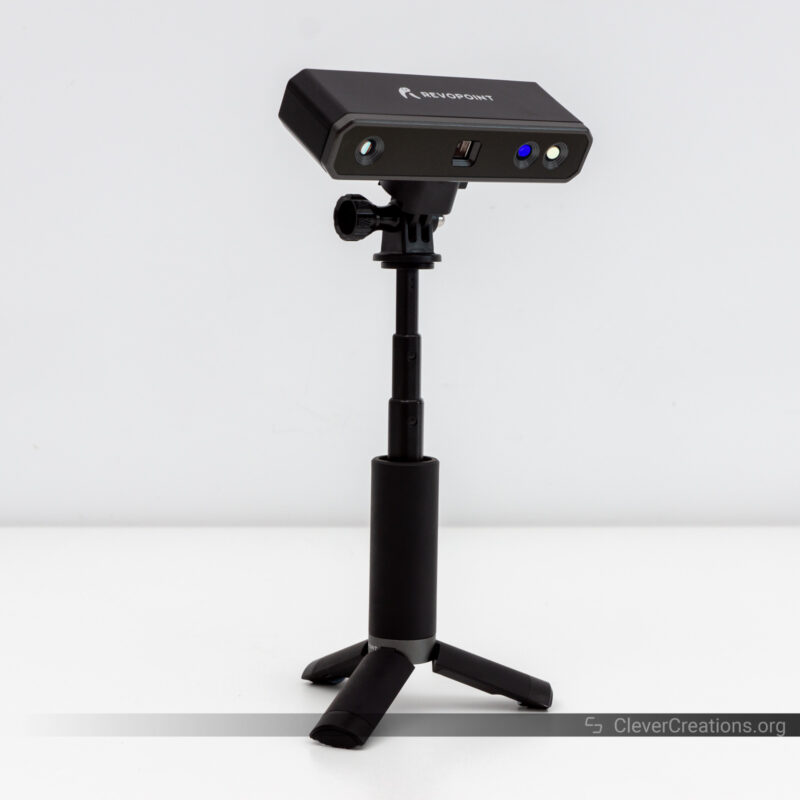
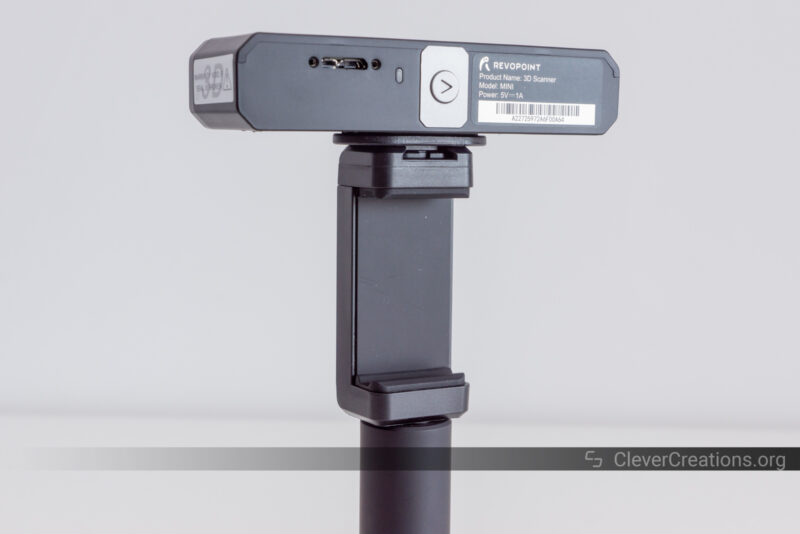
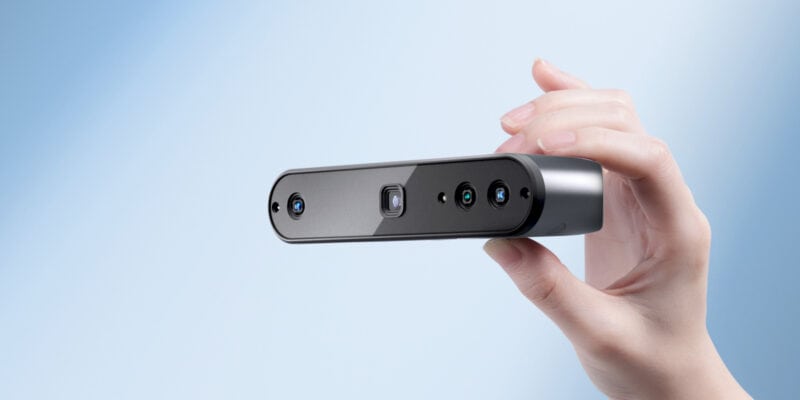
Wi-Fi Connectivity
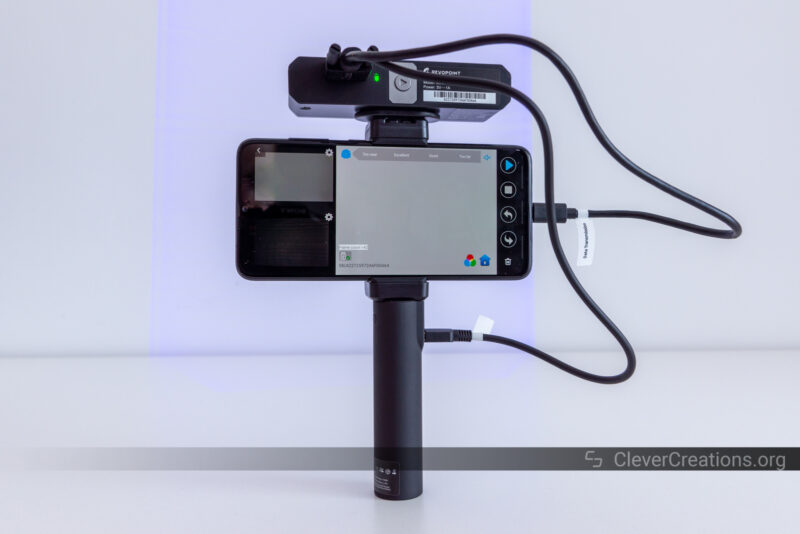
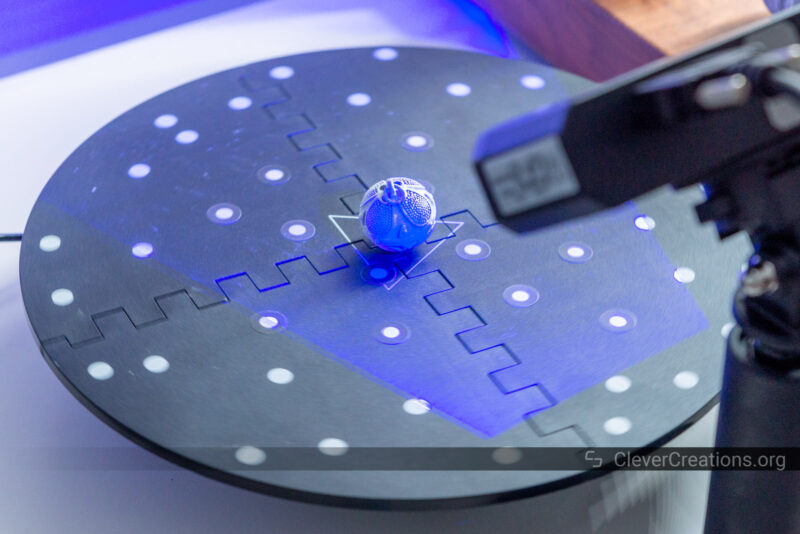
A great feature of the Revopoint MINI is its built-in Wi-Fi connection. It lets you use the device without the need to physically connect it to a computer or laptop.
You can combine this with a smartphone for a fully portable 3D scanning solution. For this, you will need a reasonably modern (i.e. fast) smartphone that has the free Revo Scan app installed (Android / iOS).
With that setup, along with the separate power bank accessory and the 3D scanner itself, you are able to scan anywhere. This is a big advantage if you need to 3D scan somewhere on-site or in the field.
We still had the power bank from our Revopoint POP 2 review, so that’s what you are seeing in the photo above.
In our testing, the Wi-Fi and smartphone app combination worked great. We did not experience any hiccups or crashes anywhere, and the interface is fairly intuitive to use.
Compared to a computer, the smartphone option is slower to work with. But it is still a perfectly feasible solution for capturing detailed scans on the go.
Unboxing the Revopoint MINI
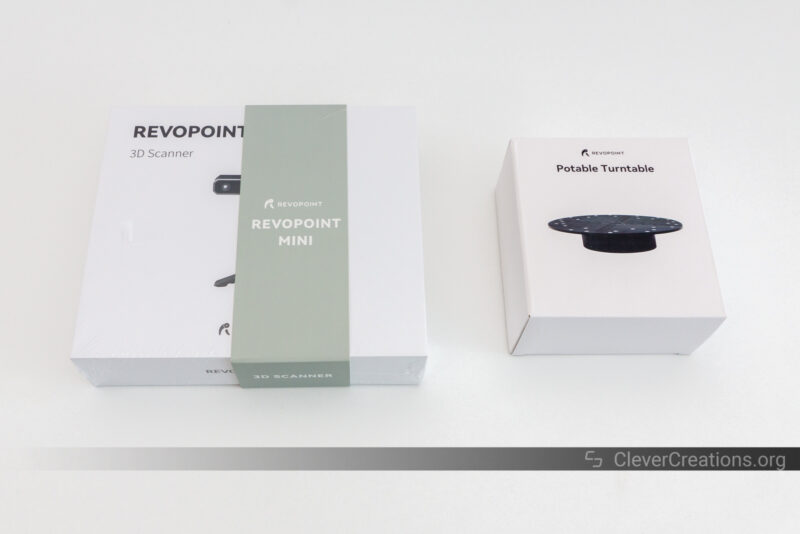
The first thing you’ll notice about the box of the Revopoint MINI is that it is small. Because the device itself is small, it does not require a lot of packaging.
The included accessories are also smaller than those of Revopoint’s other 3D scanners. The included statue is tiny, and the calibration board is reduced in size as well.
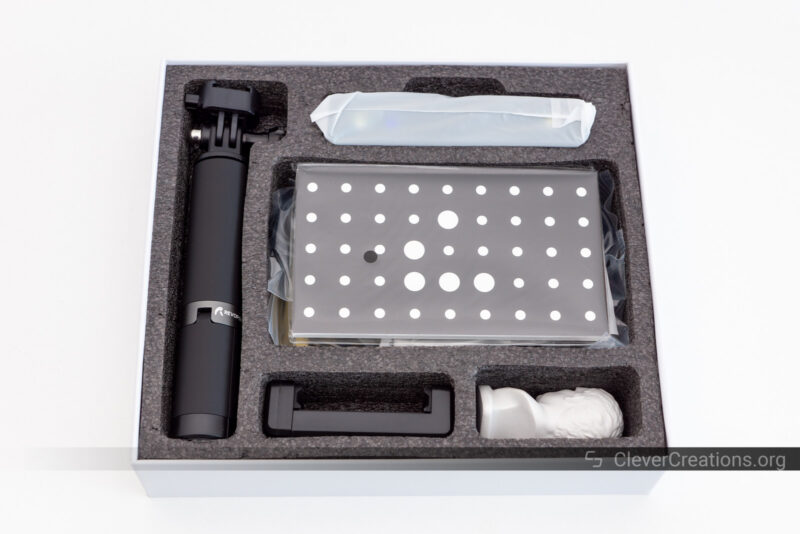
Altogether, this makes for a neat little box that is easy to store when you are not using the 3D scanner. It also allows you to carry the device with you in an EDC bag without having to worry about it being damaged.
Inside the box, you will find:
- Revopoint MINI 3D scanner
- Detachable tripod
- Phone holder
- Portable turntable
- Calibration board
- Markers
- Glue tack
- Inspection certificate
- Sample statue
- USB cable
- 2-in-1 mobile cable
- USB-C to USB-A adapter
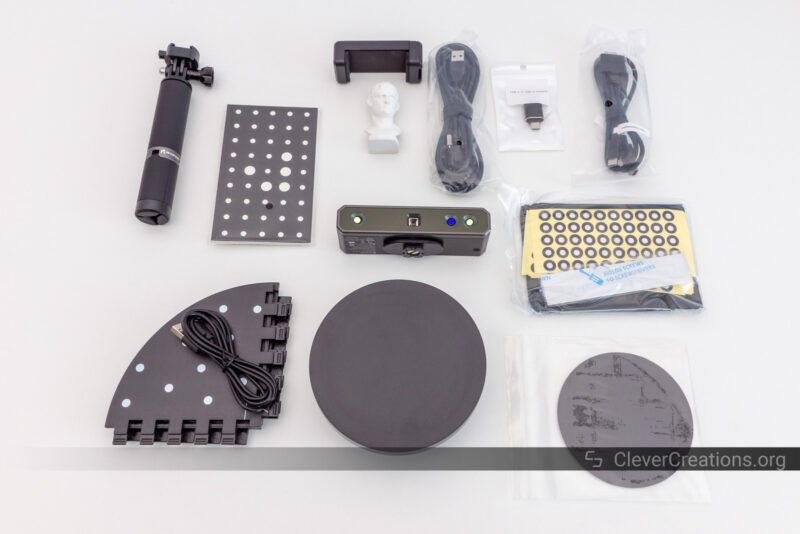
As we are used to from Revopoint, the device comes with a lot of extras. It’s practically everything you need to get started with the Revopoint MINI 3D scanner.
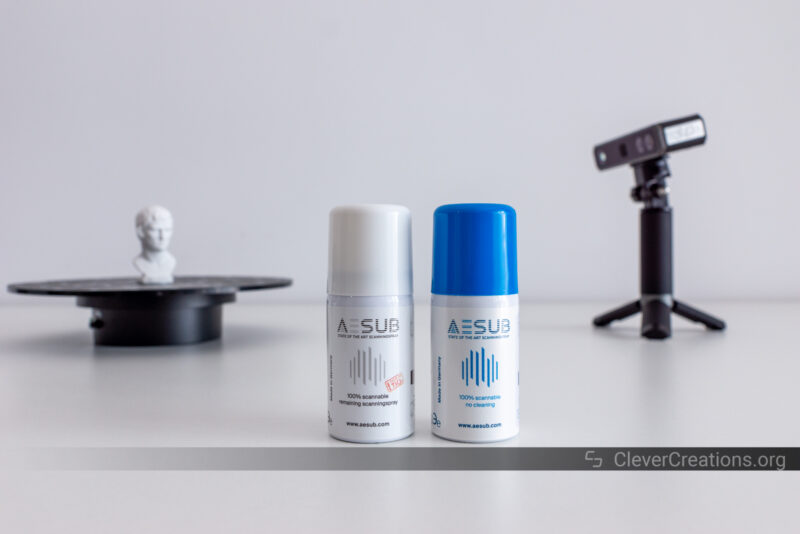
If you decide on buying the MINI, we recommend picking up a can of scanning spray as well. The blue light scanning method does not work well with non-white surfaces, and a light white coating will give the best results.
This coating ensures that the light of the 3D scanner bounces back to the sensor, regardless of the surface properties of the object.
The go-to products for this are AESUB blue (vanishes after a while) and AESUB white (needs to be wiped off).
Getting Started with the Revopoint MINI
Setting Expectations
Your experience with nearly any 3D scanner depends on the object being scanned and the preparation you put into the process.
This is especially true for small, handheld 3D scanners like the Revopoint MINI. They have a smaller sweet spot for the optimal scan and are more sensitive to movement.
Setting the right distance to the object based on the included instructions is important. The same goes for object preparation.
If you are working with black or reflective surfaces that scatter or absorb the structured blue light, you will only get good results with some kind of coating. The aforementioned AESUB spray, baby powder, or even ordinary flour all improve scanning results on these surfaces.
When working with large surfaces without many distinguishable features, it is key to use the included tracking marker dot stickers to ensure that the 3D scanner can find a common point of reference in each scan.
This is to prevent alignment issues between scans, which lead to holes or inaccuracies in the final model.
Scanning the same object several times from different angles is also key in creating a complete model. This isn’t specific advice for using the Revopoint MINI, but for working with any 3D scanner.
We find it useful to point this out because we regularly encounter people who are disappointed with the quality of their 3D scans. The majority of the time, this is caused by incorrect practices and not the limitations of the 3D scanner.
Now that we have set the right expectations, let’s move on to the fun part: the first scan!
First Scan
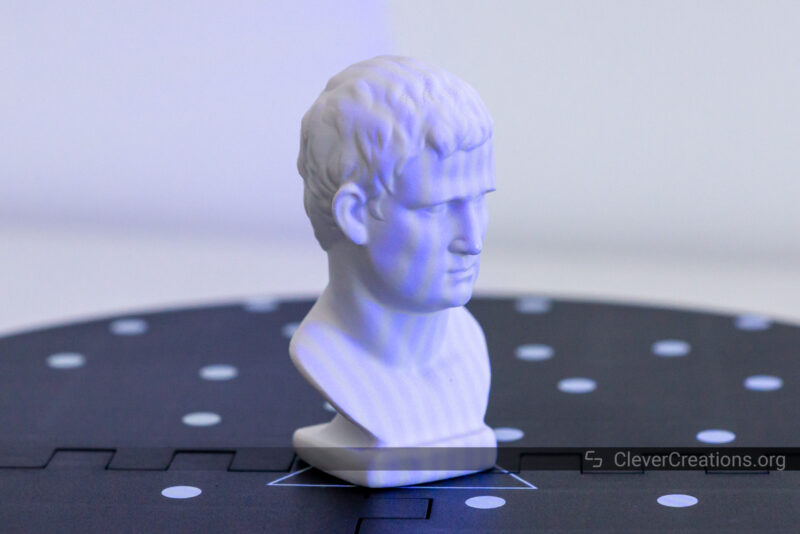
If it is your first time using a 3D scanner, we recommend using the included white statuette that comes with the Revopoint MINI. It is white, so it reflects light well, and it has a nice variety of surface features.
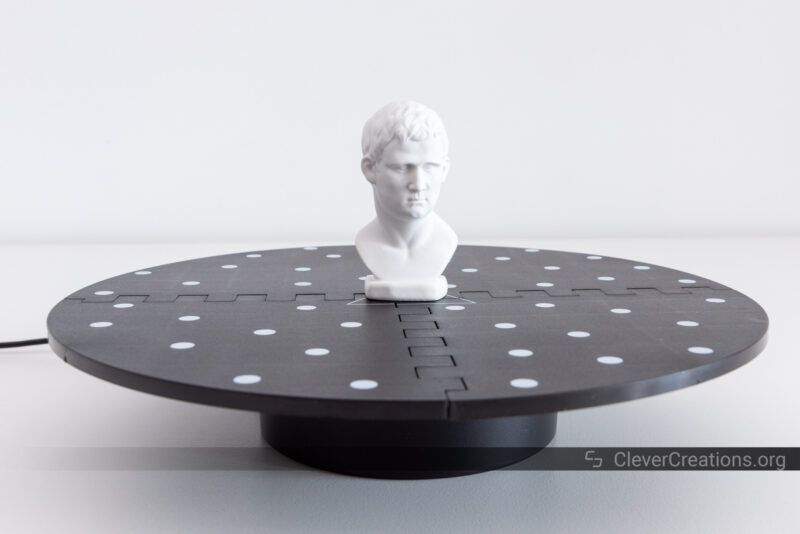
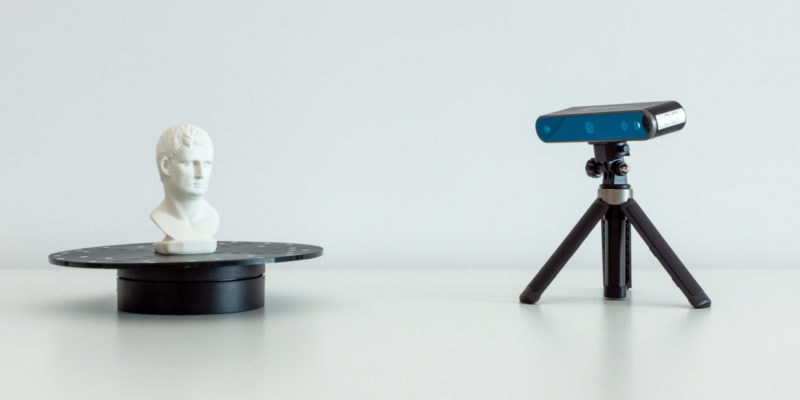
The easiest way to scan objects like these is with the turntable. It keeps the object in place while you capture it from different angles.
Place the statuette on the turntable, and make sure it is positioned as much in the center as possible. This makes it easier for the software to find common points between scans and results in a better final model.
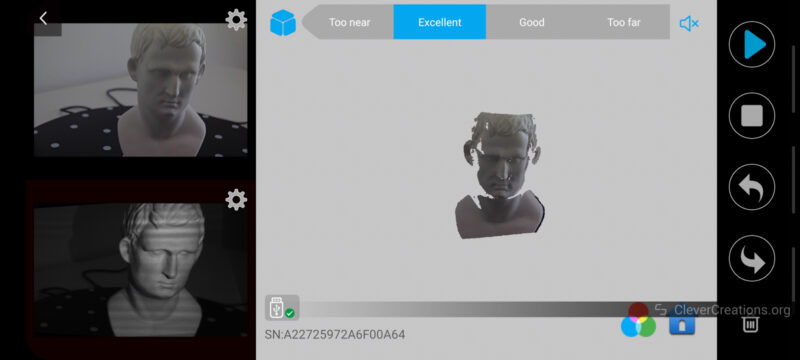
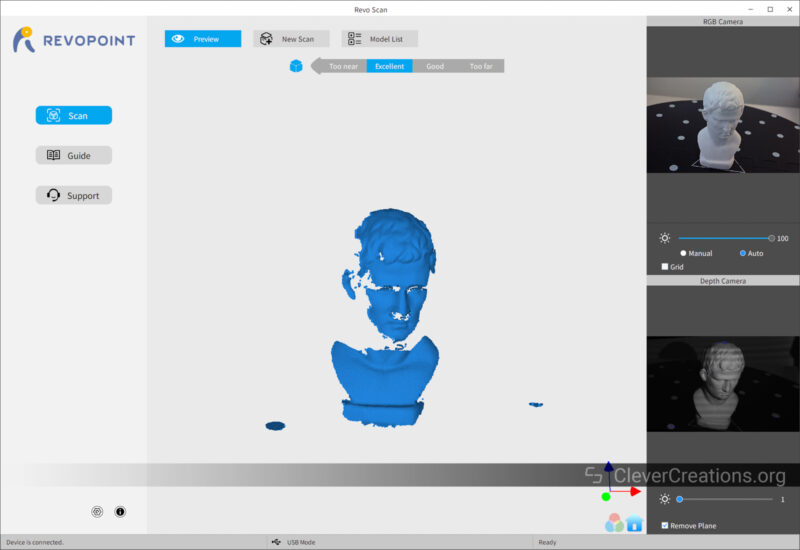
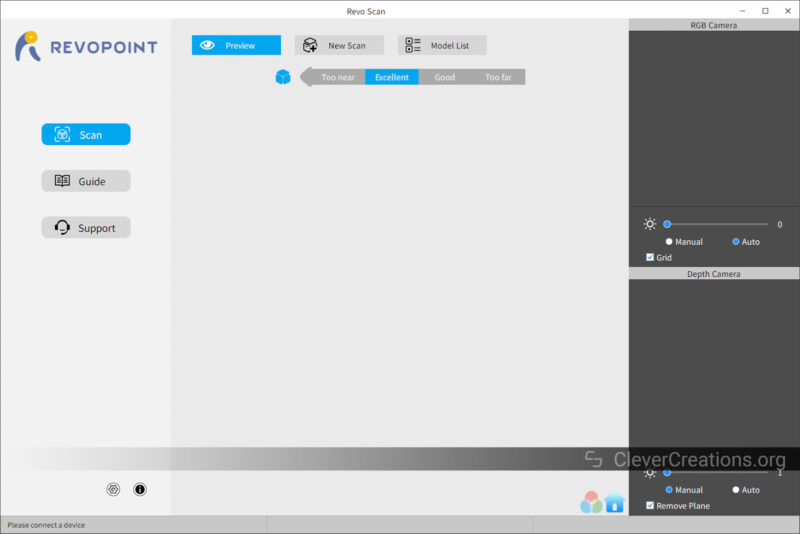
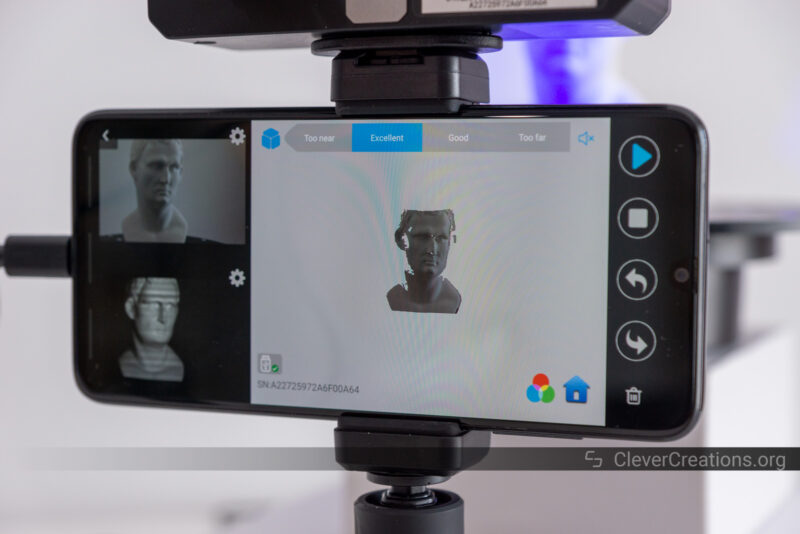
Start the Revo Scan software and ensure that the object is visible in the viewport on the right. The distance to the object should be set to ‘Excellent’, in order to get the best possible results.
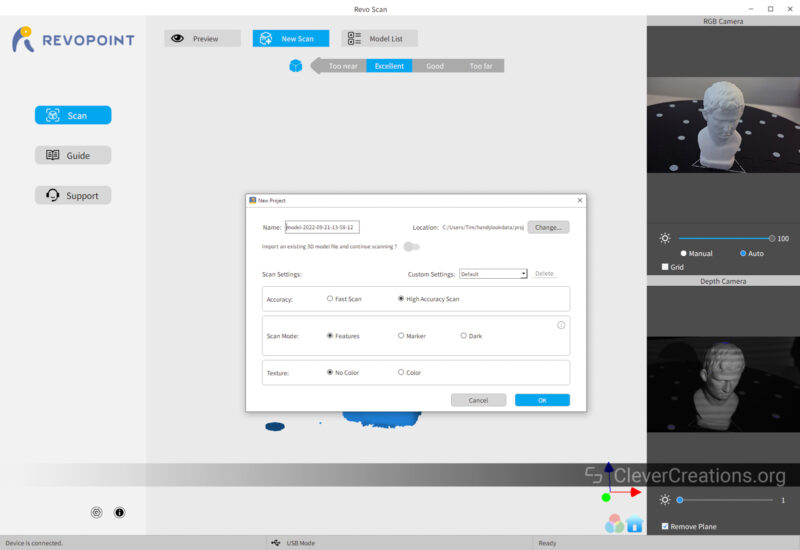
Click ‘New Scan’ to start a new scan and set the parameters. For the statue, ‘High Accuracy Scan’, ‘Features’, and ‘No Color’ for the texture are fine.
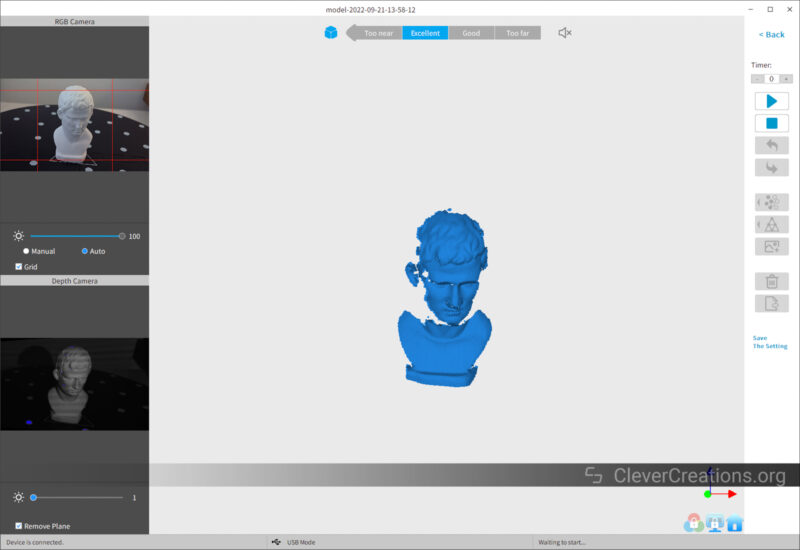
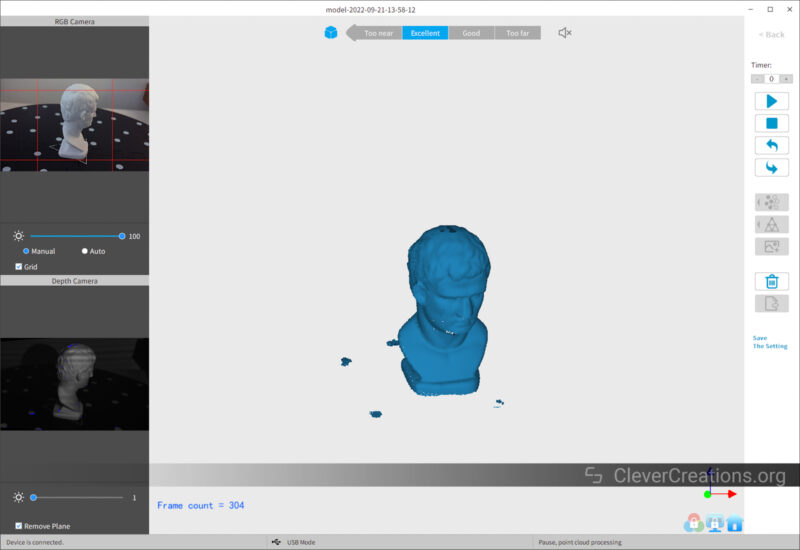
To start the scan, you click the ‘Start’ icon in the top right. Before this, however, you want to make sure that the turntable is on and rotating.
As the turntable rotates and the Revopoint MINI captures data, you will see a 3D model of the scanned object starting to appear in the Revo Scan software.
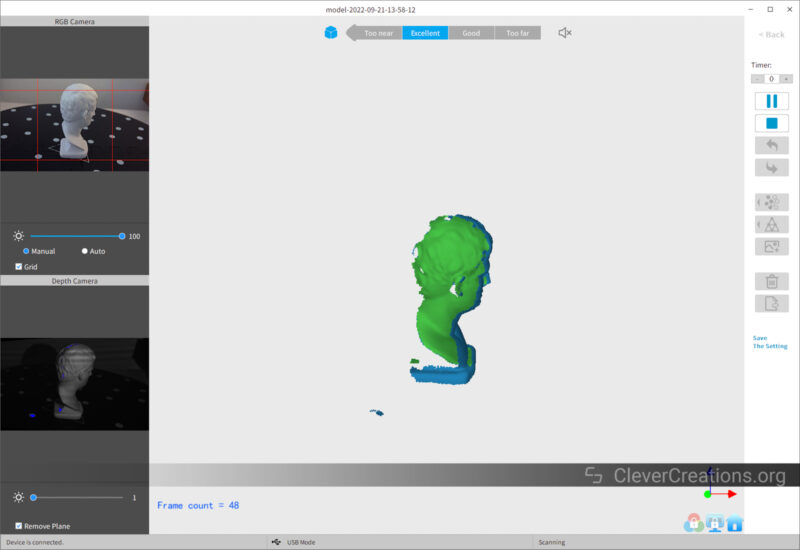
Once the turntable has completed one revolution, the 3D scanner has captured enough data to generate a decent first draft of the model. You can now pause the scan.
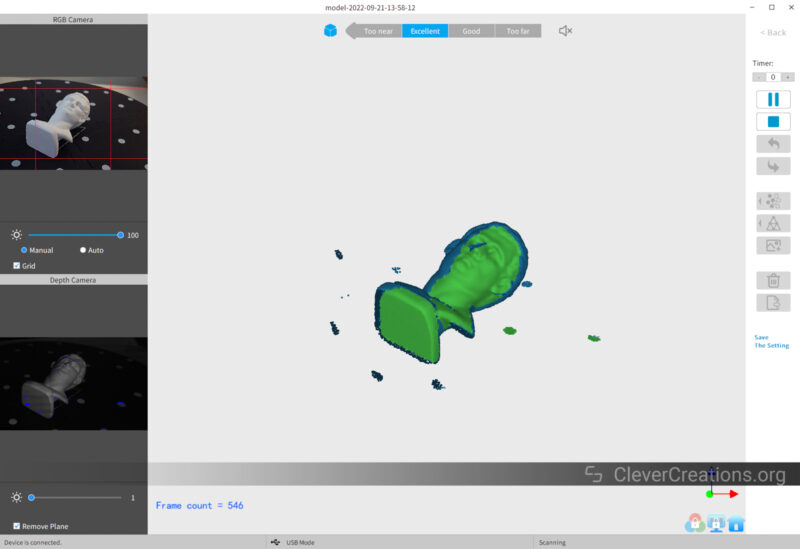
Reorient the model on the turntable and continue the scan from a different angle. Depending on the size and complexity of your object, you might have to do this several times to capture all sides.
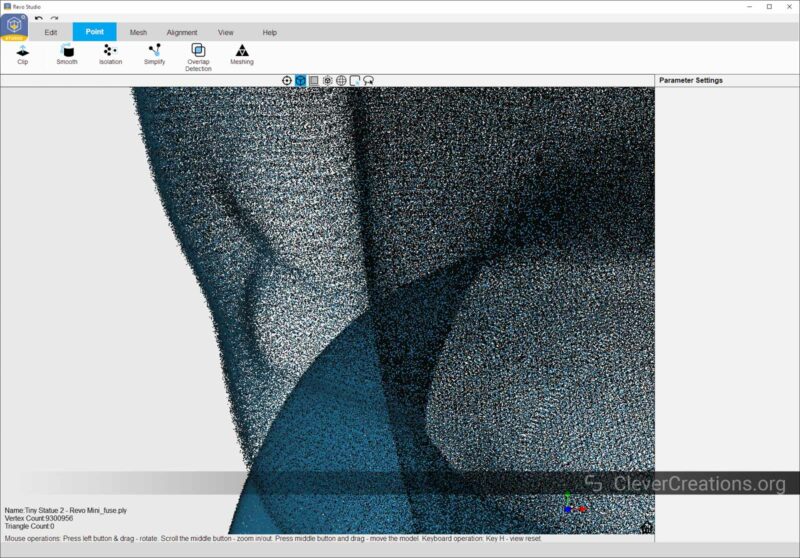
After you have captured enough data, you can complete the scan by clicking the ‘Stop’ icon in the top right of Revo Scan. You will then be prompted to fuse the point cloud immediately, which merges all scans.
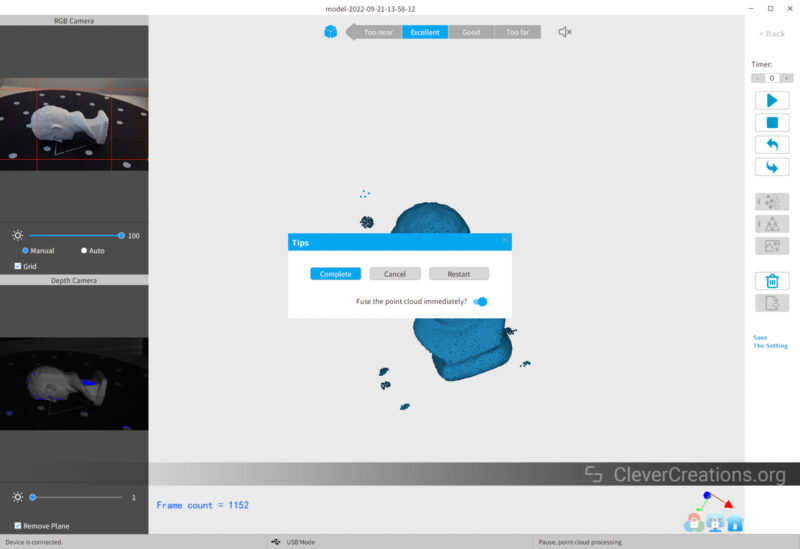
For the most detailed results, however, it is best to not do this immediately. Instead, choose the manually fusing option later. This will take more resources from your computer, but the results are worth it.
Once you have completed the scanning process, you can now export your model as a point cloud or mesh as a PLY or OBJ file.
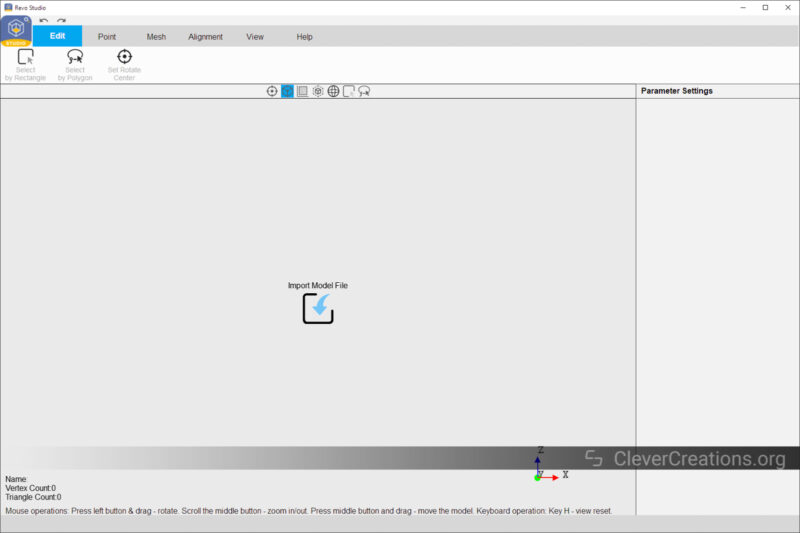
After this, you can import the file into Revo Studio for further processing.
Software
The Revopoint MINI uses the same software suite as the rest of Revopoint’s 3D scanners. It consists of three separate pieces of software that each have their own purpose:
The first is Revo Scan, which you have seen above and handles the scanning process. You use it to configure, start, stop, correct, and export point cloud data.
The second is Revo Studio. Its purpose is to import the aforementioned point cloud data and turn it into a clean 3D mesh. It comes with various features to clean, smooth, and edit the mesh. You can also use it to edit point clouds before they are turned into a mesh.
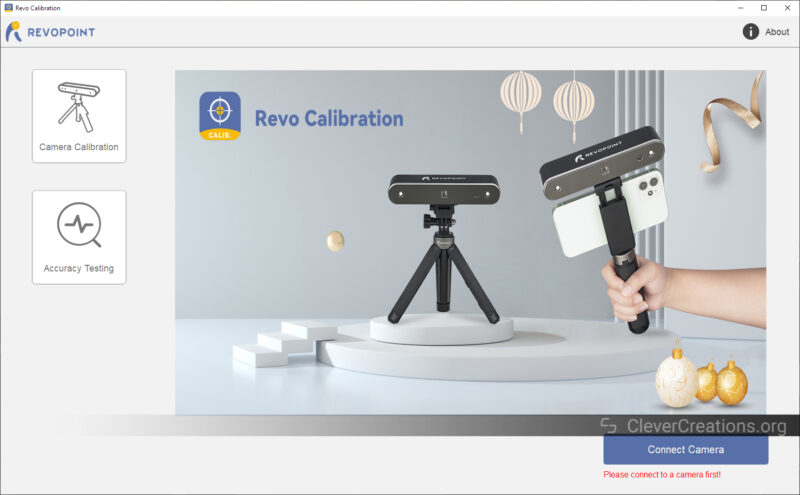
The third is Revo Calibration, which is only used occasionally to calibrate the 3D scanner.
We have covered all these pieces of software in more detail in our POP 2 review, so for a close look at them, we recommend checking out that article as well.
The short version is that Revopoint’s software solutions are not bad, but also not great.
The good points are that they provide all functions you need, they are stable and rarely crash, and none of them are cloud-based. So you are able to create 3D scans whenever you want.
The bad points are that the stitching algorithms in Revo Scan are less than ideal, and some of the settings in Revo Scan and Revo Studio are unintuitive to use.
For example, we find ourselves spending much more time manually fixing incorrectly stitched scans in Revo Scan than we do in EXScan (the software for Einscan scanners).
The latter also produces cleaner point clouds and meshes without having to fiddle around with various settings that can be difficult to understand for beginners.
At the sub-$1000 3D scanner price point, however, Revopoint’s software is still the best you can get. A big part of 3D scanning results depends on the algorithms used, and these can be very expensive to develop.
Compared to other structured light 3D scanners under $1000, like the Creality CR-Scan 01 and CR-Scan Lizard, the software of the Revopoint MINI is far ahead.
Another positive is that Revopoint continuously focuses on improving the software. Since the original Handy Scan app that came with the original Revopoint POP, the software has seen many iterations and improvements.
For example, there have been notable improvements in both software crashes and stitching. Both were key problems at the release of the POP.
We do hope that Revopoint will keep on iterating and making improvements. The current software experience is good enough for the price, but there is still some way to go to catch up to the software of the nearest competitors (the Einscan SE and Einscan SP).
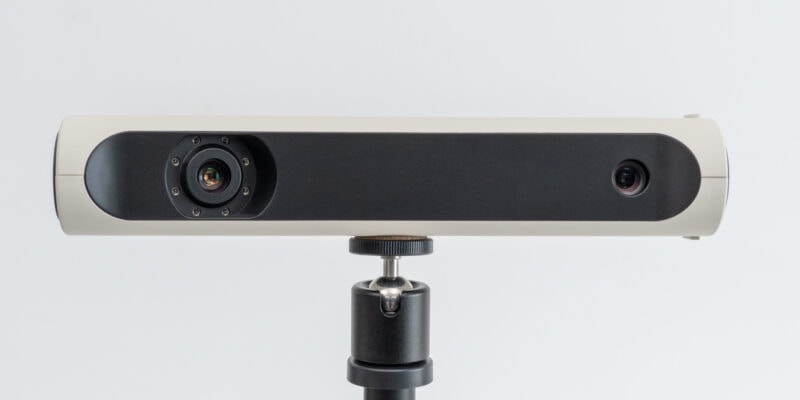
Build Quality
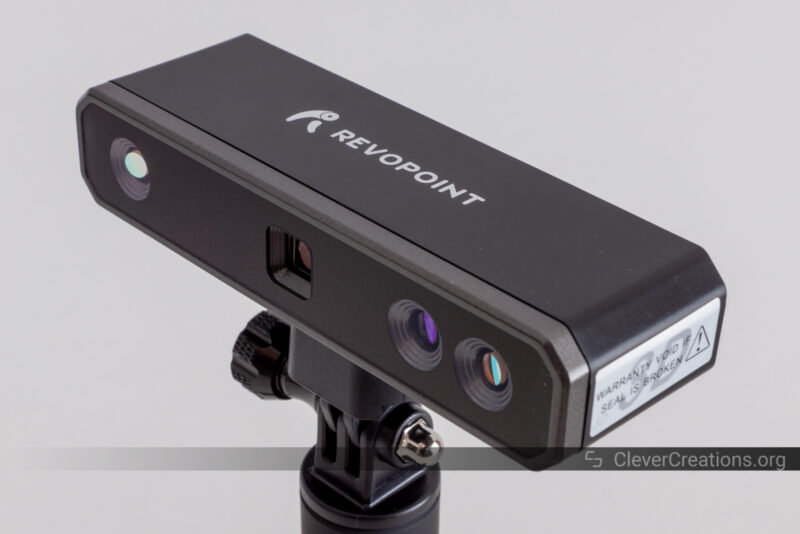
The build quality of the Revopoint MINI is in line with the rest of Revopoint’s products—excellent. Even though these 3D scanners are located on the more affordable side of the spectrum, there is nothing about them that feels cheap.
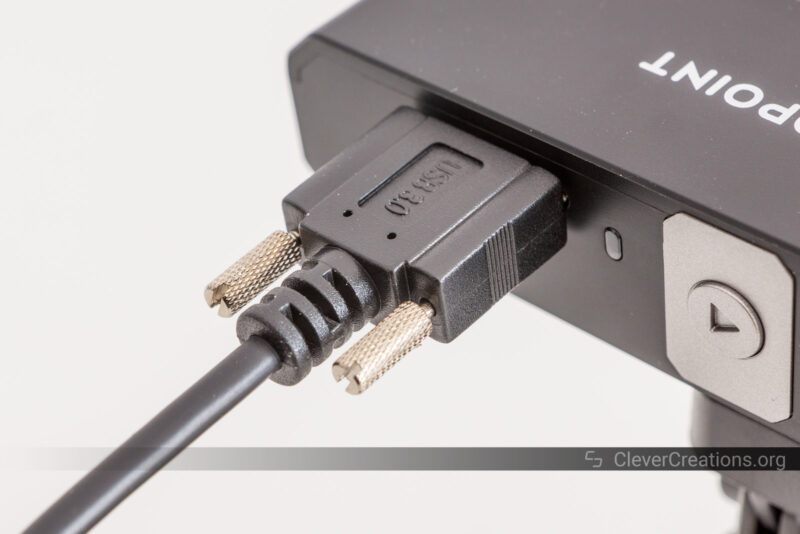
For example, we still see the same attention to strain relief as with the POP 2, which ensures that the USB cable connector does not wear out over time. This is an important aspect of 3D scanners that are used in a handheld mode, as they get moved around a lot.
The scanning head of the Revopoint MINI has a compact build and a durable feel. Everything is packed into a small form factor, so there is no wasted space. The head is also very lightweight, which makes handheld scanning a breeze.
This stands in contrast with the Einscan SE and Einscan SP that we recently reviewed. These have a larger construction, along with a more plasticky feel. It’s not something that affects usability, but it’s definitely something that you notice.
Generally, the bigger the objects you intend to 3D scan, the bulkier the scanner gets. So the compact, solid build is fairly expected.
Just like the POP 2, the MINI gets quite warm during operation. We haven’t noticed any negative effects on the scanning results from this, but it is something to keep in mind. Using the 3D scanner in particularly warm environments might affect the device’s performance or lifespan.

Accessories
The Revopoint MINI comes with a number of accessories that you can use to improve your 3D scanning experience. There are also several aftermarket accessories that you can purchase separately, which we will briefly discuss later.
Tripod

Included with all packs is a tripod. Its build quality is excellent, which is what we are used to from most Revopoints accessories.
The tripod has extendable legs, so you can either use it as a stand on the table, or use it as a handle for handheld scanning. This is a great feature, as it removes the need for two separate accessories.
One thing to note is that the extendable legs on the Revopoint MINI tripod are shorter than the POP 2 tripod legs. This makes the entire setup less stable and more likely to be knocked over. We are not sure why Revopoint went this route.
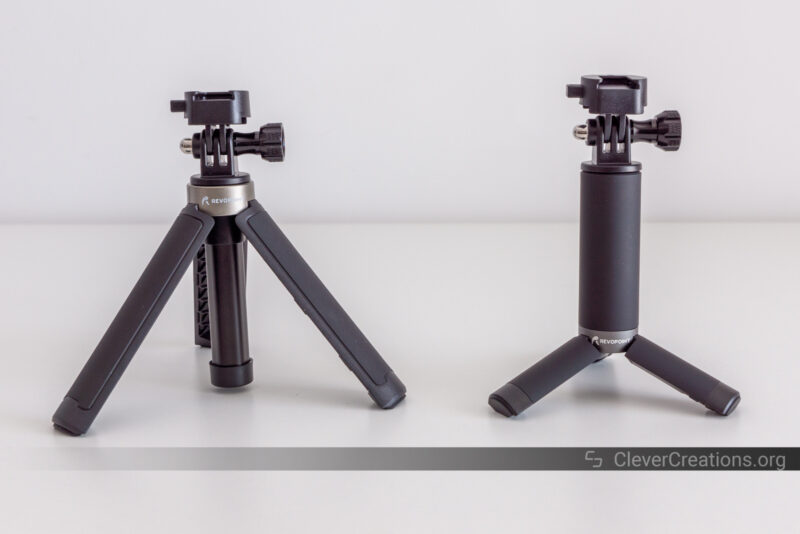
As far as adjustability goes, you can both tilt the scanning head and extend it upwards through its telescoping feature. Both are nice features to have for scanning the top of larger objects that require the scanner head to be elevated.
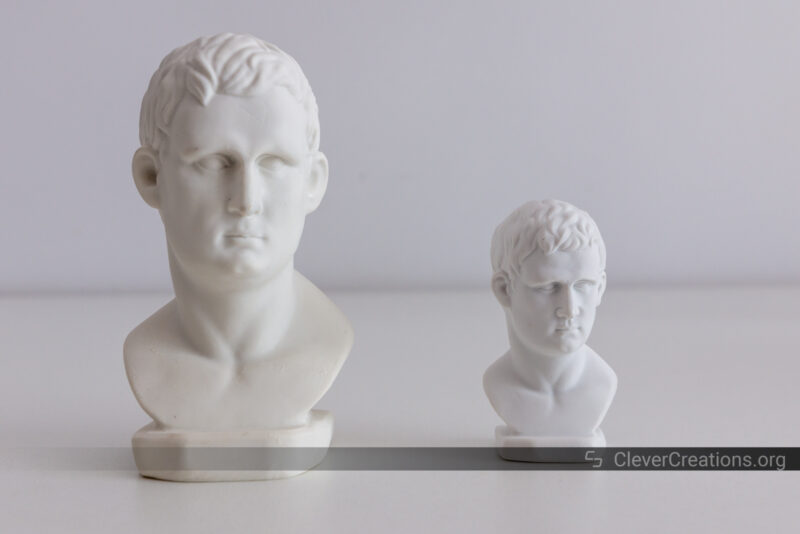
Statue
The small statue that comes with the Revopoint MINI is most useful for your first scan. Its features and small size makes it an ideal object to use to get a feel for how the device works and what settings you need to use.
Aside from that, it might also be practical as a reference object that you can scan if you want to confirm that the scanner is still working as it did when it came out of the box. If the sensor or alignment of the device becomes inaccurate, you’ll notice that it will scan this object with less accuracy than before.
The statue is made from a kind of plaster and has very intricate details. It’s the same as the one that is included with the POP 2 but scaled down in size.
Looking at the two statues side-by-side, it seems like their material has a tendency to yellow over time. It won’t affect scanning results but is interesting to see.
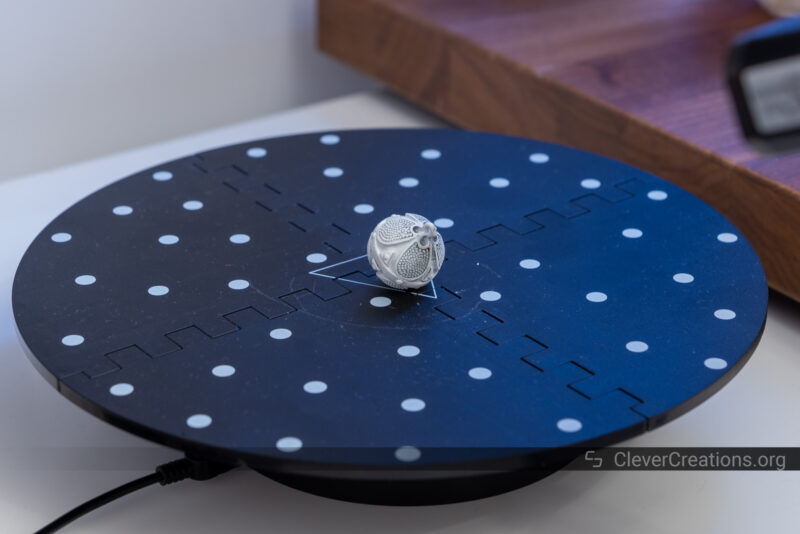
Turntable
With its lightweight build and plastic feel, the turntable of the Revopoint MINI is the accessory that impresses us the least. While it does the job and is included with all packs, its $45 price listed in Revopoint’s store feels a bit much for what it is.
The turntable speed is adjustable and maxes out at about 3 RPM. It can be set to rotate in either direction. Its power cord is a bit short and only comes with a USB connection.
Unlike the Einscan SE and SP turntables, the one from the Revopoint MINI rotates continuously and isn’t directly controlled by the 3D scanner. It’s not a big issue, but you want to make sure to manually stop the data capture after completing a full revolution.
We have found that if you do capture more data with the Revopoint MINI and POP 2 than is necessary, the Revo software sometimes has trouble aligning the data from different rotations. So you’ll want to keep an eye on that.
The dual-axis turntable that is also sold by Revopoint looks to be a superior option. It’s significantly more expensive at $120 but is also more practical. Because it automatically tilts the object up and down, the scanner can capture data from multiple angles without you having to manually reorient the object.
Regardless, the default turntable is still a great solution compared to reorienting the object or 3D scanner by hand. Its surface with tracking dots also provides a good reference for the software to use when aligning all the captured data.
Phone Holder
The phone holder is most useful if you want to use the Revo Scan smartphone app in combination with the Revopoint MINI. It’s a simple spring-loaded mount that you can attach to the tripod.
It is actually the exact same phone holder that comes with the POP 2, and we are happy to see that Revopoint did not scale this accessory down. You can still fit phones with a maximum width of about 65 mm (2.5″).
The phone holder also has rubber padding to protect your phone’s finish, which is nice to see.
We have only used this accessory briefly in our testing, but it performs as advertised. The built-in springs are strong and not the flimsy type that you see on some cheaper phone holders.
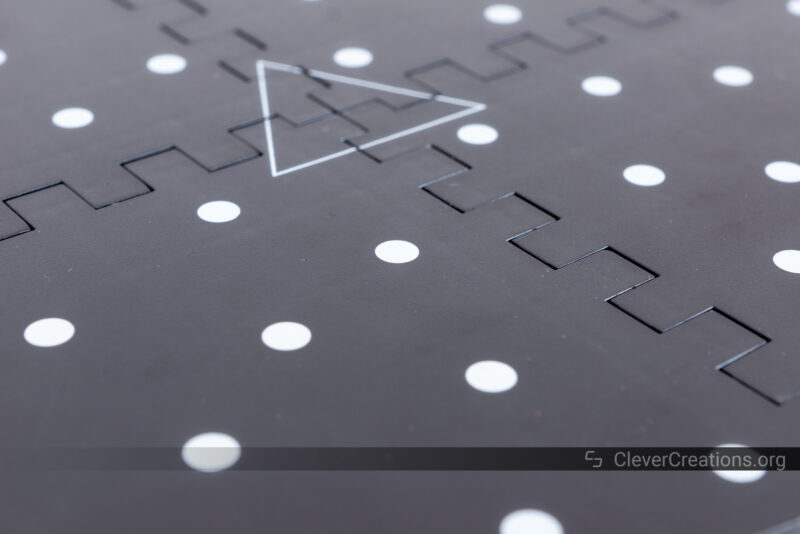
Calibration Board
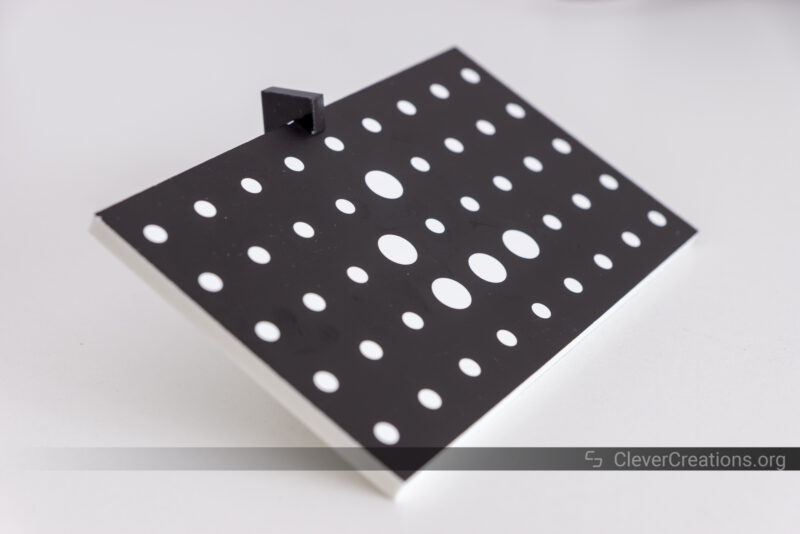
The calibration board is a flat black surface with a series of white circles printed on it. It’s used to calibrate the scanner and make sure that it’s accurately capturing 3D data.
Its use is simple: you place the calibration board on its stand, scan it from various angles, and then the Revo software will use that data to calibrate the scanner.
You only have to do this before your first scan, and after that, only if you notice your scanner’s accuracy starts to decline.
The calibration board itself is made of plastic instead of ceramic, like with higher-end 3D scanners. Given that you won’t use the board very often, the lesser durability is probably not a big deal.
Revopoint MINI Scan Results
For all the models below that were scanned with the Revopoint MINI, the final mesh was smoothed and simplified.
We did this to reduce the file size and because the Revopoint raw scan data often contains a lot of noise that can be cleaned up with smoothing. We could have smoothed the meshes further, but we didn’t want to lose too much detail in the process.
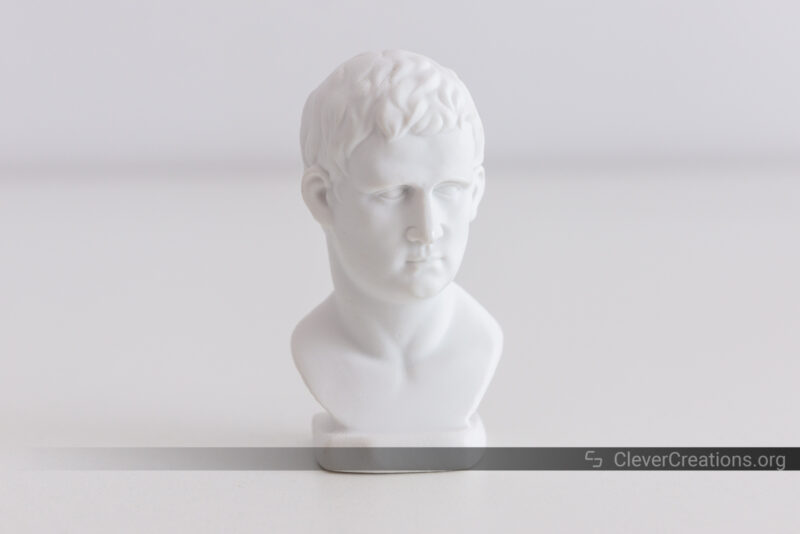
Included Statue
Not surprisingly, 3D scanning the included statue gives excellent results. Despite its 6 cm / 2.5″ height, the level of detail captured by the Revopoint MINI was quite impressive.
There’s one artifact visible on the inner corner of the right eye. We could have removed it in Revo Scan if we noticed it in time, but after processing the point cloud data, it can only be taken care of in a mesh editor.
Astronaut 3D Print
This 3D scan of an astronaut 3D print might not look appealing, but most of its artifacts come from the 3D print itself. It’s a good test for any 3D scanner to see how well it can capture surface texture, small details, and hidden features.
The Revopoint MINI did quite well here, especially considering the large size of the model. Just like with the more expensive Einscan SP, it picks up the layer lines of the 3D print pretty clearly.
The EinScan SP does a better job in terms of noise reduction, but the Revopoint MINI’s scan data is of a high enough quality that it can be used for most purposes.
Revopoint MINI
Einscan SP
Einstein Planter
We use this Einstein planter as a test model for many of the 3D scanners we review. It’s a good size, has a lot of detail, and is easy to scan without requiring any special techniques.
The inner cavity had a couple of gaps that were filled in when converting the point cloud to mesh data. This is purely because we did not spend enough time scanning that area, and is not an issue with the scanner.
This direct comparison with the Revopoint POP 2 makes it clear that the MINI captures more way more detail. There’s more surface texture captured, and the model is generally just sharper.
Revopoint MINI
Revopoint POP 2
M8 Bolt
Out of curiosity, we decided to check how well the Revopoint MINI would do with scanning threads. This M8 bolt was captured quite well, even though it is clear that there are some issues with stitching the scan data together. There is a visible seam running along the length of the bolt.
This can be improved with more careful scanning, better placement of the object, or better handling of the scan data in Revo Scan. But it’s not easy to get perfect results without putting in the extra effort.
Jewelry Pendant
The same goes for this pendant. While the Revopoint MINI captured a lot of detail, the stitching of the scans caused some artifacts that are visible on the surface of the model.
This is likely because the pendant has a lot of similar surfaces (just like with the bolt), and Revopoint’s software has a hard time dealing with that. Again, it’s possible to get around this with more careful scanning, but it takes extra effort.
Funko Pop Jerry
This Funko Pop figurine shows another example of the improved performance of the Revopoint MINI over the POP 2. Especially around the legs, hair, and shirt, the scan quality is noticeably better.
It’s clear that if you want to scan small objects with a lot of detail, the Revopoint MINI is a better choice than the POP 2.
Revopoint MINI
Revopoint POP 2
Scan Quality Conclusion
Overall, the Revopoint MINI produces very good scan data. Noise-wise, it is not quite on the same level as more expensive scanners like the EinScan SP, but in terms of details, sharpness, and dimensional accuracy, it compares quite favorably.
The biggest issue we had was with stitching together scan data of similar surfaces. This caused some artifacts on the models, but it is possible to limit this with careful scanning and capture data management.
Alternatives to the Revopoint MINI
The sub-$2500 and sub-$1000 desktop 3D scanner markets are experiencing a good bit of growth in the last couple of years, but there still aren’t too many 3D scanners available at this price point.
There are still a couple of options worth looking at if you are in the market for a desktop 3D scanner without having to spend an arm and a leg on an expensive professional solution.
Revopoint POP 2
The POP 2 is Revopoint’s other 3D scanner in the current line-up. Despite being similar to the MINI, it does not directly compete with it.
This is because the POP 2 is focused more on 3D scanning medium-sized objects with decent detail, whereas the MINI is best at scanning small objects with high detail.
To achieve this, both scanners use different light wavelengths (blue for the MINI and infrared for the POP 2). They also have different minimum and maximum scanning volumes, with the POP 2 offering a larger scanning area.
If you want to focus on 3D scanning coins, jewelry, or other small objects, then the Revopoint MINI is the better option. If you want to scan medium-sized objects like shoes or vases, then the POP 2 would be a better fit.

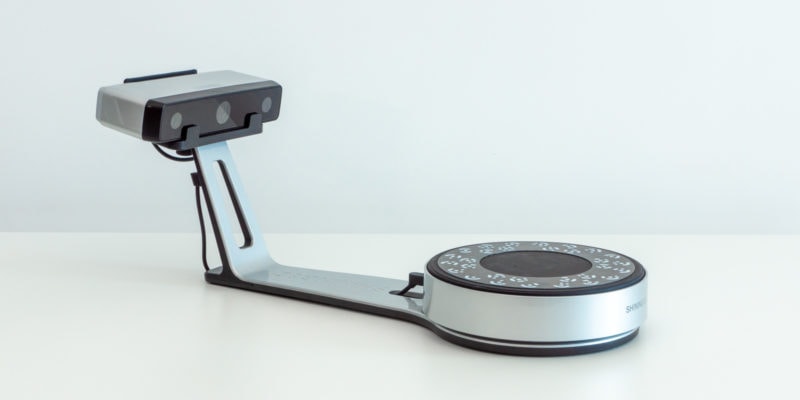
Einscan SE/SP
Shining3D’s Einscan 3D scanners are a step up from Revopoint’s devices, both in quality and in price. But since there aren’t any other desktop 3D scanners in between, the Einscan SE and Einscan SP can be considered the nearest competitors of Revopoint’s offerings.
The Einscan SE is the more affordable of the two, with a retail price of $999. With its 700x700x700 mm maximum scan volume and 0.2 mm point distance, it is more similar to the Revopoint POP 2 than it is to the MINI.
The Einscan SP, on the other hand, costs around $2199. Its increased single-shot accuracy, maximum scan volume of 1200x1200x1200 mm, and faster scan speed make it a more suitable option for professionals.
Neither 3D scanner is focused on scanning small, detailed objects like the MINI is, but they both offer a better scanning experience overall. In our experience, Shining3D’s software provides better results with less effort.
With a minimum scan volume of 30x30x30 mm for both, they should only be considered as alternatives if you are looking for a 3D scanner that can do both medium-sized objects well.


![Shining3D [EinScan-SE V2] White Light Desktop 3D Scanner, 0.1 mm Accuracy,...](https://m.media-amazon.com/images/I/31OYEqogOSL.jpg)
![Shining3D [ EinScan-SP V2 ] White Light Desktop 3D Scanner with Solid Edge...](https://m.media-amazon.com/images/I/41mTjPSXJqL.jpg)
Creality CR-Scan 01 & CR-Scan Lizard
With their CR-Scan Lizard and CR-Scan 01, Creality also offers several 3D scanners under $1000 that could be considered as alternatives to Revopoint’s offerings.
We haven’t had any hands-on experience with the devices yet, but based on user feedback, the software experience is not on par with what you get from Revopoint or Shining3D. Given that Creality is mainly a 3D printer company, that does not come as a surprise.
Both devices cost around $500, which can still make them appealing options for people looking for a desktop 3D scanner on a small budget.

Conclusion: Who Should Buy the Revopoint MINI?
If you are looking for the best sub-$1000 desktop 3D scanner for small, detailed objects, you have found it. You won’t find a different scanner on the market that matches the Revopoint MINI’s accuracy and detail at this price point.
It is an excellent solution for reverse engineering, jewelry design, and other applications where you need to scan small objects with high accuracy.
For medium-sized objects, you are better off with the POP 2. It’s over $100 cheaper at the moment and has a larger scanning area.
While the Einscan SP outshines both of these options in terms of scan quality (mostly due to its software), it is more than twice the price. If you have the budget for it, though, we recommend checking it out as well.
The Revopoint MINI is the superior option for anyone looking for a small, accurate, and relatively affordable 3D scanner. If that’s what you’re after, we recommend giving it a try.
Just be aware that with any 3D scanner at this price point, you will have to put in extra effort sometimes to get good results, especially if you are new to 3D scanning. But once you get the hang of it, you’ll be able to produce high-quality scans of your favorite small objects.


I recently picked up the revopoint Mini. After scanning the included bust which was pretty easy I tried some more complicated smaller items similarly detailed as your jewelry pendant. So far I have found that the fine detail capture is lacking… I’m fully willing to accept the blame… What steps do you recommend to ensure the capture of super fine detail?
Thanks