

Ultrasonic cleaners are amazing tools that allow you to perform in-depth cleaning on almost any object. From jewelry to watches, tools, firearm components, fuel injectors, carburetors and coins, it is hard to find a limit to what they can clean. Ultrasonic cleaning is a gentle but invasive cleaning method that, because of modern technology, anyone can do at home.
To get the best results from your ultrasonic cleaner, it is important to know the best way to use it. In this article I will explain how an ultrasonic cleaner works, give tips and techniques and share which cleaning solutions are best to use.
Let’s dive in!
What is Ultrasonic Cleaning?
Ultrasonic cleaning is a method of cleaning that uses ultrasound and a liquid to clean objects. Because it is thorough but non-abrasive, it is often used to do the final cleaning of fragile components. For the best results a specialized solution is added to the ultrasonic cleaner, but plain water with an added detergent often gives good results as well.
How Does Ultrasonic Cleaning Work?
As the ultrasound (usually 25-42 kHz) waves pass through the liquid in the ultrasonic cleaner, many microscopic vacuum-filled bubbles rapidly expand and collapse. This is an effect known as acoustic cavitation. The ultrasonic waves cause these miniscule bubbles to collapse, which in turn generates high temperatures (up to 5000 °C) and enormous forces in the liquid.
Because this all happens on a small scale and because the bubbles’ expand and collapse cycle is extremely short, the liquid only becomes mildly warm instead of absurdly hot.
The accumulative effect of the millions of imploding bubbles is what causes the cleaning effect of ultrasonic cleaning. Grease, rust, flux and other contaminants break apart and flow into the liquid. With the right cleaning solution, this is a very effective cleaning method.
What are the Benefits of Ultrasonic Cleaning?
You might be wondering why ultrasonic cleaning is one of the best cleaning methods. It has many benefits, especially compared to cleaning by hand. Most notably, ultrasonic cleaning is thorough, fast, efficient and last but not least, anyone can do it. Let’s look at the benefits in more detail.
- Clean a wide range of contaminants. There are few limits to the contaminants an ultrasonic cleaner can clean and remove. Some examples of contaminants are grease, oil, dirt, dust, rust, pigment, lime scale, flux, burned on carbon, fingerprint oils and polishing compounds.
- Thorough cleaning. Ultrasonic cleaning removes down to the smallest dirt and particulates. After a full cleaning cycle with the right cleaning liquid, objects can come out looking like new.
- Gentle. While the cleaning is thorough, it is also fairly gentle and is unlikely to cause damage. This makes ultrasonic cleaners great for cleaning jewelry, watch components or other delicate objects.
- Clean hard-to-reach spots. With an ultrasonic cleaner, you are not only able to clean exposed surfaces, but also the more hard-to-reach and even hidden areas. This makes it particularly useful for cleaning things like fuel injectors, carburetors and other complex parts.
- Clean multiple objects at once. Assuming that the cleaner is big enough, you can add additional parts to the tank and clean them without any extra effort.
- Easy to learn. It does not take a lot of time or effort to learn how to use an ultrasonic cleaner. Practically anyone can use one.
- Time-efficient. While an ultrasonic cleaning cycle can take a while depending on the object being cleaned (usually from about 2 up to 20 minutes), you can simply set up the machine and then do something else.
- Low maintenance. Ultrasonic cleaners are relatively simple devices and do not require a lot of maintenance.
- Cost-efficient. Because ultrasonic cleaning is easy to learn, easy to do and does not involve a lot of additional time for maintenance, it is very cost-efficient. Time is money after all.
- Safe. Unlike with manual cleaning, there is no risk of cuts or injuries when cleaning drill bits, scalpels or other sharp instruments when using an ultrasonic cleaner. In addition, there is no need to work with aggressive solvents that are likely hazardous to your health.
What Can You Clean in an Ultrasonic Cleaner?
It is possible to clean a wide range of objects and materials in an ultrasonic cleaner. Most hard, non-absorbent materials (like plastic, metal, glass and ceramic) are suitable. There are a few exceptions however, which I will talk more about later. First I will list common items that you can clean with an ultrasonic cleaner.
- Jewelry. Ultrasonic cleaners are ideal to clean rings, bracelets, necklaces and earrings. Jewelry that can be cleaned in an ultrasonic cleaner is made from gold, silver and platinum, and includes gemstones like diamonds, sapphire and rubies. Some gemstones and types of jewelry are not meant to be cleaned with an ultrasonic cleaner, these are listed in the next section with exceptions.
- Watch parts. Watch parts such as straps and bracelets can be cleaned in an ultrasonic cleaner. Never use an ultrasonic cleaner to clean the watch head. The ultrasonic energy can damage the movement mechanism and potentially the rubber seals.
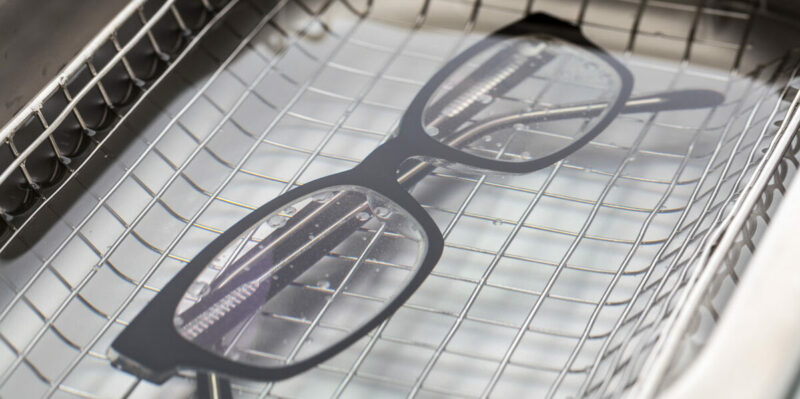
- Eyeglasses and sunglasses. Ultrasonic cleaners are a great way to clean eyeglasses as long as they are in a good condition and none of the paint or coatings are cracked or damaged.
- Dentures. Dentures and other dental appliances often get dirty with tartar, calculus and food/coffee stains, and need to be cleaned daily.
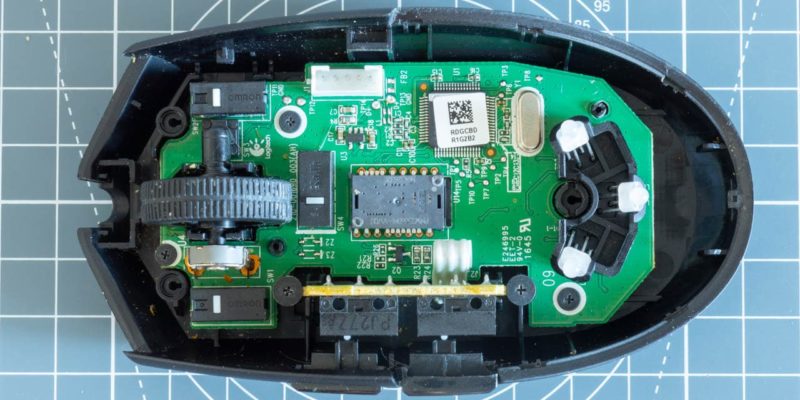
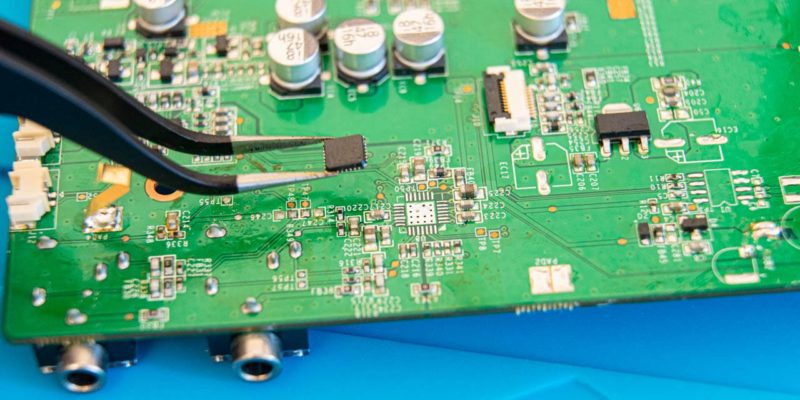
- Printed circuit boards. Fluxes, solder residue and other contaminants need to be removed from PCBs before they are placed back in the field.
- Airbrush and paint spray guns. Removing old paint is one of the strengths of ultrasonic cleaners. While this might not be desired for all items, it certainly is when cleaning airbrush and paint spray gun parts. If you are into hobbies like painting model kits for adults, you are well off with an ultrasonic cleaner for your airbrushing tools.
- Vinyl records. Over time, the grooves of vinyl records build up dirt and debris. This negatively affects their sound quality.
- Diving respirators. Salt and other residues often build up on respirators and other scuba gear and need to be regularly removed.
- Printheads. It can be tricky to unclog printheads by hand. With an ultrasonic cleaner it is effortless.
- Optical components.
- Coins.
- Tools.
- Fountain pens.
- Carburetors.
- Fuel injectors.
- Bike parts.
- Drill bits, taps, dies and milling cutters.
- Firearm components.
- Brass music instrument parts.

What Should You Not Clean in an Ultrasonic Cleaner?
Not everything can be cleaned in an ultrasonic cleaner. Some items or materials are likely to get damaged and must be cleaned with a different method.
- Soft gemstones or organic jewelry. Lapis lazuli, emeralds, turquoise, malachite, tanzanite, opals, coral pieces, amber and pearls can not be cleaned in an ultrasonic cleaner. The same goes for gems that have been impregnated or coated with oil, wax or plastic, as well as gemstones that have had their color enhanced through heat treatment.
- Scratched glasses. Glasses with scratched coatings are likely to have their coating damaged further.
- Watch heads. Unless you have removed the movement mechanism from the watch case, don’t submerge and clean a watch head in an ultrasonic cleaner. The vibrations can cause damage to the movement mechanism.
- Ceramic-based and MEMS electronics components. Microelectromechanical systems like accelerometers, gyroscopes, microphones and piezoelectric buzzers should also not be exposed to ultrasound waves. The vibrations can damage or destroy the components. In some cases they can work in reverse and produce a voltage that damages their drive circuits. Removing fluxes from PCBs with these components is better done by hand.
- Painted items. Ultrasonic cleaners have the ability to remove paint. Depending on what you want, this can be a blessing or a curse. It is great for removing (old) paint from miniatures or other objects, but if you want to keep the paint on an object, don’t clean it in an ultrasonic cleaner.
- Explosive items. This should probably go without saying, but don’t try to clean live ammunition and other explosive devices.
- Pets. Don’t use an ultrasonic cleaner to clean your pets, or any other animals for that matter.
This definitely is not an all-encompassing list, so make sure you check for yourself before you clean an item in an ultrasonic cleaner.
For How Long Should You Run Your Ultrasonic Cleaner?
Cleaning time for an ultrasonic cleaner varies and depends on a number of factors. Unfortunately there is no simple answer that covers all situations. In general however, you will be able to clean most parts with somewhere between 2-10 minutes of cleaning, and up to 20 minutes for particularly dirty stuff.
You won’t be able to sufficiently clean objects within seconds. Ultrasonic cleaning is a process that requires some time.
Let’s look at some factors that affect how long a part should be placed in an ultrasonic cleaner.
- The type of contaminants on the object. Different contaminants require different cleaning times.
- Loose contaminants like dust, metal shavings and soot come off easily, because their molecules do not interact strongly with the surface of the object.
- Grease, oil and wax take longer to remove. Their molecules form bonds with metals and plastics, and sometimes also form bonds with each other. These bonds first need to be broken by the forces of the imploding bubbles before the contaminants can come off.
- Carbon deposits, rust and other oxidation are the hardest to remove, and thus require the most cleaning time.
- The amount of contaminants. More dirt takes more time to remove. Pre-rinsing the parts to remove the bulk of the contamination helps speed up the process.
- The base material of the object. Contaminants stick differently to different materials.
- The cleaning solution. A cleaning solution that is appropriate for the material being cleaned will do a better job than other, more generic solutions.
- The age of the cleaning solution. A batch of fresh cleaning solution without particles and debris floating around in it will perform better than a batch that has already been used several times.
- The temperature of the cleaning solution. For many applications, the cleaning solution in the ultrasonic cleaner needs to be heated. Each cleaning solution has its own optimal working temperature. Usually it lies somewhere between 122-149° F (50-65 °C).
- The power of the ultrasonic cleaner. For cleaning dirt and other large particles you want your ultrasonic cleaner to have more power (per unit of volume). For cleaning fine particles on lightly contaminated objects you can get away with less ultrasonic power.
- The frequency of the ultrasonic cleaner. Lower ultrasound frequencies create larger bubbles with more power, which work well cleaning large surfaces. Higher frequencies give finer, less powerful bubbles that do a good job cleaning small intricate areas.
Long story short, it’s hard to say exactly how long you should clean something in an ultrasonic cleaner without having cleaned a similar object before in the exact same circumstances. In general, for something that is mildly dirty and not fragile, I recommend starting with 2-3 minutes of cleaning and re-evaluate after that. If it is still dirty, I put it back for another 2-3 minutes, and so on.
Of course, the longer you run the ultrasonic cleaner, the cleaner your parts will get. But if you run the device for too long, you risk exposing the items to cavitation erosion.
What is Cavitation Erosion?
Cavitation erosion is a process that damages the base material of an object. It occurs when an object is left for too long in an ultrasonic cleaner after the cleaning process is done. Small pits appear on the surface of the object, which if it gets worse enough, you can actually start to see with the naked eye.
Some materials are more prone to cavitation erosion than others. Objects with soft smooth surfaces are particularly vulnerable, for instance polished aluminum. Other soft materials that really should not be cleaned for too long are brass, lead and specific plastics like carbon fiber reinforced plastics.
Similarly, when cleaning a camera lens iris in an ultrasonic cleaner you need to be careful as well. Leaving it in for too long can cause damage to the coating on the aperture blades and create bright spots.
Factors That Affect Cavitation Erosion
You already learned about two important factors that influence cavitation erosion, namely the amount of time an object is left in an ultrasonic cleaner, and the material that the object is made from. There are two more things that are of importance. Namely the temperature of the liquid and the frequency of the ultrasonic cleaner.
Cavitation erosion usually occurs less at lower temperatures. This is one of the reasons why it is recommended to keep the cleaning fluid under 180°F (82°C). The heating function of most ultrasonic cleaners often does not go higher than that, so this is not something you actively have to keep in mind.
The frequency of the ultrasound waves also affects the erosion. Lower frequency waves, around 20 kHz, create larger vacuum-filled bubbles that implode with more force. The larger force creates a stronger cleaning action, but is also more abrasive.
Higher frequencies create smaller bubbles, which are more gentle. A downside of using these frequencies is that it takes longer to clean with them.
This effect can be best thought of in terms of sandpaper. Sandpaper with a coarse grit (lower sandpaper number) is more abrasive and removes more material, whereas a finer grit (higher sandpaper number) removes less material and has a softer touch, so to speak.
It is unfortunately inevitable that cavitation erosion also damages the water tank of the ultrasonic cleaner over time. The tank is usually made out of stainless steel and will erode too. This can take thousands of hours of operation however. For anyone who doesn’t clean things for a living and doesn’t run their machine for hours a day, every day, this is not something to worry about.
What Frequencies are Used?
As mentioned above, the frequency of the ultrasonic waves controls how effective the ultrasonic cleaning is. Each particular cleaning job benefits from a specific frequency range. This is because lower frequencies generate more powerful and abrasive bubbles, and higher frequencies create smaller bubbles that are more gentle with the object being cleaned.
Let’s go over the commonly used ultrasonic cleaner frequencies and what they typically are used for.
- 25 kHz. This is the most powerful ultrasonic frequency in use, often in industrial applications. It packs a punch and works best with heavy items that have little detail. For example, stainless steel plates, cast iron blocks and large steel cutting tools.
For removing baked-on carbon and other strong pollution, this is also the frequency you would want to use. It can be fairly destructive, so it should not be used with soft materials, like aluminum and other soft metals, or objects with high detail. Similarly, it causes damage to glass and mirror polished surfaces. - 40 kHz. 40 kHz (or close to it) is the most common frequency in use and is considered the standard. It is compatible with most materials and removes most types of contaminants. The bubbles are small enough to clean detailed objects, but also have enough power to clean dirty items.
You want to use this frequency for cleaning most of your jewelry, tools, coins, carburetors, bike parts and other general household ultrasonic cleaning jobs. - 80 kHz. This frequency works best for parts with a lot of detail and complex geometry. For example, objects with small holes, fine threads and other complex features. It removes fine particles, but is also capable of removing harder to clean contaminants like metal chips, machining oils, lubricants and coolants. Removing the harder to clean contaminants does take more time than with lower frequencies, and the cleaning solution becomes more important as well.
Because this frequency is rather gentle, there is hardly any risk of cavitation erosion damaging the ultrasonic cleaner tank over time. - 120 kHz and higher. These frequencies are the least common. They have very low cavitation power and their main application is for removing the tiniest of particles. Things that are typically cleaned with these frequencies are semiconductor wafers, sensitive instruments, various things in the optical and medical industry and removing dust from other sensitive components.
What is the Best Frequency for Ultrasonic Cleaning?
Unless you have specific demands, the best ultrasonic cleaning frequency to use is 40 kHz or something close to it, like 42 kHz. It can clean relatively detailed objects and has enough power to deal with many types of contaminants. It will cover all your household and hobbyist ultrasonic cleaning needs, like cleaning jewelry, eyeglasses, tools, bike parts, fountain pens, carburetors and so on.
Cleaning Solutions and Liquids
You might be wondering why you need to add a cleaning solution or clean fluid to your ultrasonic cleaner. Can’t you just use water? And if you need a cleaning solution, which one should you use? Let’s take a closer look at this topic and answer these questions.
Why Do You Need to Add a Cleaning Solution/Fluid to Your Ultrasonic Cleaner?
One of the reasons plain water is not very effective when it comes to ultrasonic cleaning is that its surface tension resists cavitation. This is why a wetting agent (also known as a surfactant) must be added. This is a chemical substance that lowers the surface tension of a liquid and reduces the tendency of molecules adhering to each other.
An ultrasonic cleaning solution does exactly this, but also has other ways of optimizing the ultrasonic cleaning process.
What Exactly Does the Cleaning Solution Do?
Ultrasonic cleaning solutions improve the cleaning process in multiple ways:
- Decrease water surface tension to increase cavitation. Ultrasonic cleaning solutions contain a wetting agent (surfactant) that reduces surface tension in the liquid. This allows more microscopic bubbles to form. More bubbles means better and faster cleaning.
- Emulsify and disperse oils. The surfactant allows oil molecules to mix with water molecules, letting them disperse into the solution more easily.
- Prevent corrosion. Some ultrasonic cleaning solutions contain additives (corrosion inhibitors) that provide protection against rust and other corrosion.
Which Cleaning Solution Should You Use in Your Ultrasonic Cleaner?
There are many types of ultrasonic cleaning solutions available. A few common ones are acidic (low pH), alkaline (high pH, neutral, high caustic and enzymatic solutions. They are all good at bonding to and removing specific contaminants. Generally they come in concentrate form and must first be diluted with water before use.
To keep things simple, I have listed a good ultrasonic cleaning solution for each of the most common cleaning jobs below.
Basic Cleaning of Lightly Soiled Items
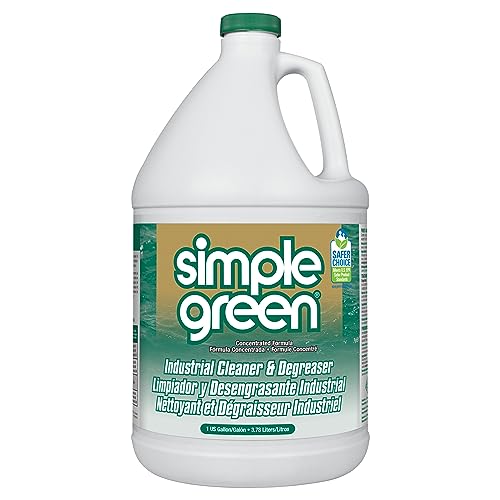
For basic cleaning of lightly soiled items, you can simply use water with a bit of dish washing detergent. Or even better, with some Simple Green. Heating it to 113-140 °F (45-60 °C) works well. If the item contains aluminum or brass, it is better to use one of the other cleaning solutions that is better suited for that material.
Jewelry and Eyeglasses
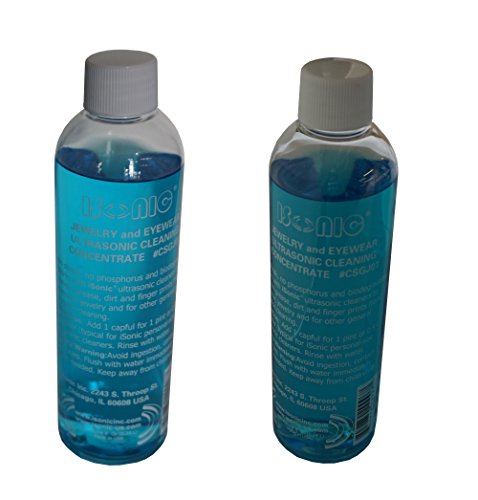
For eyeglasses and jewelry that is suited for ultrasonic cleaning, iSonic CSGJ01-8OZ is an excellent ultrasonic cleaning solution concentrate. It works well for removing smudges, fingerprints and bringing back shine to your jewelry.
Heavily Soiled Parts (Including Aluminum)
For heavy duty cleaning of grease, oil and other hard to remove contaminants, I recommend Simple Green Extreme Aircraft and Precision Cleaner. Unlike other cleaners, it works on aluminum, carbon fiber and other alloys without damaging them. You can use it on bike, engine and firearm parts without problems.

Brass Parts
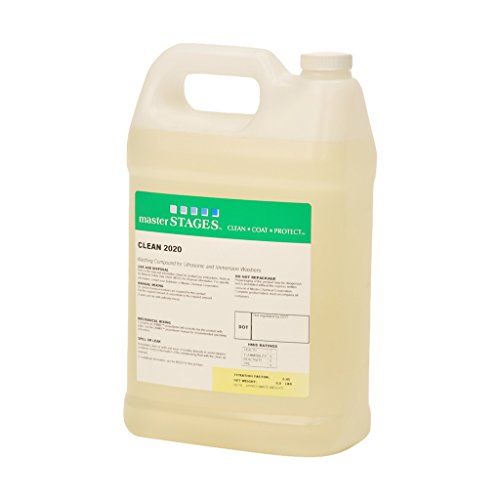
For cleanings things made out of brass, like brass jewelry or ammo casings, the Master STAGES CLEAN2020/1G cleaning solution will do wonders.
Dentures
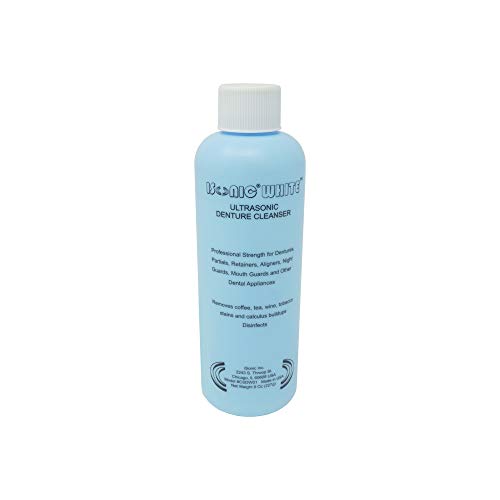
Cleaning dentures manually with a brush can be a chore. Using an ultrasonic cleaner and a good denture cleaning powder like iSonic CSDW01 makes it a lot easier.
Vinyl Records
Even vinyl records can be ultrasonically cleaned. You will need a specialized vinyl record cleaner, but when you have one, you can use it in combination with iSonic’s CSVR01 Vinyl Record Cleaning Solution

Printed Circuit Boards
It is important to remove fluxes and other soldering residues from PCB after rework. The go-to ultrasonic cleaner solution for circuit boards is Branson EC.

Nearly all solutions come in concentrate form. This means that you need to properly dilute them according to the instructions before use. A bottle of concentrate will usually last a long time.
Can You Add Isopropyl Alcohol (IPA) to the Tank?
The answer to this question is a resounding no. Isopropyl alcohol (IPA) can become unstable in an ultrasonic cleaner and will give off vapors that ignite when exposed to a spark. The answer is the same for other flammable liquids and solutions with low flash points, such as acetone and cyclohexane.
The flash point of a material is the temperature at which a material gives off sufficient vapor to ignite in air. For volatile materials like alcohol this temperature is very low, increasing its hazard.
Even if You Use an Ultrasonic Cleaner Without a Heater?
Even when you are not heating the cleaning solution, you should still not use any flammable liquids, like isopropyl alcohol. The ultrasonic cleaning process by itself also heats the liquid. This causes it to evaporate and flammable fumes to build up. After that, it only takes one spark of static electricity for things to go wrong.
In addition, there are scenarios possible where the transducer (which is responsible for creating the ultrasonic waves) in the ultrasonic cleaner fails, releasing its electrical energy into the cleaning fluid and potentially igniting it.
Compared to other ultrasonic cleaning solutions, isopropyl alcohol does not even provide that many benefits, so there really is no reason to use it in an ultrasonic cleaner.
Can You Use Simple Green in Your Ultrasonic Cleaner?
Yes! People use Simple Green in ultrasonic cleaners with success to clean a wide range of objects and contaminants. It even works well on particularly dirty objects like carburetors, pistons, bike chains, firearm parts and so on. Simple Green can be used in heated ultrasonic cleaners or at room temperature.
Simple Green is a non-toxic, environmentally friendly and biodegradable cleaner that also cleans well. It is non-abrasive and non-corrosive and therefore safe for use with most materials. And because it is non-toxic, there is no need to take measures against inhaling harmful fumes. When you add that it is skin-safe and can be heated, you can see that it is a great option for ultrasonic cleaning.
It comes in a concentrate form that you need to dilute with water for optimal results.
There are different versions of Simple Green available, all with different qualities.
Which Type of Simple Green Should You Use?
From the available versions of Simple Green, several are particularly useful for typical ultrasonic cleaning jobs.
The basic Simple Green is a good all-purpose cleaner. You can use it for ultrasonically cleaning all kinds of mildly dirty items. Because it is an alkaline aqueous-based cleaner, it will not work well on rust. It should also not be used on aluminum items.
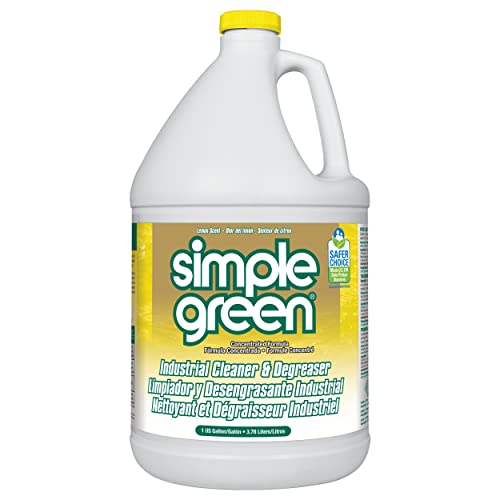
For heavily soiled items there is Simple Green Pro HD. it is a stronger, heavy-duty version that cleans even the hardest to remove grime. It is a good option for carburetors, bike parts, tools and so on.

One of the limitations of the regular Simple Green is that it should not be used on aluminum. It can cause oxidation when it is in prolonged contact with the material and will also remove aluminum anodization. If you do want to clean aluminum parts such as aluminum carburetors, dirt bike parts, aircraft components, and so on, you can use Simple Green Extreme Aircraft and Precision. It also works well on carbon fiber, rubber and high tech alloys.
It is powerful enough to remove built up grease, dirt, oil and carbon, but leaves aluminum surfaces intact and will not cause oxidation or corrosion.
How to Use Simple Green in an Ultrasonic Cleaner
People typically dilute Simple Green in a 1:1 ratio with water for use in an ultrasonic cleaner. This is a good starting point. The ‘best’ ratio or amount depends on many factors, like what you are cleaning and how dirty it is. I always find it best to look online for others’ experiences to find what works well for the thing I want to clean.
As for the temperature, you can use Simple Green both heated and cold. Experimentation, or once again, looking online will tell you what works best for your specific application.
Time-wise, using Simple Green will not be much different than other cleaning solutions. Most lightly soiled parts can be cleaned in 2 to 10 minutes. Heavily contaminated parts might need up to 20 minutes or longer to be cleaned. When in doubt, clean for 2-3 minutes at a time and re-evaluate the parts periodically. This way you can see if it is clean enough yet, and if there is any visible cavitation erosion.
After cleaning an item in an ultrasonic cleaner, including when using Simple Green, it is important to rinse it afterwards. This removes any leftover residues.
What About Using Vinegar or Other Acidic Solutions?
Vinegar and other acidic solutions are great for removing lime deposits, scale and removing rust from metals. But if we want to use them in our ultrasonic cleaner, we first must take some precautions. Acids will damage and corrode the stainless steel tanks that are commonly found in ultrasonic cleaners. Needless to say this is something that we want to avoid.
Unless you use an ultrasonic cleaner that is specifically designed for use with acids, it is necessary to take proper precautions to protect the tank. This generally means isolating the acidic solution in a glass or other acid resistant container. This set-up protects the stainless steel from the acid, while still allowing the ultrasound waves to reach and clean the parts. It is commonly referred to as indirect ultrasonic cleaning.
People often report good results diluting vinegar with water to a 1:1 ratio when using it in an ultrasonic cleaner.
Make sure to immediately rinse metals after ultrasonically cleaning them with vinegar. This avoids any negative effects from long-term exposure to acids.
How to Use the Indirect Cleaning Method
When using vinegar or other acids in your ultrasonic cleaner, it is important to use the indirect cleaning method to isolate the solution from the stainless steel tank. This involves filling the ultrasonic cleaner with water or a cleaning solution, placing a separate container in that solution and then filling the container with our objects and the actual cleaning liquid.
Let’s look at the indirect cleaning steps in more depth:
- Partially fill the tank of the ultrasonic cleaner with a cleaning solution. Simple water and a splash of detergent will suffice. The detergent reduces the surface tension of the water to increase cavitation (formation of bubbles). It is important to not fill the container to its indicated maximum at this point because the water level will still rise when we add the container.
- Place a glass or acid-resistant plastic container into the basket of the ultrasonic cleaner. Make sure not to place the container on the stainless steel surface of the tank, this can cause damage to the ultrasonic cleaner.
A container made of glass will conduct the ultrasound waves best. Make sure that it is big enough to fit the objects you plan on cleaning, but small enough that it does not touch the sides of the tank. - Place the objects into the smaller container.
- Fill the smaller container with the desired solution. This can be an acidic liquid, or any other appropriate cleaning solution. Aside from protecting the stainless steel tank from acid solutions, this method also has other benefits.These are listed below.
- If necessary, fill the solution in the main tank up to the cleaner’s water level indicator. This will provide better cleaning results, because the cleaner is designed with a certain amount of liquid in mind.
- Run the ultrasonic cleaner. You can use the same settings and the same amount of time as you otherwise would.
Because the ultrasonic energy passes through the walls of the container, the cleaning still happens the same as with the direct method.
Other Benefits of the Indirect Cleaning Method
Protecting the stainless steel tank is not the only benefit of the indirect method. There are several other advantages that might not be apparent at first glance.
- All dirt and contaminants stay in the container, so there is no need to thoroughly clean the stainless steel tank afterwards.
- Because the actual cleaning is done with a smaller volume of cleaning solution, cleaning with expensive solutions becomes a lot cheaper.
- It is easy to test multiple different solutions on one type of object to figure out what works best.
- You can use multiple containers to clean multiple batches of parts at once, without risk of cross-contamination.
- Small objects that would otherwise fall through the mesh of the basket remain in place in the separate container.
Can You Use Bleach in an Ultrasonic Cleaner?
This is not a good idea. Just like with acid solutions, bleach damages the stainless steel tank of the ultrasonic cleaner. Bleach also releases potentially dangerous fumes when heated, and has a negative effect on cavitation activity. There are better cleaning solutions out there for you to use.
What About Other Solutions or Liquids?
There is little that can’t be cleaned with the cleaning solutions listed above. If you do want to use something else, always check with the manufacturer of your ultrasonic cleaner and/or the manufacturer of the cleaning solution.
Liquids that are not designed for use with an ultrasonic cleaner can be a danger to your health when used for that purpose.
What Ratio of Water to Cleaning Solution is Best?
This depends on the cleaning solution that you are using and on the object that you are trying to clean. If you are using a store-bought ultrasonic cleaning fluid, always follow the mixing ratio instructions on the bottle (and the rest of the instructions too!).
If you are using something else (like Simple Green), you can check online what ratio people typically use for cleaning that type of object.
Can You Make Your Own DIY Cleaning Fluid?
Probably, yes. But it might be safer and a better use of your time to buy something ready-made. After all, these are two reasons why we use ultrasonic cleaning in the first place. Besides, purchased ultrasonic cleaning solutions are not that expensive and will get you more consistent results.
My advice is to clean the simple stuff with water and a bit of detergent, and if you need a specialized solution, just buy it.
What Temperature Should You Use Your Ultrasonic Cleaning Solution At?
Generally, heating makes the cleaning process more effective. With most cleaning solutions a temperature of 122–149 °F (50–65 °C) works well. But just like when it comes to the mixing ratios, always check the instructions of the manufacturer first.
One exception is cleaning objects with biological material, in which case the temperature should be kept under 113 °F (45 °C) to prevent protein coagulation.
Unless otherwise indicated, keep the temperature of the solution under 180°F (82°C) to maximize cavitation.
How Much Should You Fill the Tank?
If your ultrasonic cleaner tank has a fill line that indicates the amount of required liquid, then you should fill the tank up to that line. If it does not have a fill line, then you can fill the tank up to about two-thirds of its total capacity. Make sure that you keep in mind the volume of any objects you will add later to clean.
There are two main reasons why the ultrasonic cleaner tank needs to be filled with the right amount of solution:
- Cleaning performance. An incorrect amount of liquid can affect the cleaning performance of the ultrasonic cleaner. For example, it can change the frequency of the ultrasonic waves or reduce circulation of the solution.
- Damage to the ultrasonic cleaner. Underfilling the tank can damage the transducer(s) that is responsible for the ultrasonic waves. Heating elements (if the ultrasonic cleaner has them) can cause damage as well when they are not under the water line. Without water, the heat will only be transmitted to the tank, possibly causing it to get too hot and warp.
How Often Should You Change the Cleaning Solution?
You need to swap out ultrasonic cleaning fluid when parts take longer to clean, parts do not get as clean as they would with a clean batch of solution, or if the solution looks too contaminated.
Lots of debris floating around or not being able to see the bottom of the tank are an indicator of a too contaminated solution.
Can You Leave the Cleaning Solution in the Tank for Next Time?
If you will use the ultrasonic cleaner again in a couple of days, it is okay to leave the solution in the tank. If it will be a while before the next use, it is better to remove the fluid and store it in something like a plastic bottle.
Degassing
When researching which ultrasonic cleaner to buy, you might come across the term ‘degassing’ or see cleaners with a degas function. Let’s take a closer look at what degassing is and why it is important for ultrasonic cleaning.
What is Degassing?
Degassing is the removal of gases from a liquid. In the context of ultrasonic cleaning, these gases are usually dissolved air and air bubbles that are present in the cleaning solution. In order to get the best cleaning results, it is important that these air bubbles are first removed before starting an ultrasonic cleaning cycle.
Why is Degassing Important for Ultrasonic Cleaning?
Any gases in an ultrasonic cleaning solution interfere with the cleaning process. They do this by absorbing energy from the ultrasound waves that would otherwise go toward forming and collapsing the microscopic vacuum-filled cleaning bubbles. Therefore, we must degas the solution first, before cleaning the actual parts.
If you skip the degassing process, you can still use the ultrasonic cleaner and clean any parts with it. But because only a part of the energy is used for the cleaning process (a significant portion goes to degassing first), it will take longer.
When Do You Need to Degas the Solution?
Each time you pour new liquid in the ultrasonic cleaner tank, you need to degas it. Once the solution is degassed, it does not need to be done again until it is replaced. It is important to degas the solution before placing the parts in the tank, because the parts can interfere with the degassing process.
How Do You Degas the Cleaning Solution?
With all this talk about degassing, it might seem like a daunting task. It is super simple however. Degassing an ultrasonic cleaning solution can be done in three different ways:
- Running the ultrasonic cleaner. Fill the tank to the right level (taking into account any parts that will be added afterwards), and run the ultrasonic cleaner for 5 to 10 minutes. Raising the temperature of the solution by turning on the heater helps as well. The heat and cavitation drive the air to the surface of the solution.
- Wait for a couple of hours. Alternatively, letting the solution sit for a couple of hours will also work. Any gases naturally rise to the surface of the solution over time. This is quite time-consuming and therefore not a great option.
- Use the degassing function of the ultrasonic cleaner. Some ultrasonic cleaners come with a degassing function. It helps remove gases by running the ultrasonic transducer in pulses. In-between pulses gases have the time to rise to the surface of the liquid. This typically lasts about 5-10 minutes.
General Tips for Ultrasonic Cleaning
So far, we have talked about the best practices for cleaning solutions, cleaning time, solution temperature & ratios and degassing. But we are not done yet. Here are several other tips that will help you get the best results from your ultrasonic cleaner.
Pre-Cleaning Tips
- If the tap water in your area is hard (has a high mineral content), use distilled water instead. This will avoid limescale deposits on your parts and improve cleaning. Soft water (low mineral content) is always okay to use.
- Only place objects in the basket of the ultrasonic cleaner, or in a separate container that is placed in the basket. Never place anything on the surface of the tank. If your ultrasonic cleaner does not come with a basket, you can use wire to suspend items into the tank.
- Wipe or rinse down heavily soiled items before putting them in the ultrasonic cleaner. While an ultrasonic cleaner can clean thick layers of dirt and grease, it saves a lot of time to remove the bulk of the contaminants first. This also reduces the amount of cleaning that has to be done to the tank afterwards.
- Make sure that the parts are completely submerged in the fluid.
Post-Cleaning Tips
- Rinse parts after cleaning to get rid of any leftover residues on their surface. Using distilled water for this will avoid water spots. Soft water is okay for this as well.
- Regularly clean, rinse and wipe down the tank. Over time, a layer of dirt settles and builds up on the bottom. This will dampen the ultrasonic waves and negatively affect cleaning. Rinse the tank with clean water and wipe it down with a dry cloth afterwards.
Safety Tips
- Never overfill the tank. This can cause spilling. Water and electricity don’t match, so keep all liquid in the tank.
- Unplug the ultrasonic cleaner before draining the solution. For the same reason as the tip above.
Does Ultrasonic Cleaning Remove Viruses and Bacteria?
Ultrasonic cleaning alone is not enough to remove micro-organisms such as bacteria, viruses and fungi from surfaces. To properly sterilize items, they must be sterilized in an autoclave after ultrasonic cleaning. This is typically done for things like medical and tattooing equipment.
Is It Safe to Stick Your Hand in an Ultrasonic Cleaner While It is On?
It is not safe to stick your hand in a running ultrasonic cleaner. The ultrasonic cleaning effect can be harmful to living tissue, even if it is not immediately visible with the naked eye. In addition, the high temperature and potentially harmful chemicals in the cleaning liquid can cause burning, skin irritation and other discomfort.
Can You Use an Ultrasonic Cleaner Without Its Basket?
Only if the items you place in it are not touching the surfaces of the tank. So this means suspending the items from wires or crossbars that are placed over the ultrasonic cleaner. Any objects that touch the tank can cause damage to the stainless steel and the transducer(s).
Can You Use an Ultrasonic Cleaner Without the Lid?
Yes, this is okay. It will cause the ultrasonic cleaner to take more time heating up however, and use more energy to keep the solution at its target temperature. Also, any fumes and/or smells will spread around the room more easily. Not using a lid will be the same in terms of cleaning performance.
Can Ultrasonic Cleaning Cause Damage to Your Items?
As long as you don’t clean the object for too long and you use the right cleaning solution, it is unlikely that your items end up damaged. Of course, this assumes that it is an item that can be cleaned in an ultrasonic cleaner.
Can You Clean Rubber O-Rings, Seals and Gaskets?
As long as the rubber has not started to deteriorate, dry out or crack it can be cleaned in an ultrasonic cleaner without problems.
Troubleshooting Your Ultrasonic Cleaner
You might run into a situation where it seems like your ultrasonic cleaner is not cleaning properly. Before troubleshooting the device itself, it is important to first eliminate all other variables. This means making sure you use the right cleaning solution, cleaning time and temperature. If these are all okay, it is time to test the ultrasonic cleaner itself.
There are several tests you can do to check whether your ultrasonic cleaner is working properly, like the foil test and the glass slide test. They check whether there is enough cavitation taking place in the device.
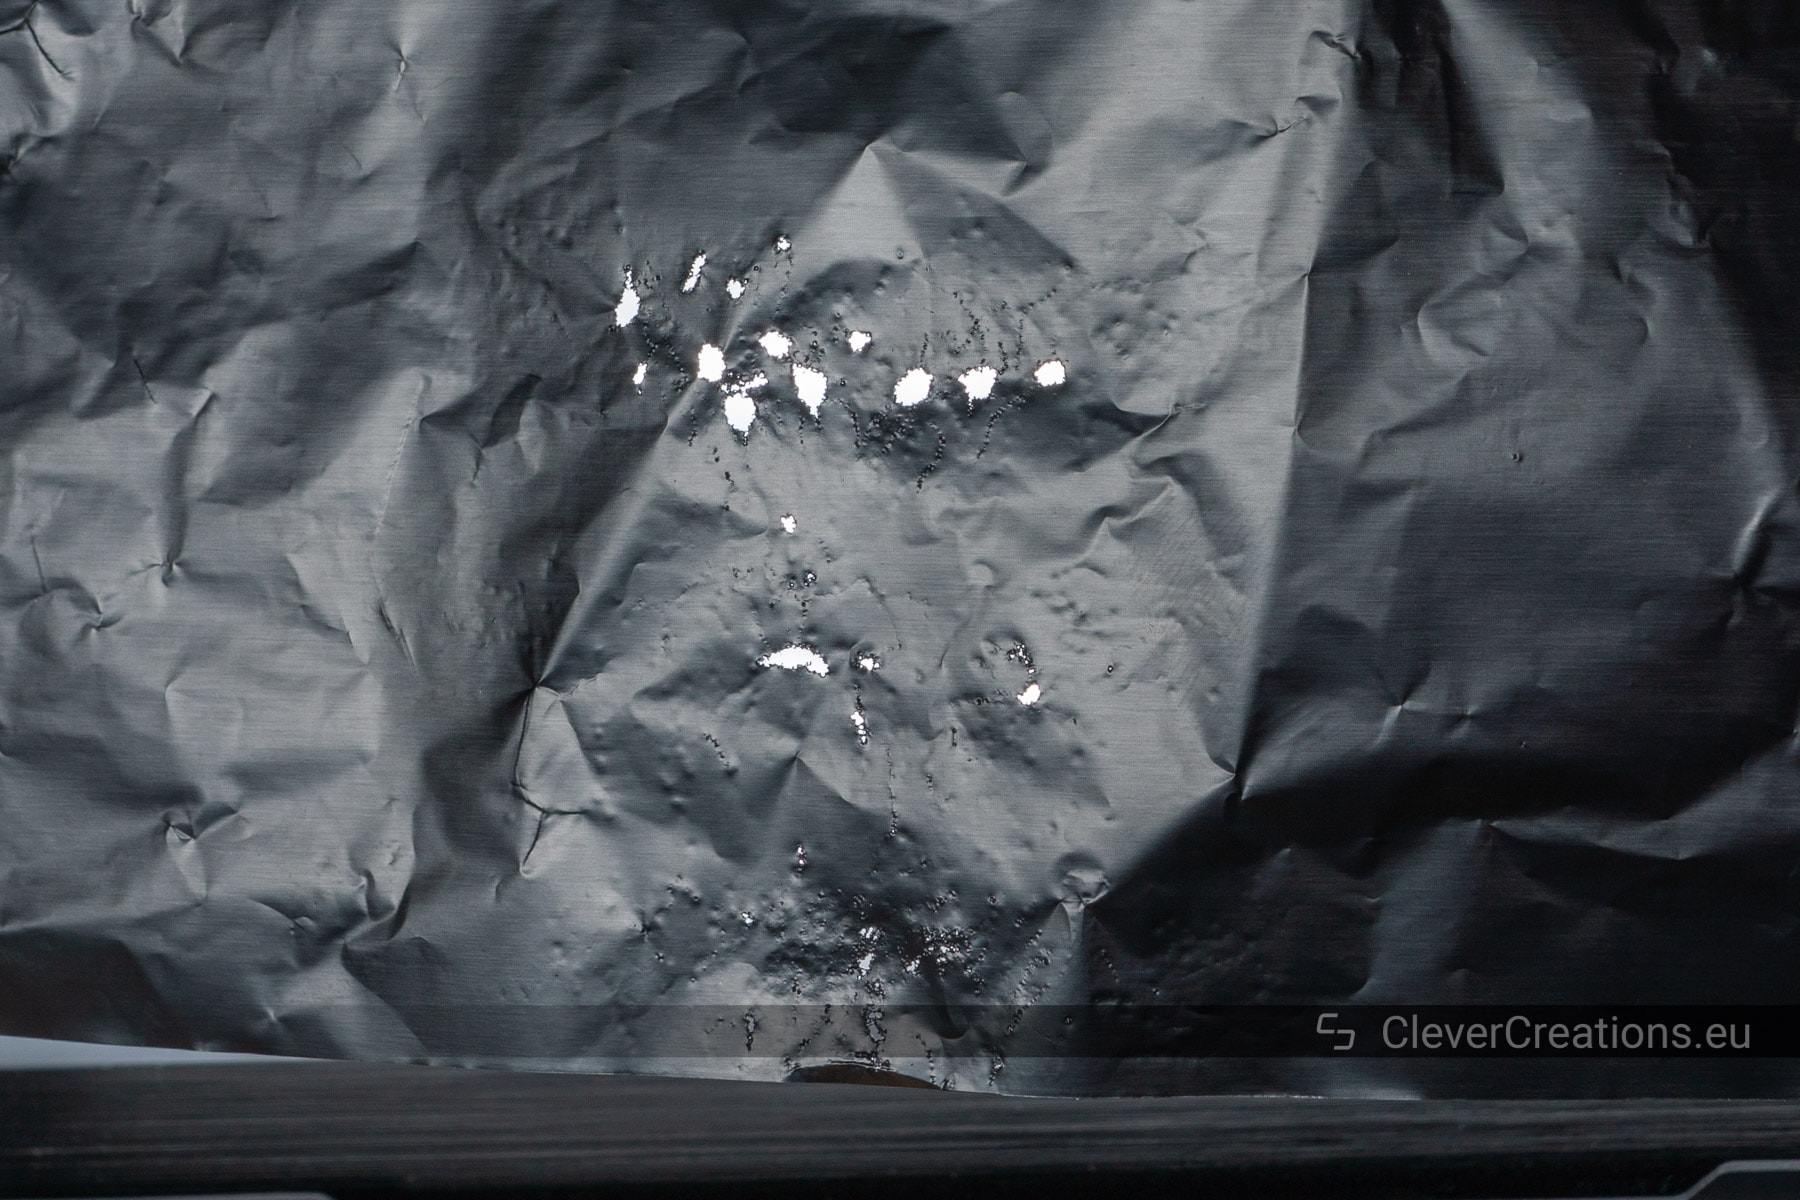
What is the Foil Test?
The foil test is used to visualize the intensity and distribution of cavitation in an ultrasonic cleaner. Typical aluminum household foil is placed in the ultrasonic cleaner. If the device is working well, the foil should end up perforated and wrinkled.
Let’s take a closer look at the steps involved in the foil test.
How to Perform the Ultrasonic Cleaner Foil Test
To do the foil test, you can use standard household aluminum foil and a basic cleaning solution (water + detergent) foil – It should be as wide as the entire width of the tank. Make sure that it is long enough to almost touch the bottom.
- Fill the ultrasonic cleaner with a cleaning solution. It is important to not use plain water, because its surface tension does not promote cavitation.
- Degas the solution if necessary.
- Turn the heater on to get the solution up to its operating temperature.
- Lower a piece of household aluminum foil vertically into the ultrasonic cleaner. You can either hold it in place for the duration of the test, or fold it over something long and rest that on the edges of the tank.
- Run the ultrasonic cleaner for 1-2 minutes.
- Remove and inspect the aluminum foil.
If the foil is perforated and wrinkled uniformly, then your ultrasonic cleaner is working well. If there is little to no perforation in large areas, then it is likely that your ultrasonic cleaner is not performing well. In that case you will need to have it serviced or replaced.
How to Perform the Glass Slide Test
Another test you can use to assess the performance of your ultrasonic cleaner is the glass slide test. It requires a small piece of frosted glass and a no. 2 pencil.
- Draw an ‘X’ on the glass. Use the no. 2 pencil to draw the X from corner to corner.
- Fill the ultrasonic cleaner with a cleaning solution, degas it if necessary, and bring it up to temperature. These are the same steps as for the foil test.
- Place the glass in the ultrasonic cleaner basket.
- Turn the ultrasonic cleaner on.
If the device is working well, then the ‘X’ should start to disappear immediately and be gone in 10 seconds.
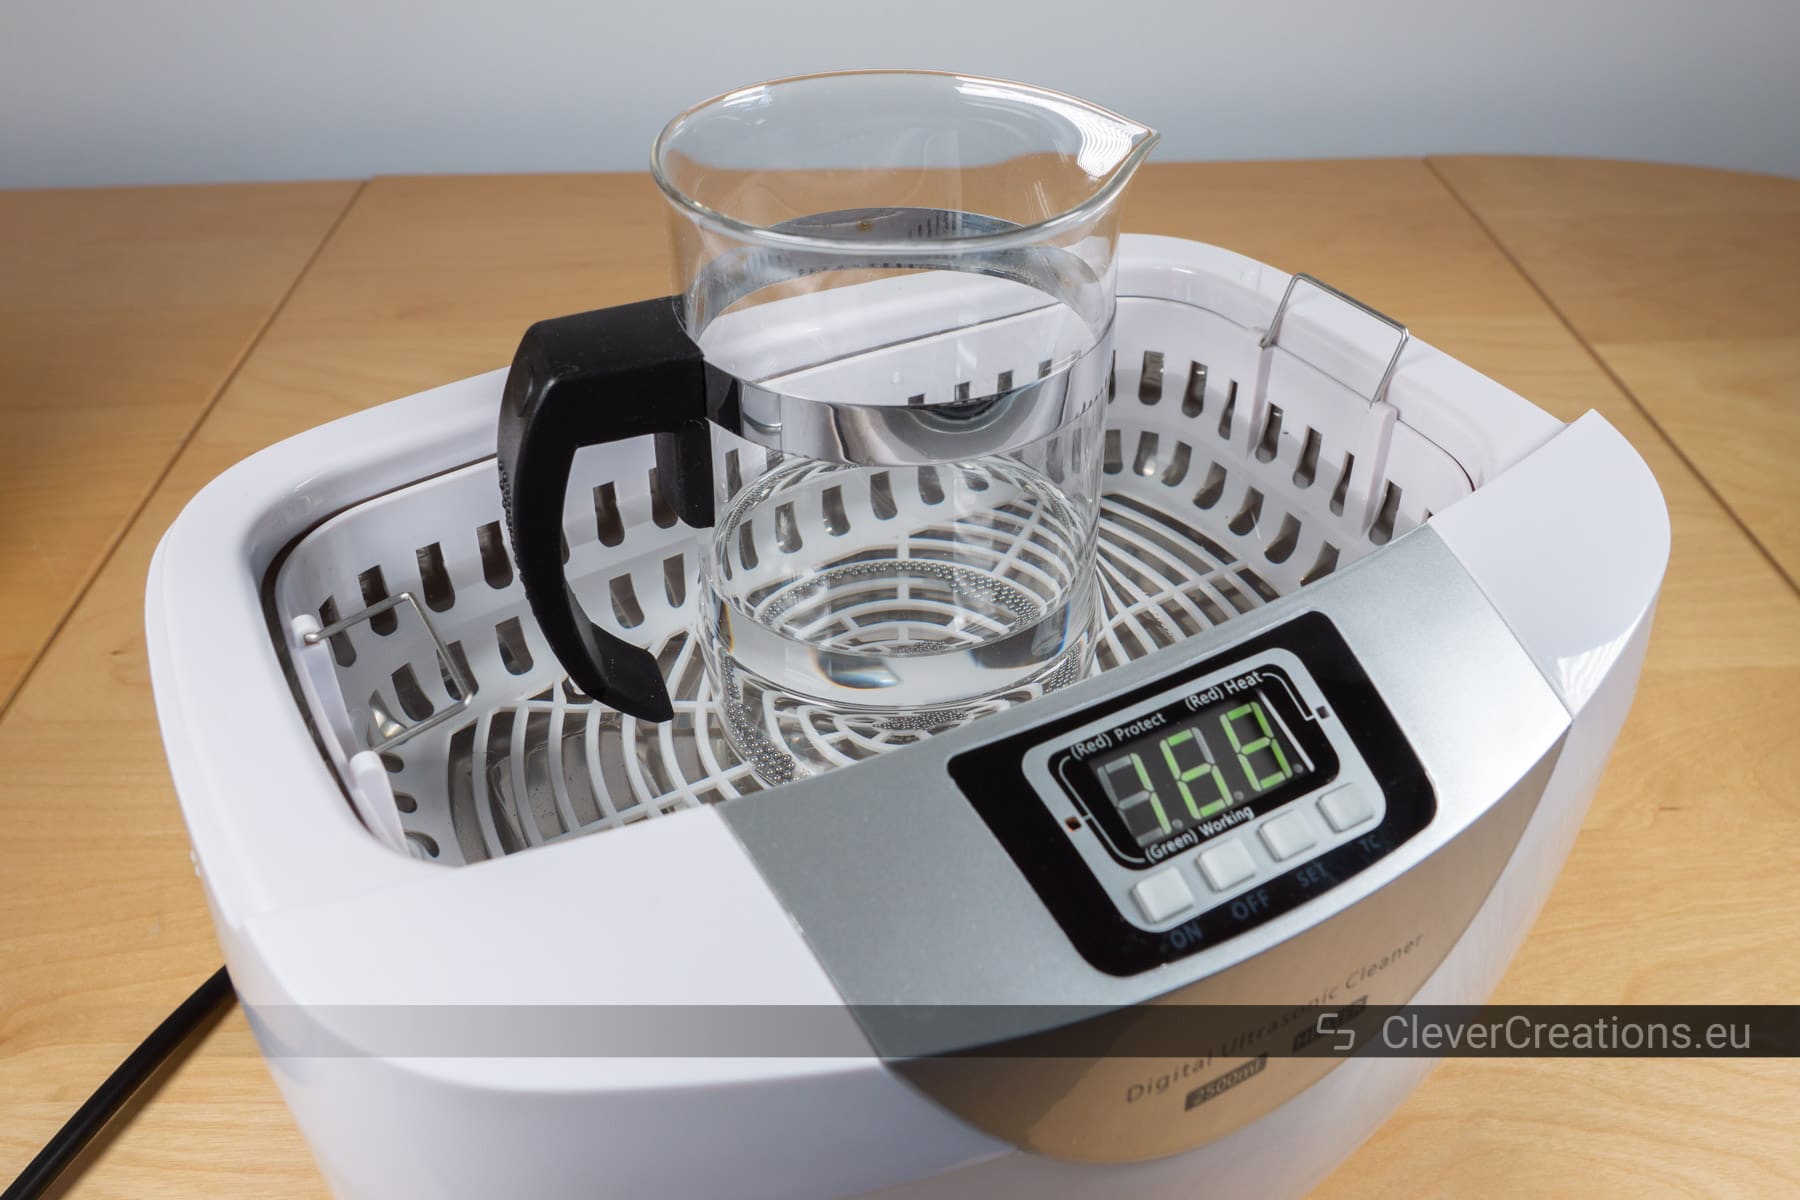
How to Use an Ultrasonic Cleaner
Now that we have covered the important information, it is time to look at how to use an ultrasonic cleaner. The variables like cycle time, cleaning solution and heating will vary depending on the item(s) being cleaned, but the overall process is always roughly the same.
- Fill the ultrasonic cleaner tank with a cleaning solution. Fill the tank up to the fill line, or otherwise about 2/3 full, minus the volume of the items you will clean in the solution, which will be added later. Make sure to use the right solution for the items that you are going to clean.
- Plug the cable of the ultrasonic cleaner in a power socket and turn the device on.
- If necessary, turn on the heater to bring the solution up to temperature.
- Degas the cleaning solution. You can do this by turning the ultrasonic cleaner on for 5-10 minutes, or by using its degas function if it has one.
- If the items you are planning to clean are particularly dirty, wipe or rinse them down first. This removes the bulk of the dirt and speeds up the ultrasonic cleaning process.
- Place the items you want to clean in the cleaner’s basket. Close the lid of the cleaner once you have done this.
- Run the ultrasonic cleaner for the intended amount of time.
- Remove the items from the ultrasonic cleaner.
- Rinse the items with distilled or soft water, and dry them with a cloth afterwards.


Conclusion
Ultrasonic cleaners are versatile tools that can be used to clean many items. You don’t need to be an expert to use one. As long as you follow the right steps for the item that you are cleaning, you can be sure of a good result.
You can be assured that when you buy an ultrasonic cleaner, it will be a solid investment that makes your life a lot easier.
You have learned:
- What ultrasonic cleaning is and how it works.
- What you can and can not clean in an ultrasonic cleaner.
- For how long you should run an ultrasonic cleaner.
- What cavitation erosion is and what affects it.
- Which ultrasonic frequencies are best for cleaning several types of objects.
- Which cleaning solution you should use in your ultrasonic cleaner.
- What degassing is and why it is important.
- How to test the performance of an ultrasonic cleaner using the foil test and glass slide test.
- How to use an ultrasonic cleaner.


Hi Tim,
Thanks for a very comprehensive article.
Just an observation but your comment regarding sandpaper in the section ‘Factors that affect cavitation erosion’ is confusing for a UK based reader. The number on sandpaper here in the UK refers to how fine the sandpaper is, i.e. 400 is smoother than 100. The larger the number the finer the finish is, not sure if this true for the US.
KR
David
Hi David,
thank you for pointing that out! I seem to have mixed up the grit size and grit number there. I have updated the text to correct it.
Tim
Same here in the US. Sandpaper is graded uniformly graded the same everywhere around the world.
It’s such a weird question, I almost don’t want to ask…. but here goes anyway. Triggered by the article asking not to clean pets or fingers/hands, I am wondering if the cavitation would tenderize meat. Could I treat a tough piece of meat in the sonic cleaner? Wouldn’t it tenderize it?
I know, crazy question, right?
Hi Debby,
that’s a great question! Yes, it is certainly possible to tenderize meat ultrasonically. Here is a study about it, or if you are more visually inclined, here is a video.
There are even specialized ultrasonic meat tenderizers for sale, but they seem to be more marketed towards high-end gourmet restaurants.
I don’t think that a regular off-the-shelf consumer ultrasonic cleaner (<100 watts) has enough power for tenderizing, but I could be wrong on that.
Tim
Hi Tim,
Thank you for your article that was very informative. It definitely answered all of the questions that I had about ultrasonic cleaners.
Have a good day!
Hey Tim,
A”GREAT” article, super informative. I’m considering an ultrasonic tank to clean firearm parts but I’m concerned about your recommended step of a final rinse. Won’t this lead to rust?
Thanks for your time.
Jim Clark
Hi Jim,
I can’t say I have experience ultrasonically cleaning firearms, but I imagine that with proper drying and an application of gun oil afterwards there won’t be much risk of corrosion. The cleaning only takes a short period of time and the humidity exposure is negligible compared to storing firearms in a humid environment, for example.
Thank you. This covers a lot of stuff I didn’t know and haven’t seen elsewhere. Most comprehensive.
can you use car ultrasonic cleaner on jewellery if so how much water should you mix it with
Hi, thanks for all the info!
For the indirect method, what did you mean by saying I shouldn’t allow the smaller glass container to touch the stainless surface of the ultrasonic cleaner?
Is it supposed to be supported on a little stand, perhaps?
What transfers the ultrasonic frequency to the glass container? The detergent/water that is in the main basin?
Why couldn’t I just place the glass jar right in the main basin and rely on the vibration of the basin to transfer directly to the glass?
THANK YOU!
Great article! I make glass beads by winding molten glass around a metal rod which is coated in a clay-based bead release. The rods with the beads and bead release are then annealed in a kiln which is set to slowly decrease the temperature from 950C down to ambient temperature. When I take the beads off the mandrel, the clay bead release coats the hole left in the bead. What solution should I use in my ultrasonic cleaner to remove the hardened clay left in the hole? Thanks!